In some of my last blogs, I wrote about installing virtual machines on different hypervisors such as KVM, VMware, VirtualBox, etc.
I use the windows machine as a daily driver Virtual Machine on my Ubuntu host; having the choice of both operating systems at a time is excellent. And I can switch between them any time I want.
Can you install a VPN on a virtual machine?
Some of my blog readers asked me, is it possible to connect the guest VM to the VPN while the host machine is connected to the local internet? or Does the VPN work on VM?
The answer is, YES!
You can install a VPN on a virtual machine and it can connect to a VPN within the VM and it works great.
In this blog, let’s take a look at how you can access VPN from your Virtual machine while your host machine is connected to the local internet.
For example, you would be somewhere in the US, and you can connect to Australia as the VPN gateway in your VM and access your local internet resources via your PC/MAC. And in your VM, you could access the Australian internet just like how you would access the internet in Australia as if you are physically present in the country.
Isn’t that cool? 🙂 so let’s get to it.
Prerequisite.
A VPN software – Any VPN software with multiple gateways (countries) should work. However, I recommend using Nordvpn, as it works great across the platform, be it Windows, MAC, IOS, Android, Linux, and so on, with multiple countries’ choices as a VPN gateway. Click here to get a nordVPN.
I will get a small commission if you use my link to purchase without any charge from your side 🙂
A virtual machine – I am using windows virtual machine with internet access. Any other VM’s should work as well.
Is a virtual machine a VPN?
The virtual machine is a virtual operating system installed in a physical machine known as hypervisors. And the VM shares the system resources such as CPU, memory, storage, and so on from the Physical host. The physical host is called, host machine, and the Virtual machine (VM) is called the guest machine.
They are some hypervisors out there, For Example, KVM, VMware ESXi, XEN, Hyper-V, and so on.
To answer the question we need to know what is a VPN as well.
What is a VPN?
VPN stands for Virtual private network, it helps you connect to the private network via the public internet, and it also encrypts the traffic, which means no one can spoof into your internet browsing. To put it simply, you can mask your public IP with different regions IP.
Note: The enterprise also uses another VPN to access internal enterprise resources while connected from home over the internet.Though both works in a similar way, we are not talking about enterprise VPN here.
Now you know the Virtual private network and the virtual machines are not the same; though both are virtual, it’s function are not the same.
If you are not familiar with the VPN, I have covered the benefits of using the VPN here. You may check them out.
Why should I connect to the VPN from VM?
Having VPN access is great, but while working on something on your local machine and you wanted to switch to VPN, what happens is that it will disconnect you from some of the sessions that you had already opened on your computer, so it is inconvenient at times.
Let’s say, For Example, you are from the US and trying to access google; by default, based on your public IP, your website will always point to google US servers, but what if you want to access some sites that are blocked in the US or your country ?. then the VPN can come to your rescue.
Another such use case is when you wanted to search for a product and understand its cost in a different country, For Example, in the UK.
Then you can connect to the UK VPN gateway and start looking at the available products in the UK; more on that later.
However, connecting and disconnecting VPN back on forth based on your need would be a little difficult and inconvenient at times as it would disconnect from some of the sessions you already opened. So there got to be a better way.
And there is; you can create your own VM and connect those VMs to the VPN, so if you are trying to access your local content or resources, you can do so from your local machine. If you are accessing internet content from other countries, you can use VPN, which is always connected via your VM.
Isn’t that awesome? So let’s begin.
Creation of the Virtual machine
I have covered plenty of blogs related to the creation of VMs. You may check out the blogs below for that.
- Windows 10 in KVM, centos/Redhat or Ubuntu
- Ubuntu on VMware workstation on MAC/Windows.
- Centos on KVM
- Ubuntu in KVM
- Centos on VMware workstation/Fusion.
- Windows 10 on VMware workstation.
How to use VPN on Virtual machine?
1. Connect VM to the internet.
Imagine if you are using a windows machine as the VM and your host machine like Ubuntu, and you wanted to connect to the VPN.
First, your windows VM should be connected to the internet. To connect VM to the internet, the easiest way out is to use the NAT or bridge interface.
NAT will help you connect your VM private network to the local network by translating the VM IP to the localhost IP address.
Whereas the bridge interface will connect directly to the local network, by bridging the VM network to the host interface that is connected to the local network.
It will also take care of assigning the IP address and everything to the VMs.
2. Configure the VM interface using Bridge/NAT.
Each user will have different hypervisors where they deploy the VM’s. You can follow the guide here to use either NAT or bridged interface on your favorite hypervisor.
Which one is better Bridge or NAT?
To get a good performance it is better to use a Bridged adapter over NAT, as the host machine has to perform the NAT translation as well for the traffic will be a little slower. I only use the NAT network when the bridge network doesn’t work for internet access.
Bridged interface in KVM.
Bridged network using VMware workstation.
Bridge connectivity using Virtualbox.
Nat configuration on KVM.
NAT configuration on VMWare workstation.
NAT configuration on Virtualbox.
Bridged interface in KVM.
Shut down the VM, Open the VM, and click on the Show virtual hardware details button.
Click on the Network interface card (NIC)
In the Network, the source chooses the interface on the host machine that is connected to the local network.
Select the Source mode as Bridge and click on Save.
Click here to learn more about the bridge interface on Centos/Redhat.
And the steps to configure the bridge interface using netplan.

Follow the steps below to connect the virtual machine to the NAT interface.
Bridged network using VMware workstation.
Shut down the VM in the VMware workstation, right-click on the VM, and click on settings.
Choose the Network adapter to Bridged.
Note: There are times the bridged network in the VMware workstation may not work, if that’s the case, check out the article here to learn how you can fix that.
You can learn more about different VMware workstation network types here.

Bridge connectivity using Virtualbox.
On VirtualBox, Shutdown the VM and right click on it and click on settings> Network.
Choose the adapter as Bridged Adapter, Power on the VM and you should now get an IP address from your local network just like on your host machine.
You can learn more about VirtualBox network types here.

Nat configuration on KVM.
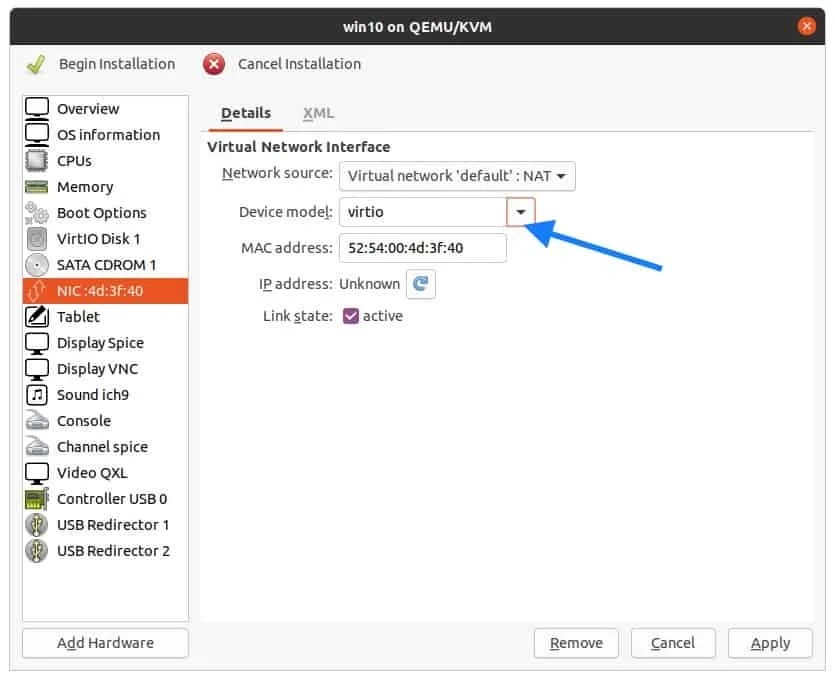
If you are using a KVM just like me, then you can use the NAT interface to connect the KVM machine to the internet.
- Shut down the VM.
- And Goto the VM settings and choose Virtual Network ‘default’: NAT interface in NIC.
- Click on Apply.
NAT configuration on VMWare workstation.
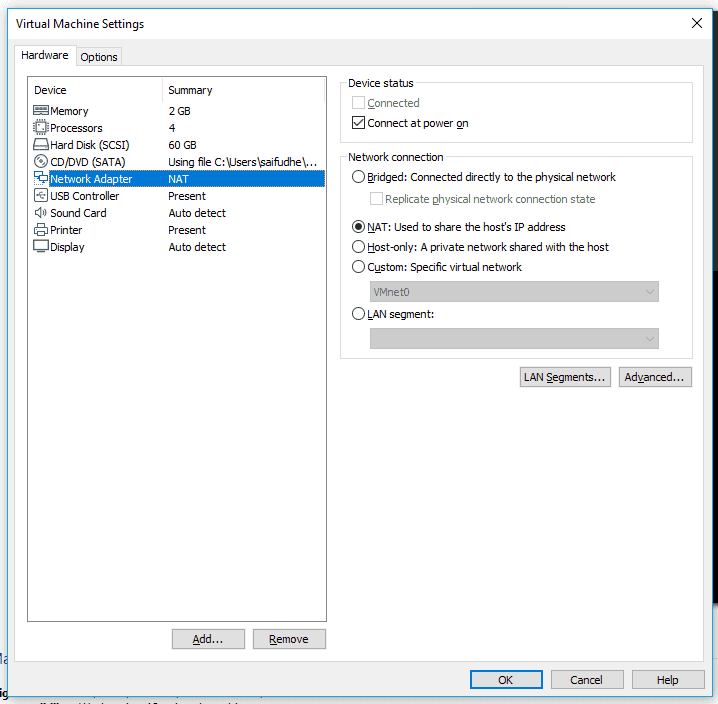
In the case of VMware workstation pro, right-click on the VM and click on settings. And in settings, you can select NAT as the interface.
NAT configuration on Virtualbox.
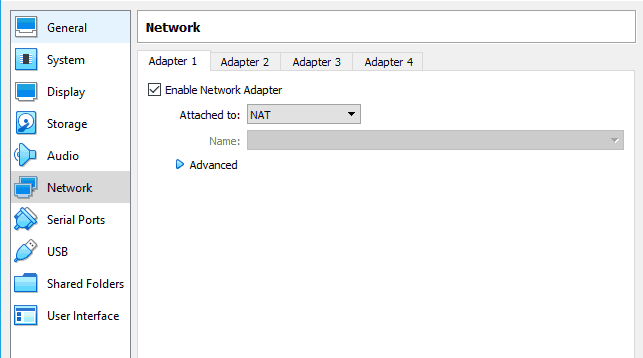
The same goes with the VirtualBox as well. Right-click on the VM and settings, and in the network, select NAT interface.
You can learn more about the VirtualBox networking here.
3. Check your internet IP
Your local machine (PC/MAC) is connected to the internet, and you can verify its public IP address by checking your public IP here.
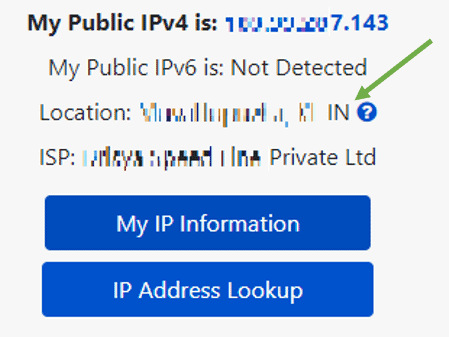
Both the guest VM and the local host should have the same public IP, and location as both use the same internet service provider.
Note: Public IP is used on the internet in your home network; however, you should be using 192.168.0.1 or 10.0.0.1 from the private range of IPs.
Below is the output from my local machine and the guest VM. Both showing the same information.
Note: to protect privacy, I masked the IP address.
We have the VM setup and working fine, and it is also can access the internet. So let’s go ahead and configure the VPN in it.
4. Download the VPN client.
Since I am using NordVPN, let me head over to my NordVPN account and download the VPN client on my guest VM.
Now open your browser and log in to the NordVPN account and click on download on the screen’s left side.
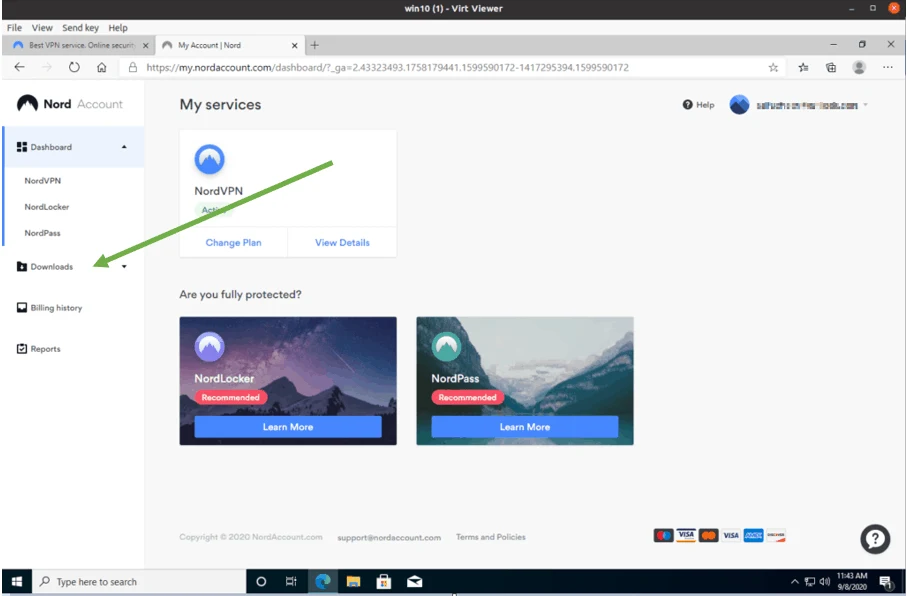
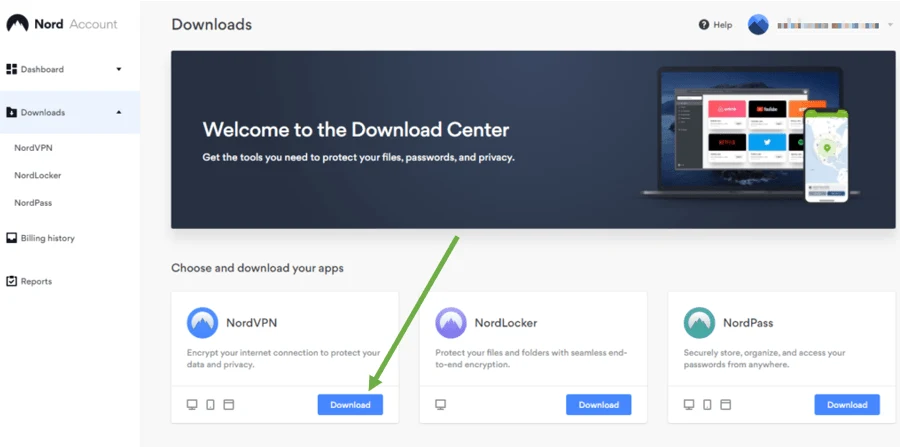
You can click on Download on the NordVPN.
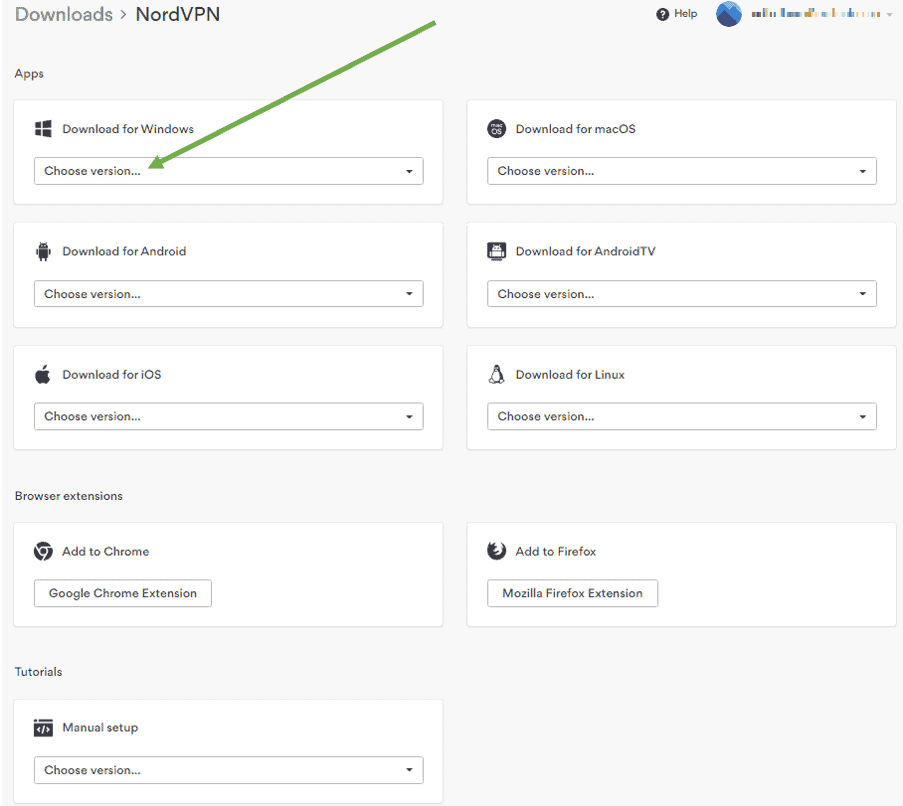
As you can see, there are many options to choose from. Since I am using windows, I download the windows version from the download for windows options under Apps.
You may download the client that works with your operating system.
After downloaded, just double-click on it to install.
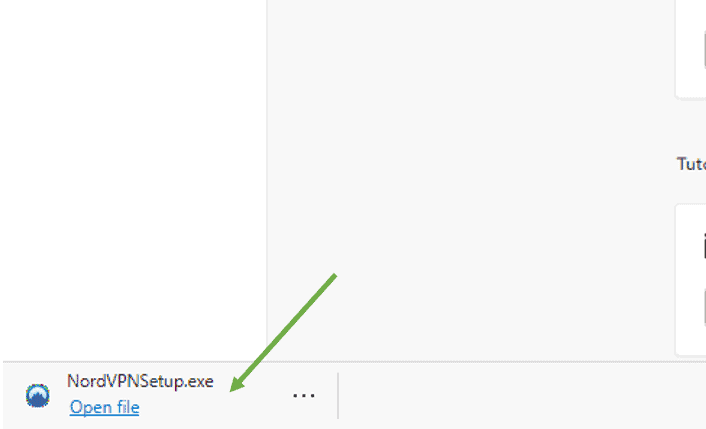
Click on Finish

5. Connect to the VPN.
When you open the nordVPN client on your VM, it should prompt you to enter your credentials here. You may enter the credentials that you have received from the VPN provider and click on Sign In.

Once you logged in, you should see a list of gateways (countries) that you can connect.
I am going to connect to Canada gateway, so I clicked on Canada. You can see on the bottom of the window that it is trying to connect.
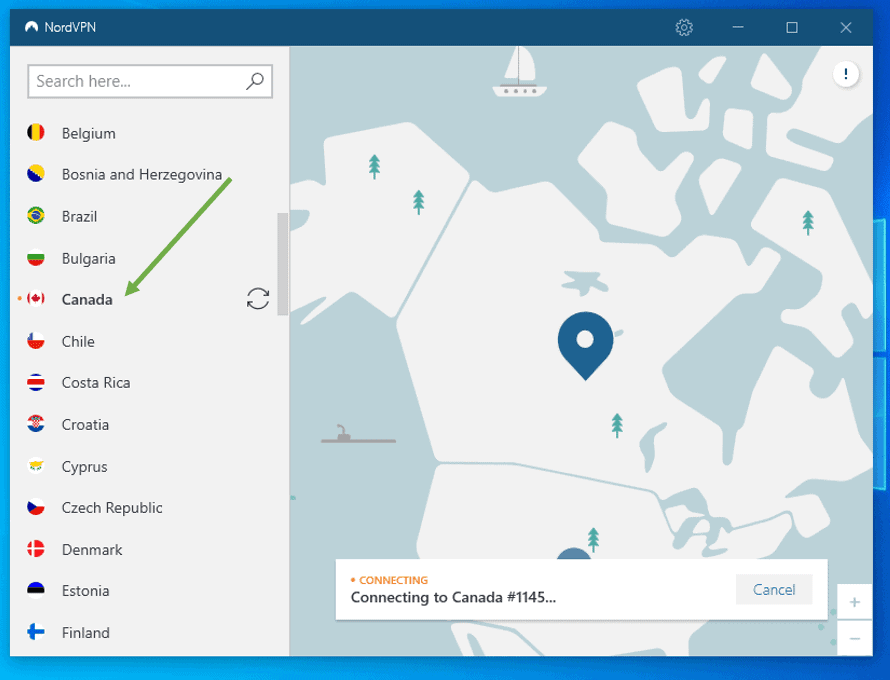
Once it is connected, you should be able to see it is connected notification down below.

6. Verify the VPN connectivity on the Virtual machine.
Now on my guest VM, let me open google and type what my IP is, as you can see, it directly connected to Canada.
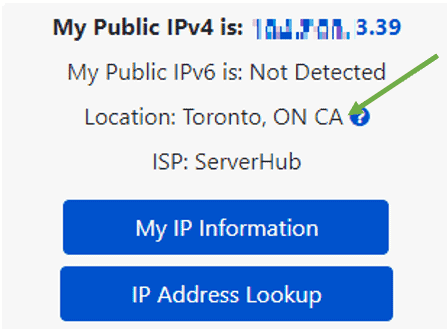
7. Compare the internet experience from both machines.
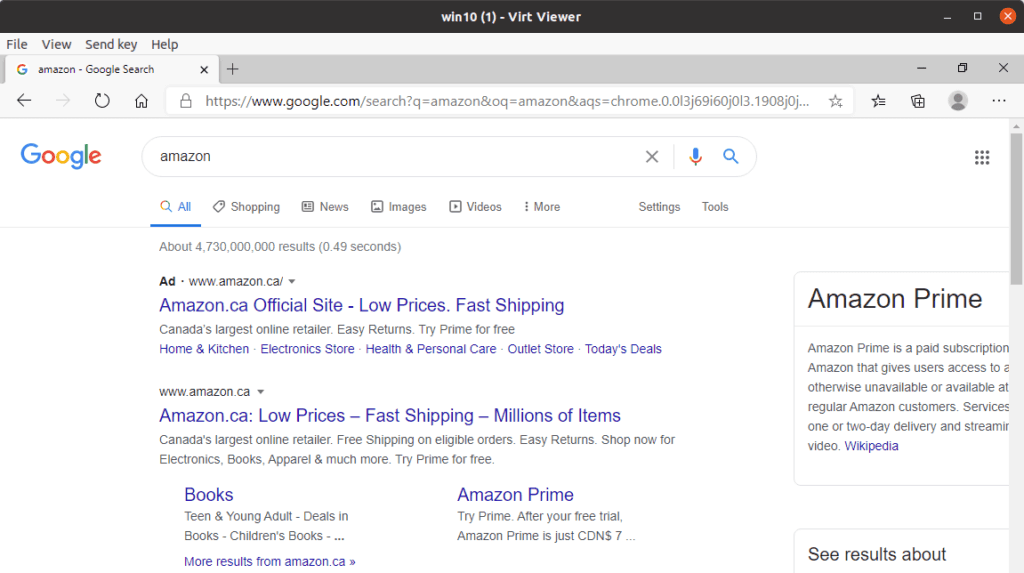
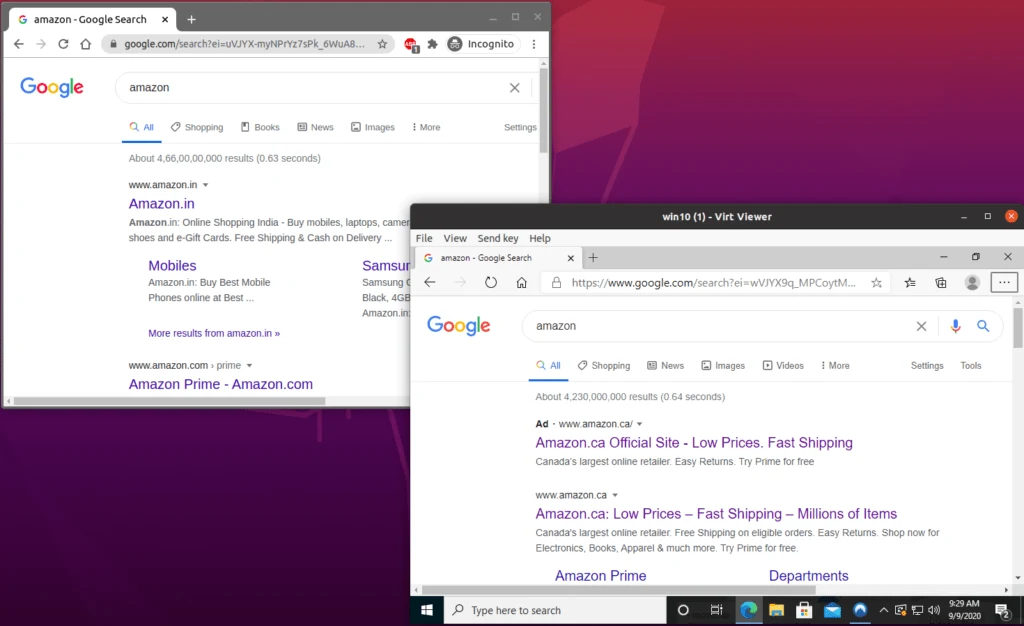
Let’s do one more thing, I am going to search Amazon on both the host machine and the guest VM, and let’s see the difference.
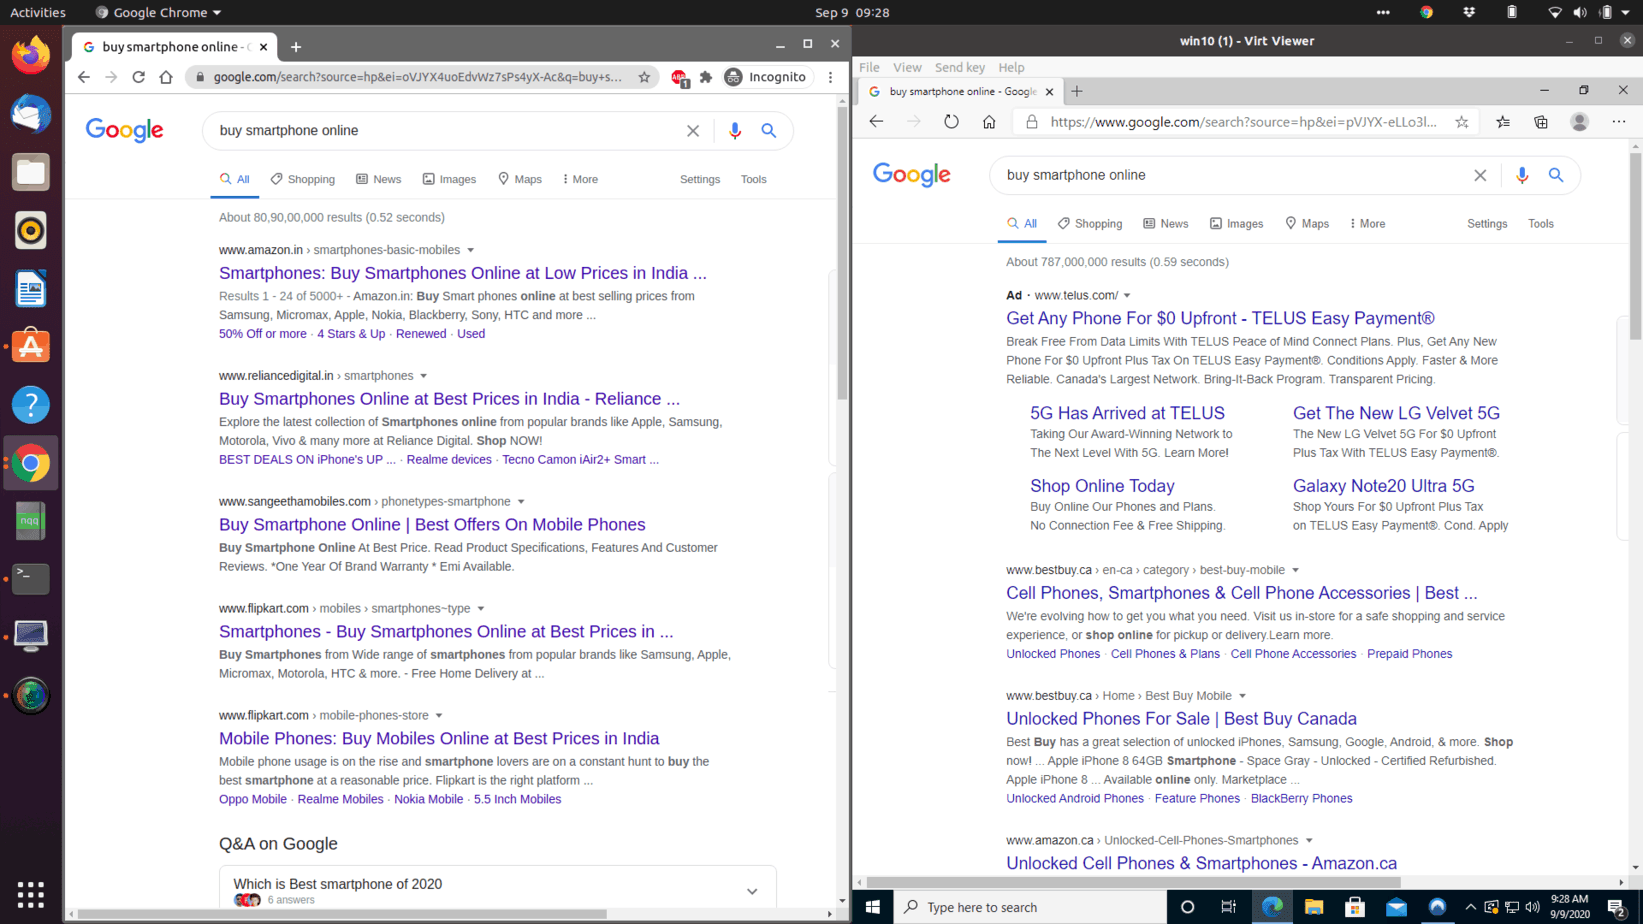
When I searched for amazon from my Ubuntu local machine, it showed me the result from India, of course, this machine is connected to my local ISP.
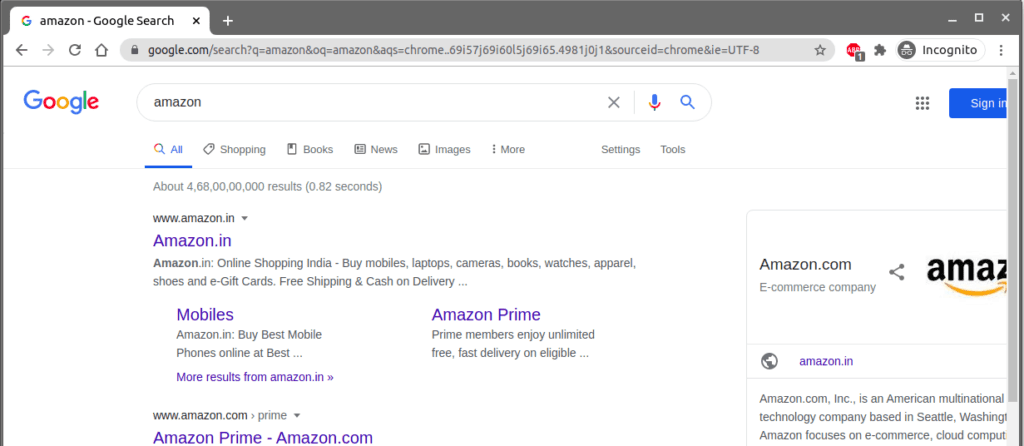
But on my VM, you can see the search results shows for amazon Canada 🙂
And both windows side by side
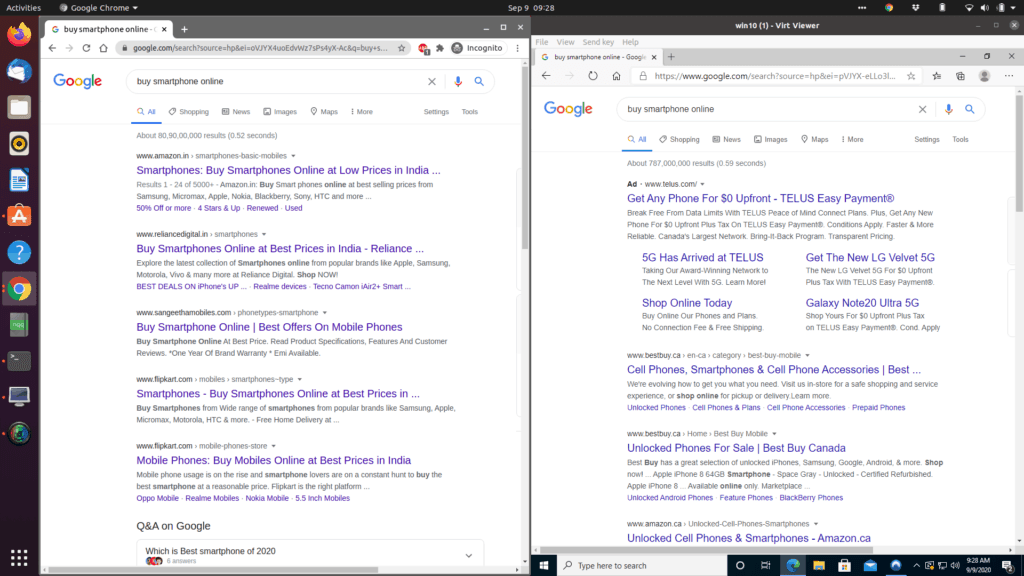
Also, the search results are different on both the host as well as on the guest VM.
Note : The host Chrome browser on the left and the windows VM on the right.
8. Try another VPN gateway.
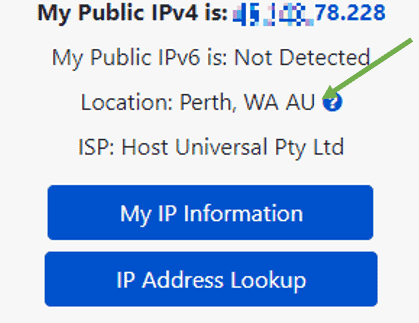
Now let me switch my VPN to Australia and see the difference.
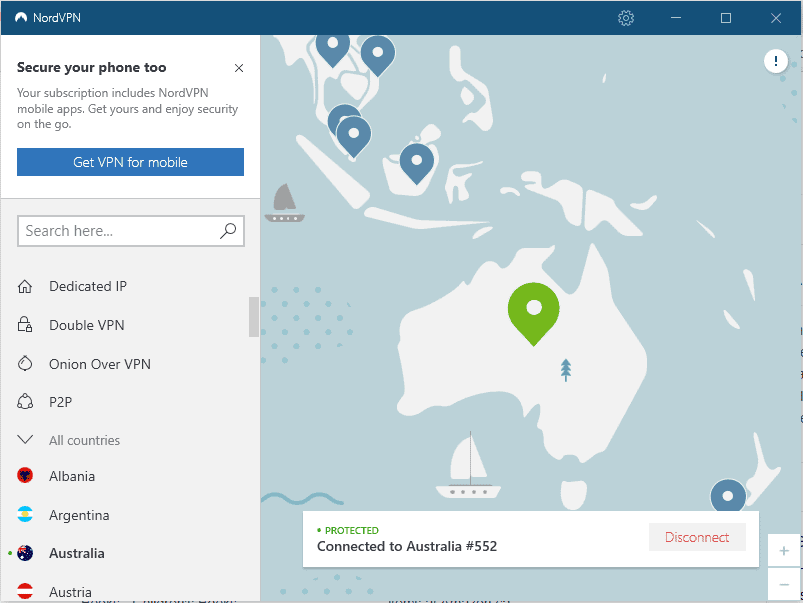
After the VPN is connected and when I try to search again, you can see how the search results are now showing for Australia. Which is very cool.

Here is my IP information, and the location says AU, which means Australia.
Connecting to the VPN from your VM is very convenient, and the best part about this setup is that you can use your local internet from local PC and when you need a VPN, you have to switch to the VM, and you don’t have to connect and disconnect from the VPN either.
Let me know in the comment section below how did it work for you.
