In Centos or Redhat hat Linux, when you want to configure a virtual machine, we use the native hypervisor called KVM. And there are multiple ways you could let the virtual machine talk to the network. Sometimes, you would want the virtual machine to talk to just the internet; in that case, you could use the default NAT interface. Maybe you would wish the Virtual machine to use VLAN to go out of the network. Then you would tag the VLAN by creating the sub-interface for those VLANs. However, for all those VLAN networks to connect to the virtual machine, you would also require creating a bridge interface.
One common scenario where we create the bridge interface is to bring the virtual machine to your local network. The virtual machine will become part of your LAN network just like any other machine in your LAN. And everyone in the LAN segment will be able to talk to the virtual machine, including the host machine.
You can think of bridge interface as a switch in the real world where the communication happens on the Layer2 with the MAC address; it even supports spanning tree protocol.
In the last blog, we have looked at how to connect KVM virtual machine to the host machine using bridge interface in Ubuntu KVM host, and it this blog we are going to do just that using Centos / Redhat operating systems.
This blog will look at how you can configure the bridge interface in Centos / RHEL Linux using the network manager command line, shortly known as nmcli. You should be able to connect your virtual machine to the bridge interface, and we will test the outbound inbound traffic from the virtual machine.
Note that the creation of bridge interface using nmcli I have performed on CentOS, and it will be the same for Redhat (RHEL)7/8/9.
It is assumed that you already installed the KVM packages and dependencies on your machine to test the VM connectivity later.
1. Identify the physical interface name.
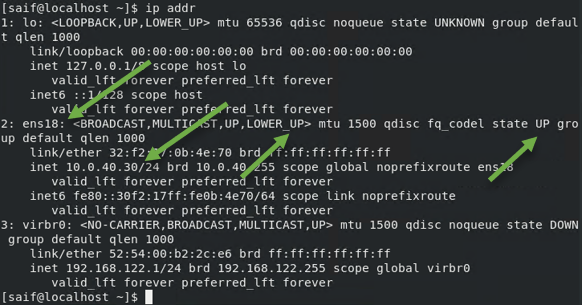
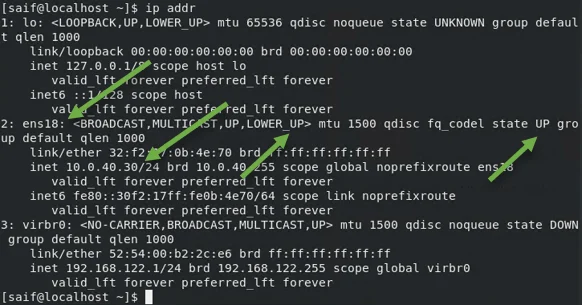
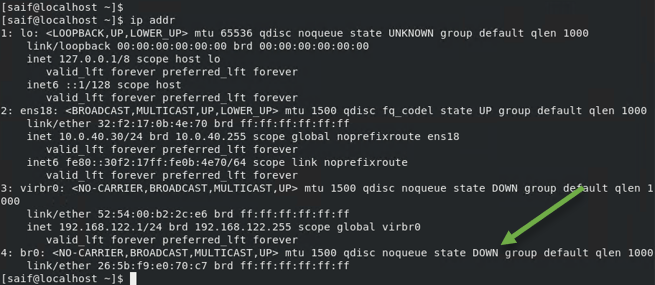
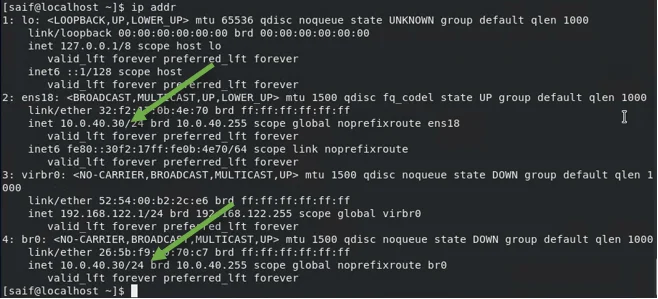
Login to the Centos /RHEL machine and type ip addr, it will show you a list of available interfaces on your machine.
My system has only a single physical Ethernet interface which is ens18 and it’s currently up right now.
You can also see the device status using the nmcli command nmcli dev status


2. Create bridge interface.
To create a bridge interface, issue the command below.
nmcli connection add type bridge con-name br0 ifname br0


3. Map the physical interface to the bridge.
At this point, the physical and bridge interfaces are two separate interfaces. We will have to connect both and make the br0 as primary. Enter the command below to connect the physical interface to the bridge.
nmcli con add type ethernet ifname enp1s0 master br0

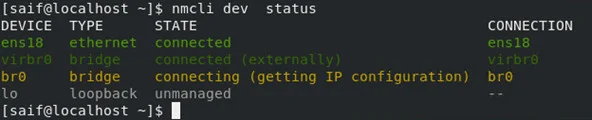
You may check the device status my typing nmcli device status, as you can see we have the bridge interface in connecting mode trying to get the IP. After we complete the configuration, it will become connected.
4. Configure the IP address on the bridge interface.
When we looked at the interface above, we saw that the IP address was configured on the physical interface.
By default, the bridge interface will act as a DHCP client and get the IP address from the physical interface it is connected to, which is ens18 in our case, and we don’t have a DHCP server in the network and I am configuring the IP address manually.
Enter the below command to configure the ip address manually.
nmcli con mod br0 ipv4.addresses 10.0.40.30/24
nmcli con mod br0 ipv4.gateway 10.0.40.1
nmcli con mod br0 ipv4.dns 8.8.8.8
nmcli con mod br0 ipv4.method manual


5. Bring up the bridge interface.
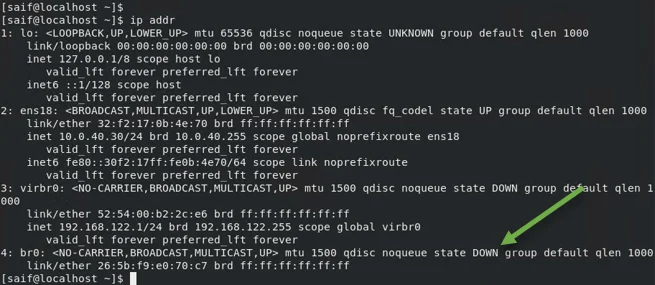
You may check the IP address on the system again, and you should see the IP address not configured on the bridge interface yet. That’s because the bridge interface is down, and we have not brought it up.
To bring up the bridge interface, you may enter the command below.
nmcli con up br0

Restart the networking.
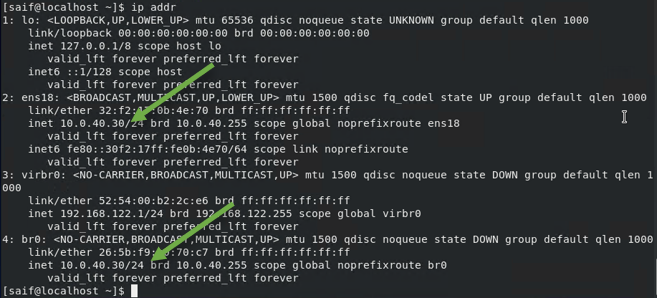
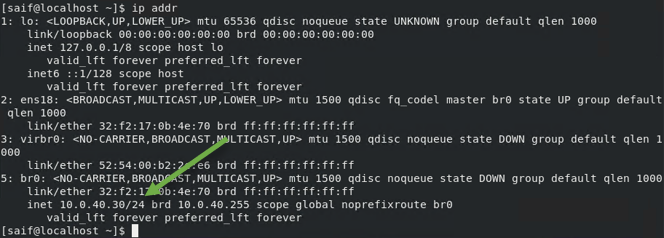
If you check the IP address on the system, You can see both the physical and the bridge interface has the same IP address configured and the bridge interface state is still down.
To make everything work you will have to restart the network using the nmcli command, use the command below to turn off network and turn it back on.
nmcli networking off
nmcli networking on


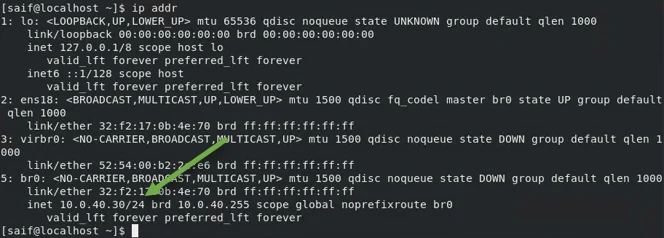
When you check the IP address on the centos machine, you should see the IP address is now configured on the bridged interfaces instead of the physical one.
You can find all the bridge network configuration files in the /etc/sysconfig/network-scripts location, and if you would like to make any modification you could do that from there as well.
6. Test the bridge interface network.
We have completed the bridge interface configuration and its time to test it.
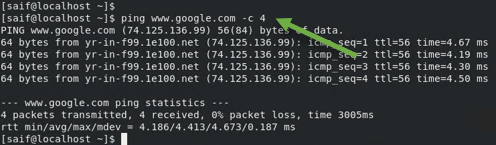
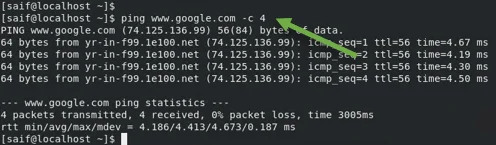
Check the outbound connection.
To test the connection to outside, you can ping the google fqdn and see if you are getting any response. As you can see, I am getting the response which is good.
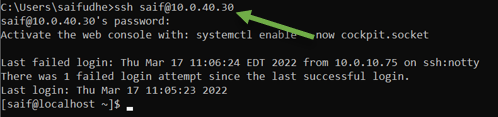
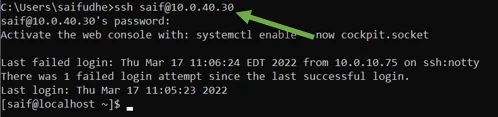
Check the inbound connection.
You could also check the inbound connection by ssh into the centos / rhel host and as you can see I am able to get in.
Test the bridge Network from a Virtual machine..
We know that the host can communicate using the bridge interface. We are now going to test the connection by introducing a virtual machine to the network and connecting to it.
I have already deployed a virtual machine in the KVM in Linux, and it is currently using the default NAT interface.
To open the virtualization manager, type virt-manager in the terminal.
- Shutdown the Guest VM.
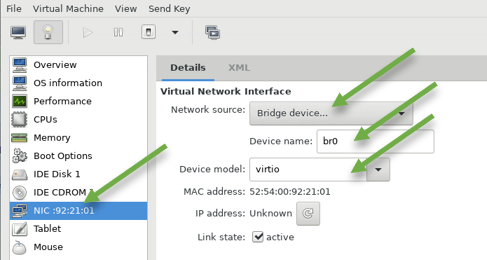
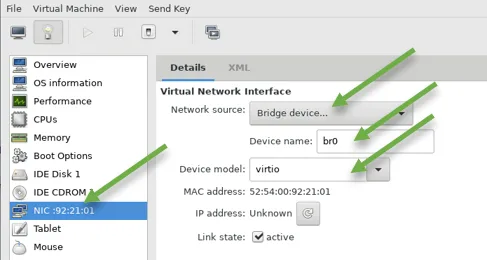
- Double click on the VM, and in the hardware details, choose NIC and change the network as follows.
- Network Source :Bridge device.
- Device name: br0
- Device model : virtio
- Apply the configuration.
You may go ahead and start the virtual machine.
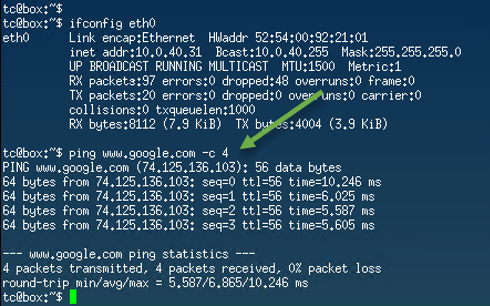
After the VM came up, I configured it with an IP address 10.0.40.31 from the same subnet 10.0.40.0/24.
As you can see, the Virtual machine can now talk to the internet, which is good.

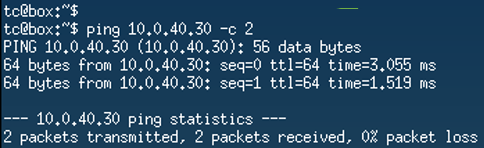
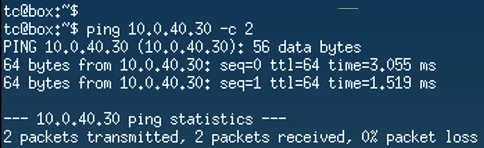
How about the host machine, which 10.0.40.30.
As you can see that worked just fine as well.