
The bridge interface in Linux is a virtual switch, and you can create multiple bridge interfaces that can connect to the VM’s under Libvirt.
Maybe you can have bridge interface 100 that represents VLAN 100 that can be connected to some VM’s and bridge interface 200 that represents VLAN 200 for another set of VM’s.
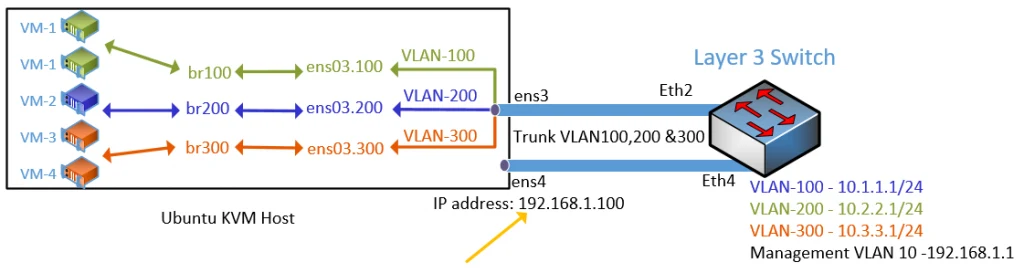
Below is the topology that we are going to set up. It does look confusing, isn’t it?. Don’t worry; it is a straightforward configuration, and I am going to break it down.
- I have a layer3 switch on the right configured with VLAN gateways for VLAN 100, 200 and 300.
- The first interface on the Ubuntu host ens3 and Ethernet2 on the switch act as a trunk that carrying those VLAN’s.
- Second interface ens4 is a Ubuntu host management interface.
- In this blog, in the Ubuntu KVM host has multiple Virual machine running and we need to provide VLAN network connectivity from the switch to the VM on the left. To achieve that,
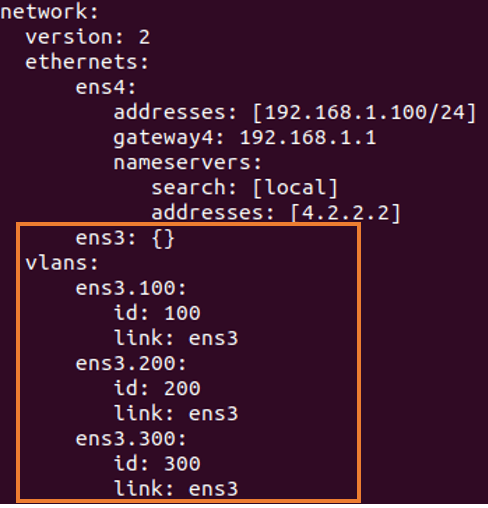
- You need to create VLAN interface (sub interface) on the ubuntu using netplan.
- After the VLAN configuration we will perform the bridge configuration.

Let’s go ahead and create the bridge interfaces, which later we can use to connect to the VM’s.
As we mentioned before, The KVM host has two interfaces, ens3 and ens4.
ens4, we will be using it to manage the Ubuntu KVM host and assign an IP address 192.168.1.100, and for the ens3, we would split them into 3 different VLANs as 100, 200, and 300, finally create bridge interfaces from the VLAN.
1. Install the bridge utilities.
Before you configure the bridge interfaces in Ubuntu using netplan is to install the bridge utility program on Ubuntu.
Enter the below commands to install the bridge utility package.
apt-get install bridge-utils -y
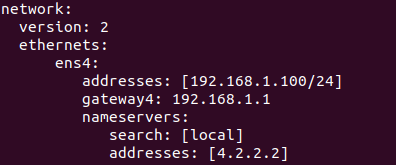
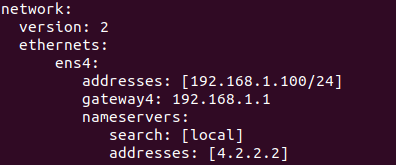
2. Configure the management interface.
let’s configure the management interface ens4 with an IP address 192.168.1.100
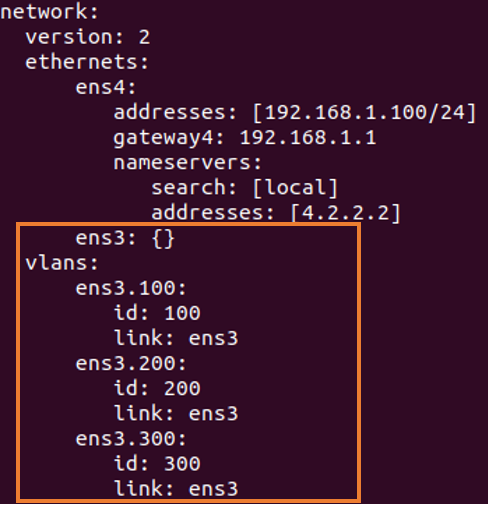
3. Configure the VLAN interfaces.
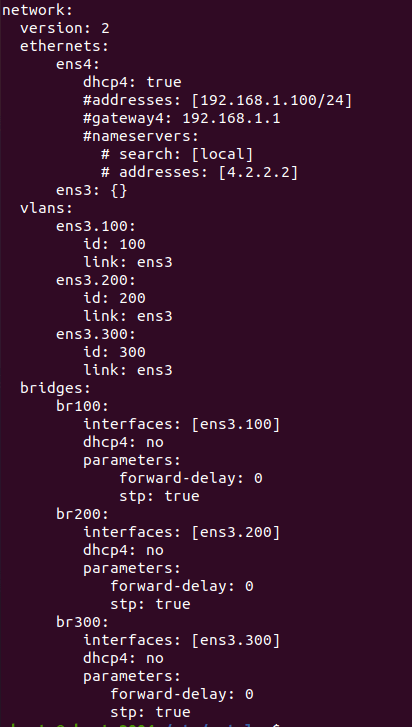
First, I defined the physical interface that I am going to use, in this case, ens3. Then I have created three layer2 VLANs with no IP address.
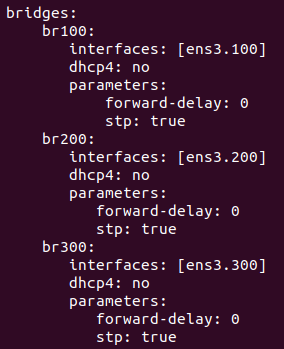
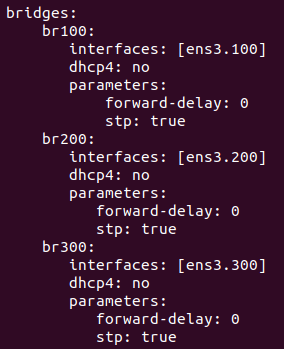
4. Configure the Bridge interfaces.
Create a bridge block called bridges, define the bridge interfaces starting from bridge 100, then I pointed to each VLAN interface. For example, ens3.100 belongs to br100, ens3.200 belongs to br200.
For simplicity’s sake, I am using VLAN numeric value at the end of each bridge interface, so it is easy for me to identify.
Note: The bridge name doesn’t really need to start with br, you can even name it as mybridge1, or vm1, it doesn’t really matter as long as you can differentiate the interface.
Configured not to use dhcp4.
Enable the STP by choosing true.
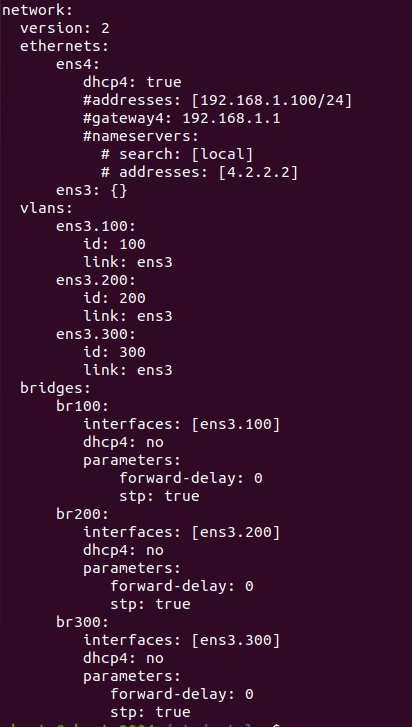
The final configuration looks like below.
5. Apply the configuration.
Apply the netplan configuration using the command sudo netplan apply.
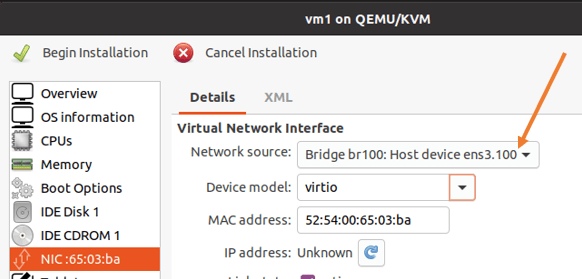
6. Point the VM’s to use the bridge interfaces.
As you can see, I am trying to create a VM1 in KVM, and I can see a list of bridge interfaces that we have created.
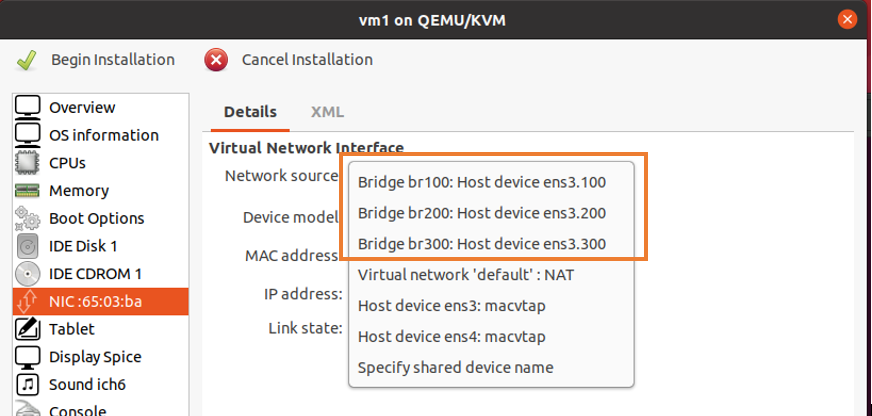

I have picked up bridge interface 100 for the VM1.

7. Verification.
Type IP addr to see the interfaces that we have created.


In the VM, I have configured the IP address 10.1.1.10/24.
And when I try to ping my default gateway, which is on the switch 10.1.1.1, as you can see, I am getting the ping response.
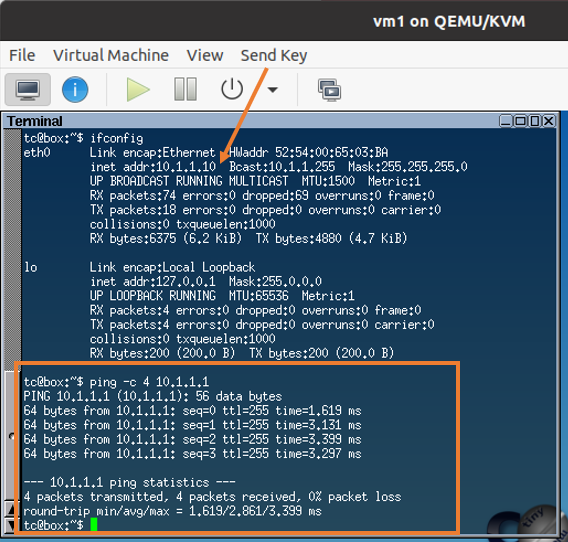

Which indicates the bridge interfaces are working fine.