
Proxmox is one of my favourite hypervisors out there, though it does not support all the features that ESXi provides, it is still a great alternative to ESXi and moreover it is open source and free for anyone to use it.
Only when you need to get a support you need to pay, other than that everything is free.
Sometimes, you may want to test the proxmox in your PC, or you would want to install Proxmox on a virtualized environment, so that you can run small VMs or multiple containers in your LAB environment.
But most of them get stuck at the initial installation screen that says “Virtualized Intel VT-x/EPT is Not Supported on this Platform.”
And we are going to fix all the problems and properly install the proxmox on VMware worksation.
I know you came to this post to learn more about the installation of proxmox in VMware workstation pro, however If you wanted to know how you can install Proxmox on virtualbox which I have covered in detail in our previous article.
In this blog post, we will take a look at the installation of Proxmox in a Vmware workstation pro.
The steps mentioned here would work with any version of VMware workstation pro.
Pre-requisites.
I am using windows 11 machine here, with VMware workstation installed in it, and if you have a linux machine with vmware workstation installed, that will work fine as well.
However if you are using latest m series mac, these steps will not work, as the proxmox is based on x86 platform and the m series mac are based on arm architecture.
- You need to download the Proxmox iso file from the Proxmox official website , ensure to download the iso installer.
- A Vmware workstation pro – you can download that from here.
Once you have the prerequisite ready, let’s go ahead and install Proxmox in vmware workstation pro.
I am using Workstation pro 17, and the steps mentioned here are identical to other versions as well.
Here is the step by step instruction video.
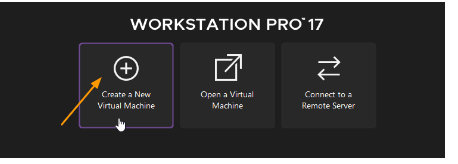
1. Create the Proxmox virtual machine.
Open the vmware workstation pro, and click on Create a new virtual machine.
Or you can use keyboard shortcut CTRL + N

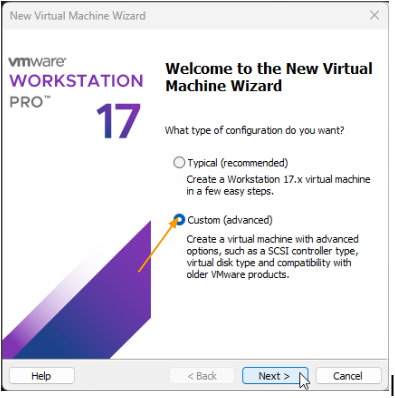
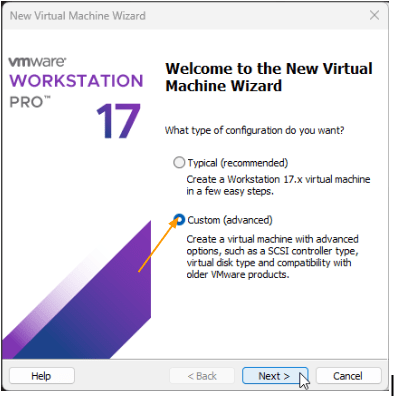
A new window would now pop up, you can choose Custom (advanced) and click on next.
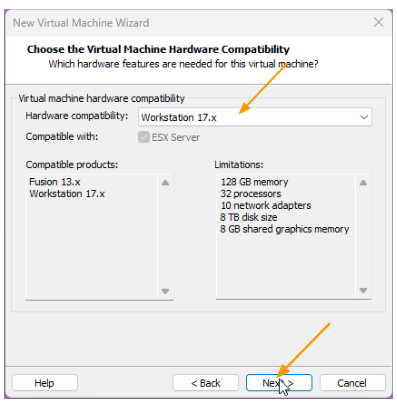
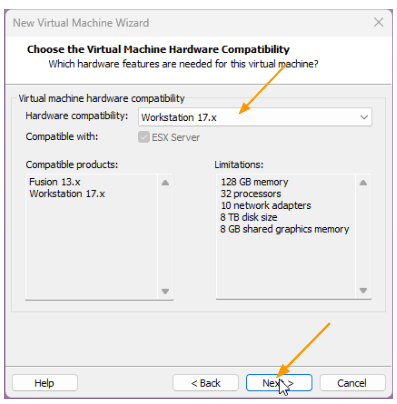
In the hardware compatibility window, choose Vmware workstation version 17, if you have another version, you will have to choose your version from the list and click on Next.
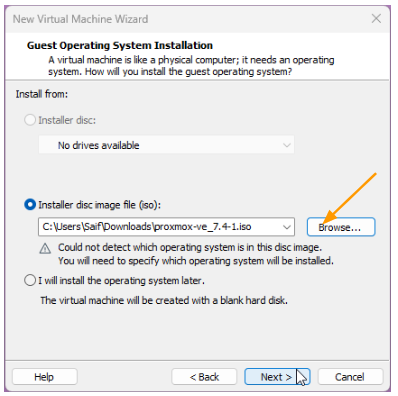
2. Attach the Proxmox iso file.
We are now going to use the Proxmox iso file that we downloaded earlier in this step, in the new window, choose installer disk image file (iso) and click on browse to browse for the file and click on next.

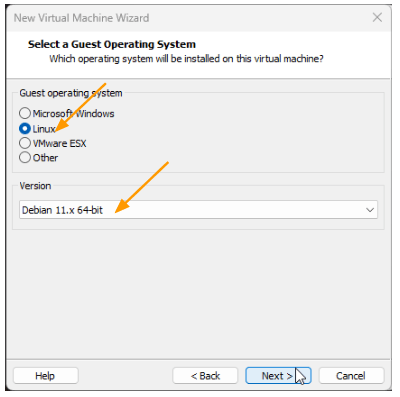
3. Choose the Guest operating system.
As you might know, the Proxmox is based on the Linux operating system, especially Debian11,so from the Guest operating system selection choose Linux from it.
And the version Choose Debian 11.x 64 bit.
Note: In case if you want to take a step further, don’t want to virtualise the Proxmox in vmware workstation, you can choose dual booting as well with your windows machine and debian operating system.
After the debian installation, you need to install the required packages for the Proxmox to work.
I have covered a detailed guide on how you can install Proxmox and Windows operating systems on the same machine using dual boot, you may take a look if you are interested.
After the selection click on next.

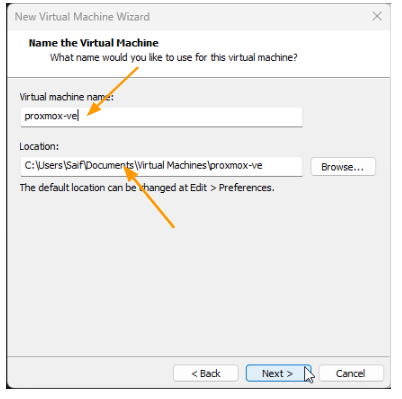
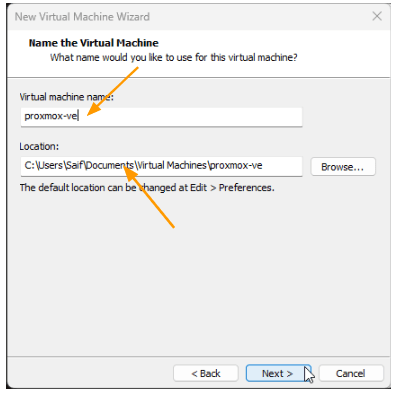
4. Name the Proxmox VM and choose the VM location.
In the virtual machine name, define a user friendly name.
Location: You can leave the default location, or if you have extra storage you can move the location of your choice by clicking Browse.
I am okay with the default location and click on next.
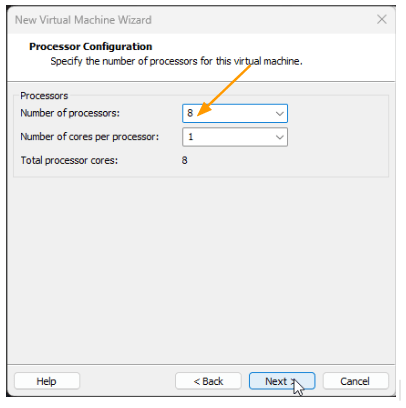
5. Configure the CPU.
As we are installing a hypervisor, it is important that you assign enough CPUs so that you can run virtual machines in it.
In my case, I have 12 processors, and I can very well assign 8 CPUs.
So depending on your cpu count, you need to configure the CPU for the Proxmox VM.
And click on continue.

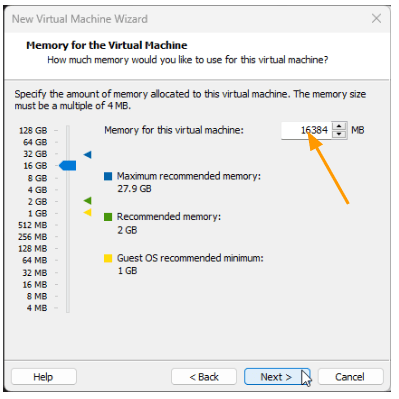
6. Configure the memory.
Again, just like cpu, it is important to configure enough memory for the Proxmox vm, because we will be running multiple VM’s in it.
Since I have 32gigs of RAM, I am okay to give 16gigs of RAM solely for the Proxmox vm.
If you cannot give 16gigs of RAM, thats totally okay, even 4 or 8gigs of RAM will do, however you need to be mindful that we are going to run VM’s in it, so it is best to configure the RAM based on what operating system vm that you are going to deploy in the proxmox hypervisor.
So depending on your requirement, you may configure the memory.
Click on Next.

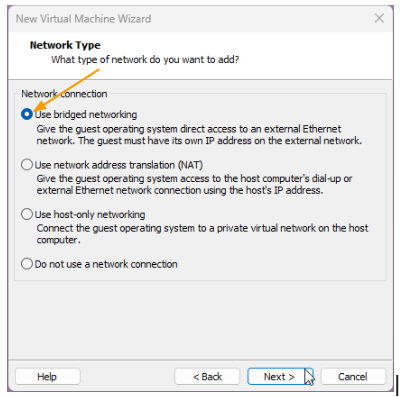
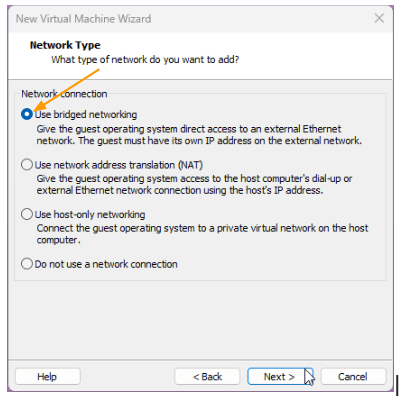
7. Configure the Network.
I wanted the Proxmox virtual machine to act as a separate host in my LAN network.
For that reason, I am choosing a bridged network.
The network requirement is also based on your network need.
You can learn more about the VMware workstation network types in VMware workstation here, so I would recommend reading that in case you would like to configure the network based on your need.
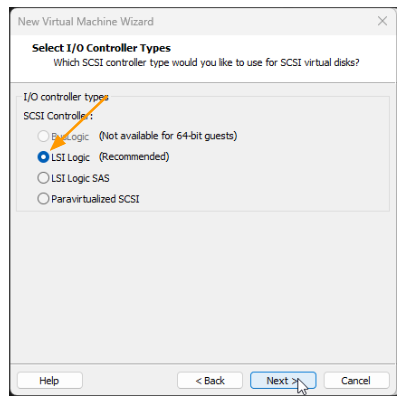
Choose the I/O controller type as the default, which is LSI logic and click on continue.
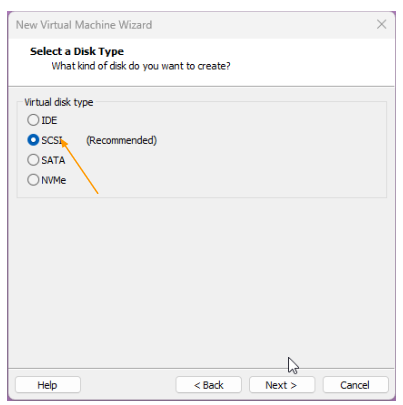
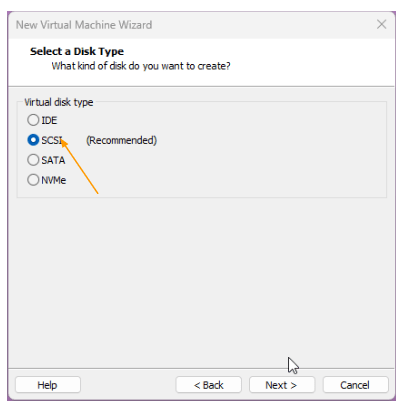
The virtual disk type, choose the default again which is scsi.
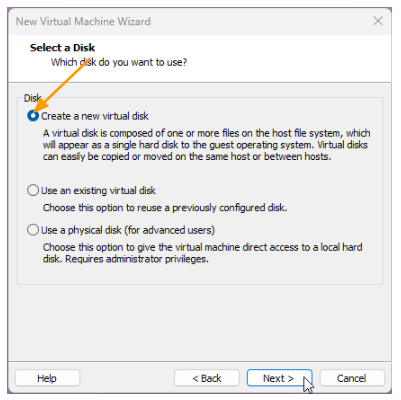
8. Configure the virtual hard disk.
In the select disk windows, choose create a new virtual disk and click on next.
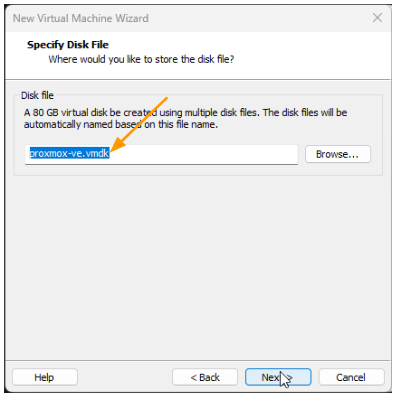
In the maximum disk size, I have given 80GB, which is okay if you want to install a few vms.
However if your VM’s in Proxmox require more disk space, you might need to adjust according to your environment.
Choose Split virtual disk into multiple files.


In the Specify disk file, you will have the name of the virtual hard disk, if you would like to change the virtual hard disk location, you can click on browse, and choose the location of your choice.
However, I am okay with the default location, hence left the default and clicked on Next.

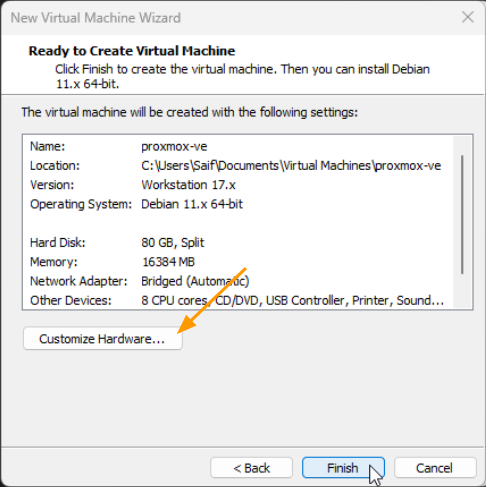
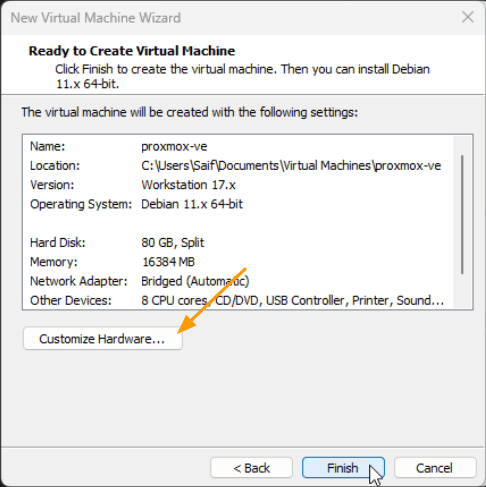
9. Enable Hardware based virtualisation.
You will be presented with the below screen.
In the ready to create virtual machine screen, you can see an option that says Customise Hardware..
Click on that.
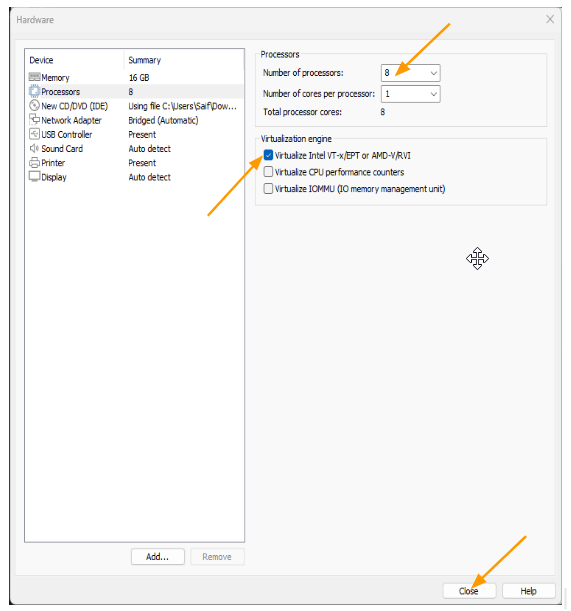
Select processor from the menu,
On the right pane, enable Virtualize Intel VT-x/ETP or AMD-V/RVI and then click on Close.
Note: Even after enabling, and you still receive error “Virtualized Intel VT-x/EPT is Not Supported on this Platform.”, follow the guide here to fix the issue.

10. Proceed with the Proxmox installation in Vmware workstation.
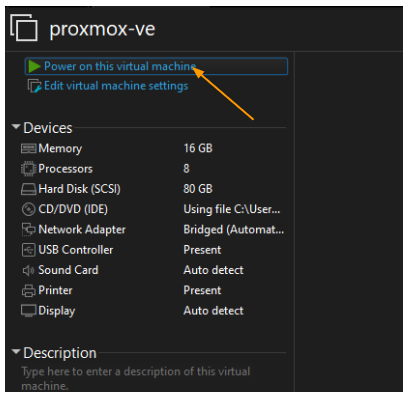
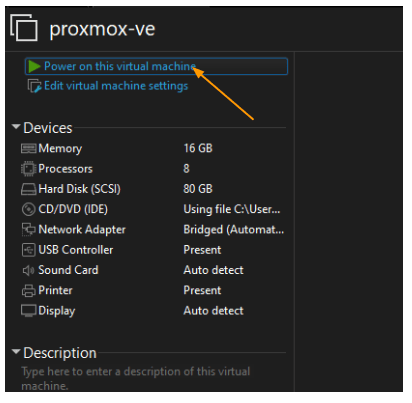
Now that we created the Proxmox virtual machine in the VMware workstation, let’s go ahead and start the Proxmox to proceed with the installation.
Select the Proxmox VM and click on Power on this virtual machine.
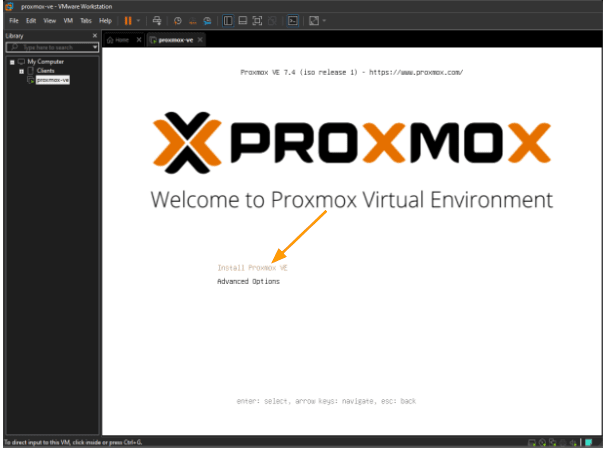
You will be presented with the below screen, click on Install Proxmox VE.
If you have not enabled the hardware based virtualisation on your machine, you might get an error message here, so in case if you are getting an error message, go to this article to fix it, and come back here to continue.
here is the video to fix the error message issue.

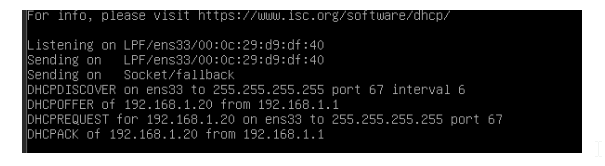
Since I have selected Bridge interface, in the loading screen you would now see the dhcp discover packet was send, and my LAN router has assigned a local IP address from the 192.168.1.0/24 network to the Proxmox server.

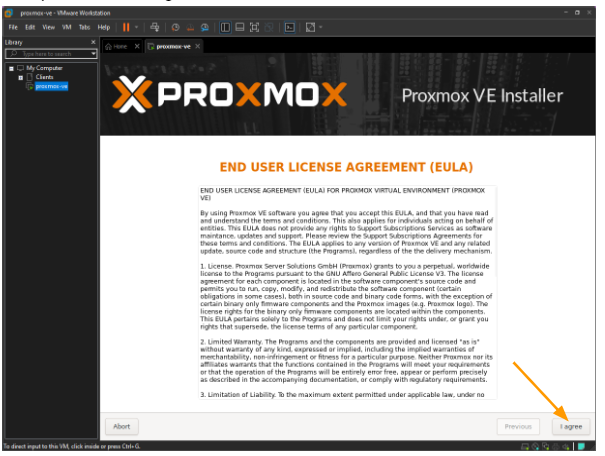
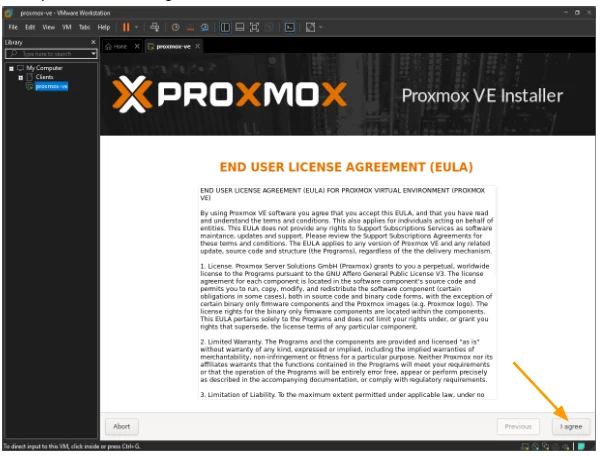
Accept the licence agreement.
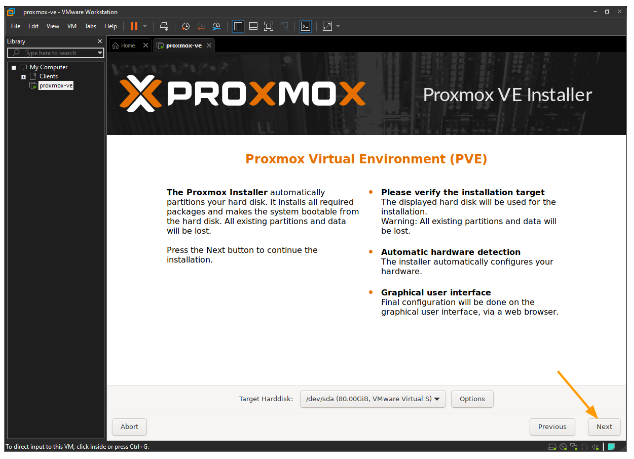
Proxmox automatically detected the virtual hard disk we configured, choose the virtual hard disk and click on next.

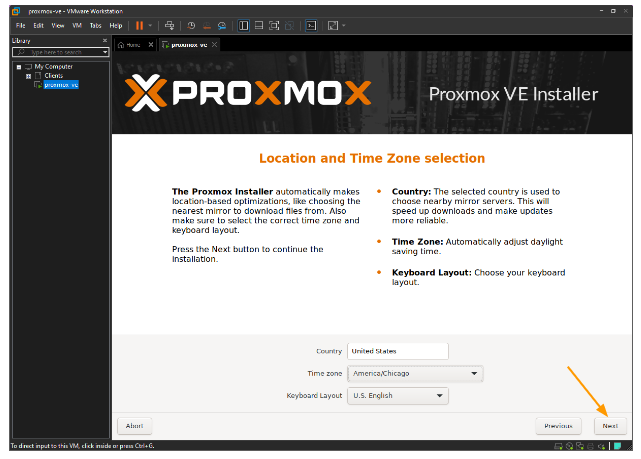
Select the location, time zone and keyboard layout and click on next.
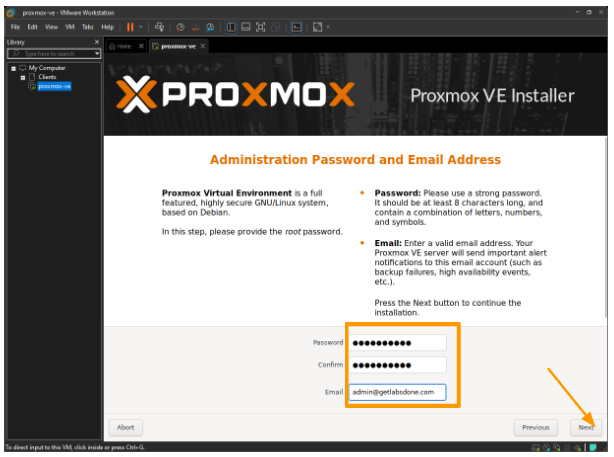
Set the Proxmox credentials.
We are now going to set the password that we are going to use with the Proxmox server.
It is important that you make a note of this password, as it will be required to enter in the web GUI later on.
Enter the password and confirm the password.
Enter the email address as well and click on Next.

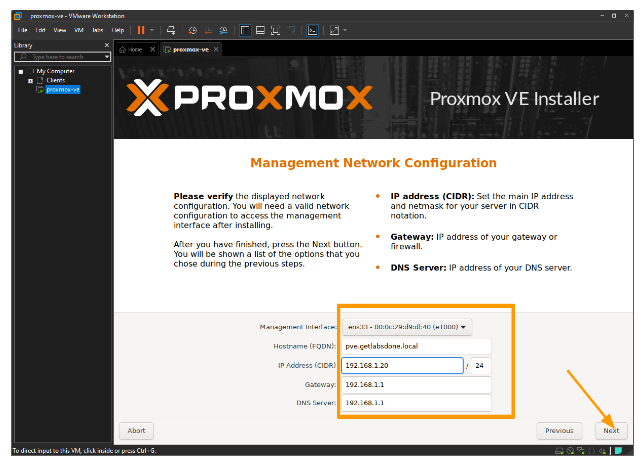
11. Configure the management IP.
Management interface: As we only have a single interface, you can leave the settings as it is.
In case if you are using multiple interfaces, one for management and other for VM’s you need to choose the right management interface here.
Hostname: Enter some user-friendly name for the server.
IP address: My Proxmox server already has an IP address so I am leaving the same IP address, in case if you are planning to use different IP addresses, you might need to change to something of your choice.
DNS server: The DNS server again received from my local router so I am leaving the default here as well.. And click on Next.

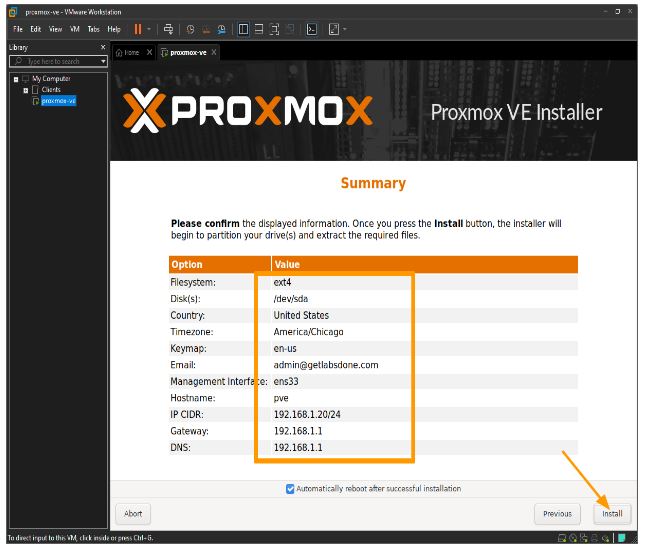
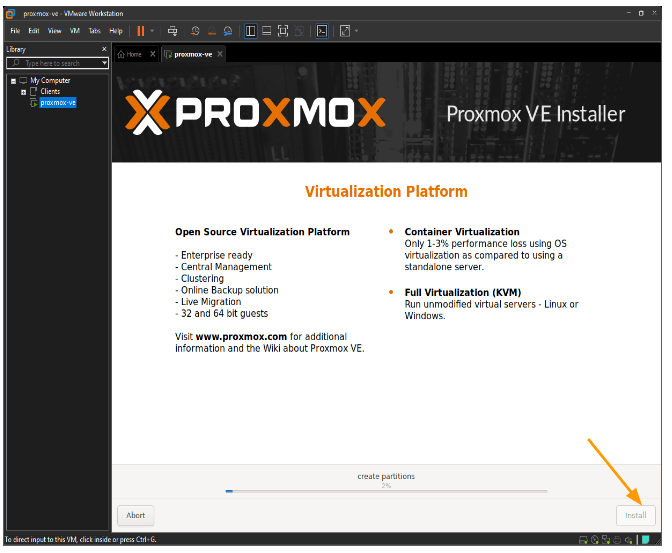
You will get the summary of the installation, once verified everything is fine, you click on install.

The installation will now proceed, and it will take some time for the installation to finish.

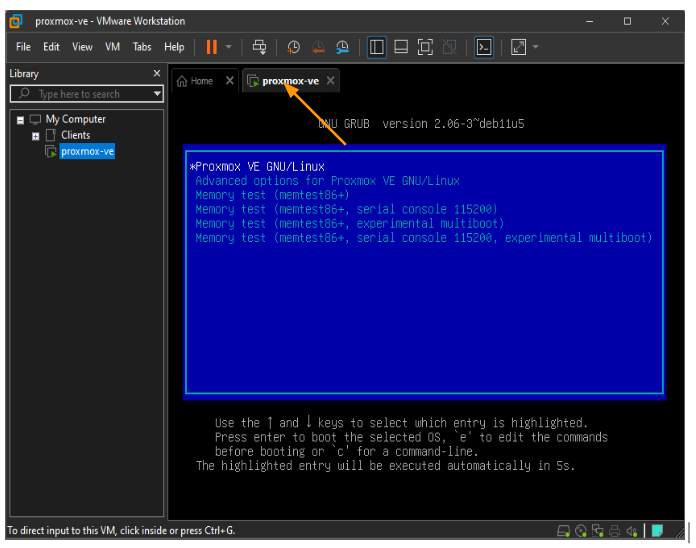
Once done, the Proxmox will restart, and you will see the boot screen of the Proxmox with the bluescreen.
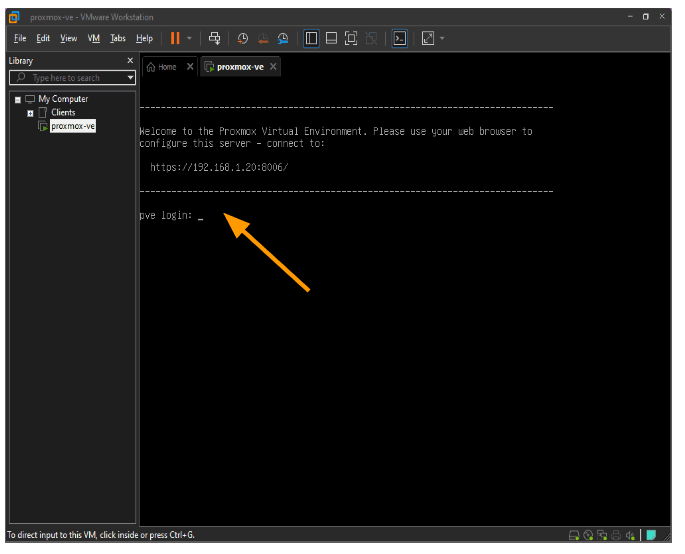
You can now see the main screen of the Proxmox server, where it will show you the url that you can use to access the Proxmox server.
In my case, it is https://192.168.1.20:8006
You can even login to the Proxmox server with the username root and the password that you set during the installation.

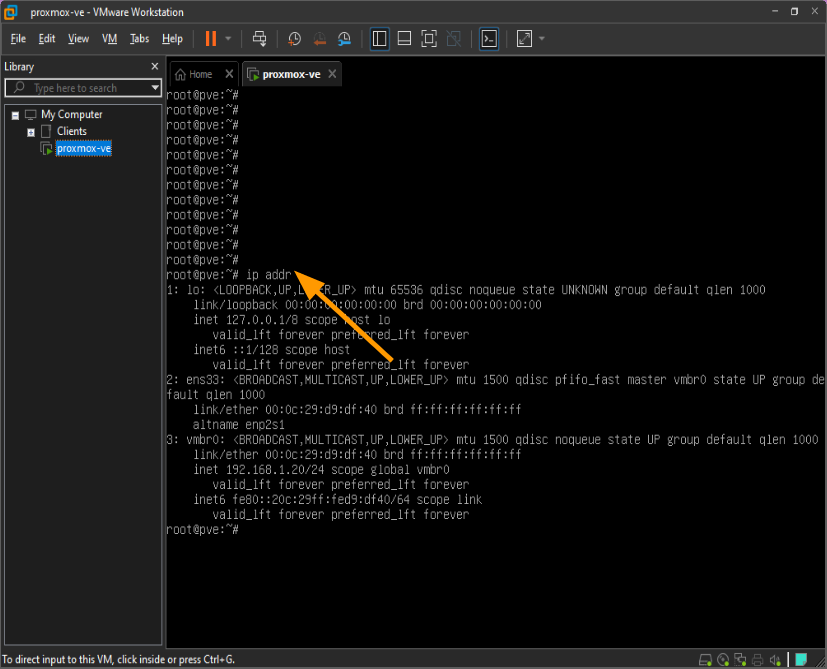
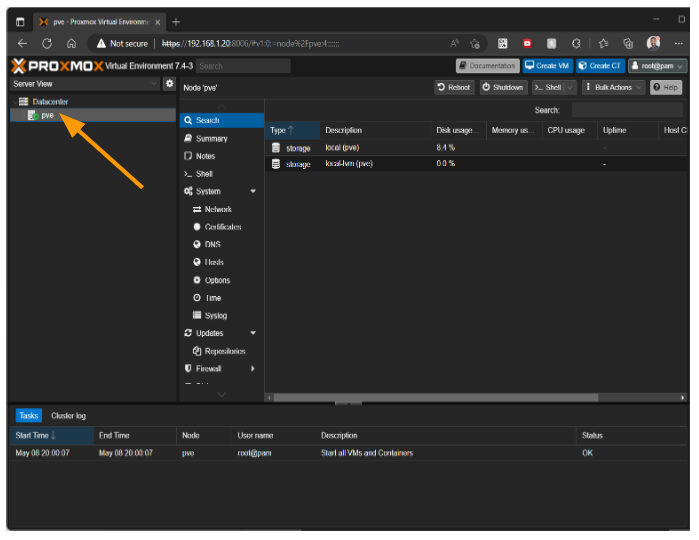
As you can see, I have logged in the Proxmox CLI.
It is the same CLI screen that you get with the normal debian systems, and most of the linux commands that will work with the Proxmox as well.
I just typed the ip addr command and you can see the Ip address that is on the system.

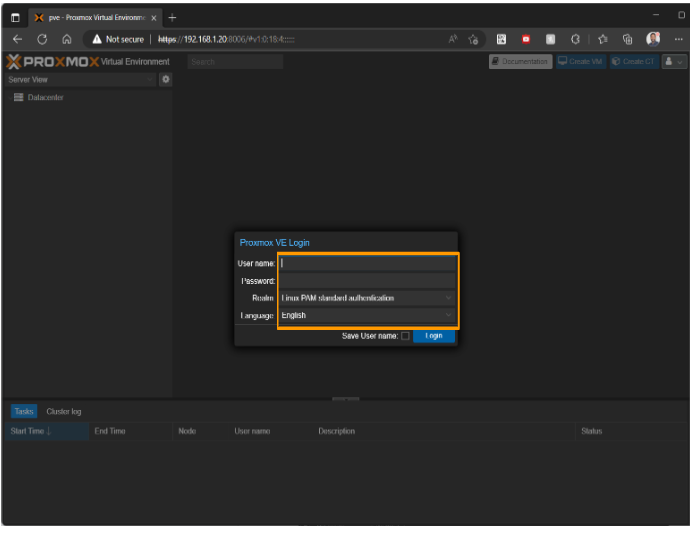
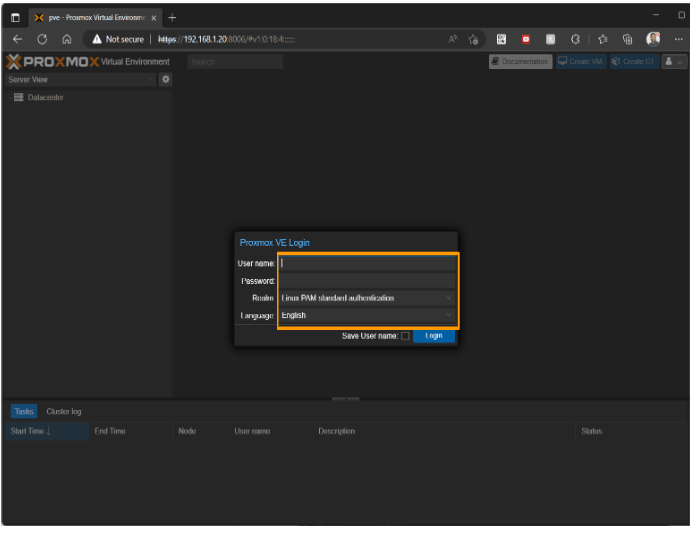
I just accessed the Proxmox url, and it is prompting me to enter the creds.
The default username is root.
And the password, of course the one you set during the installation.
As you can see, I have logged into the Proxmox and I can now go ahead and start deploying the virtual machines in Proxmox server, following the article here.

Conclusion:
Installing Proxmox is pretty easy, however to install multiple virtual machines and run them you need to have a good configuration PC. You also need to be mindful for the fact that we are doing nested virtualization, so you cannot expect to have rock solid performance. However this setup is good if you would like to setup multiple containers.