
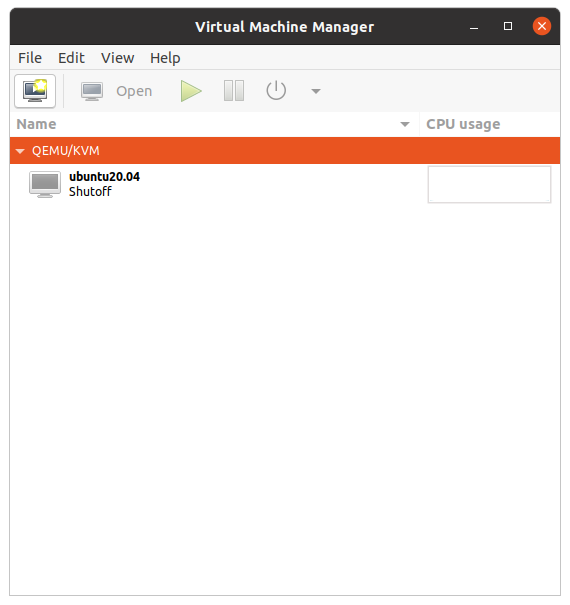
You have been working with KVM and heard about the Proxmox hypervisor which is a greate alternative to KVM. Mainly because of the nice web GUI it provides, similar to the one found in vmware esxi.
At the same time, in KVM, you are missing out on the GUI experience that you get with vmware ESxi. Though you can install other packages to manage the KVM using web GUI, it’s not a out of the box option.
In Proxmox, you just need to install the software in a bare metal and you are ready to get started. Moreover, it is also based on KVM and you can even use qcow2 image to transfer your existing vm’s to the Proxmox, which is great. But that’s all about the baremetal, what if you wanted to try Proxmox quicking, can you run as vm in the KVM, is it possible?
The answer is yes, you can very well install Proxmox in KVM environment.
And in this blog, we are going to take a look at how you can install Proxmox hypervisor in KVM.
Prerequisites.
Proxmox iso installer.
You can get the image from here. Download the Proxmox VE iso installer.
Once the Proxmox iso image is downloaded, you need to move this to kvm default directory /var/lib/libvirt/images, though it is not mandatory, it will be easy to attach the ISO during the installation.
saif@gld-srv:~$
saif@gld-srv:~$ ls /home/saif/Downloads/
Proxmox-ve_7.4-1.iso
saif@gld-srv:~$
saif@gld-srv:~$
saif@gld-srv:~$ sudo mv /home/saif/Downloads/Proxmox-ve_7.4-1.iso /var/lib/libvirt/images/
[sudo] password for saif:
saif@gld-srv:~$
Install the KVM package on your computer.
Ubuntu.
sudo apt install qemu-kvm bridge-utils virt-manager libosinfo-bin -yCentos/Redhat.
yum install qemu-kvm libvirt virt-install virt-manager virt-install -yFedora.
sudo dnf -y install bridge-utils libvirt virt-install qemu-kvmKali Linux.
sudo apt install qemu-kvm libvirt-clients libvirt-daemon-system bridge-utilsLinux mint.
sudo apt install qemu-kvm bridge-utils virt-manager libosinfo-bin -ySetup network for Proxmox.
By default, when you install the kvm on a brand new system, it will have a default network, which will act as a NAT interface, so only the host machine can talk to the virtual machine. Any other machines in your LAN cannot talk to the virtual machine.
Though you can configure port forwarding with KVM on the default NAT interface, that’s not an ideal solution when you want to scale things up.
When you deploy Proxmox as a virtual machine in KVM, it is important that you expand the network beyond the host machine. So you need to create another network other than the NAT, to be able to access the Proxmox on your local area network.
However, in this lab, I am using the default NAT network.
Follow the article here to learn how you can connect KVM vm to the network.
Installation of Proxmox in KVM step by step.
1. Creation of Proxmox virtual machine.
Open terminal and type virt-manager, the KVM virtualization manager window would now open up.
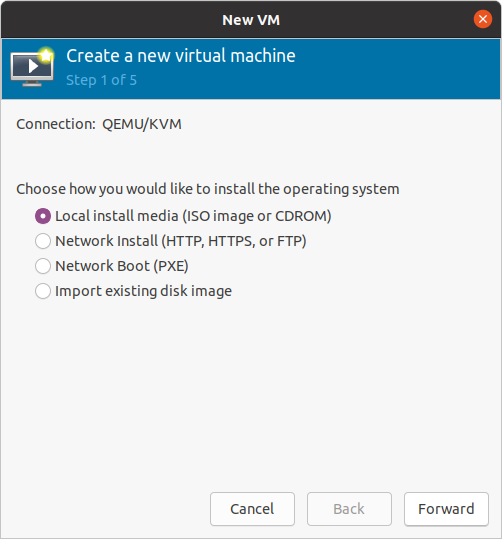
Click on the New button to create a new virtual machine.

In the create a new virtual machine windows choose local install media (ISO image or CDROM) and click on Forward.
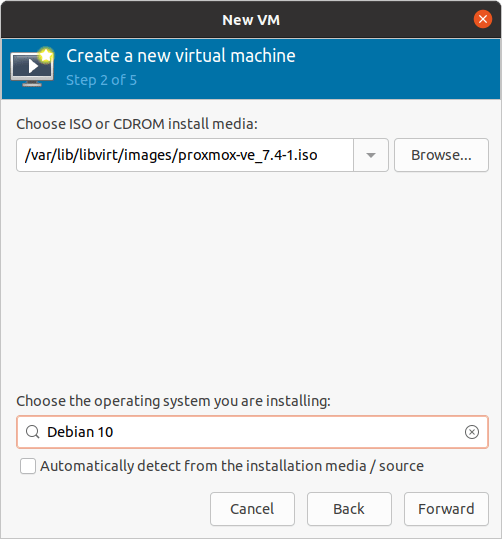
As we already moved the iso image to the /var/lib/libvirt/image, you can just click on browse to attach the iso image.
You need to uncheck the option that says Automatically detect from the installation media/source.
And manually select Debian11/ 10 from the drop down as the Proxmox server is based on debian operating system, afterwards click on forward.

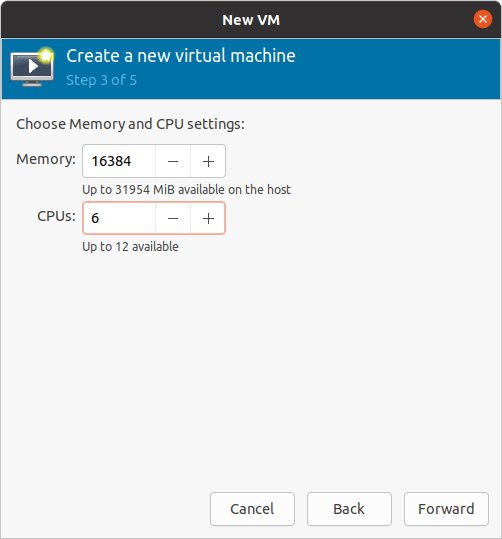
2. Configure the memory and CPU.
We are not installing just the virtual machine, we are going to virtualise an hypervisor, so it is important to provide enough memory and cpu, that way you can spin up multiple VMs and containers in it.
I am adding 16 gigs of RAM and 6 CPU’s. So depending on your requirements, you may add or remove both the memory and cpu.
Once the changes are made, you may click on continue.

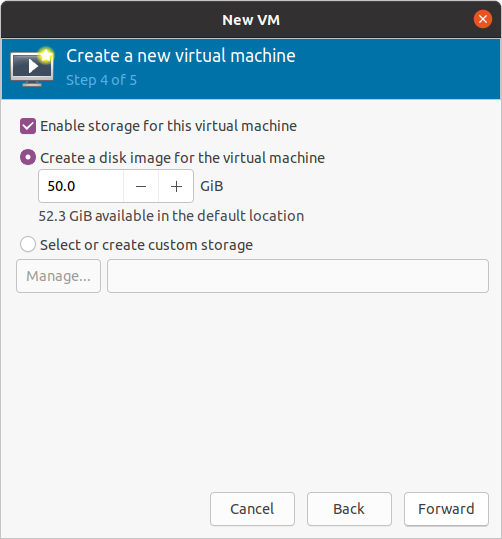
3. Setup virtual Hard disk.
The storage you assign here, further gets distributed to virtual machines, so depending on your requirements you need to add the storage as well.
Check the option that says Enable storage for this virtual machine.
Create a disk image for the virtual machine.
Mention the storage volume and click on Forward.
I know I should be adding more storage than just 50gig, unfortunately in the current KVM host I don’t have that much of storage, hence I am adding only 50 gigs.

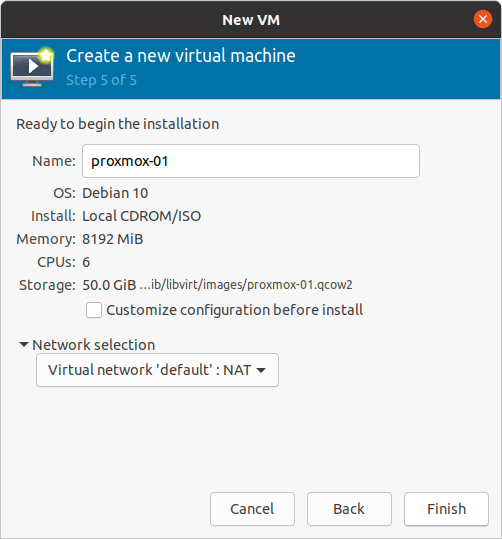
4. Name the virtual machine and choose the network.
Name: provide a user friendly name.
Network Selection : This again depends on the network that you have. This network will be used to access the Proxmox GUI.
Most of the kvm setup, you will have a separate network for management, so you may choose that.
As I mentioned earlier, in my setup, I am using the default NAT network, so choosing that from the drop down list.
Note: If you would like to add more virtual network interfaces, you can check the option that says Customise configuration before install. And add new hardware and select network interface from the list.
In my setup it’s only a single interface so I click on Finish.

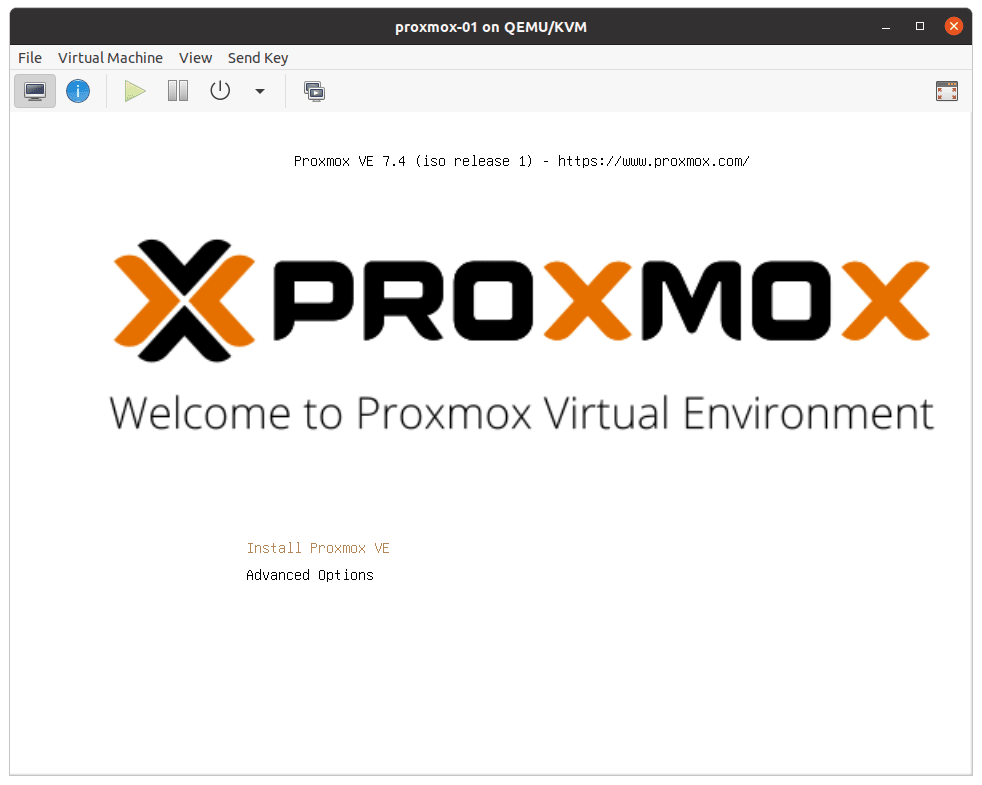
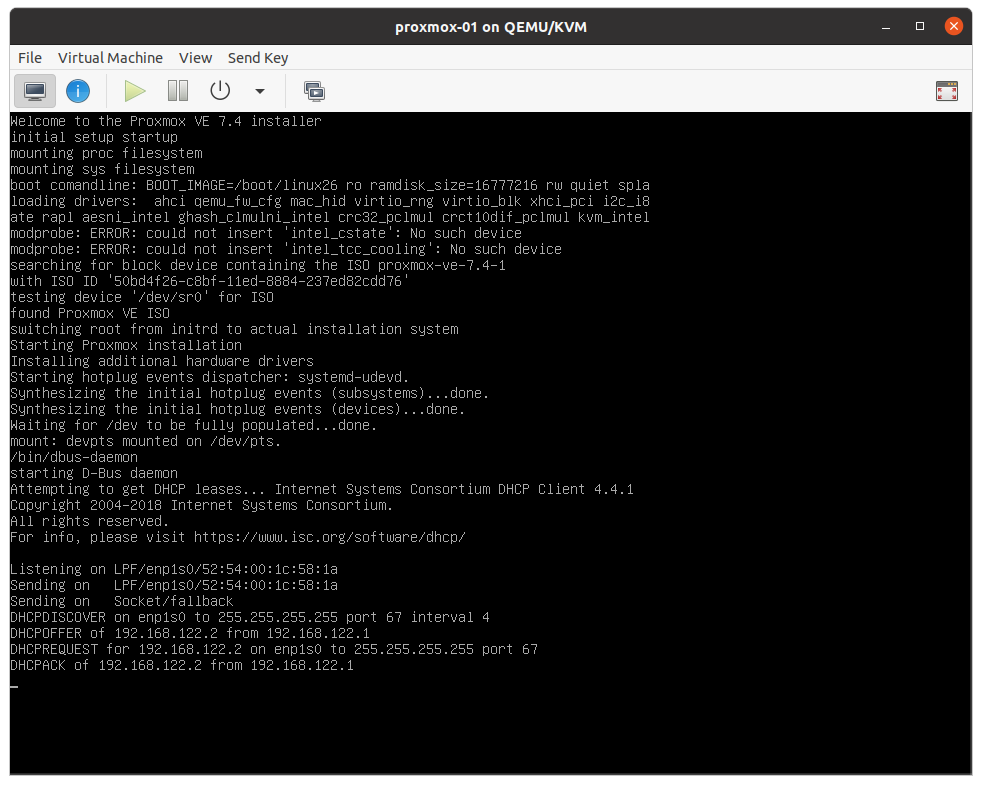
5. Install the Proxmox.
The Proxmox installation would now begin and you would get a screen that says, Install Proxmox XE.
Select that to proceed with the installation.

As I have selected the NAT network, I automatically got an IP address from the NAT DHCP service.
If you have selected network other than NAT, and if you dont have DHCP service running for that specific network, you will have to configure the IP address manually.

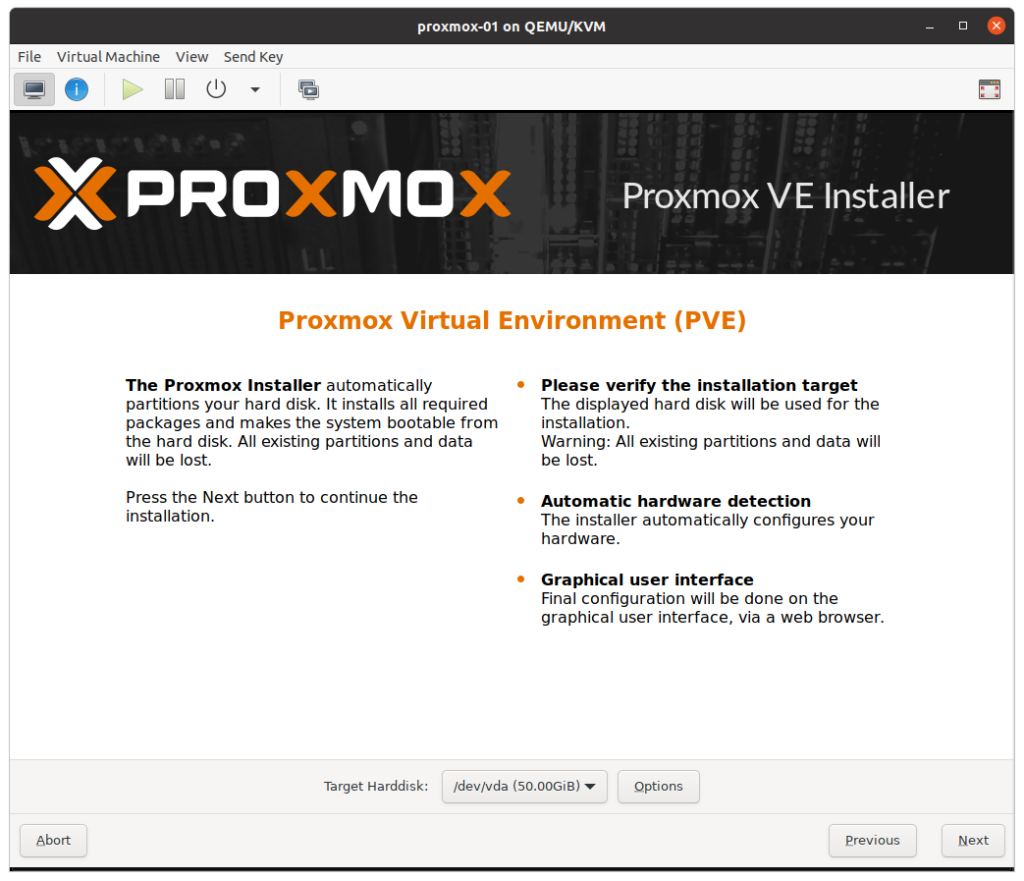
Accept the licence agreement by clicking I agree.
Choose the virtual hard disk that you configured earlier, if you have multiple hard disks, you will have to make a decision on where to install the Proxmox software and click on next.
You will get an option to choose the virtual hard disk, choose the virtual hard disk that we configured and click on next.

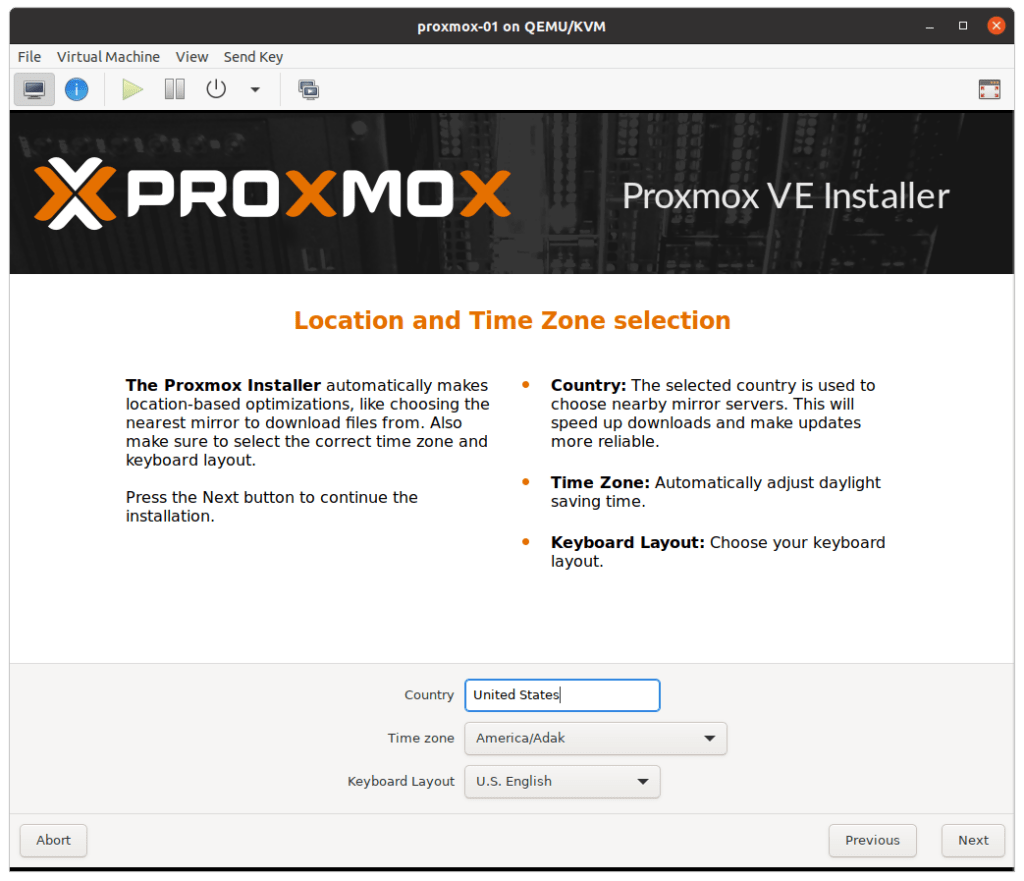
Choose the location and timezone, also choose the keyboard layout and click on Next.

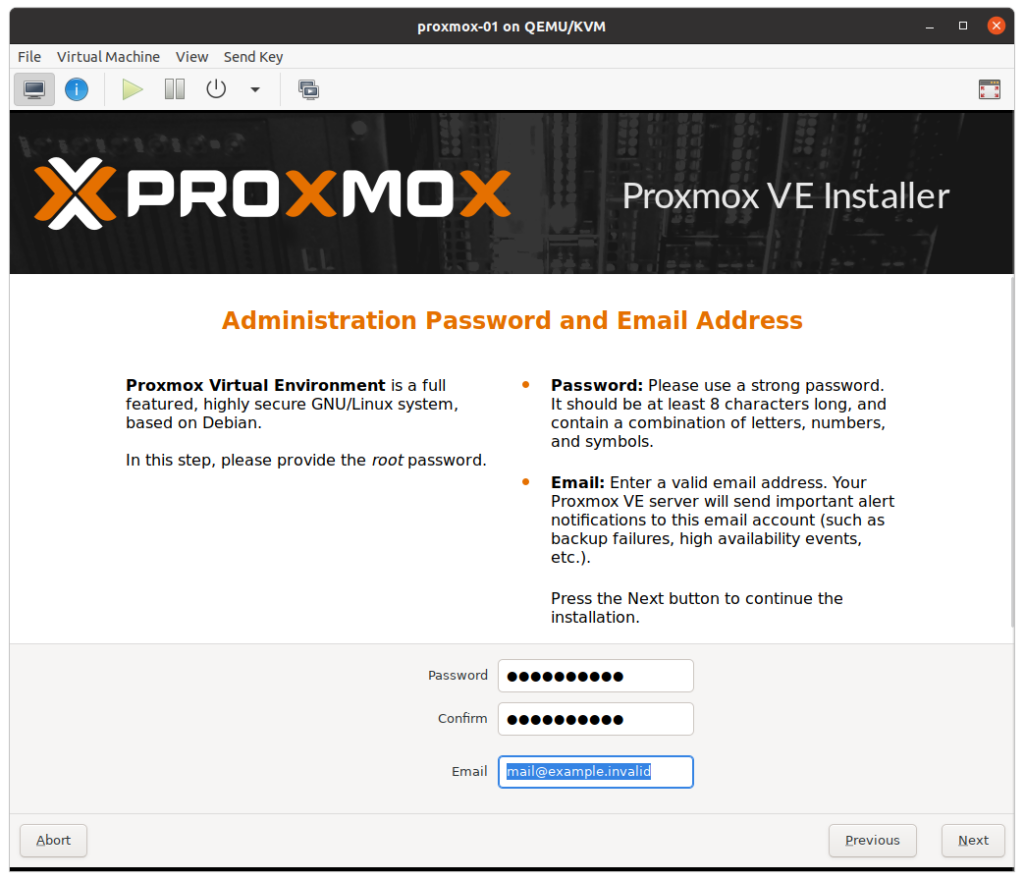
6. Setup password for the Proxmox.
You now have to set up a password for the Proxmox virtual machine.
Enter the password and confirm the password, also add the email address and click on Next.

7. Configure the hostname and the IP address.
As you can see, the Proxmox configured a default hostname, you may change if you would like.
In the IP address, I am leaving the default one.
So after that click on next.
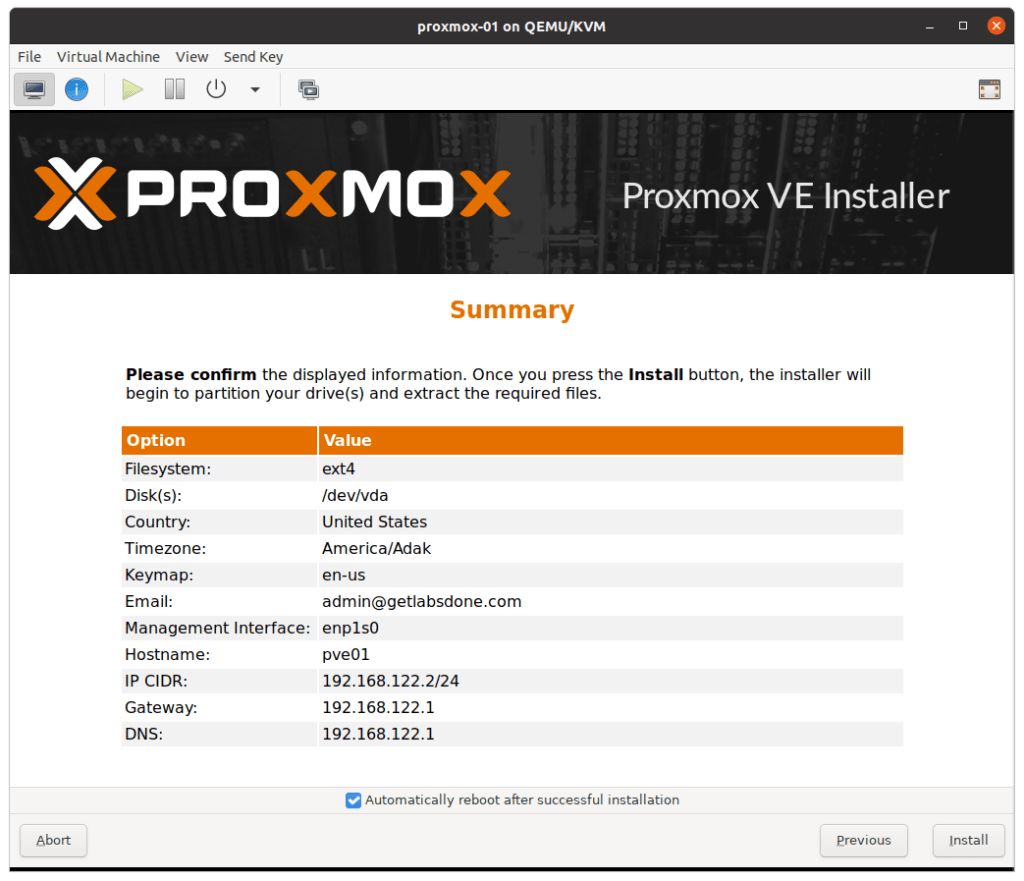
You will get the summary of the Proxmox server, if everything looks good you can go ahead and hit install.

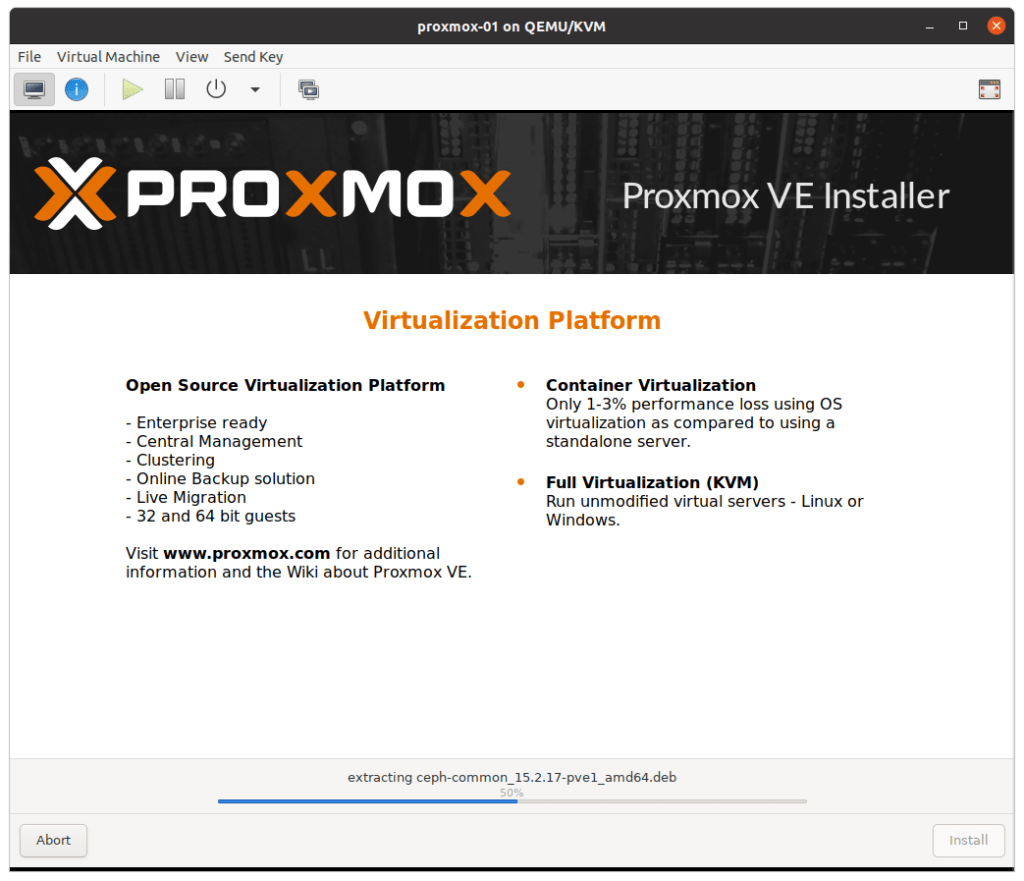
The installation now started and it would take some time to finish.

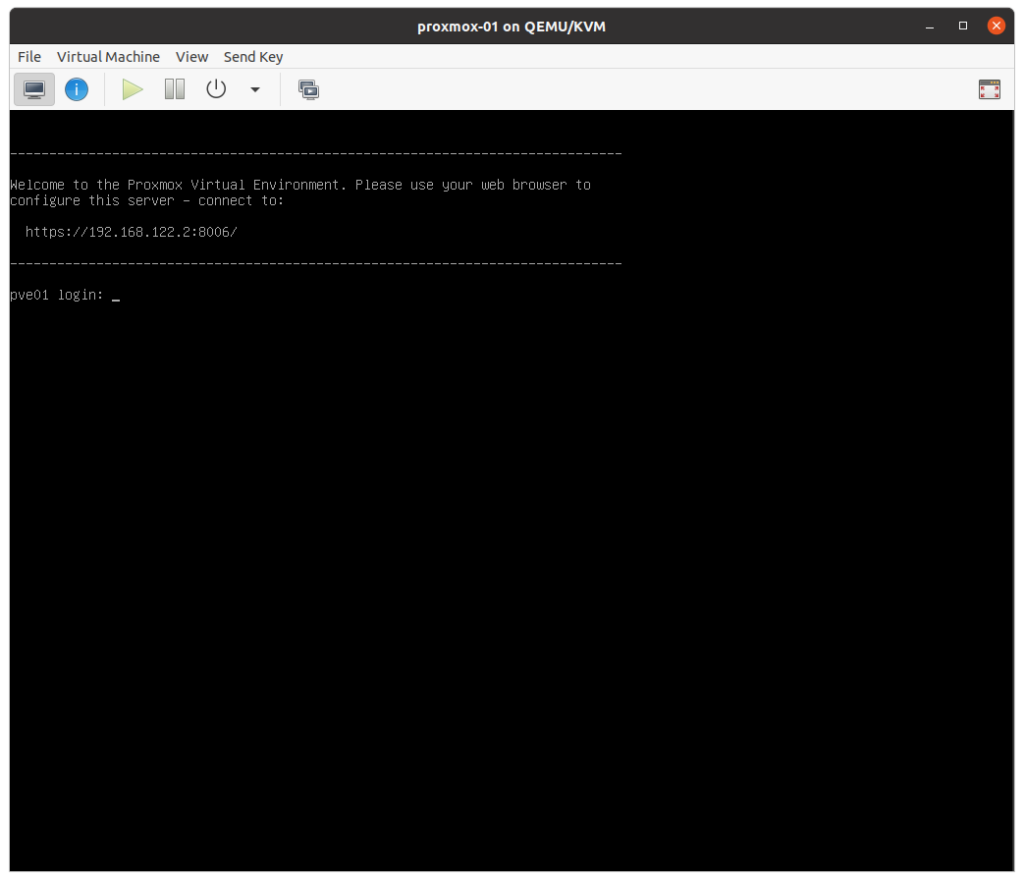
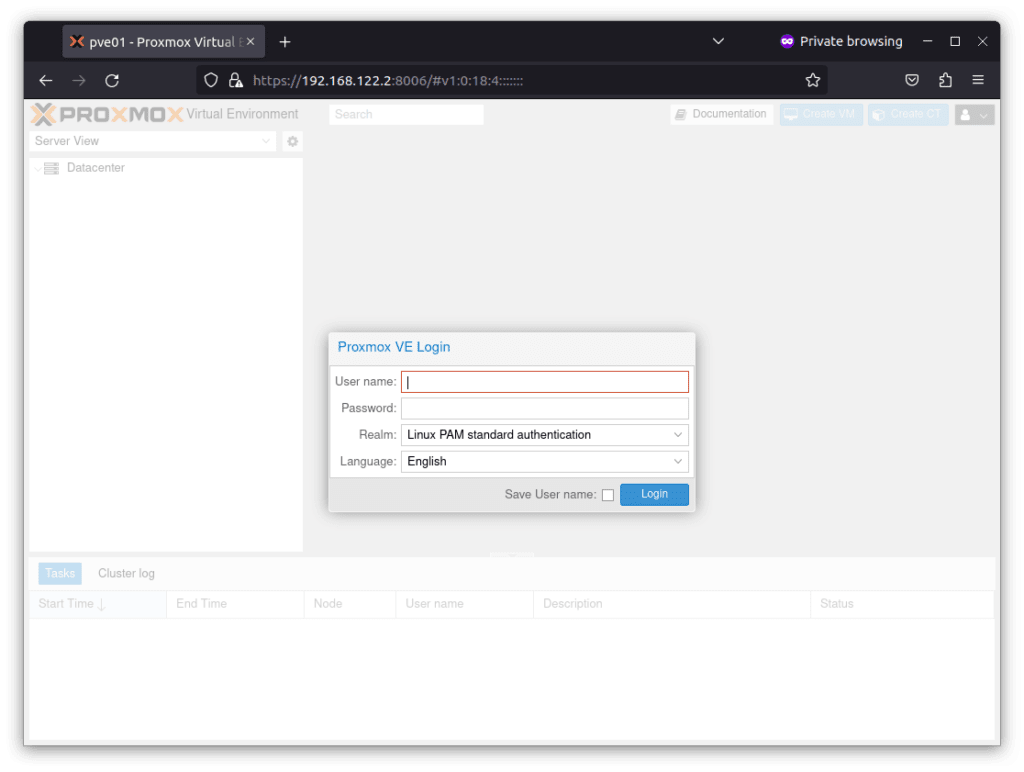
During the installation, the vm would reboot and once done you will be at the login screen, where it is prompting you to enter the credentials along with the web url which you can use to login to the Proxmox web GUI.
Make a note of the url that is shown on the cli, as you can see, it doesn’t use default https port 443, instead it uses 8006.

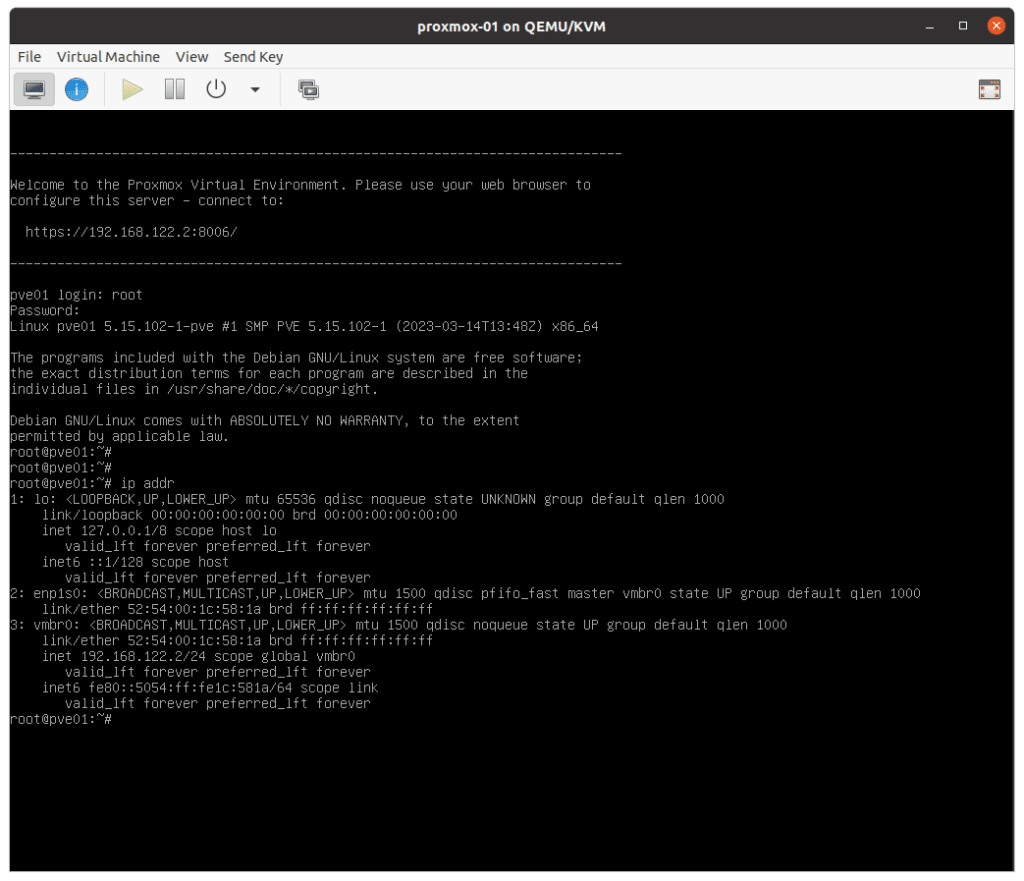
You can enter root as the username and password that you set up during the installation. It will take you to the debian CLI screen, as the Proxmox is based on debian.

8. Access the Proxmox web GUI.
If you are using a NAT network, in the host machine browser, type the Proxmox url that you got from the Proxmox cli screen.
You may ignore the security warning, and continue.
You will now be prompted to enter the Proxmox username and password.

If you have another network configured, you will have to just access the url just like we did before, replacing it with the different network IP.
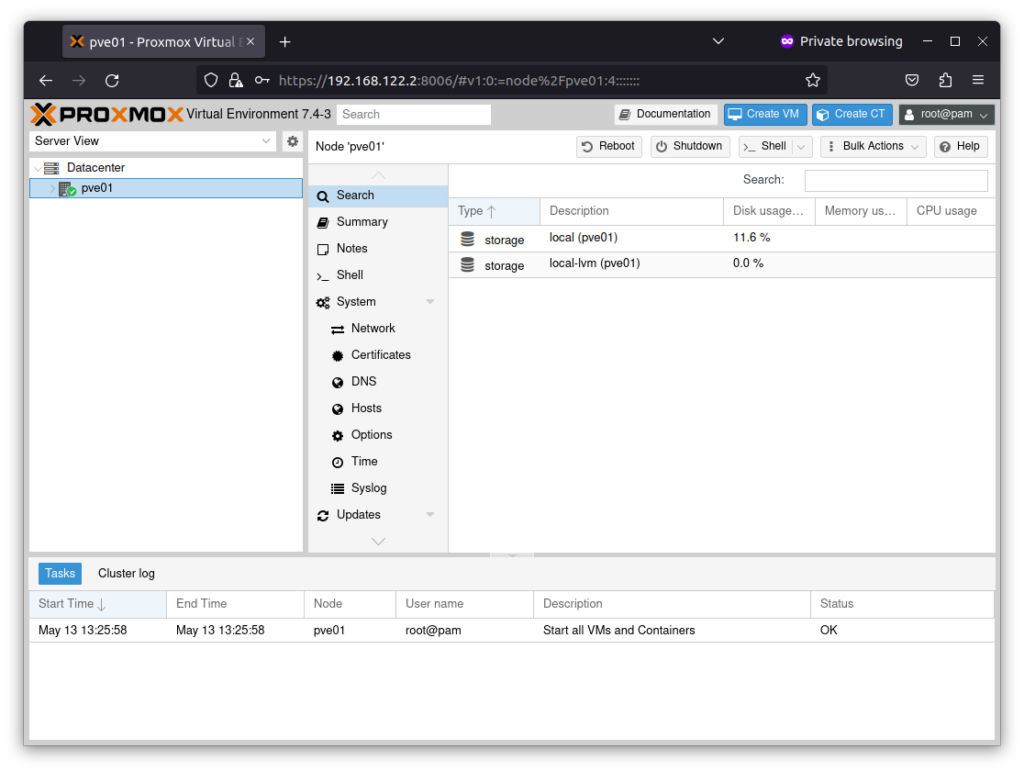
And as you can see, we are now in the Proxmox web GUI.
You can now proceed to create virtual machines and containers in Proxmox.
Here is the step by step GUIde on how you can set up a virtual machine in Proxmox.
Conclusion:
Proxmox has been successfully installed on KVM, enabling nested virtualization. While running virtual machines in this setup is possible, it may not deliver optimal performance. However, it is well-suited for testing purposes and running containers.
Ken Mathers
Wednesday 3rd of December 2025
Nice article but a couple of the screenshots don't get loaded, which is a real shame and detracts from an otherwise great post.
The licence agreement: blob:https://getlabsdone.com/51fecec3-b899-493a-944b-0890daca0377
And the hostname, IP address etc summary: blob:https://getlabsdone.com/cb0d29ab-87ef-48a2-8bad-a95ed9f62f7c