
The other day I was trying to install Proxmox in VMware workstation, which requires me to do nested virtualisation, and all of the sudden at the start of the installation, I got an error ‘Virtualized Intel VT-x/EPT is not supported on this platform. Continue without virtualized Intel VT-x/EPT?’

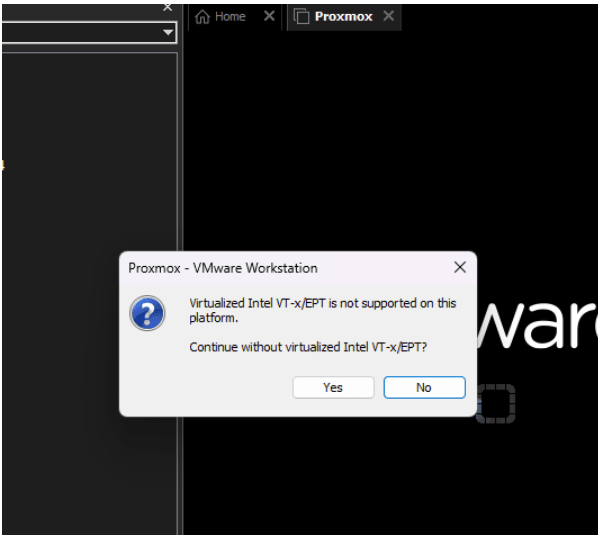
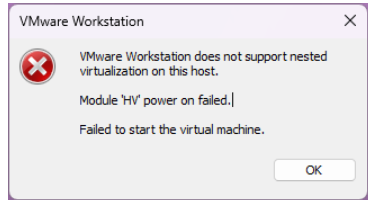
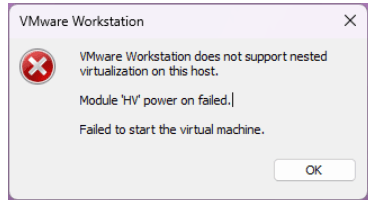
If I click on Yes, I would end up getting another error message VMware workstation does not support nested virtualization on this host, Module ‘HV’ power on failed.
So the result is, unable to run the VM itself, as it will continue to throw the error.
What if I click on No, I would get an error Failed to start virtual machine.
Most of the time what people would do is turn off the machine and get right into bios and realise that they already enabled the intel-vt or AMD-V, so why on earth does it keep throwing the error ?
I use, intel 9750h cpu on my machine. It’s a great CPU for a laptop, and It should support intel-vt and I shouldn’t be getting the error message like this one.
After a lot of trial and error, I found that I had hyper-v enabled, however disabling that and restarting the machine didn’t really fix the issue either, but eventually I was able to fix the issue.
And in this blog article, we will see how you can run any operating system in vmware workstation with intel-vt-x or AMD-V enabled.
So I recommend you go through this step by step.
In case if you prefer to watch the video, below is the step by step instruction video.
1. Ensure your CPU supports hardware virtualization.
Before you do anything it is best to check whether your CPU supports hardware based virtualisation or not, otherwise it will be a waste of time.
Most processors nowadays support hardware based virtualization, and if you are using a system which is pretty old, chances are you most likely will not have the hardware based virtualisation (intel-vt or AMD-V) on your processor.
So it is important to check whether your processor supports it or not beforehand.
Get the CPU model number.
In windows 11, click on windows key + s
Type system information, and open the system information app.
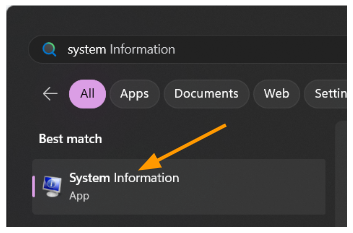
This will show you the entire system information, on the right pane look for processor
As you can see I have Intel(R) Core(TM) i7-9750H CPU @ 2.60GHz, 2592 Mhz, 6 Core(s), 12 Logical Processor(s)
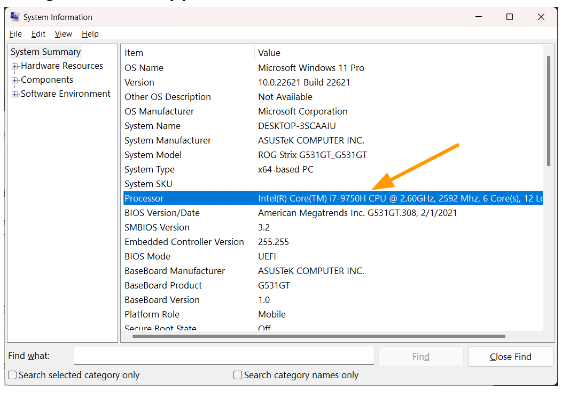

Which is a pretty good CPU, and I know that it supports intel-vt, however let’s confirm that front the intel site.
Check hardware virtualization for Intel processors.
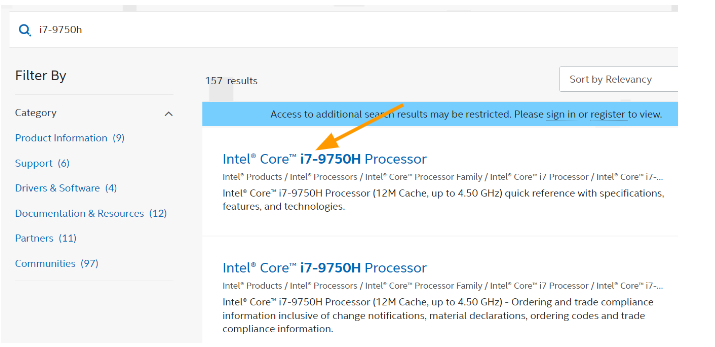
Make a note of the cpu model number, which is i7-9750H
Goto Intel search page here.
In the search field enter the CPU name and hit search.
Click on the first link.

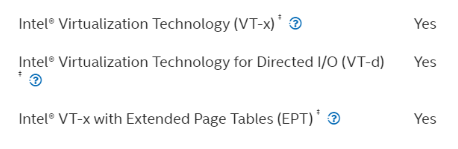
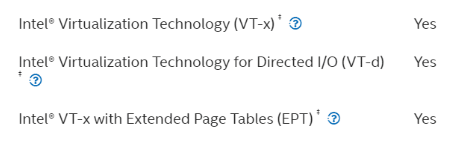
Under security and reliability you will see whether your CPU supports intel-vt or not.
As you can see my processor supports hardware based virtualisation. Which means I am good to go and I should be able to run the virtual machine with no issue, and I could even use it as nested virtualisation as well.
Check the hardware virtualization in AMD processor.
The same way we checked the Intel processor, we can do it in AMD as well.
In one of the other AMD laptop I have AMD Ryzen 7 4800H
Goto the AMD processor search here
Enter the processor model, and hit enter. You will see the processor information, click on it.
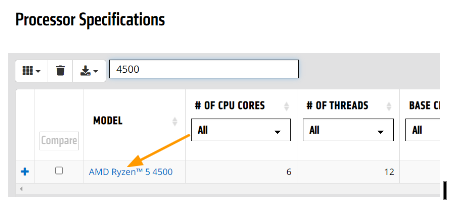
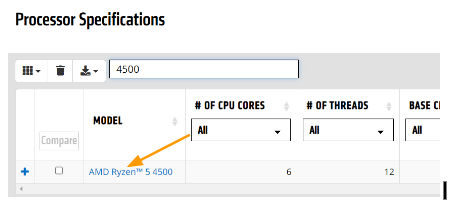
In the processor information page, scroll down and you can see, AMD-V is supported in Supported Extensions.
So we are good to proceed with the AMD processor as well.


If you don’t have the Intel-vt or AMD-V supported on your CPU, you may ignore the error and continue to use the VM in VMware workstation, however, you may not get better performance. So, this might be a good reason for a PC upgrade 🙂
To get better performance, it is recommended to get a CPU which supports hardware based virtualisation.
So if you have verified the above steps and you have hardware based virtualisation on your processor, you are good to go and you can proceed with the other steps.
2. Disable Hyper-v Virtualization Platform in Windows.
Although Microsoft and VMware got together and planned to get the VMware workstation and hyper-v work together in the same pc. I never had any success in doing so. The Virtual machine in hyper-v would work fine, however the VMware workstation virtualization machine performance gets degraded.
So if you are using hyper-v as well on your machine, you need to decide which hypervisor that you are going to use.
So whatever operating system that you are going to use will work with hyper-v as well, so if you can run in it, well and good, go ahead and install the operating system in the hyper-v environment itself.
Otherwise, you need to stick with VMware workstation.
In my case, I like VMware workstation pro over hyper-v because of the features that it supports and I also paid for the licence. So that is one of teh reason I stayed with VMware workstation pro, in case if you require VMware license, You can get them here.
Since I am sticking with the VMware workstation, let’s go ahead and disable the hyper-v on windows 11.
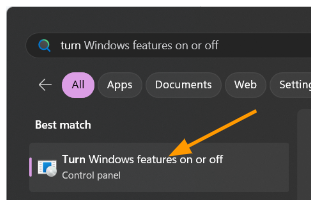
Click on Start -> type turn windows features on or off and click on the turn windows features on or off item in control panel.
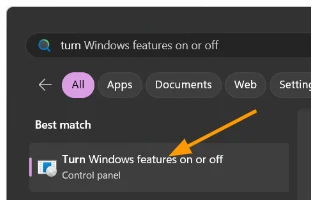
The windows features window would now appear.
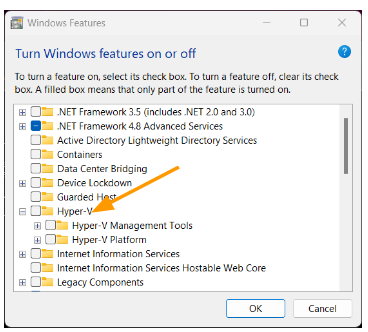
As you can see, the hyper-v is now enabled, you may go ahead and uncheck the option and click on OK.

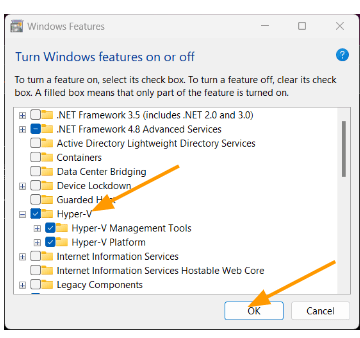
I have now disabled the hyper-v, but I have not clicked on Ok yet.

Most people don’t realise that they can just disable the hyper-v and think that things will work just fine, however it doesn’t work that way, you also need to disable one more setting.
3. Disable Virtual machine platform.
While on Turn windows features on or off screen, scroll down to the bottom and look for Virtual machine platform.
If it is enabled, disable that as well and click on OK.

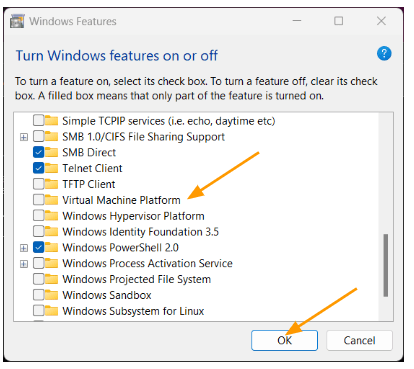
So we just disabled hyper-v and the virtual machine platform.
You will be asked to reboot the machine. Cancel it and do not proceed to reboot yet.
3. Disable memory integrity in windows 11.
Finally we also need to disable memory integrity in windows 11.
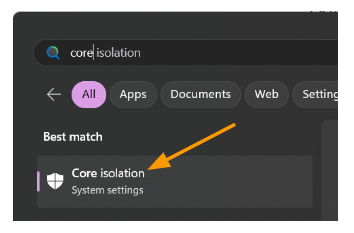
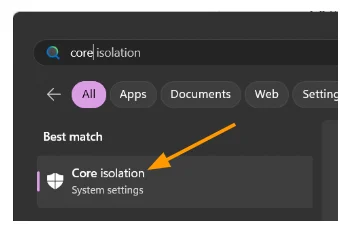
Click on the start menu and type core isolation.
Open the core isolation in system settings.
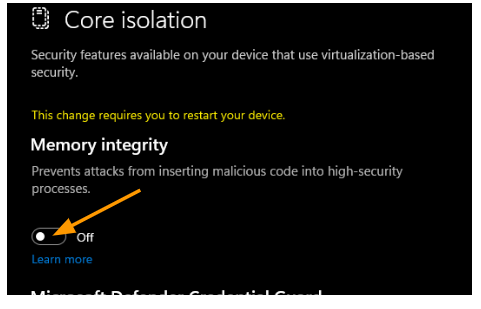
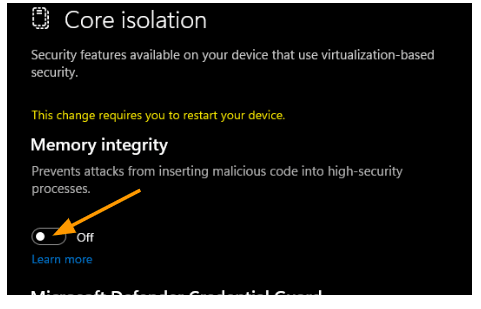
Uncheck the option that says memory integrity.
You will be prompted with windows security, click on yes.
It will take a few seconds to change the settings, once done you will be asked to reboot the machine. So you may go ahead and reboot the machine now.
4. Enable the Intel-vt or AMD-V on your bios.
During the shutdown, you will see that the windows are updating the softwares. But we need to make sure that we enable hardware based virtualisation. In my case it was already enabled, but you might as well check before you continue.
When the system shuts off and powers it back on, you may continue to press F2 (for asus) and get into the bios.
Note: The F2 key works with Asus laptop to get into the bios, that doesnt mean it will work with other laptop, so you may check with your laptop vendors documenation to find out how you can get into Bios. For eg: in hp laptop the key is F9.
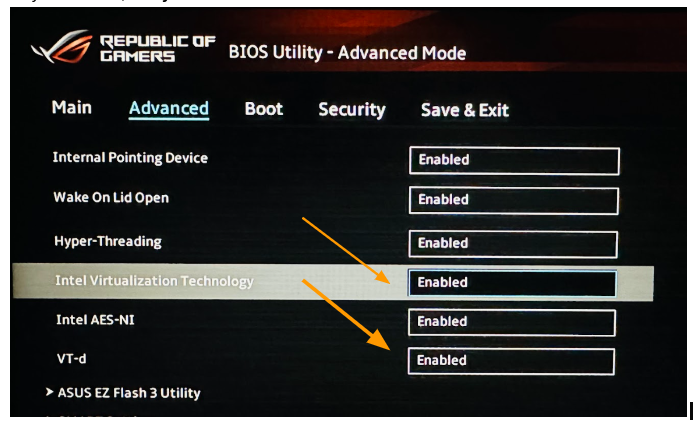
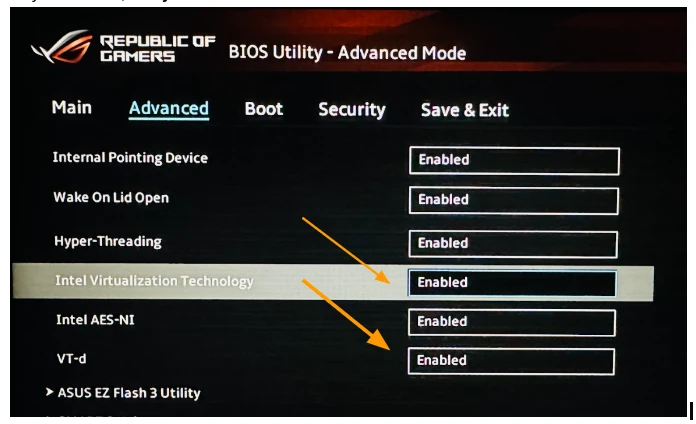
In the bios advanced settings, get into the intel-vt settings and enable that if it is not enabled already.
Also enable VT-d as well.
As you can see, in my bios it is enabled.
Save the changes and exit the bios.
The machine would now load into the windows 11.
5. Enable Virtualisation in Virtual machines.
Now that we enabled all the required settings for the VM to work, you also need to enable the hardware assisted virtualization in the VMware workstation side as well.
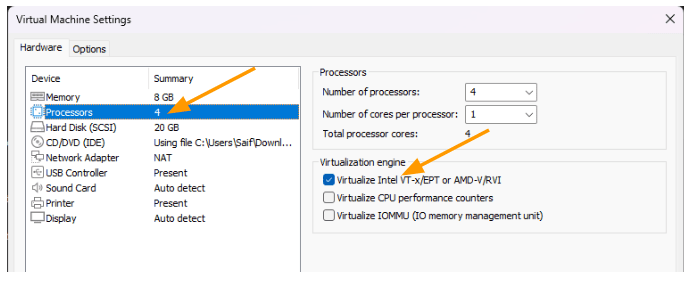
Open the VMware workstation and right click on the VM that requires hardware virtualization, and click on settings.
In the Hardware, click on Processor.
On the right side, under Virtualization engine, check the options that says. Virtualize intel VT-x/EPT or AMD-V/RVI

You may now proceed to create/start the virtual machine and it should work just fine.

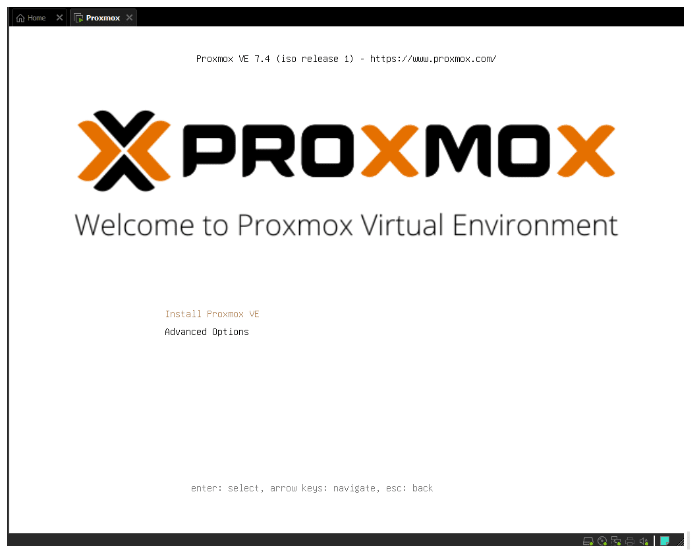
As you can see, I no longer get an error message when I try to start the Virtual machine, and I can continue to install Proxmox on my machine now.
sunil
Saturday 10th of January 2026
Hi Thank you for amazing blog, But still after following step, Proxmos throw same error, I am using core ultra 225 and eabled vtd and intel virtualization technology, also disable hyper-v, core isolation,
Can you help me futher to debug ?
Paul
Wednesday 12th of November 2025
DELL Precision 3591 workstation, I brought this new laptop to work on vmware workstation. but still issue is there. Please suggest some solution for this.
I have disabled features - Hyper V, windows hypervisor platform and VM platform. Also disabled core isolation.
I have did the below settings in BIOS and ✅ Enabled Intel Virtualization (VT-x) ✅ Enabled VT for Direct I/O (VT-d) 🚫 Disabled DMA Protection 🚫 Disabled Intel Trusted Execution (TXT)
System has latest BIOS (v1.18.1)
CPU: Core Ultra 5 135H
Shinsa
Tuesday 21st of October 2025
I have windows 11 pro and vmware workstation pro 17. I have tried all the solutions mentioned above but the error persist. When i unchecked Virtualize intel VT-x/EPT or AMD-V/RVI checked box or i edit the .vmx file, my eve-ng will boot correctly, and then generate the warning message: neither Intel VT-x or AMD-V found.
However, when ios images are uploaded in the EVE-NG, and fixed permission applied as supposed, the images start and stopped and doesn't proceed further.
Help a brother please!
mikel
Wednesday 20th of August 2025
Great guide on fixing the Intel VT-x error! I found that in some cases, especially with newer Windows 11 systems, you also need to ensure Hyper-V is disabled to avoid conflicts with VMware. I wrote a detailed step-by-step guide on this topic, focusing on VMware setups, which might help your readers: https://bitamooz.com/%d8%b3%d8%b1%db%8c%d8%b9%d8%aa%d8%b1%db%8c%d9%86-%d8%b1%d9%88%d8%b4-%d8%b1%d9%81%d8%b9-%d8%a7%d8%b1%d9%88%d8%b1-intel-vt-x-%d8%af%d8%b1-vmware/
Blue
Tuesday 22nd of April 2025
I have tried on windows 11 pro and vmware workstation pro 17. I have to include to disable all these three for it to work.
Hyper-V Virtual Machine Platform Windows Hypervisor platform.