Proxmox is one of the popular open-source hypervisors out there. It is entirely free for anyone to use, including their home lab and enterprise setup. If you are planning to install Proxmox on an enterprise network, you must get the support that will add some cost, and there are different options available for you to choose from.
If you plan to install Proxmox on a server, follow the article here to learn more. In this blog, let’s look at installing a virtual machine on the Proxmox server. After installation, we will look at the connectivity of VM to the internal VM network and to the outside, which is the internet.
Before you begin,
You need to have Proxmox installed and running on a server.
A virtual machine – any virtual machine would work, we are going to use a ubuntu server 20.04 on our installation.
1. Upload the virtual machine iso file to the storage.
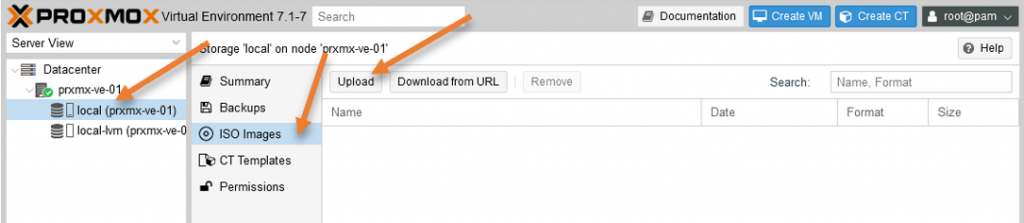
We have already downloaded the Ubuntu Server 20.04 virtual machine iso file. We now have to upload that into the Proxmox storage under iso files.
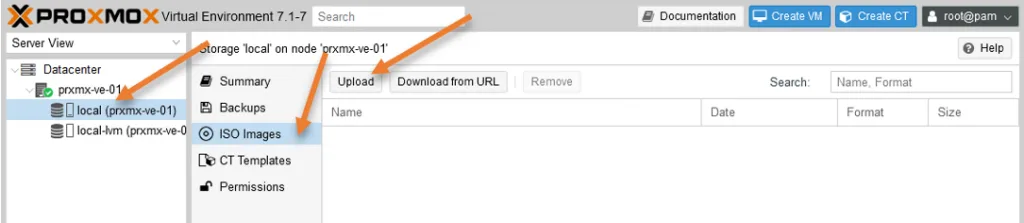
Login to Proxmox, in that, choose Local (pve)
Select ISO images-> Click on Upload to upload the iso image to the storage.
Alternatively, you could use the Download from URL option to get the image, similar to the wget in linux.
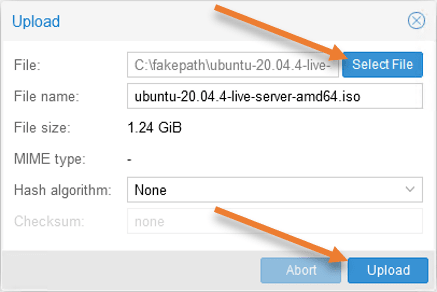
As we have already downloaded the file, you may click on Upload.
In the upload prompt, click on ‘Select file’ to browse the ISO image and click on Upload.
Based on the connectivity from the machine to the server, it will take some time.

2. Create the Virtual machine.
We have uploaded the virtual machine ISO image. Let’s go ahead and install it in the Proxmox. For that, click on Create VM.


You will get a Create: Virtual machine wizard with multiple tabs. You can either fill in each tab by moving from one tab to another or start with General and click on Next to go one by one.
Let’s start with the General tab.
General configuration.
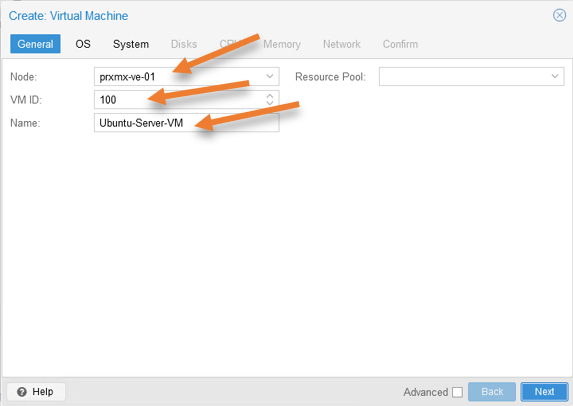
In General configuration, you will need to configure the node and the essential VM information.
Node: Choose the Proxmox host where you will install the virtual machine. Since we have only one node, we don’t need to care much. Choose the one which is already populated. If you have multiple nodes, you have to choose the right one according to your requirement.
VM ID : Each virtual machine will have a unique VM ID, starting from 100. You can either leave the default or choose your own. 100 is Already populated, so leaving the default for now.
Name: Ubuntu-Server-VM
Resource Pool : Leave it empty as we have not created any resource pool.
After the selection click on Next.

OS configuration.
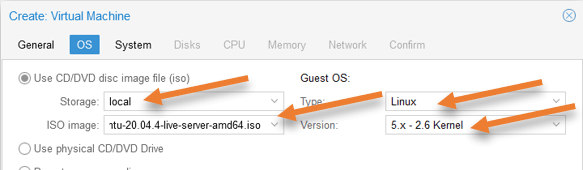
You now need to configure the ISO image to boot from.
Storage: Choose the storage as Local.
ISO Image: You need to point to the ISO image we uploaded in step1.
Type : Linux, and leave the default kernel.

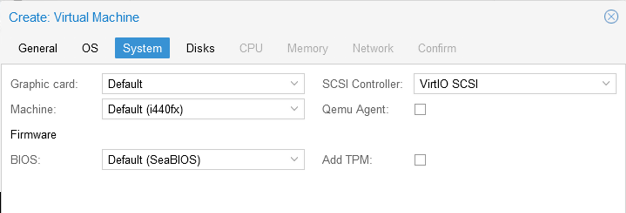
System.
There is nothing much you have to do for the system configuration; hence you can leave it with default. If you would like to change the Graphic card or want to configure the secure boot, you can do that here.
And click on Next.

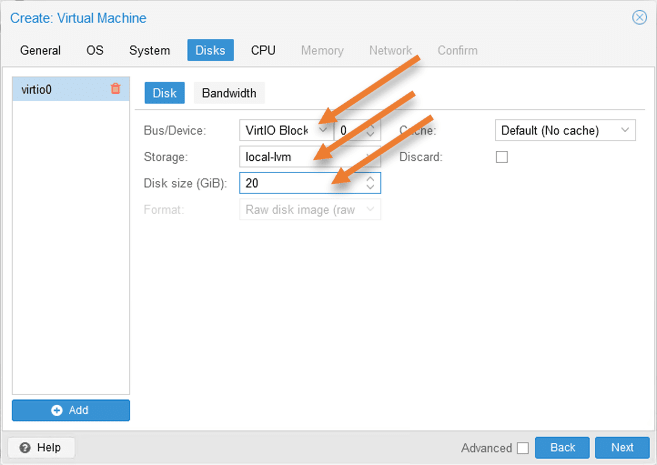
Configure the virtual hard disk.
Under Disks, and make the changes to the virtual disk as follows.
Bus/Device : By default, Proxmox would choose SCSI. You will have to change it VirtIOBlock.
Storage: Choose the location where you want to keep the virtual hard disk.
Disk Size : Based on your requirement, you may choose the storage size, by default it would pick 32GB of storage, which is not required for my need; hence I have chosen 20GB.
If you are using the SSD, you can enable the discard option; otherwise, leave it empty.
If you would like to add another virtual hard disk, you can click on Add in the bottom left.
And click on Next.

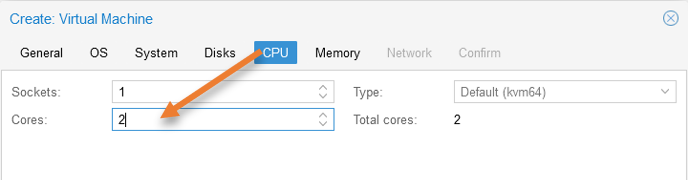
Configure the CPU.
The CPU configuration is based on the requirement of your environment. By default, Proxmox would assign 1 CPU. If you require more CPU, you may add that.
I am giving 2 CPUs, hence changing the cores to 2.

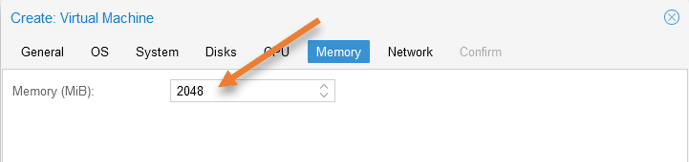
Configure the memory.
The Proxmox already added 2GB of RAM for the virtual machine, which is enough in my case. If you require more RAM, you may increase the size.
After that, click on Next.

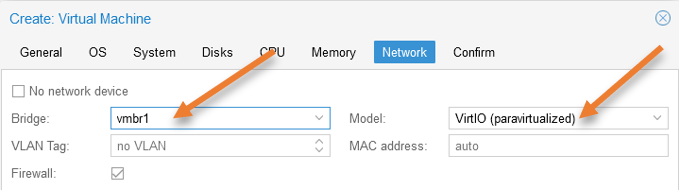
Setup the network for the virtual machine.
I have two interfaces to my Proxmox server, the vmbr0 is for the management purpose, and vmbr1 is for the VM traffic. Hence I have chosen vmbr1, and the model is VirtIO.
Your network might be different, so make sure you keep the virtual machine in the right network to connect to other VMs and connect to the internet.It depends on how your VM network wants to behave.
Click on Next.

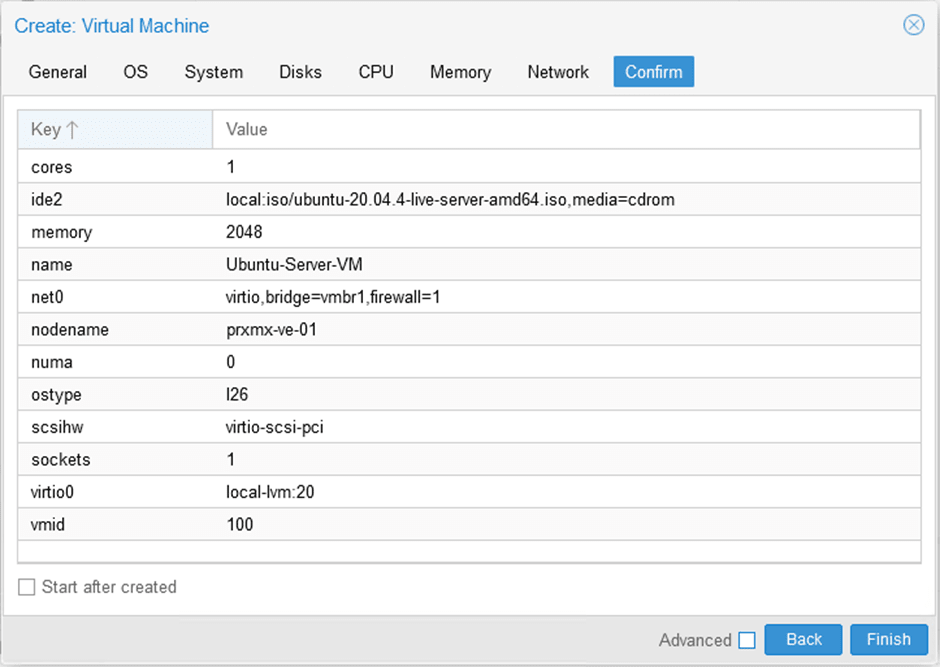
Install the virtual machine.
You will get a final summary of the virtual machine configuration in the final confirmation screen, ensuring that everything is configured correctly. To proceed with the virtual machine installation right away, you may check the option Start after creation.
I am not checking that for now, which I will post the VM creation.
Click on Finish.

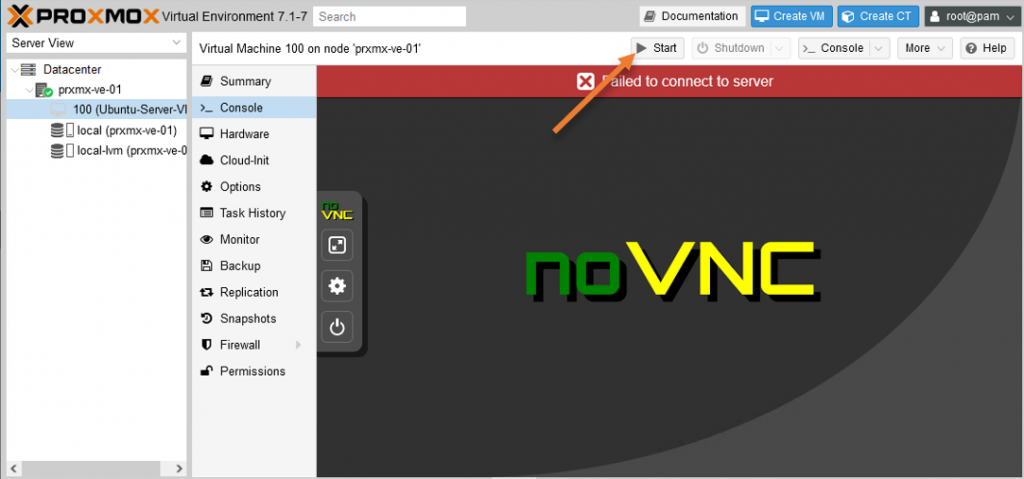
3. Virtual machine installation in Proxmox.
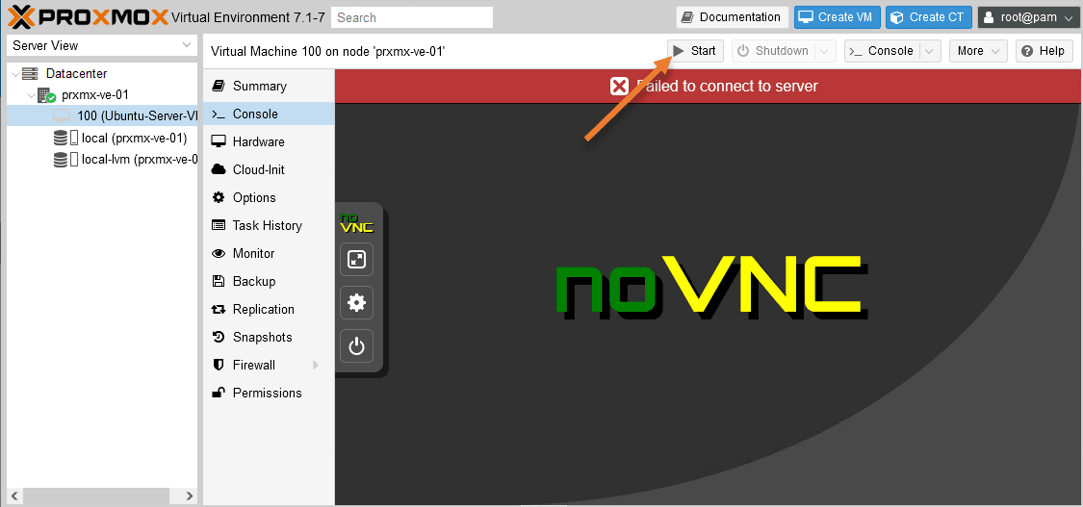
You will now see the virtual machine is now created just below the node1 server. You may click on Console now, where it will show you that it failed to connect to the server, which is expected as we have not turned on the virtual machine; hence there is nothing to display.
To start the virtual machine installation, you may select the VM and click on Start.

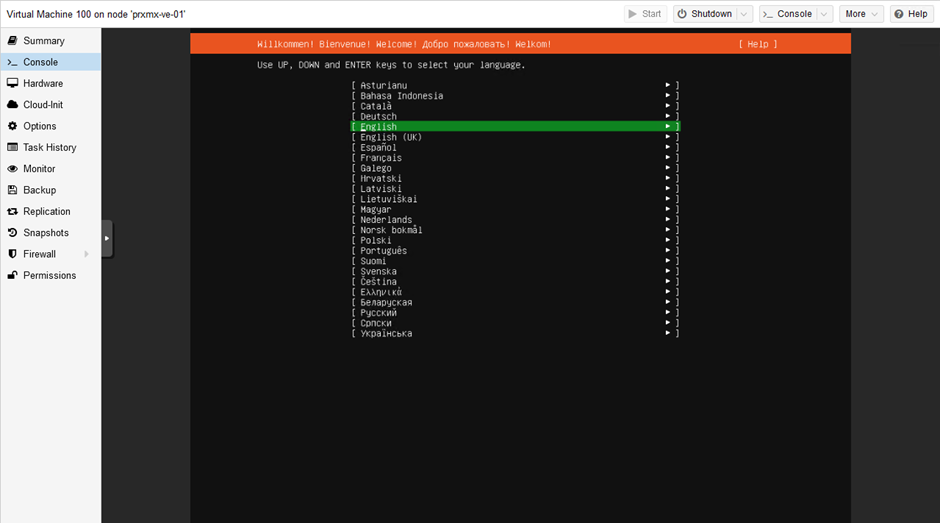
You will get a console screen with the Proxmox logo, and after a few seconds, you will get a screen for the VM installation screen. You may go ahead and finish the virtual machine installation.
I have ensured to set the IP address to static cos I don’t have any DHCP server in my network. If you have a DHCP service running in your network, you don’t have to set the IP address separately.

4. Verify the Virtual machine installation.
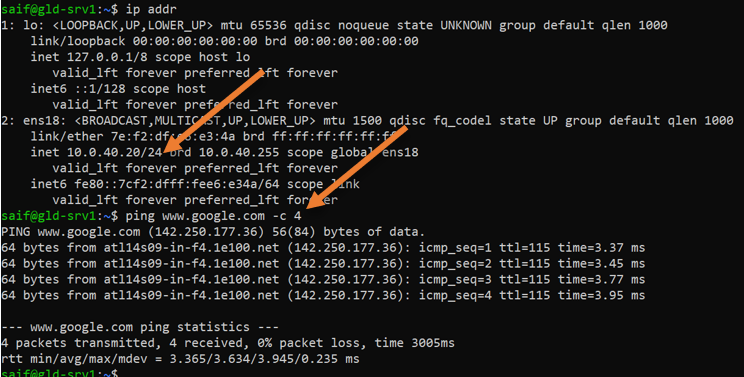
After the installation, ssh into the virtual machine and see if you can go out to the internet.
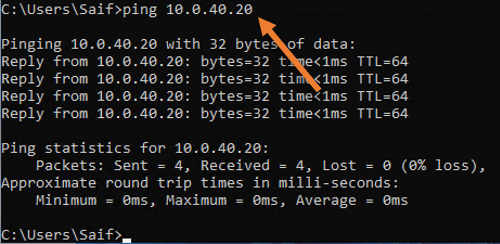
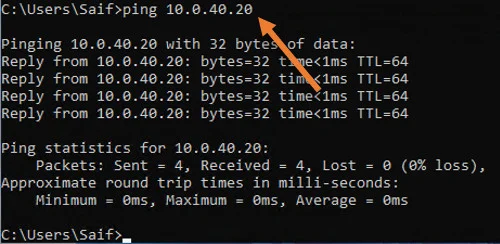
As you can see, I can ssh into the Virtual machine in the Proxmox, and the VM can go out the internet as well.

I have installed another windows 11 virtual machine following this guide, and as you can see, I can reach from that virtual machine to the newly created virtual machine.