

I run multiple VMs in my home lab, mainly I use KVM to run the virtual machine, and now I moved to Proxmox VE, which is again based on Linux KVM. But more polished software similar to the commercial VMware ESXi.
These days, most servers don’t require a physical CD Drive, even a USB thumb drive to install the operating system, as it provides options to boot the image from the server management console. Just download the iso image and upload it to the management console, and boot from there. For example, the HPE server provides ILO for management, and if you would like to install Proxmox on an HPE server, you have to upload the iso through the ILO and boot from it.
In this article, we will make the Proxmox VE USB bootable image and install Proxmox on a server or a PC with a USB drive.
Is Proxmox free to use?
Anyone new to Proxmox will have this question in their mind: Is this Proxmox hypervisor free? If yes, how do the developers make money?
The Proxmox is a complete opensource type 1 virtualization software or a hypervisor. And it is free for anyone to use for their home lab or even in an enterprise production network. However, suppose you plan to use Proxmox in a production environment in an enterprise network. In that case, it is recommended that you get a subscription, which will provide enterprise-level packages to your Server and even technical support. There are different tiers available to choose from.
So if you are building a network for your home, you can use it for free. In the case of enterprise setup, it is still free, but it is recommended to get support, so if anything were to go sideways, you could always reach out to the support for help. And there is a lot of development time and effort spent on these kinds of projects, so if you purchase the subscription, that will help them make the product better.
Before you begin;
- You need to have a Server/PC or Laptop that supports the following;
- 64bit CPU with intel/AMD virtualization support.
- At least 1 GB of ram, but it is recommended to have more RAM. If you have 8GB or more that will work very well.
- Network interface – Most servers will have more than a single interface, so you can make one interface for the management, and the second one is for the VM traffic.
What if you have a single interface, for example, on a PC?
Then you can get an additional network interface and plug it in the motherboard to expand. In the case of a Laptop, you will have only a single interface, so at that time, you need to rely only on VLAN to separate the management and the VM network.
- USB Drive with at least 4 GB of storage to make the Proxmox USB bootable media.
- Rufus software – This tool will help you to create USB bootable media. Click here to download it.
- Proxmox ISO image – you can download it from here. Download the ISO installer file.
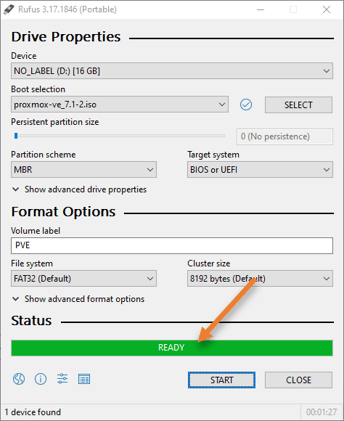
1. Create Proxmox bootable media.
- Plugin the USB pen drive.
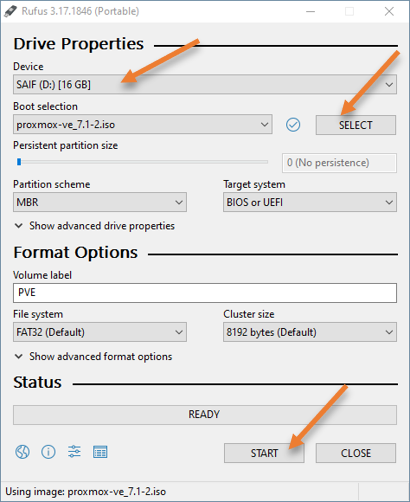
- Open the Rufus software.
- It will automatically pick up the Pendrive that you plugged in.
- Boot selection-> Choose the Proxmox iso that you downloaded.
- Leave everything else to default and click on Start.
- You will get a prompt that says ISOHypbrid image selected, in that choose Write in DD image mode and click on okay.
Note: Normally people would choose Write in ISO image mode and they ended up getting a grup rescue error when they boot from the USB. So make sure you choose DD image.


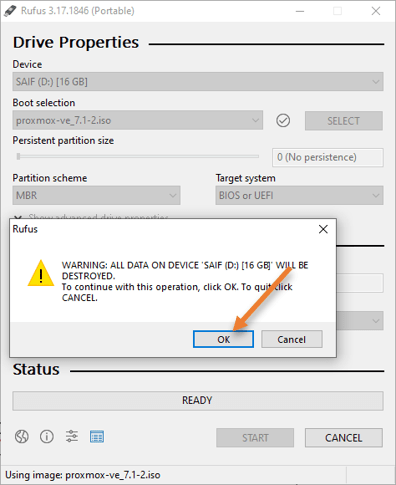
- You will get the prompt that says all the files in the USB drive will be formatted, say Ok to that.

- The process of making the bootable image will take some time, once it shows Ready on the Rufus software, your bootable Proxmox USB is ready to use for any hardwares where you want to deploy the Proxmox operating system.

Unplug the USB from your computer.
2. Choose USB as the bootable media.
Start the Server and choose the USB as the installation media in the bios.
Each vendor has different ways to get into bios. In the case of the HPE server, you will have to press f11 to get into the boot option.
On my Azuz laptop, I have to keep pressing the f2 key to get into the bios.
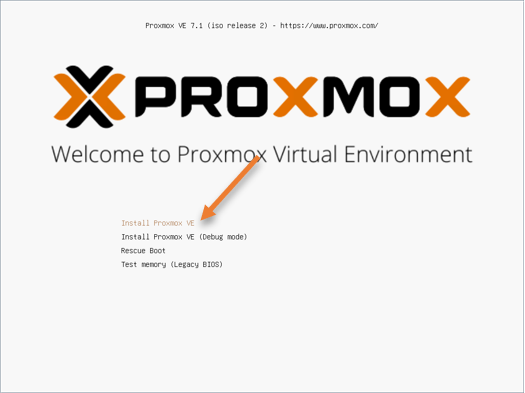
If you have configured the USB with proxmox bootable image and chosen USB as the bootable media, you will get the Proxmox installation wizard screen as below.
In the installation screen, choose the first option, Install Proxmox VE by hitting enter.

The Proxmox installation screen will load in a few seconds. During this time, if you have your Server plugged into your network, and you have DHCP service enabled, Proxmox will pick up an IP and assign it to the Server. If you don’t have DHCP enabled, it will send the DHCPDISCOVER message to all its available interfaces and after a few seconds, when it doesn’t get any response, it will load the installation wizard automatically.
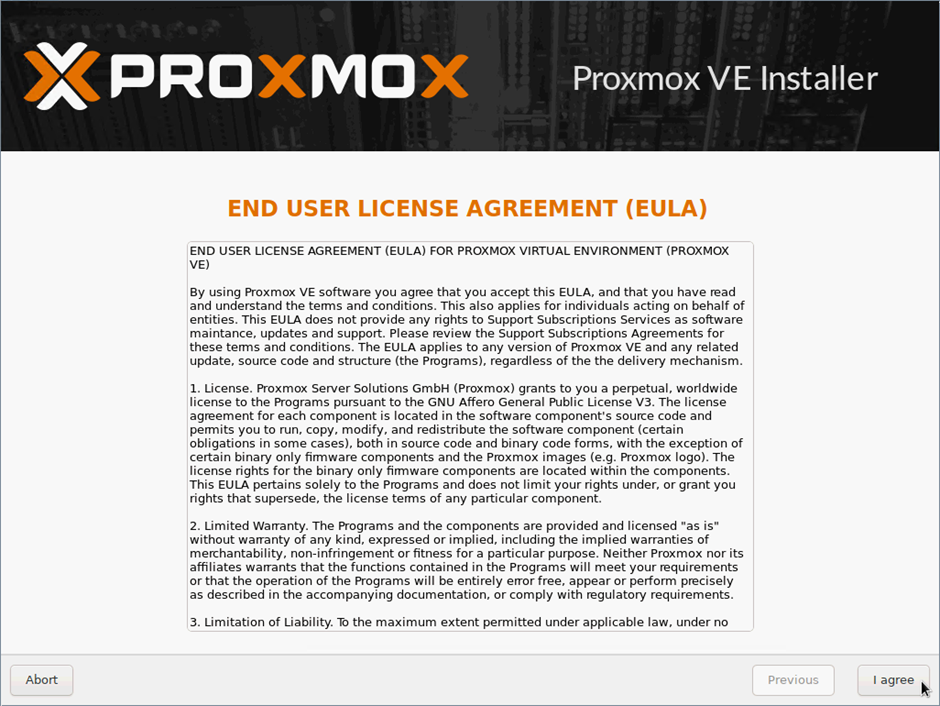
3. Accept the license agreement.
In the first step, you will have to accept the license agreement for the Server, click on I agree.

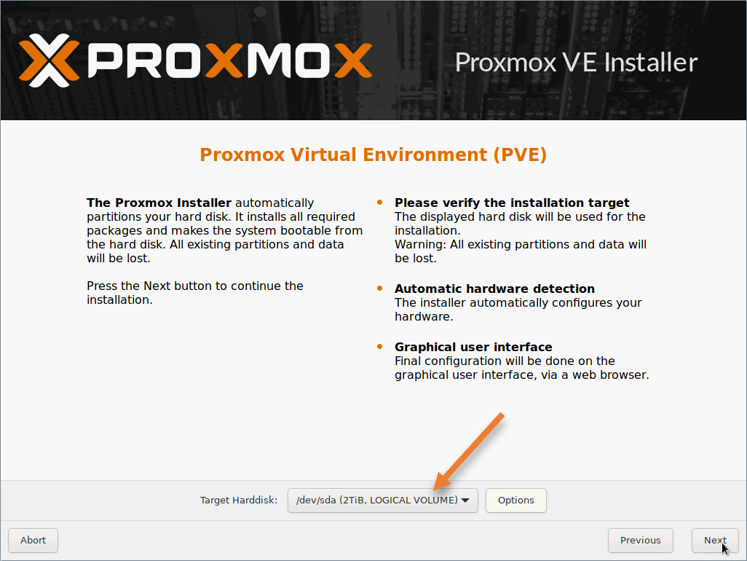
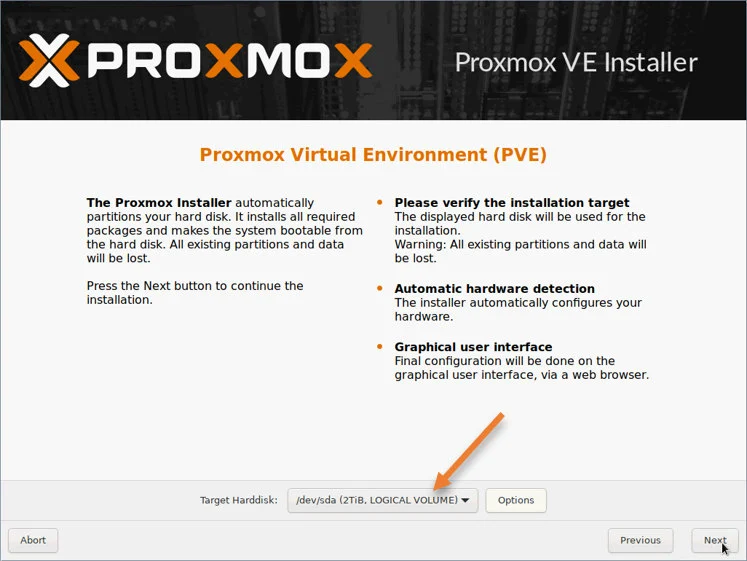
4. Choose the hard disk.
On the next screen, it will display all the hard disks that are available in your Server under Target hard disk. Choose the one where you would like to install the Proxmox on.
If you would like to make any changes to the hard disk, for example, Raid configuration, storage size, etc. You can do that by clicking the Options button.
After choosing the hard disk, click on Next.
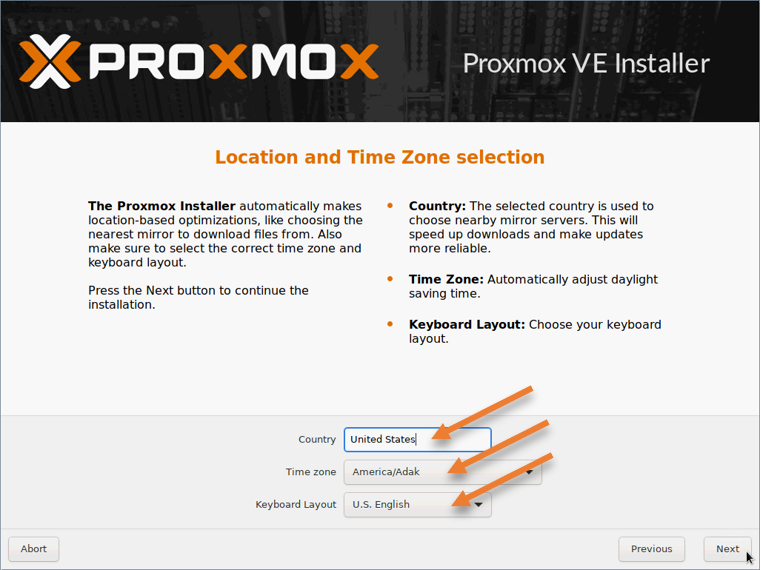
5. Location and Time zone selection.
Chose your country and the timezone, also keyboard layout of your choice after that click on Next.

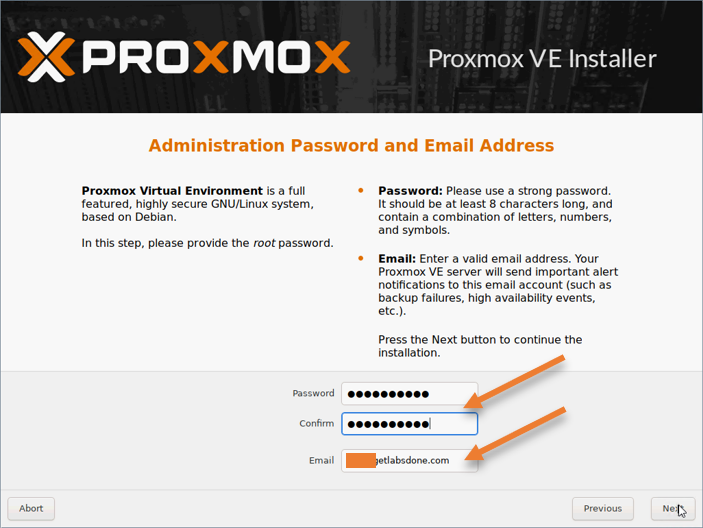
6. Set the password and the email.
You are required to set the password and your email address here, after that, click on Next.
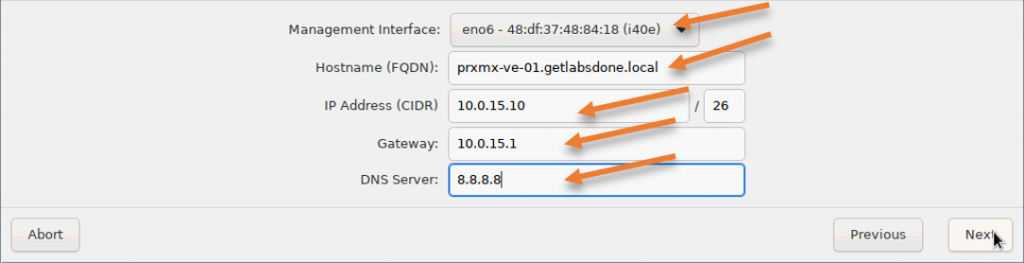
7. Management network configuration.
We access the Proxmox via web GUI, just like the VMware ESXi, so we need to configure the management interface to access the web GUI of the Proxmox Server.
Management interface: I have multiple interfaces in my Server that I could use for the Proxmox management interface. I have so chosen the one that I configured on the switch. There is no option to configure the VLAN information here, which you can do later with CLI access. I don’t require any VLANs, so I should be good.
Hostname: here, you need to configure the hostname of the Proxmox Server, this name will be reflected in the web GUI that way, we can identify the Server that we are working on.
In my case, I am naming it like prxmx-ve-01, so when I add the next Server I could use prxmx-ve-02 and so on.
IP address: Enter the IP address for the virtual machine, I am using the subnet 10.0.15.0/26, which can accommodate 62 usable IP addresses, hence enter the IP address from the subnet- 10.0.15.10
Gateway: Enter the gateway for the IP address. Which is 10.0.15.1
DNS server: You most likely will have an internal DNS server for your network. Enter that here. If you don’t have a local DNS server, you may point to the public DNS server.
Since I have not set up a DNS server for this lab, I choose the Google public DNS server 8.8.8.8.

8. Proceed with the installation.
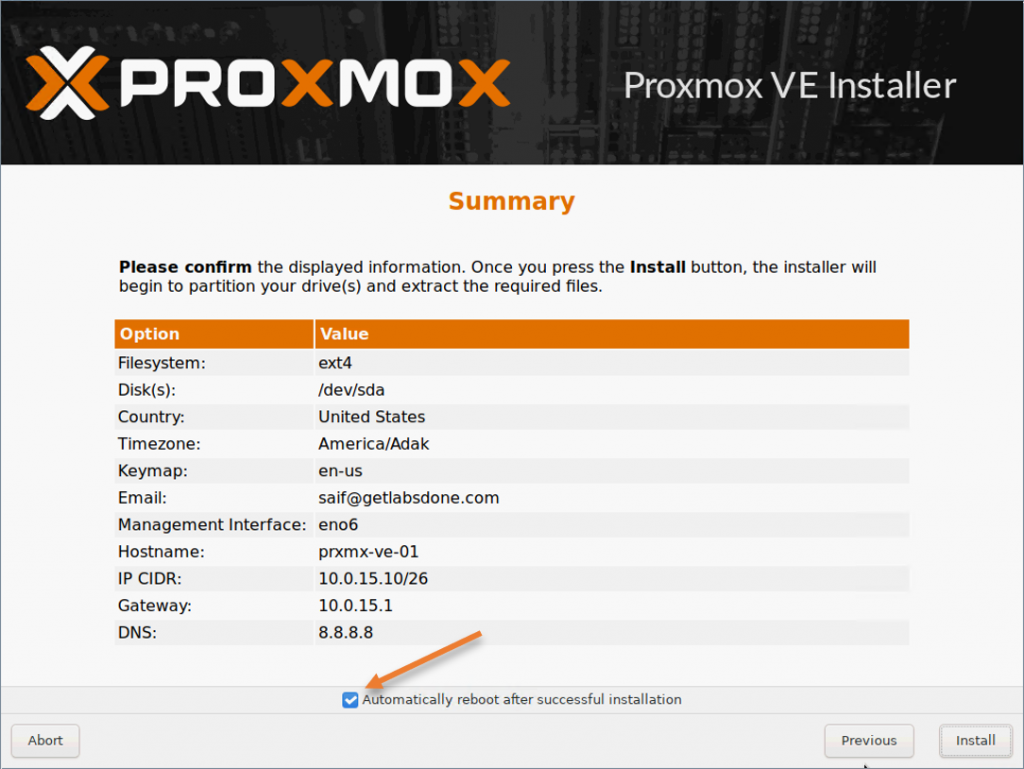
You will get a summary of the Proxmox installation, verify everything looks good as per your setup and then click on Install.
The installation will take some time to finish. After the installation, since you have checked the option Automatically reboot after successful installation the Server will go ahead and reboot.

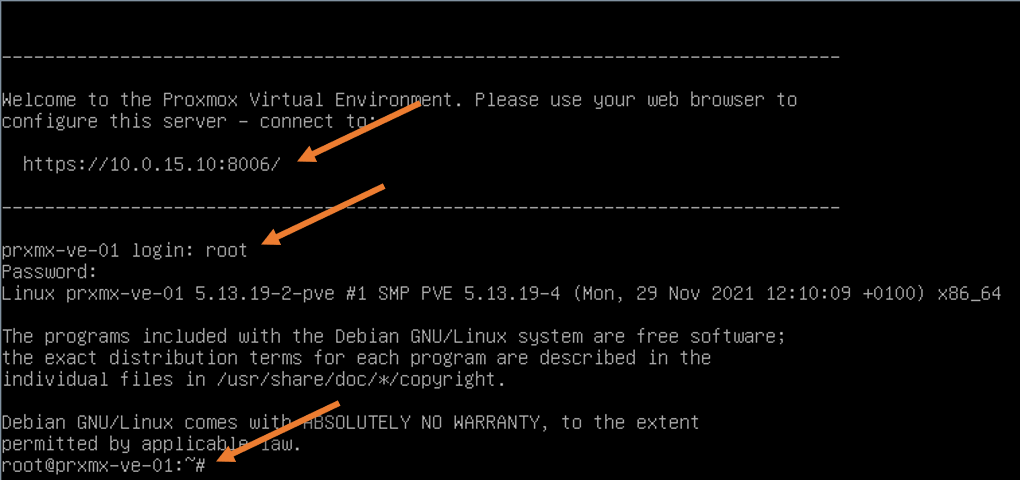
After the reboot, you will get a prompt to enter the credentials. The console will also show the URL to access the web GUI. Which is https://<yourIP>:8006

9. Access the Proxmox web GUI.
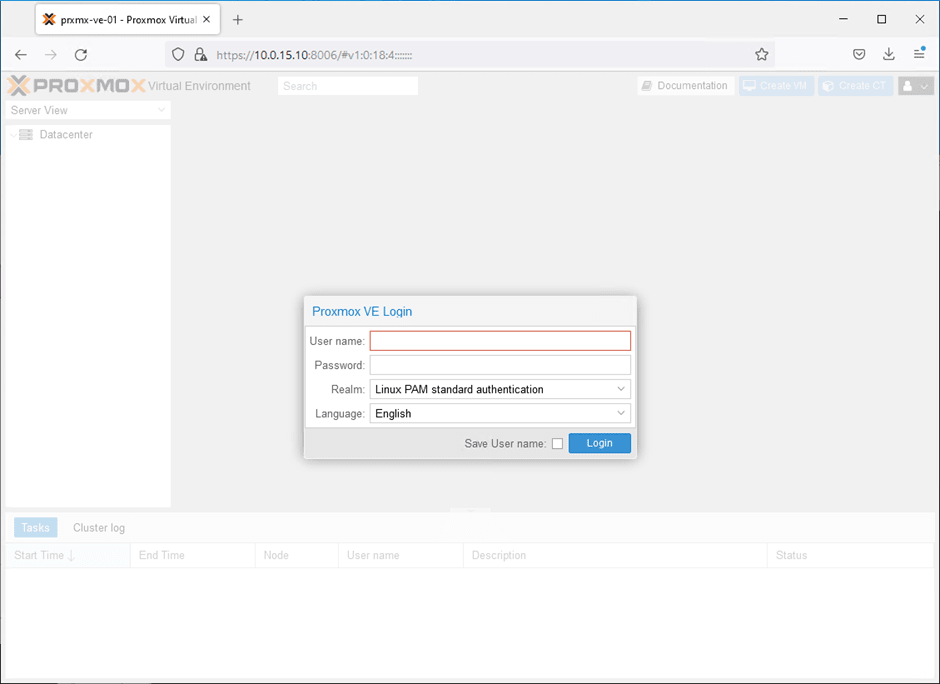
Though you can manage the Proxmox using the CLI, most of the work happens on the Web GUI.
Open any web browser in your machine and access the URL shown above to access the Proxmox web gui.
As you can see, Proxmox is now asking you to enter the credentials, enter the username as root and the password you set during the installation and click on login.

You will get a notification that says no valid subscription, which is okay to ignore.
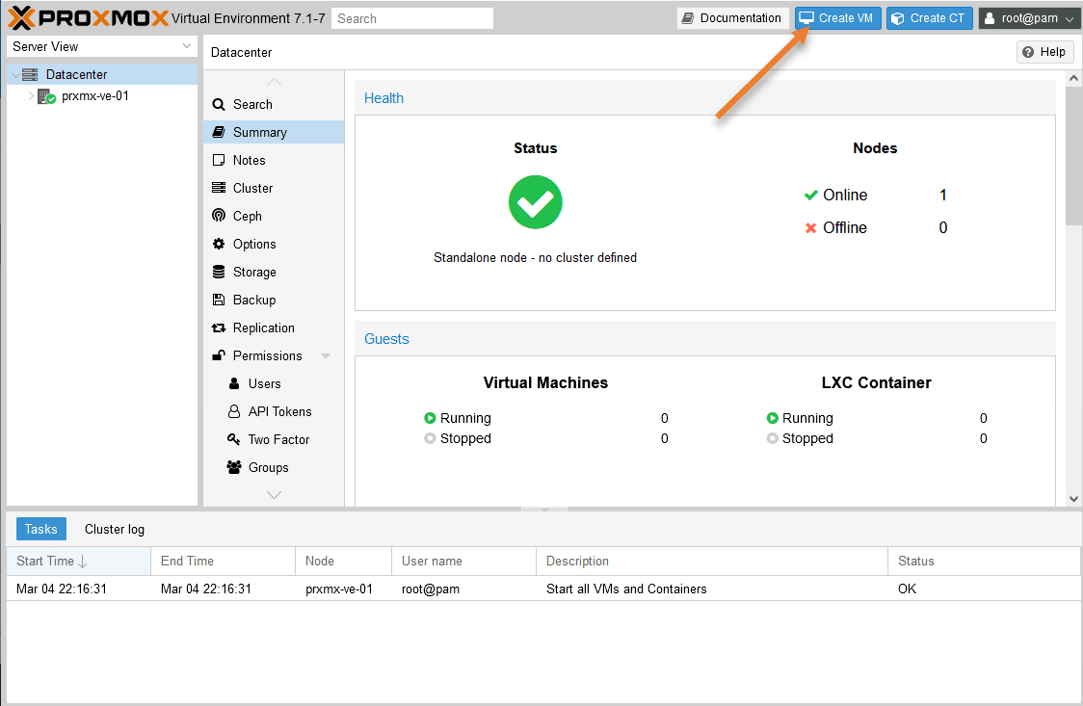
Here is the Proxmox home screen, where you can see there is only one node configured at the moment.
To create a virtual machine, you can click on Create VM.
Follow the article here to set up your first virtual machine.

