
When you come from a production network, you might think, what if you had a firewall, virtualization platform available in production network gear is available for free? Wouldn’t that be great? That way, you can build your home lab with those gears, right.?
That’s when opensource comes to our help. For a free Opensource firewall, you could use the pfSense/Opnsense firewall. And suppose you would like to run multiple virtual machines on a server. In that case, you can use the Proxmox opensource virtualization platform, it is similar to the Esxi type1 server, and it is completely free unless you opt for support.
I have covered here the different options you could try to build a pfSense firewall lab. You may check it out if you are interested.
Can I run pfsense on Proxmox?
The pfsense community addition firewall is an open-source firewall that you can run in pretty much any environment. Since the image is available in iso format and it is based on FreeBSD operating system, you can virtualize and run pfsense in your Proxmox setup.
After the deployment, all the virtual machine traffic behind the pfsense LAN will go through the pfsense firewall, and you can configure the security and NAT policies to control how the VM traffic behaves.
And you can enable all the typical features such as IPsec tunnels between branches, OpenVPN for client VPN connectivity, DMZ network, and so on.
Read also,
PfSense IPsec Site to Site VPN Setup – Step by Step.
How to Configure OpenVPN in PfSense? – Step by Step Guide.
How to Install PfSense on VMware ESXi? – Step by Step Guide.
How to Install PfSense on AWS EC2 Cloud?
Below is the topology that we are going to build in this lab.
I have the Proxmox server installed on the right with the Ubuntu and Windows virtual machine. This Proxmox server connected to the switch using the interface eno2, which is mapped to the vmbr0 for management purposes. Similarly, I have mapped the physical interface Eno1 to the vmrb1 Bridge for VM traffic.

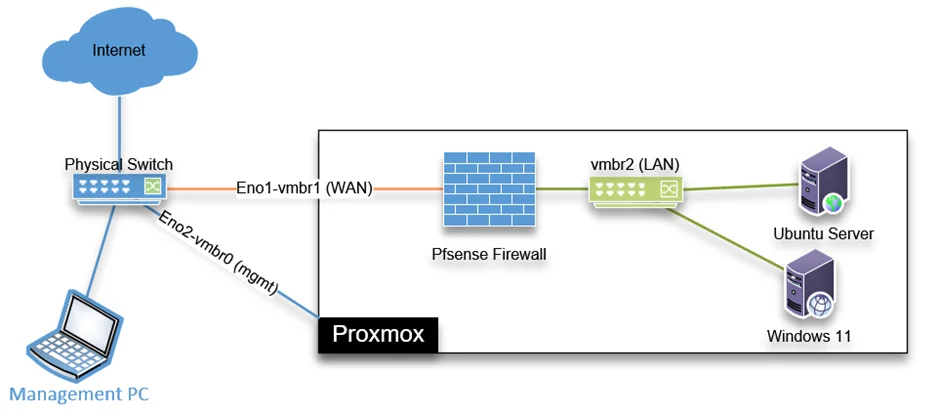
We will create a private bridge vmbr2 without mapping to any physical interface that will act as a LAN bridge interface, and all other Virtual machines will connect to this Bridge. This bridge doesn’t have connectivity outside the Proxmox unless you want to extend your LAN, which we will discuss at the end.
After the pfSense deployment on the Proxmox, we would test the connectivity by verifying the IP address on the virtual machine. By default, pfSense should allocate IP addresses using its DHCP service to the virtual machine. After that, we will initiate some traffic from the virtual machines on the right to the internet, see if it can talk to the internet, and what path it is taking to get there.
Before you begin, you need to have;
- Proxmox server installed and up and running.
If you have a similar setup as mine, that’s good. If you have configured your Proxmox server differently, then follow along and make sure you connect the interface correctly for the setup to work.
- PfSense ISO image – You can download that from here. Alternatively, you can copy the link and download the image from the server itself.
Note: While downloading, make sure to select DVD Image (ISO) Installer and the mirror nearest to you.
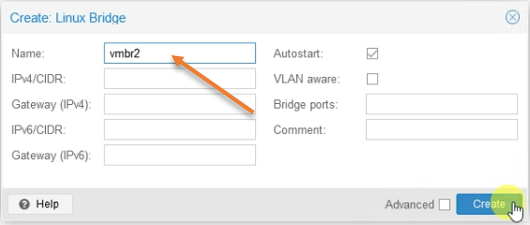
1. Create a private bridge interface for pfSense LAN.
For the virtual machine to connect to the pfSense LAN network, you need to configure a private bridge interface that is not linked to any physical network.
Login to Proxmox-> Click on the Node where you are going to install the pfSense firewall->System->Network-> Create->LinuxBridge
Name the Bridge as vmbr2.
And click on create.
After that, you will have to reboot the Proxmox server.

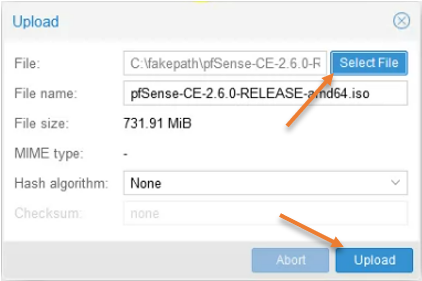
2. Upload the pfSense ISO image to Proxmox.
Once the server is back online, we can proceed with the pfSense installation. So let’s go ahead and deploy the pfSense iso image to the Proxmox server.
There are different ways you can upload the ISO to the Proxmox server. You can either upload the ISO to Proxmox directly or use the link to download the iso file.
Since I have already downloaded the pfSense firewall, I can upload it to Proxmox.
Click on the Proxmox host-> Local-> ISO images-> Upload.
Choose the file to upload by clicking ‘Select File’ and clicking on upload in the prompt.

3. Deploy the pfSense firewall in Proxmox.
After we have the network and the ISO image installed, let’s go ahead and deploy the pfsense firewall in Proxmox.
Click Create VM to start the pfSense virtual machine configuration in Proxmox.
You will get a prompt to configure the virtual machine, follow the steps below to configure the pfsense VM.
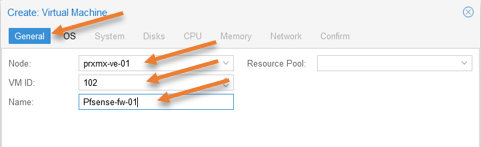
General configuration.
Node: Choose the node where you would like to install the pfSense firewall. If you have a single node, it should be okay. If you have multiple nodes, you have to choose the right one.
VM ID: Each virtual machine will have a unique ID created in Proxmox starting from 100. You can keep the default or change it if needed.
Name: PfSense-fw-01, I am adding the number at the end because if I ever plan to create a HA for the firewall, I could name the next firewall as PfSense-fw-02.
Click on Next.

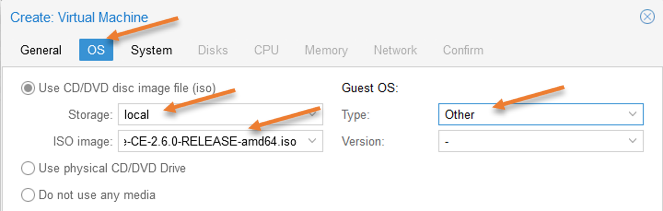
OS Configuration.
We have to point to the ISO file we uploaded in step2 here.
Choose Use CD/DVD image file (iso)
Storage: Choose Local.
ISO image: Choose the ISO image that we uploaded.
Guest OS.
Type: Other.
There is nothing really to choose from for the version.

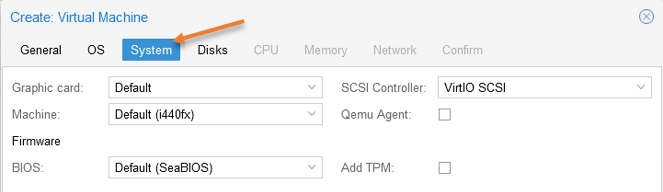
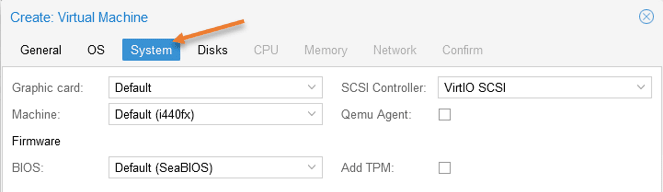
System.
Leave the system configuration pretty much default.
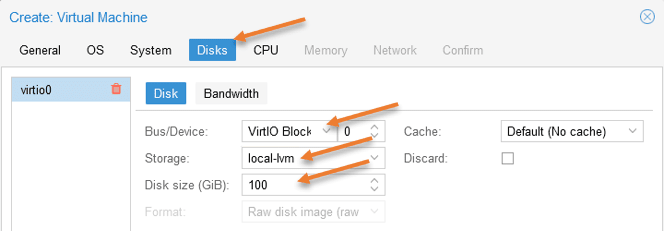
Configure pfSense virtual hard disk in Proxmox.
Let’s make some modifications to the pfSense virtual hard disk.
Bus/Device: By default, it has picked up IDE. Change that to VirtioBLock.
Storage: If you have multiple storage, choose the storage where you want to store the pfSense virtual hard disk.
Disk Size: Proxmox would give 32GB for the pfSense VM; however, if you start using pfsense as the permanent firewall in Proxmox and start capturing more and more logs, you might require more storage. Since I have enough storage and I don’t have another Syslog server, I will give 100GB for the pfSense storage.
Click on Next.

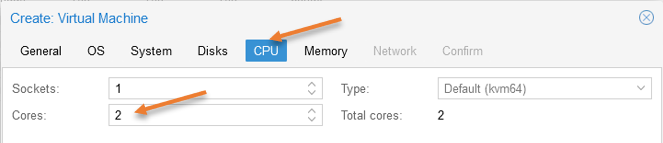
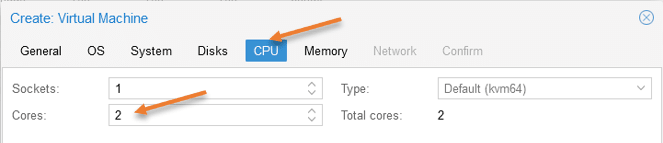
Configure the pfSense CPU.
Next, configure the pfSense CPU, which by default is 1, that should be enough, but I am giving 2 as I have enough cores.
Configure the memory.
Proxmox already defined 2GB which is enough. You could even reduce it to 1GB if you want to.


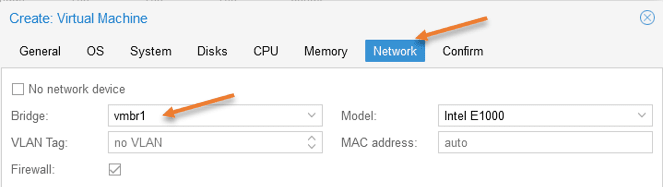
Proxmox pfSense network configuration.
PfSense requires two interfaces for typical WAN and LAN networks. If you plan to build DMZ, you would need one more interface, which I covered in detail on how you can set up DMZ in the pfSense firewall.
In this setup, we are not configuring the DMZ; hence let’s go ahead and configure the wan interface first.
As per our diagram, vmbr1 is our WAN interface so choose that under Bridge.
If you are using VLAN, you may add the VLAN tag here.
The LAN interface configuration we will take care of it later. Now click on Next.

You will get the summary of the pfSense Proxmox installation, do not check the option Start after created, as we need to add the LAN interface later.
Click on Finish here.


You can see the pfSense firewall is now added under your host.
4. Add the LAN interface for the pfSense.
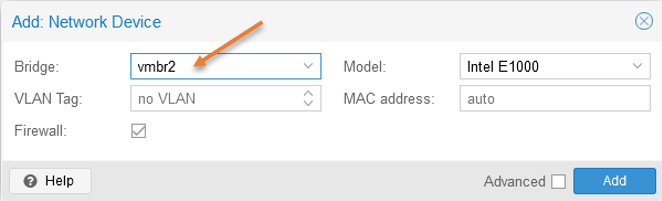
Select the pfSense virtual machine and click on Hardware-> Add-> Network Device.
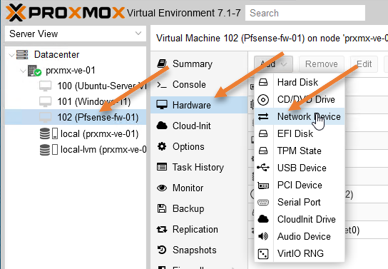

Choose the private bridge interface that we created earlier and click on Add.

5. Initiate the pfSense installation.
To proceed with the pfSense installation, select pfSense firewall, click on Console, and click on Start on Proxmox.
If you have configured everything successfully so far, you will get the pfSense installation wizard.
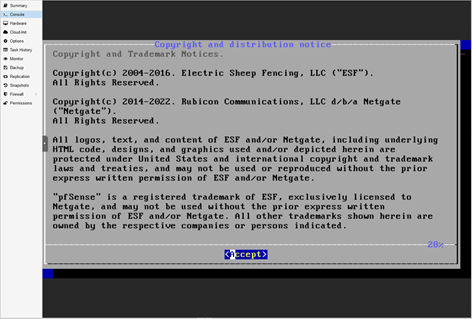
Accept the license agreement.

- Choose Install and hit enter.
- Continue with the default keymap, or change it if needed.
- Choose Auto ZFS
- Select Install.
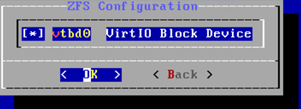
- Choose Stripe.
- Select the virtual hard disk vtbd0 by using the space bar.

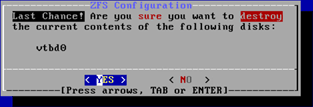
- In the ZFS configuration, say yes to the hard disk formatting.

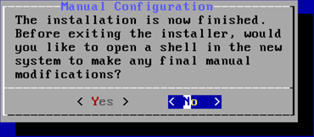
- The formatting will initiate, and the installation will begin. After the installation, you will get a screen that says installation is now finished. Would you like to go to the shell? For that choose no, unless you want to make some changes to the pfSense VM in the shell.

- Finally, reboot the server.
6. Setup the pfSense network.
After the pfSense firewall installation, you would get WAN and LAN configured automatically with IP address, The WAN IP address from your local DHCP server and LAN with default 192.168.1.0/24 IP subnet.
As I don’t have the DHCP server configured, I have no IP address on the WAN side, which I need to configure.
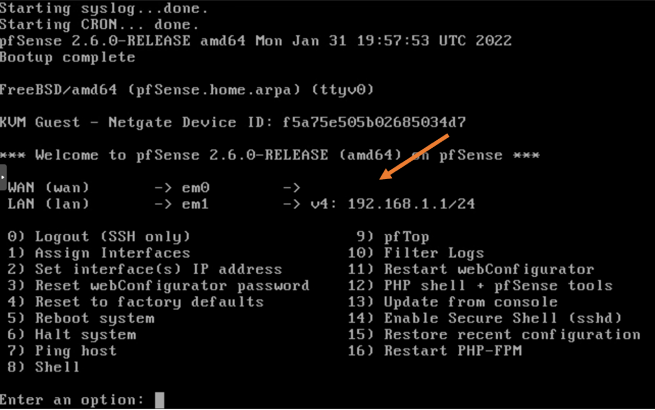
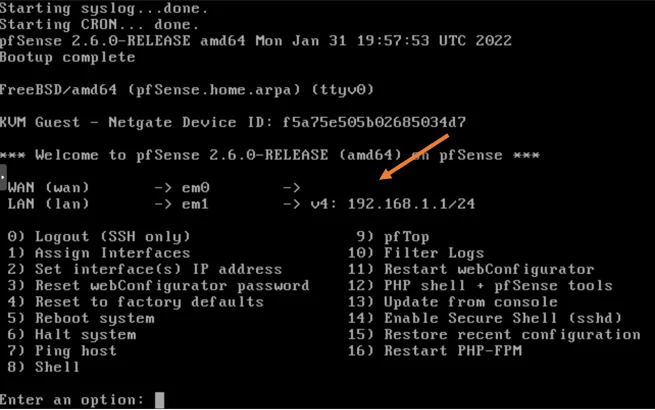
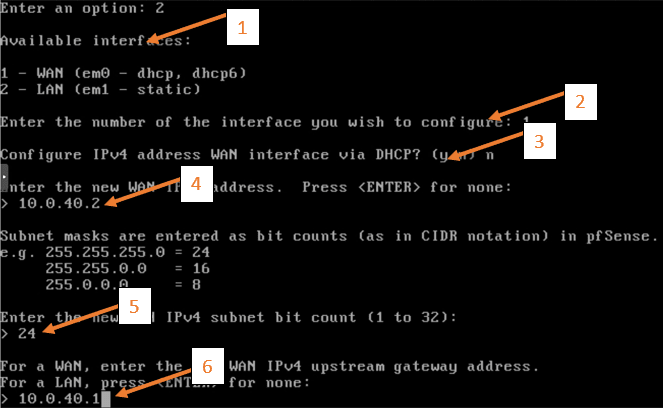
To configure WAN IP address, In the PfSense console, choose 2 to assign an IP address.
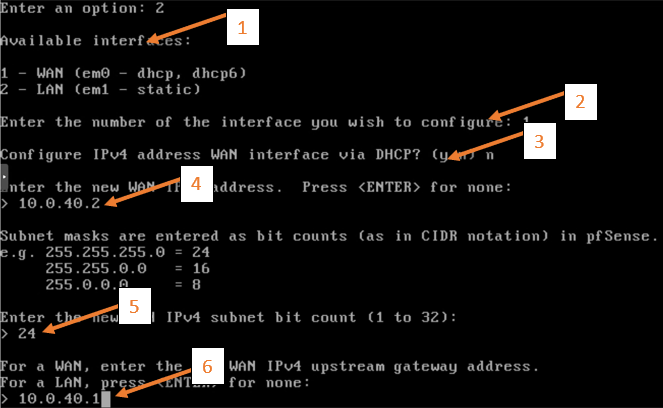
- You will get the available interfaces.
- For the prompt to configure the interface, choose 1 for WAN.
- No for DHCP.
- Configure the IP address manually, Enter the address.
- Enter the subnet mask.
- Configure the WAN gateway.
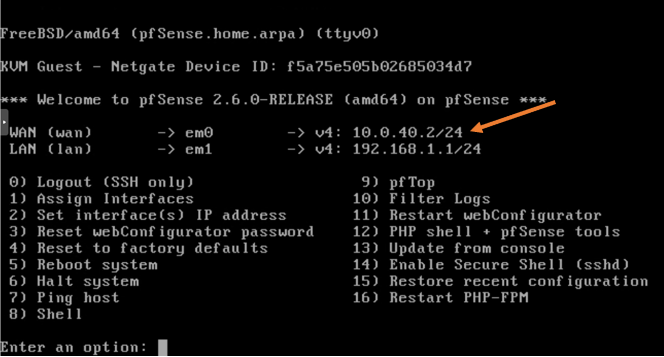
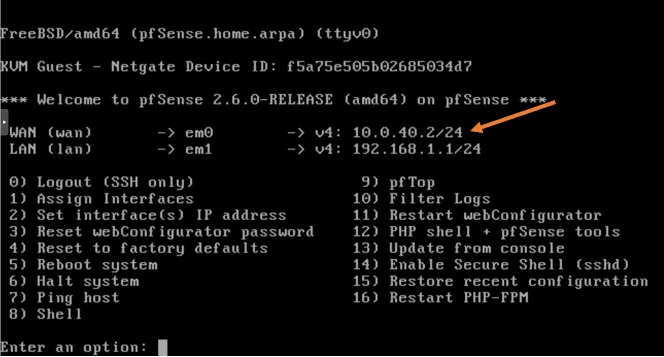
After that, you will have both the WAN and the LAN configured with IP addresses.
Some users who are not familiar with the networking have configured WAN and LAN with the same subnet. You should never configure WAN and the LAN in the same subnet.
Note: There is a way you could make the pfSense an edge router and configure the public IP address on the WAN interface on the Proxmox. For that, you will have to connect your modem configured as Bridge, connect to one of the server ports, and configure another bridge interface in proxmox to configure the public IP, which is beyond the scope of this article.
7. Make pfsense autostart.
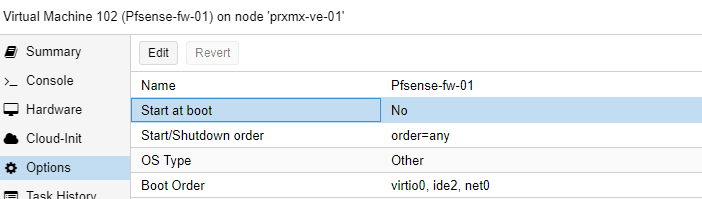
We deployed the pfsense firewall and next time you reboot the server, the pfsense firewall will not come up automatically. For that you need to enable start at boot on pfsense virtual machine.
Select the pfsense firewall VM in proxmox-> Options-> Double click on Start at boot, which is now set to No.
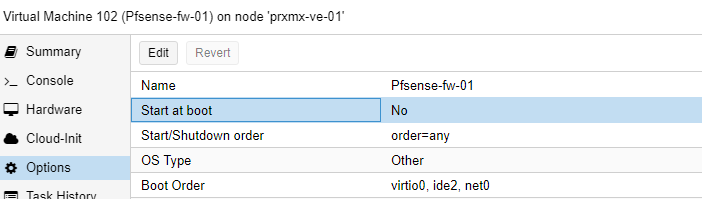
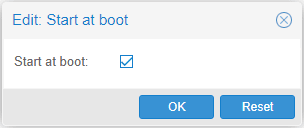
Check the option that says Start at boot and click on Ok.

Next time you reboot the Proxmox host, the pfsense VM will automatically start after the Proxmox come up.
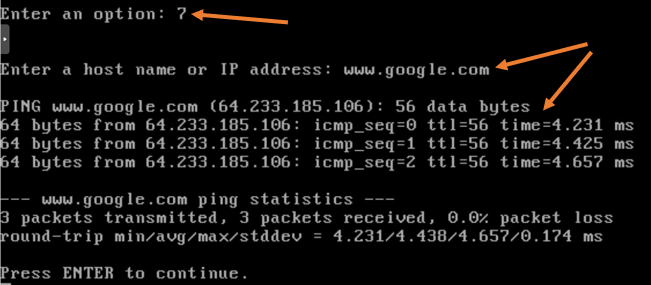
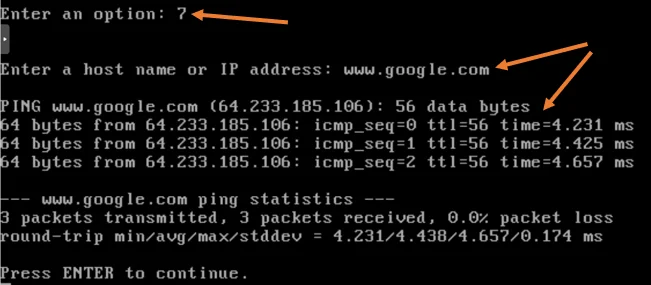
8. Test the internet connectivity from the pfSense.
To test the internet connectivity from the pfSense you may type 7 for ping and enter any of the public fqdn, and as you can see, my internet connectivity is working fine.
9. Connect virtual machine to pfSense LAN network.
We have completed the pfSense configuration. Let’s go ahead and attach the virtual machine to the LAN side of the pfSense that way, all the virtual machines will get an IP address automatically from the pfSense DHCP service. One of the benefits of pfSense is that it has NAT and security policies, and even the DHCP services are enabled out of the box, so managing it is pretty straightforward. As an admin, you don’t need to configure anything extra.
Select the virtual machines in your environment, click on hardware, change the network adapter to vmbr2, the pfSense LAN interface.
Test the windows 11 network.
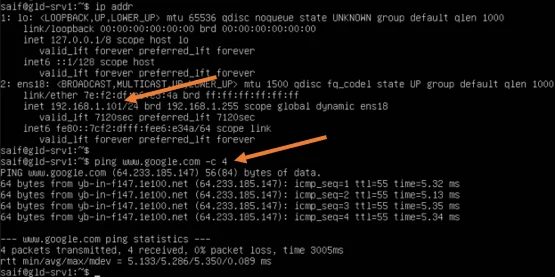
As you can see, Windows 11 machine got the IP address from the pfSense LAN side.
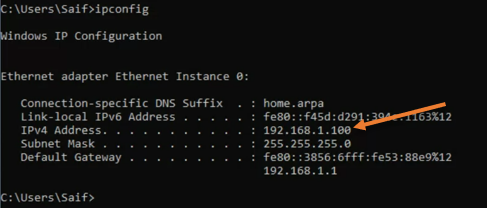
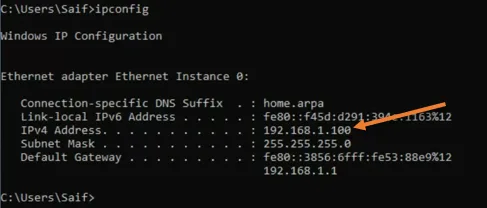
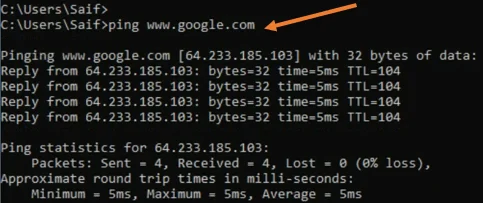
I can even ping the internet just fine.

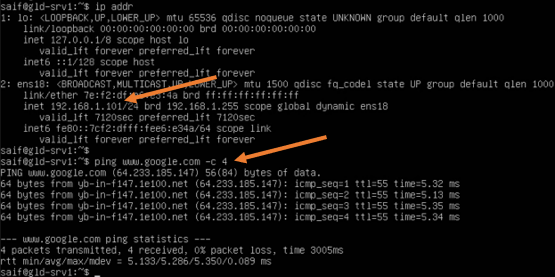
Check the network from Ubuntu.
Similarly, I got the second IP address from pfSense LAN DHCP scope on the Ubuntu machine.
And the internet connectivity works fine.
10. Finish the pfSense initial setup wizard.
Now that we have the pfsense installed and running, we will have to finish the initial setup wizard. For that, you would require a web browser.
Let’s open the web browser in a VM connected to the LAN side of the pfSense, and in the address bar, type https://192.168.1.1 to access the web Gui,
Ignore the security warning and continue.
On the login prompt, enter the username as admin and the password as pfsense.
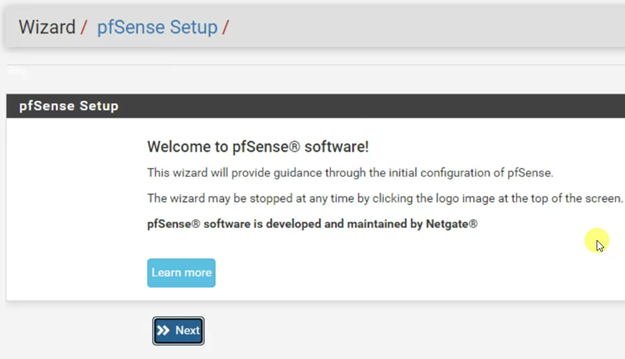
You will be presented with the initial setup wizard. Finish the initial setup wizard by clicking next.

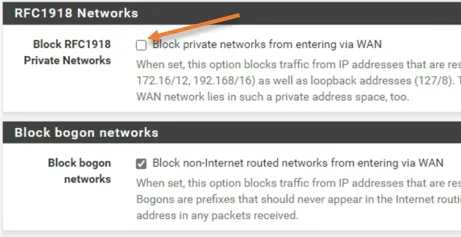
We are using the private Ip address on the WAN side of the pfSense firewall, and we need to make sure that you uncheck the Block private network from entering via WAN on Step3.
If you are using public IP on the WAN side, you may ignore this setting.

Also, change the default password to something else.
Check the DCHP lease.
We verified that the windows and the ubuntu machine got the IP address and can talk to the internet, but how do we verify whether that IP is actually leased out from pfsense itself?
You can verify the IP assignment in pfsense by looking into the DHCP leases.
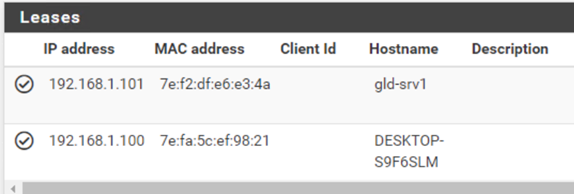
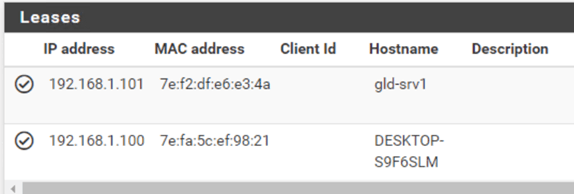
When I look at the DHCP lease, in Status->DHCP leases.
I can see that the IP address got leased from the pfSense firewall to both my VMs.
Check the traffic in pfsense.
To verify whether the traffic is going through pfsense or not, we have to enable logging on one of the rule on the LAN side.
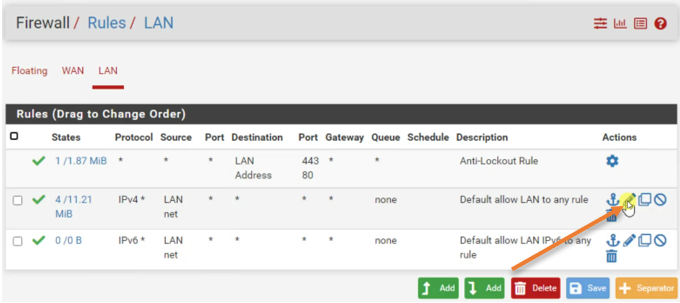
Click on Firewall-> Rules->LAN
Click on Edit on the default allow LAN to any rule.

Scroll down and enable the Log packet that is handled by this rule.

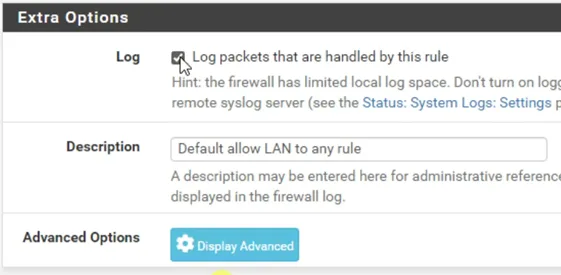
Save and apply changes.
You may initiate some traffic from any one of the virtual machines to the internet.
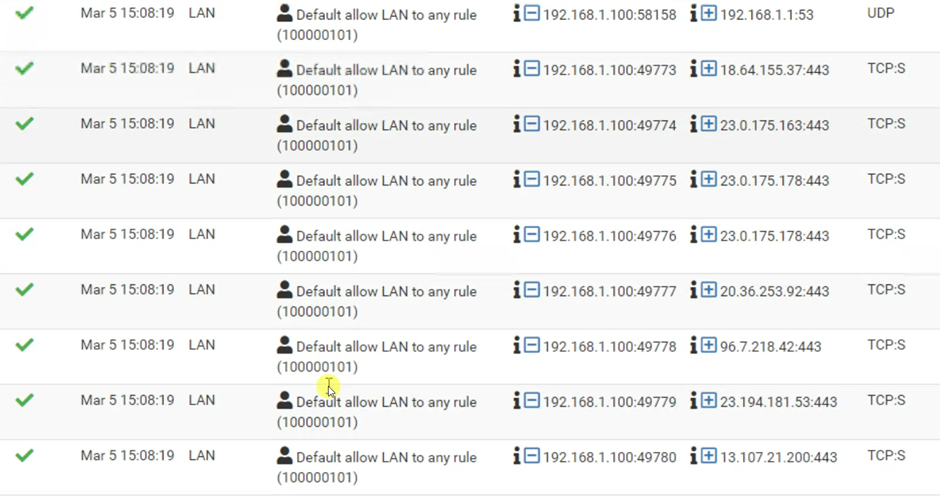
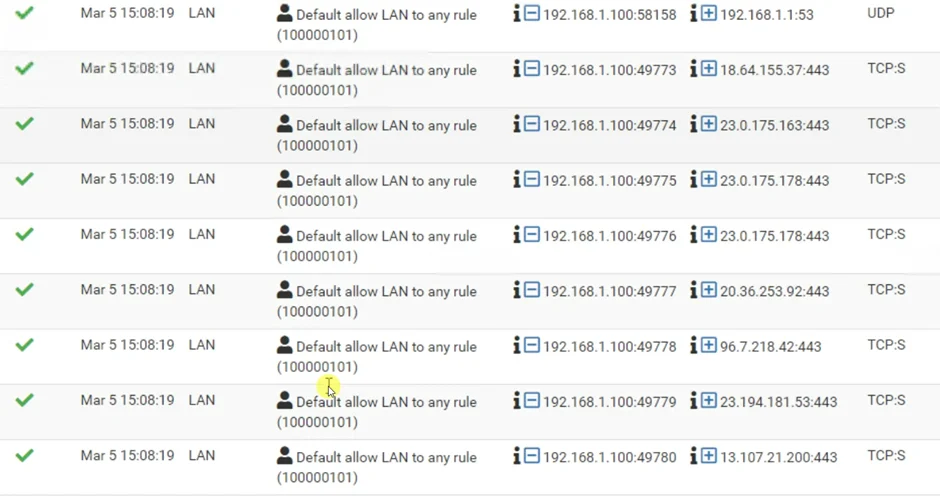
To see the logs, Status-> System Logs->Firewall-> Filter the logs with virtual machine IP.
As you can see all the traffic is going via the pfsense.
After the deployment, you will have a network with a pfSense firewall configured with the virtual machine connected on the LAN side. If you want to access these virtual machines from your local area network, you will have to configure the port forwarding or static one-to-one nat to get there because those VMs are sitting behind the pfsense firewall. Which doesn’t make sense, right?
To make your LAN and the pfSense LAN on the same network, you have to extend the pfSense LAN from Proxmox to outside.
If you plan to extend the pfSense LAN network to outside the Proxmox host, you will have to map your pfSense LAN interface (vmbr2) to a physical port on the server and connect that physical port to your LAN switch or wifi router and access the pfSense LAN.
When you move your Lan to pfsense, your entire LAN and the VM network will be part of a single LAN sitting behind the pfsense.
RKGraves
Wednesday 29th of May 2024
Thank You! I've read through your tutorials on installing pfSense, Windows Server 2019, and Windows Server 2022, on Proxmox. I just wanted to drop you a note to say Thank You! Your articles are concise, complete, and well written. I know these take time and I'm greatly benefitting from the work you put into these (former VMware ESXi user). Again - Thank You and Much Appreciation!