
I have been using windows 11 on my laptop for some time now, and the new changes on the operating systems are great. Most of the time, I use windows 11 as my primary operating system. However, I use Linux as my second operating system. When I say Linux, I mean Ubuntu Linux.
If you want to use Ubuntu and Windows 11 on your same PC, you could virtualize either the operating system or dual boot.
In this blog article, I will install Ubuntu Linux along with the windows 11 operating system. My laptop came preinstalled with window 10, which I later upgraded to windows 11. So currently, I am running only the windows 11 operating system on my machine.
The only downside of the dual boot is that you can use only one operating system at a time, and if you would like to make a switch, you have to shut down the current operating system and switch back to the other one. But you get the best performance while using both the operating systems.
If you do not want to switch between the operating systems, you should try virtualizing the Ubuntu/windows operating system. I have covered plenty of articles below regarding the same topic.
Read also,
Windows 11 on KVM – How to Install Step by Step?
How to Install Ubuntu on Hyper-V Windows 10/ Windows 11?
HHow To Install Ubuntu On VirtualBox In Windows 10?
How To Install Ubuntu On VMware Workstation 15/16?
Before you proceed:
- You need to have a machine that is running Windows 11 operating system.
- Ubuntu software image – You can download the ubuntu faster following the article here.
- Rufus image software – Download from here.
- A USB drive with a minimum 4 GB of storage.
Prepare the host machine.
The first step in dual-booting Ubuntu with windows 11 is to make sure your PC can do the dual boot without affecting any files or programs on the Windows 11 machine. You need to decide how much you need to allocate for the windows 11 storage and the Ubuntu. You can change the storage later on. However, it is better to keep the required storage from the beginning instead of changing it later when you are in the middle of something.
In my machine, I got 500GB of storage, in that I would like to keep half of the storage to windows11 and the rest of the half to Ubuntu.
Allocate the storage in Computer Management.
In windows 11 machine.
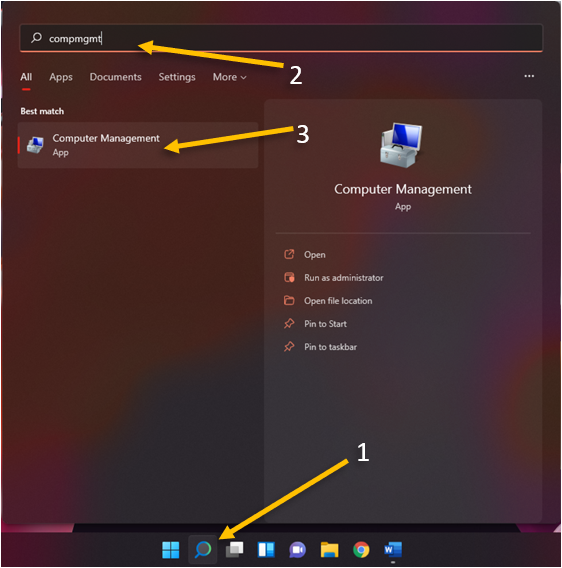
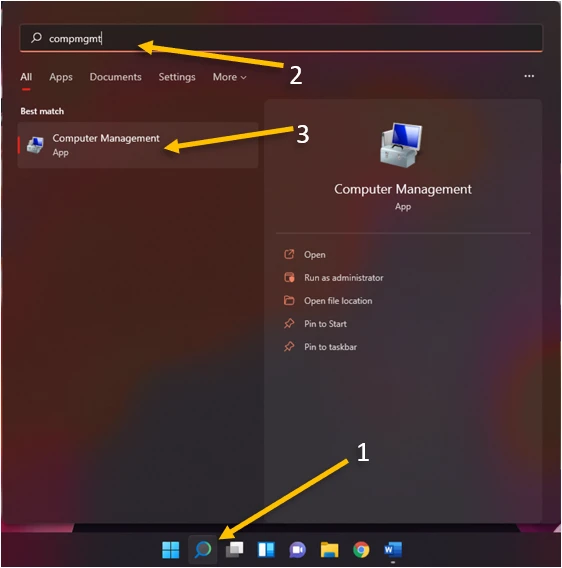
- Click on the search button next to the start menu.
- In the search field, type compmgmt.
- Click on Computer Management.
Allocate storage for Ubuntu
We will manage all the system hardware on the computer management. In the window, click on Disk management.
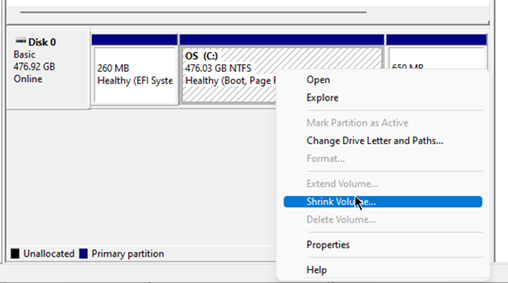
As you can see, I have a C drive which has close to 500GB. I will allocate 250GB for my ubuntu machine rest I will use for windows.
Right-click on the C drive and click on Shrink drive.

The storage would be either less or more in your disk management, depending on your hard disk capacity, so you need to ensure how much you want to allocate for the Ubuntu host. Maybe you don’t want to use Ubuntu as the primary operating system and require less hard disk storage, let’s say 50GB or 100GB. That’s fine as well. Depending on your requirement, choose the storage.
Since I require 250GB of storage, I have added 255081 and clicked on Shrink.

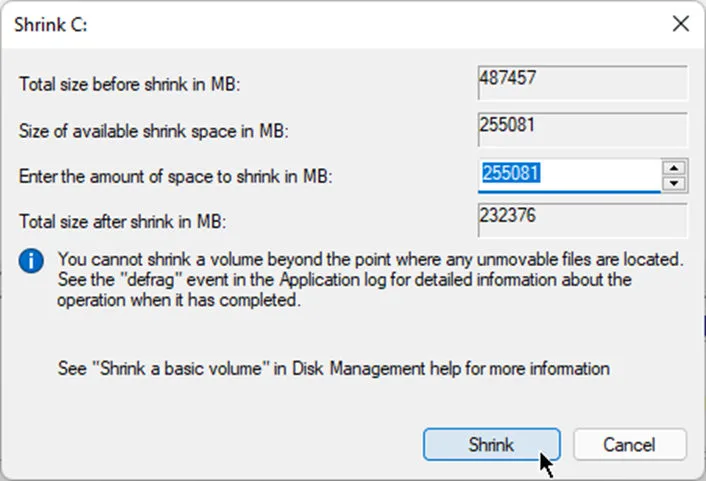
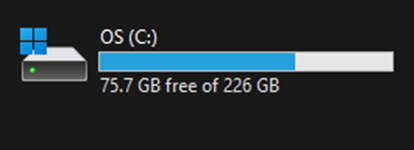
After a few seconds, you should see the storage that was shrunk and came with black color that says Unallocated. This means your windows 11 operating system no longer see the unallocated space. And your C drive would have shrunk down to lesser space. 226.93 GB in my case.


You can also confirm the same by going to This PC as you can see below.

Create the Ubuntu bootable USB.
Our system is ready for Ubuntu installation. We now need to create an ubuntu installation media to install Ubuntu along with windows 11 without affecting the files and programs on the windows11.
Note: You can follow this procedure on the existing windows 11 machine or from another machine. At the end, we should make a Bootable Ubuntu USB with which you can boot from it.
- Plug in the USB on your machine.
- Open the Rufus software on your machine.
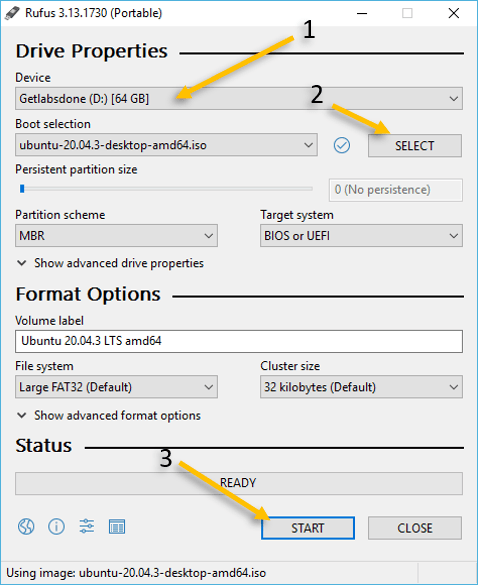
- By default, on Rufus software, under Device, you should see the USB is listed there.
Note: Confirm that it is the right Device by going into my computer (This PC) - Under Boot selection, you need to choose the Ubuntu ISO image that you downloaded earlier, click on Select and attach the Ubuntu image.
- Leave all the other settings default and click on Start.

As soon as you click on Start, you will get a message, choose ‘write ISO image mode (Recommended)’ and click on Ok.
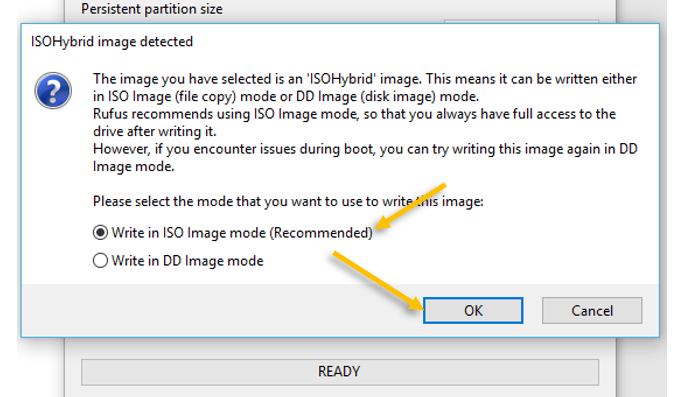
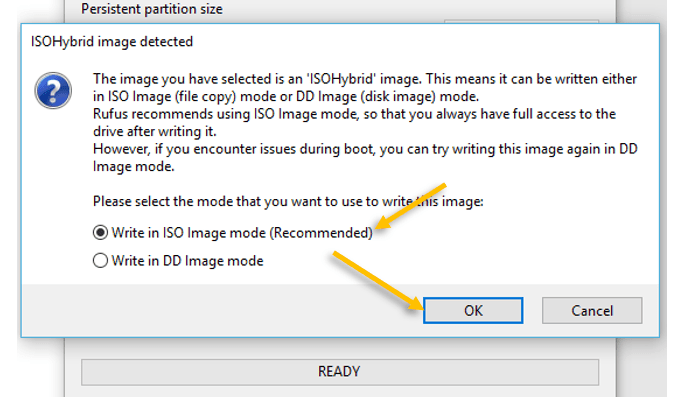
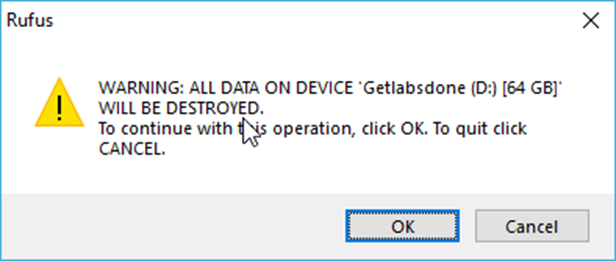
You will get a warning message as well. Click on Ok. The process will now begin.

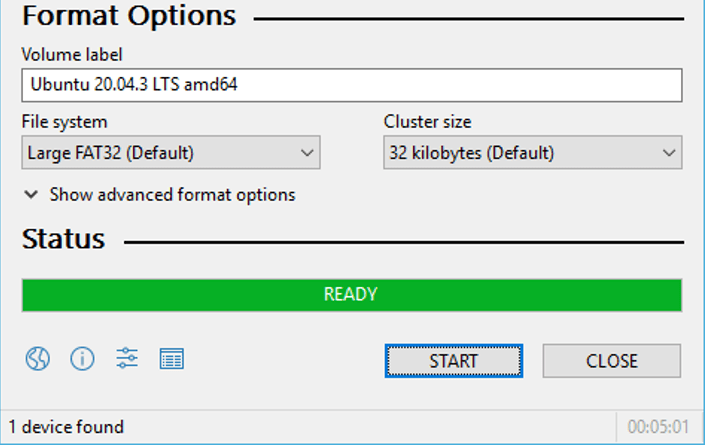
Once completed, you will get a message that says ready. Meaning the USB is ready for dual boot now.

Choose the USB as the primary boot device.
We have allocated the space for the Ubuntu machine to install on windows 11, and we also created the bootable Ubuntu USB. We now need to make sure that we boot from the USB to install the Ubuntu operating system.
Reboot your Windows 11 machine, and get into the bios settings.
When the machine starts, you may continue to keep pressing the f2 key. This would take me to my Asus laptop bios menu.
So other laptop vendors, the options will be different. For reference, below are the keys that you have to press during the boot on major laptop manufacturers.
For DELL machine = Tap the F2.
HP Laptop = Tap f10.
Lenovo = Tap F1
After you have made the changes, you may go ahead and save the settings.
Boot into the Ubuntu installer.
If you have done everything perfectly, you should see an option to choose Ubuntu or Windows boot location upon next boot.
Choose Ubuntu to proceed with the Ubuntu installation.
Install the Ubuntu operating system.
In the Ubuntu welcome screen, you can click on Install Ubuntu to proceed with the installation.
Choose the keyboard layout.
On the wireless, please do not connect to the wifi yet. Choose I don’t want to connect to a wifi network right now and click on Continue.
We are not choosing the wifi because the installation will take longer to complete as Ubuntu will start updating its software along with the installation, so it is best not to connect to the network. You can update the software post-installation.
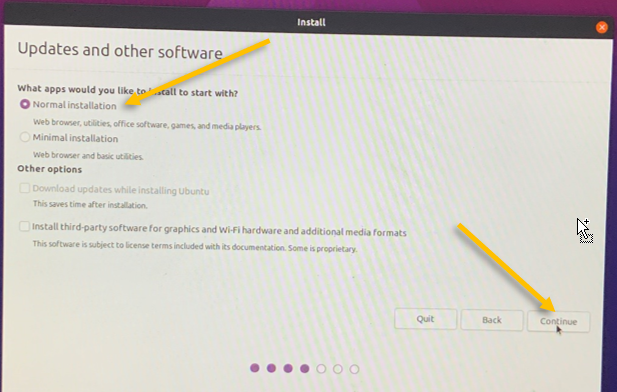
You can either choose to go ahead and with Normal installation or Minimal installation. For most of the daily usage you should choose the Normal installation and click on Continue.
Installation type.
Ubuntu will intelligently identify that you already have windows 11 on your hard disk and simplify the option to install the Ubuntu alongside windows 11 by choosing Install Ubuntu alongside windows boot manager. For most of the users, this will be enough. However, I would like to have more control over the installation and the storage. Hence I choose something else.
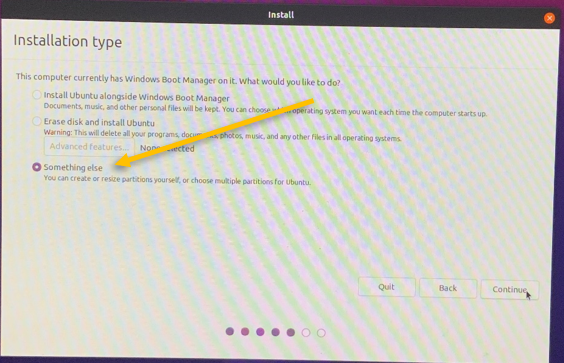
Note: Do not choose Erase disk and install Ubuntu. This will wipe out the entire windows 11 operating system and install only Ubuntu.
Allocate root and home storage.
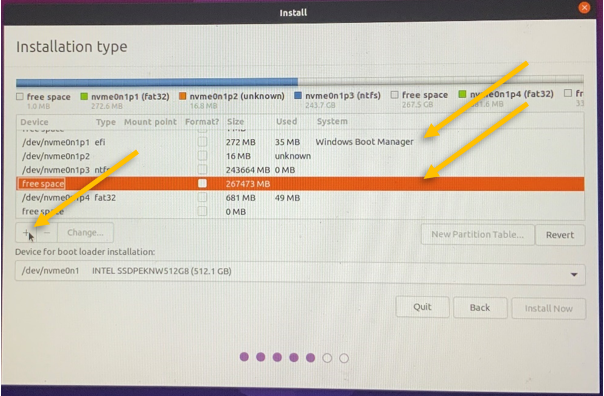
You will now be presented with the storage options on your machine. By looking at the free space, you can identify the unallocated space in your machine.
The Windows Boot manager under the system is where we have the windows storage located.
Select the free space and click on the plus icon.
I would require 50GB of storage for the home directory and remaining space for the root for my usage.
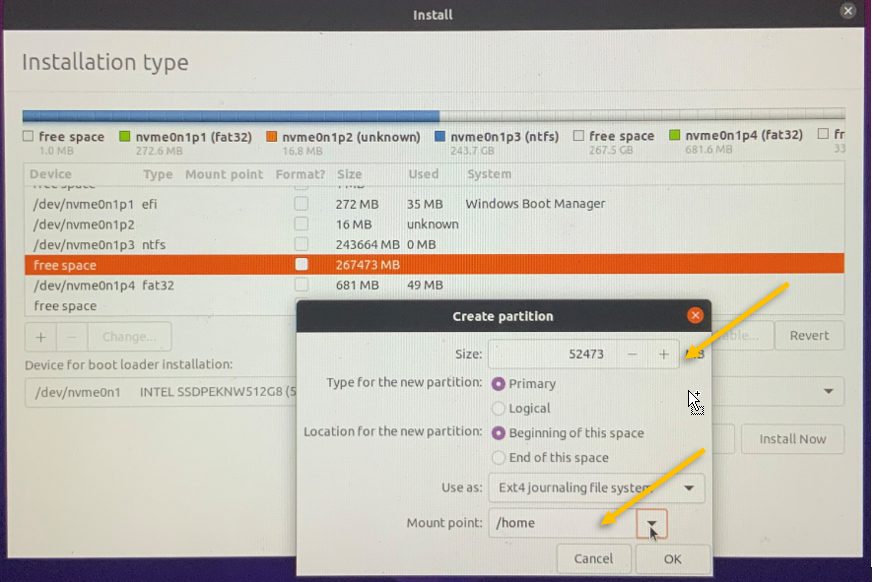
- In the create partition option, type the size as 52473
- And choose the new partition as Primary.
- Location for the new partition : Beginning of this space.
- In the Mount point choose /home and then click on Ok.
We have allocated 50GB of storage for the home directory.
You will now see the free space with less storage(from 267473 to 215000), select the free space and click on the plus icon.
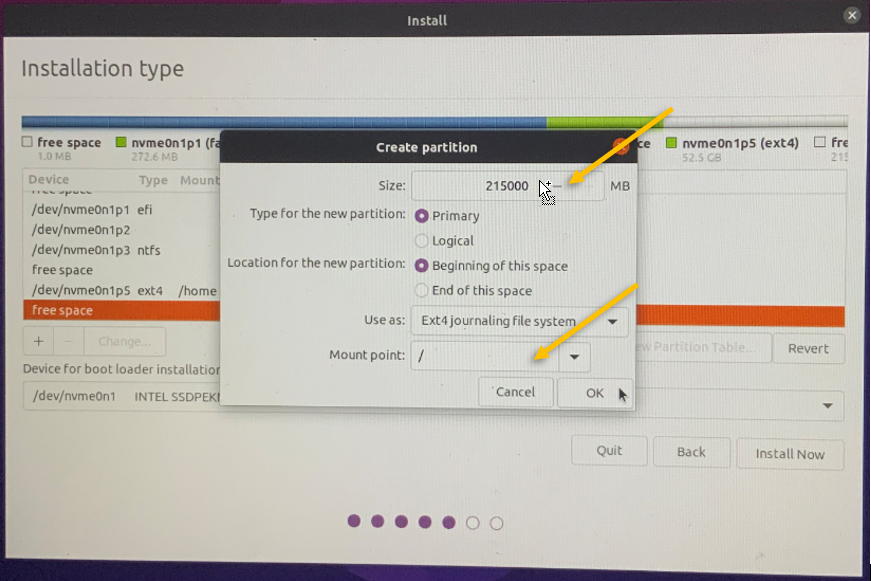
- In size, you don’t need to make any changes, leave the remaining unallocated storage from windows 11.
- Choose the partition as Primary.
- Location of the new partition as the beginning of this space.
- In mount point drop-down, choose the root folder (/) and click on Ok.
Choose the root storage, and click on install now.
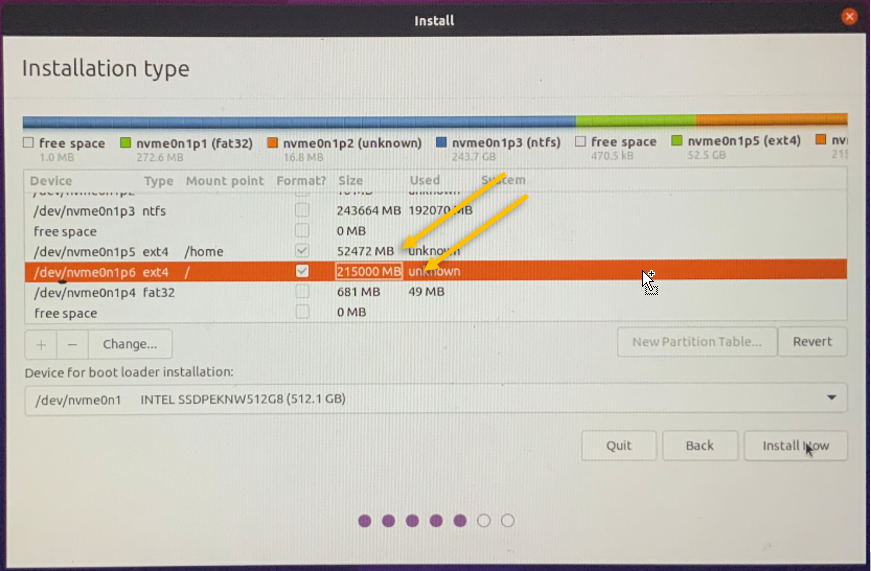
Note: Make sure you are not choosing the Windows boot manager system. If you do so the windows 11 will be wiped out from your machine.
On the warning, click on Continue.
Proceed with the Ubuntu installation.
Choose the timezone, set up an account, and continue again.
The installation will begin, and the process will take some time, so you need to have little patience.
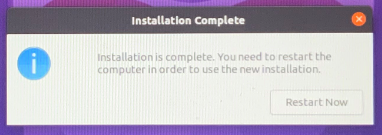
After the installation is complete, you will get a message that says installation is complete. Click on Restart now.
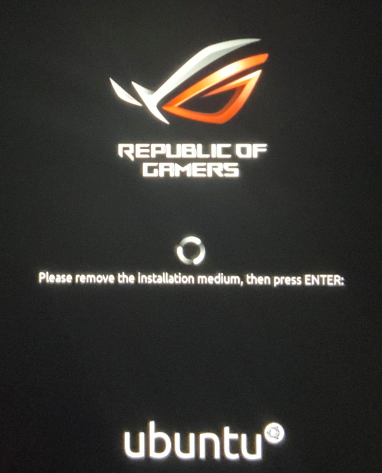
You will be asked to remove the installation media, remove that, and hit enter.
Boot into windows 11.
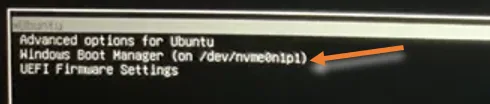
As soon as you reboot the machine, you will get an option to choose which operating system that you want to select, like many of us, I would really want to see my windows 11 operating system first and go back to Ubuntu.
So choose the 3rd option that says, windows boot manager. If you don’t choose anything, you will be taken into the Ubuntu operating system.

Since you have chosen Windows boot manager, you will now be taken into the Windows 11 operating system login screen.
Login to windows and make sure everything looks good, now let’s boot into Ubuntu.
Boot into the Ubuntu.
To boot into Ubuntu, you may go ahead and reboot Windows 11, and during the boot process, you will be asked to choose which operating system you would like to boot into, select Ubuntu from the list. If you don’t make any choice, you will be taken into Ubuntu automatically after few seconds.
And you must be able to log in to the Ubuntu machine just fine.
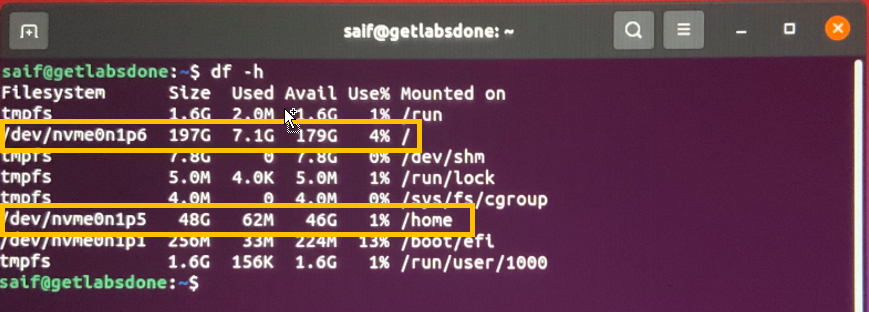
When you open the Ubuntu terminal and check for the storage, you can see the storage as below.
Conclusion.
We have successfully installed ubuntu dual boot with windows 11. The only drawback with this type of installation is that you cannot use both operating systems at the same time. And to switch between the operating system, you will have to reboot the current operating system. But the bright side is you will get the entire hardware resources dedicated for both the operating systems.