The Ubuntu version 21.04 was recently released and I decided to spin up the VM in Microsoft hyper-v on a windows machine. I have used it for a while and haven’t noticed any issue with the operating system.
So in this blog, let’s go ahead and start the installation of the latest Ubuntu 21.04 on windows Hyper-V.
Prerequisite:-
- A windows 11 or 10 operating system.
- Download the latest Ubuntu21.04 software image.
Steps to install ubuntu on Hyper-V hypervisor.
- Enable the Hyper-V feature on windows.
- Open the Hyper-V software on windows.
- Creation of the VM in Hyper-V.
- Configure the memory.
- Virtual machine network configuration.
- Configure the Virtual hard disk for the Hyper-V VM
- Install the Ubuntu operating system.
- Disable the Secure Boot.
- Initiate the ubuntu installation.
1. Enable the Hyper-V feature on windows.
I have covered the article here on how you can enable hyper-v on a Windows 11/10 machine, follow the article here to enable the hyper-v on a windows machine.
2. Open the Hyper-V software on windows.
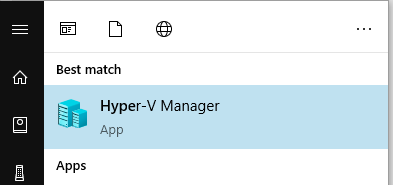
After you logged in, click on the start menu, and type Hyper-V.
You should see the program called Hyper-V manager. Click on it to open.

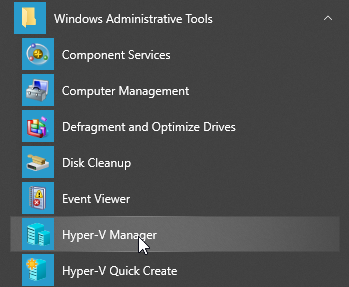
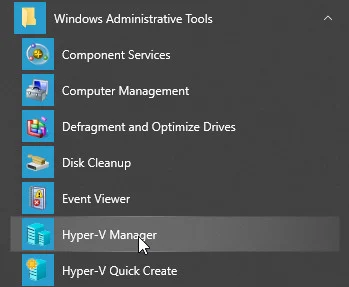
Alternatively, In the start menu, you can go to windows administrative tools, and you should see the Hyper-V program there as well.
3. Creation of the VM in Hyper-V.
On the Hyper-V manager, you should see your machine name, and currently, we don’t have any Virtual machine installed on it. We are now going to install Ubuntu in the Hyper-V.
Under Hyper-V Manager, right-click on your computer name and click New>Virtual machine.
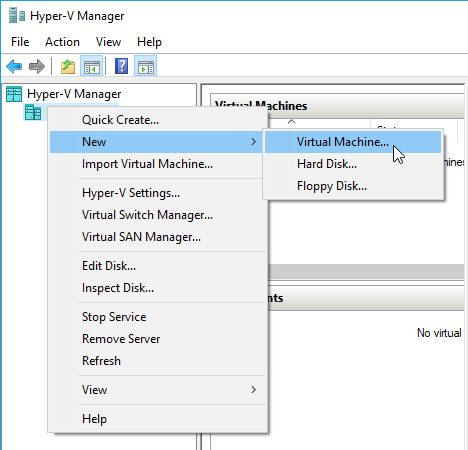
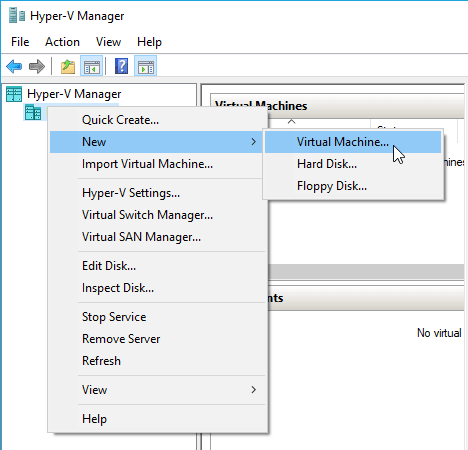
A new virtual machine creation wizard window will now pop up.
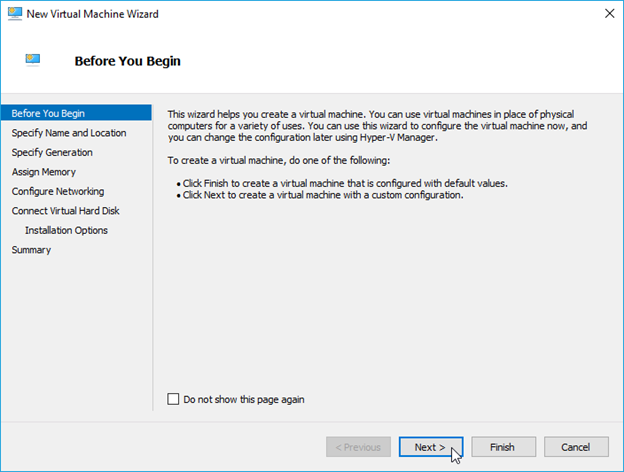
Before you begin, you may click on next to create a virtual machine with custom values.

On the next screen, you need to specify the name of the VM we will install. Since I am installing the ubuntu version 21.04, I am naming it as Ubuntu 21.04.
By default, the Hyper-V would choose the default location to store the Virtual machine files. In case if you would like to change the storage to some other place, you may check the option that says Store the virtual machine in a different location, and browse for the location of your choice.
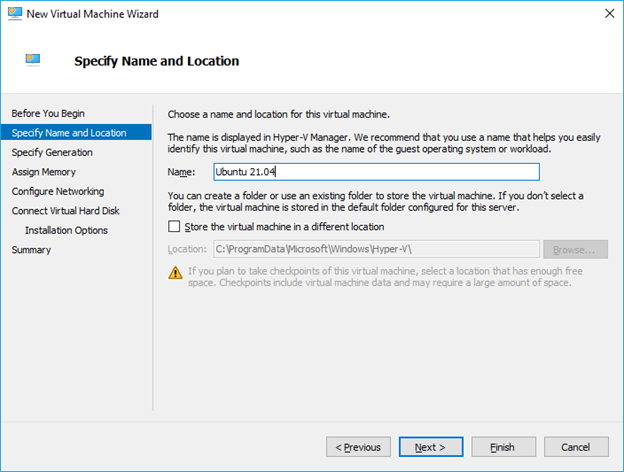
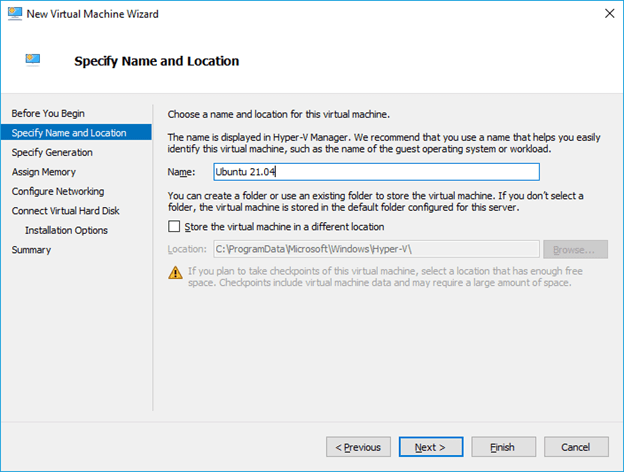
As I have enough storage space, I am OK with the default location and click on Next.
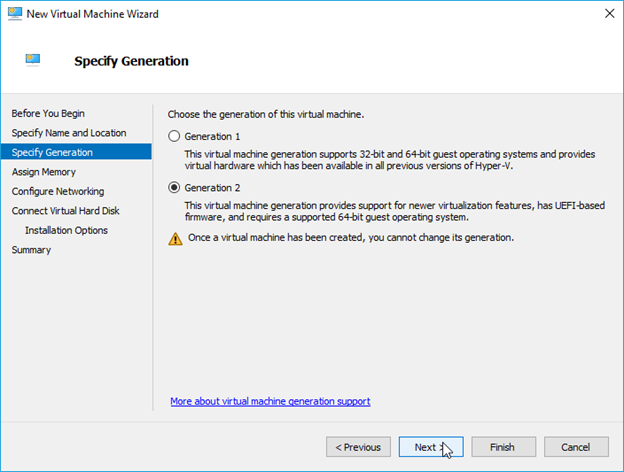
You will have to choose what generation of Virtual machine you want to install, choose generation 2 here, and click Next.

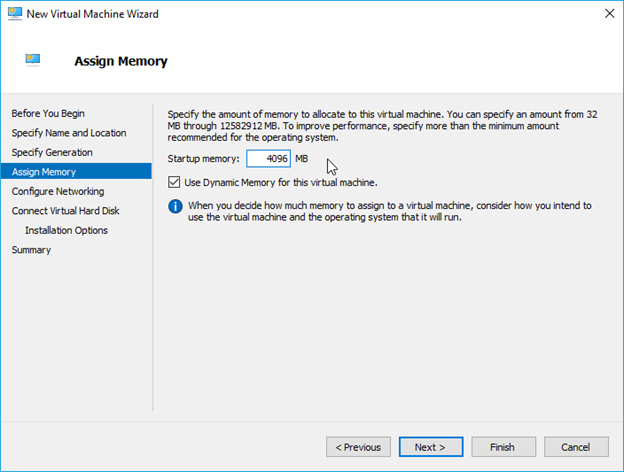
4. Configure the memory.
We are now going to configure the memory for your VM, by default, the hypervisor would pick up just 1GB of RAM, which will not be sufficient for the Ubuntu machine to run smoothly. For a better experience, it is better to have at least 4GB of RAM.
Under Startup memory, choose the memory size, and leave the default option. Use Dynamic memory for this virtual machine, checked and click on Next.

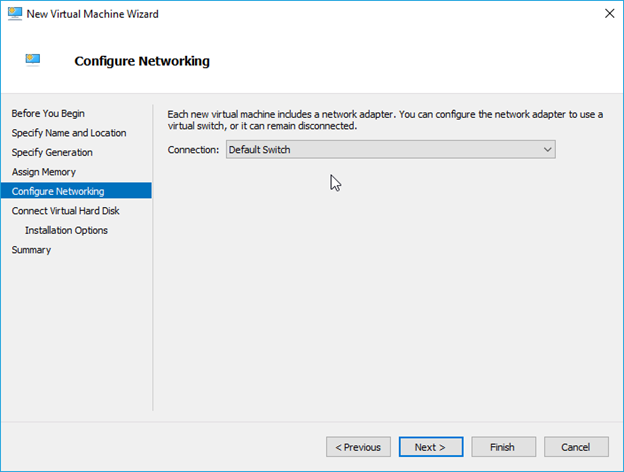
5. Virtual machine network configuration.
We have to connect this VM to the network. For that, from the connection drop-down, choose the default switch and click on Next.

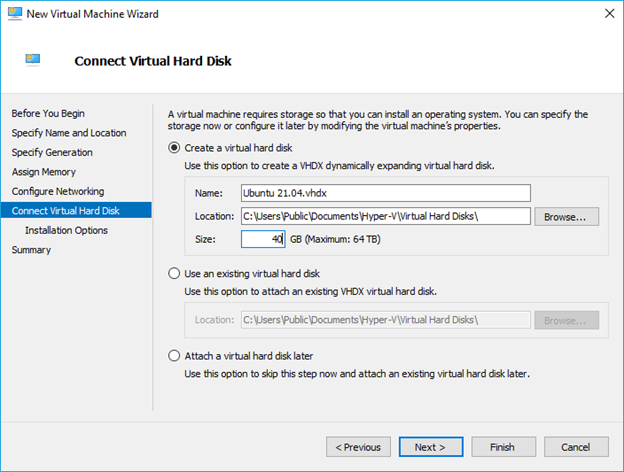
6. Configure the Virtual hard disk for the Hyper-V VM
Under Create a virtual hard disk, you should see the size of the VM picked up as default 127GB. If you have enough storage, you may leave the default or reduce it based on your hard drive free space.
I am providing 40GB of storage; after the selection, click on next.
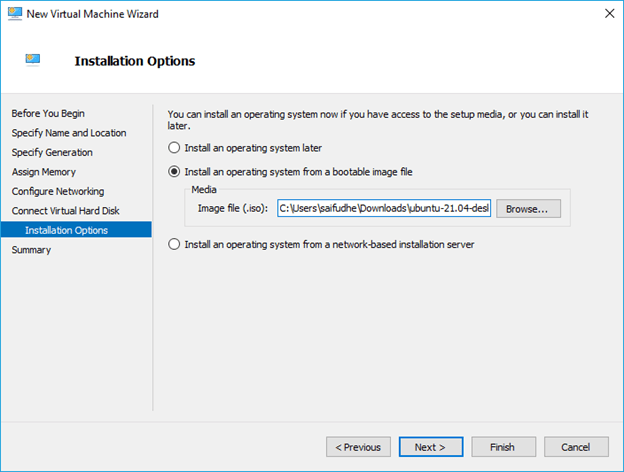
7. Install the Ubuntu operating system.
By default, you will have an option selected here that says install an operating system later, however, we already have the latest Ubuntu ISO image, so we can install it right now.
Check the option that says install an operating system from a bootable image, and click on Browse to attach the iso image that you downloaded. And click on Next.

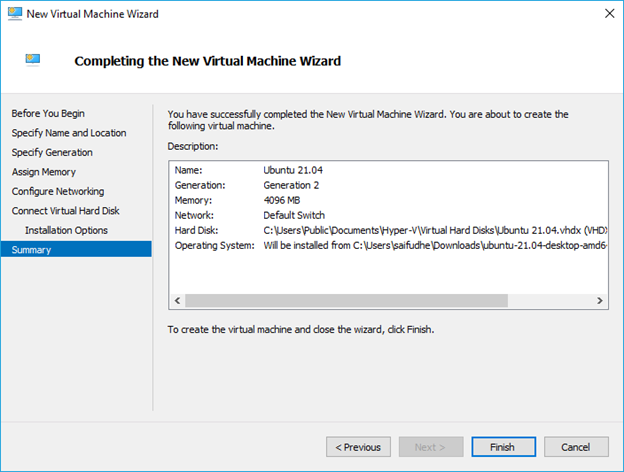
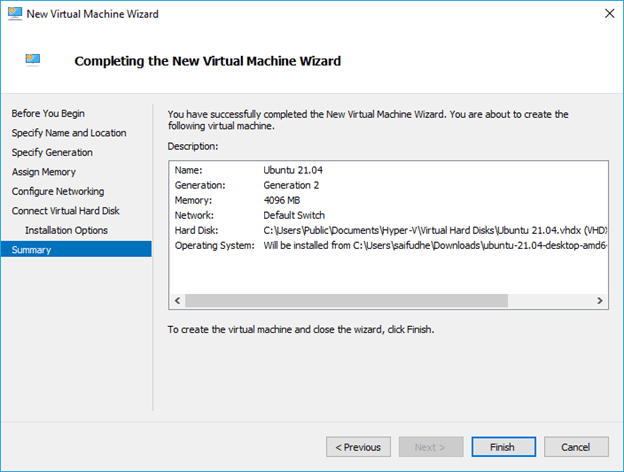
You should get a basic summary of the Ubuntu Virtual machine that we are going to install. If you want to make any changes, you can do that by choosing the desired option on the left.
To create the Ubuntu virtual machine in Hyper-V, you may now click on Finish.
8. Disable the Secure Boot.
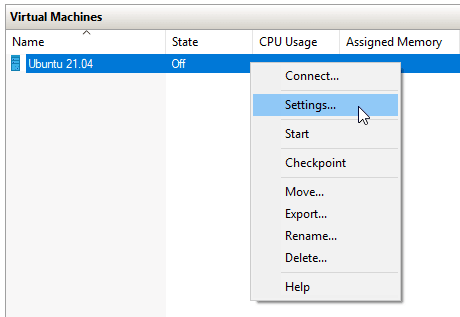
You will see a newly created Ubuntu VM under a Virtual machine. For the Ubuntu virtual machine to boot correctly, you will need to disable the Secure Boot which is enabled by default.
Right-click on the VM, and click on settings.

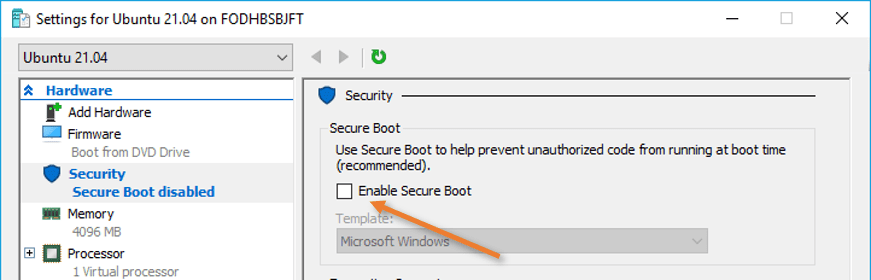
In Security, uncheck the option that says, enable secure Boot and click on OK.

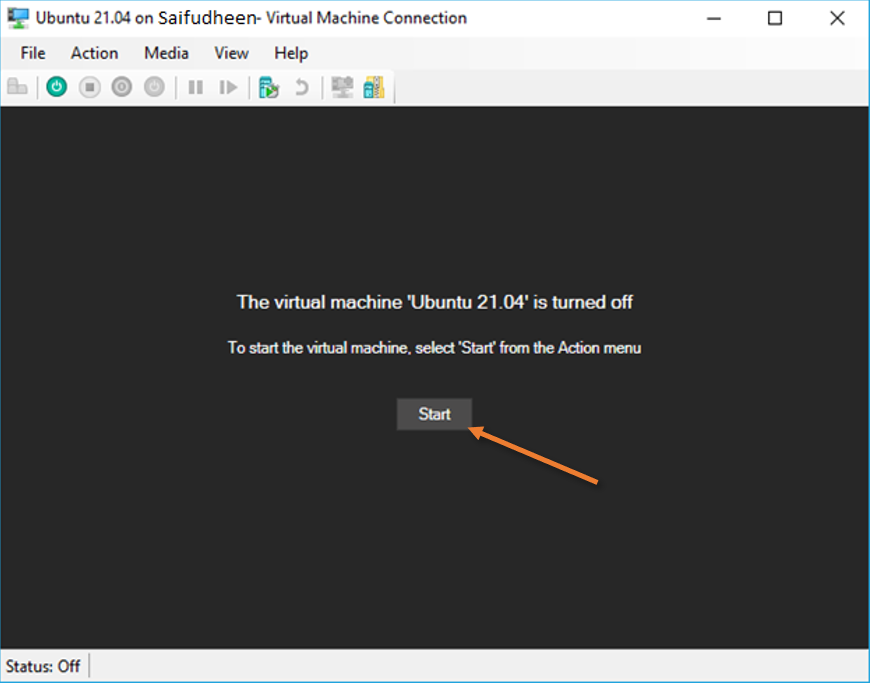
Right-click on the VM and click on Connect.

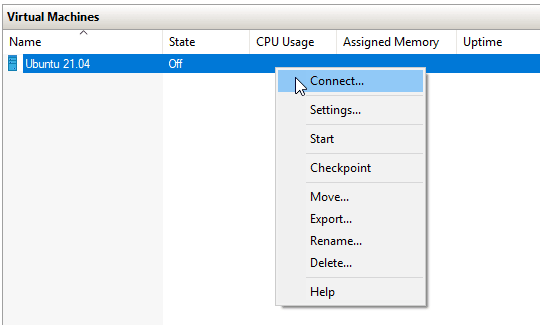
You will see a new window that says the virtual machine Ubuntu 21.04 is turned off. You may click on start to power on the VM. Click on start.

9. Initiate the ubuntu installation.
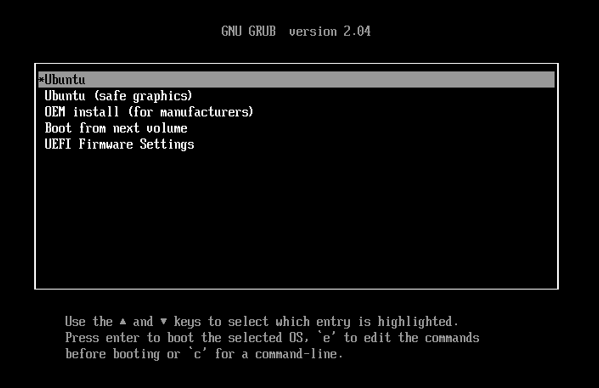
Starting off the Ubuntu virtual machine will take some time. After few seconds, you will see the menu to choose the operating system. Choose Ubuntu from the list.

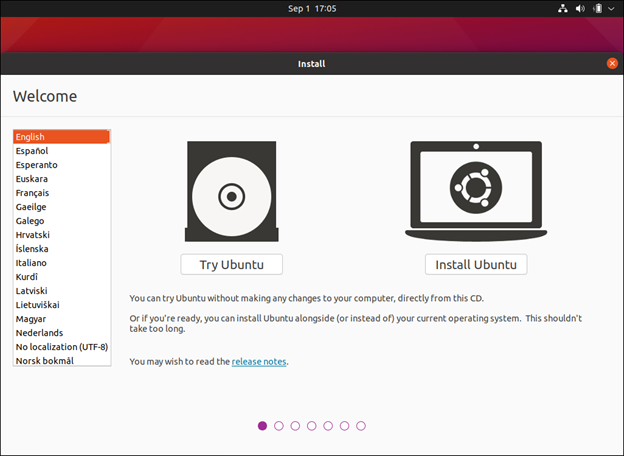
You can either try Ubuntu or install it on the hypervisor, Click on install to proceed with the installation.

- Choose the language of your choice and click on Next.
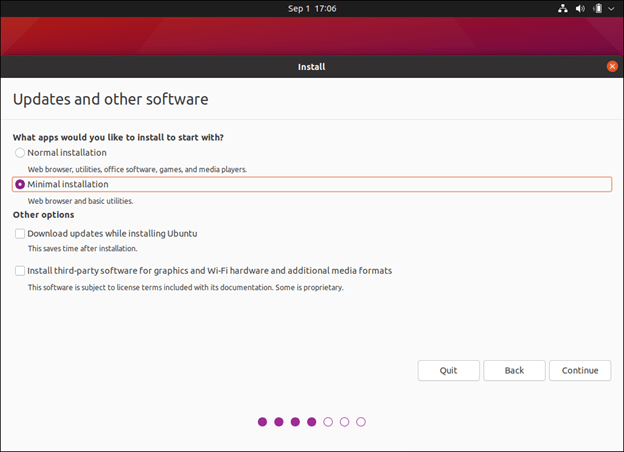
By default, Ubuntu would pick up normal installation, which includes a media player, office utilities, and others. I will choose the minimal installation since this is a VM, and I do not intend heavy use.
Note: The Ubuntu will automatically start connecting to the internet and download the required update during the installation if you choose the default option. ‘Download updates while installing Ubuntu’. You need to make sure you uncheck this option, as it will delay the installation process for a long time. You can install the update later on post the installation.
After the selection, click on Continue.

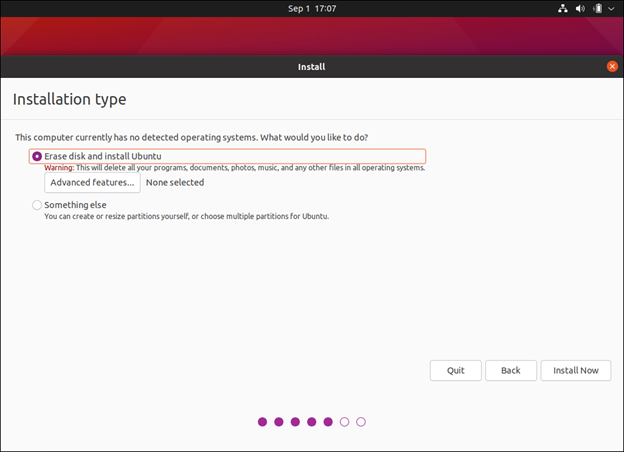
Under installation type, you need to choose to erase the disk and install the Ubuntu, so click on install now.

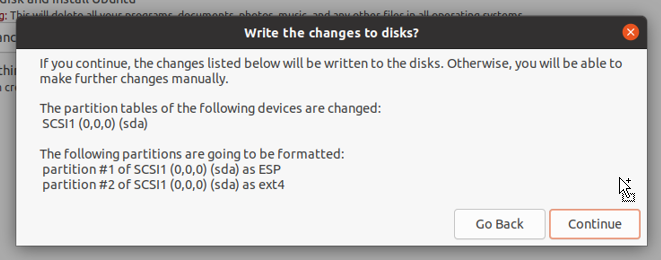
Write the changes to disks, click on Continue.

- You need to choose your timezone based on your location and click on Continue.
- Set the user credentials and click on Continue.
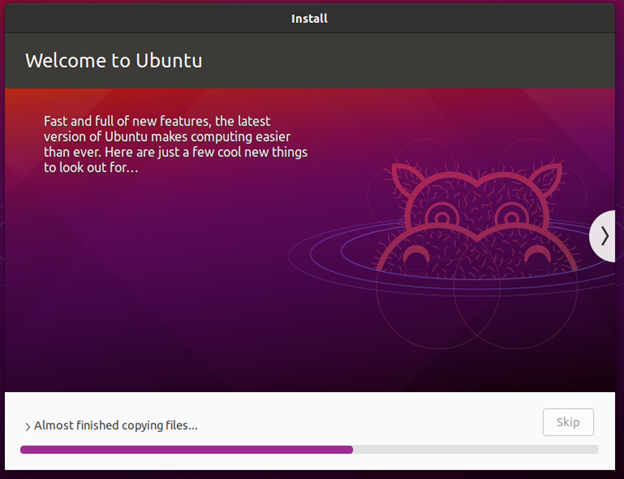
The installation will now begin, and this process will take some time to complete.
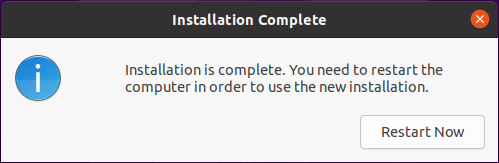
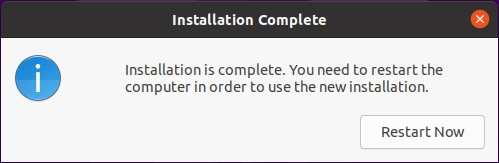
You will get a message that says installation complete and you can click on Restart now.
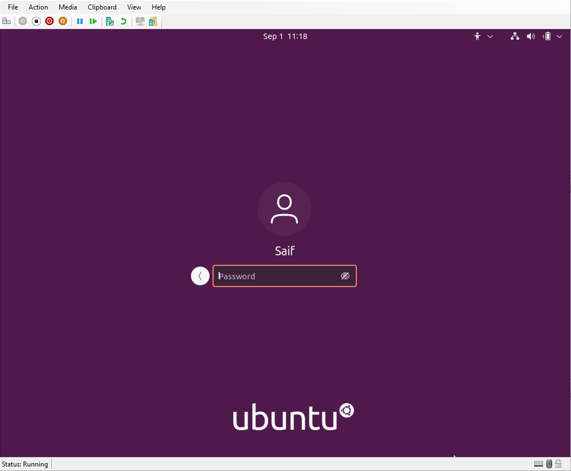
That’s it you have successfully installed Ubuntu 21.04 on a Microsoft Hyper-V. Login to the machine and enjoy the Ubuntu Linux operating system on the native Microsoft hypervisor.
And with the default configuration that we followed, your virtual machine will have internet access as well.