The best way to test the latest operating system is by virtualizing them in the lab environment before moving it to production. You can test things out and understand what works for you and what doesn’t. In this blog, we will virtualize windows server 2022 on a VirtualBox hypervisor.
Many users choose VirtualBox hypervisor because it can be installed in pretty much any operating system, such as windows, mac, and Linux. It is open-source and free for anyone to use it. However, certain features are lacking on VirtualBox, which other paid version counterparts VMware workstation has. One such feature is the TPM. For some reason, it is not available ‘yet’ in the VirtualBox hypervisor. However, you can get all the work done with the VirtualBox.
Can Windows Server 2022 be installed in VirtualBox?
The windows server 2022 is the latest server operating system from Microsoft. Providing an upgrade to the old windows 2019. You can install Windows Server 2022 on VirtualBox without any issues. However, TPM and the secure boot are the pre-requisite for some of the features to work. For example, bit locker encryption. The VirtualBox has a secure boot option. However, it currently doesn’t support TPM even though your system has it. So any program which requires TPM will not work with windows server 2022 VM running in VirtualBox. Everything else should work just fine. And VirtualBox software is improving, and as per Oracle, mostly in version 7, the TPM will become available.
This blog article will look at the installation of windows server 2022 in the VirtualBox hypervisor. After the installation, we will test the network connectivity and RDP into the server from the local machine.
Create windows server 2022 virtual machine.
Open VirtualBox hypervisor, click on Machine-> New.
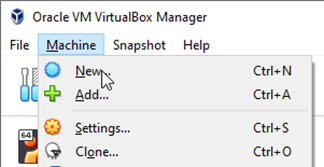

A new virtual machine creation wizard will now open up..
Choose an expert mode.
There are two modes available to create the virtual machine, the guided mode, and the expert mode. To get more control over the virtual machine, let’s choose the expert mode.
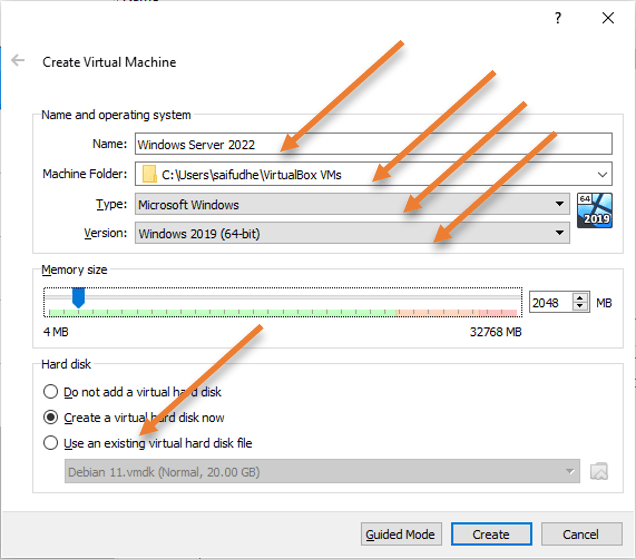
In the VM creation pop-up, fill in the details as follows.
Name: Provide a name for the virtual machine.
Machine folder: The location where you would like to save the virtual machine files.
Type: Choose Microsoft.
Version: Windows 2019 – We are running the VirtualBox version 6.1, which currently doesn’t have Windows 2022 in the list, so let’s choose Windows 2019 instead.
Memory : 2048MB
Hard disk: Create a virtual hard disk now.
Click on Create.

Create a virtual hard disk.
In the create virtual hard disk pop up,
File location: Choose the file location where you want to save the virtual hard disk file. The virtual hard disk storage will be in the same location, based on our Machin folder selection before.
File size: This will be the storage size. I am giving 50 GB of storage.
Hard disk file type: Leaving the default VDI, if you have a plan to move this virtual machine to some other hypervisor, it is recommended to choose VMDK instead.
Storage on Physical hard disk: Dynamically allocated.


Set the virtual machine parameters.
Right-click on the Windows server 2022 Virtual machine and click on settings. Virtual machine settings window now pops up.
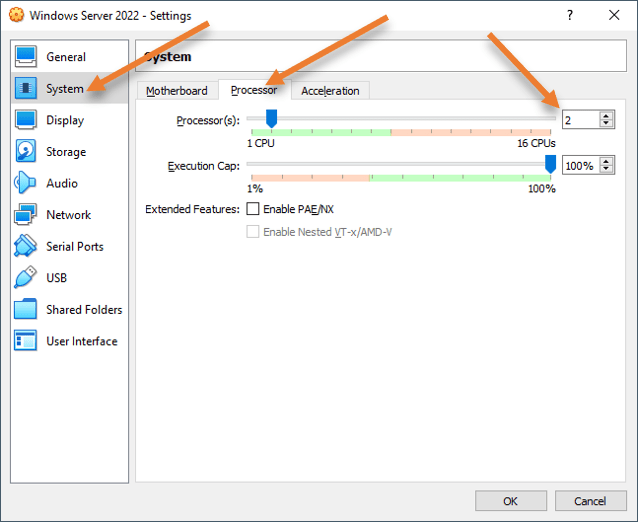
Configure the CPU.
By default, when we configured the CPU, it was just a single CPU. To get better performance, it is best to add one more CPU, so you will have a total of 2 CPUs.
So depending on your requirement, you will have to choose the processor count.
To change the CPU configuration Goto -> System-> Processor
After the change, click on OK.

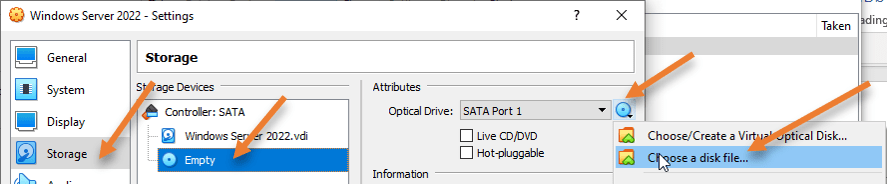
Attach the iso image.
Although we created the virtual machine, we have not attached the Windows server 2022 iso image to the VirtualBox.
In the settings menu, click on storage-> Empty disk-> Choose a disk file and attach the windows server 2022 iso image to it.

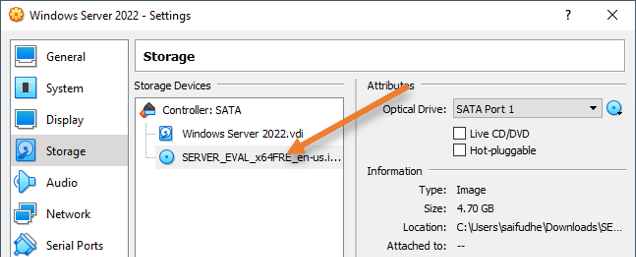
The server iso image is now attached to the VirtualBox VM.

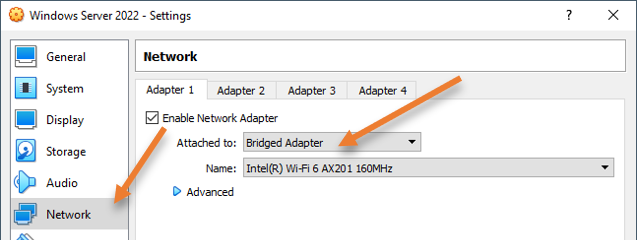
Configure the network.
By default, the VirtualBox would assign a nat interface to the virtual machine, which is good for the virtual machine to go out to the internet. However, you cannot communicate to the virtual machine from the LAN network.
So for the virtual machine to be part of the LAN network, I will choose the bridge adapter and the physical adapter I have used to connect to the LAN network.
You can check out the VirtualBox network types I explained here.
It will bring the virtual machine to be part of the LAN network.
You may note that using the Bridge adapter option in the office network is not recommended, so you may consult with the network team before using it. In an office network, NAT will be the easy option, and if you require to log in to the virtual machine using RDP, you may configure port forwarding on the VirtualBox in NAT adapter.
Click on OK.

Star the windows server 2022 VM installation.
Right-click on the virtual machine and start the windows server 2022 VM.
Once the VM starts, the installation will now begin.
- You may choose the language, location, and keyboard layout and click Next.
- Click on Install Now.
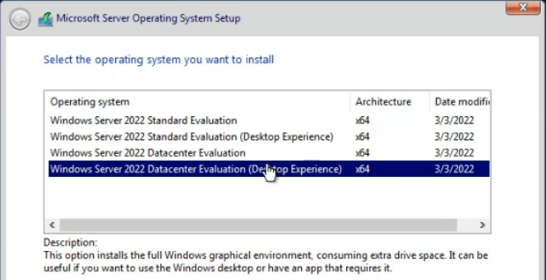
- Choose the Windows server 2022 additions.
Here you need to decide whether you want to have GUI or Command-line interface. Since I require GUI, I have chosen Datacenter with Desktop Experience. The one without desktop experience is the CLI version.

- Accept the license agreement.
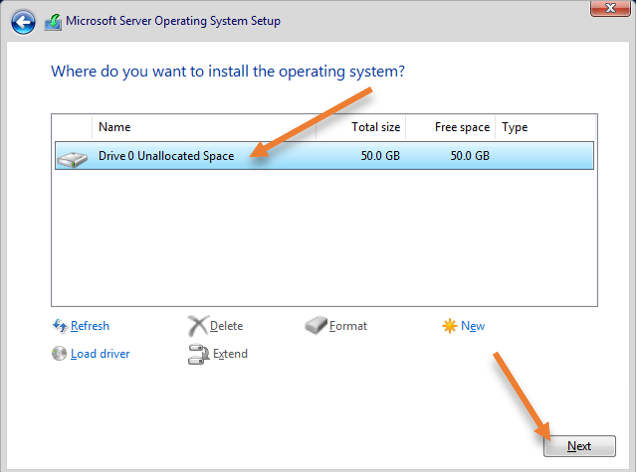
- Choose custom installation.
- Select the virtual hard disk and click on next.
After the installation, the windows machine will boot from this virtual hard disk.

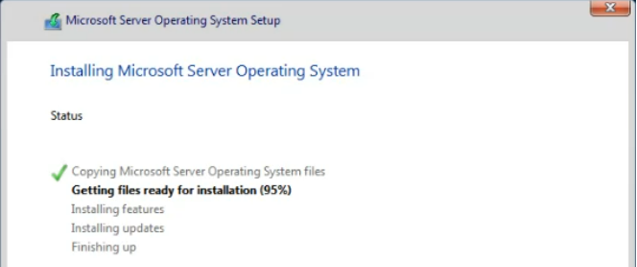
The installation will now begin and it will take some time to finish.

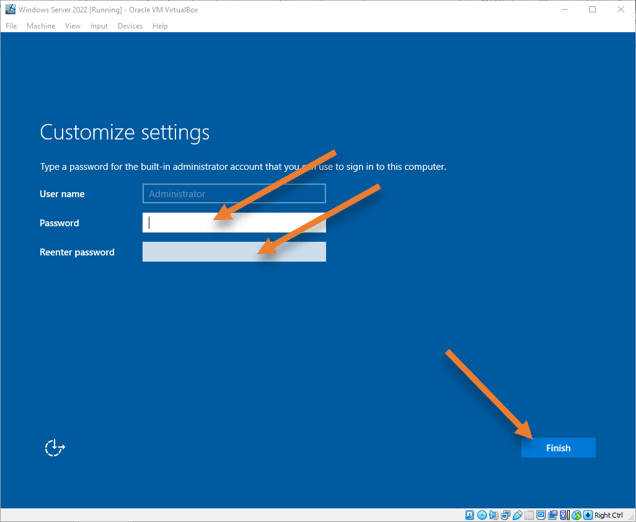
- Set the admin password.
After the installation is complete, the windows server 2022 will reboot a couple of times and it will ask you to set the password for the administrator account, which is the default account.
After the password is set, you may click on finish.

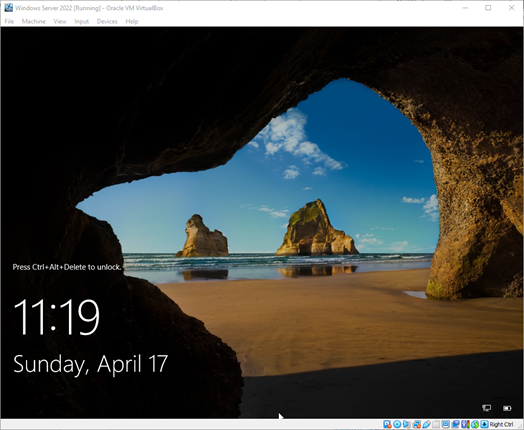
- Log in to the windows server 2022.
You will now be taken into the windows server lock screen. To get into the server’s login screen, you will have to press CTRL+ALT+DEL since that will take you to the host machine settings if you use Windows. Alternatively, you could press CTRL+DEL to get to the login screen. And it should prompt you to log in as an administrator with the password you just set.

Change the boot sequence.
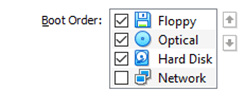
At this point, the boot order in VirtualBox is as follows.
Anytime you reboot the VM, it will first check the Floppy, Optical, Hard disk. In that order.
I don’t have any clue, why Floppy is still there 🙂

We installed the windows server 2022 from the CD to the virtual hard disk. which means, the virtual hard disk now has the operating system installed. We need to make sure the virtual hard disk is the primary boot device for windows server 2022.
- Shut down the windows server 2022.
- Right-click on the VM and click on settings.
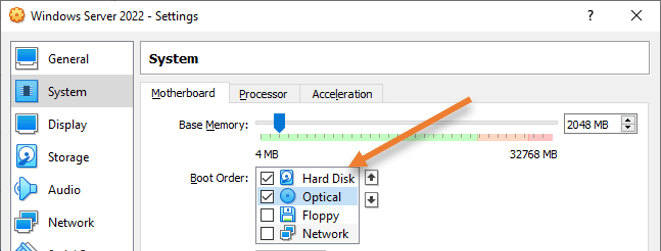
- In the settings menu, choose system.
- Uncheck the Floppy, move the Hard disk to the top and the Optical to the second.
This will ensure the VMware workstation always loads from the virtual hard disk.
If you don’t make any changes here, the optical drive being the primary, will boot again to the windows server 2022 iso image and start the installer whenever you reboot. You will get a message ‘press any key to boot form CD/DVD..’ if you don’t press any key, it will take you to the virtual hard disk where we have the operating system installed. If you press any key then the windows server installer will start again.

Install the VirtualBox guest additions.
The VirtualBox guest addition is like a driver for your virtual machine, which will improve the overall performance of the virtual machine.
In the Menu-> Devices-> Insert Guest additions CD image..
It will insert the guest additions iso image to the VirtualBox CD Drive.
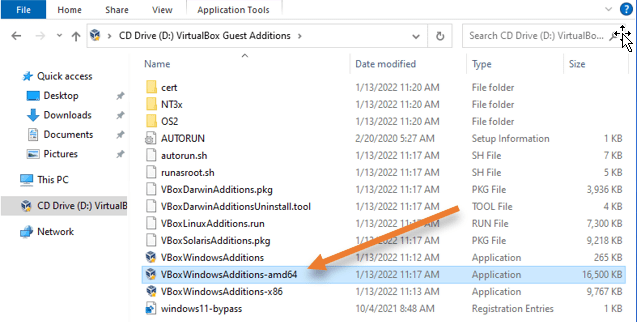
Open windows explorer-> You will see VirtualBox guest addition added as CD Drive-> Open the cd Drive.
Double click on the VboxWindowsAddtions-amd64 to install the VirtualBox guest additions on the windows server 2022.

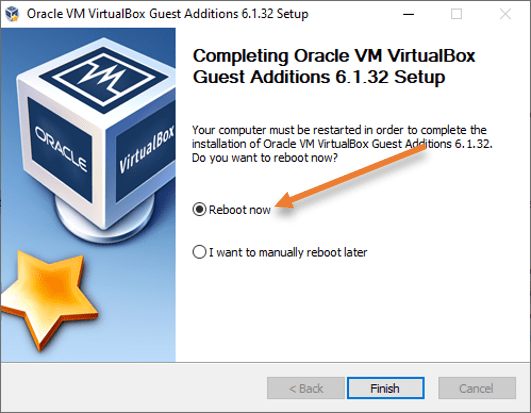
After the installation, you will be asked to reboot the server. You could either reboot the server now or later. However, it is recommended to reboot the server right now for the guest addition to function correctly.

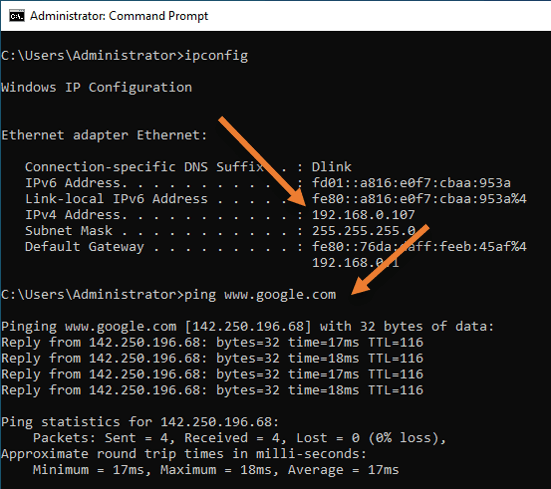
Test the connectivity.
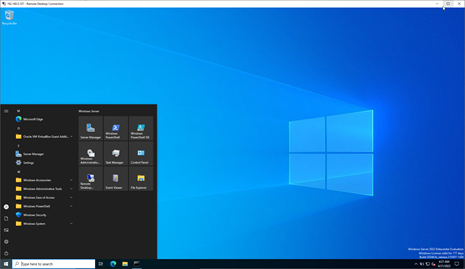
Since we have configured the bridge interface as the network for the virtual machine, it should get an IP address from my LAN DHCP server. And I can get to the server using RDP from my local machine.
As you can see, I got an IP address of 192.168.0.107 from my DHCP server, and of course, I can get to the internet as well.

I have enabled the RDP access on this server, and as you can see I can RDP into it from another machine from the same LAN network.