We have covered plenty of blog articles related to the Ubuntu server in this blog.
When the Ubuntu server 22.04 came out, I couldn’t wait to get my hand on, so I spun up the Ubuntu server 22.04 in the Proxmox VE server.
So in this blog post, we will install Ubuntu server 22.04 on a Proxmox VE server. After the installation, we will test the internet connectivity and ssh into the host from another host.
Can Ubuntu 22.04 be installed on Proxmox?
The Ubuntu server 22.04 LTS is the long-term support version of Ubuntu from canonical. At the time of this writing, It is still going through some development, and it is not officially available for you to put in the production yet. If you go to the Ubuntu download page, you still get the 20.04 build to download, not 22.04. we have to download the 22.04 using a different link. So for testing, it should be okay, so you will have to wait for a little to deploy this server in production. It works well with the Proxmox server because both are based on Linux. I have been running Ubuntu server 22.04 as a VM in Proxmox for quite some time now and haven’t had any issues thus far.
Before you begin, you need to have;
Ubuntu server 22.04 – you can download that from here.
Proxmox server installed and up and running – You can follow the article here to learn more about the Proxmox installation on a server.
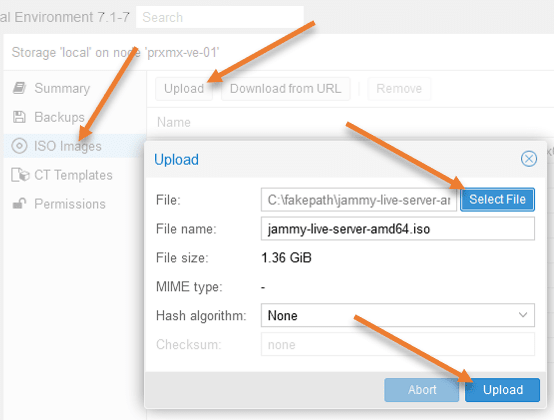
Upload the Ubuntu Server 22.04 ISO image to the Proxmox.
We have downloaded the iso image already, and let’s now upload it to the Proxmox server.
Login to the Proxmox, and select the host where you will install the Ubuntu server 22.04.
Chose the local storage-> ISO images-> Upload
Select the file and upload the ISO image to the Proxmox server in the upload prompt.

Create Ubuntu Server 22.04 VM in Proxmox.
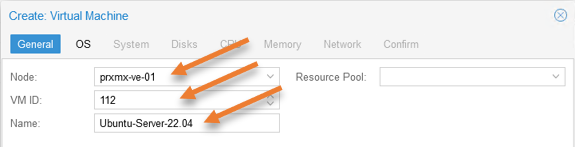
To create the virtual machine, click on Create VM.
You will be asked to define the virtual machine parameters in the Create VM pop-up.
General configuration.
Node: Enter the node where you will install the Ubuntu server 22.04 VM.
VM ID: It will be automatically created.
Name: Ubuntu server 22.04
Click on Next.

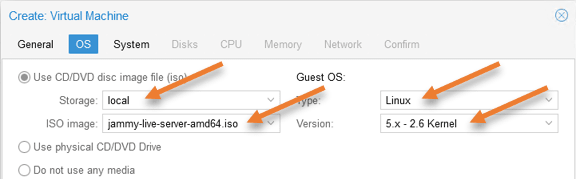
OS configuration.
You state to the Proxmox server what operating system we will install by pointing to the ISO image and the Guest OS version.
Choose Use CD/DVD disk image file.
Storage: Local
ISO image: Chose the ISO image we uploaded in the first step.
Guest OS:
Type: Linux
Version: 5.x-2.6 Kernal and click on Next.

Leave system settings default.
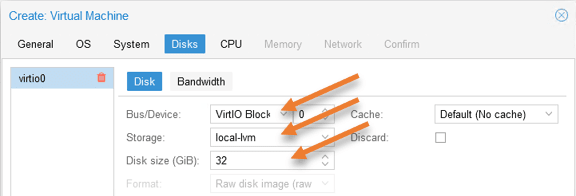
Configure Ubuntu server 22.04 virtual hard disk.
Bus/Device: VirtIO Block.
Storage: Local-lvm
Disk size: 32 GB – This is the default storage size, you may choose the storage based on your requirement.
This virtual hard disk will be the main boot location.

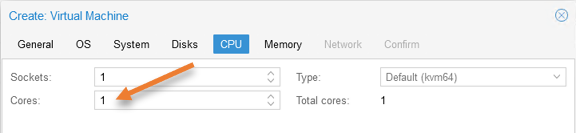
Configure the CPU.
The CPU configuration again depends on your requirement. I am choosing a single CPU, so you may enter them here if you require more CPUs.

Configure the memory.
2GB of memory should be enough. Hence I am leaving the default.


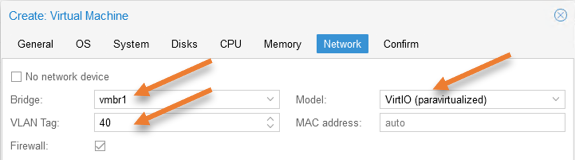
Network configuration.
I have a VM network configured on vmbr1 with VLAN 40. you might have a different network setup, so based on your setup, choose the network. You can learn more about the configuration of VLAN tagging on Proxmox here.
Bridge: vmbr1.
VLAN tag: 40 – You may leave it blank if you don’t have VLAN tagging.

You will get a summary of the configuration. If you are okay with the parameters, you may click on Finish.
Since we don’t have to add any more virtual hard drives and no further modification is needed on the virtual machine, I leave the Start after created option checked, which will take me to the VM installation screen right after clicking on Finish.
Click on Finish here.
As soon as you click on Finish, and I have the ‘Start after created’ option selected, the virtual machine installation will now begin.
Start the Ubuntu server 22.04 installation on Proxmox.
You may head over to the Virtual machine -> Console.
You will get a below screen that says Try or install Ubuntu server. Hit enter here.
If you don’t make any selection after a few seconds, the first option will be autoselected.


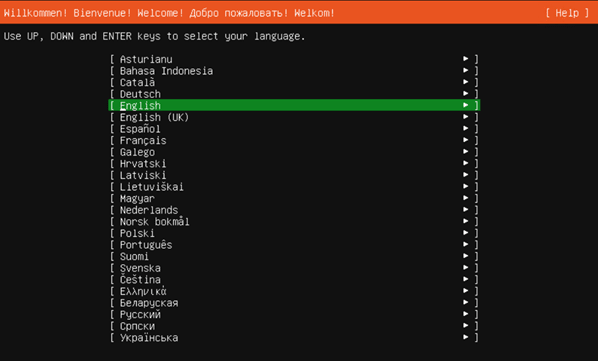
Choose the language.
You need to choose the language, afterward the keyboard layout for the server.

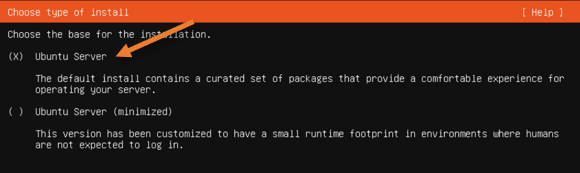
Choose the type of install.
You got two options to install Ubuntu server 22.04, I am choosing the Ubuntu server, the first option.

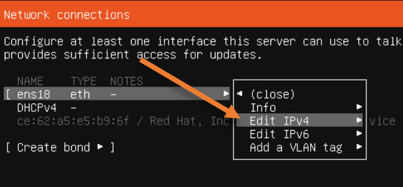
Configure the network.
If you use DHCP for the server, you may skip this step.
I am going to configure the server with Static IP.
Hence hit enter on the network interface-> Edit IPv4.

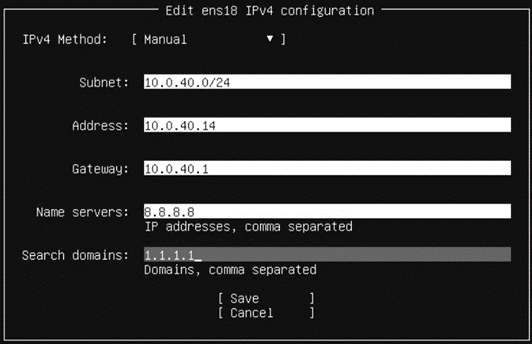
In the IPv4 edit screen,
IPv4 method: Manual.
Subnet: Enter the network subnet here.
Address: The IP address that we will use for the server.
Name Server: If you have internal DNS, you may use the internal DNS IP here, if not you could use a public DNS server.
Search domain: If you have any FQDN for the Ubuntu server, you may type them here and save the configuration.

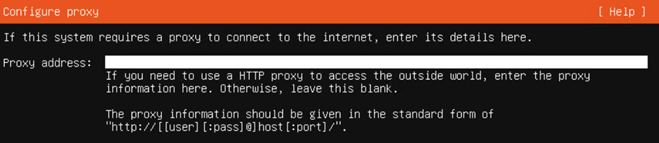
Configure proxy.
If you use a proxy to access the internet, you may enter it here. Leave it blank if you don’t have a proxy.

Configure Ubuntu Archive mirror.
Ubuntu automatically added the Ubuntu archive mirror based on the location I choose. Which is good.
If you want to use a different mirror, you can change that here.


Configure the storage.
In the Proxmox, we defined the 32 GB of storage, and I am going to choose the entire virtual hard disk for this VM, hence I have chosen to Use an entire disk.
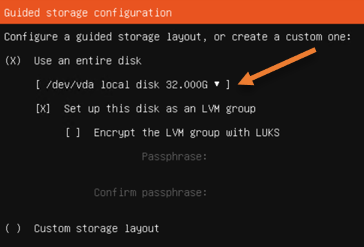
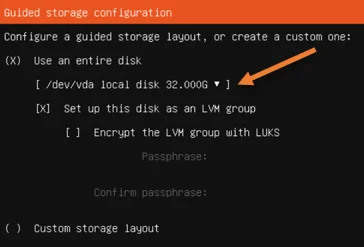
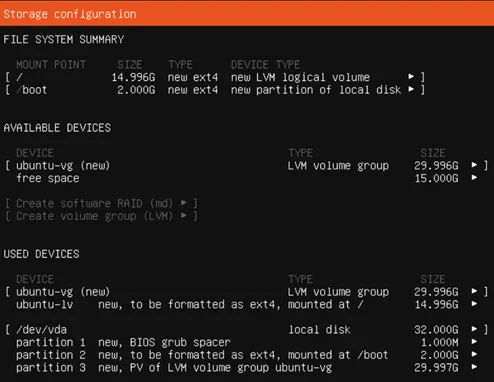
You will get the summary of Storage configuration with each partition, if all looks good you may continue.

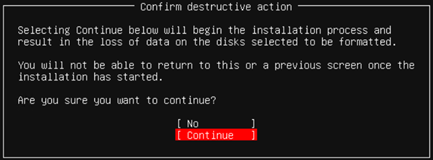
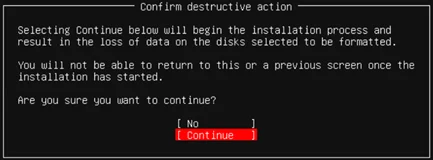
You will get a warning about the virtual hard disk format, click continue on that.
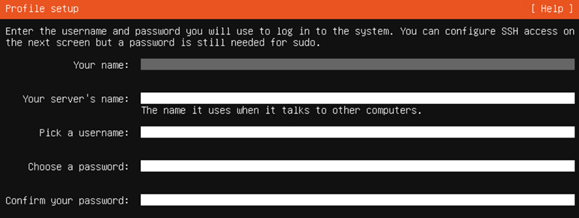
Profile setup.
In the profile setup, you will have to configure the following.
Your name: Enter your name.
Your servers name: This will be the servers name, which is located in the etc/hostname
Pick a username: This will be the username that you should use to log in.
Finally, set the password and done.

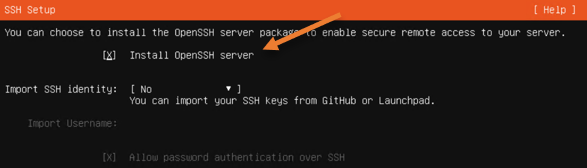
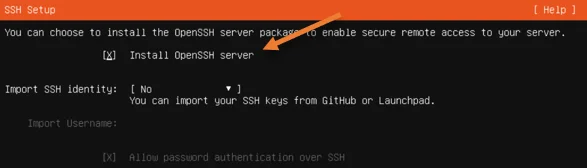
Enable the SSH.
To login to the server from another host using the network, you need to have ssh access enabled.
Use the space bar to select the Install OpenSSH server option and continue.
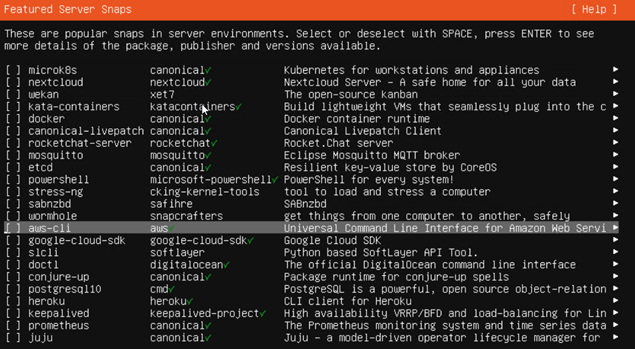
Choose the Server snaps.
By default, the Ubuntu server would provide you with the featured snap that you could add during the Ubuntu OS install.
You may choose the required snap-in, and continue, and you could use the spacebar to make the selection.
For example, you could install aws-cli from the get-go if you plan to use AWS with the Ubuntu server.

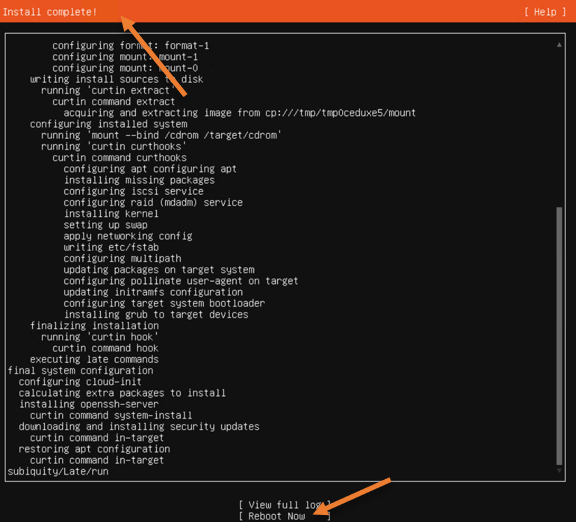
Reboot the Ubuntu server 22.04.
The installation is now complete, since the Ubuntu server had internet access it also updated the Operating system and it is now ready to reboot.
Choose reboot now.
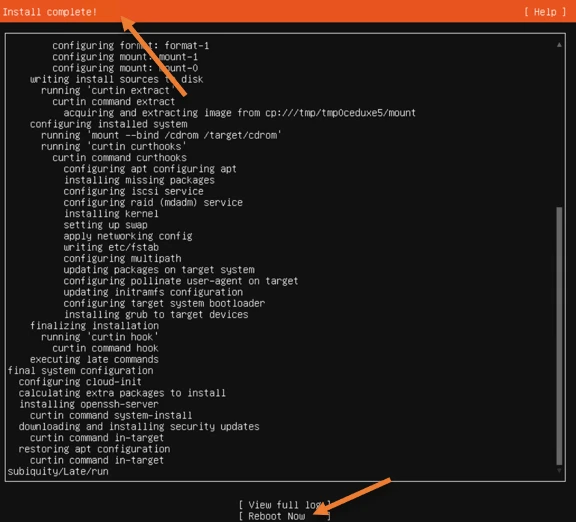
You will get an error message that says failed to unmount CDROM, which should be okay to ignore as the virtual hard disk is the primary boot device.


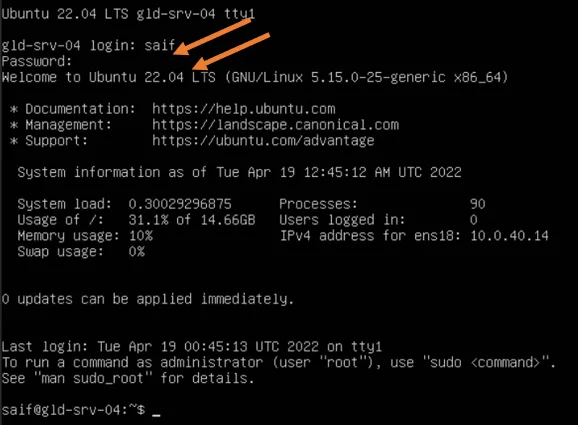
Log in to the Ubuntu server 22.04.
After it is rebooted, you will get the screen asking you to enter the credentials.
Enter the username and password you set up during the ubuntu installation. As you can see, I can get in.

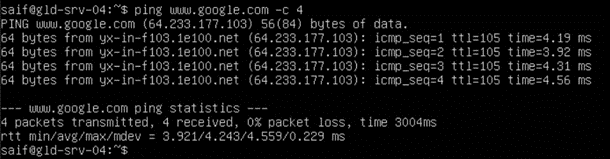
Test the internet access.
You can ping any public IP or Public FQDN to see if you can reach the internet.
As you can see, we can reach the internet just fine.

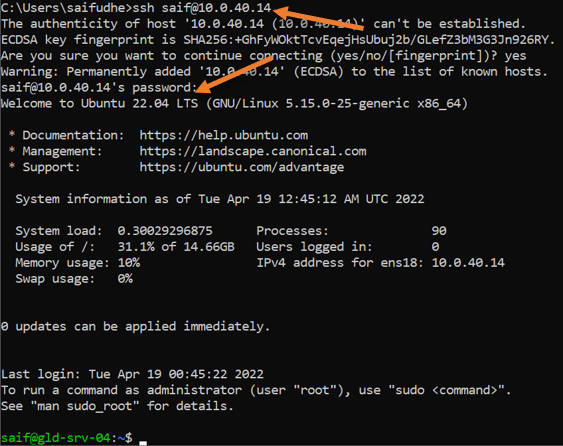
Test the ssh access.
We did configure the SSh access during the installation, from your local machine you may now ssh into the Ubuntu server and you should be able to login.
As you can see, we are able to login now.