
When you install the windows server 2022, the next thing you would want to do is to manage the operating system remotely. For that, we could use something called Remote desktop in Windows.
RDP provides remote desktop access to the windows machine over port 3389. This blog post will configure RDP access on windows server 2022 for both administrators and local users.
After which, we will test the connectivity from different machines.
You need to keep in mind that we will use RDP in the Windows server 2022 to manage other services in the server, and it will not act as an RDP server where multiple users can log in. By default, the windows server would allow only two concurrent RDP sessions to the server.
To allow multiple sessions to RDP, you need to have an RDP license to allow more than two sessions.
After enabling the RDP we will restrict the access to a local user. We will further secure the access on the windows server firewall to allow RDP access to only specific IPs. This will be useful when you expose the Windows Server to the public internet.
Create local users.
The server I have installed is brand new and doesn’t have any other users apart from the Administrator. When you allow RDP access to the users, it is best to create a specific user and allow access to them, even when the user is an admin.
That way, you can track the activities done by the users when they RDP into the machine. If you allow RDP access to the Administrator, there are chances that the administrator account is shared among multiple server admins. And if any of the admins mess up some services, it will be hard to find who did it. So it is best to create a specific account for each individual.
Open Computer management.
Start-> Server manager->Tools->Computer management.
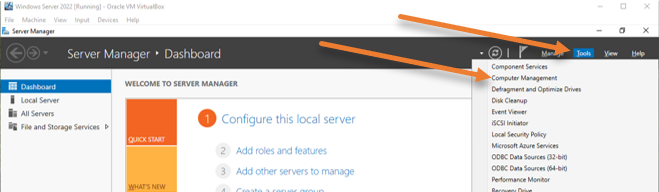

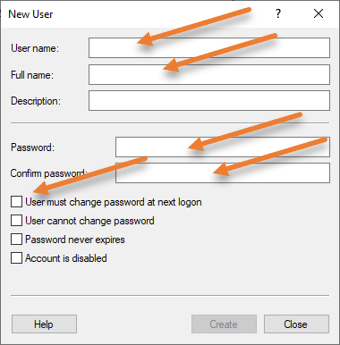
Expand Local Users and Groups-> Users-> Right-click New user..
Fill in the details for the new user and click on Create.
I have unchecked the option that says user must change password at next logon.

Enable RDP access.
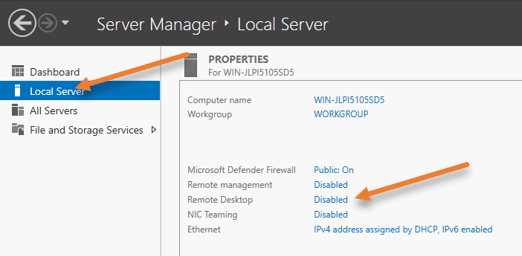
To enable RDP services, go back to the server manager, and click on Local Server on the left side.
You can see that the remote desktop service is disabled, which is the default configuration.
Click on Disabled on the Remote desktop.

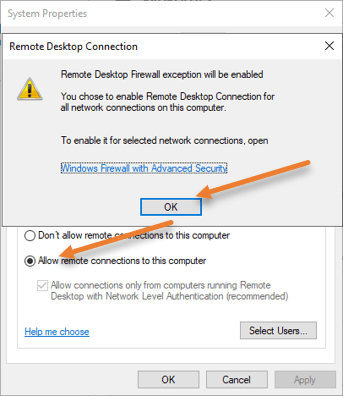
Select the option that says Allow remote connections to this computer. You will get a security warning that says, “Remote desktop firewall exception will be enabled”. This means that after this service is enabled, it will open port 3389 on the windows server firewall side to allow all the users from outside. We will further restrict this later on. For now, click on Ok on the warning.

Restrict to Specific users.
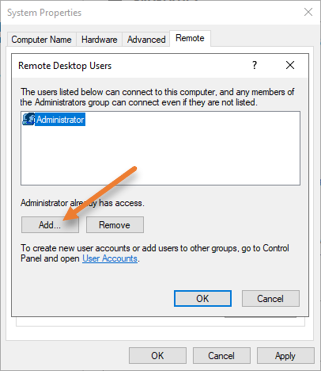
Just below, Allow remote connections to this computer, and click on Select users. Here we can allow the RDP connections to specific users. We will enable RDP access to the newly created User plus the Administrator in our case.
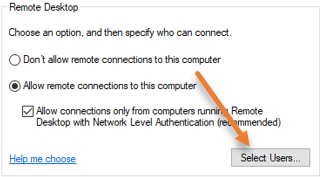

You can see, Administrator user is already there. You can either keep it or remove it, depending on your requirement.
Click on Add.

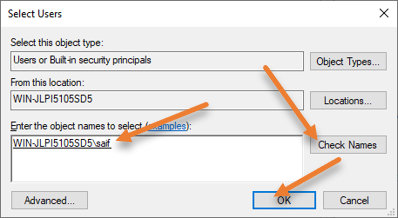
Enter the username in the object name field that we defined and click on Check names.
It will detect the username on this local server, and you can now click on Ok.
Click ok on other windows as well.
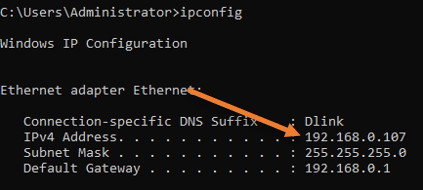
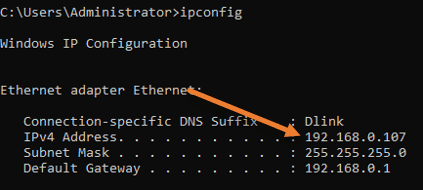
Get the IP address of the server.
We just enabled RDP access to the specific user, and you may now get the machine’s IP address by going into the below.
Start-> Search CMD-> And select command prompt
In the command prompt window, type ipconfig. It will show you the IP address of the Windows server.
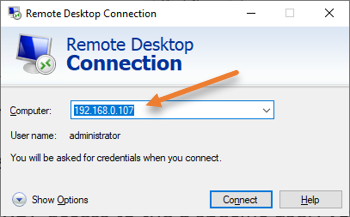
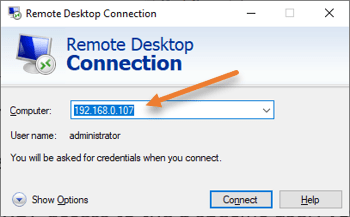
Test the connection.
You can now RDP into the server from a different machine.
From another machine, open up the RDP application.
In the computer field, enter the IP address of the windows server where we enabled the RDP access.
Note: You need to ensure the network reachability between the machines.
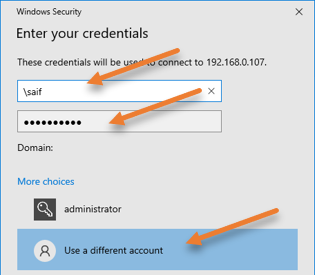
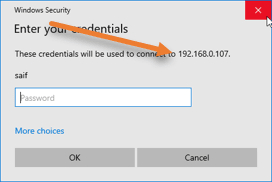
You will be asked to enter the password and click on more choices.
Choose Use a different account.
If you know the domain name, enter it and \username.
If you are not aware of the domain, you may type \username and then the password.
Click on ok.
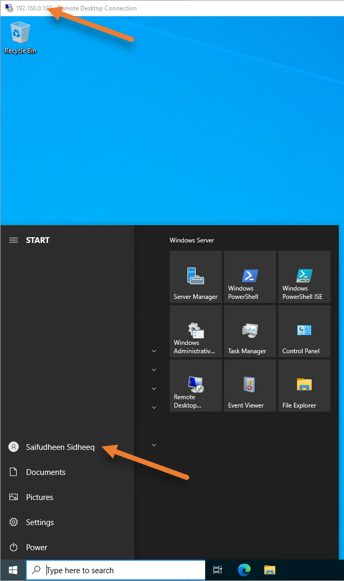
If you get a security warning, say yes.
As you can see, I could get into the RDP just fine.

Restrict RDP access to specific IP.
To tighten the security, it is best to allow RDP access to a specific IP or a subnet to ensure only those who are part of the IP/Subnet should be able to get into the server.
I have two machines, one with the IP address of 192.168.0.123 and the second with 192.168.0.162. We will allow RDP access to only an IP address that ends with 123.
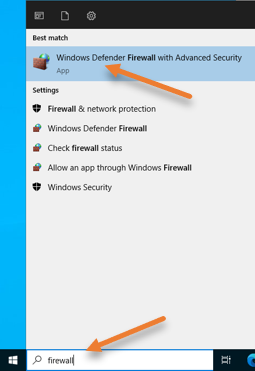
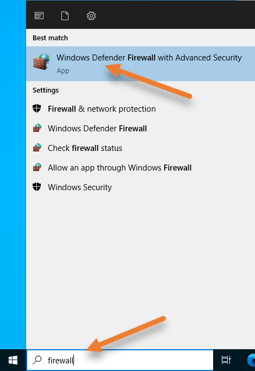
Access Windows advanced firewall.
In Start -> Search for the firewall.
Open ‘Windows Defender Firewall with Advanced security‘.
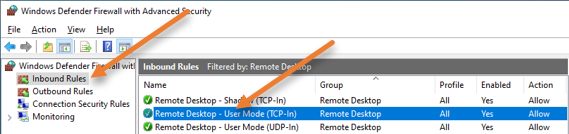
Select inbound rules.
I have filtered the rules with the Remote Desktop. You can see enabled rules with the green tick mark.
The rule that was enabled for RDP access is Remote Desktop – User Mode (TCP-In).
Double click on the rule, or right-click and click on Properties.

In the properties, choose a scope tab.
Under the remote IP address, you may add the source IP address you want to allow for RDP access, 192.168.0.123.
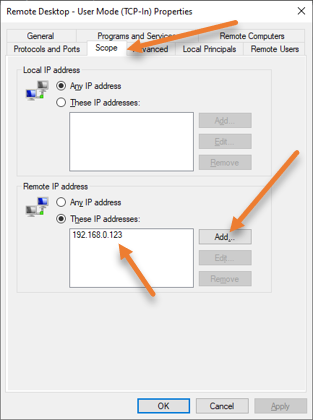

If you want to allow access to the entire network subnet, you can also add a subnet, for example, 192.168.0.0/24, if you wish.
And click on Ok.
You can further fine-tune the rule in such a way that only specific users should be allowed to connect (In the Remote users tab). And if your machine is part of the domain, you can even restrict access to specific computers in the domain by going into the Remote computers tab.
Test the RDP connection again.
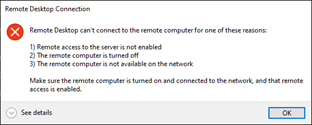
To test the RDP access to the server, From the machine 192.168.0.162 try to do the RDP.
As you can see, I got an error message, and I can’t get into the RDP right now.

However, the machine’s IP address ending with 123 prompted for a password, and I was able to log in.

Check the logs.
I have enabled the logs for this troubleshooting.
From the logs, you can see that the machine with the IP address ending with 162 kept trying, and the server was dropping the traffic as per the firewall policy.
Similarly, the connection from the machine IP address 192.168.0.123 was allowed straight away and we were able to RDP into the machine.

