Port forwarding is a network concept where we allow external users to access some of the network resources located internally. We have covered multiple blogs on how you can configure port forwarding on pfSense and Opnsense firewall.
In this blog, we will look at how to configure port forwarding in VirtualBox using the NAT interface.
What is port forwarding in VirtualBox?
In the Virtualbox NAT interface, the host machine cannot talk to the guest VM’s, and from the local Network, the guest VM is invisible to local network hosts. The only way you can allow the communication to certain services on the Guest VM from the host machine or the local Network is to configure port forwarding on the VirtualBox. While configuring the port forwarding, you need to make sure the host machine is not using the same port that you configured on the Guest VM.
For example, Your host machine is a Linux box, and it is enabled with ssh access on port 22. If you try to enable port forwarding on the guest VM, it will not work because the host machine itself is listening to port 22, and instead of forwarding the request to the guest VM the request would go right to the host machine itself. We will look into that in more details.
Once the port forwarding is configured for specific ports, you use the host IP address to access the guest VM on configured ports. And you should be able to access the guest VM resources.
To access the guest VM from the host, you can use the host IP 192.168.1.14. (My host machine IP)
Let’s look at how you can configure port forward in VirtualBox for ssh, HTTPS and HTTP services, and we will also test to see how it performs.
Can I run web servers on the VirtualBox and access from the internet?
There are multiple options for you to run a VM as a web server in VirtualBox and access it from the internet. You can either use a bridged network which means the VM will be part of the local Network and do a port forwarding on the edge of your local Network or use the NAT network and do a port forwarding for the HTTP or HTTPS traffic, which will be the secure way.
Since the discussion here predominantly based on the NAT mode, you can follow the steps below to allow VirtualBox Web server VM out to the internet.
- First, you configure the port forwarding on the VirtualBox.
- And configure port forwarding on the edge of your local Network, which is primarily a wifi router if you are at home, or if you are an advanced user, then typically a firewall. I have covered how you can configure port forwarding on the pfSense and the Opnsense firewalls in my previous blogs.
Suppose you use a custom port for the http and https service because your local machine is already using the same ports. In that case, you can alter the port forwarding on your wifi router or a firewall that says, anybody, trying to hit my public IP on port 80/443, it should forward to port 8080/8443 (custom ports) on my local Network.
So let’s see, how we can configure port forwarding on VirtualBox, and by the end of the article, you will be pretty familiar with the VirtualBox port forwarding.
Virtualbox port forwarding greyed out.
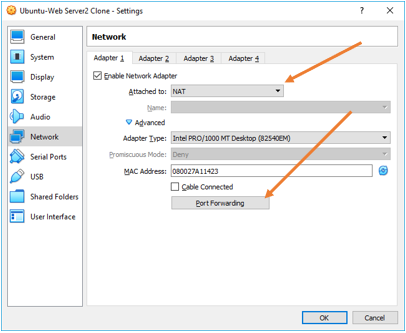
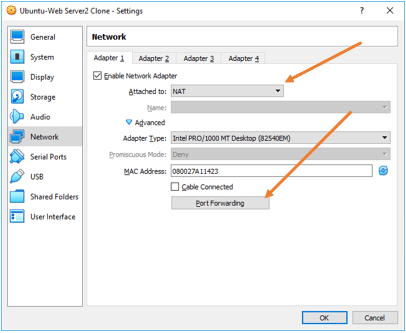
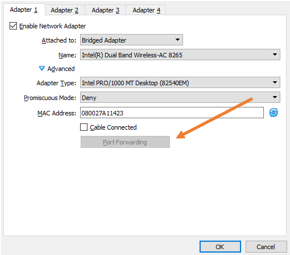
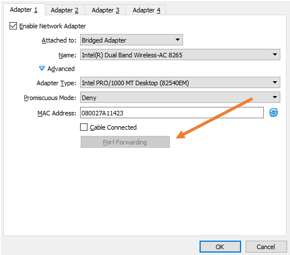
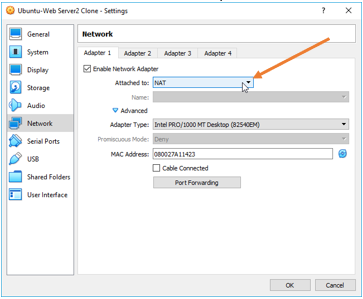
The port forwarding is a feature available only in NAT mode, so you need to connect your VM to that NAT then only you can configure the port forwarding. If you try to connect your VM to other network modes apart from the NAT, the port forwarding option will be greyed out for you. So, make sure you choose NAT mode.
As you can see, in the bridged adapter, the port forwarding option is greyed out.
Configure port forwarding in VirtualBox.
To test the port forwarding, I will use an Ubuntu machine which I am using as a web server for HTTP, HTTPS and ssh enabled, and I am going to connect its interface to the NAT adapters.
- Shut down the VM and Right-click on it, and click on settings.
- In the settings pop up, click on Network.
- Choose the NAT from the drop-down list and click on OK.

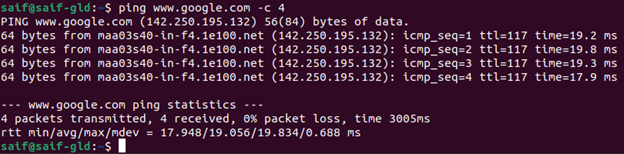
You may now power on the VM and make sure you can access the internet, which means the NAT mode is working fine. In mine, it is working fine.

VirtualBox port forwarding ssh
We are now going to configure port forwarding on the guest VM for the ssh service. The ssh service is critical when you want to manage the VM remotely.
Configure the ssh access on a single Guest VM.
We will first configure the ssh access to a single Guest VM, and later we will look at accessing multiple VM’s using VirtualBox port forwarding.
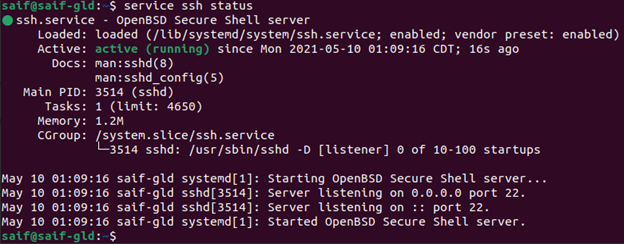
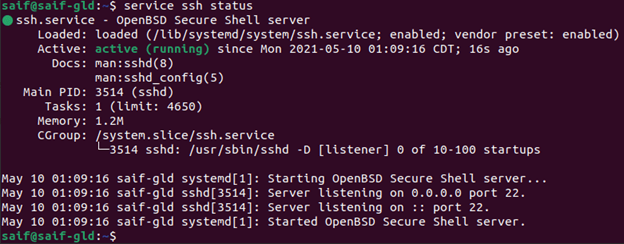
- Validate the SSH service on the guest machine.
In Ubuntu, we can type the command service ssh status or systemctl status ssh to see the status of the ssh service.
- Try to access the guest machine on ssh.
To access the guest VM using the NAT interface, you cannot try with the guest VM actual IP 10.0.2.15. Instead, you should use the host machine IP address.
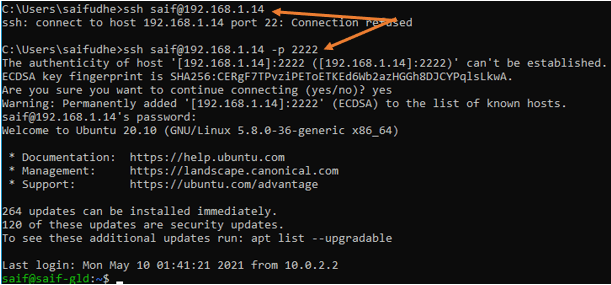
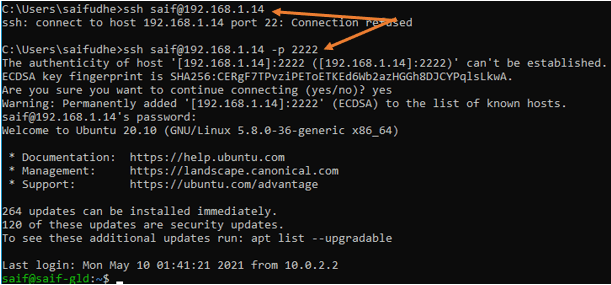
I tried to access the guest from my host machine, and as you can see, the connection is refused.
C:\Users\saifudhe>ssh [email protected]
ssh: connect to host 192.168.1.14 port 22: Connection refused
C:\Users\saifudhe>
Note: You have to remember one crucial thing: I am using a windows machine that has the ssh service is disabled by default. So if you have ssh service enabled with the default port on the localhost you need to make sure that you use a different port number, for example, 2222. We will configure that as well and test the configuration.
- Configure the port forwarding for ssh on port 2222.
Right-click on the Guest VM and click on settings.
In the Settings window, click on Network and expand advanced and click on Port forwarding.

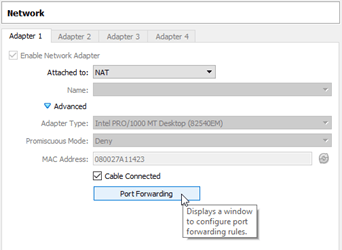
A new port forwarding window will now appear.
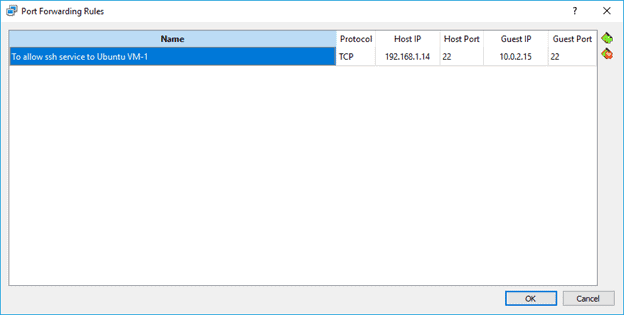
- Click on the plus icon on the right to add a new rule for the ssh service.
- In the name, provide a user-friendly name.
- Leave the protocol as TCP.
- Host IP should be your host machine IP which is 192.168.1.14. Before adding this make sure you check the host IP address on the host.
- Host Port – Since we are trying with the default port leave 22.
- Guest IP – we know the guest IP is 10.0.2.15.
- Guest port – I am again using the default ssh port number.
If you have used different port numbers for the ssh service, you need to make sure you add them instead of the default port number.

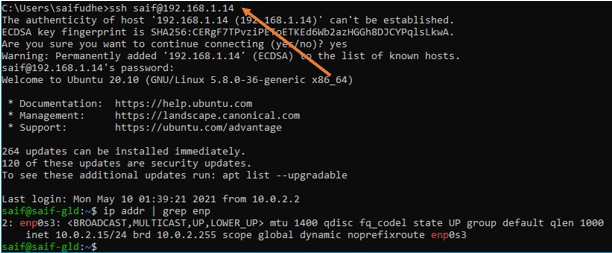
- Access the guest machine on ssh.
You can type ssh [email protected] from the host machine or from the local Network.
As you can see, I can ssh into the guest VM, and you can also see the IP address of the VM down below.

- SSH access with a different port number.
Let’s suppose your host is running the ssh service on the default port 22. If you enable the port forwarding, the host will forward the request to the host itself rather than the guest VM, so you must never use the same port number as the host machine while configuring the port forwarding. So the workaround for this is to change the host port number in the rule to another one.
Let’s configure the port forwarding with a different port number. Go back to the port forward settings on the VirtualBox (Right-click on the VM>Settings>Network>NAT mode>Port forwarding) and in the host port, change the port number to 2222 and click on OK.


SSH the guest VM from the host with a different port number.
When I tried to access the host with the default ssh port, it says the connection refused, so if your host is Linux or windows with ssh enabled, it will let you into the host machine.
To access the guest VM, type ssh username@<host IP> -p 2222
I had to type port number 2222 manually, and I could get into the guest VM.
VirtualBox port forwarding multiple VMS.
We just configured ssh access to a single host in VirtualBox. How about the ssh access to multiple VM’s?
You cannot do that when the guest machine is running with the default ssh port number. To enable Virtualbox forwarding for multiple VM’s each VM should use a different port number for ssh. For example, VM-1 can use 2222, and VM-2 can use 2223 and so on.
And while adding the rule, keep the rule as below.
| Name | Protocol | Host IP | Host Port | Guest IP | Guest Port |
| To allow ssh access to VM-1 | TCP | 192.168.1.14 | 2221 | 10.0.2.15 | 2221 |
| To allow ssh access to VM-2 | TCP | 192.168.1.14 | 2222 | 10.0.2.15 | 2222 |
| To allow ssh access to VM-3 | TCP | 192.168.1.14 | 2223 | 10.0.2.15 | 2223 |
And to ssh into each VM, you need to change the port number on the host.
For example, ssh [email protected] -p 2221 for VM-1.
And ssh [email protected] -p 2222 for VM-2 and so on.
VirtualBox port forwarding 80
Now you have a basic idea of how you can configure port forwarding on VirtualBox, let’s see how to configure port forwarding for port 80 in VirtualBox.
The same VM is acting as a web server and listening to port number 80. But there is a problem with my host machine. It is also listening to port 80, which means I cannot allow port forwarding on the same port number. Even if I do so, the request will not go to the guest VM.
So we can either disable the HTTP service on the windows 10 machine or change the port number to something else.
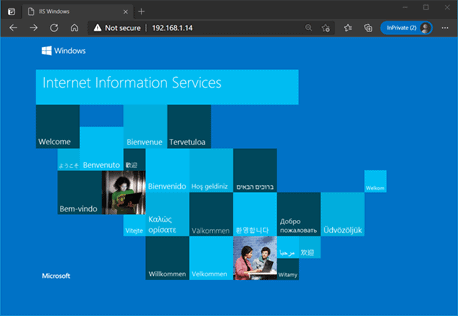
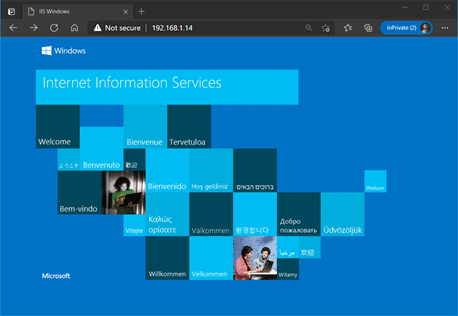
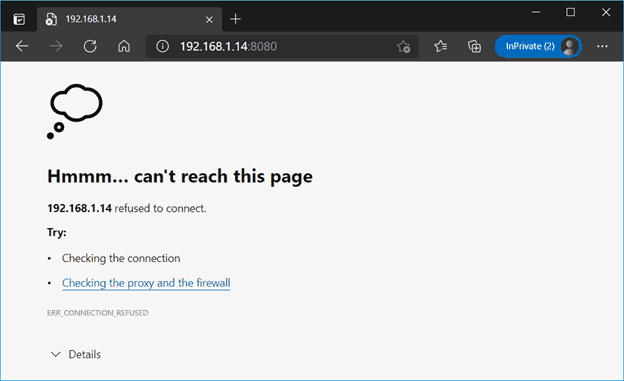
I am going to choose a custom port number 8080 for HTTP access while configuring the port forwarding.
Let’s try to access the HTTP service on port 8080. As you can see, it is not working from my host machine.

Right-click on the VM and click on settings>Network>NAT>Click on Port forwarding.
Add the port forwarding rule as below.
| Name | Protocol | Host IP | Host Port | Guest IP | Guest Port |
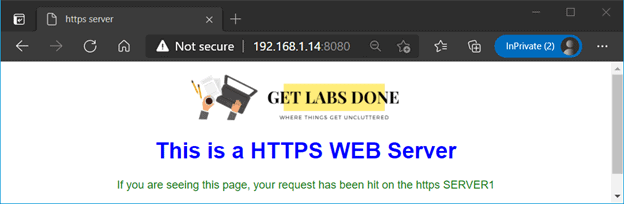
| To allow http access to VM-1 | TCP | 192.168.1.14 | 8080 | 10.0.2.15 | 80 |
After you configured the port forwarding rule for HTTP, you can see that I can access the static web page on my guest VM, which is pretty cool.
Don’t worry about the web page that says it is HTTPS, that is from my html static page you can ignore that 😊
VirtualBox port forwarding 443
Finally, we will look at port forwarding on the HTTPS service on port 443.
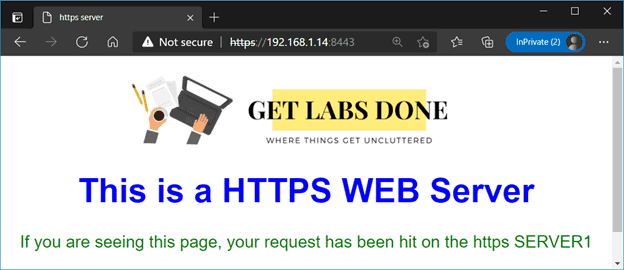
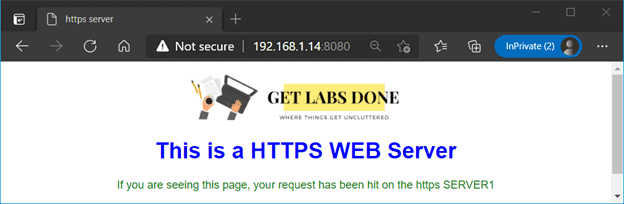
Since my host is listening to port number 443, I will use the custom port 8443 again for this purpose.
Configure the port forwarding rule as below.
| Name | Protocol | Host IP | Host Port | Guest IP | Guest Port |
| To allow ssh access to VM-1 | TCP | 192.168.1.14 | 8443 | 10.0.2.15 | 443 |
Test the configuration.
After I configured the HTTPS access via port 8443, I can now access the web services that are running on port HTTPS from my local machine.