
OPNsense is one of the popular open-source firewalls out there. If you want to use them in a small office or at home, it will be the best choice for your network edge, instead of a regular inexpensive wifi router. This firewall is similar to the pfsense but not so popular as the pfsense. Still, it is getting popular among network security enthusiasts who want to play around with the firewall.
Can I install the OPNsense firewall in GNS3?
Sometimes, when you try to install the OPNsense firewall in gns3, it may fail for some reason, and you might think that installing OPNsense on the GNS3 is not possible. The OPNsense firewall is compatible with the GNS3, and You will be able to install the OPNsense on gns3 if you have got the right image. And in this blog, we will install the OPNsense firewall in gns3, perform a basic lab where we connect the end-user machine on the LAN side, and ensure it can reach the internet.
Before you begin, you need to have;
Opnsnese firewall – click here to Download it.
While downloading, you need to ensure that you choose,
System Architecture – amd64
Boot- nano
Choose the mirror nearest to you.
Gns3 up and running – You can use gns3 with a remote server or with a VMware workstation. In this blog, we are going to use the remote server setup. If you want to learn more about how I have set up my gns3, you may check out the article for the same.
If you are using GNS3 with the VMware workstation, you may use OPNsense on the Vmware workstation or virtual box and attach it to the GNS3.
How to Install OPNsense on VMware Workstation?
How To Install OPNsense On Virtualbox?
I like the remote server installation because you can run multiple instances of the VM with a single OPNsense image.
Steps to install OPNsense firewall in gns3.
Add OPNsense firewall to the gns3.
We have downloaded the OPNsense firewall from the internet. Let’s go ahead and add it to the gns3.
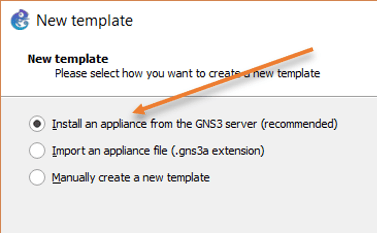
Click on security devices, and click on a new template.
In the new template wizard, choose to install an appliance from the GNS3 server and click Next.

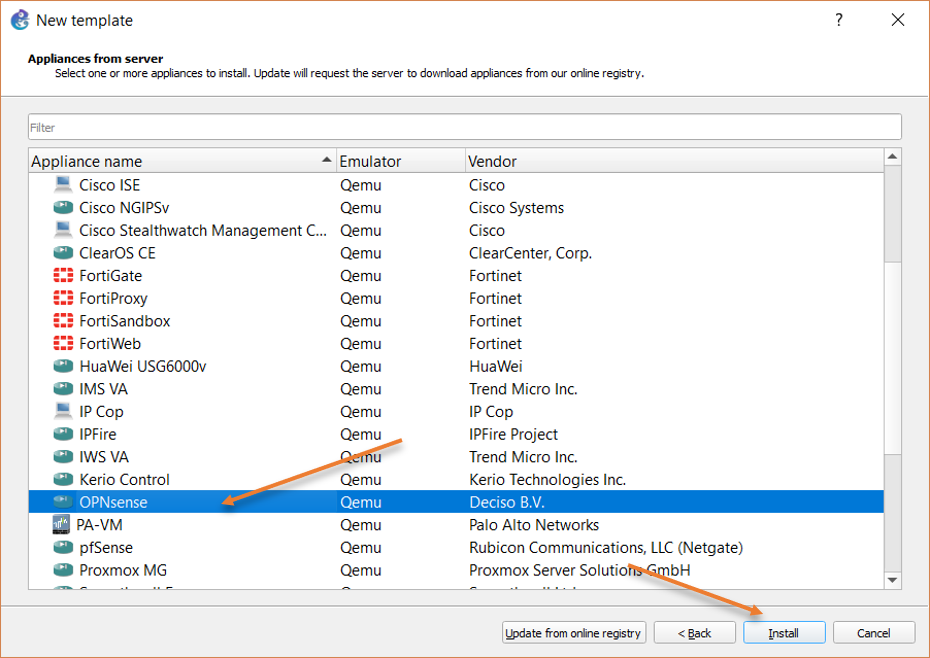
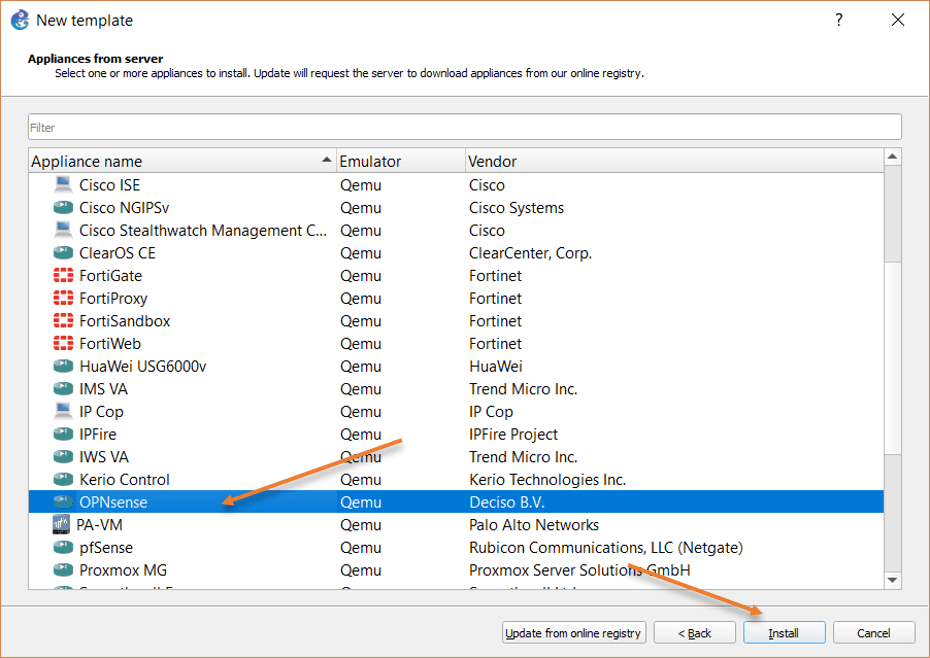
Choose the appliance.
You will be taken to the appliance list supported by the GNS3 software, expand the firewall field, choose OPNsense from the list, and click on Next.
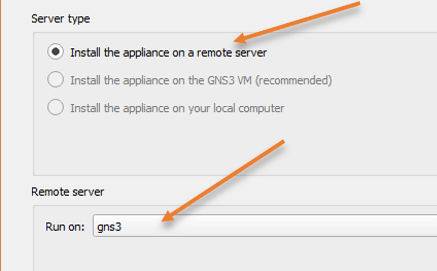
You will be asked about the server type, here you need to choose to install the appliance on a remote server. In case if you are not using a remote server, and you are using GNS3 VM on Vmware workstation, you have to make the choice Install the appliance on the GNS3 VM, and you don’t have to worry about the install the appliance on your local computer, which is not possible at this time.
Since I have chosen the install the appliance on a remote server, I will have to choose the name of the GNS3 remote server and click on next.

Choose the default Qemu binary and click on next.
Chose the correct version.
At the time of this writing, the latest OPNsense version I downloaded is 22.1. However, I don’t see that in the list. That doesn’t mean you cannot install the newest version. You just need to make some changes here.
Select any version in the list, and click on Create new version at the bottom.
You will get a pop-up. In the pop-up, choose the version name as 22.1 and click on Ok.


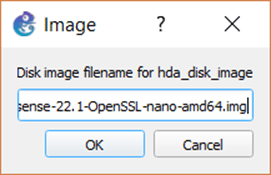
You will get a prompt to choose the name of the Disk image.
Copy and paste the extracted OPNsense disk file name from your machine to the pop-up and click on Ok.

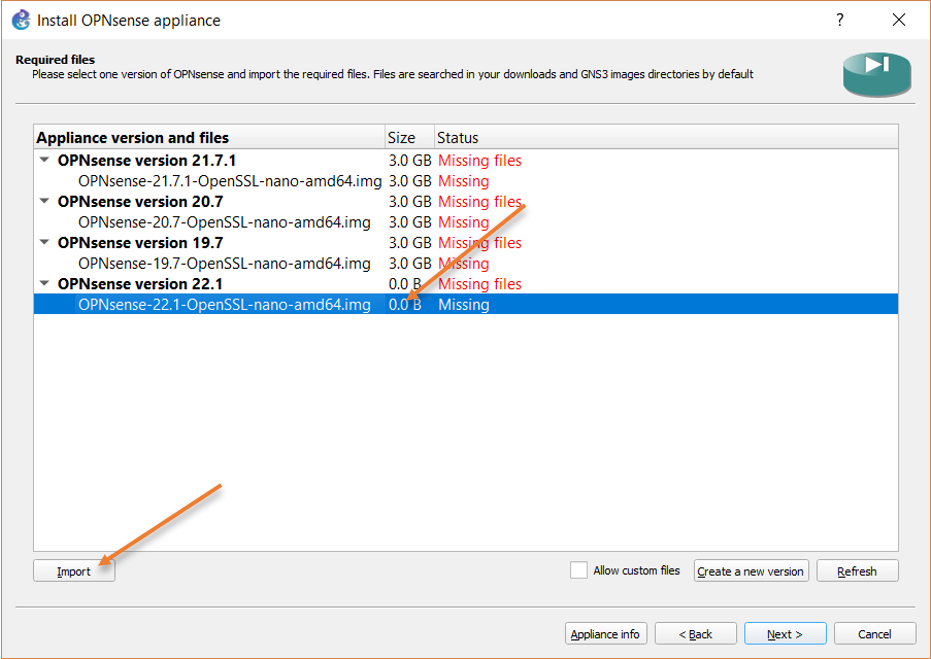
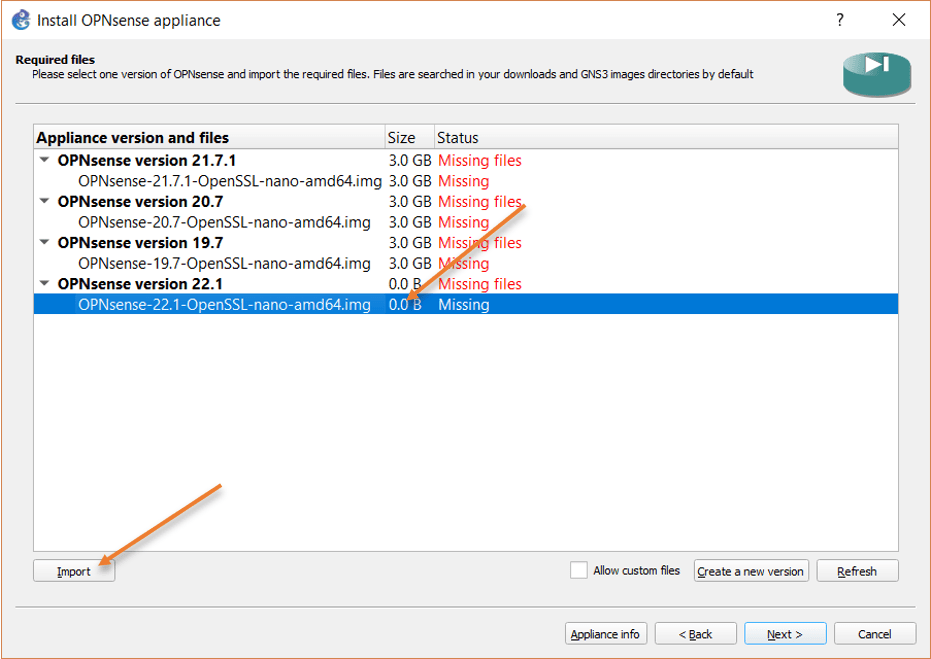
It will take some time for the gns3 to upload the file to the remote server, so you need to have little patience. Once it’s complete, you will see it ready to install.
Select the version you just added, click on import, and choose the image file you downloaded earlier.
Note: This import will take some time to finish.
Once the import is complete, you will be seeing Ready to install, select the version you just added and click on Next.
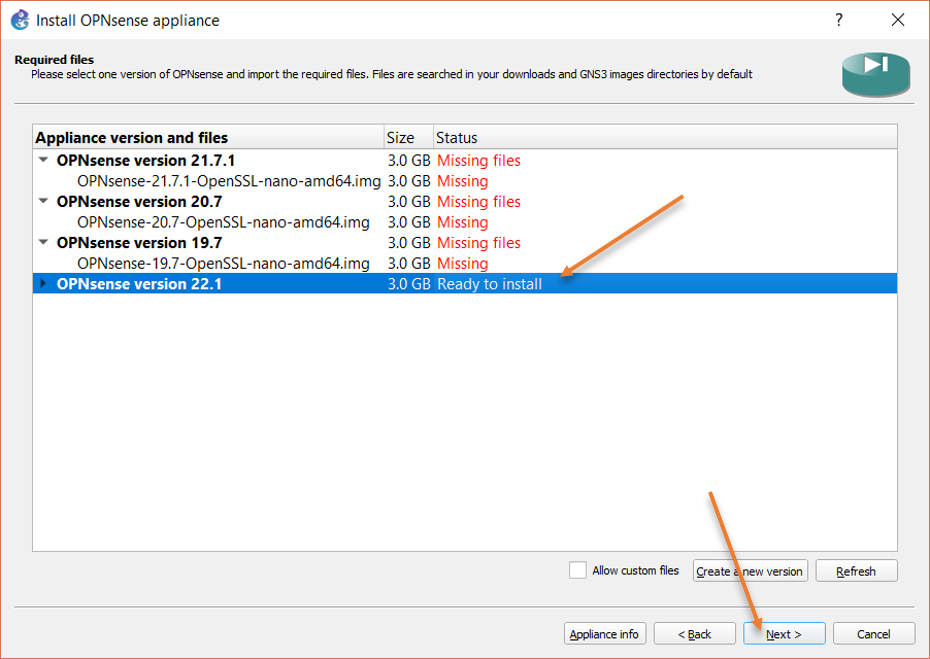
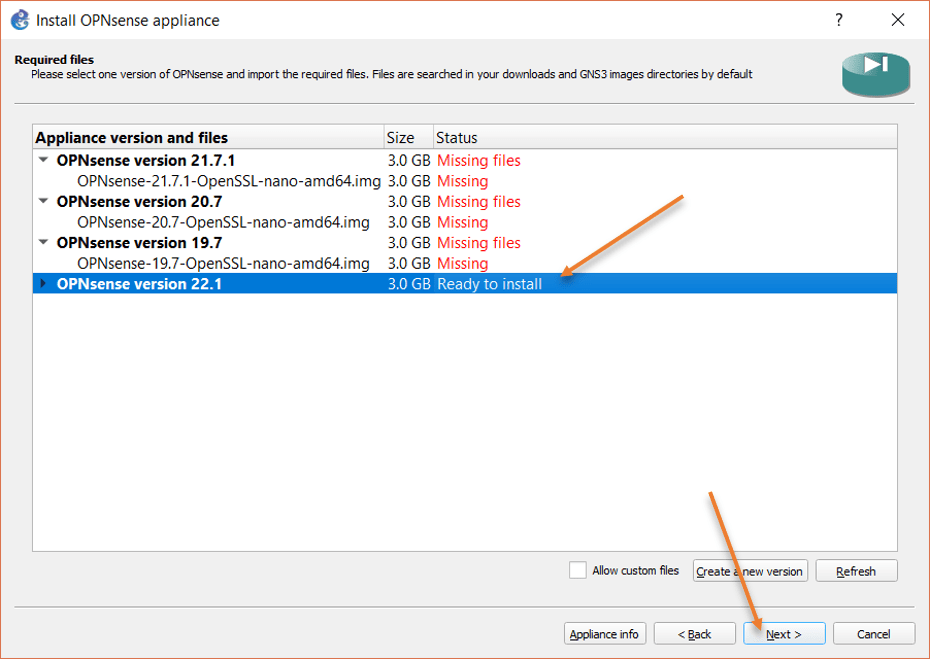
When you get a prompt, would like to install OPNsense version 22.1, you may click on Yes.
Connect the OPNsense to the topology.
We have completed the installation of the OPNsense firewall in gns3. Now it is time for us to test the connectivity by adding the firewall to the topology and building a basic lab.
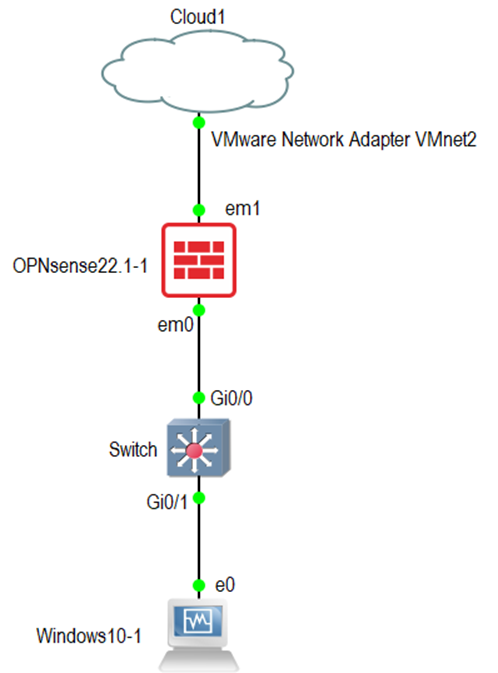
Add an OPNsense firewall, cloud, switch, and an end host to the topology.
In OPNsense, the first interface is the LAN and the second interface is the WAN that connects to the ISP.
Connect the OPNsense firewall first interface (em0) to the switch and the second interface (em1) to the Cloud virtual interface.
We are using the cloud for internet connectivity. Click here to learn more about how you can configure the cloud for internet access in gns3.
Connect the end-user machine to the switch. If you don’t have a switch you could connect the end-user machine directly to the LAN interface of the firewall.
After everything connects, your topology will look like below.

Configure the OPNsense firewall.
When I say configure the firewall, you don’t really need to do anything out of the box. As I mentioned above, if you have connected the network, the OPNsense firewall will have LAN and WAN configured with IP addresses. It will also have NAT and DHCP service enabled for the LAN, so the end hosts will get the IP address from the OPNsense firewall, and it will be able to talk to the internet.
Right-click on the firewall and click on Start.
Double click on the OPNsense firewall to get into the console. After a few seconds, you will be prompted with the credentials. Enter the credentials as below.
Username : root
Passowrd: opnsense

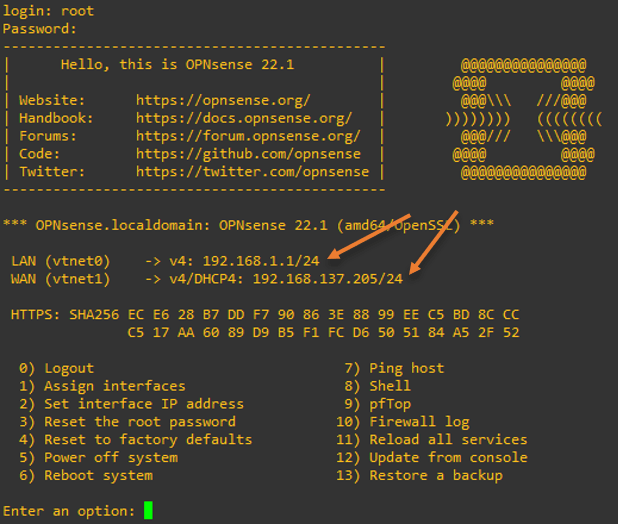
Right after I logged in, you can see the LAN side is configured with the IP 192.168.1.1/24, and the WAN interface has the IP address from the DHCP address on the cloud.
If you try to ping any of the public fqdn or IP , you can talk to the internet. I tried to ping google fqdn, and I am getting the response as you can see.
Enter an option: 7


Enter a host name or IP address: www.google.com
PING www.google.com (142.250.182.68): 56 data bytes
64 bytes from 142.250.182.68: icmp_seq=0 ttl=115 time=37.431 ms
64 bytes from 142.250.182.68: icmp_seq=1 ttl=115 time=149.563 ms
64 bytes from 142.250.182.68: icmp_seq=2 ttl=115 time=60.944 ms
--- www.google.com ping statistics ---
3 packets transmitted, 3 packets received, 0.0% packet loss
round-trip min/avg/max/stddev = 37.431/82.646/149.563/48.281 ms


Press ENTER to continue.
Check the connectivity from the end hosts.
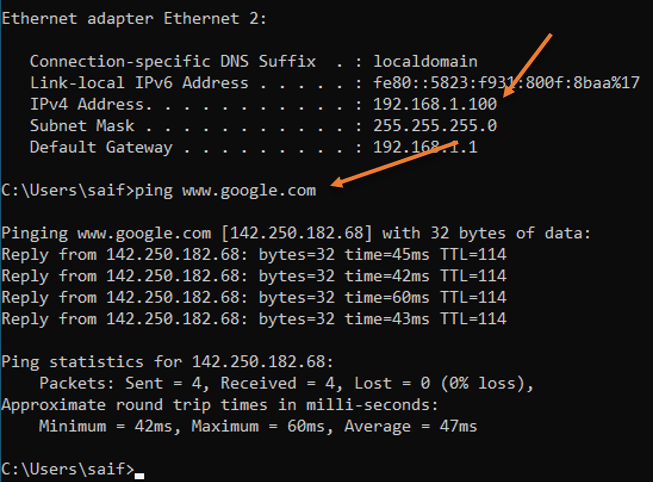
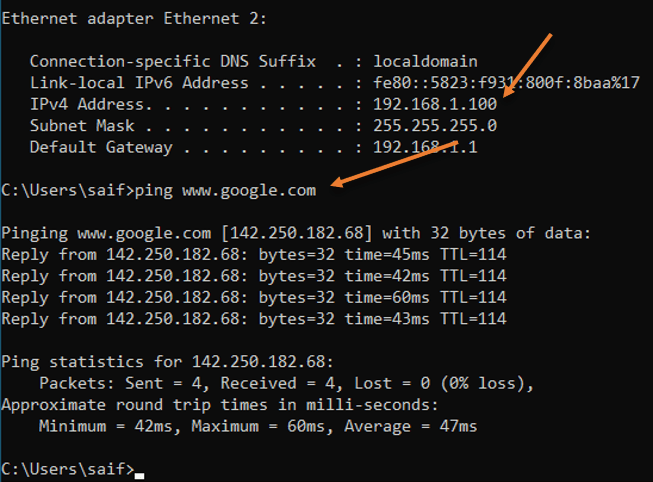
You may power on the switch and the end hosts connected to the switch, I am using a windows machine as the end-user machine in this lab. Let’s get into the cmd and check the IP address on the windows machine.
As you can see, I got an IP address from the OPNsense local area network, and I can also talk to the internet just fine.
Finish the initial setup wizard.
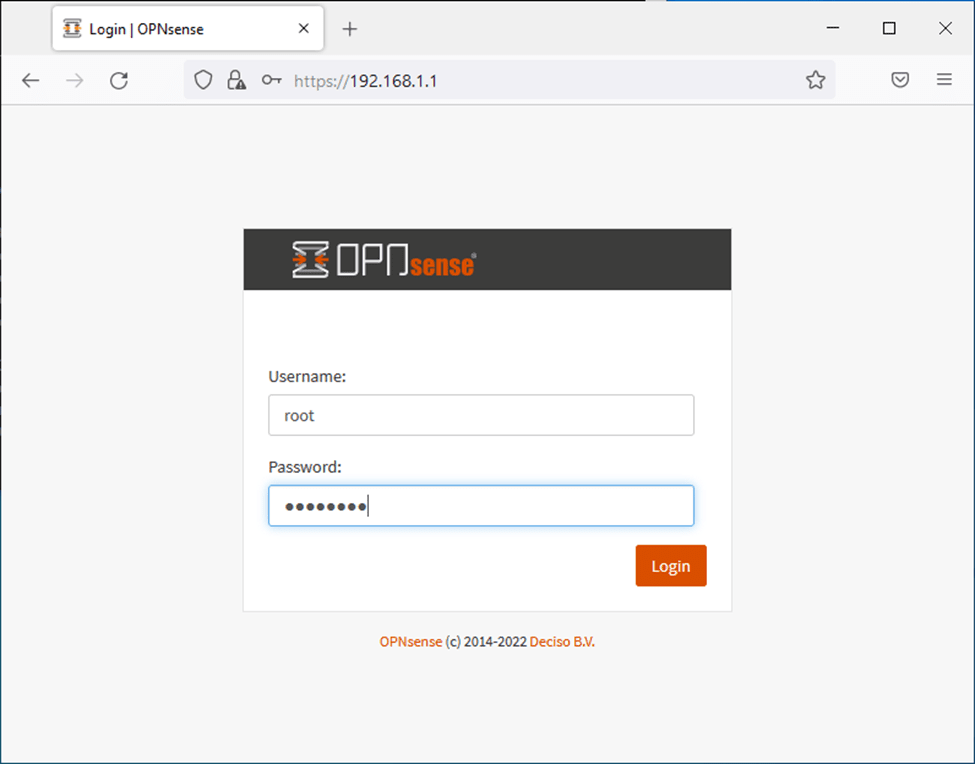
You may open a browser on the Windows host and access the OPNsense GUI via typing https://192.168.1.1
You may ignore the security warning.
Ans you will be welcomed with the login screen of OPNsense firewall.
Enter the same username and password and click on login.

You will get the initial setup wizard screen, and let’s go ahead and complete it.
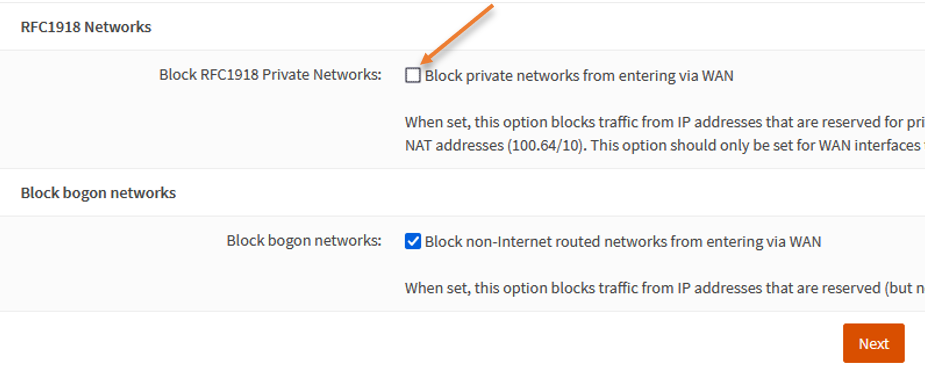
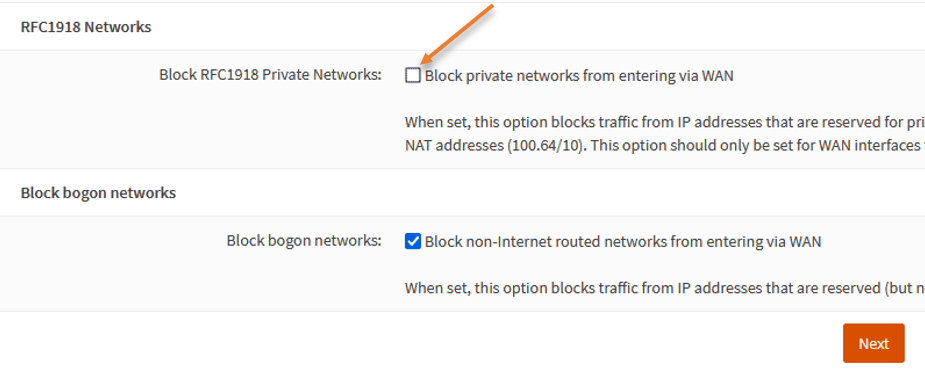
In the Configure WAN interface, you need to ensure to uncheck Block private network from entering via WAN because we are anyways using the private IP. If you leave this as blocked, you won’t be able to communicate in/out of the WAN interface.
After that click on next.
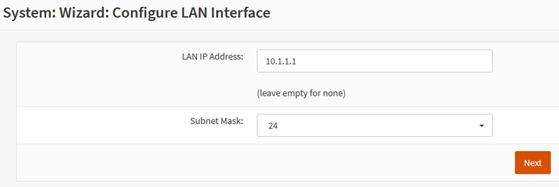
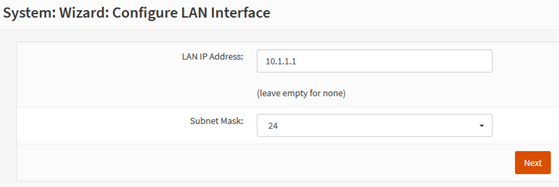
In case you would like to change the IP address in the OPNsense firewall, you can do that on the configure LAN interface step.
I am going to change from default 192.168.1.0/24 to 10.1.1.0/24
Change the password if needed, wanted to leave the default password, you may click on Next.
Finally, reload the configuration.
Configure the end hosts for new IP configuration.
Since you have changed the IP address, you won’t see the Reload option is complete because your host is still on the old subnet trying to talk to the old IP.
After a few seconds, you may go to windows cmd and enter the below two commands to get the new IP address from OPNsense.
Ipconfig/ release
Ipconfig/ renew
As you can see, without me doing anything, the DHCP service already pointed to the new IP, and I got the IP address 10.1.1.10 from the new subnet, pretty cool right.

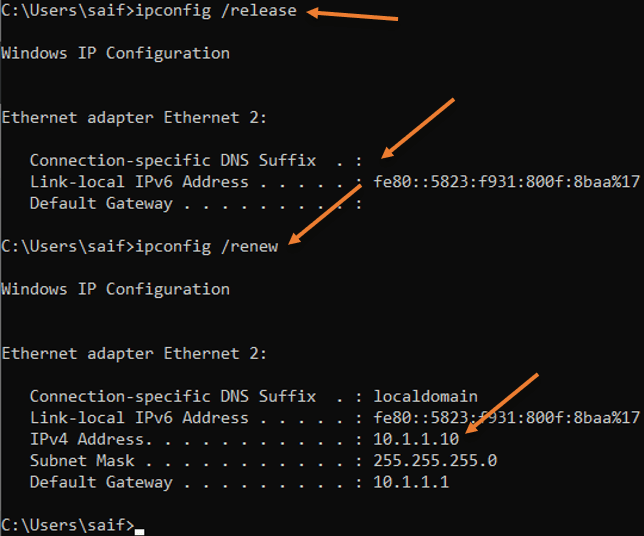
Sure enough, I can still access the internet just fine.
Windows IP Configuration


Ethernet adapter Ethernet 2:

   Connection-specific DNS Suffix  . : localdomain
   Link-local IPv6 Address . . . . . : fe80::5823:f931:800f:8baa%17
   IPv4 Address. . . . . . . . . . . : 10.1.1.10
   Subnet Mask . . . . . . . . . . . : 255.255.255.0
   Default Gateway . . . . . . . . . : 10.1.1.1

C:\Users\saif>ping www.google.com

Pinging www.google.com [142.250.182.68] with 32 bytes of data:
Reply from 142.250.182.68: bytes=32 time=44ms TTL=114
Reply from 142.250.182.68: bytes=32 time=131ms TTL=114
Reply from 142.250.182.68: bytes=32 time=507ms TTL=114
Reply from 142.250.182.68: bytes=32 time=143ms TTL=114

Ping statistics for 142.250.182.68:
    Packets: Sent = 4, Received = 4, Lost = 0 (0% loss),
Approximate round trip times in milli-seconds:
    Minimum = 44ms, Maximum = 507ms, Average = 206ms

C:\Users\saif>