If you think about an open-source firewall, the first two names that come to your mind would be Opnsense and PfSense firewalls. I have installed pfSense on my old machine, and I am still using it. It works great. When I first heard about the Opnsense firewall, I thought, let me spin them up in my old machine, replacing the pfSense firewall. However, since I did not find any issues using PfSense, I decided to spin up the Opnsense firewall on a VirtualBox hypervisor environment. It is the best way to test things out.
I was looking to see the major difference between the two and decide which one I can use as my permanent home firewall.
Does VirtualBox support OPNsense?
Like Pfsense, the OPNsense is also based on FreeBSD operating system. Since VirtualBox is a hypervisor and supports many operating systems, including FreeBSD, you can very well install the OPNsense on a Virtualbox. If your machine has enough resources such as memory and CPU, you can spin up multiple VM’s and configure them as a client machine connected to the LAN side of the firewall. And we are going to do just that in this lab.
Which one is better Opnsense or PfSense?
Many users argue PfSense is much better than Opnsense and the same way some people support the other way round, and it is a difficult choice to make one over the other.
Based on multiple tests I did, I found most of the features that I use with PfSense are available and identical with Opnsense as well; however, the Opnsense doesn’t have pfblocker NG package available.
Many people say the Opnsense GUI is cleaner and user-friendly than PfSense, but I found the pfSense GUI is more user-friendly. Maybe because I use them regularly, and it might take some time to get used to the new GUI. And performance-wise, both support the same hardware and provide the same network performance.
In this blog, we are going to install Opnsense on an oracle VirtualBox. There are many other hypervisors such as KVM, VMware workstation you could use to install the Opnsense in it. Since VirtualBox is free and available across the operating systems (windows mac and Linux), this article would help you install the Opnsense on your machine regardless of the operating system you have.
You may check out the article PfSense on a VirtualBox if you wanted to install the pfSense on a VirtualBox. Maybe you can install both and start building a lab with two.
Objective.
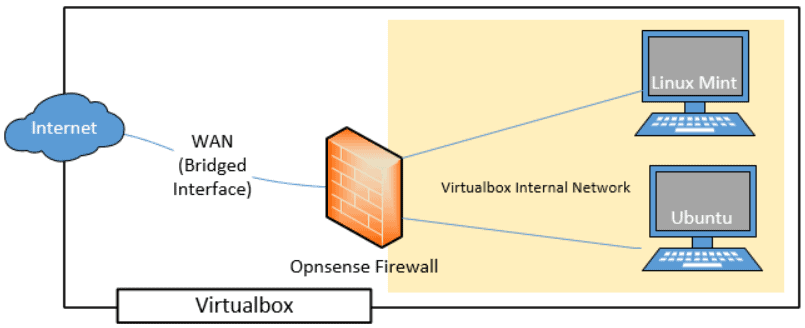
In this blog, we would install an Opnsense firewall on the Virtualbox hypervisor. The WAN side should provide internet access, and the LAN side is on an internal network, which is completely isolated from the host network. We would also add two virtual machines to the same internal network, and those machines should be able to go out of the network or to the internet is through the Opnsene firewall.
Prerequisite.
- Install the latest VirtualBox software on your machine.
- Download the Opnsense software here.
While downloading the ISO image, make sure you select architecture as AMD64 and DVD as the image type.
Steps to install Opnsense firewall on oracle virtualbox.
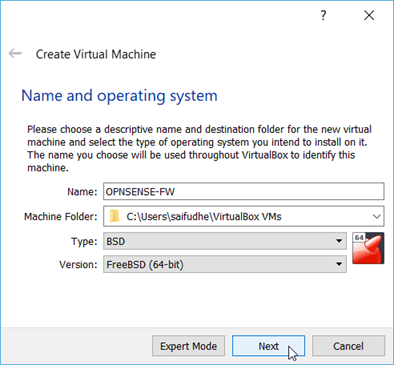
1. Create OPNsense VM instance.
- Open the VirtualBox software on your machine and click on the New icon to create a VM instance.
You can either choose an expert mode or a Guided mode. For simplicity, let’s choose the guided mode. - Name the VM.
- Choose the location where you wanted to store the Opnsense VM virtual hard disk and files.
- Choose the Type as BSD and version as FreeBSD 64bit and click on Next.

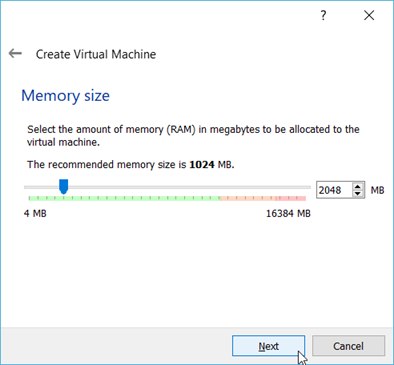
2. Configure the memory.
We are now going to configure the RAM for the Opnsense firewall VM. Since I have plenty of RAM available on my machine, I choose 2048. However, the Opnsense VM would work just fine with the 1GB of RAM as well, so if you don’t have much memory on your local machine, it is recommended to use 1GB of RAM.
Once configured you may click on Next.

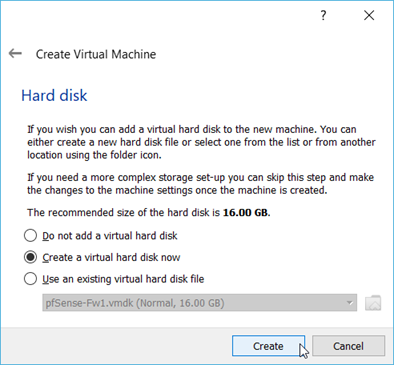
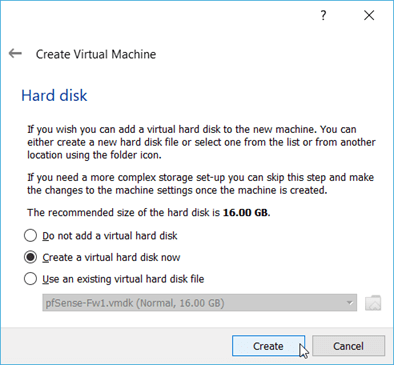
3. Configure the Virtual Hard Disk.
We will create the virtual hard disk for the VM, and you may click on Create a virtual hard disk now and click on Create.
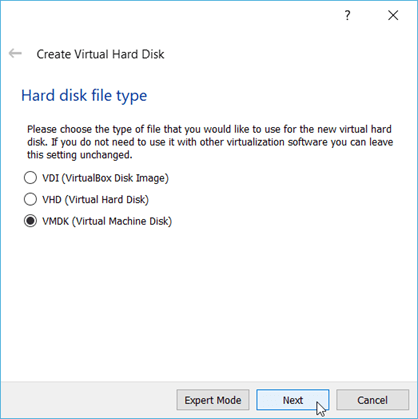
You will have to choose the hard disk file type. By default, Virtualbox would choose VDI as the image, but I recommend you choose VMDK if you are planning to move this VM to other hypervisors. You can still choose the hard disk as VDI if you plan to use the Opnsense VM only on the VirtualBox.
After selecting the hard disk file type, you may click on Next.

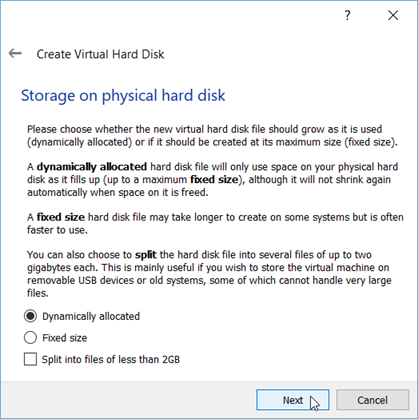
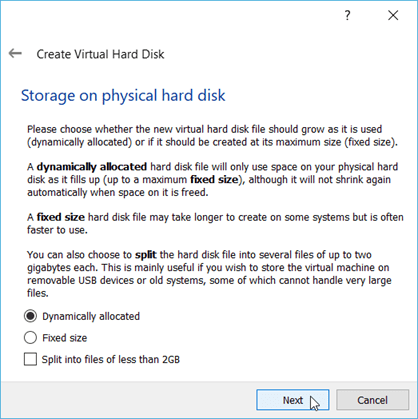
In the storage of physical hard disk, you can choose dynamically allocated and click on next.
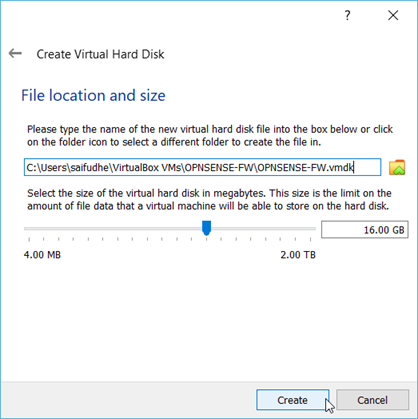
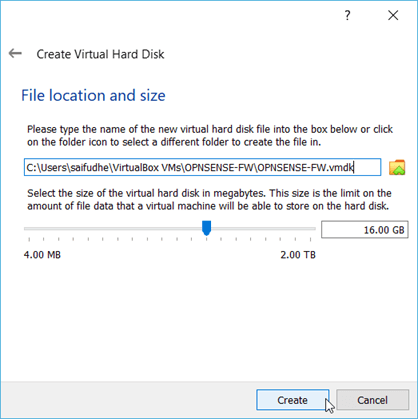
And finally, we are going to specify the location and the size of the virtual hard disk. The location for the VM disk was already selected, so I choose the same location, and you may increase or decrease the hard disk size.By default, it is 16GB, so I decided to keep the same size.
After you choose the location and the hard disk size, you may click on create this would create a virtual hard disk on the machine.
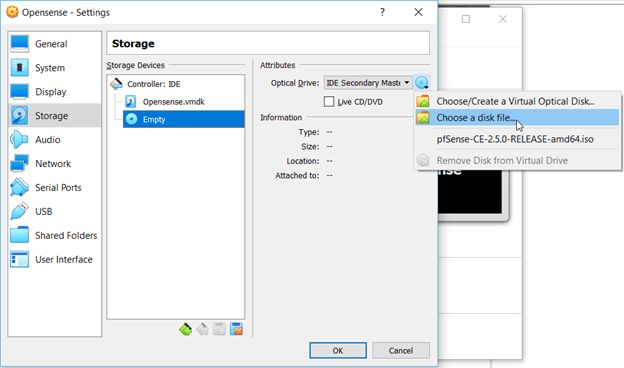
4. Attach the OPNsense ISO image to virtualbox.
We have now created the Opnsense VM instance. Let’s go ahead and attach the ISO image to the VM instance to boot from.
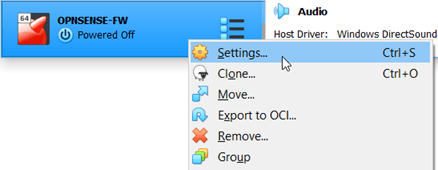
Right click on the VM instance and click on settings.

Click on Storage and click on the Empty drive, and under attribute Optical drive, click on the choose a disk file and attach the Opnsense image that we have downloaded earlier.

5. Connect the network interfaces to the Opnsense firewall.
After you selected the virtual CD drive to boot, you may now click on the network.
It will show you the network configuration of the VM instance.
The Opnsense VM has two interfaces, just like Pfsense, and the first interface represents the LAN interface, and the second interface is the WAN interface. (In Pfsense, it is the opposite.)
Connect the WAN interface.
So on network adapter 2, check the options that say Enable Network adapter.
And Choose the bridged adapter. By default, the VirtualBox would pick up an internet-facing interface on the host. Since I am connected to the wired LAN, it is selected. This will make sure I get internet access on the Opnsense WAN interface.
Note: For internet access, you can try connecting to the NAT interface as well. Because that would add another NAT-ing overhead on the VirtualBox, it is better to choose the bridged adapter for better performance.
The bridge interface will make Opnsense firewall another host on the local network. And anyone on the local network should be able to reach the Opnsense via the bridge interface.
You can learn more about the VirtualBox network settings here.

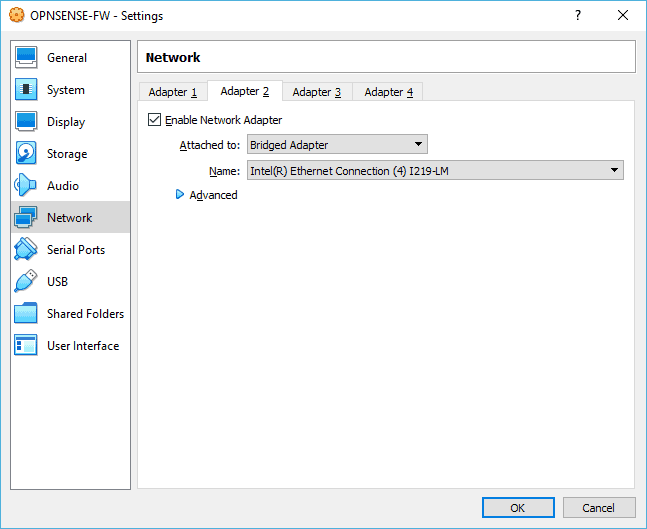
We have now attached the WAN interface to the firewall, you can now click on the network adapter 1.
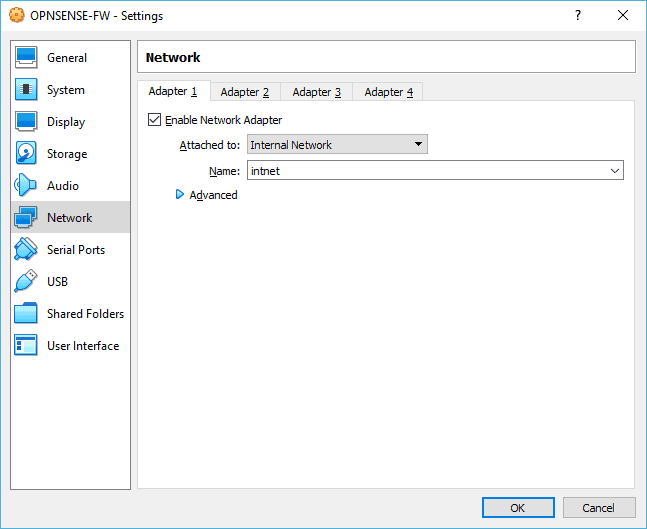
Connect the LAN interface.
The LAN side is the internal network that only my Virtualbox VM’s should be able to reach. Hence I choose the internal network. This will keep the Opnsense LAN side in the internal network and isolated from the host machine.

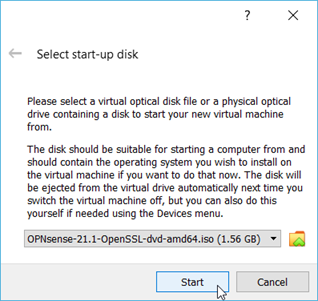
6. Start the Opnsense VM.
You can select the VM and click on start. You will get a pop-up to select the start-up disk, choose OPNsense from the list and click on Start.

After few seconds, you should be able to see the Opnsense login screen. You can notice I have a LAN and the WAN interface on the firewall if you look closely. The LAN interface got the default IP address 192.168.1.1, and the WAN side got the IP address from my wifi router because I am using a bridged network.
However, there is a problem, the screen that you see right now is a live cd environment, and whatever you do here will be deleted when you restart the VM. We have not installed the Opnsense firewall software yet on this virtual machine completely. Let’s go ahead and install them now.
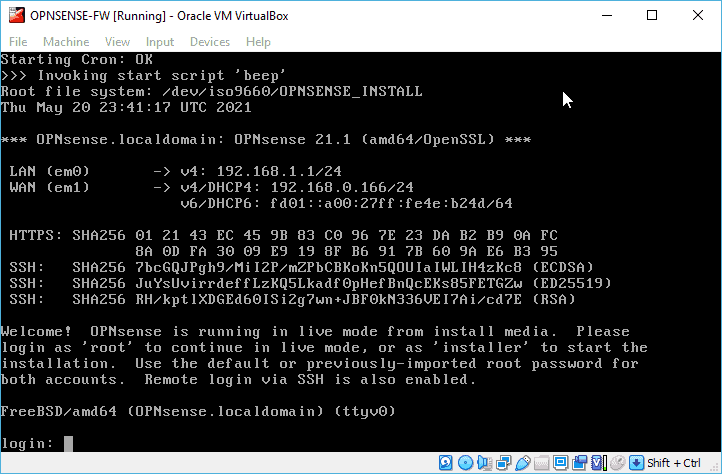

There are two login credentials out of the box on Opnsense, the first one is the root credentials, and the second one is the installer.
To install the software you need to login with the installer credentials.
Enter the username as installer and the password as opnsense and hit enter.
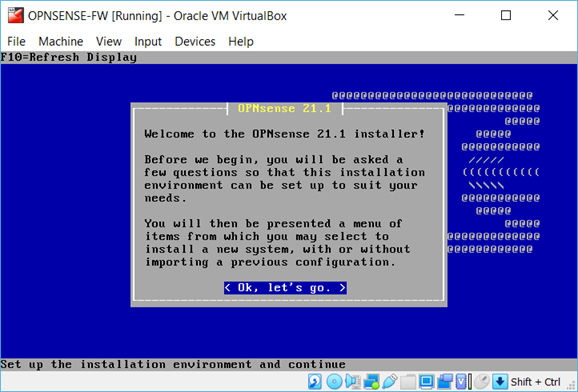
7. Install the Opnsense VM on VirtualBox.
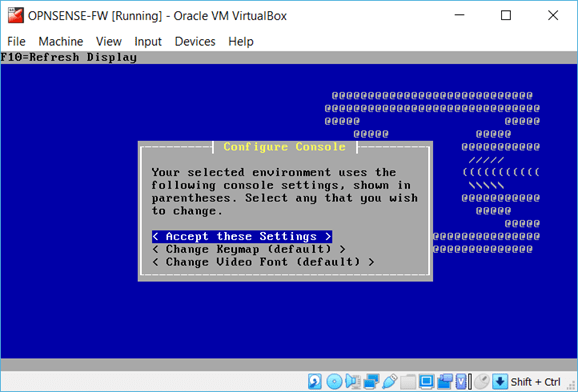
The Opnsense installation will now begin, you may click on Ok, let’s go
Accept these settings.

Choose Guided installations.


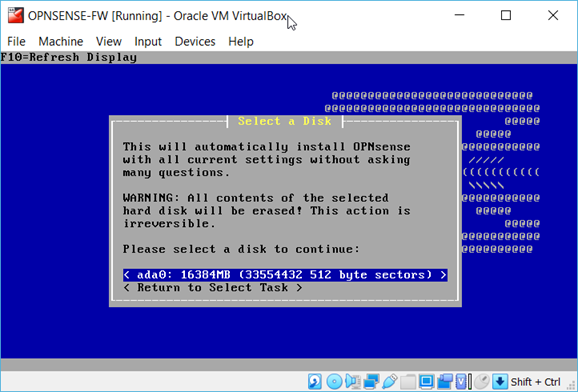
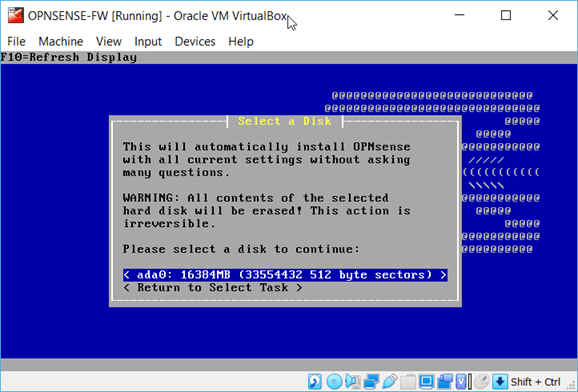
You will be able to see the virtual hard disk that we have added earlier, choose that by hitting enter.
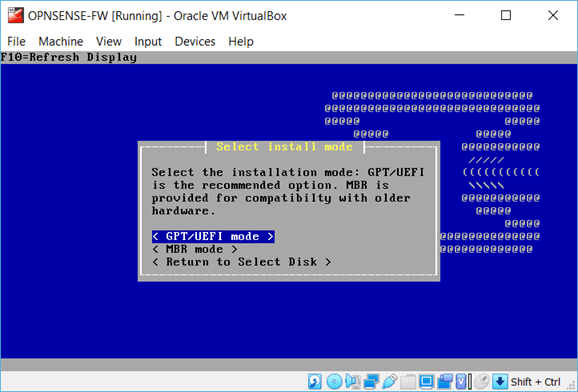
In the installation mode choose the GPT/UEFI mode.

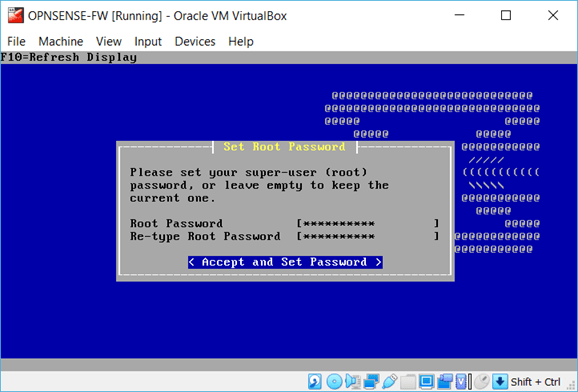
You will now be asked to enter the root password. After you specified the root password, use the down arrow key to select the Accept and set the password.

You will get an option to restart the VM, you can click on Reboot.
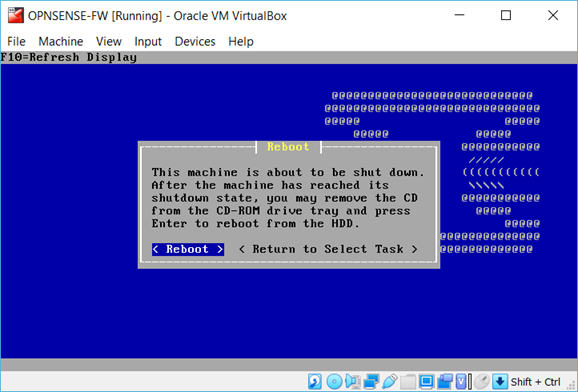

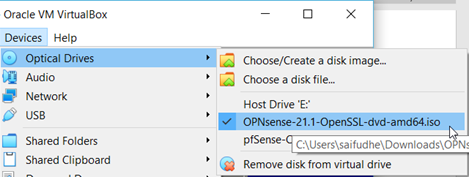
During the reboot, as soon as the machine is shut and when you see the virtual machine boot screen, you may remove the CD drive that you had attached earlier. By clicking Devices>Optical Drives> and click on Remove Disk from Virtual Drive.
Note: You may click on ctrl + shift to come out of the Opnsense screen.

Wait for few seconds for the VM to boot then it would ask you login to the screen.
This time, you will have to enter the credentials that you have set during the installation.
Once you logged you should be able to see same interface IP configuration on the Opnsense firewall.
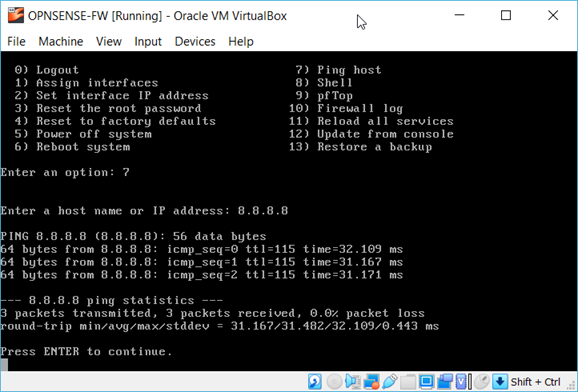
8. Verify the internet connectivity from the firewall.
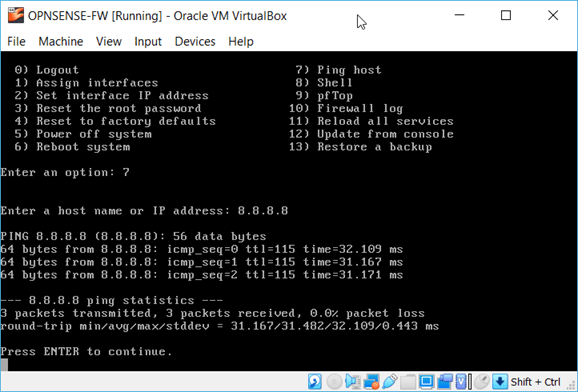
We have selected the Bridge interface for the WAN, and we should be able to access the internet at this point. On the CLI, press 7 to ping a host.
And type the public IP address 8.8.8.8 to see if it is responding. As you can see, I have got the response. This means the internet connectivity is working fine on the firewall.
If you are not able to access the internet which means, you must have not selected the interface properly.
9. Access the Opnsense WEB GUI in VirtualBox.
The firewall GUI access is via the LAN side IP, which 192.168.1.1. As we are using the internet network on VirtualBox VM’s, only the VM’s that are part of the internet network should reach the LAN side of the firewall.
We are now going to access the firewall GUI using one of the Ubuntu VirtualBox that have installed earlier.
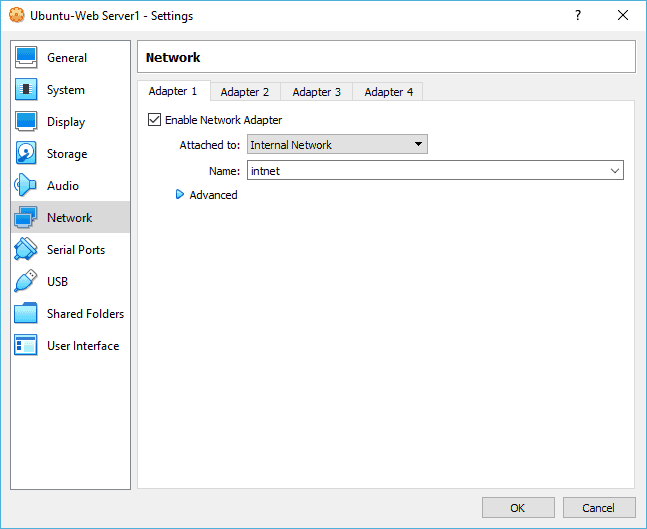
Select the Ubuntu VM and goto settings.
In the pop up choose the network and choose network adapter 1 and choose the Internal network and click on Ok.

Start the Client machine.
Make sure the Ubuntu client machine has got the IP address from the Opnsense firewall.
Open terminal and type ip addr

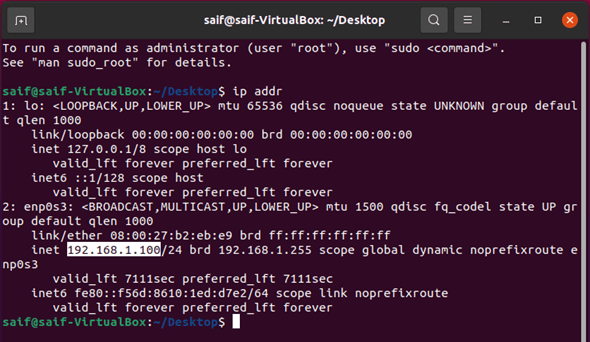
As you can see the Ubuntu host received a DHCP IP address from the Opnsense firewall, which is good.
Open firefox and type https://192.168.1.1
You may get the security warning, accept the risk and click on continue. You will be prompted with the Opnsense VM login screen, enter the username as root and the password that we have set up earlier.

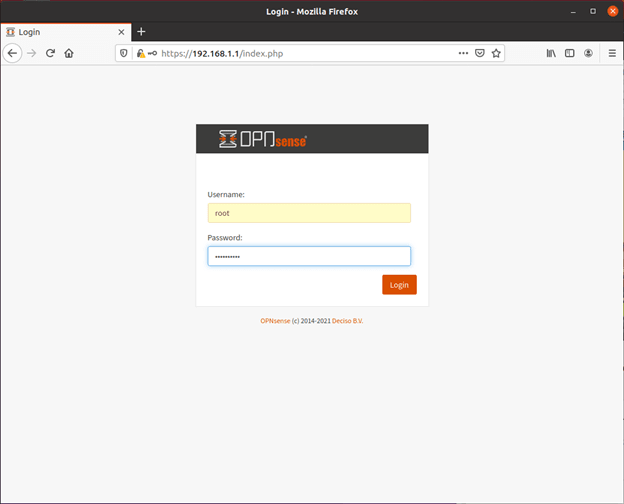
And click on Login.
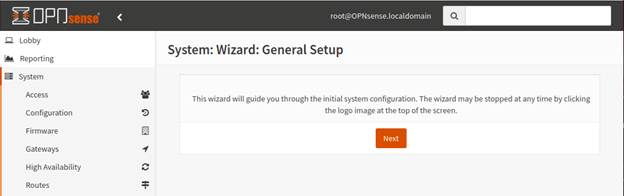
Finish the setup wizard.
After you logged in, the Opnsense would start the system wizard you may click on Next.

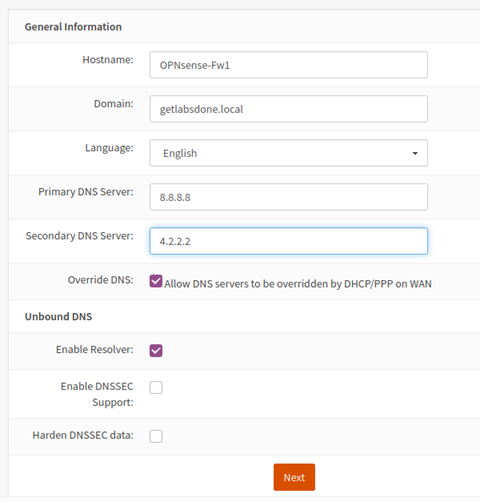
Under General information.
- Enter the Hostname.
- And your domain name, if you don’t have one, you may leave the default local domain.
- Enter the primary and secondary DNS server name, leave everything else to default and click on Next.
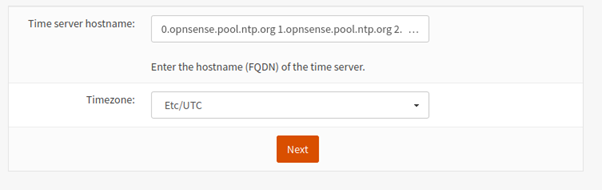
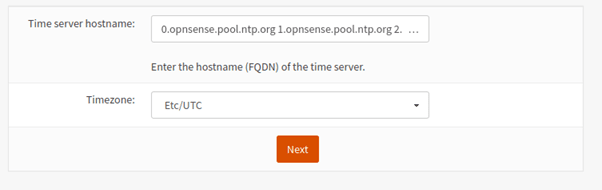
Setup the NTP server. You may choose the default NTP server and in the timezone, select your local timezone and click on Next.
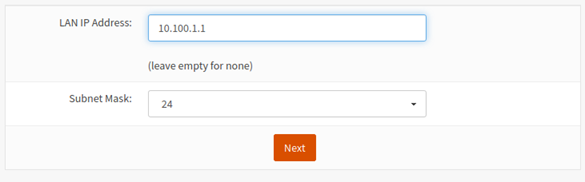
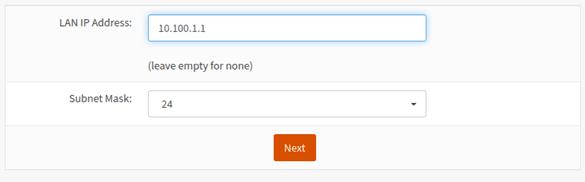
I am not making any changes on the WAN, hence click on Next. If you wanted to change the IP address of your LAN you can do that here.
Since my local network has the identical subnet on my firewall LAN side (192.168.1.0/24), I decided to change to 10.100.1.1 on the LAN side,
Basically, both the LAN and WAN are identical. (WAN – 192.168.0.0/24 and LAN 192.168.1.0/24) there is no problem leaving the default, and you may skip this step if you want to click on Next.
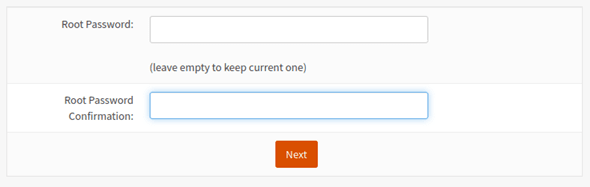
You will get an option to change the password now, you may leave it empty to keep the current one.

Finally you may click on Reload, after you click on reload this will happen.
- The LAN side IP address of the firewall will change to 10.100.1.1/24
- The Ubuntu machine still has the IP address from the 192.168.1.0/24 subnet.
If you have not change the IP address during the setup wizard, you should be good, nothing would change.
I turned off the network and turn it back on, as soon as I did that I got a IP address from the new subnet.

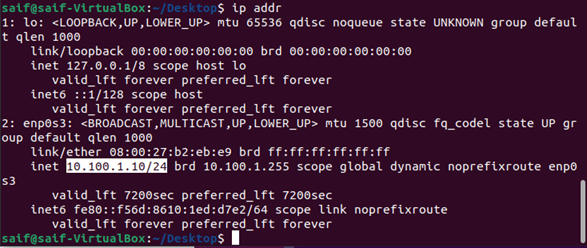
To access the firewall web GUI again, you may enter the URL https://10.100.1.1.
10. Verify the internet access from the Ubuntu client.
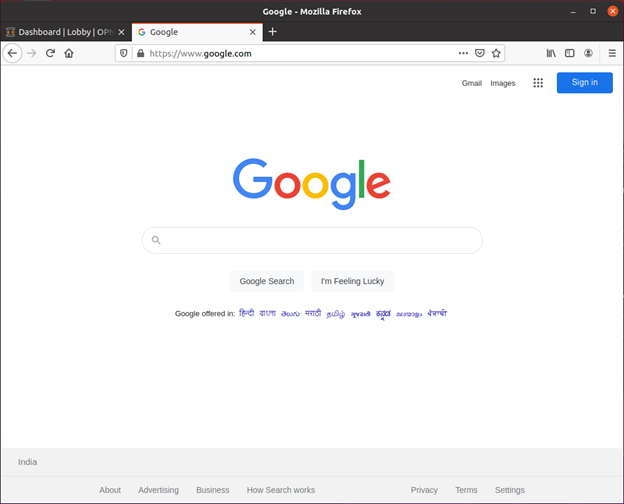
Lets verify the internet access from the Ubuntu client by browsing google.com.
I tried accessing google.com and as you can see, we are able to access the internet from the client side as well.

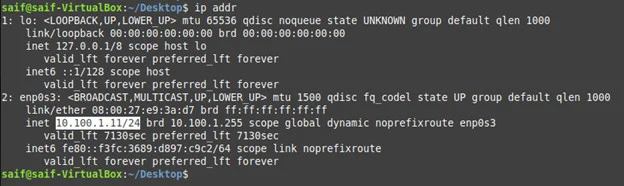
Let me connect another client and see if it works the same way.
I have a Linux mint that I have installed on the VirtualBox. I have already changed the interface to an internal network as well. Just like Ubuntu, the Linux mint will act as a LAN side machine for the firewall.
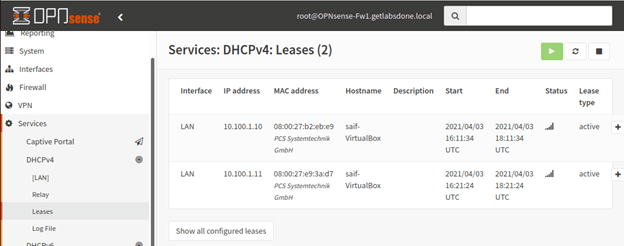
As you can see, I got the next IP address from the DHCP scope.

You can also see the DHCP lease status on the firewall web GUI as well.