
If you’re new to MikroTik routers and eager to explore its functionality, the best way to learn is by using real hardware. However, investing in a router right away might not be ideal, and you’d prefer to test things out in a lab environment. So, what can you do?
A great solution is to use MikroTik CHR (Cloud Hosted Router) instead of the physical hardware. The CHR router is available for free from MikroTik and provides almost all the features, although it caps the interface bandwidth to 1Mbps, which is okay for lab testing.
If you decide to take it a step further, you can obtain a licence to remove the bandwidth cap and unlock the dyndns functionality.
Now that we know how to get the software from MikroTik, let’s explore its installation in a virtual environment. Is it possible?
Absolutely! MikroTik CHR software is compatible with various hypervisors, including VMware Workstation, ESXi, KVM, Xen, and VirtualBox.
In a previous blog post, we covered the installation of MikroTik router in VMware Workstation, and while it works great, it requires a VMware Workstation Pro licence. As a more accessible alternative, we’ll focus on using VirtualBox instead.
In this article, we’ll guide you through the installation of the MikroTik router in VirtualBox. The best part is that running the MikroTik virtual machine in your virtualized environment won’t demand extensive resources. Just 1 CPU and 128MB of RAM will be sufficient for your lab experiments. This way, you can get hands-on experience without a significant hardware investment.
Prerequisite:
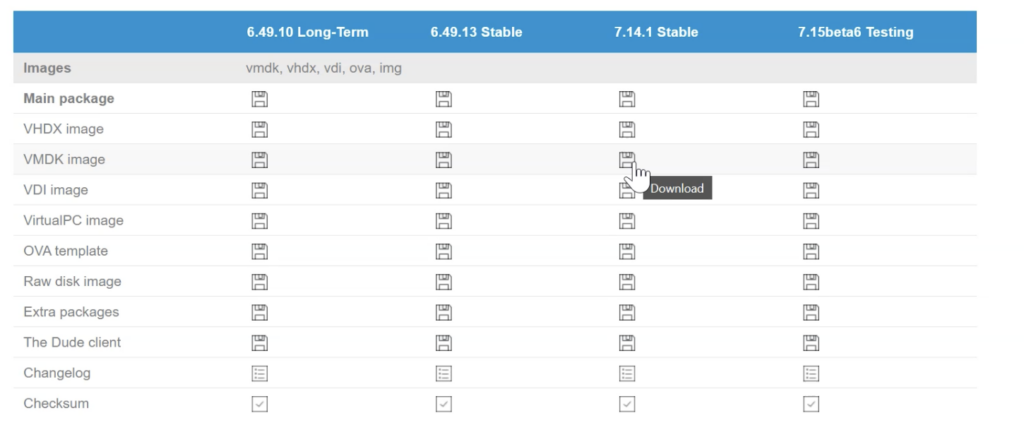
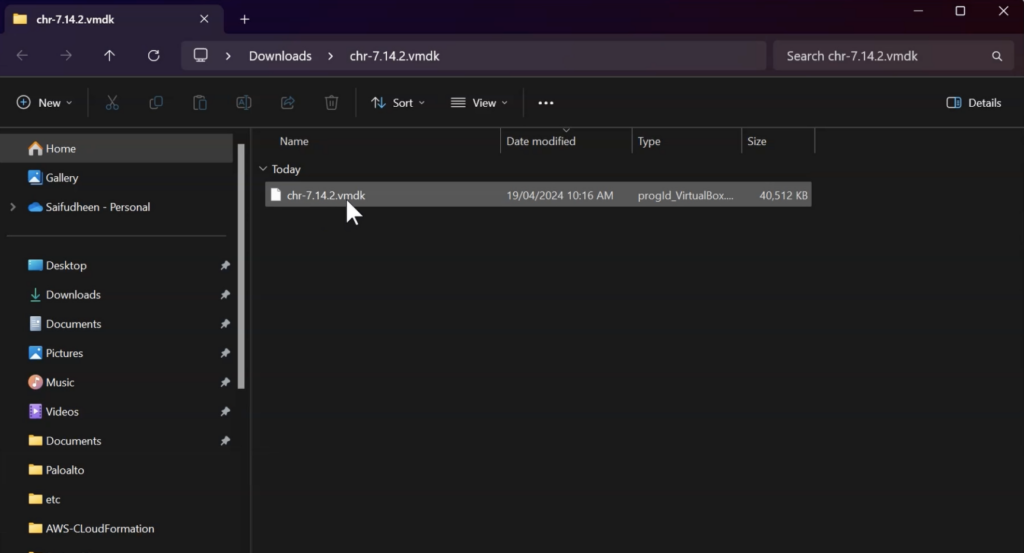
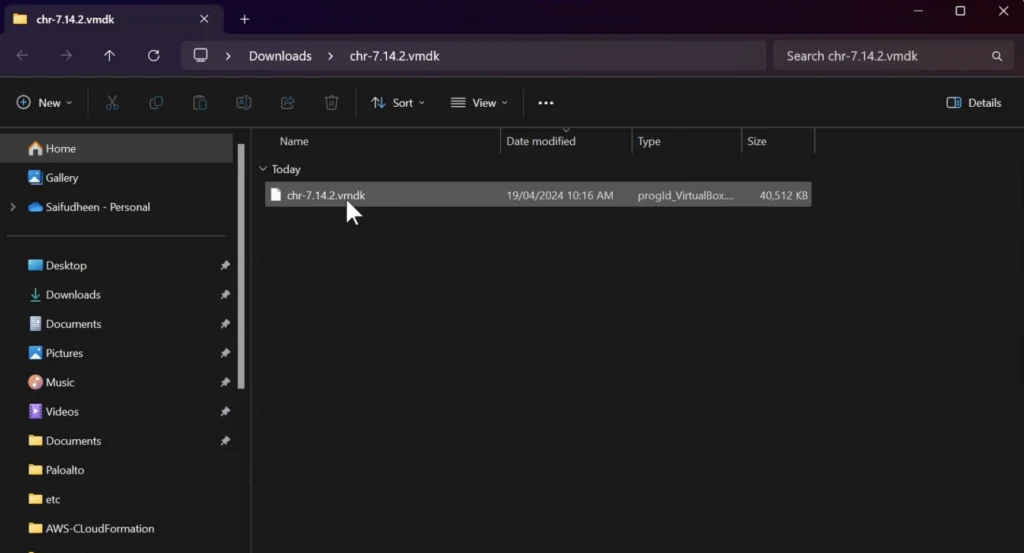
- You need to have a MikroTik software image, you could download that from here. scroll down to the Cloud hosted Router and Download the VMDK image.
The downloaded file will be zip format, ensure to extract the zip file.
- Virtualbox software: You can download that from here.
- Winbox software: you can download that from here.
Below is what we are going to do in this blog post, we have virtualbox installed and running in a windows PC, inside that we will be installing the MikroTik router.
The router WAN interface connected to the internet which is basically my physical LAN network 192.168.1.0/24, and the lan side connected to the private network 10.100.0.0/24 where all the virtualbox VM’s are connected.

After the installation and configuration of MikroTik CHR router we will test the network connectivity from the virtual machine.
Here is the step by step instruction with video.
1. Create the virtual machine.
To create MikroTik virtual machine in in Virtualbox, Open Virtualbox -> machine-> new
Alternatively, you could press CTRL+N
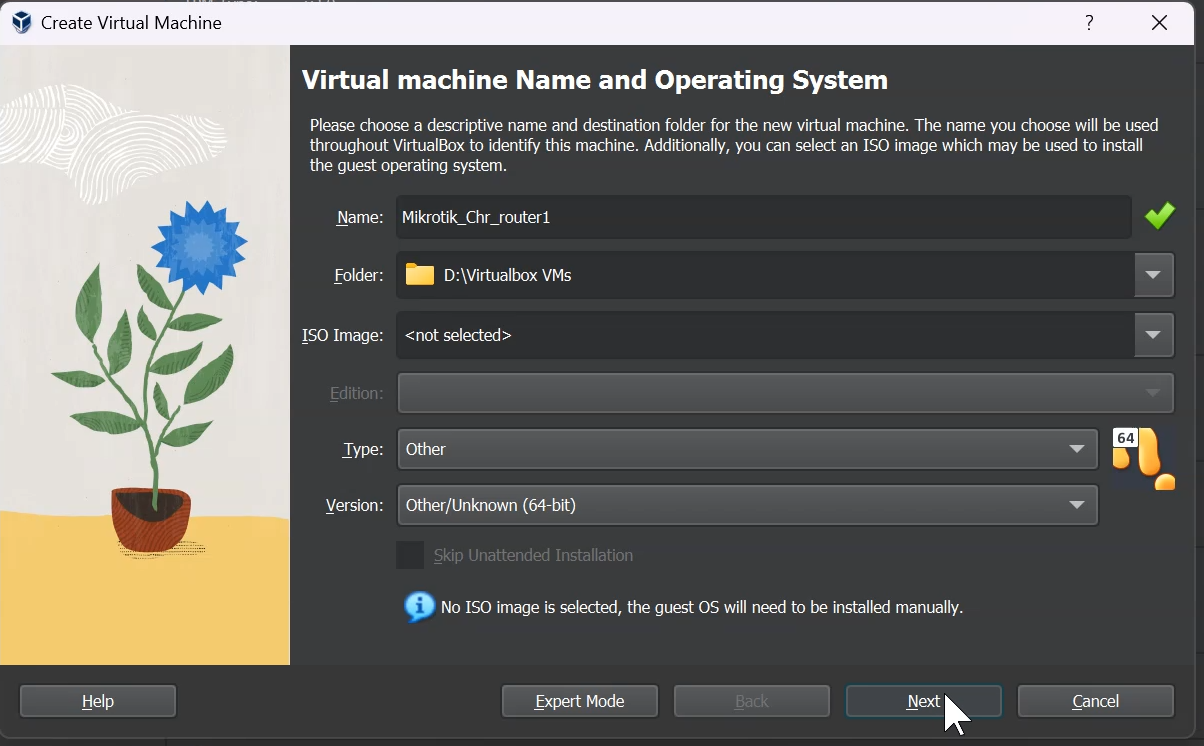
A new Virtual machine creation wizard now opens up. Currently we are in Guided mode, so stick with the same. If you are in Expert mode, you may switch back to guided mode.
Name: MikroTik_CHR_Router
Folder: You can leave the default location, or choose a different directory to save the MikroTik vm virtual hard disk and files.
Since I am using my ssd ‘D’ drive to save all the virtualbox files, I clicked on the drop down in the folder and chose Other
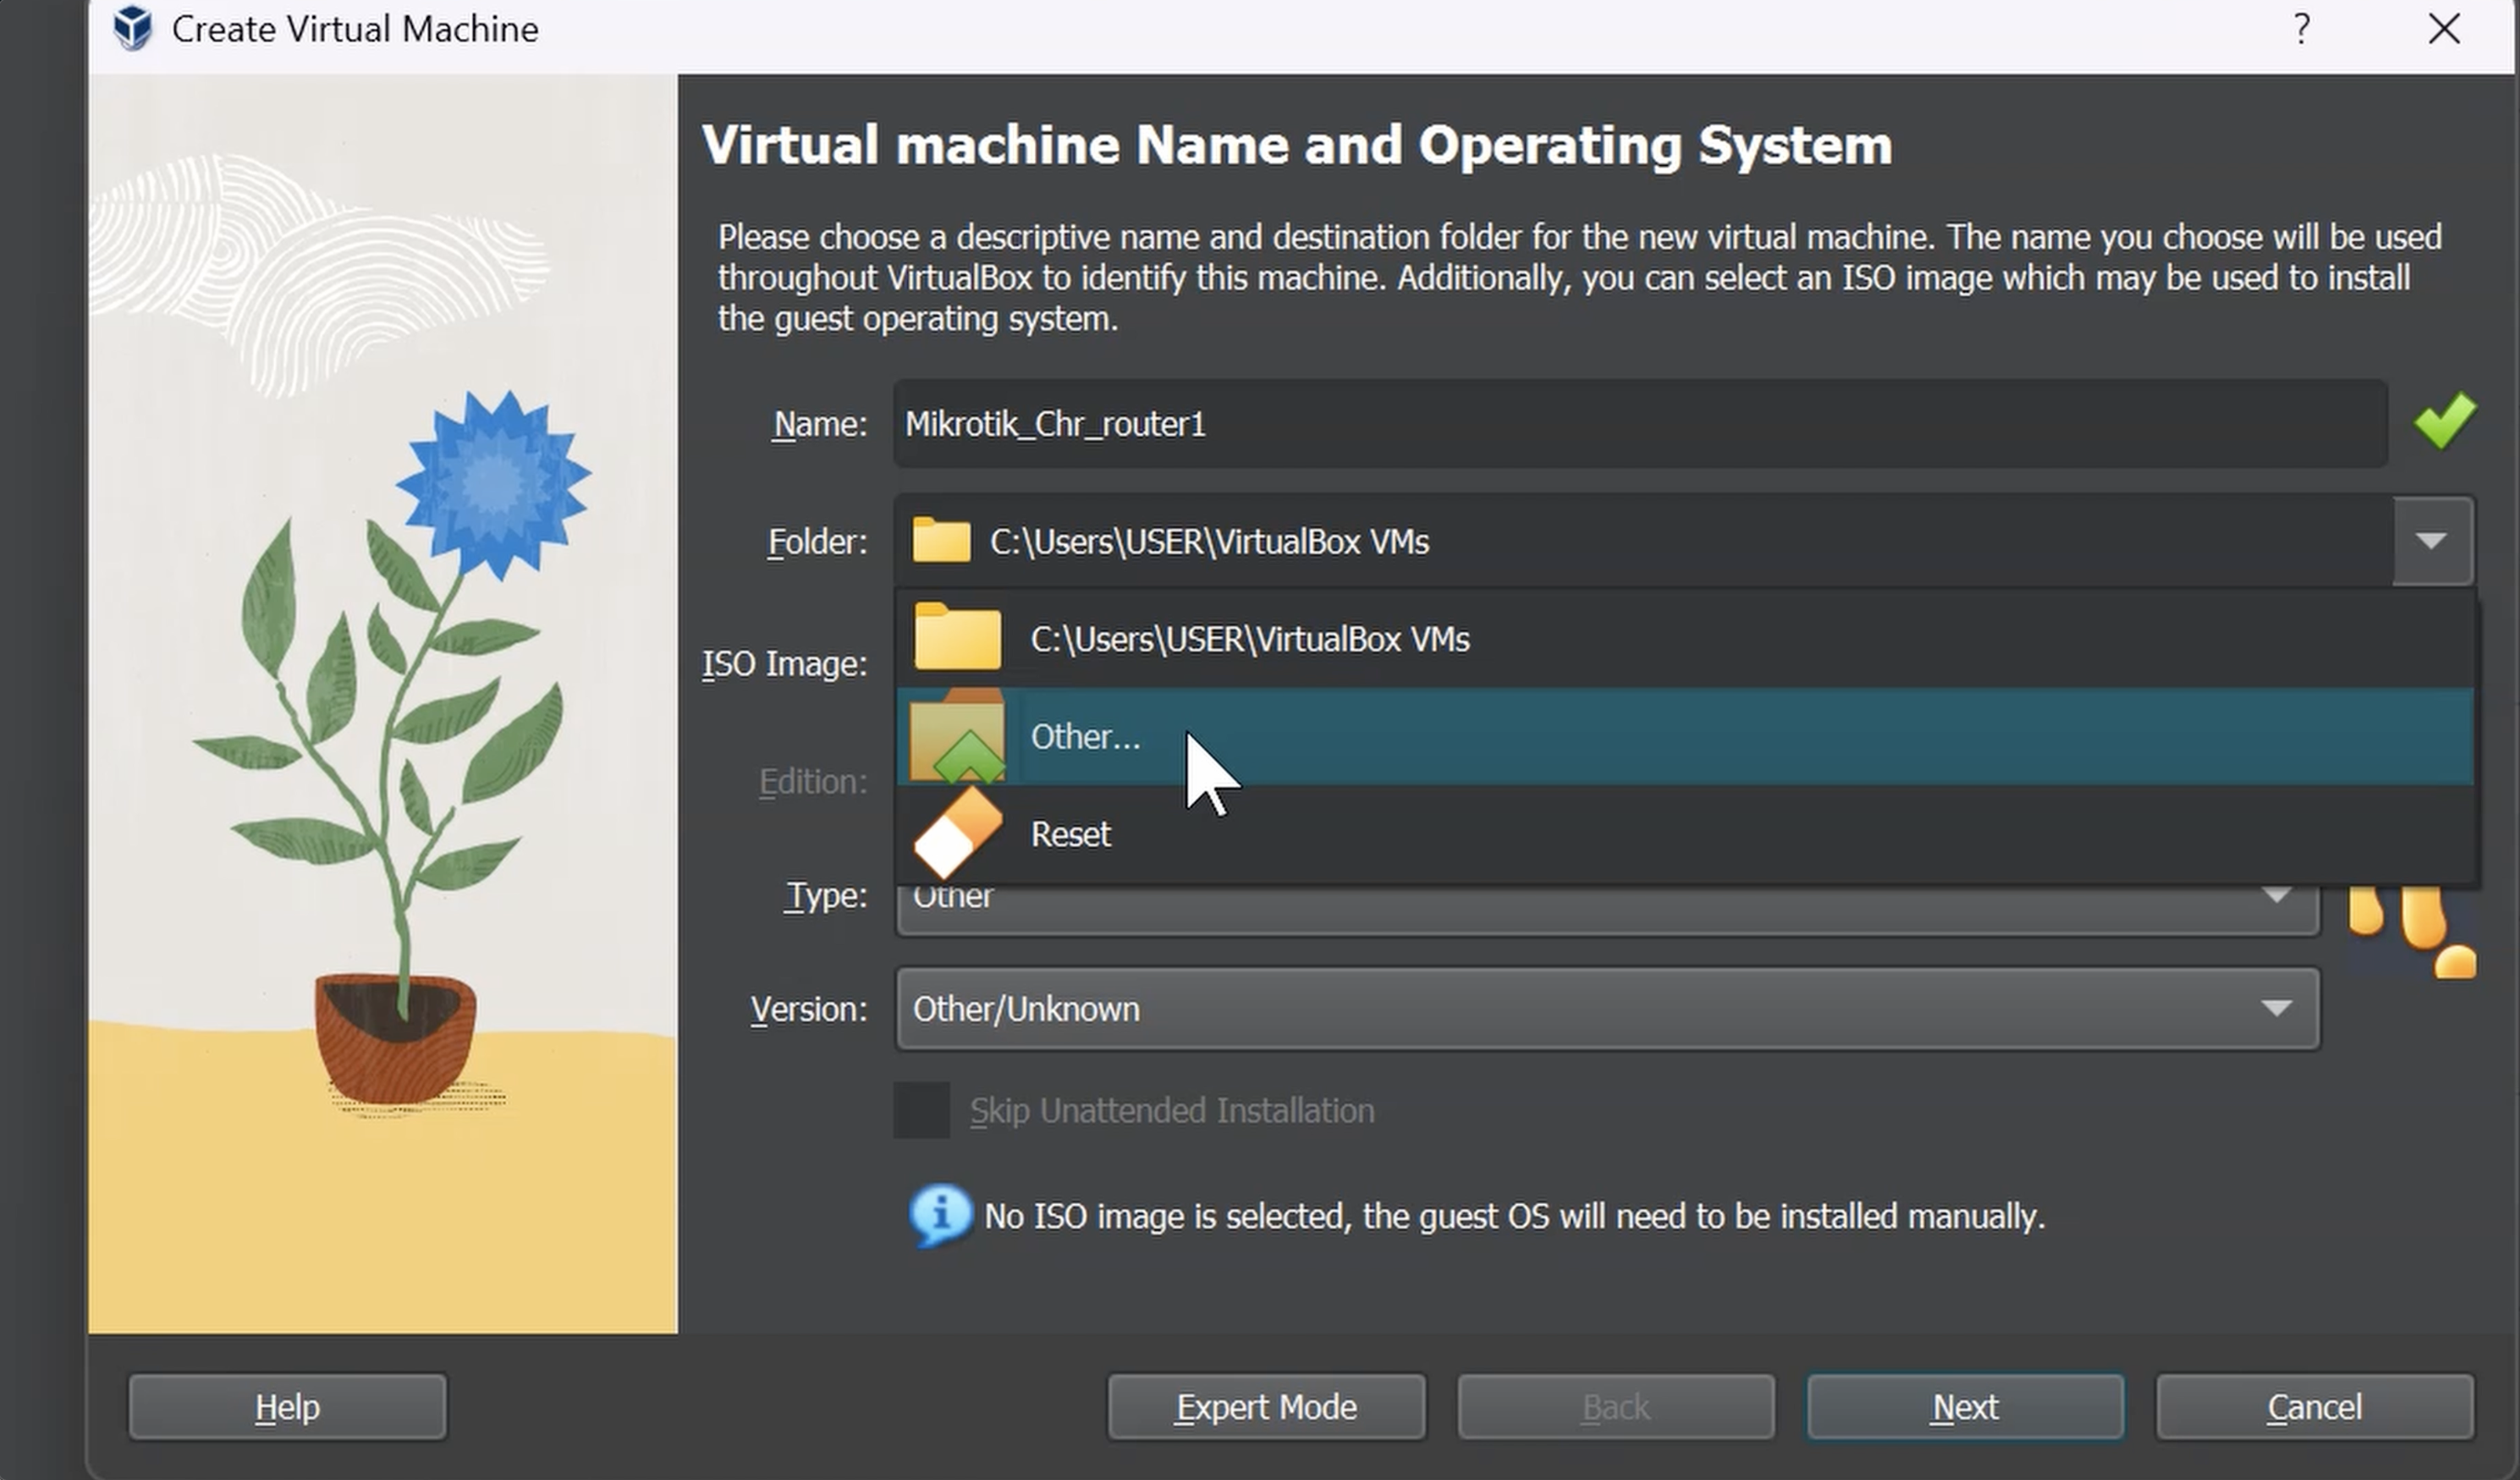

And pointed to the correct directory.
Type: Other
Version: Other/Unknown (64 bit) – it is important that you chose 64bit, because the MikroTik router is based on 64bit, and if you don’t choose 64bit the VM will not boot.
Click on Next
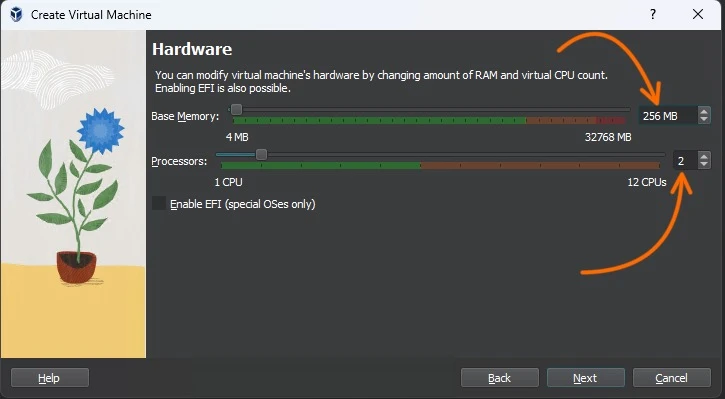
2. Configure the Memory and CPU.
Here you can define how much memory and CPU that you are going to allocate to the virtual machine.
Memory: Provide at least 128MB of RAM, in my case I have added 256mb.
CPU: 1 CPU will be enough, However I have given 2 CPU and click on Next.

3. Attach the virtual Hard disk.
We are now going to attach the virtual hard disk that we downloaded from the internet and moved to the MikroTik virtualbox folder in step1.
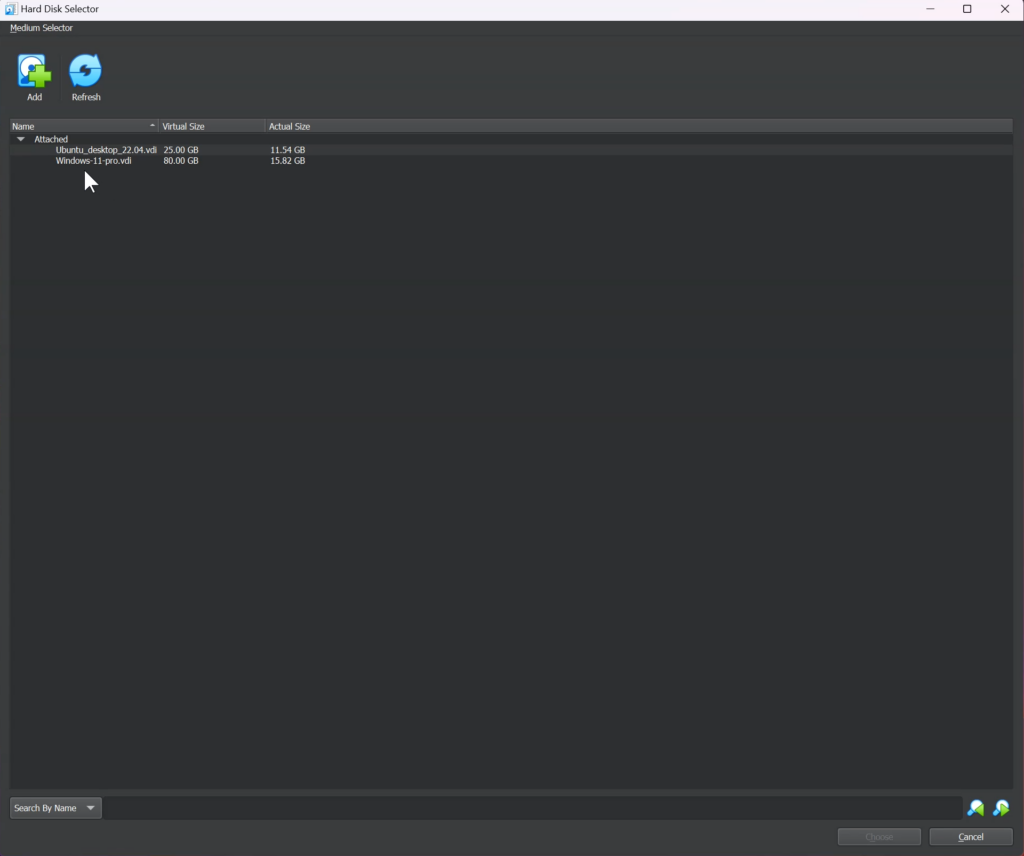
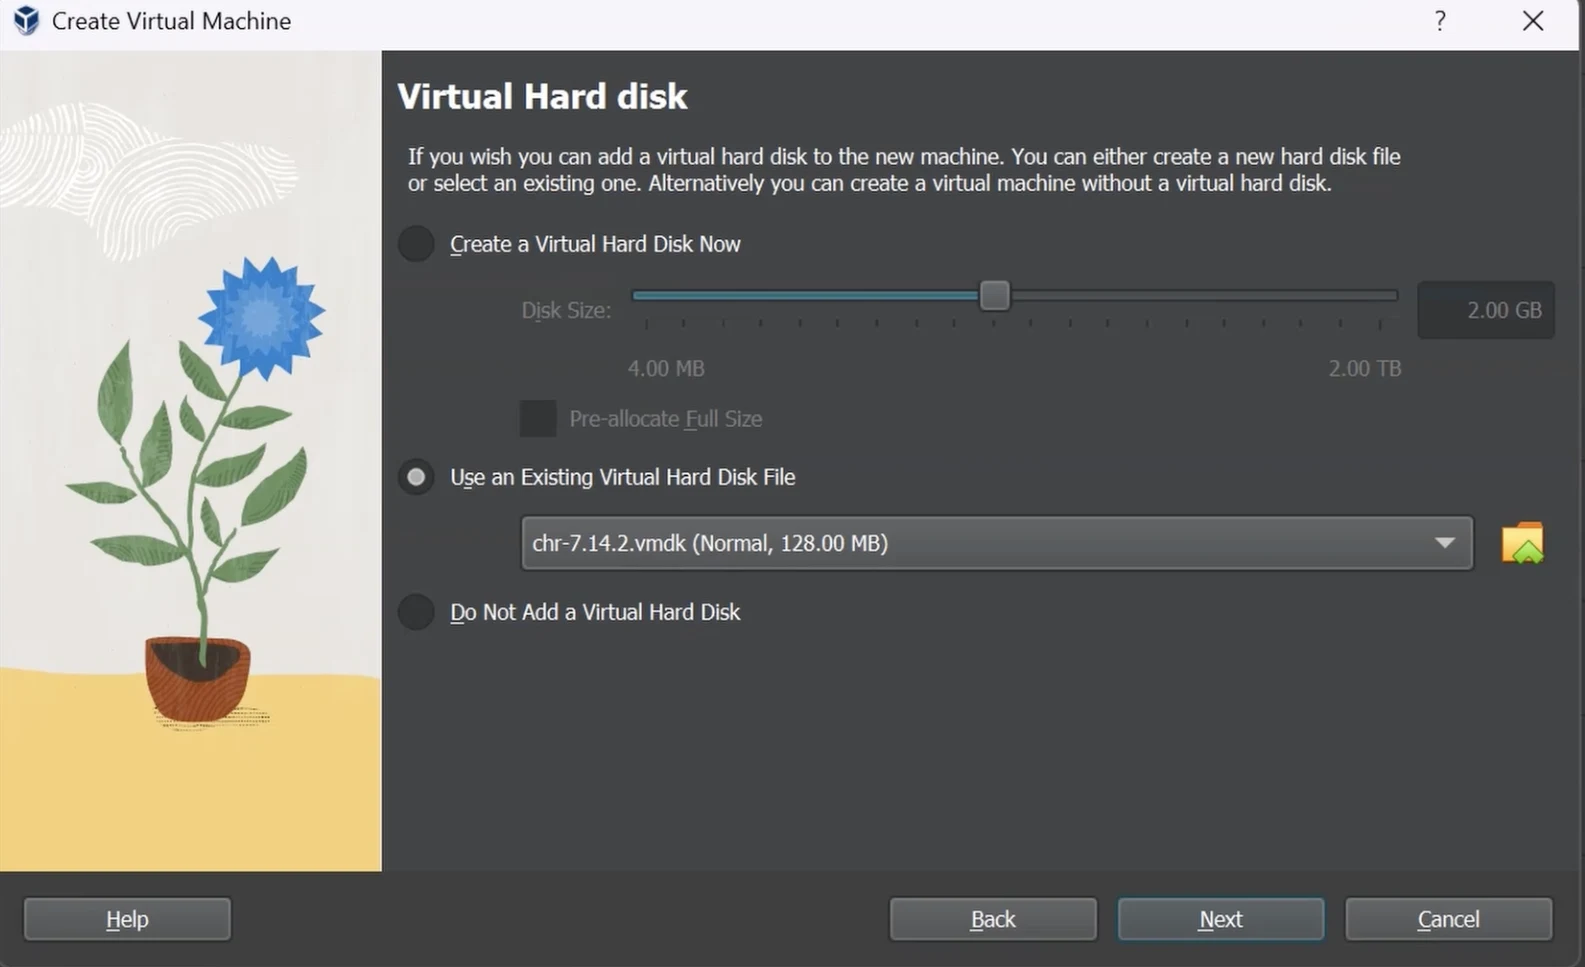
In the virtual hard disk screen, choose Use an existing virtual hard disk file, and click on the folder icon on the right screen
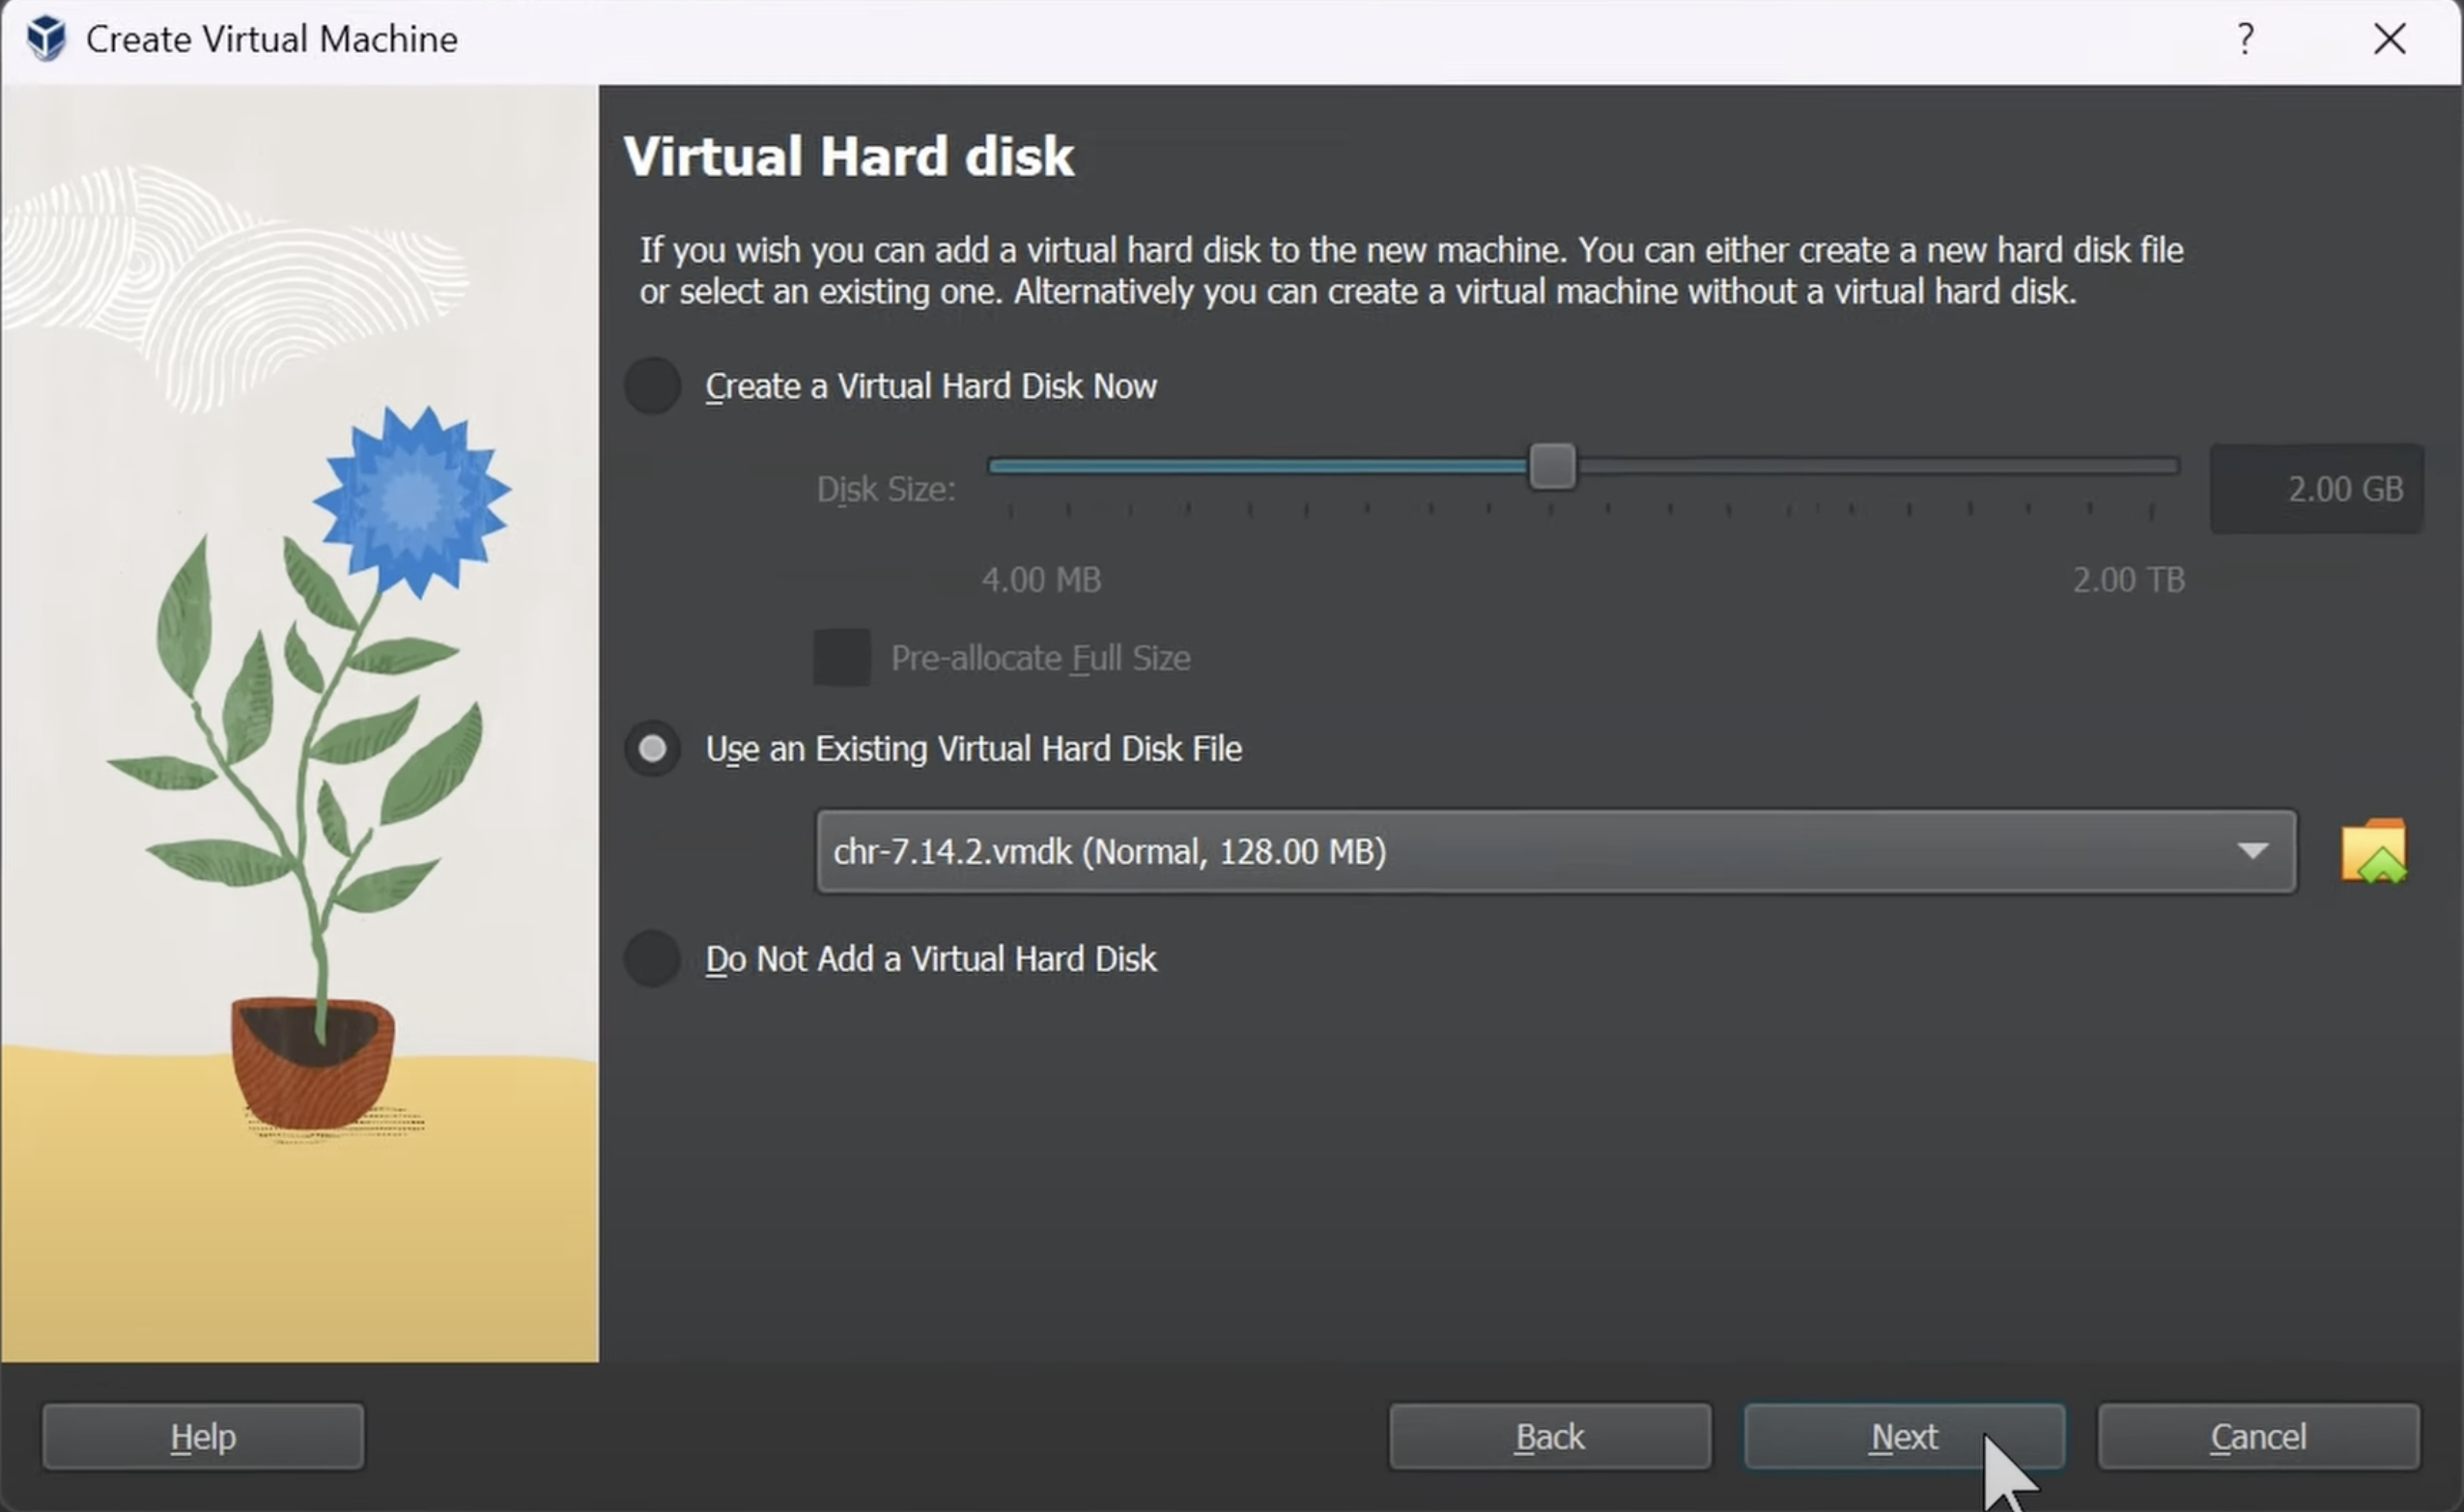
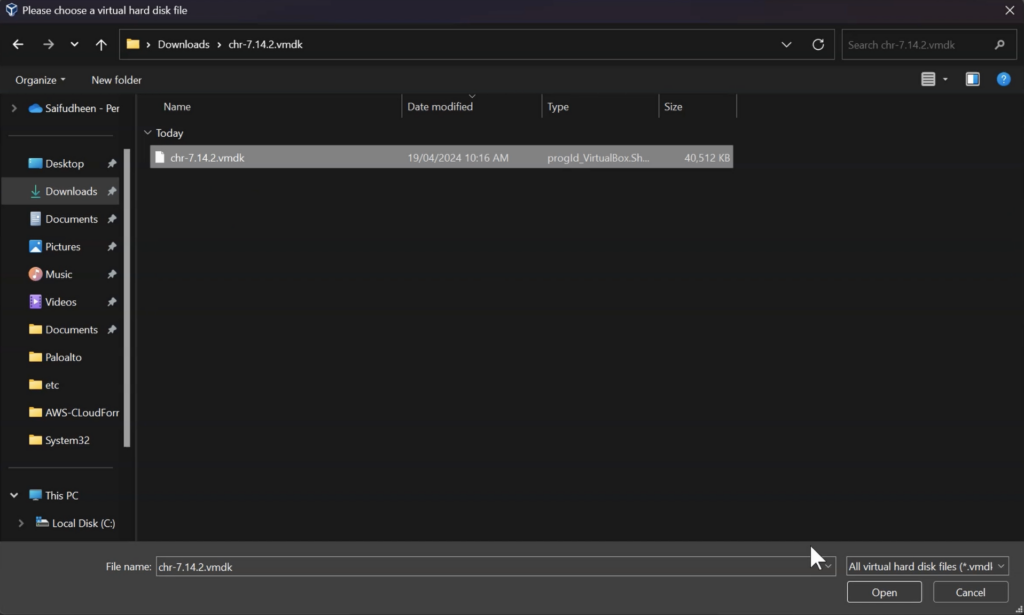
You will be presented with a hard disk selector screen, here click on Add to point to the VMDK file that we downloaded.

Select the file.
Once added, select the VMDK file and click on Choose.
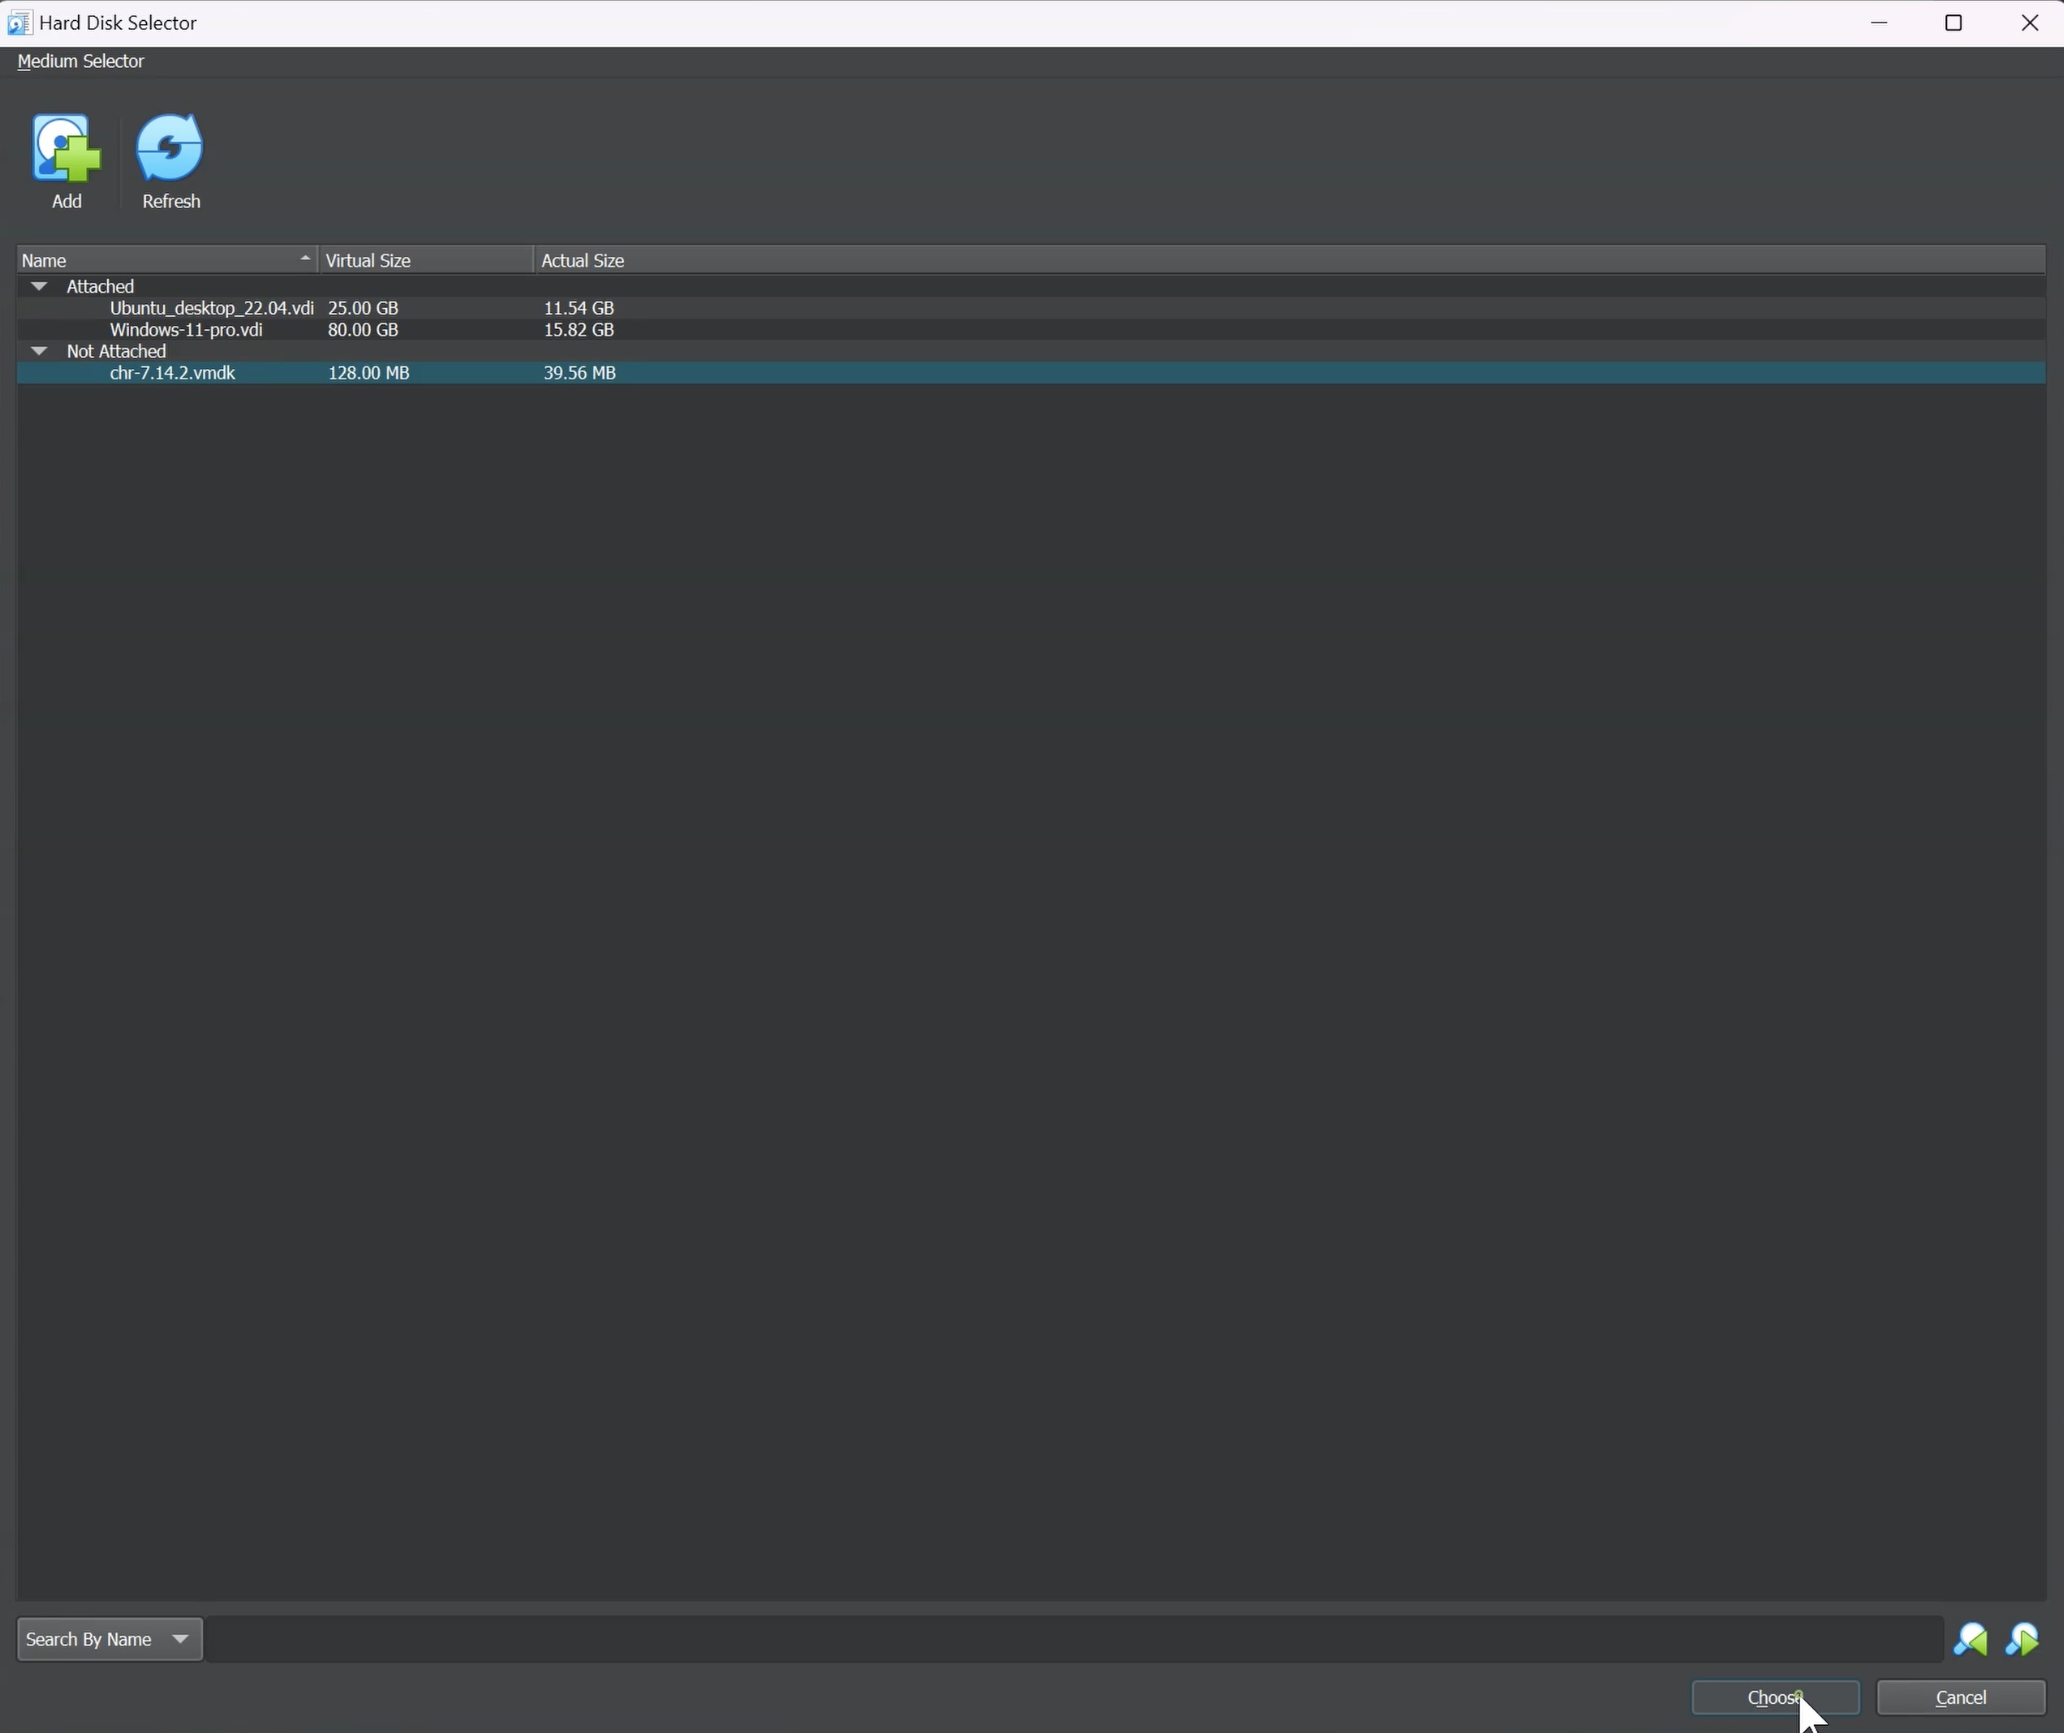
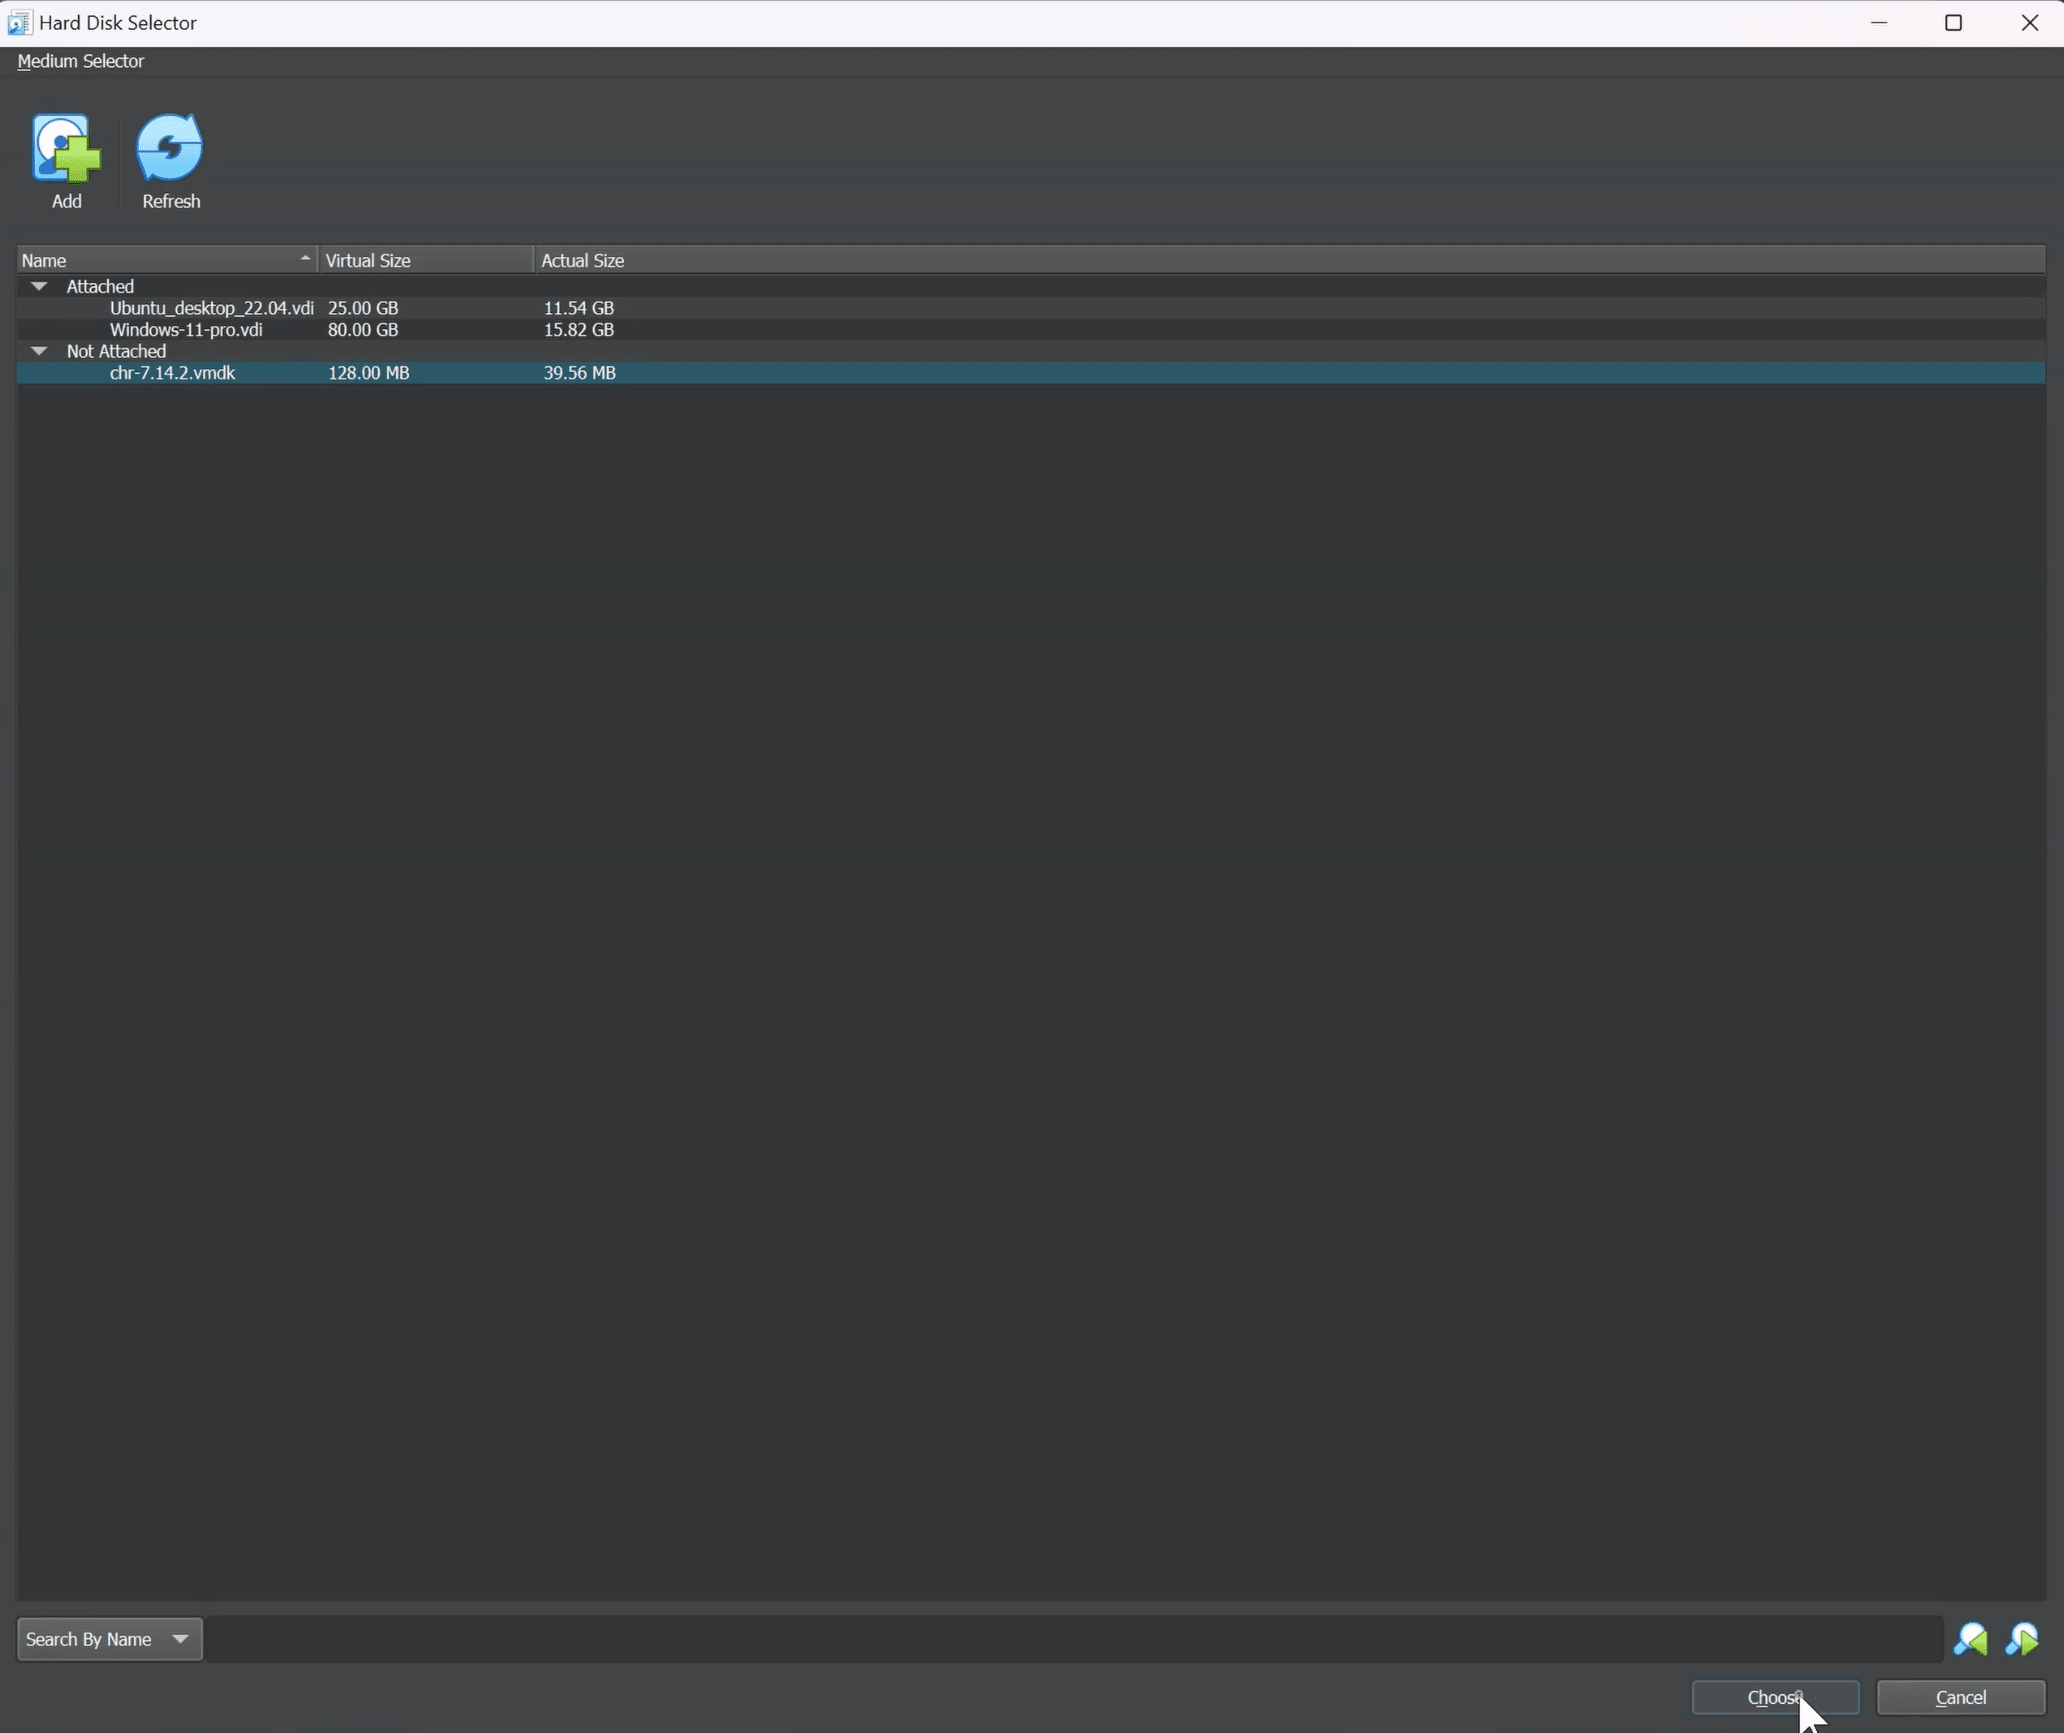
You will now see the VMDK file is now selected, click on Next.

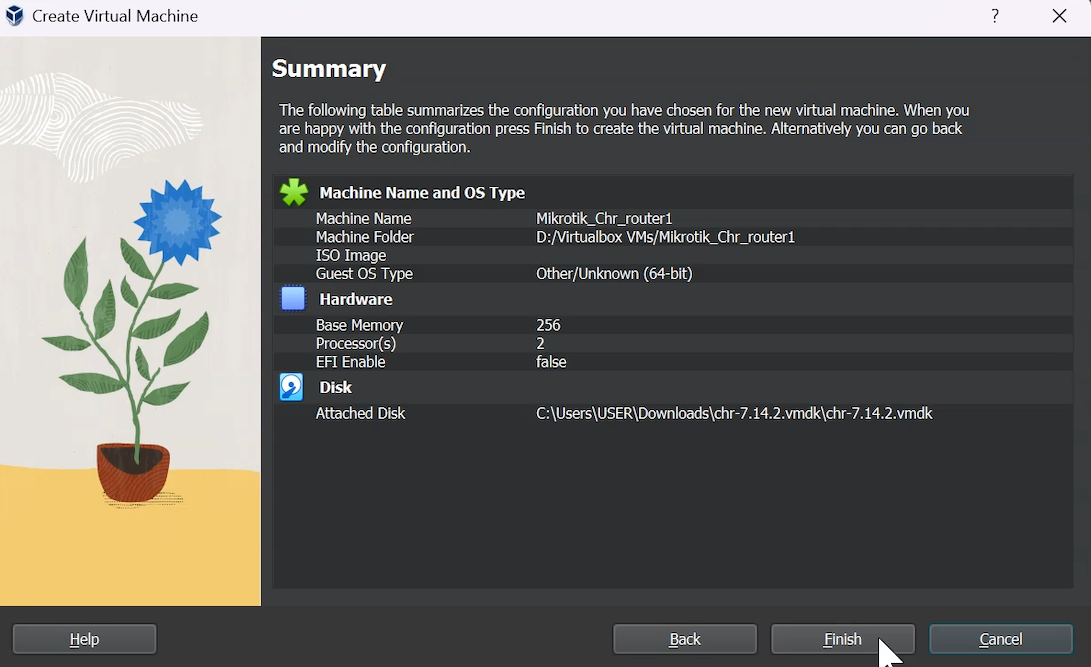
Eventually you will be presented with the summary of the installation screen, you may now click on Finish.

4. Add Network adapter.
By default, when you install the MikroTik router, it will have a single network adapter, since we require 2 network adapters, one for the WAN and other for the LAN, we need to add one more adapter.
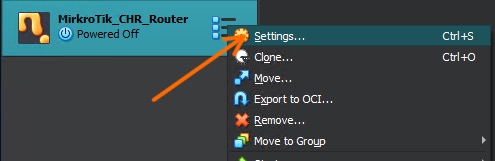
Right click on the vm and click on settings.
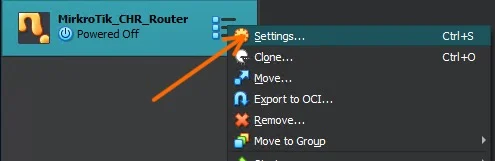
Change the WAN adapter.
Click on Network.
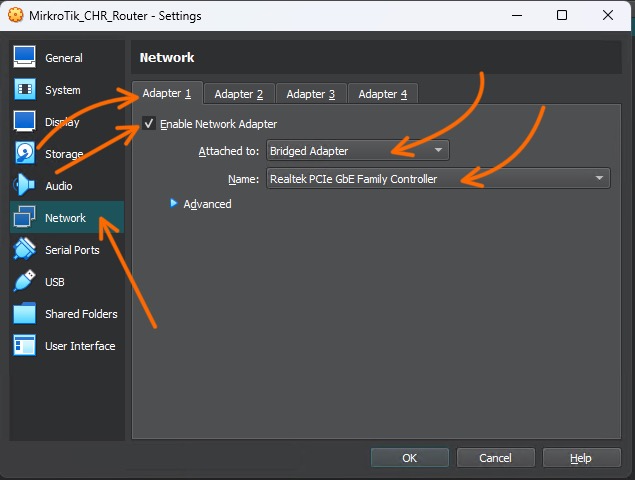
On the Adapter1
Check the box that says Enable Network Adapter.
Attached to: change this from NAT to bridged adapter, we could choose NAT interface as well, however that doesn’t give full control on the MikroTik router.
If you choose a bridged interface the virtualbox will put the MikroTik vm to your local area network just like any other machine.
You can learn more about virtualbox different network setup here.
Note: Only choose NAT, if the bridge adapter is not working.

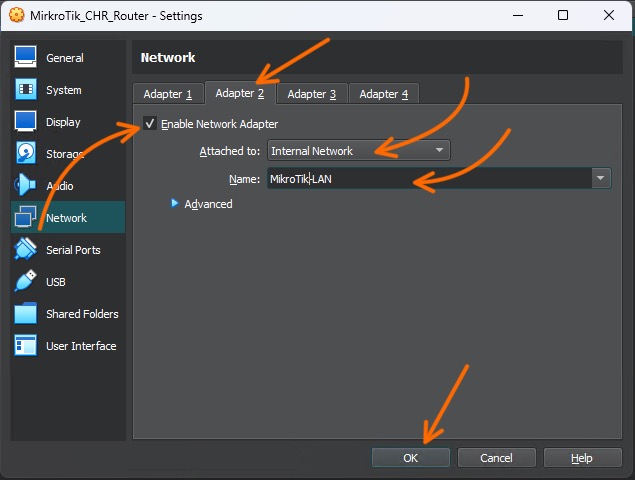
Add the LAN adapter.
Click on the Adapter 2 tab.
Add the LAN port.
In the adapter2 tab,
Attached to: Internal network.
Name: Provide a name for the network adapter, in this case it is MikroTik LAN and click on ok.
5. Start the MikroTik VM in Virtualbox.
You may now double click on the VM, or select the vm and right click on it and click on start.
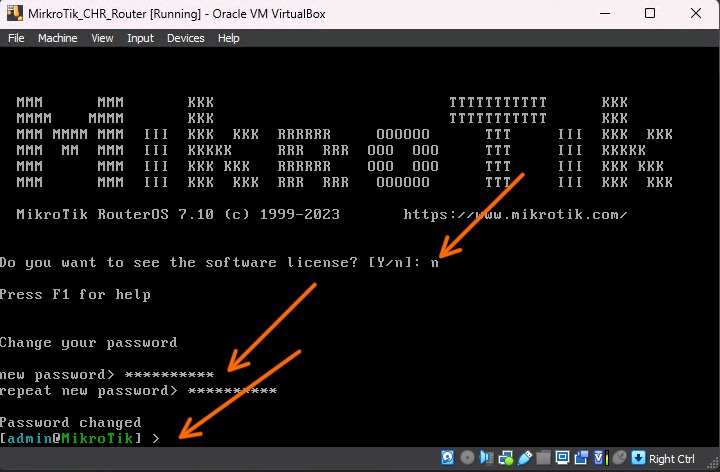
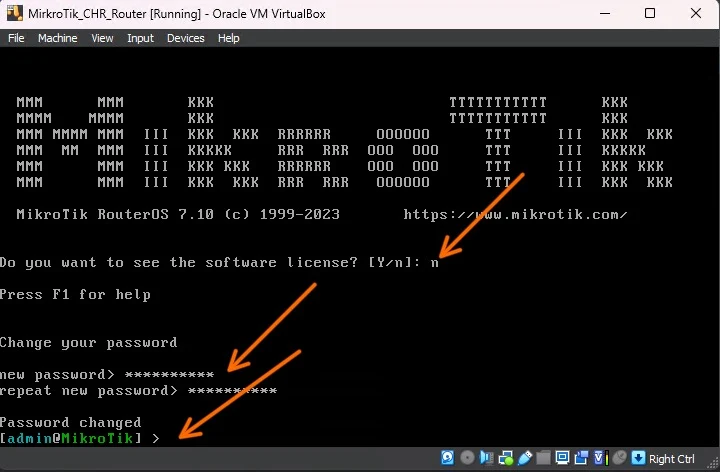
The MikroTik VM will now start, and after a few seconds, it will prompt you to enter the credentials.
The default username is admin, password is blank.
So enter the username as admin
Since the password is blank, hit enter.

In the software licence prompt, enter ‘n’.
You will be asked to set the password for your MikroTik router.
Enter the new password and repeat the new password.
And you will get a message that says, the password changed.
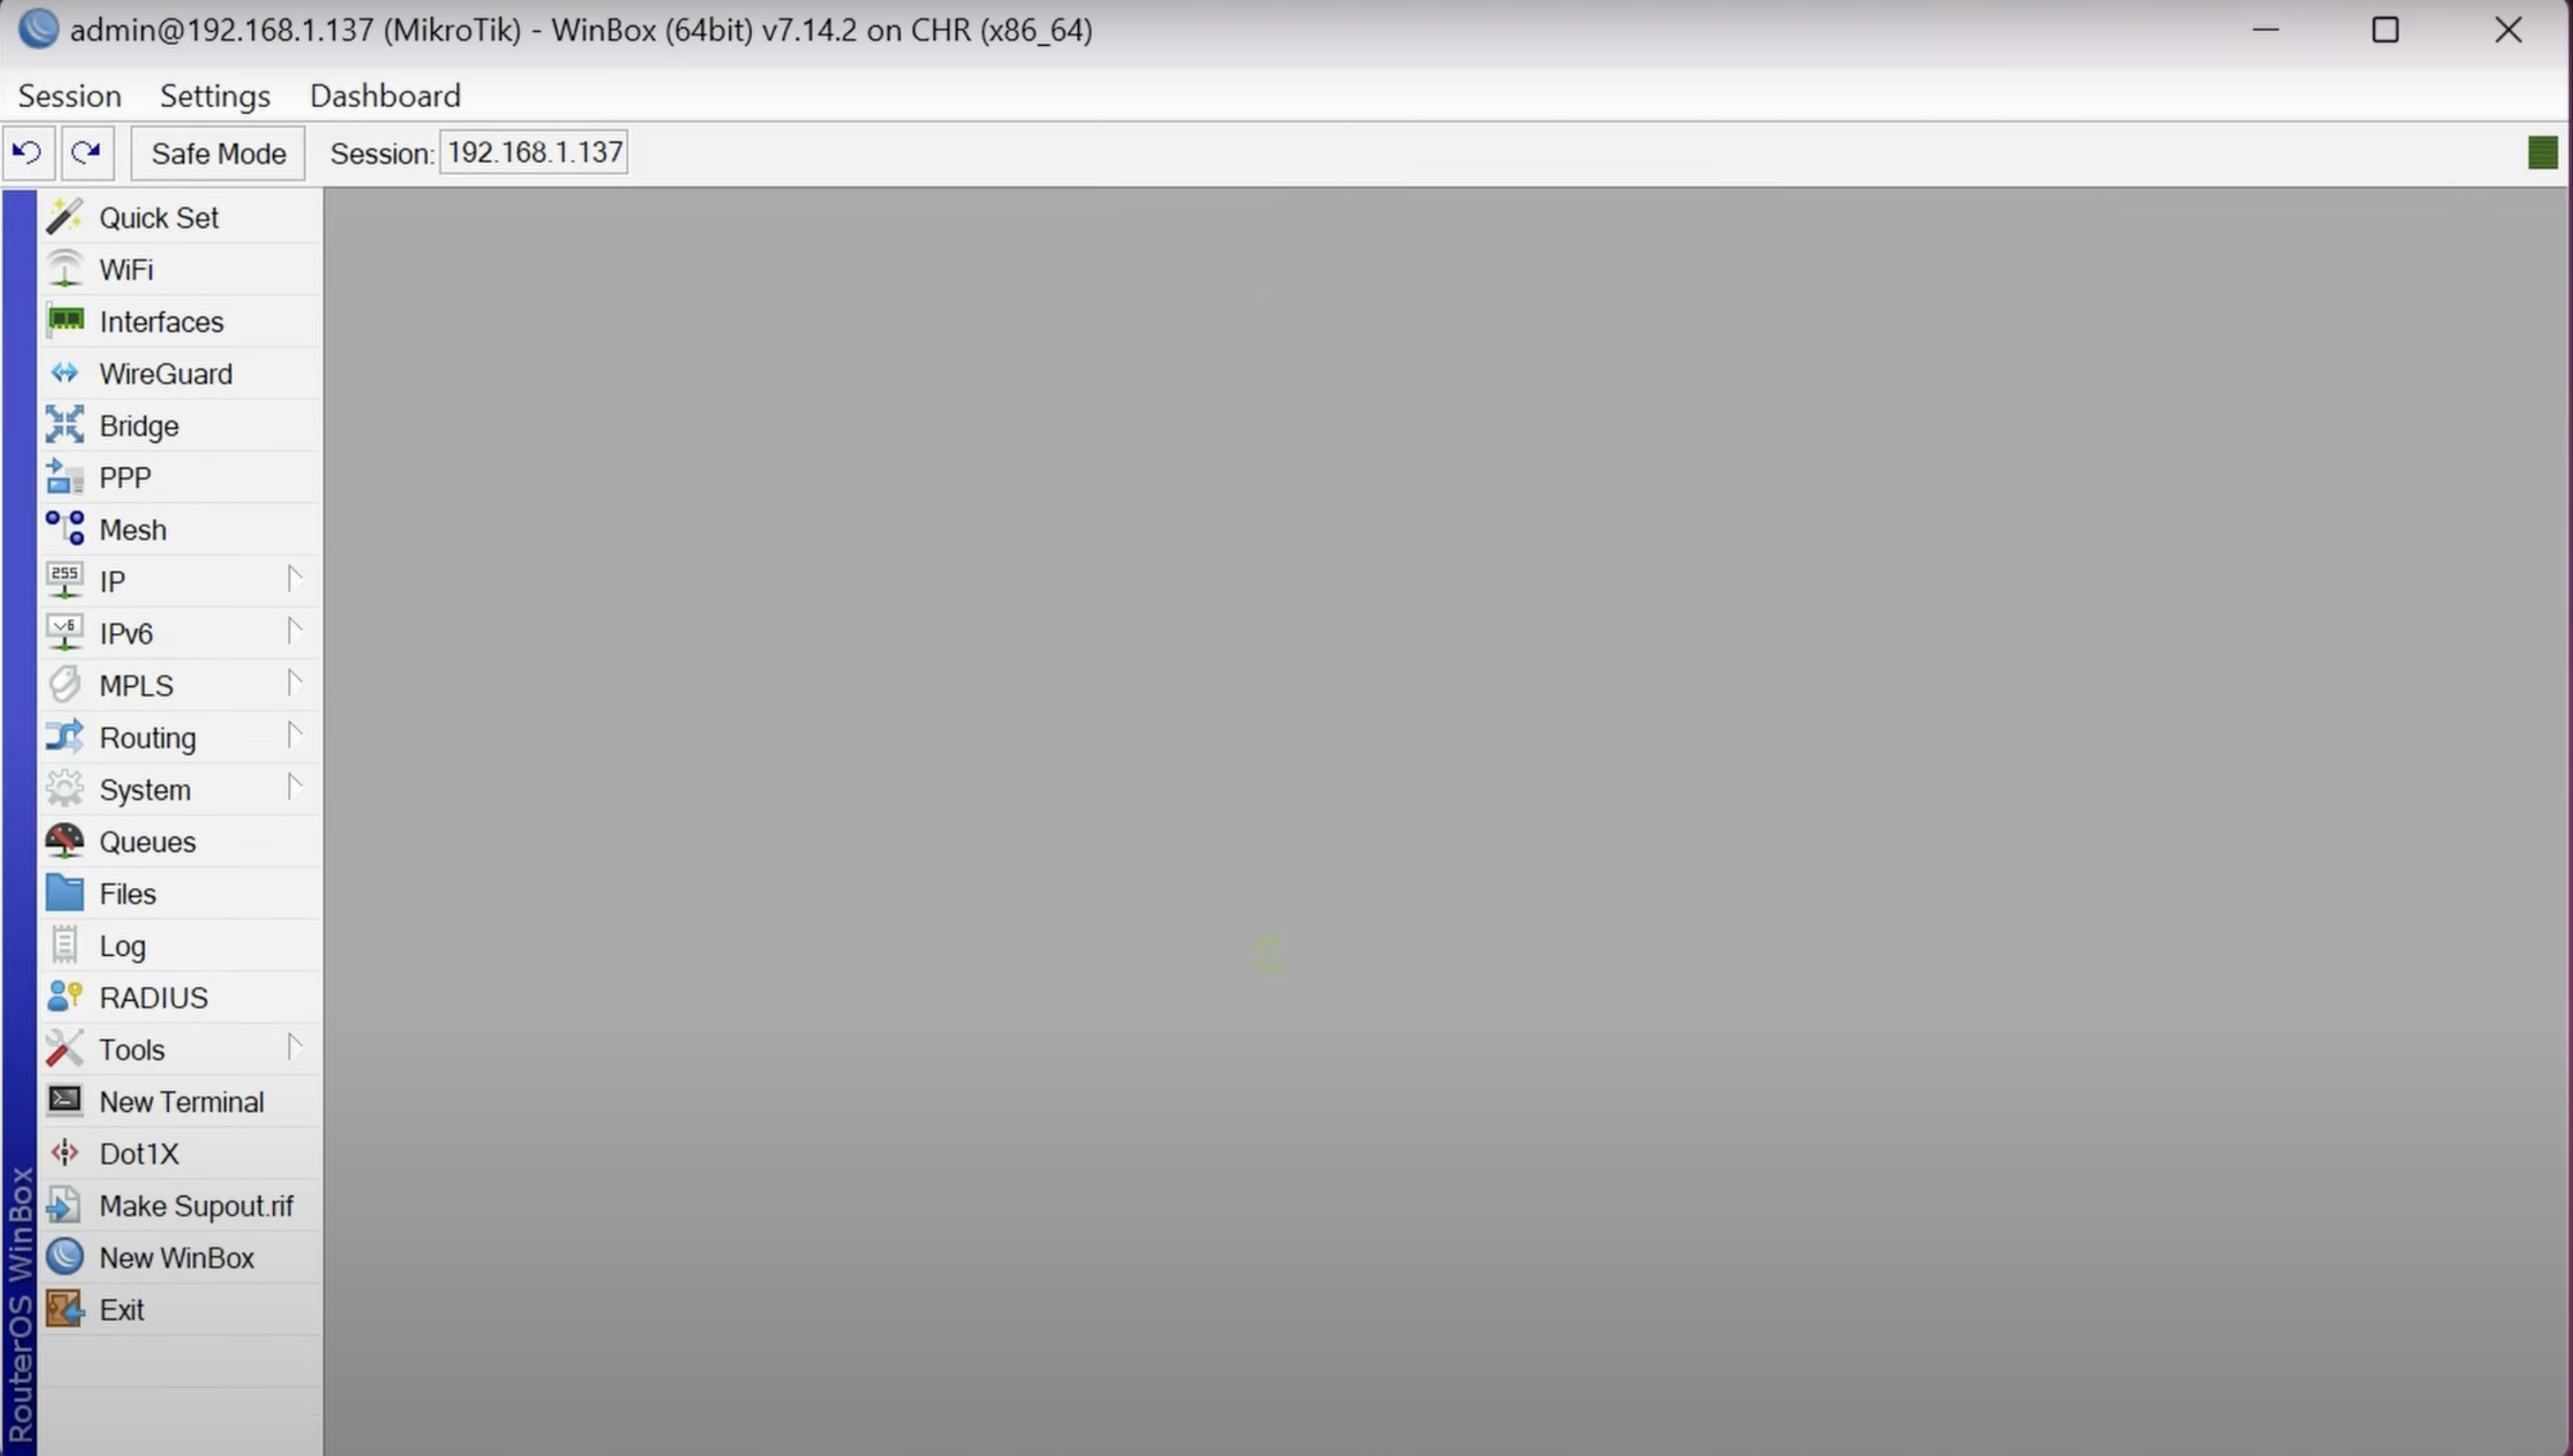
6. Access the MikroTik GUI.
We have set up the MikroTik router in virtualbox, for that we need to access the MikroTik admin GUI.
We already have CLI access within Virtualbox, and the other ways you could access MikroTik management GUI is either by web browser or winbox utility.
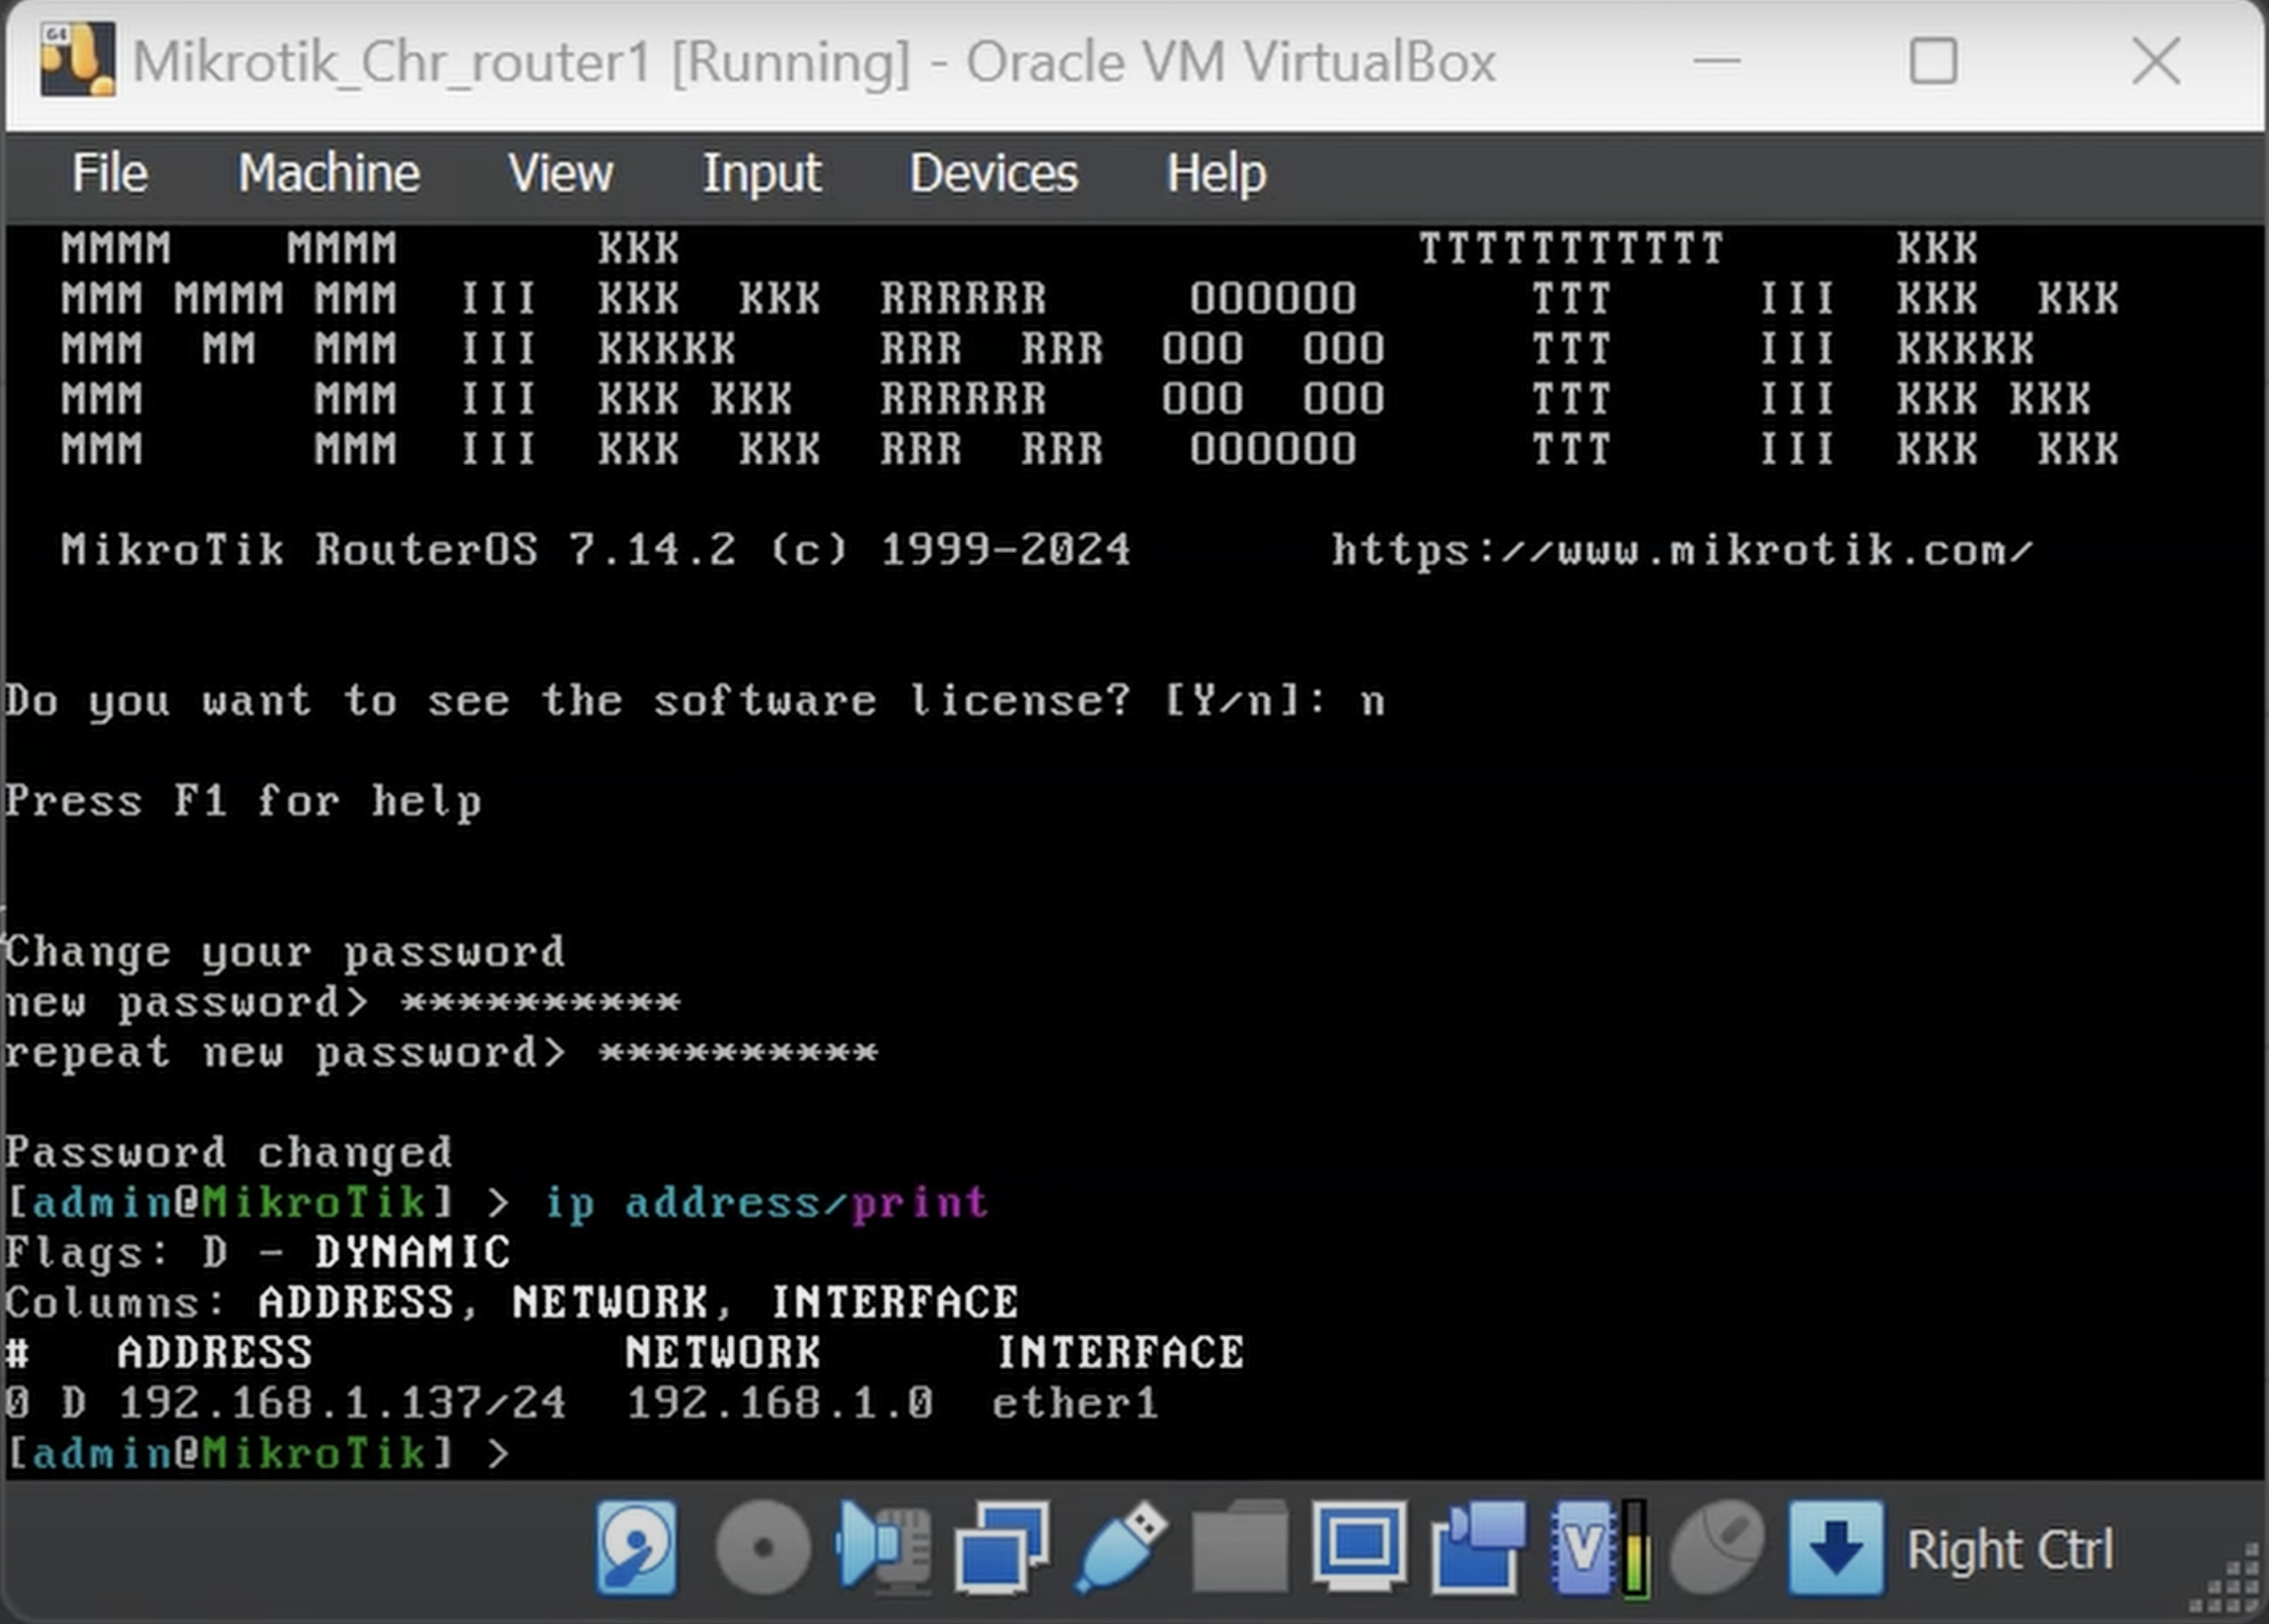
Let’s get the IP address that we have for the MikroTik.
In the CLI screen, type ip address print.
It will print out the IP address of the MikroTik router on the screen.
Access the winbox web config.
Open a browser and enter the ip address as url like http://192.168.1.137, as shown below.
when you enter the username and password, it will take you to the webconfig page, however I would prefer to access the MikroTik management GUI using the winbox software.
Open the winbox utility.
The best part about winbox utility is that you could access the MikroTik router either using mac address (L2) or IP address.
We already downloaded the winbox software on our machine, open it.
By default, when your machine is the same network as the MikroTik, you will get the MikroTik under neighbour list with its ipv6 ip.
As I am not using the IPv6, I would specify the private Ipv4 address that I have and try to access the MikroTik GUI using the winbox.
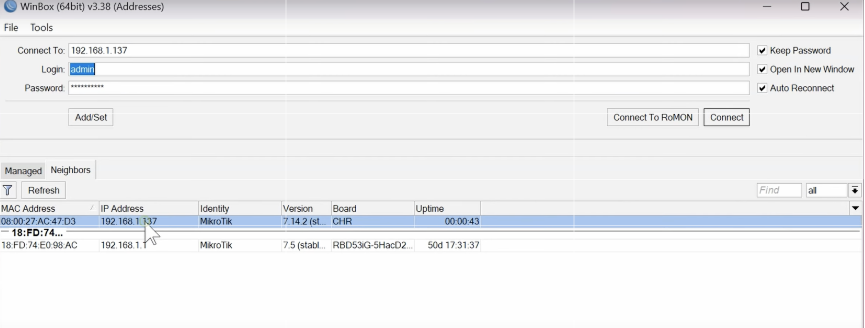
And here is the winbox management console of the MikroTik chr router.
7. Setup the initial network.
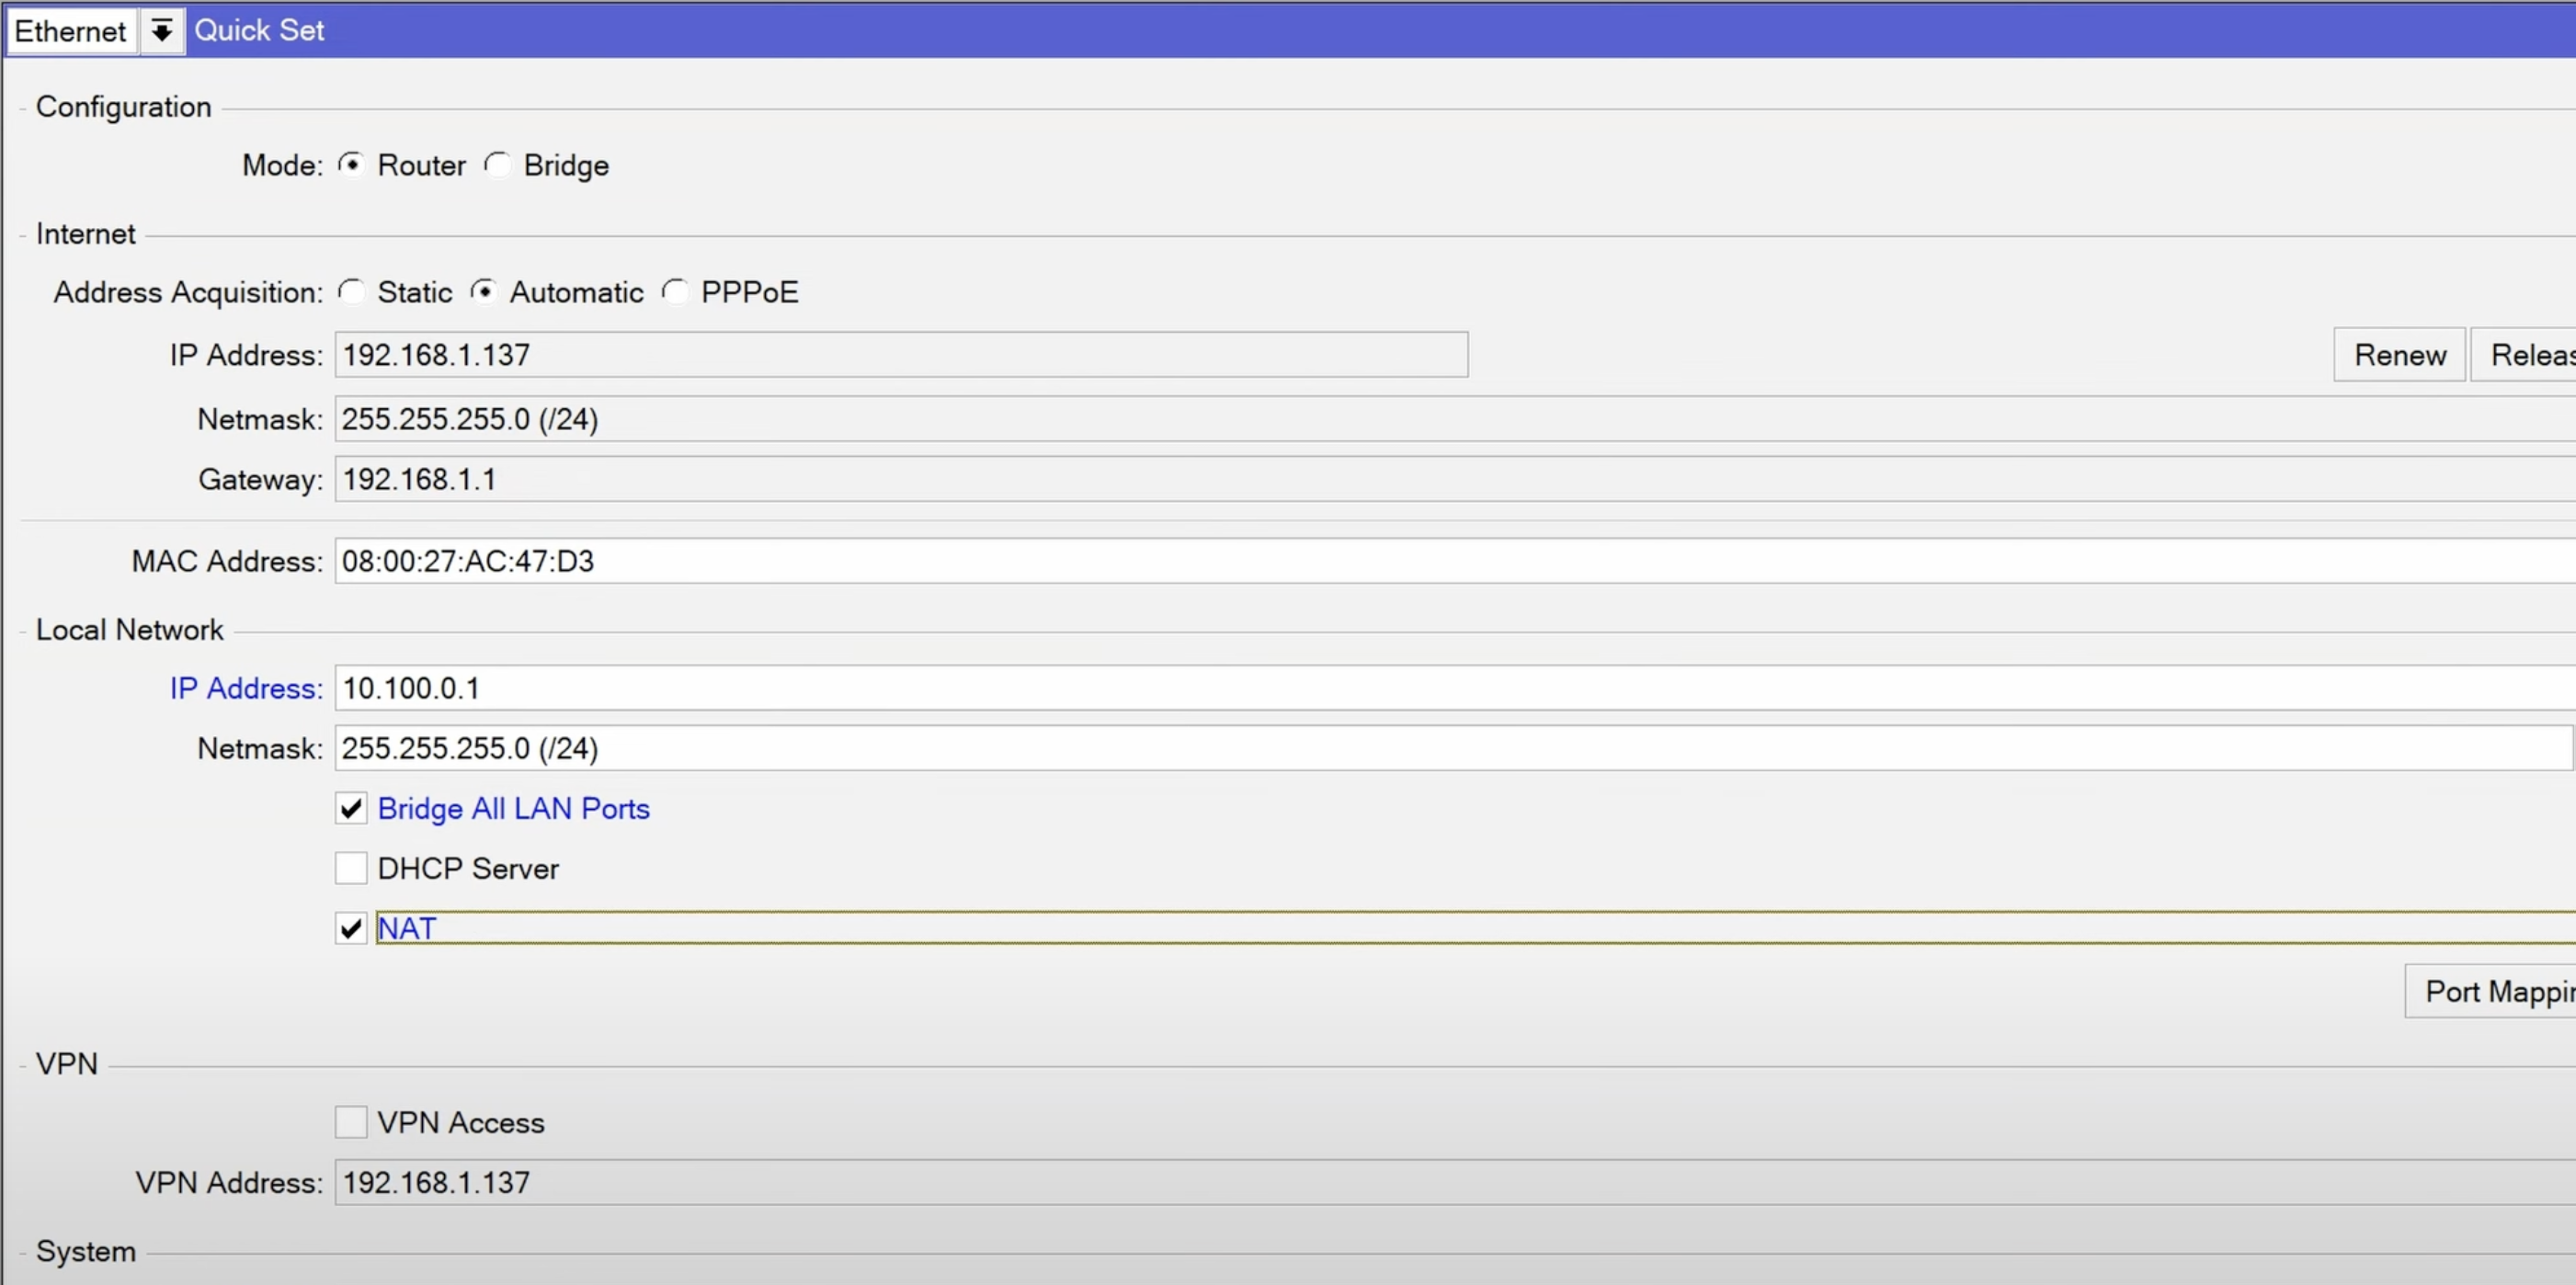
Click on the Quickset option located on the top left corner. You’ll notice that the WAN link is already configured with the IP address 192.168.1.137, and we’ll keep it as is with the Automatic configuration.
Now, let’s move on to setting up our local network. As mentioned earlier, we’re going to configure the IP address 10.100.0.1 with a subnet mask of 255.255.255.0 (/24).
- IP address: 10.100.0.1
- Netmask: 255.255.255.0 (/24)
Next, make sure to check the box that says “bridge all LAN ports.” This will add our lan interface ether2 to the bridge interface.
For now, we won’t check the DHCP server option, as we’ll handle that setup later.
Additionally, ensure that the NAT (Network Address Translation) option is checked. This way, the internal Virtual Machine (VM) will have access to the internet using the MikroTik WAN interface.
Once you have reviewed these settings, go ahead and click on the “Apply” button, followed by “OK” to confirm the changes. This will apply the configurations and finalise the setup.
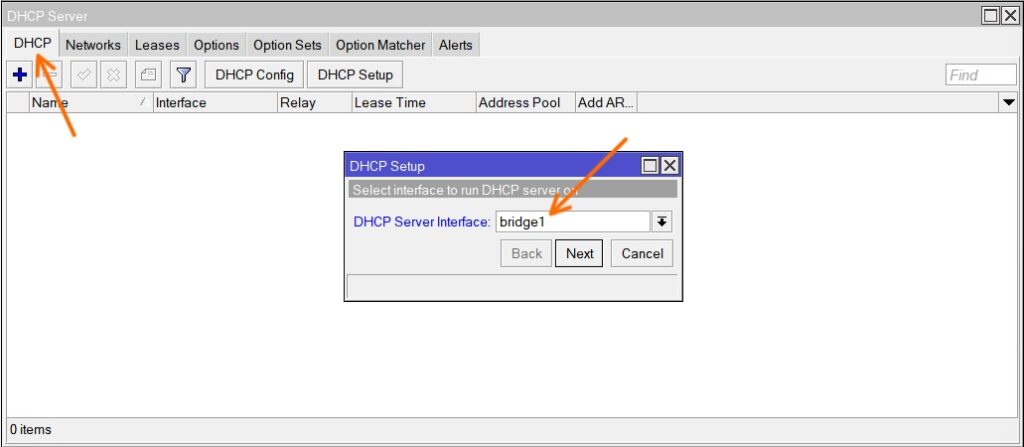
8. Update the DHCP service.
I found setting up the DHCP service within the quickset is a little buggy, so I decided to configure it manually.
Goto IP-> DHCP server.
In the New window DHCP tab, click on DHCP setup.
A new wizard will pop up, choose bridge1 as the DHCP server interface and then click on Next.

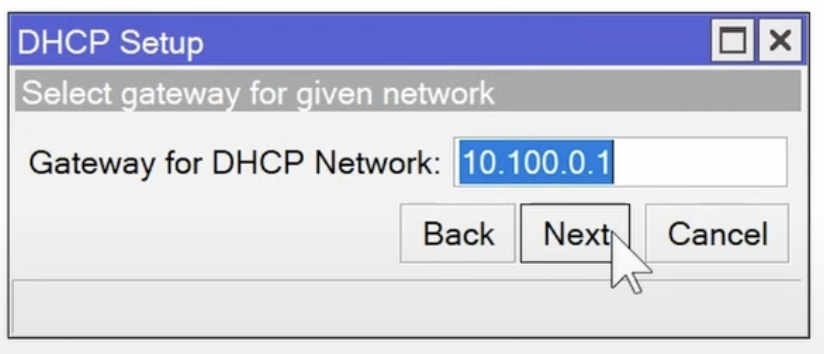
You will be asked to enter the DHCP network address, enter 10.100.0.0/24.
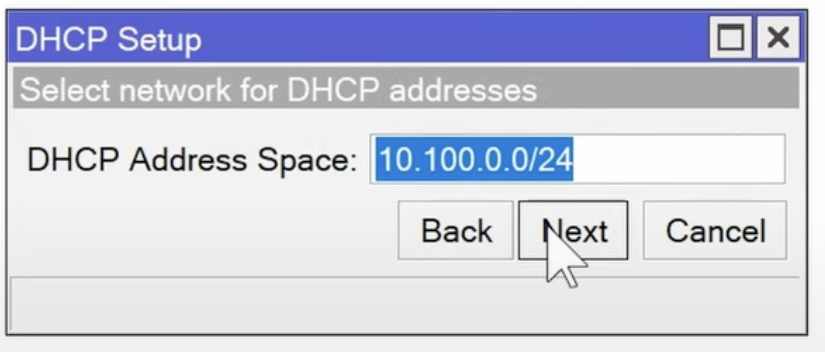
The gateway will be the MikroTik LAN interface IP, so enter 10.100.0.1
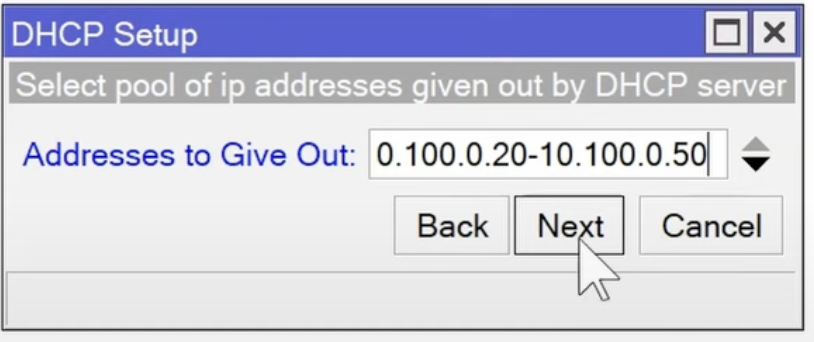
We could give out the entire scope or limit to whatever the scope that we want.
I am just leasing out only 40 IP’s which is again an overkill for my setup, but that’s okay. So I added 10.100.0.20-10.100.0.50.
So depending on your requirements, you may set up the dhcp scope range and click on next.
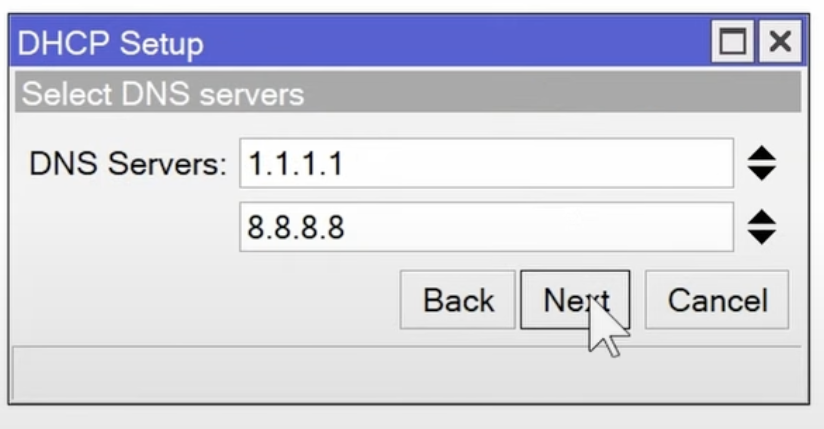
In the DNS, add the primary and secondary DNS servers and click on next.
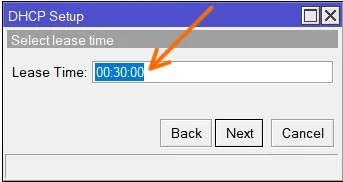
Leave the lease time to default and click on next.

9. Test the network connectivity.
So we have set up the network, it’s time for us to test if everything is working or not.
We are going to test the network connectivity by connecting a virtual machine to the MikroTik LAN network and try to access the internet.
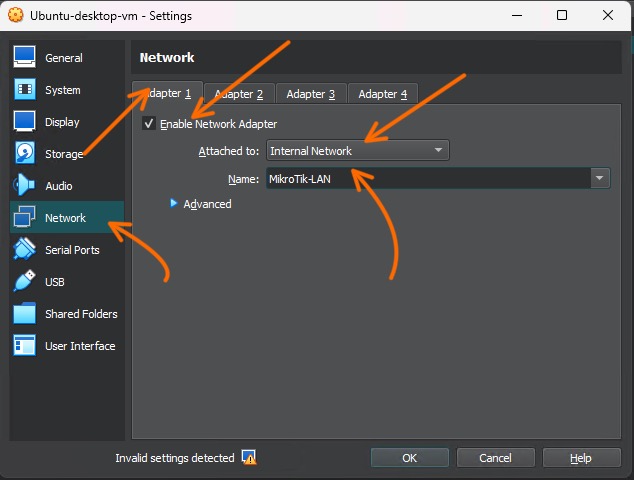
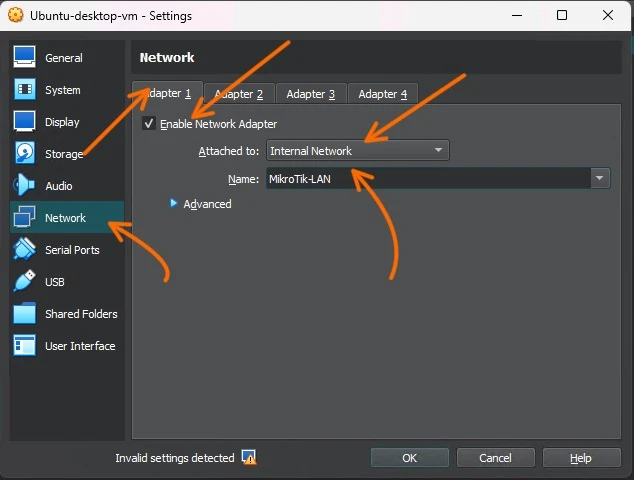
I have an windows11 VM, and I have connected it to the MikroTik LAN network by going into settings -> Network and Adapter1, I chose Internal network and from the drop down choose MikroTik LAN and click on Ok.
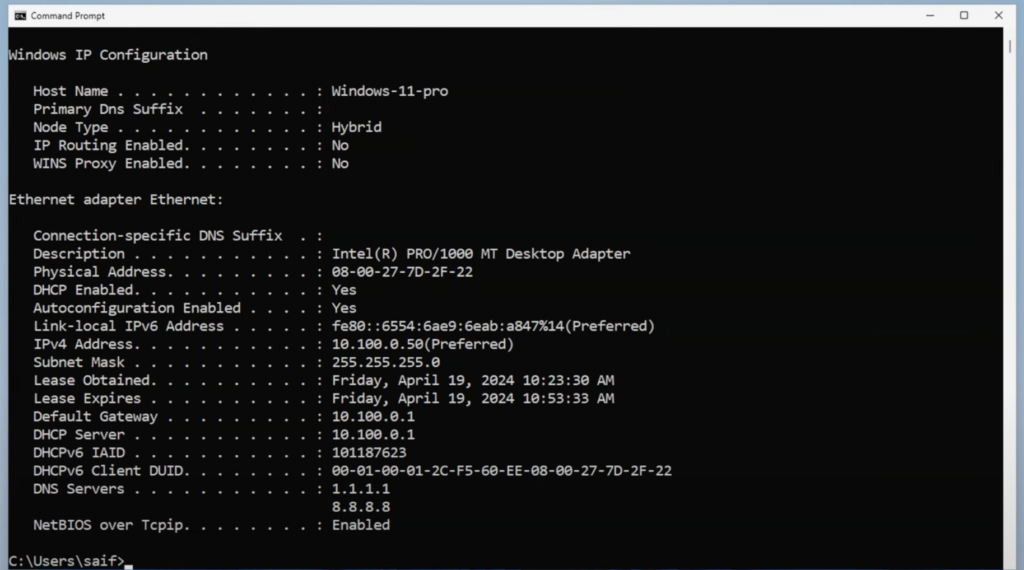
Started the Windows11 machine and as you can see, I got an IP address from the MikroTik DHCP service. Let me see if I can reach the internet.
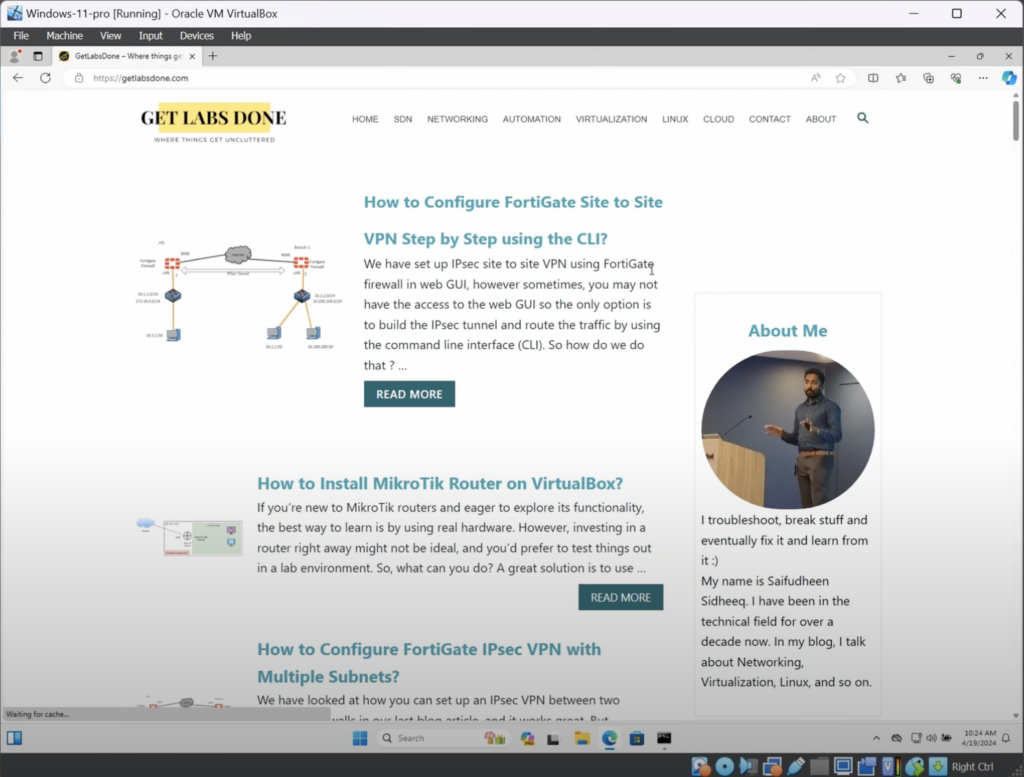
I tried to browse my website and it works fine as well.
If you try to run internet speed test, you will see the speed of the internet is not going beyond 1mbps, thats because of the you dont have license.
Once you get the license as shown in the video, you will be good to go.
srinivas
Thursday 5th of September 2024
Dear Sir, Hope you are fine. I followed your tutorial and created mikrotik router OS in VM vertual box. My Desktop having only one LAN port how to make it as virtual router for lab practice purpose