The MikroTik router has gained popularity in recent times for home and small business branch deployments due to its support for firewall features and IPsec compatibility.
One of the key advantages of this hardware is its affordability compared to other vendor products, which has contributed to its growing popularity.
Another advantage of the MikroTik router is its support for virtualization, allowing you to deploy it in various environments of your choice.
Before investing in the hardware, you might want to test its functionality or create a separate lab network that is isolated from your main network. In such cases, you can build a MikroTik router on VMware Workstation. This not only gets your work done but also requires minimal resources and is lightweight.
Imagine running a firewall with just 128 MB of RAM – that’s what we’re talking about here.
While you can certainly find inexpensive hardware in the market, the easiest way to set up and run everything is by virtualizing the MikroTik routers.
One thing to keep in mind is that, when you install the MikroTik router, known as MikroTik CHR router, by default, you will have a free licence, which will restrict the speed of all the interfaces to 1Mbps, which is enough for the lab purposes.
In this blog post, we will explore how to install a MikroTik router on VMware Workstation Pro and create a small lab using it.
Below is the video instructions If you prefer to watch step by step guide video.
Prerequisites:
VMware Workstation Pro: Vmware workstation pro is now free for personal use, you can follow the articl here to get a free copy of the software.
In case if you are looking for commercial use, you can get the license from here.
Winbox: This management utility can be downloaded from the internet here. We will use this utility to access the MikroTik management GUI.
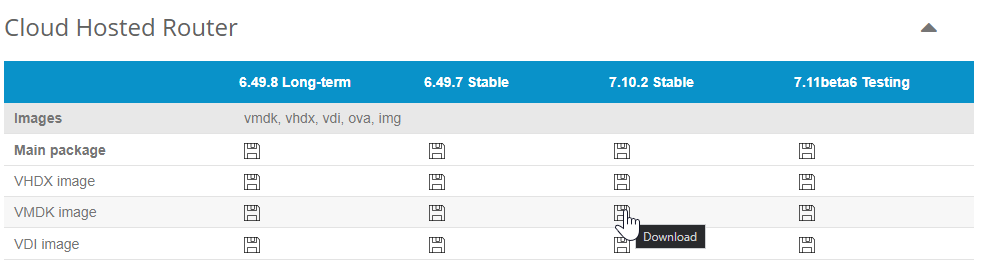
MikroTik Cloud Router image: MikroTik supports various hypervisors, and you can download the VMware-supported image from the site here.
Scroll down to the Cloud Hosted Router , and click on download under VMDK image.

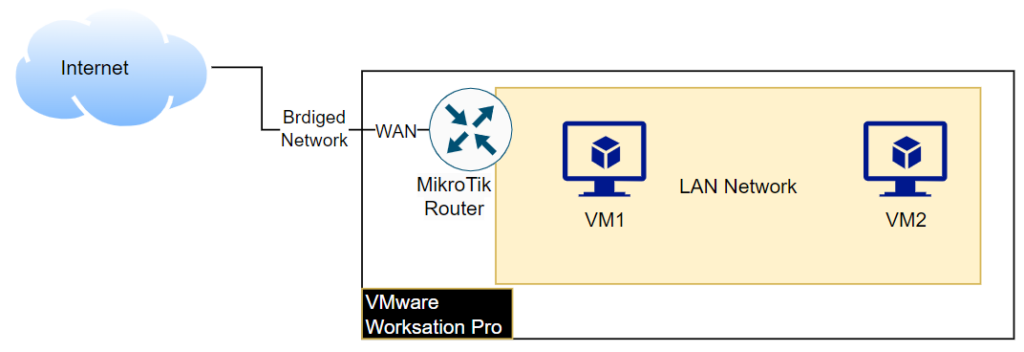
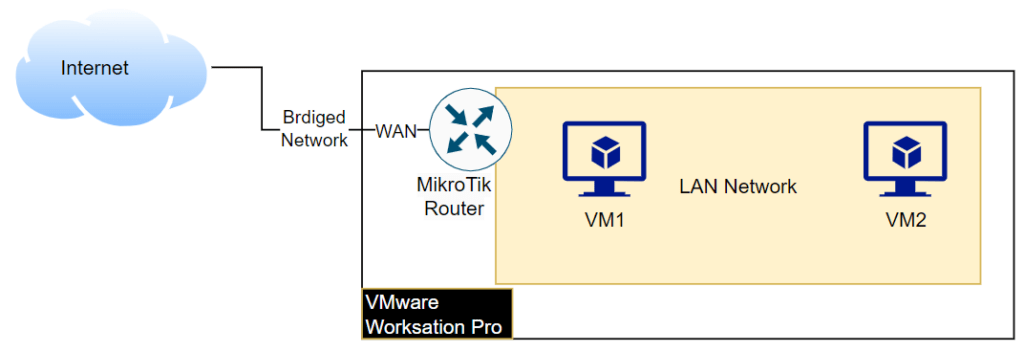
The topology we are going to build is as follows:
We have a MikroTik router connected to the internet, and another VM that will act as LAN users. We will configure the MikroTik router to allow the LAN users to access the internet.
1. Import the MikroTik router image to the VMware workstation.
Lets go ahead and import the MikroTik VMDK image into the VMware workstation pro.
Open Vmware workstation.
Click on Create a new virtual machine. Alternatively, you could type as well press CTRL + N.


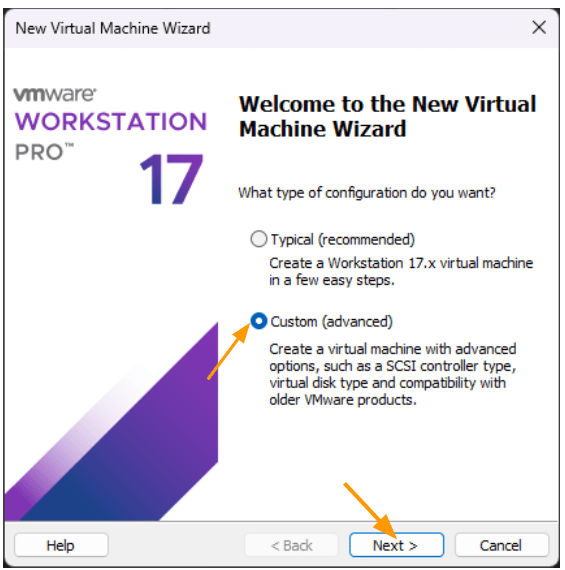
Choose Custom (advanced)
And click on next.

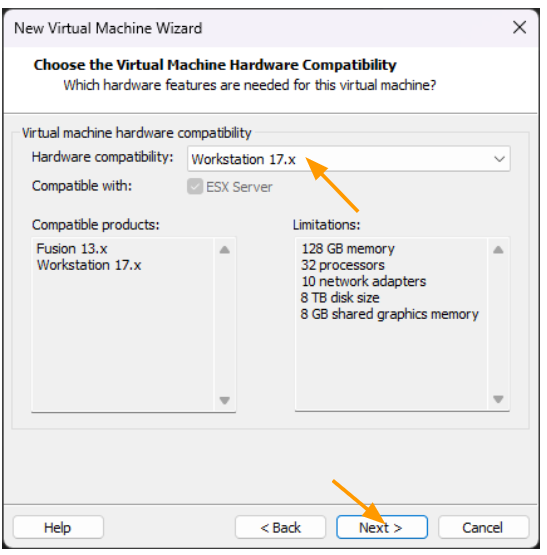
In the Virtual machine hardware compatibility, choose Vmware Workstation 17.x and click on next.

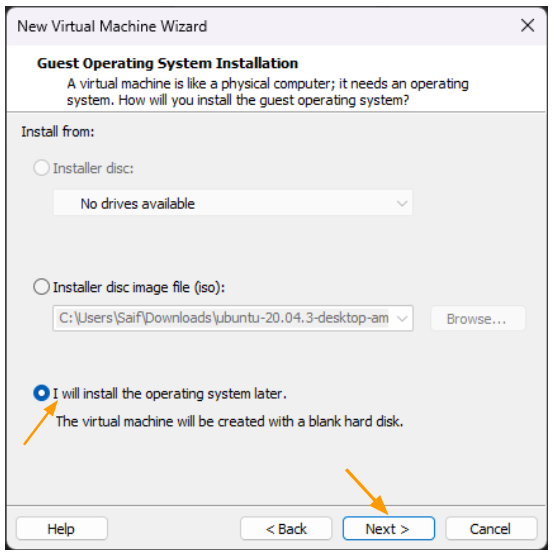
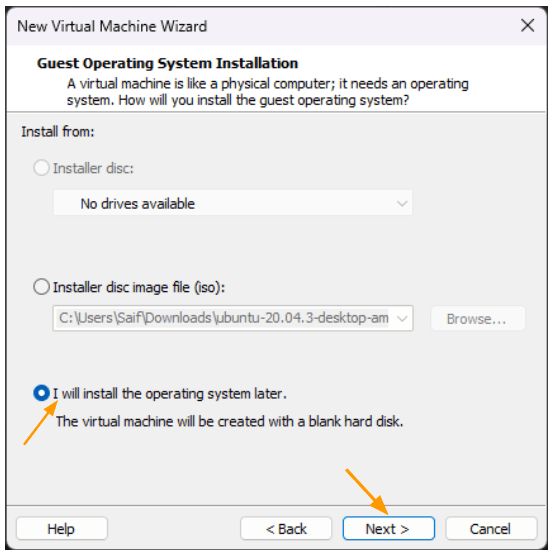
On the next screen, choose i will install the operating system later and click on Next.
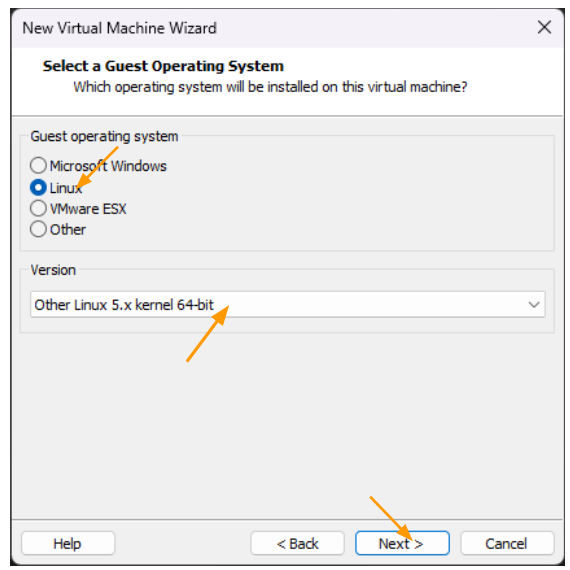
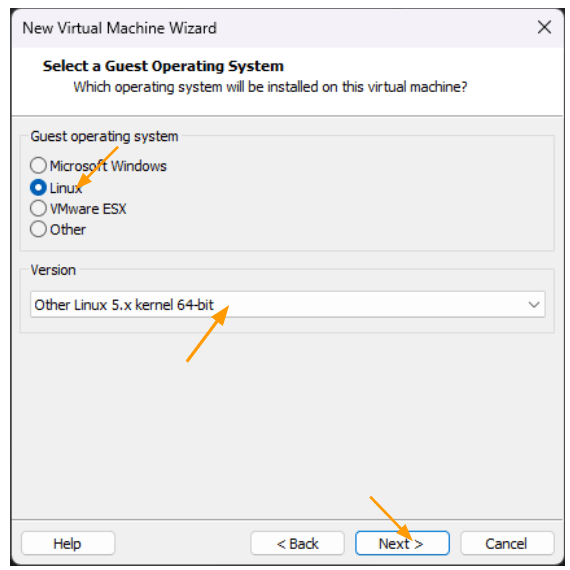
Under select Guest operating system, choose Linux.
In the version choose Other linux kernel 5.x kernel 64-bit and click on next.
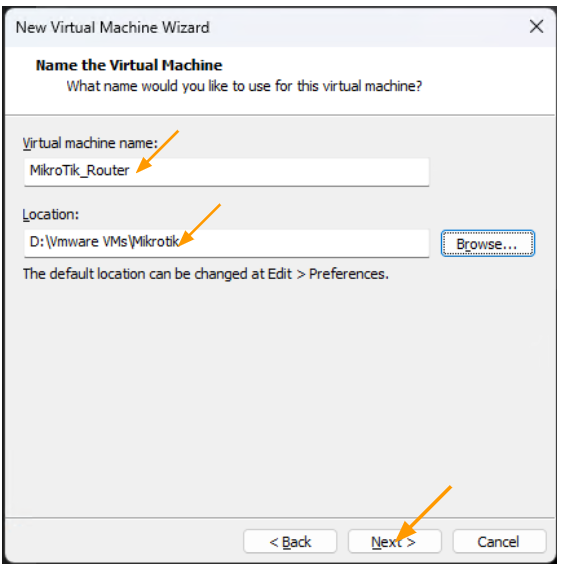
Enter the name for the router and choose the location where you would like to install the MikroTik software. You may click on browse to browse for the VMDK location. And click on Next.
As you can see, I have chosen the same location where I have kept the VMDK file.

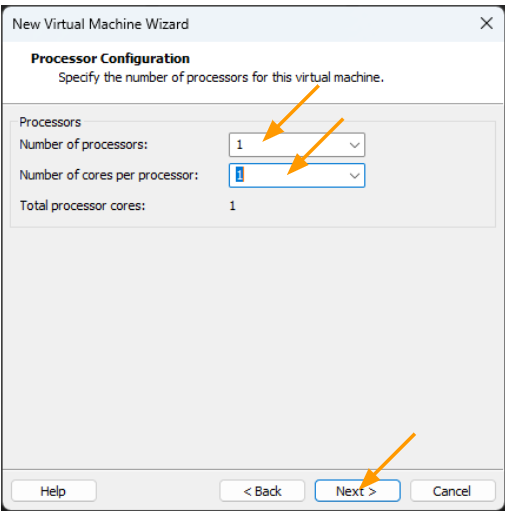
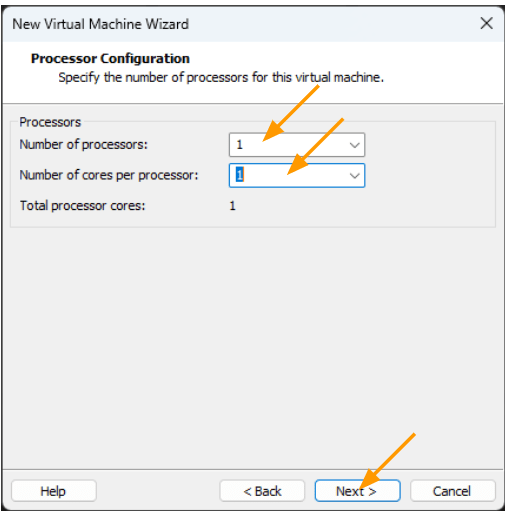
In the processor configuration, choose 1 in the number of processors and in the number of cores per processor choose 1 again and click on Next.
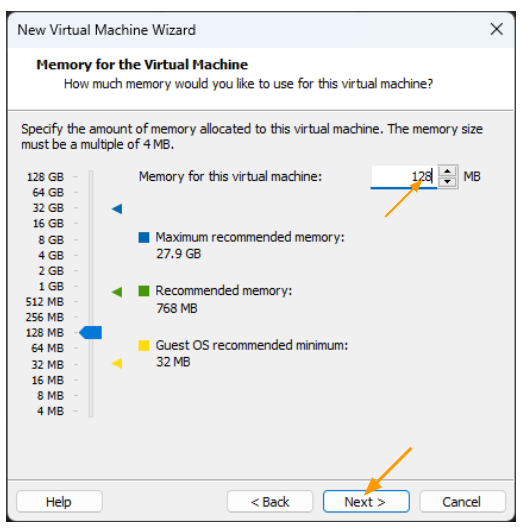
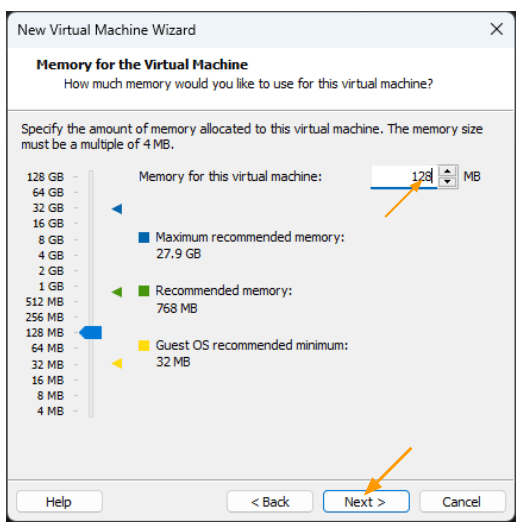
Enter the memory for the virtual machine, give 128MB of Ram and click on next.
2. Configure MikroTik WAN interface.
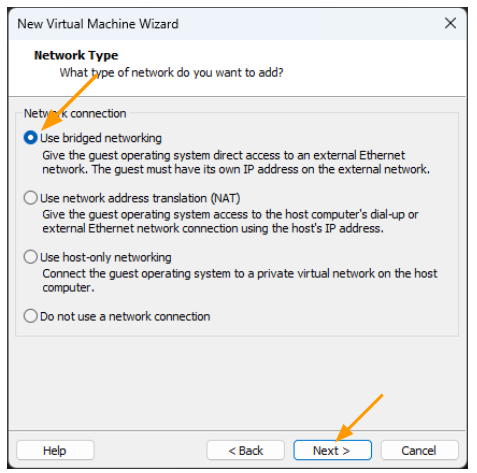
We would require two networks to be created, one will act as WAN and other will act as LAN.
In the WAN we will use a bridge network, when you choose a bridged network your MikroTik router WAN interface will get an IP address from your LAN network, and it becomes part of your LAN network.
And for the MikroTik LAN side, we will choose the LAN segment which we will configure when we customise the hardware.
Click on next.

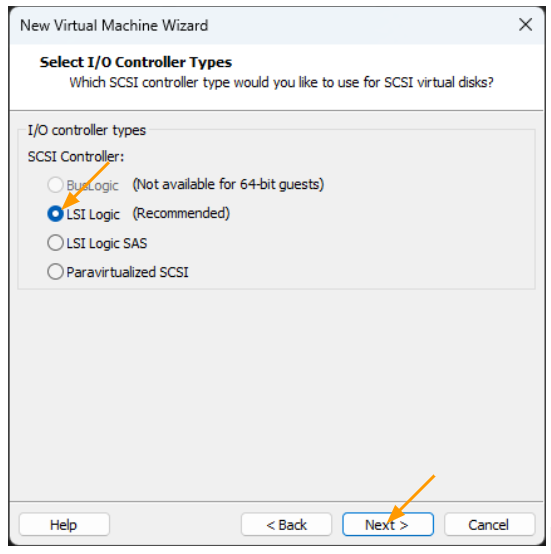
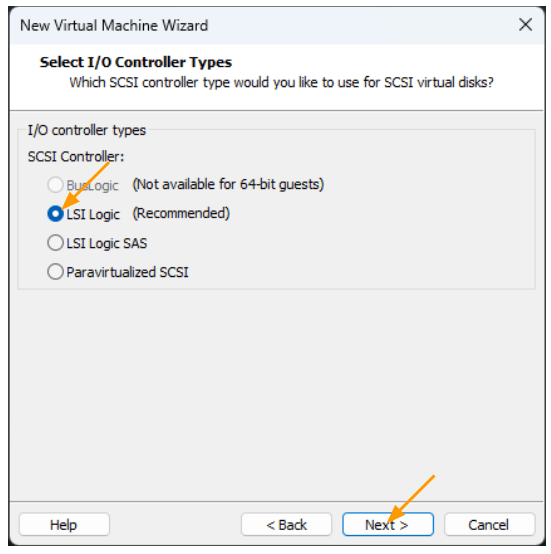
Select I/O Controller type.
CHoose default settings and click on Next.
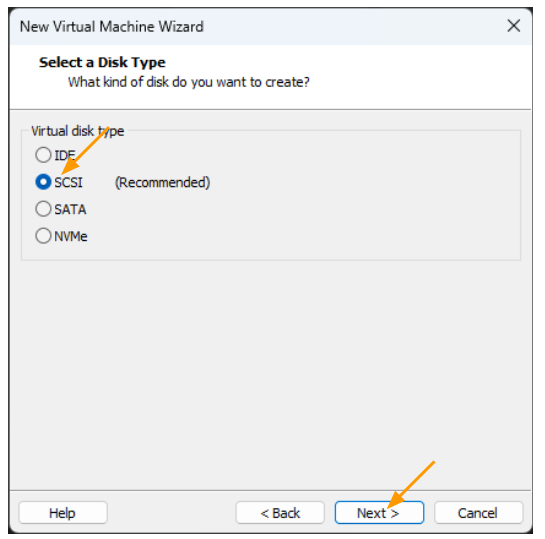
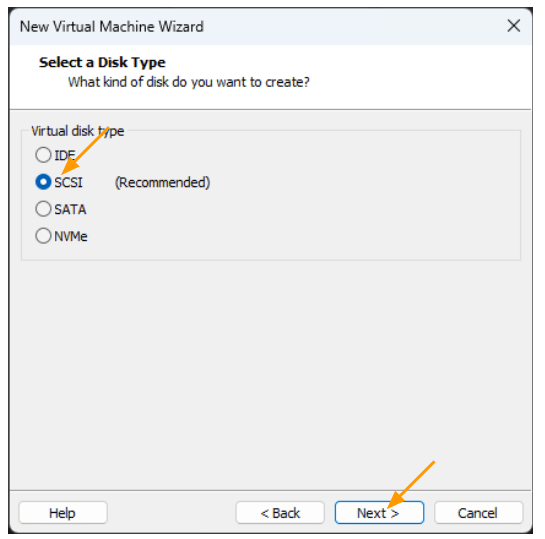
Select disk type.
Choose the default scsi option and click on Next.
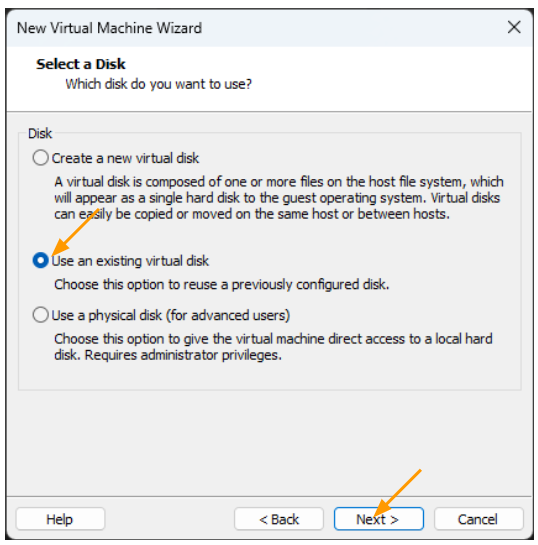
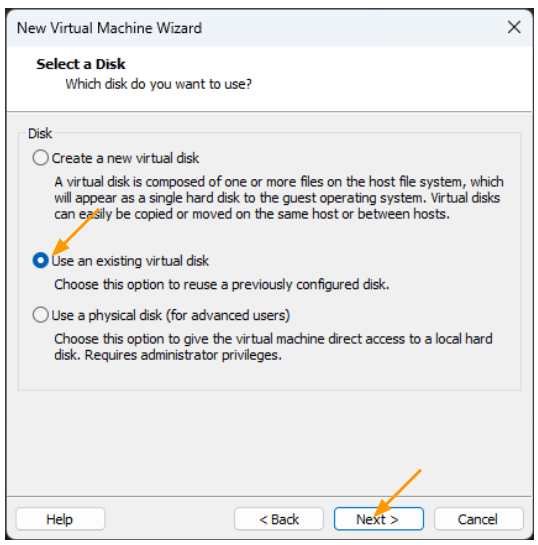
3. Import the MikroTik VMDK disk image.
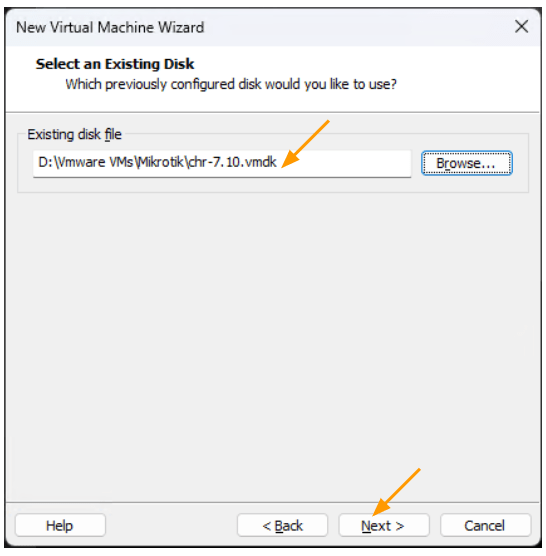
On the next screen, choose to use an existing disk image and click on next. This will let you browse for the VMDK image that we downloaded.
Click on next.
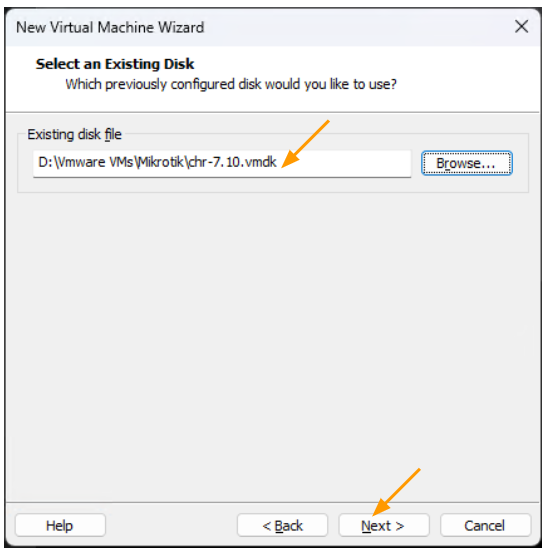
You may now click on browse to attach the disk image and click on next.
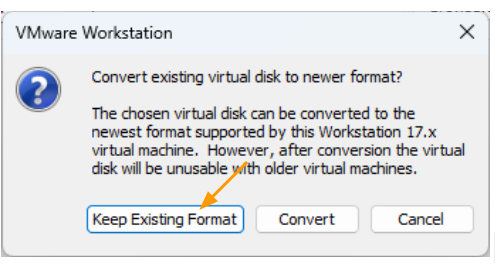
You will be prompted to convert the vmdk image, for which you may choose to keep existing format.

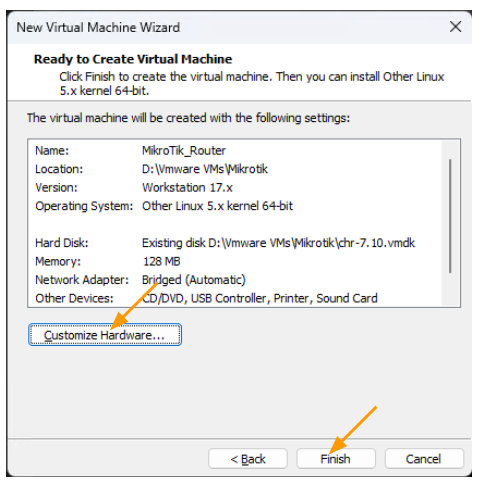
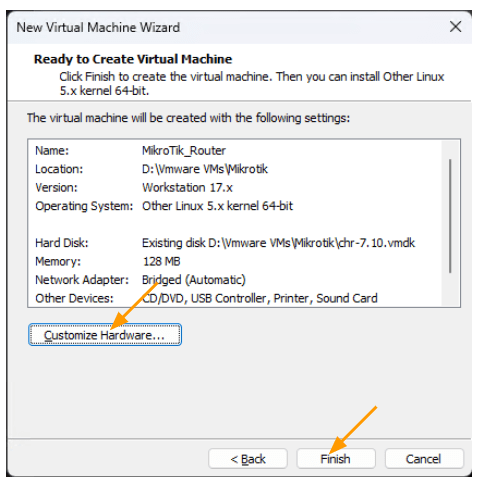
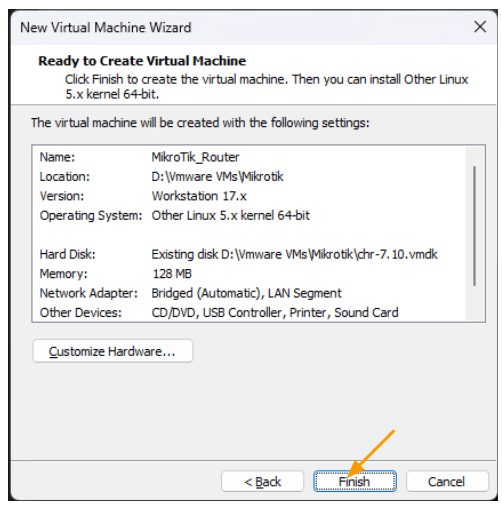
4. Customize hardware.
You will get the summary of the MikroTik installation, click on customize hardware to make some changes.
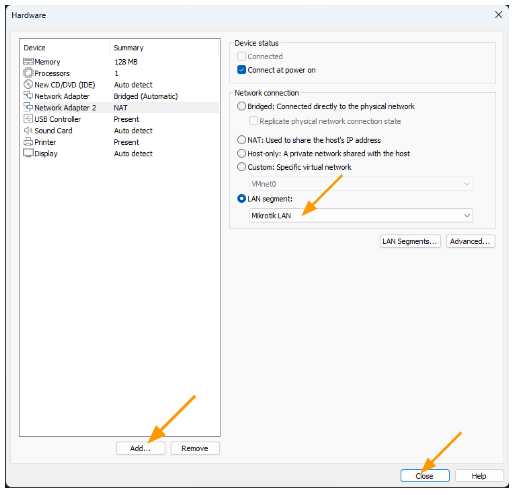
5. Configure the MikroTik LAN interface.
When we added the network, we added only the bridge interface which will act as WAN and we are now adding the LAN interface.
Click on Add.. to add a new network interface.
We are now going to add an isolated network where only the interfaces that are part of the network can talk to each other.
For that we can use LAN segments.
On right side click on LAN segment, and create LAN segment specifically for MikroTik.
Choose mikrtok LAN segement from the list and click on close.

You may now click on Finish.

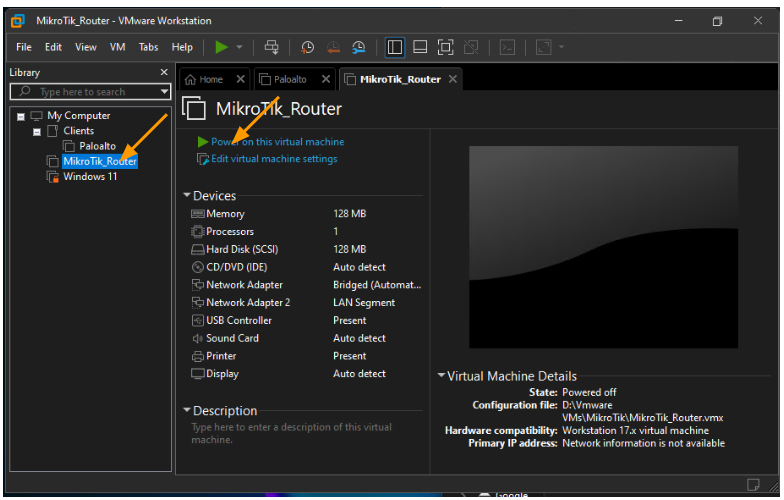
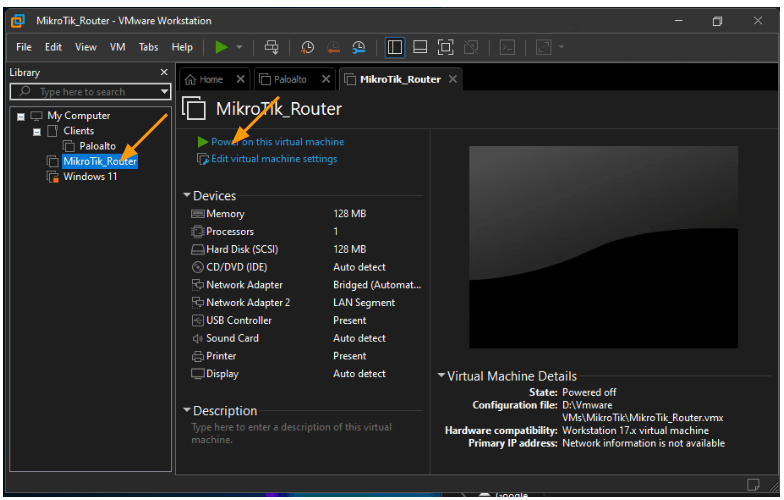
From the VMware console, power on the VM by pressing the play button.
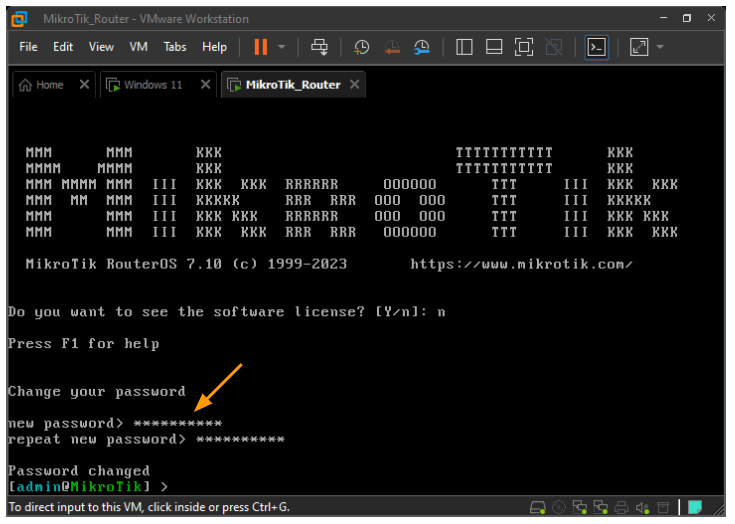
After a few seconds you will get a login CLI of the MikroTik cli page where it is asking you to enter the credentials.
Enter the username as admin and password is blank and hit enter.
You will be asked to enter the new password and confirm the password and hit enter, you will get a message that says password changed.

6. Access the management Gui.
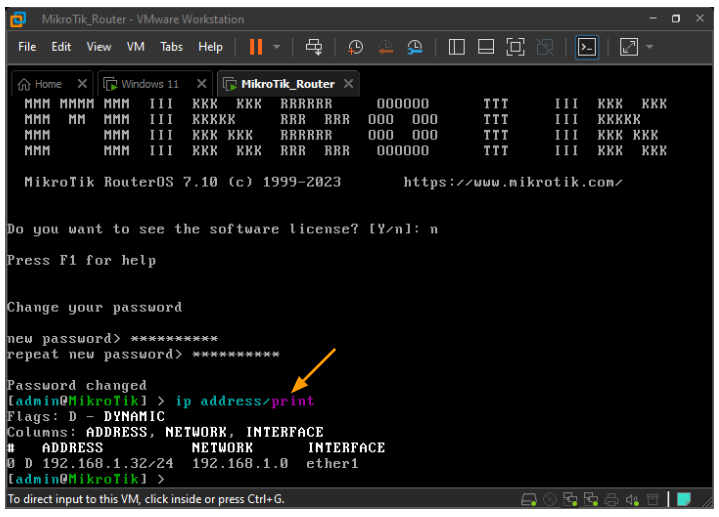
To view the IP address on the command line interface (CLI), you can enter the command “ip address print.” This command will display the IP address obtained from the bridged adapter.
You may note that if you encounter difficulties in obtaining the IP address on the bridge interface, you can checkout the article here to troubleshoot further.
Alternatively, if you are unable to obtain the IP address on the bridged interface, you can use the NAT interface as a temporary solution.
For more information about the different network types available for VMware Workstation, you can explore further here.
In this case, the IP address 192.168.1.32 has been acquired on the MikroTik WAN interface.
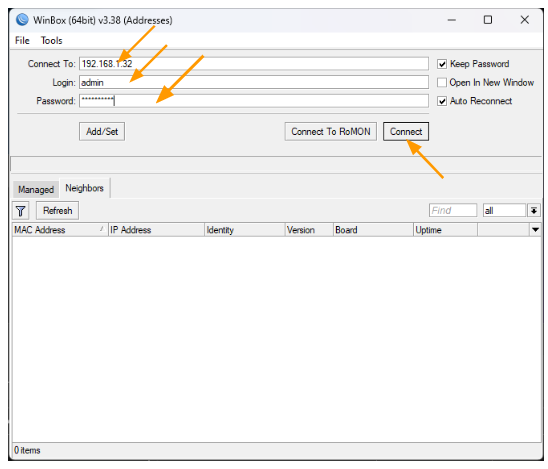
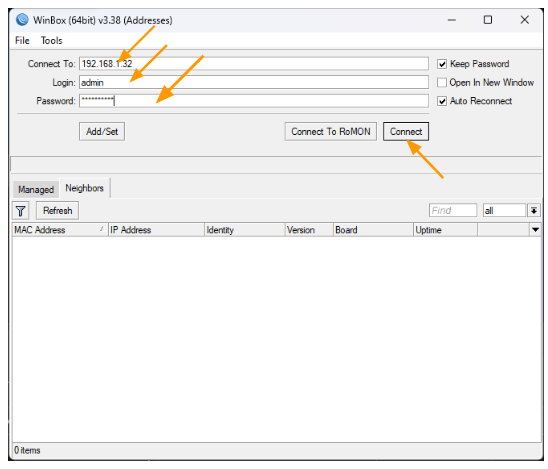
To access the management GUI, you can use Winbox in either L2 or L3 mode, utilising the available IP address.

Open Winbox, enter the IP address.
In the username field, enter admin, and in the password field enter the password that you just reset and click on connect.
7. MikroTik Initial setup.
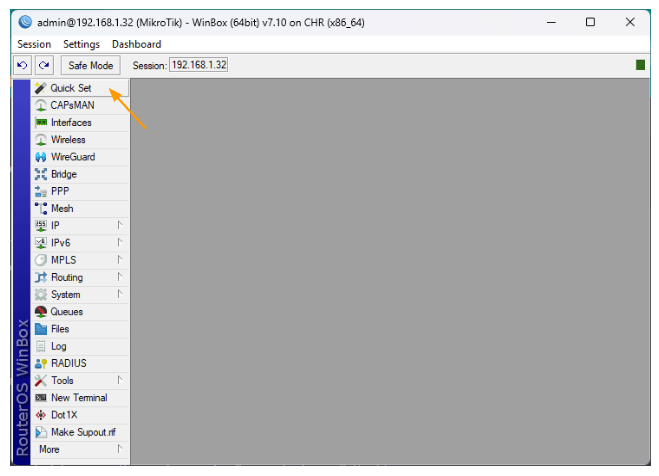
In the MikroTik main page, click on Quickset on the top left corner. This will let you configure everything step by step.

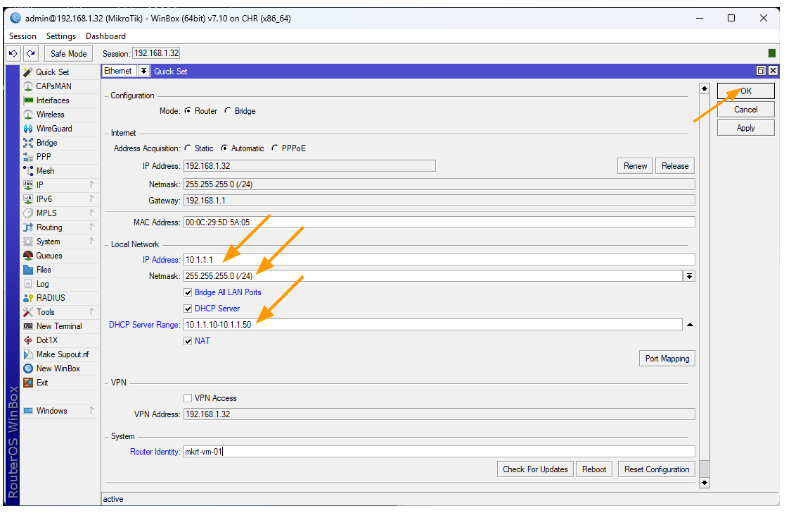
8. Configure the LAN side.
On the internet side, leave everything default. This is where you configured the WAN interface.
Local network.
By default, you will have 192.168.88.0/24 as the network, you could either use the same or change it if you would like.
In my case, I am changing it to 10.1.1.0/24 network.
IP address: enter the ip address.
Netmask : enter the netmask that you are going to use.
DHCP Serve Range: As we require the IP to be assigned automatically for the VM, we are going to specify what range the vms can get the IP address.
I am adding 10.1.1.10 to 10.1.1.50 IP address.
Clik on Apply and ok.

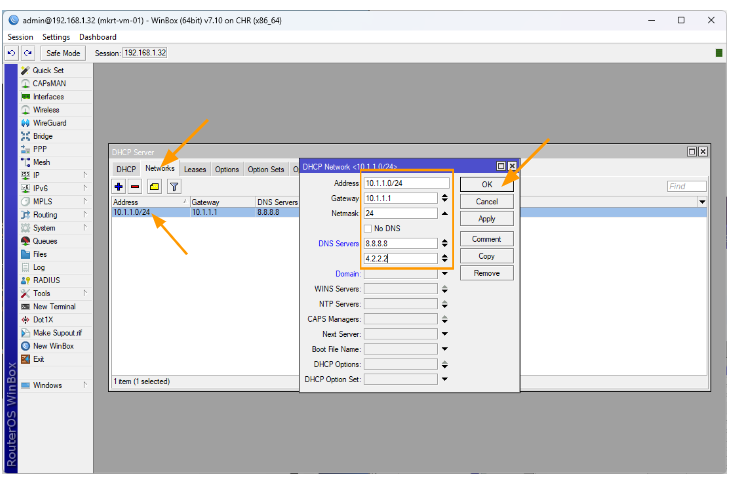
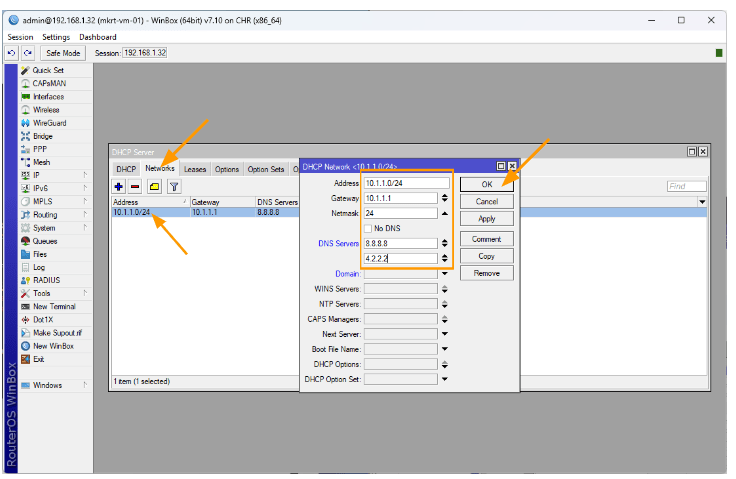
Though we configured the DHCP service, the DNS is still pointing to the old DNS IP, so we need to change that.
Click on IP -> DHCP server.


Networks
Click on the network that you see, here you can see 0.0.0.0/0 even though we assigned 10.1.1.0/24
In the new tab, add the following.
Address :10.1.1.0/24
Gateway:10.1.1.1
Netmask : 24.
DNS servers: 8.8.8.8, 4.2.2.2
Click on ok.
9. Test the connectivity.
I already have a Windows 11 VM currently running in the VMware workstation.THe operating system doesn’t have to be windows 11, you could try with other operating systems as well.
Right click on the VM that you have, and click on settings.
Change the network adapter to the same LAN segment as the MikroTik LAN.
Power on the Virtual machine.
As you can see, i go the IP address from the DHCP scope that we defined and it also has the dns servers that we defined.

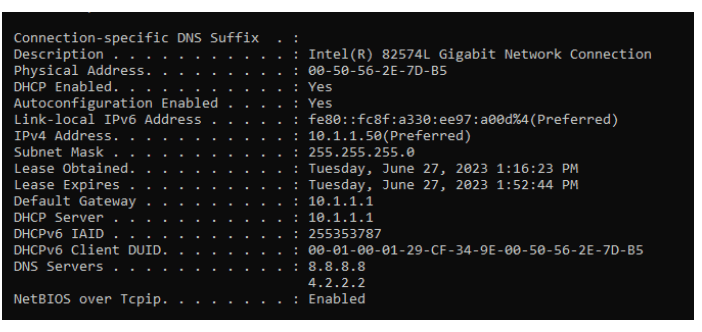
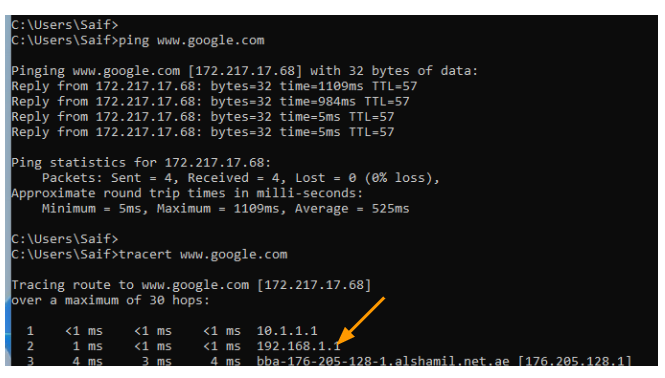
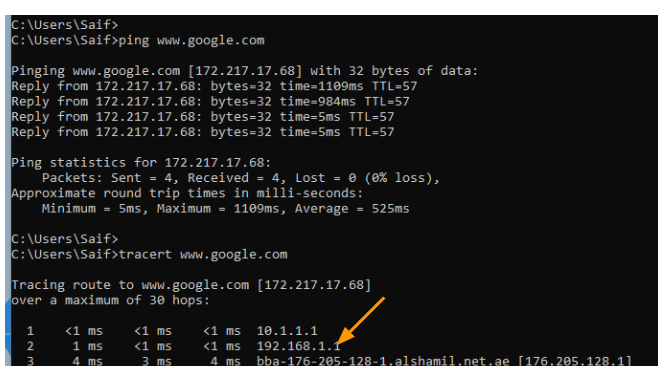
You may try ping google or any public domain, you should now get a response.
And the traceroute says, it is taking the MikroTik router gateways, afterwards you can see it is going to the LAN gateway which is 192.168.1.1