
Ubuntu is one of my favorite Linux distros, but I love windows 10 as well. I used one of my windows machines as my main operating system, as I also needed Ubuntu. I used to virtualize Ubuntu on a VMware workstation.
It was going well until I decided to use GNS3 on my windows machine. I was using GNS3 with a VMware workstation. However, from my experience, to get better performance, I realized that it is better to use GNS3 on a Ubuntu KVM box instead of virtualizing them on VMware workstation hypervisor., which again runs on top of the windows operating system.
For those who don’t know what GNS3 is, GNS3 is a network simulation software that lets you create the virtual network and topologies. Since I am a network engineer, I use many POC labs before I deploy them in production and GNS3 works best for that.
how am I using GNS3 on my Ubuntu as a remote server? I covered that article here.
Anyways, I decided to make a switch, in the beginning, I thought let me format the whole system and start using my machine as an Ubuntu workstation. Since I also love windows and I had a lot of files on my windows box, I didn’t want to give up on the windows machines either. Hence, I decided to use Ubuntu and windows together, what are the options did I have?
The first option was to try installing Ubuntu on my machine and virtualize windows 10 as KVM in it, which worked fine on my previous project. But what if I want to perform some heavier task? Which can only be achieved on a windows physical host than a guest VM. That’s when I needed to think about the dual boot windows 10 and ubuntu, meaning install the Ubuntu along with side windows on the same machine.
Can I dual boot Windows 10 and Ubuntu?
I decided to perform a dual boot of Ubuntu alongside Windows 10, that way I can start using Ubuntu as my main computer and switch to windows when needed. I can also have windows 10 in KVM, just so if I need to access the VPN or perform some tasks on windows 10.
You can do a dual boot to Ubuntu and Windows 10, and it works great. I have used it many times, however, the only concern is you can use one operating system at a time, either windows or Ubuntu. For example, you are using Ubuntu and you need to run a program in windows and at that point in time, you will have to shut down the Ubuntu machine and switch to windows 10.
Read also,
Windows 11 on VMware workstation – How to install it?
Windows 11 on KVM – How to Install Step by Step?
How To Set Static IP On Ubuntu? (GUI and CLI)
How To Install Windows 10 on Ubuntu KVM?
How To Install Ubuntu Desktop On KVM?
How to Configure SSH Access on Ubuntu? SSH &SCP
How to transfer files from windows to Ubuntu ?
Can I install Windows and Ubuntu on the same partition?
This is one of the items many people get confused about and mess up the operating system. In the end, they would lose the windows operating system during the process.
Since windows use NTFS and Ubuntu EXT4 (different disk format), you cannot install windows and Ubuntu on the same partition, and if you ever try to do that you might lose the windows operating system files during the Ubuntu partitioning.
Don’t worry, we are going to follow a simple procedure that would help you set up the windows on your Main C drive, and we would carve out some space from your main drive or a spare drive and allocate for the Ubuntu to use. More on that later.
In this blog, we are going to install Ubuntu on PC alongside windows 10, basically going to do windows and Ubuntu dual boot. On my laptop right now, I have windows 10 installed already.
Prerequisite,
- USB drive with at least 4 GB storage.
- Rufus software – for Making the USB bootable disk.
- We are using Ubuntu’s latest version 20.10 for this setup.
- Download the Ubuntu 20.10 here.
- In case other versions use the below links.
- And a windows PC with a decent configuration of course. You should have a minimum i3 CPU with 4 gigs of RAM.
Steps to install windows alongside ubuntu.
- Create free hard disk space for Ubuntu in windows.
- Create a Ubuntu bootable USB.
- Choose USB as the boot drive in bios.
- Install Ubuntu on your machine.
- Setup the Ubuntu Hard Drive.
- Set the time zone and restart the Ubuntu.
- Select the operating system to load.
How do I go back to Windows 10 after installing Ubuntu? - Verify the storage.
1. Create free hard disk space for Ubuntu in windows.
The first step in the process is to create a free disk space that can be used by Ubuntu.
You need to first identify how many hard drives you have in your system if you have multiple hard drives, you need to decide on which hard drive you are going to install the Ubuntu.
For example, apart from the C drive, where you have installed windows 10, you might have a D drive as well. You now need to analyze how much space you have, based on that you can decide how much storage that you are going to give to the Ubuntu host.
In my case, it is pretty straightforward, In my machine, I have 500GB of storage, all in my C drive.
In that 500 GB, I have used 220GB.
So I decided to give about 250GB for Windows 10 and 250GB for Ubuntu.
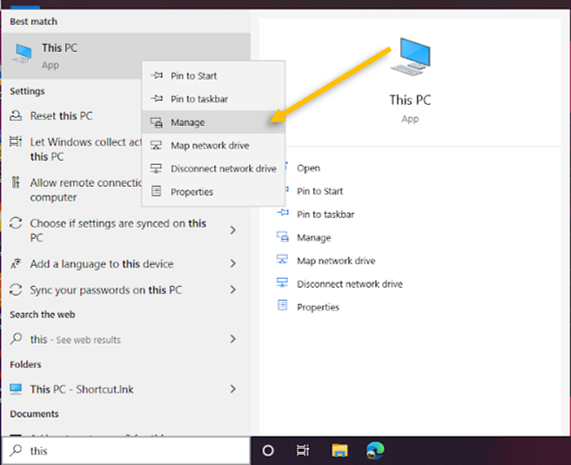
In windows click on the start menu, and search for This PC. Right-click on it and click on Manage.

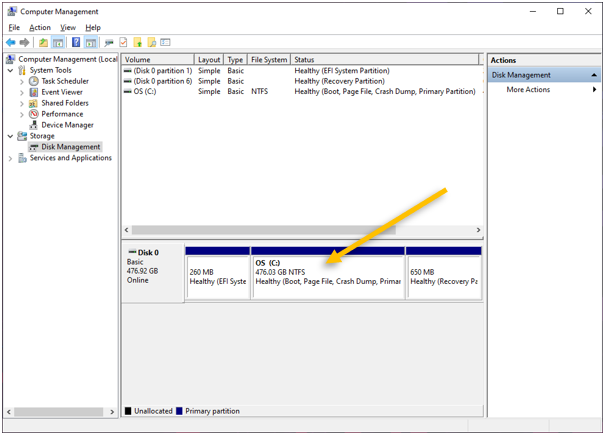
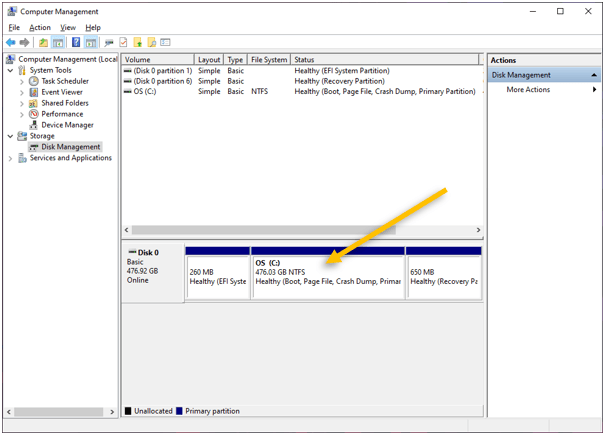
The computer management window will appear on the screen. You will have to click on Disk Management to manage the Disks on Windows 10 PC.
As you can see, the size of my hard disk is about 500GB.
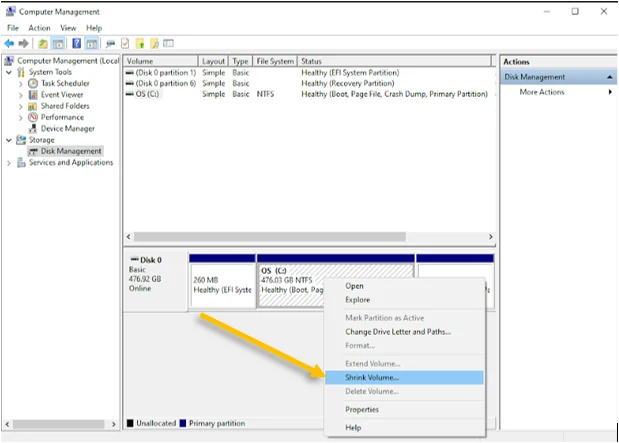
The next step is to create unallocated storage of 250GB in Windows 10, that can be used by the Ubuntu machine. Right-click on the drive that you want to shrink it, in my case C drive, and click on Shrink Volume.

A new window will pop up, In the field to Enter the amount of space to shrink in MB, I have given 255081 which is about 250GB then click on Shrink.

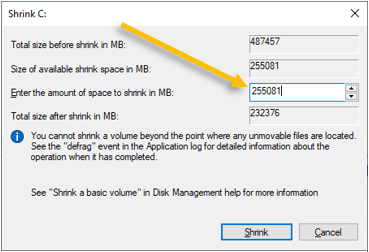
Right after you did that, you can see the unallocated space of 250GB has been created in the windows disk manager.


2. Create a Ubuntu bootable USB.
The next step is to make the USB bootable and copy the Ubuntu image files in it, there are multiple ways you can do it, however the easiest and the best way is to use Rufus software.
- Plugin the USB to your computer.
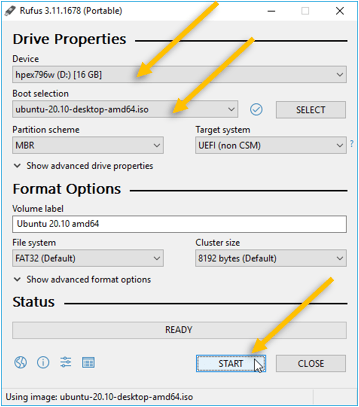
- Open Rufus software.
In the device choose the USB drive that you wanted to use.
Under boot selection, select the Ubuntu ISO image that you downloaded.
Leave everything else as default and click on start.

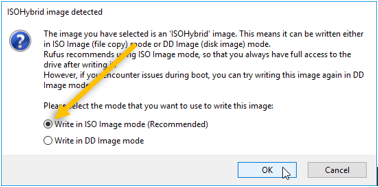
You will get two prompts, 1st is to select the mode, choose Write in ISO image mode and click on Ok.

You will get a warning that says the USB drive will be formatted, click on OK here.
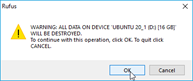

After a couple of minutes, the Ubuntu bootable USB will be ready to use.
3. Choose Ubuntu USB as the boot drive in bios.
You can keep the USB drive plugged in, next we will have to make changes on your Bios to Boot from the USB drive instead of your internal hard disk.
Shut down the machine and click on the power button, while the machine is boot up you need to press a key to get into the Bios.
In my Asus rog machine, I had to press and hold F2 to get into the bios.
For DELL machine = Tap the F2.
HP Laptop = Tap f10.
Lenovo = Tap F1
Each machines are different, so you have to choose your USB as the first boot device in the boot priority order.
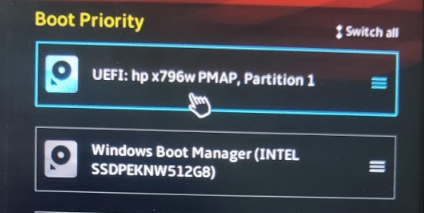
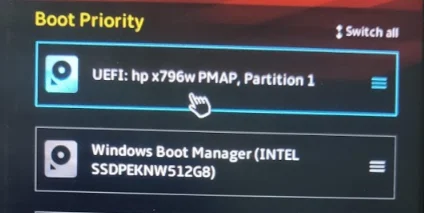
Once you selected the USB you can save the configuration and exit.
4. Install Ubuntu on your machine.
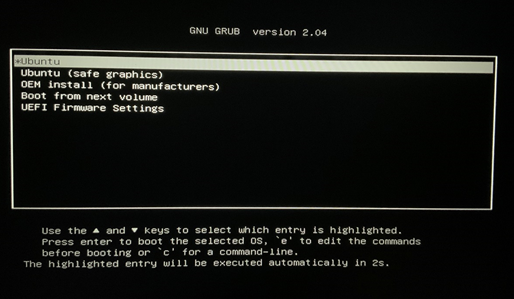
On the next boot, the machine will start with the Ubuntu bootable USB that we plugged in.
From the boot menu, choose Ubuntu.

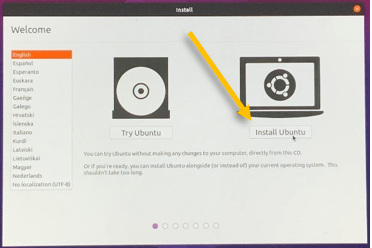
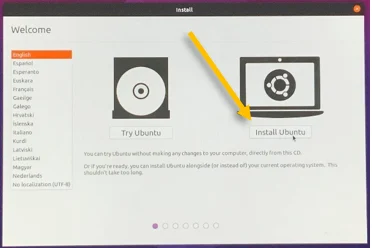
You will get Ubuntu welcome screen now, you can either try Ubuntu or install Ubuntu.
If you choose Try Ubuntu, it would take you to the Live environment of Ubuntu. We are going to install Ubuntu on this box, hence select Install Ubuntu.
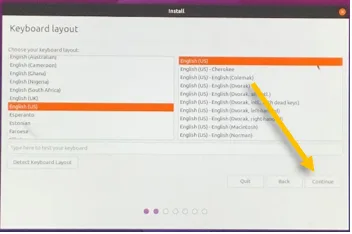
Choose the Keyboard layout based on your language and click on Continue.

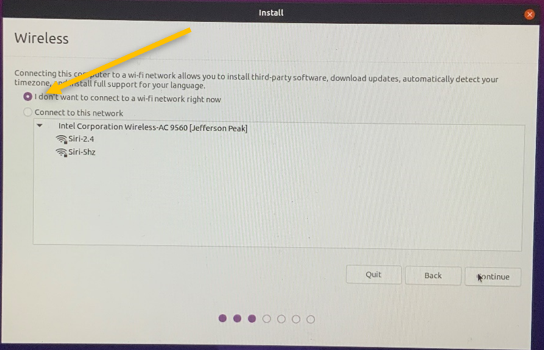
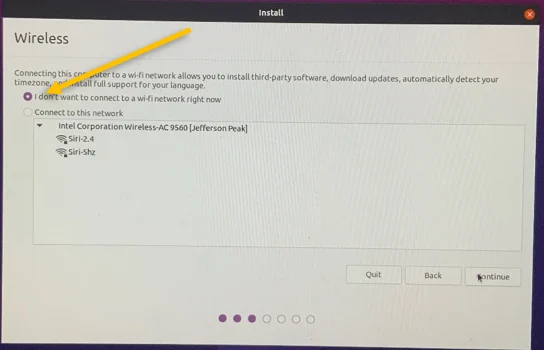
You will get a prompt, where it is asking you to connect to the network, You can skip this option at this time and choose I don’t want to connect to a wifi network right now and click on Continue.
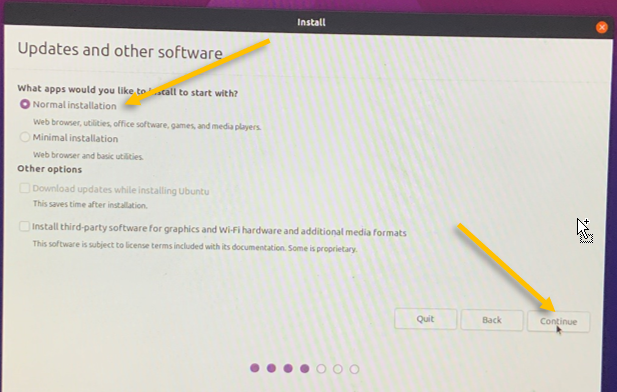
There are two options to choose from for the installation, 1st is Normal installation, where it would install all the required office applications, and media player, and so on.
And next is Minimal which will install only the basic programs.
Because I use this machine as my primary computer, I am choosing the normal installation and click on continue.

5. Setup the Ubuntu Hard Drive.
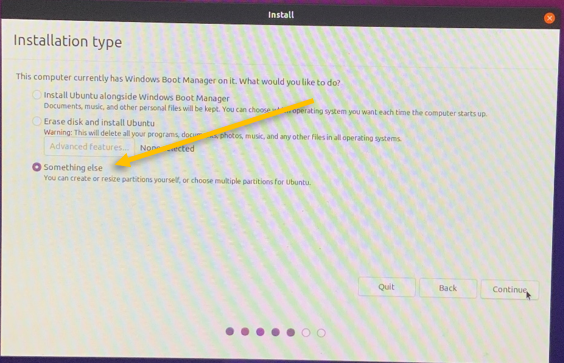
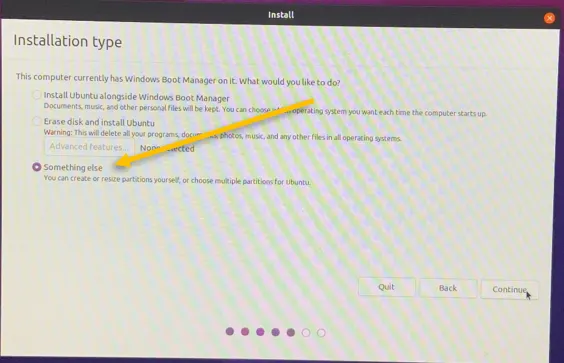
For a normal user, you can select the option that says install Ubuntu alongside windows boot manager, however, we will not be using this option. Instead, choose Something else and click on continue.
We have 250GB of storage, in that we have to assign 50GB of storage on the Home folder of Ubuntu, where all the user profiles and its files are saved, and 200GB for the root where I can store the rest of the files.
Note: If use a lot of office application files and save a lot of files in your user directory for example, /home/user/. Then you can decide to give more storage for the home, maybe 100 or 150GB for the home folder and the rest to the root. Just keep in mind when you create the storage.
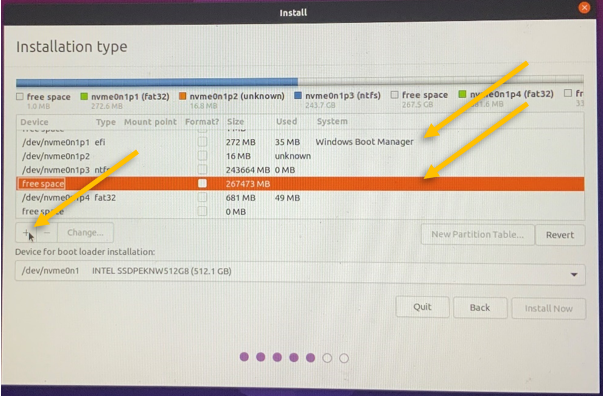
In the storage window, you can see the windows boot manager is on the top, just below that you should be able to see the free space that we allocated in the windows disk manager.
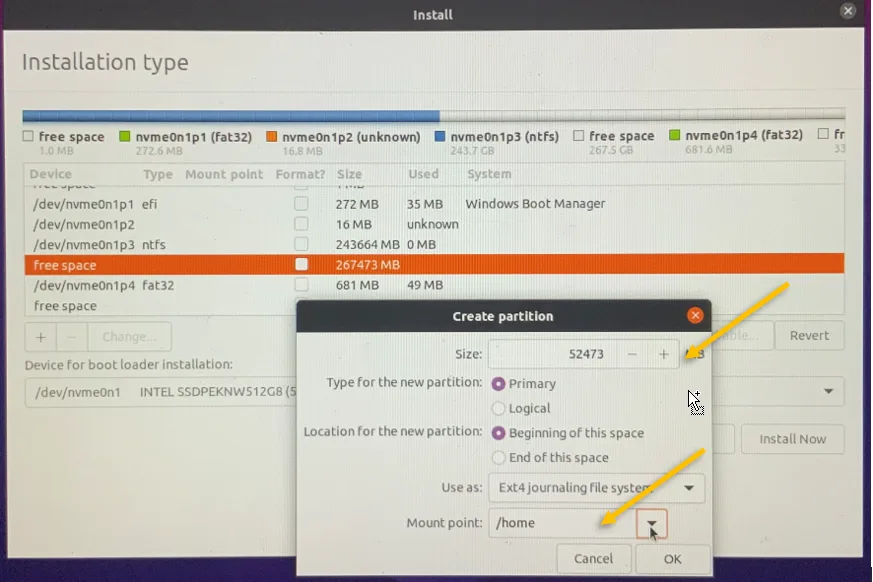
Select the Free space and click on the plus icon.

I am going to assign 50GB for the home directory, hence I have given 52473 in the size.
Choose all other options as default, and in the mount point choose home.

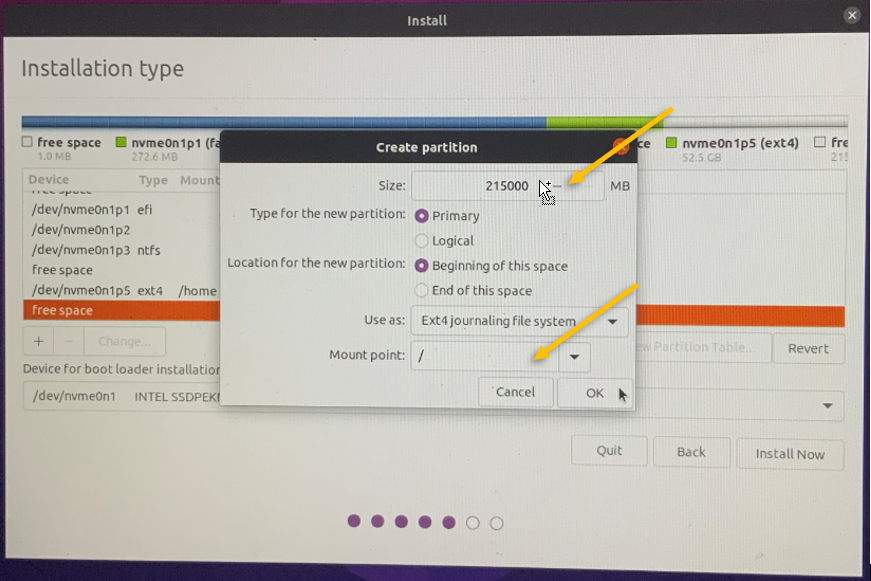
Next let’s go ahead and assign the storage for the root directory, go back and select the free space and click on the plus icon.
In the size, it would pick up the storage that is left on the drive.
Leave all the fields default and choose the mount point as root (“/”) and then click on Ok.

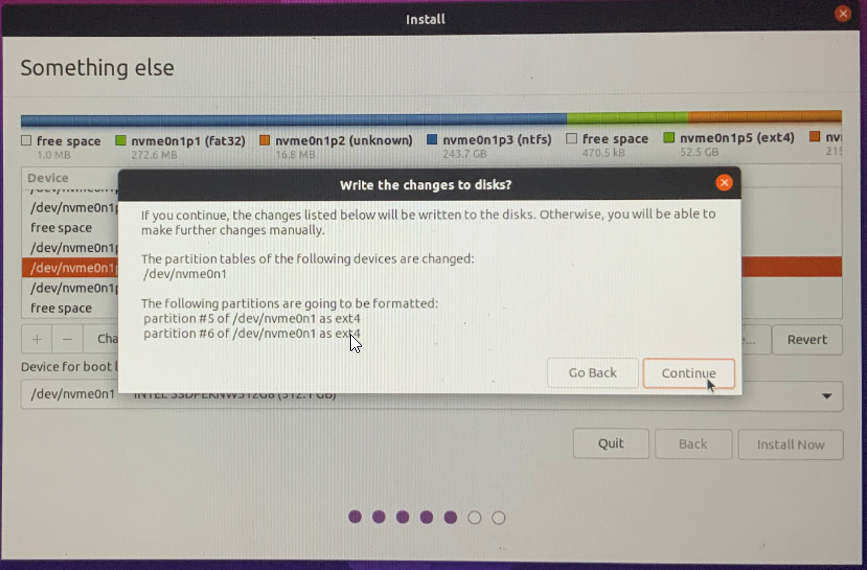
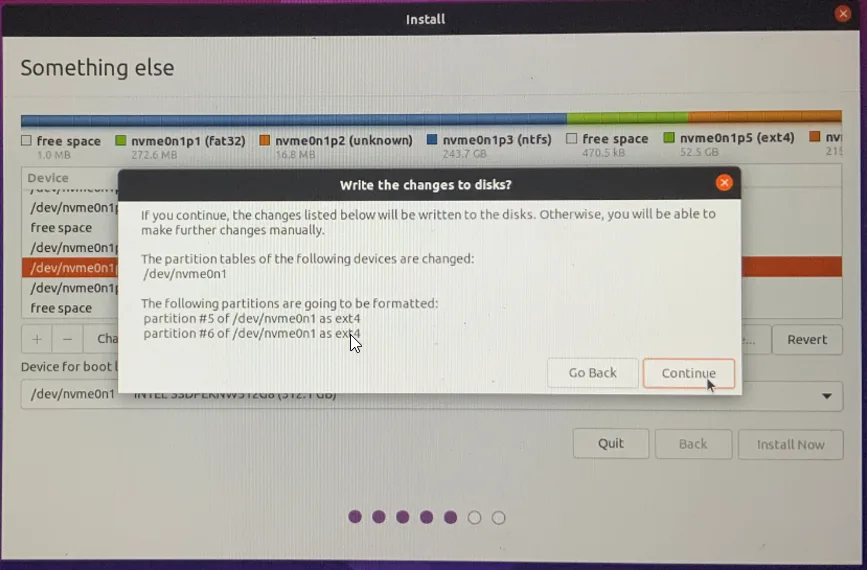
Verify that you have assigned the storage properly for the home directory as well as the root, after verified click on install now.
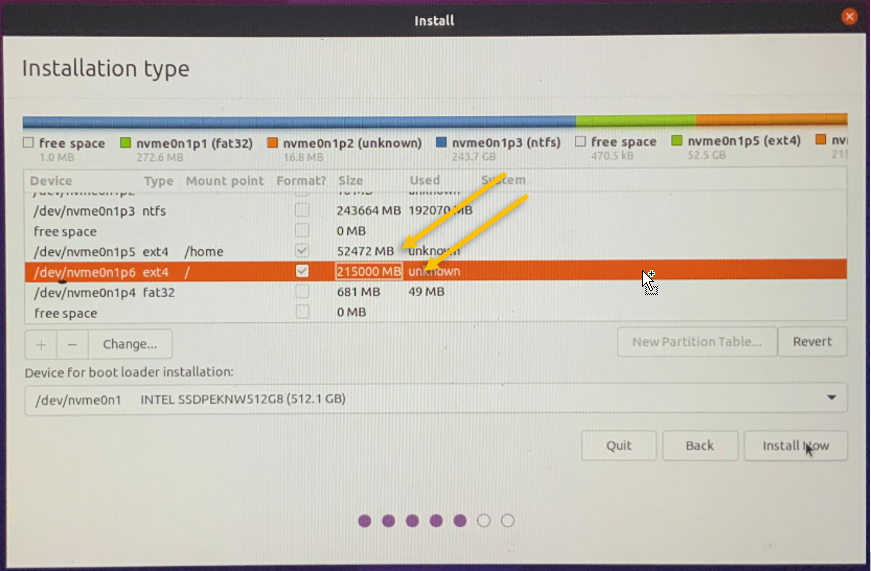
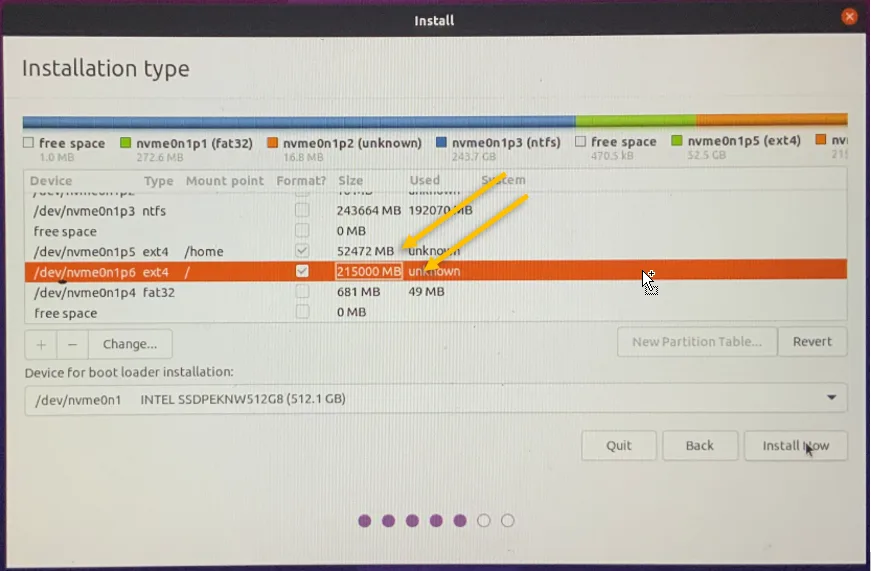
You will get a warning that you are going to format the drive, I know what I am using so clicked on continue.
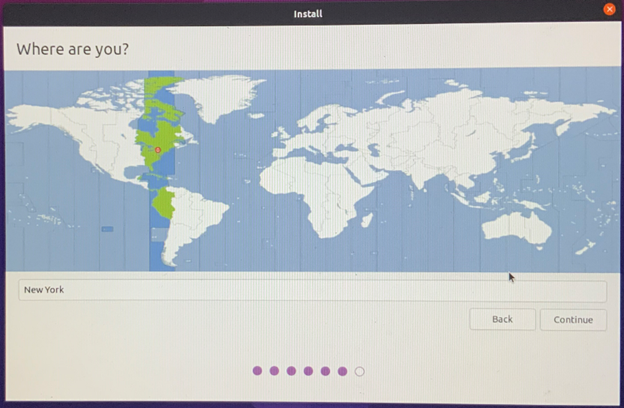
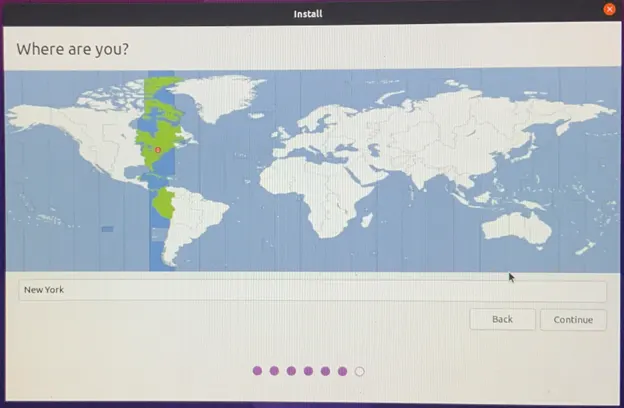
6. Set the time zone and restart the Ubuntu.
Choose the time zone and click on continue.
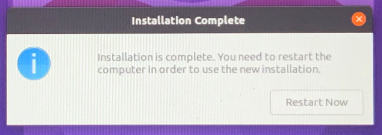
The installation will take some time, after it is completed, you can click on restart now.

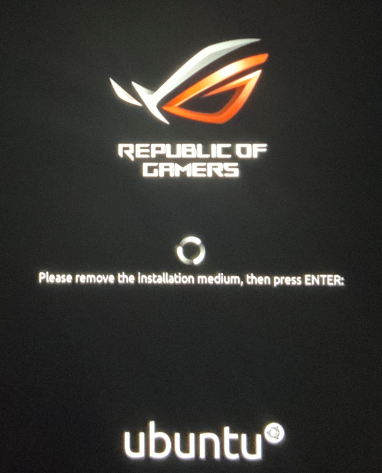
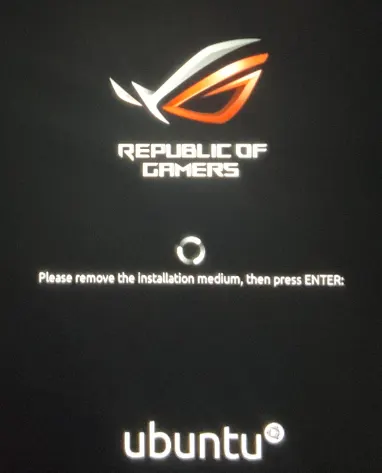
During the reboot, you will be taken back to the screen where it is prompting you to remove the USB storage, unplug the USB and click on Enter.
7. Select the operating system to load.
That’s it you have now successfully installed Ubuntu alongside windows. By default, Ubuntu is the default operating system so during the prompt you will have the choice to select Ubuntu or windows as the operating system. So if you don’t make any choice during the reboot it would take you to Ubuntu.


How do I go back to Windows 10 after installing Ubuntu?
Whenever you boot the system, you will get a GRUB prompt to choose Ubuntu or windows, so based on your need you can choose the operating system. To choose windows 10 operating system use the down arrow key to select the windows boot manager.
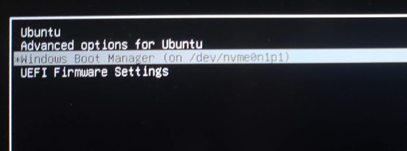

By Choosing UEFI Firmware settings, it will take you to the bios settings.
8. Verify the storage.
Login to the Ubuntu and type df -h in the terminal, you should be able to see the storage information’s, you can validate from here how much you have for the root as well as for the Home directory.

