
After a long wait, the windows 11 iso image officially came out for the public to download, however, there are some issues with virtualizing Windows 11 on a VMware workstation.
Microsoft has made it clear that you need to have TPM enabled on your machine to install windows 11, that’s fine with the physical machines because most of the newest laptops do support the TPM.
So what if you want to virtualize the operating system, up until the beta version that I downloaded from the windows insider program when it was available, I didn’t really have any issues installing Windows 11 on VMware.
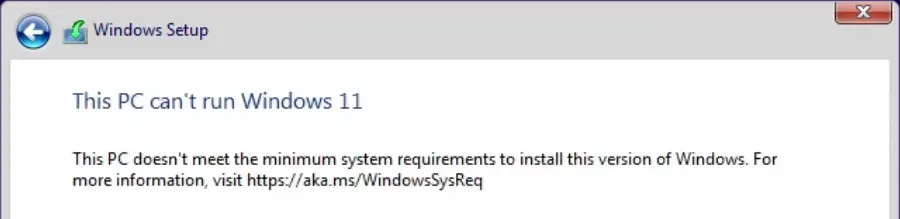
But after the official release things have changed, if you just use the VMware default settings, you will get an error that reads This PC can’t run Windows 11.

So let’s go ahead and install windows 11 on a VMware workstation with TPM enabled.
I have already tried out Windows 11 on KVM on my Ubuntu machine, and that works great. You may check out the article here if you are interested.
If you want to use Hyper-v as the hypervisor and install windows 11 in it, you can follow the article here on how to do that.
In this blog, we are going to install Windows 11 on VMware workstation pro.
Before you begin, you need to have,
- A windows 11 ISO image. Follow the article here on how to download the windows 11 iso image officially from Microsoft.
- VMware workstation, click here to get it.
Once we have the prerequisites ready, let’s go ahead and start installing windows11 on the VMware workstation.
Steps to install windows 11 on VMware workstation with TPM and secure boot enabled.
- Create the Windows 11 Virtual machine.
- Configure the system resources.
- Choose the Network.
- Create a Virtual hard disk.
- Encrypt access control and enable TPM.
- Begin the Windows 11 installation in the VMware workstation.
- Windows 11 initial setup wizard.
- Install VMware tools for windows 11.
1. Create the Windows 11 Virtual machine.
The first step in the process is to create the Windows 11 Virtual machine on the VMware workstation.
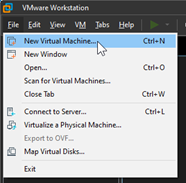
Open VMware Workstation and on File click on New virtual Machine or Press CTRL+N on your keyboard. it will open up new virtual machine wizard.
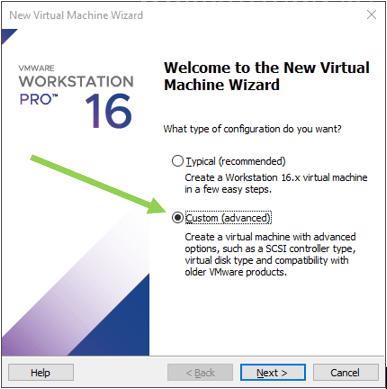
In the new virtual machine wizard, you may tend to use the typical option, do not choose Typical. Select Custom instead and click on next.

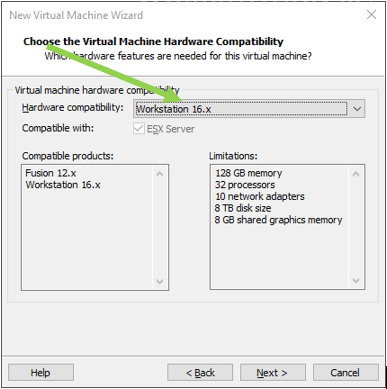
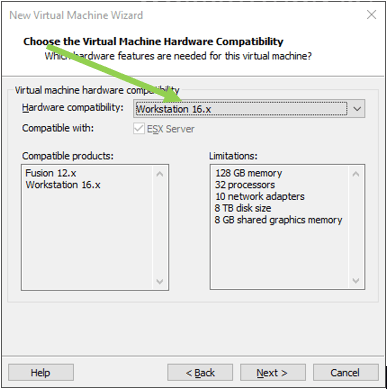
You will have to choose the hardware compatibility. As I am using VMware workstation 16, I am okay to leave the default. If you are on an older version, you might have to choose your version under hardware compatibility.
After the selection, click on Next.
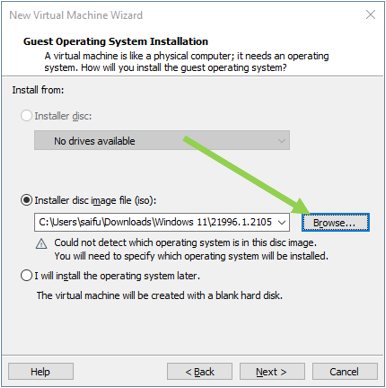
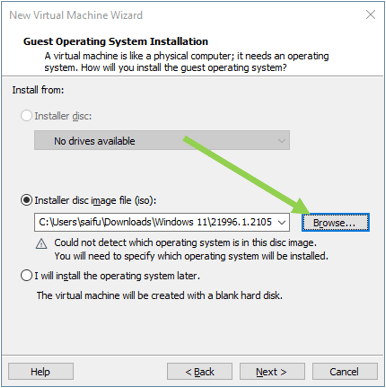
Attach the Windows 11 ISO image.
We have to attach the windows 11 ISO image under the installer disk image file. Click on Browse and attach the windows 11 iso file.
Click on Next.
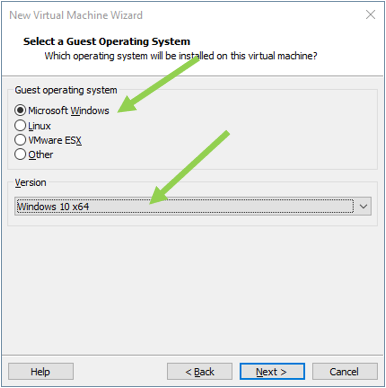
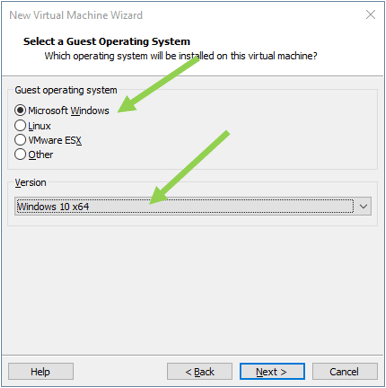
Choose the guest operating system version.
You now need to choose the Guest operating system version in the VMware workstation.
As you know, Windows 11 was recently launched. It is not available yet as a supported operating system in VMware workstation, so the workaround would be to choose windows 10 and work just fine.
Choose the Guest operating system as Microsoft Windows and version as Windows 10 x 64 and click on Next.
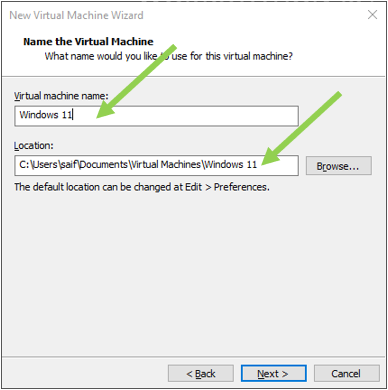
Name the VM and choose the location.
Provide a user-friendly name, I will name the VM as Windows 11, and you need to choose where you want to save the VM files.
I am okay with the default location. If you want to choose a different location you may click on the Browse option and change it.
After you choose the name and the VM location, you may click on Next.

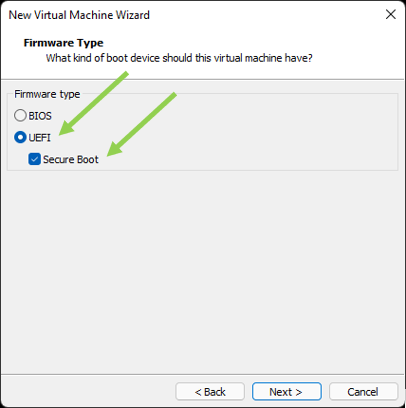
Firmware type.
Choose the firmware type as UEFI and check the Secure Boot option and click on Next.

2. Configure the system resources.
We have to configure the CPU and memory for the VM now, let’s configure the CPU first and we will configure the memory.
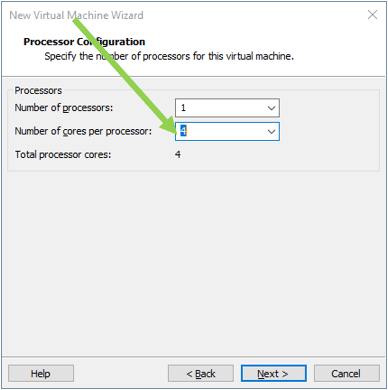
Configure the CPU.
I will give 4 CPUs for the windows machine, and my host has about 12 CPUs, including threads, so I am okay to give 4 CPUs. If you want to provide more CPU cores or less than 4 CPU’s you may choose to do so and click on Next.

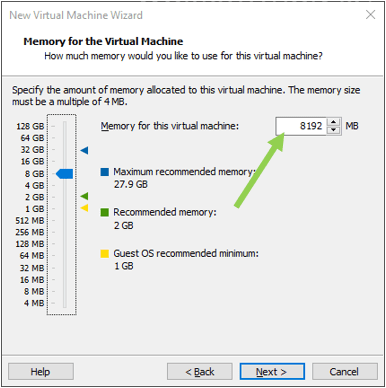
Configure the memory.
For Windows 11 to work fine, you need to provide at least 4GB of RAM. I will give 8GB of RAM for my VM and click on Next. Depending on your requirement, you may choose the memory, but it is recommended to keep more than 4GB and click on Next.

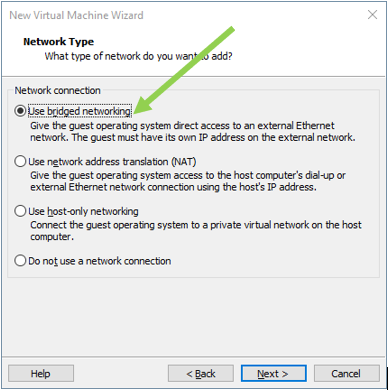
3. Choose the Network.
Don’t get confused by the number of options you get for the network. You have to choose either NAT or bridged network if you want your guest machine to access the internet. I am selecting the network as Bridged. That way, this Windows 11 machine becomes part of my home network, and my router would start assigning IP directly to the VM.
Sometimes your bridged adapter may not work fine, so you can choose NAT instead.
You can follow the steps here if you would like to troubleshoot the VMWare workstation bridged adapter not working.
After choosing the adapter of your choice click on Next.
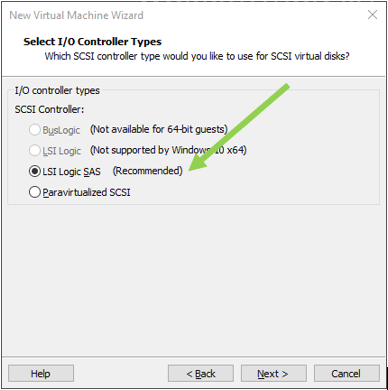
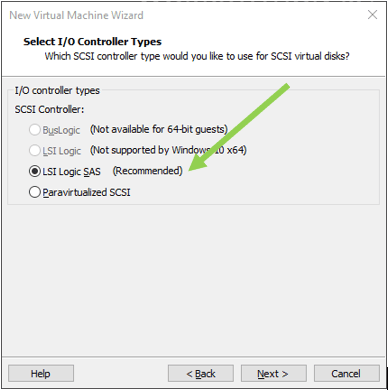
Leave the I/O controller type as LSI Logic SAS and click on Next.
Select disk type as NVMe and click on Next.


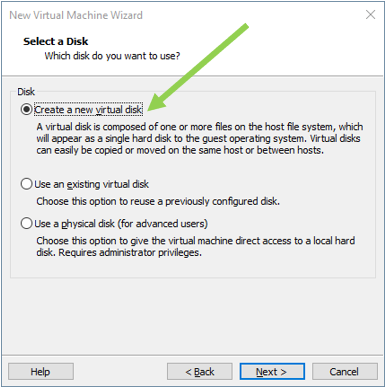
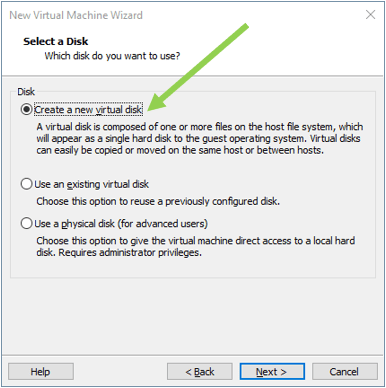
4. Create a Virtual hard disk.
For any operating system to work, you need to have a hard disk attached to it, so in VMware, you can either create a new hard disk or choose an existing virtual hard disk. You can even choose your physical hard disk, but for this blog, I will keep the default which is Create a new virtual disk and click on Next.
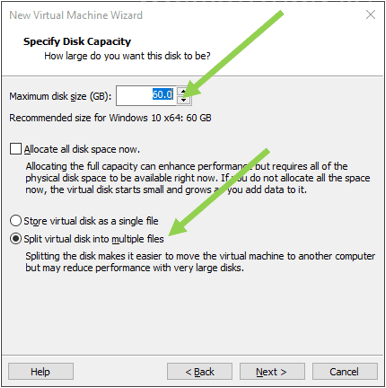
You need to provide the capacity for your virtual hard disk. By default, it has picked up 60GB, which is a good amount of storage for me. So based on your requirement, you may alter the hard disk space here.
Also, be sure to choose Split virtual disk into multiple files and click on Next.

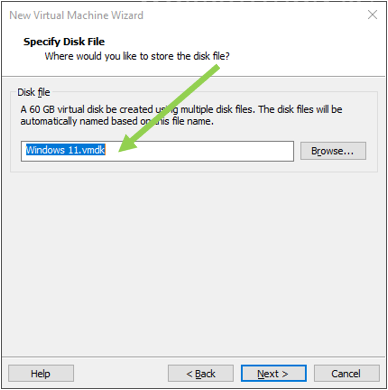
You can see the virtual hard disk created with VMDK extension that will save on your chosen location. Click on next.

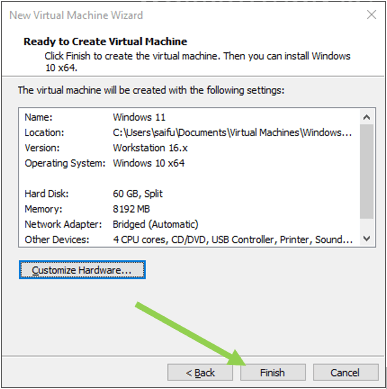
Finally, you will get the properties of the VM that you are going to set up. Once you verified everything, click on Finish.

5.Encrypt access control and enable TPM.
As we discussed earlier, we need to enable secure boot and TPM in the VMWare workstation in order for the installation to succeed.
We already enabled secure boot in the VMware wizard. So to proceed further, we need to enable TPM along with encrypting the virtual machine.
You will see the windows 11 Virtual machine is created in the VMware workstation.
If you don’t enable the below, you will get an error during the installation that says This PC can’t run windows 11.
Note: In case, if you would like to disable the TPM and secure boot check, then you may skip this step and follow the article here to know how you can bypass TPM and secure boot check during the windows 11 installation.
For others, you may follow the steps.
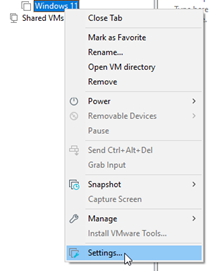
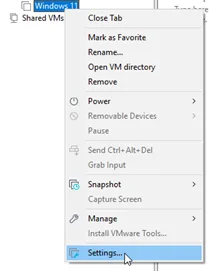
Right-click on the VM that you just created and click on settings.
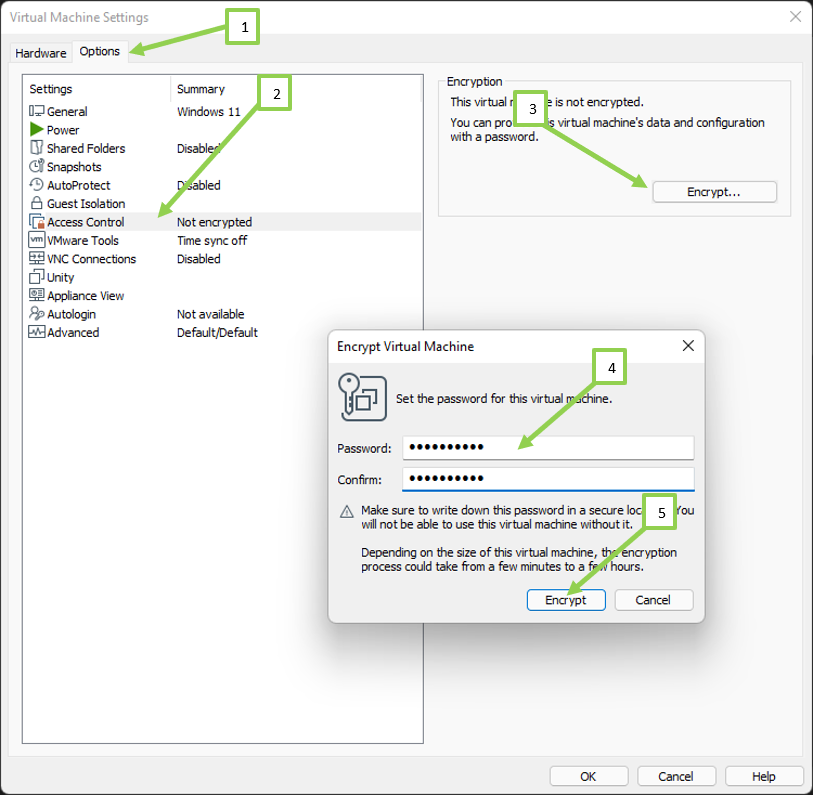
In the Virtual machine Settings pop up;
- Click on Options.
- Select Access Control
- Click on Encrypt.
- Enter the password for encryption and confirm the password.
- Click on Encrypt.
Note: You need to make sure that you make a note of this password, otherwise you won’t be able to make any changes on the VM in the future.

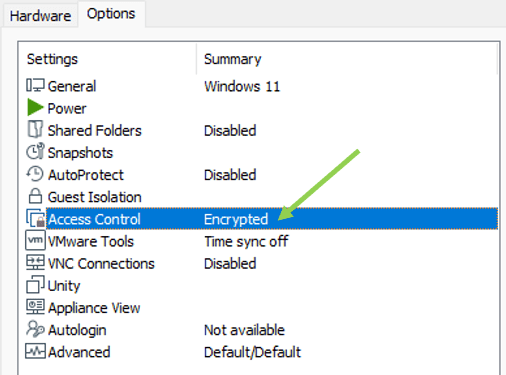
You should see the Access control option is Encrypted now.

You may now click on the Hardware tab, and click Add to add new hardware.

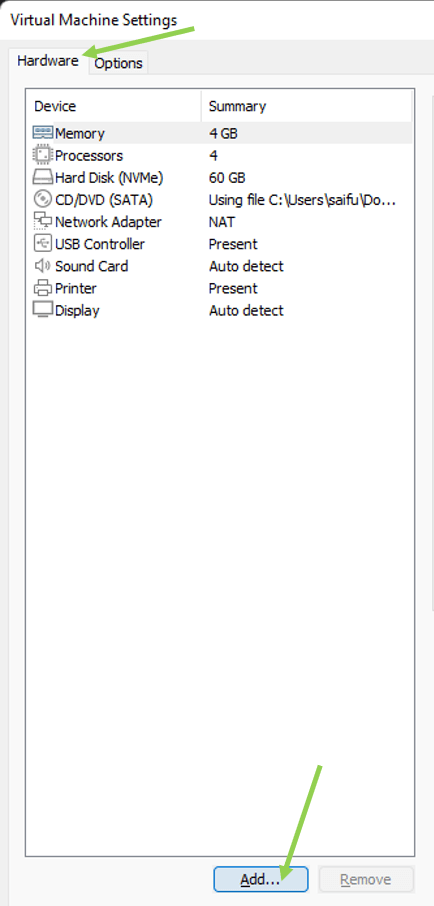
In the Add new hardware window, select trusted Platform Module, and click on Finish.
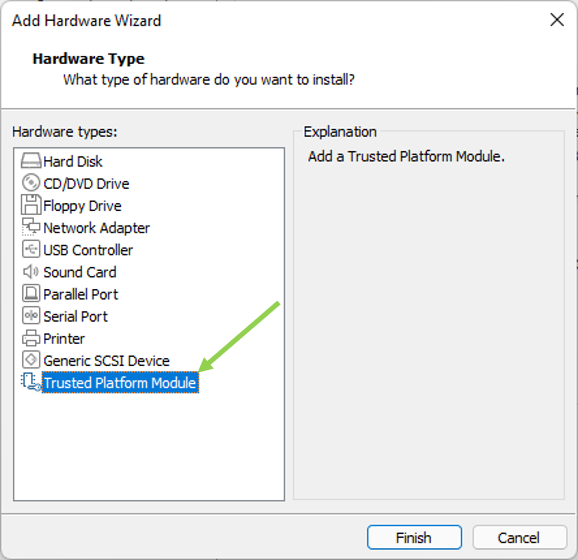

And click on Ok on the next screen.
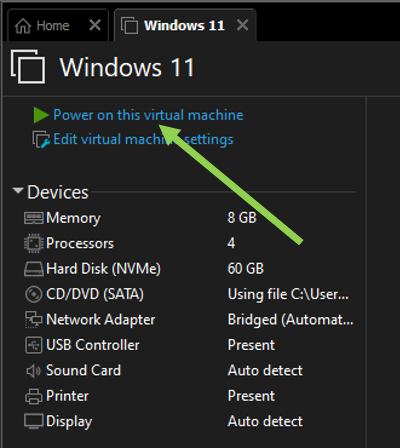
6. Begin the Windows 11 installation in the VMware workstation.
Select the VM and click on power on this Virtual machine.

After few seconds you will get a screen that says Press any key to boot from CD or DVD..
Press any key to proceed.
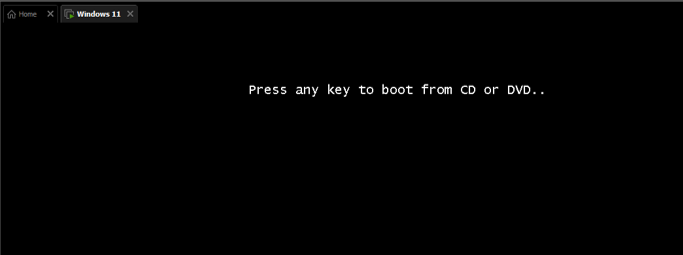
You will now boot into the windows 11 installation wizard.
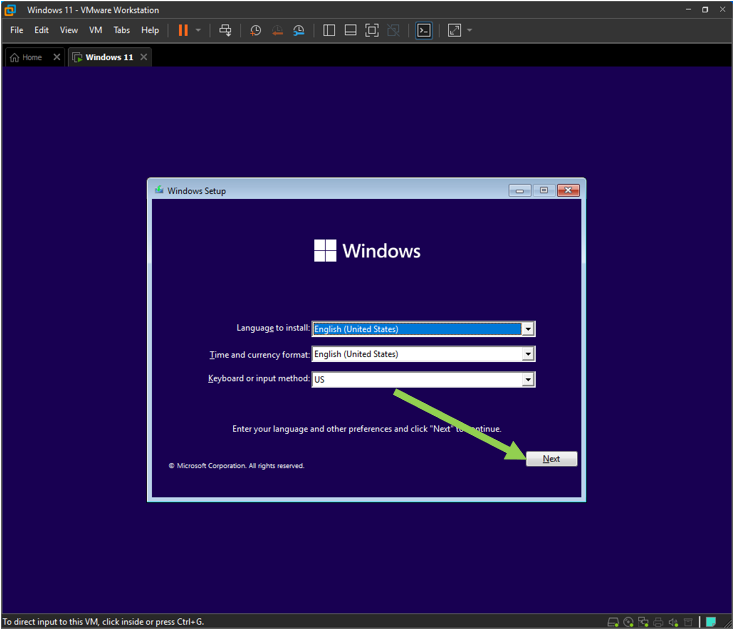
Choose the language, time, and keyboard layout of your choice, click on next, and click on Install now.

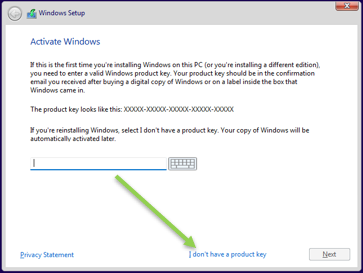
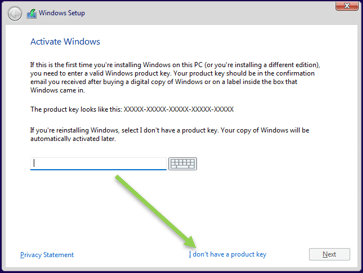
If you have a product key, you may enter them here; it is unlikely that you will have a product key for windows 11. You may click on I don’t have a product key option.
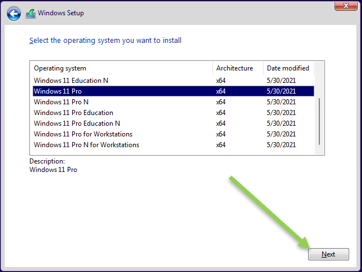
Choose the Windows 11 version.
There are some windows 11 versions are available to choose from, choose the one that fits your need and click on next.
I am choosing the windows 11 pro, and you will get license agreement windows. You may accept it and click on Next.

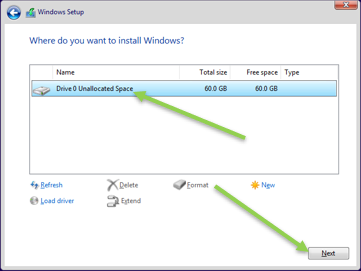
Choose the custom option as the installation type. It will take you to choose the virtual hard disk that you have set up in step 4.
Select the virtual hard disk and click on next.

The installation of windows will now begin. This process will take some time, so you may take a short break and come back.
7. Windows 11 initial setup wizard
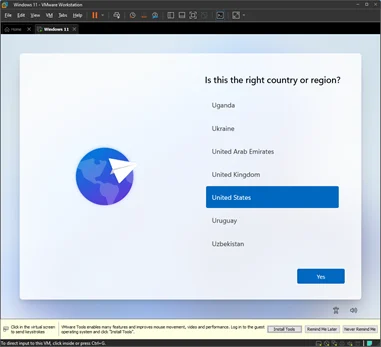
After a couple of restarts, you will be presented with the Windows 11 initial setup wizard.
Chose the country or region and click on next.
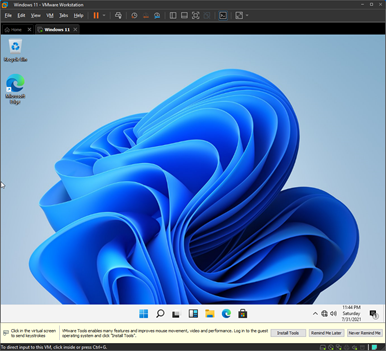
Note: You may ignore the VMware tools warning at the bottom of the screen, which we will install it, later on.

You will have to choose the keyboard layout and click on Yes.
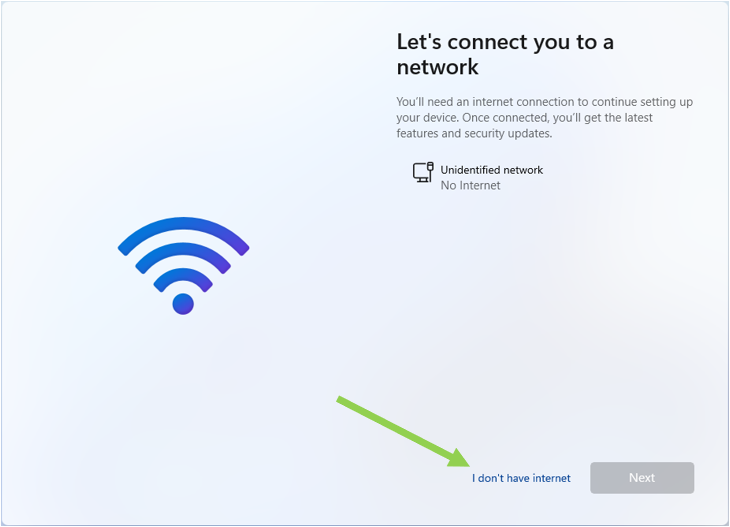
I will not connect to the network yet, which I will do after completing the initial setup wizard, so click on I don’t have internet.
Not connecting to the internet would help me to set up my local account and save some time during the installation. Because Windows 11 will not start searching for an update either.
You may click on Continue with limited setup, and you will get an option to set up a local account, enter your name and click on next, and set up your password as well.
You will also be asked to answer three security questions as well after finishing that, you will be taken to the windows11 desktop in few seconds.

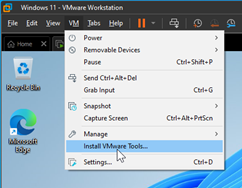
8. Install VMware tools for windows 11
We have now completed the installation of windows 11 on your VMware workstation. We are going to install the VMware Tools on the machine now. It will provide good performance for the Virtual machine.
Click on VM> Install VMware Tools.
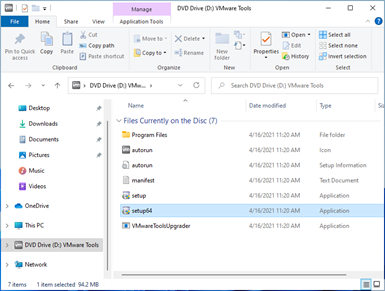
This will mount the VMware tools disk to your windows 11 machine. Click on the folder icon on the bottom to get into ‘This PC,’ and on the left side, you should see VMware tools DVD has been attached.
In the DVD files, you should see a file called setup64. Double click on it to install the VMware workstation tools on your VM.

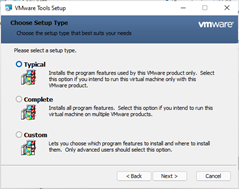
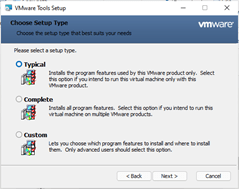
In the VMware Tools Setup wizard, choose Typical and click next.
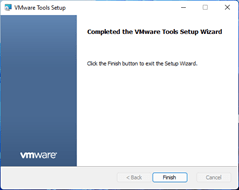
After a few seconds, the VMware Tools will be installed on your machine. Click on Finish on the installation wizard.

You will get a prompt to restart the windows 11 machine. You may click on yes. After that, you are ready to go.
As you can see, we have successfully installed Windows 11 on VMware workstation pro, and remember I was chosen not to connect to the network, and I have now connected to the network, and I can access the internet just fine.
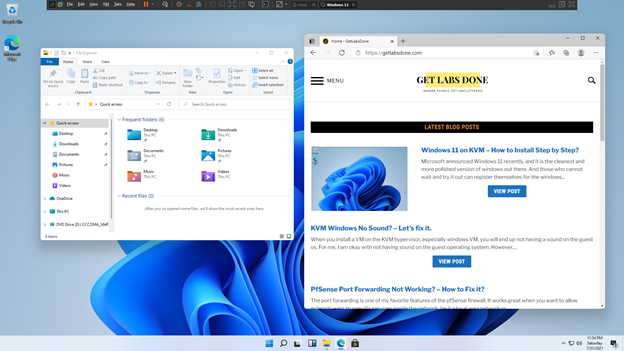
Enjoy Windows 11 on VMware workstation pro!
henrietta macpherson
Tuesday 21st of May 2024
Thanks, it worked , and if you need a windows 11 key to activate the windows 11 in VMware workstation, you can get it from the Microsoft Partner store keyingo