
In Linux mint the ssh service is not enabled by default, you need to enable the service manually. In this blog, we are going to enable ssh service on the Linux mint and to secure the access we will go ahead and change the default port and also allow specific users to the ssh service.
What does SSH stand for in Linux?
SSH is known as a secure shell lets you access the remote Linux machines over a secure channel, it uses TCP port number 22 by default. Unlike telnet where the traffic between the client and server is not encrypted, in ssh, the packets are encrypted so no one can see what you are doing with the SSH.
This SSH protocol is not just used by Linux, there are plenty of network devices do use ssh to remotely manage the devices. In Linux, you can use the OpenSSH service to enable ssh access, more on that later.
Since we don’t have the ssh access enabled on the Linux mint by default, you will get an error message when you try to ssh into the host saying connection refused. As you can see below.


The error that you see ‘Connection refused’ means there is no port open on the host to let you connect, in our case it is port 22.
Read also,
How to Configure SSH Access on Ubuntu? SSH &SCP
How To Deploy Linux Mint On VirtualBox?
10 Easy Steps To Install Linux Mint On VMware Workstation.
How to Manage Snapshot in VirtualBox? – Both GUI and CLI.
So let’s go ahead and install the ssh on the Linux mint host.
Steps to enable SSH access in Linux.
- Install the OpenSSH service.
- How do you check if SSH is enabled in Linux?
- Enable ssh service on boot.
- Verify the SSH service.
- Verify the SCP access.
- Enable security.
1. Install the OpenSSH service.
For the SSH access, we are going to install a service called the OpenSSH server.
Open terminal and type the below commands.
Sudo apt update
sudo apt update
sudo apt install open-ssh -y
After a few seconds, the ssh service will be installed on your Linux mint host.
2. How do you check if SSH is enabled in Linux?
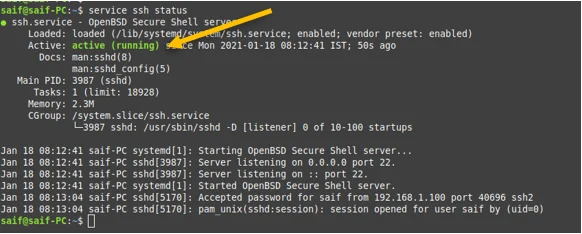
After the installation you can check the ssh service status is by typing service ssh status, it will show you whether the service is active or not.
You can also try to stop, start, or restart the services if you would like.
In our machine, you can see the ssh service is active and running.

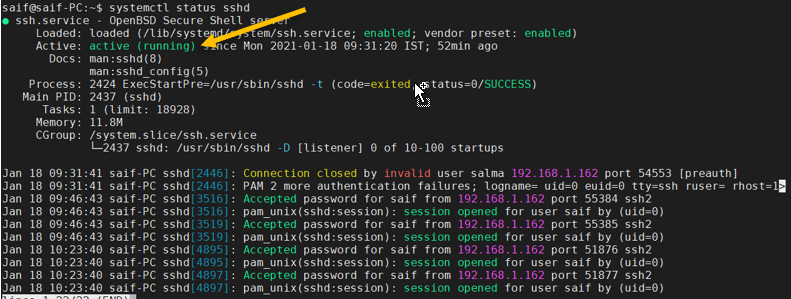
Alternatively, you can also try the command systemctl status ssh or systemctl status sshd.
Similar to the previous command, it does show you the status of the service on your machine.

3. Enable ssh service on boot.
You need to enable the ssh service during the boot so that anytime when you reboot the machine you can still ssh into the machine after it is rebooted.
If you don’t enable this option, by default the ssh service will not be started at the boot, and at that time when you try to ssh into the Linux mint, you would get the error message that says connection refused, of course, you don’t have the ssh service running to access the device.
To enable the ssh service at start enter the command sudo systemctl enable ssh.


4. Verify the SSH service.
Alright, we have successfully installed the ssh service on your Linux mint machine, lets try to ssh the machine to verify whether it is working or not.
There are two ways you can do this test, first from local machine and second is remote ssh access.
Verify SSH locally.
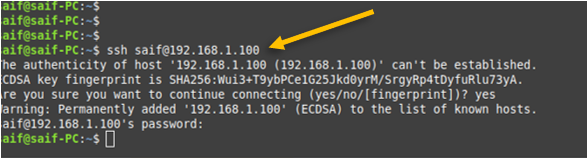
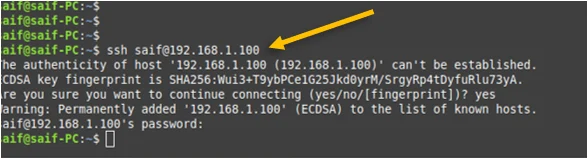
To access the ssh service locally on the machine, on the local machine terminal type ssh username@IPaddress.
For example ssh [email protected]
As you can see, you can ssh and it is prompting to enter the credentials, after I authenticated I can log in. Which is good.
Note: This test also can be performed when you are not able to ssh from the remote and if you can ssh locally which means the service is working as expected but there seems to be some issue with port 22 not been allowed on the network.
Verify the SSH access remotely.
We just verified the ssh access locally on the machine, let’s try to ssh into the machine from the remote.
In this scenario, I have a windows box with mobaxterm installed, and I am going to ssh into that.
The First error that you see is before the ssh installation, after the installation you can see that it is authenticated successfully.


Did you notice that I didn’t have to enter the credentials to login?
That’s because I already had another Ubuntu machine with the same Ip address accessed from the same mobaxterm hence the credentials are cached.
Mobaxterm is just an ssh client, and you can try an alternate ssh client if you want to for example putty, SecureCRT, Tera term, and so on.
5. Verify the SCP access.
Though this step is not mandatory, it is essential if you wanted to transfer some files from your local machine to a remote host (Linux Mint) and vice versa.
After enabling the SSH access, you should be able to access the files over SFTP.
I am using WinSCP software for this here, you can try FileZilla for this purpose as well.
Open Winscp, and in the hostname, you may enter the IP address of the machine and its username and password.
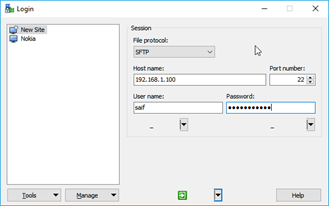

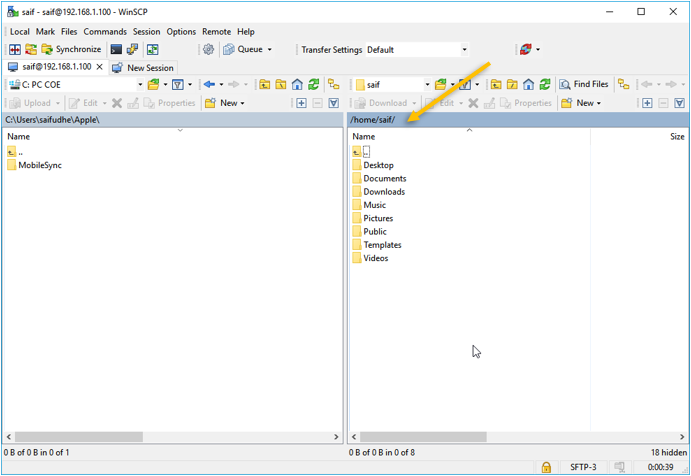
As you can see, after you entered the credentials the WinSCP is authenticated and you can access the Linux mint folders from the windows host machine.

At this point you should be good to go with respect to accessing the remote host remotely over SSH. You can follow the further steps, if you would like to add more security to the SSH access.
6. Enable security.
To enable security to the ssh service you have multiple options.
- how to change ssh port in Linux mint?
- how to allow specific users in ssh?
how to change ssh port in Linux mint?
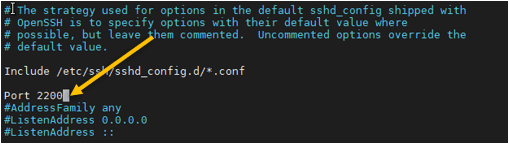
By default ssh use port number 22, to enable the ssh on a different port number you can go to the file /etc/ssh/sshd_config and uncomment the part that says, port 22 and mention the port number that you like.
Change the port number to whatever port that you wanted to choose, there are well know port numbers from 0 to 1023, it is recommended to choose port numbers outside that range.
For example, I am going to use port number 2200 on the ssh configuration file.
I opened the file, and changed the port number from 22 to 2200, and saved the file.

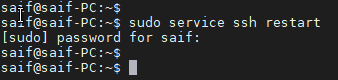
For the changes to take place you need to go ahead and restart the ssh service.
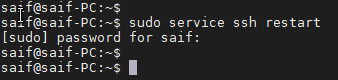
So restart the ssh service by typing the command sudo service ssh restart
Enter the system password
After the ssh service has restarted, you can try ssh into the machine just like you tried last time.
ssh [email protected]
As you can see, it says connection failed which used to work before this change. So how do I access the system now over the ssh?


You need to specify the port number whenever you would like to ssh into the device.
To specify the different port number you can add -p.
For example ssh username@ipaddress -p 2200.
As you can see, I am now able to access the remote host on ssh port number 2200.


how to allow specific users in ssh?
If you want to allow only specific users can log in to the system, you can add those users to the ssh configuration file.
Access the sudo nano /etc/ssh/sshd_config and add the line AllowUsers username.
For example, I added a user called user1 to the ssh and restarted the ssh service.


Note: To add more users, you can type the same AllowUsers and add the username.
Try to access the system now using the old ssh username.
As you can see, I used to be able to access the Linux mint host using the username saif, however, when I try to access it now, it prompted me for the password, and then permission was denied.

