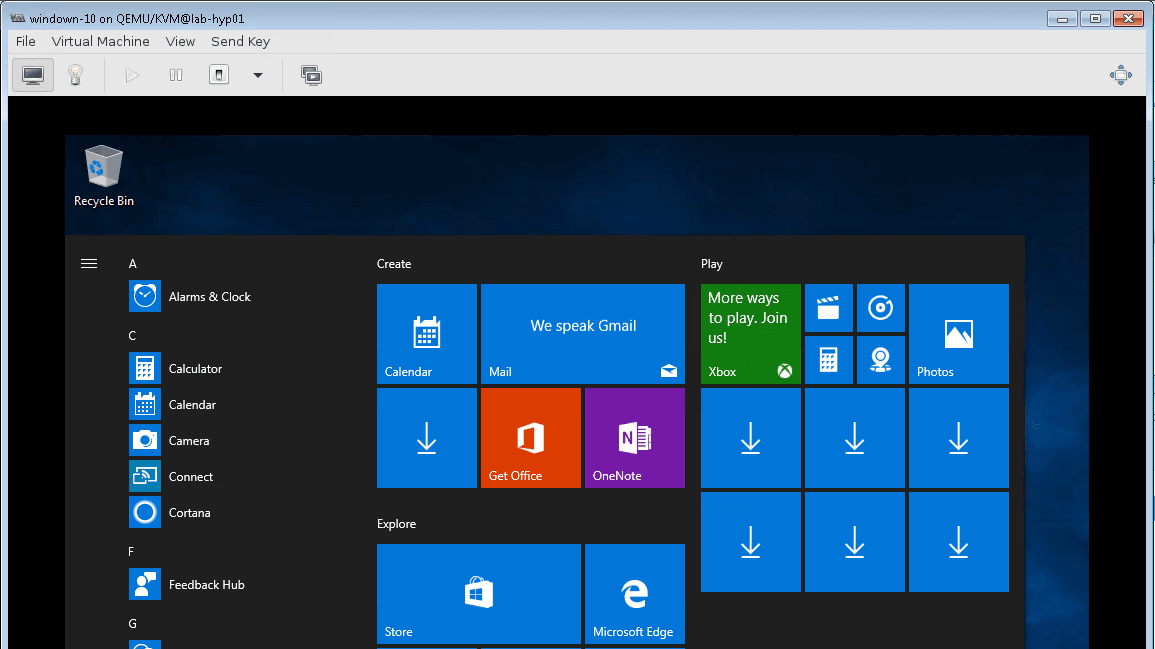
I usually use the windows vm machine as a jump server inside my labs, that way I can move around the files and stuff quickly, sometimes I install the windows machine on the ESXi host else I would install it on the KVM.
For some, they wanted to use windows machines on their Linux box. They can either install a Vmware workstation and install windows in it or use a native Linux virtualization platform known as KVM and install Windows 10 in it.
KVM is great if you wanted to run VM’s in Linux environments, You can install multiple VM’s and switch between them and moreover, it’s opensource and free.
Can I install KVM on Windows ?
If you are new to virtualization and may have heard the term KVM and you might be wondering. I have a beefy windows server or windows 10 in my network, and I should be able to install KVM on Windows host machine and start spinning up the VM’s just like I would with the other hypervisors such as VMware workstation and Virtualbox, right?
But that’s not the case, the KVM stands for the kernel-based virtualized machine, and it is the open-source hypervisor program that is available only for Linux machines and not for windows.
However, you should be able to run windows machines as VM on the Linux KVM host. In short, you cannot enable KVM on Windows.
So the answer is, you cannot install KVM on the windows machine. But, if you have a Linux host, you enable the KVM packages in it and spin up the windows virtual machines on them, be it windows server or windows 10, and in this article, we are going to install windows 10 in KVM.
Does Windows 10 work well with the KVM?
There are some KVM virtIO drivers available for Windows machines. With the help of VirtOI drivers, you should be able to install most of the windows 10 drivers in KVM, and it works just great.
I have been using windows 10 on my KVM machine for over a year now. And haven’t faced many issues with it.
So if you wanted to run Linux as your base operating system and Run windows as a secondary operating system then this is the way to go.
One of the use cases being, I use my KVM windows box to always connect to VPN.
I have covered the installation of Centos in KVM, and in-depth SD-WAN lab in KVM in my previous blogs, you may check them out if you are interested.
In this lab, we are going to install windows 10 on the Linux KVM espesially on a Centos/Redhat/Fedora version.
If you are using Ubuntu KVM then you may read this blog.
Note: The steps mentioned here can be followed for Windows client VM such as windows 10 and windows 7.
If you are going to install the Windows server then you can follow the guide here.
Read also,
Windows 11 on KVM – How to Install Step by Step?
Windows 11 on VMware workstation – How to install it?
KVM Windows No Sound? – Let’s fix it.
So let’s see how we can install windows 10 on Linux KVM.
Requirements for windows 10 deployment on KVM
- Linux machine with virtualization enabled, I am using Redhat machine for this example and steps that I am following here is pretty much the same for all the flavors such as CentOS, Fedora, etc.
Ubuntu
If you are using Ubuntu follow the guide here.
Centos/RedHat
yum install qemu-kvm libvirt virt-install virt-manager virt-install -y
- Windows 10 ISO image for the installation, you can follow the guide here to get the ISO image.
- Windows virtio drivers to communicate with the KVM, you can download them here.
Steps to install windows on Redhat/Centos KVM.
Once you have the prerequisite ready, you can follow the below steps to start the installation of windows 10 in KVM.
- Creation of Windows 10 KVM VM
- Customizing the Hardware for Windows 10
- Adding the Graphics Hardware.
- Update the Virtual Network Interface
- Adding Windows 10 storage and hardware drivers for KVM
- Configure Boot device order for windows 10
- Begin Windows 10 installation on KVM.
- Install Windows virtio drivers.
- Installation of KVM QXL display drivers for windows 10
- Remove the VNC and Cirrus display adapter
1. Creation of Windows 10 KVM VM
In this step, we would create the windows 10 VM in KVM virtualization environment step by step. This include the windows VM CPU, Memory storage and the network interface.
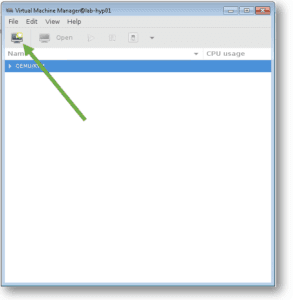
Step 1. Open terminal and type virt-manager, this would open up Linux Virtual machine manager.
Click on Create a New virtual machine button.
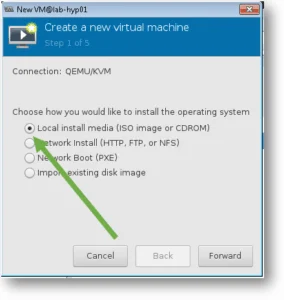
Step 2. Select local install media and click forward.
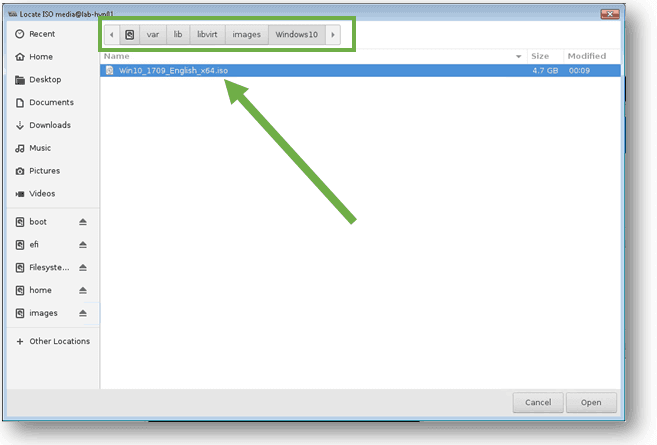
Step 3. You need to point the windows 10 ISO image to the Virtualisation manager, click on Browse.
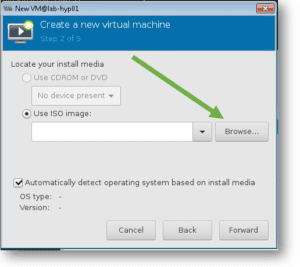
- Select Windows 10 iso image and click on open.
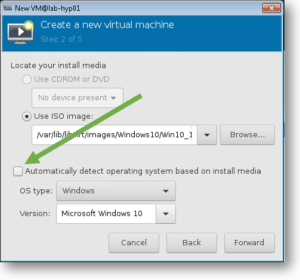
- Uncheck the option Automatically detect operating system based on install media, and select the OS type as Windows and Microsoft Windows 10 and click Forward.
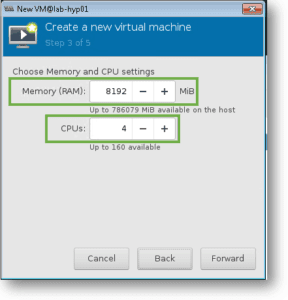
Step4. You have to define the memory and CPU here, I am assigning 8192 MB as the memory and 4 CPUs and click Forward.
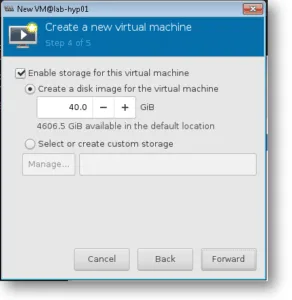
Step5. For the storage, you may leave it as default 40 GB and click forward.
You can change the storage size following this guide if you are planning to extend the storage later.
Step6. Name your VM, and check the option which says Customize configuration before install, also select the network interface which you would like to use for your guest VM.
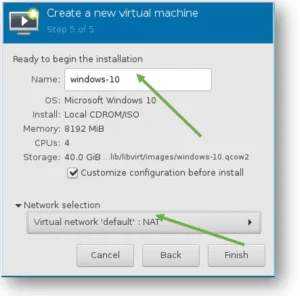
Note: If this Windows 10 VM wanted to access the host machine internet, then you would have to select ‘Virtual network ‘default’ : NAT’. This means none of the other machine on your network can see this machine.
If you wanted to bring this machine to your network and talk to other machine or network then you would have to use bridge interfaces or macvtap.
2. Customizing the Hardware for Windows 10
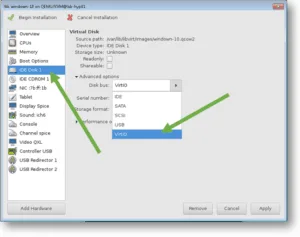
Step1. Since we clicked on Customize hardware before install, the KVM installation wizard would now open, you need to change the disk storage type to VirtIO here.
- Select IDE Disk 1, Click on expand Advanced options and select VirtIO from the Disk bus drop-down list and click Apply.
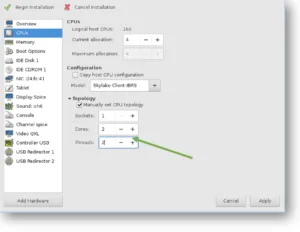
Step2. Click on CPU, expand Topology and check the option Manually set CPU topology.
By default the socket is picked up as 4, let’s change that to 1 and 2 core and 2 Threads
Note : You may type the command virsh nodeinfo in the terminal to see your CPU and it’s socket information.
Windows Machine KVM Common CPU issue.
How come my windows machine not detecting more than one CPU, even though I had given 4 CPU’s during the installation?
This is the common issue that we see after the installation, so please make sure that you don’t skip the steps above to not to face such CPU issues for windows VM in KVM.
3. Adding the Graphics Hardware.
For the Windows 10 graphics card to work post-install, you would need to use QXL driver in it. However, during the installation of Windows 10, it uses the Cirrus adapter to display the output.
Let’s add that.
Step1. Click Display Spice and select the type VNC Server and click Apply.
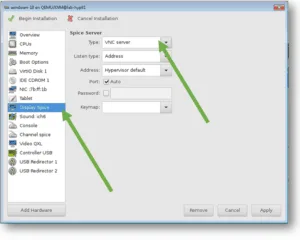
Step2. Click Video QXL, Change the Model to Cirrus and click Apply.
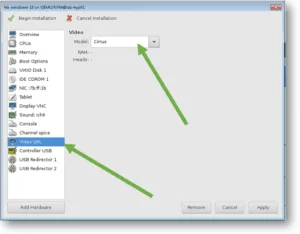
Once you complete the Windows 10 installation you can install the QXL driver in windows under Device manager. Therefore, we are adding QXL hardware along with Cirrus, and then you can shut down the VM and remove the Cirrus display drivers from the virtualization manager later.
Note: If you use Cirrus as the display adapter then after you reboot you would not be able to see the display output, as it would be just black.
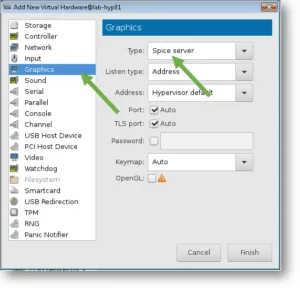
Step 3. Add QXL driver via spice server.
- Click on Add hardware and click on Graphics and add graphics type as Spice server and click Finish.
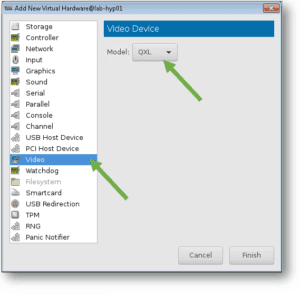
- Go back to Add hardware again and click on Video and select the model QXL and click Finish.
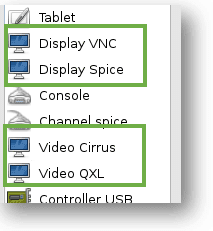
Your display virtual hardware details would look like below.
4. Update the Virtual Network Interface.
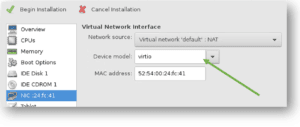
Step1. Click on the NIC, change the device model from Hypervisor default to virtio, and click Apply.
5. Adding Windows 10 storage and hardware drivers for KVM.
We now need to attach the windows 10 iso image and virtio driver image that you had downloaded earlier in this lab.
If you have not downloaded the windows virtio driver yet, please go ahead and download from here.
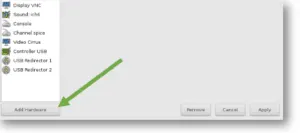
Step 1. To add windows 10 ISO image as CDROM. Click on Add hardware.
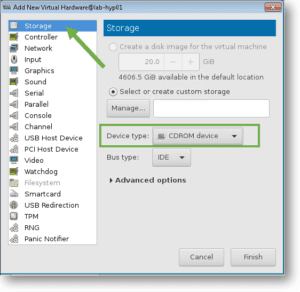
Step2. Click on Storage, Select Device type as CDROM device, and click Finish.
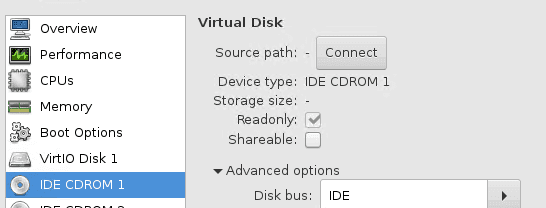
Step3. Click on IDE CDROM1 that we just added and check the box Sharable and click on Connect.
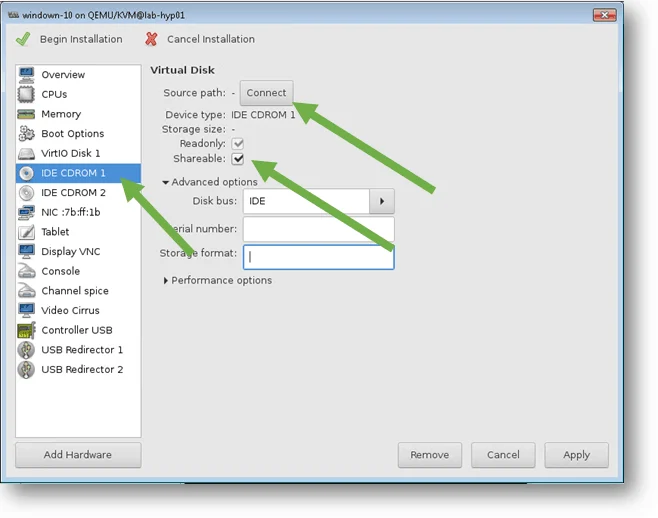
- On the prompt, you need to select the Windows 10 ISO image.
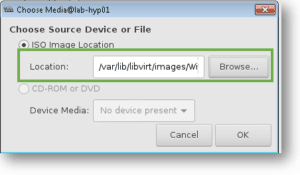
- Click OK then Apply.
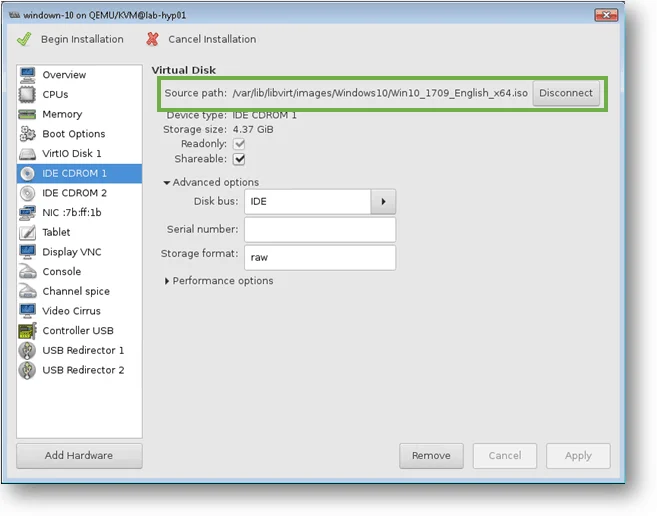
Step 5. Attach the windows virtio drivers
We have to attach the windows virtio driver (This has all the KVM required drivers for windows machines) that you have downloaded earlier.
Click on IDE CDROM 2, Check the option sharable. And click on Connect.
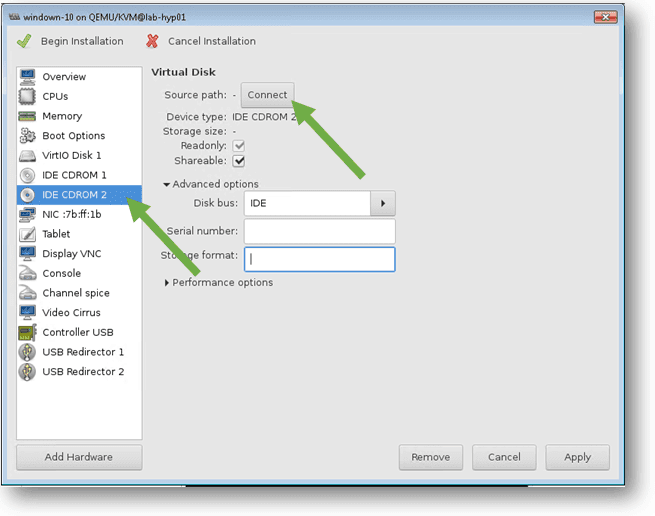
- Here you need to attach the virtio-win-0.1.118.iso, select that and Click choose volume. And Ok and Apply.
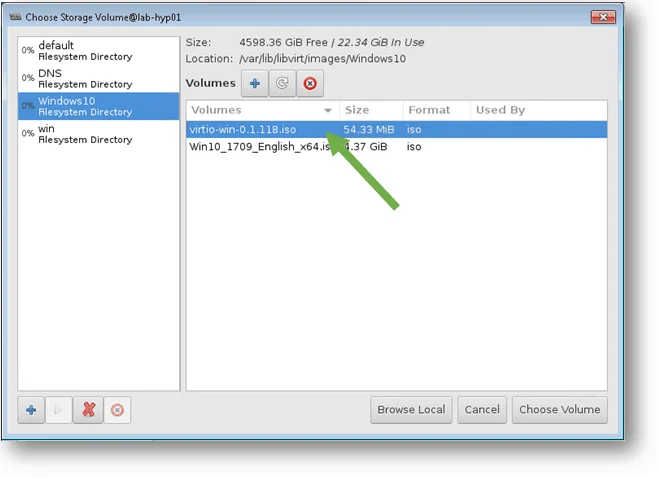
6. Configure Boot device order for windows 10.
Step 1. You need to define the Boot device order for windows 10 to boot up, just like how you would do it on bios of a normal PC.
- Check the option Enable boot menu under customise hardware window, and select the device you would like to reorder and use the arrow to reorder them.
First, it should be IDE CDROM1, VirtIO Disk1 then IDE CDROM2, once you rearranged click on Apply.
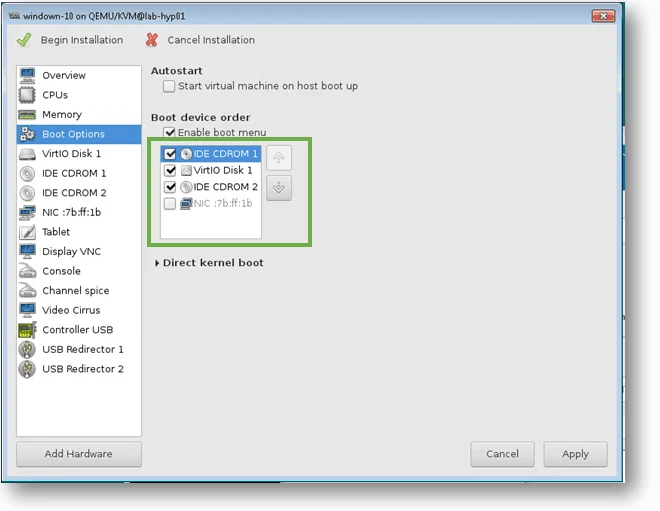
You just completed defining the hardware for windows 10, you can now click on Begin the installation, and start the installation.
7. Begin Windows 10 installation on KVM.
We have successfully created the VM in KVM machine. It is time for us to start the windows 10 installation just like you would do on any other computer.
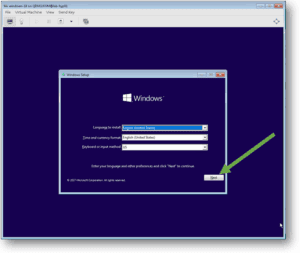
Step1. On the windows installation screen set the preference according to your requirement.
Click Next.
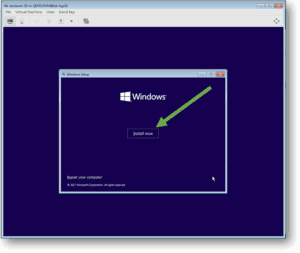
- Click on Install Now.
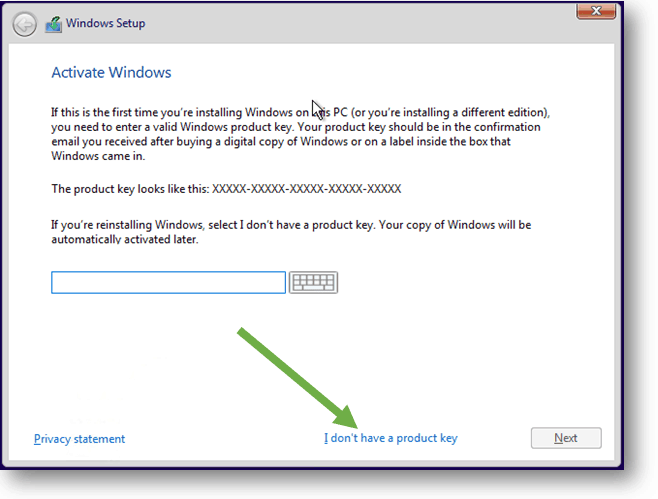
Step 2. You will be presented with Activate windows screen, I am not going to activate windows now, which I can do it later. Click on I don’t have a product key.
Step 3. Select the version of Windows you would like to install and click on Next.
- Accept the license and click Next.
- Click on Custom: Install Windows only (Advanced)
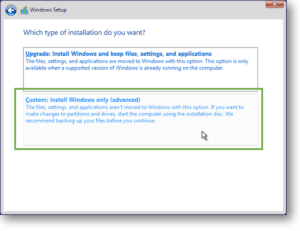
Step4. You will be presented with the screen with an error message that says We couldn’t find any drives, To get a storage driver Click load driver.
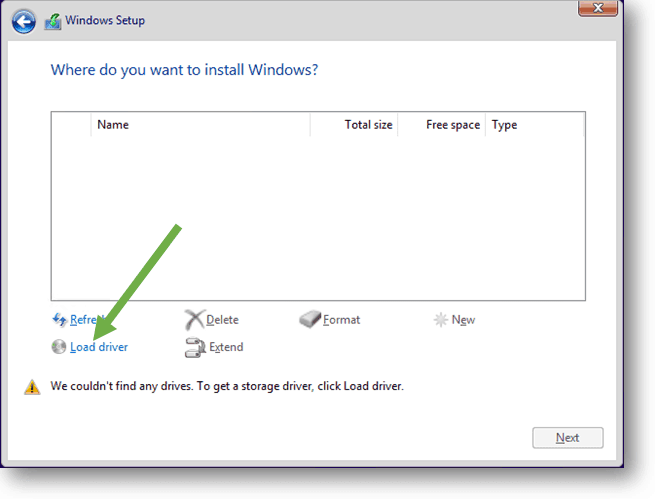
- When you get the below message, click on Ok.
- You may get below error message, click OK on it.
- Click on Browse.
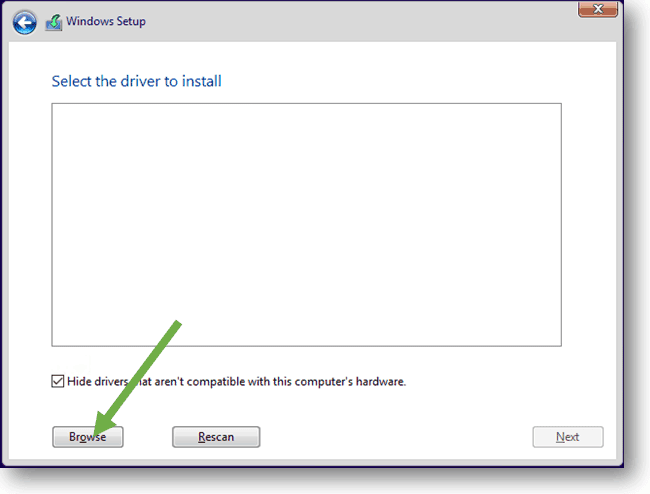
- Remember we had attached virtio driver as CDROM 2 during the VM setup, In the CD Drive (E:) virtio-win-0.1.1
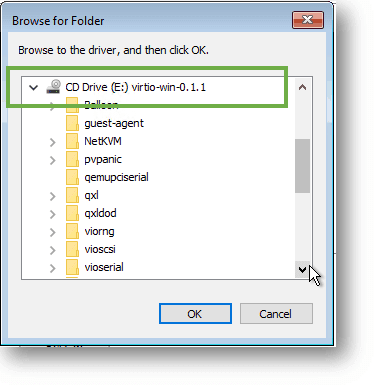
- Goto the location -> viostor/w10/amd64 click on Ok.
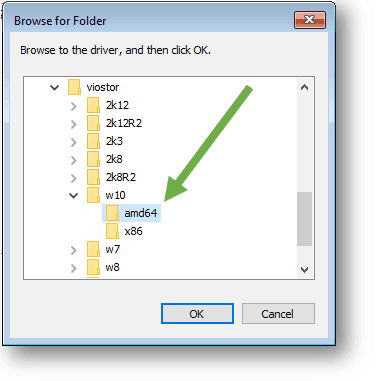
- You can see the drive listed here now as Red Hat VirtIO SCSI controller select that and click on next.
- This may take few seconds and you would be able to see the storage that you added earlier as 40 GB, click Next.
- The windows installation will start now. This will take some time now.
Step5. After couple of reboots, you will get a screen with windows 10 initial setup wizard.
Finish the initial setup wizard and after a couple of minutes, you will be presented with the Windows Desktop.
8. Install QEMU Window 10 virtio drivers.
Did you notice the network card is showing an error on the icon down the right corner?
That means there is some issue with the windows driver.
Don’t worry we are going to fix that now by installing qemu virtio drivers on windows.
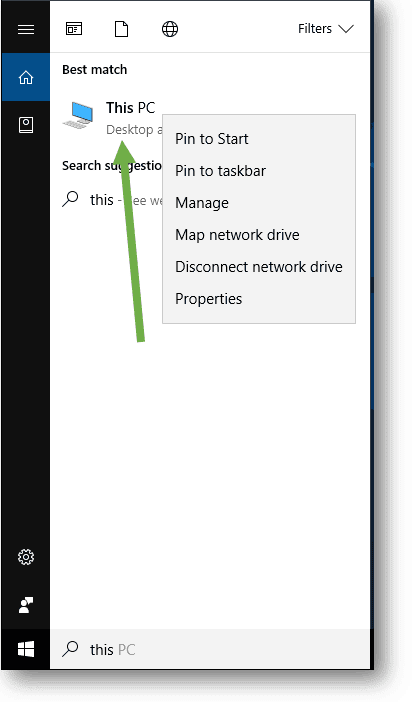
Step1. In the start menu, type This PC and when you get the This PC icon, right-click on it and click on Manage. This would open up the device manager.
- Select Device Manager and you can see there are some hardware needs to fixed.
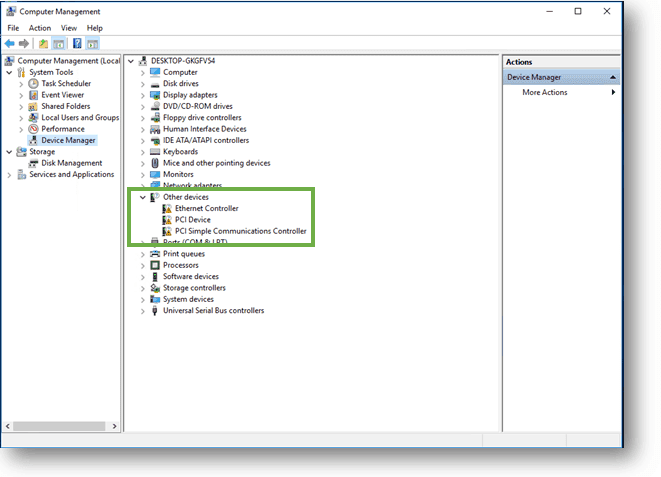
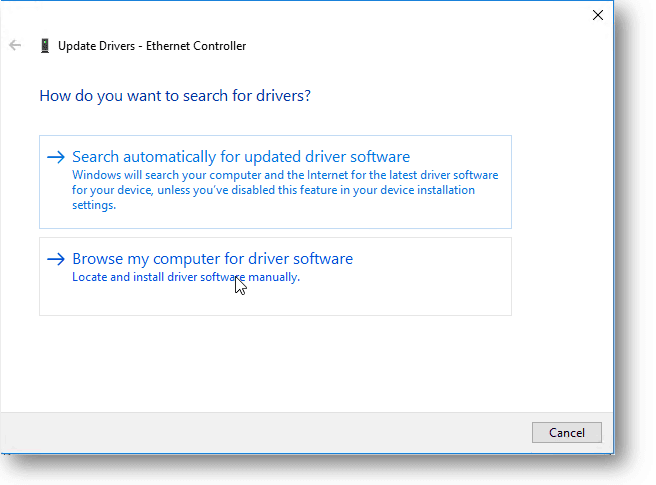
Step 2. Click on Ethernet Controller, right-click on it and click on Update driver.
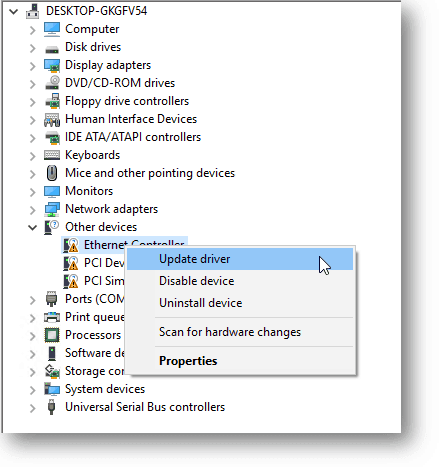
- Click on Browse my computer for driver software.
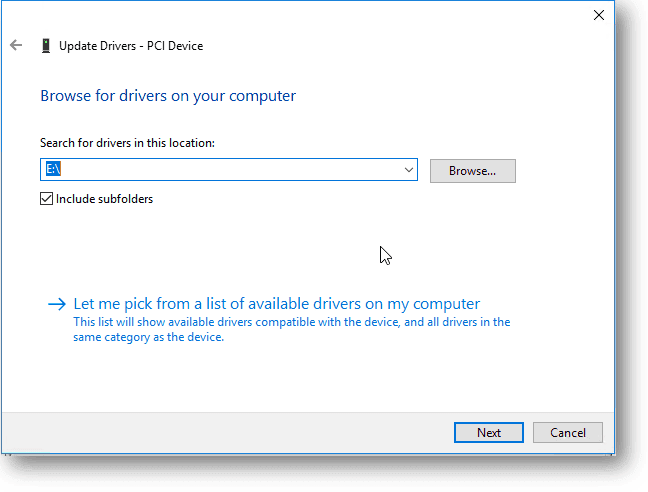
- Click on Browse and select the CD Drive (E) and click on OK
- Check the option Include Subfolders and Click on Next.
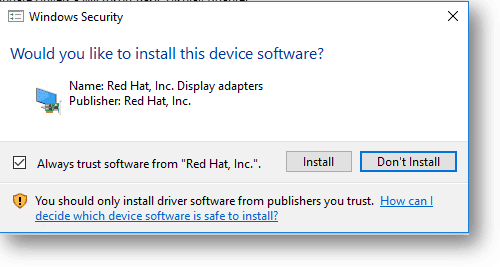
- You will be prompted with security Warning click on install.
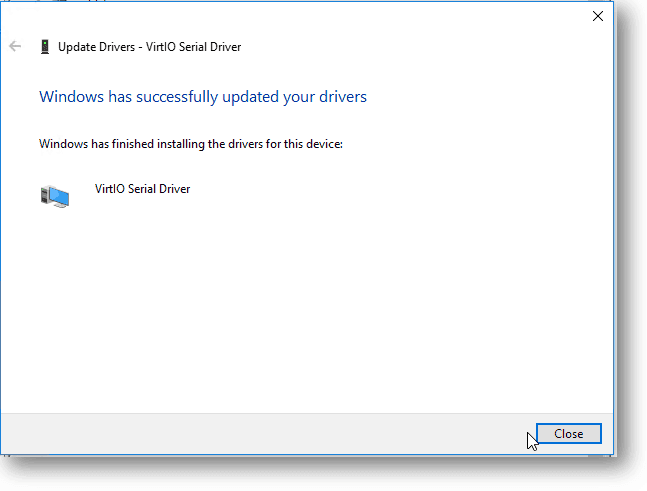
- Once installed you will get a successful message.
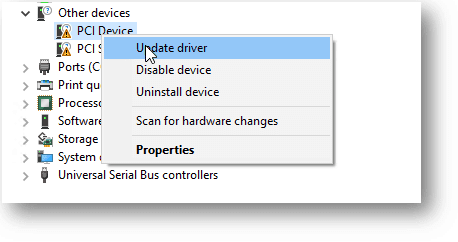
Step3. Next right click on the PCI Device and click Update driver.
- Click on Browse my computer for driver software, since we had selected the CD Drive, it is available by default option click next.
- You will get a successful message for the same.
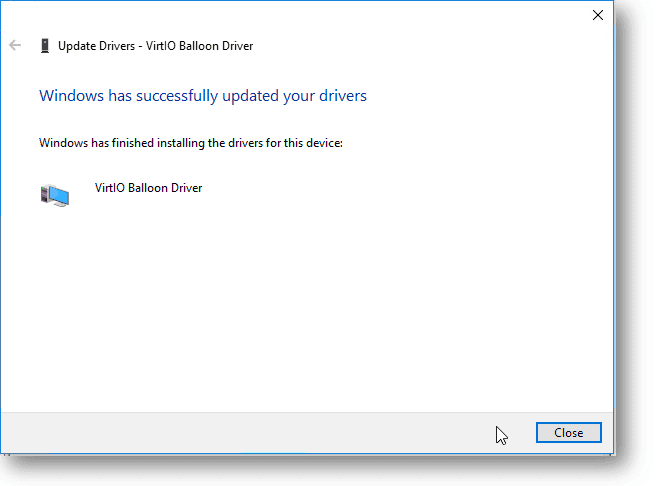
Step4. Do the same steps for PCI Simple Communications Controllers as well.
9. Installation of KVM QXL display drivers for windows 10.
Step 1. In windows open the virtio CD drive and go to the path \guest-agent\qemu-ga.msi run the qemu-ga-x64.
Once the installation is complete goto to the device manager again.
- And click on Display adapters, you can see its shows Microsoft Basic Display adapter, right-click on it and update hardware. And Just like how you updated the hardware for other devices, install the display adapter from Redhat
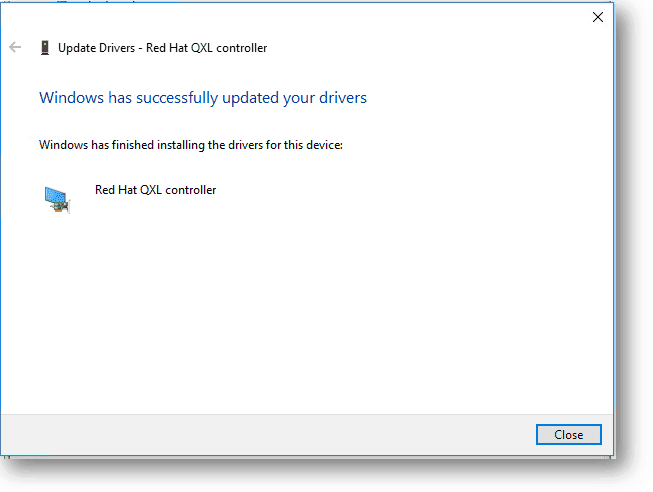
- You will get the successful message that the Red Hat QXL controller has been installed.
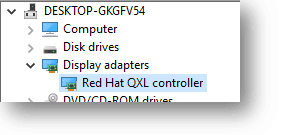
- Display adapter has now been updated to the Red Hat QXL controller.
10. Remove the VNC and Cirrus display adapter
Close the device manager window and shut down the windows 10 guest VM.
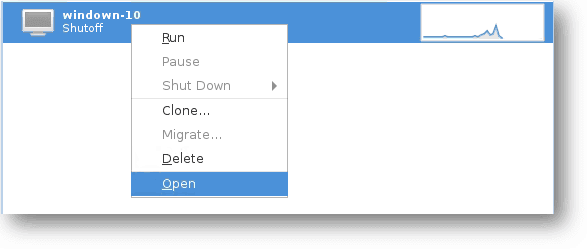
- Step 1. We need to remove some software that we had added earlier during the installation, goto windows10 VM in virtualization manager right click and click on Open.
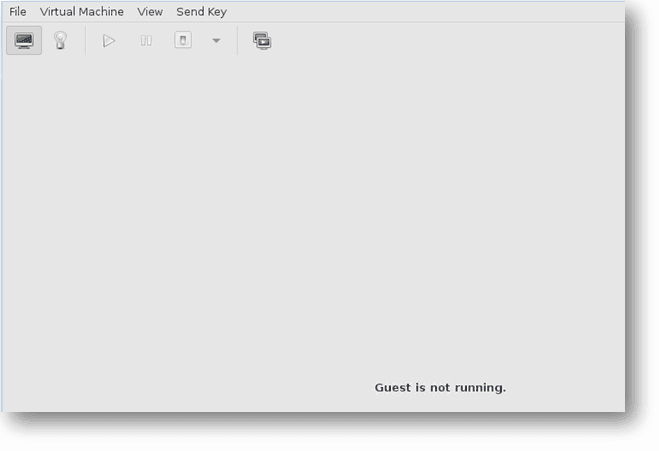
- Click on the bulb icon to Show hardware details.
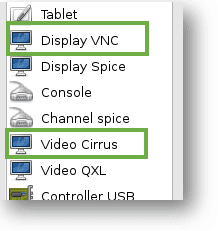
- You need to remove both Display VNC and Video Cirrus from the list of hardware.
We have installed Redhat QXL display driver on the windows10 guest in step 9 and that match with the hardware Video QXL in the hypervisor and it should start working fine, that’s it.
Now you have successfully installed windows 10 VM on your Linux machine KVM and you should be good to go.
- Also, disconnect the windows and VirtIO ISO from the CDROM1 and 2, that you had attached earlier.
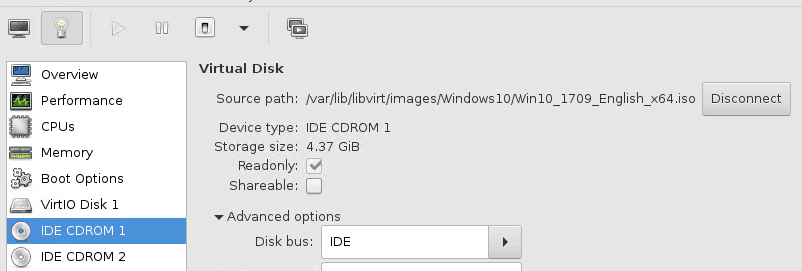
- And start your windows 10 machine and it is ready to use.
Congrats! and your windows 10 KVM guest is ready to use. If you wanted to access the VM on your Linux, you can type virt-viewer on the terminal.
Select the VM that we have installed and you should be able to access the VM on your computer similar to how you access a windows machine over RDP.
If you wanted to learn more about KVM commands that you can see, here I have covered the same.
