In the last blog, we have configured Opnsense on VirtualBox, in this blog we are going to take a look at how we can configure port forwarding with Opnsense firewall. As you know, the Opnsense firewall would block any connections that come from the external/public internet. And we can use Opnsense port forwarding to allow certain ports from the external network.
For example, you have an internal web server, RDP Server, or even FTP service for which you wanted to allow specific external IP that you trust to be able to speak to those services. You can permit those using the port forwarding feature.
While configuring the port forwarding, there is one important thing you have to remember, only allow IP or subnet that you trust. And do not allow source subnet ‘any’ which will put your firewall at risk.
How do you access the internal resources using port forwarding?
As a user who is connected to the internet will have a public IP address, you can check that by typing what is my IP in google. When you enable port forwarding for internal services for an outside user, you basically allow the public IP of the external user to inside. And for external users, how will they be able to access those internal services. From the internet you cannot access anything from public to private. So you have to use the public IP (which is the NAT’d IP of the remote network) and the port number of the Destination. And the firewall will translate that packet to inside.
For example, lets take a look at a https traffic flow when the port forwarding is enabled.
Source IP (2.2.2.2), Source Port (Random), Destination IP(1.1.1.1), Destination port (Port 443) – The firewall will nat the traffic to inside private IP. For eg: 10.1.1.1:443
Return traffic.
The private IP get’s NAT’ d back to the public IP.
Source IP and the port (1.1.1.1:443), Destination IP and the port (2.2.2.2: Random port)
You can even specify a different port to secure the environment, for example, to access the 3389 which is the RDP default port number. We could change to some other port number on the firewall. And the firewall will translate whatever port you defined to 3389 when it forwards the traffic to the internal network. We will see that in action later on.
Let’s look at different scenarios in which you can configure port forwarding. We will be looking at 3 services.
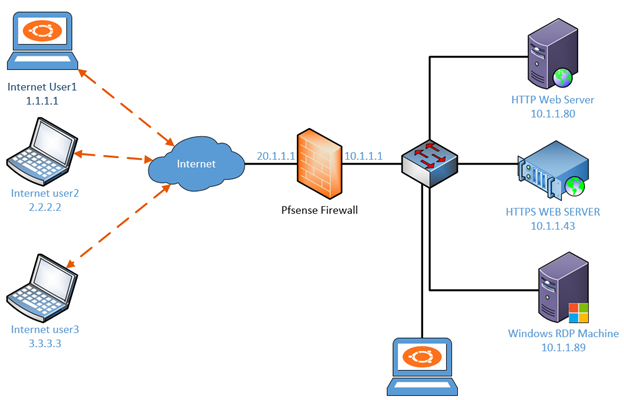
We will be using the below topology for this lab. I have multiple users who are connected to the internet and the Opnsense firewall is configured on one of our branch offices and there are some servers connected behind the firewall such as Web servers (HTTP, HTTPS) and RDP server.

How to allow RDP port forwarding in OPNsense?
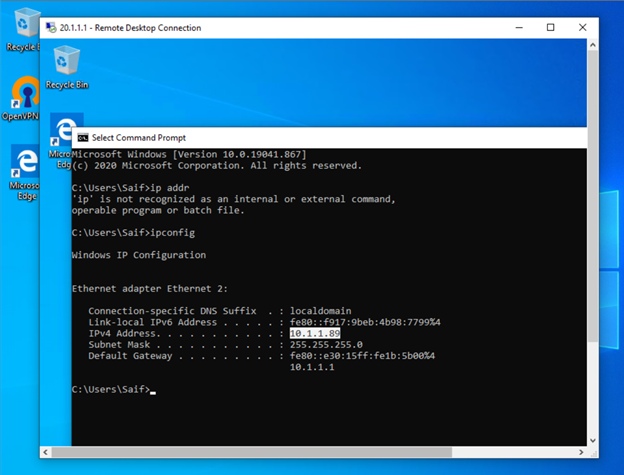
Before we start configuring the port forwarding let’s go ahead and check if we can reach the RDP server from outside. From the windows machine connected to the internet, let me try to connect to the branch network using the RDP port.
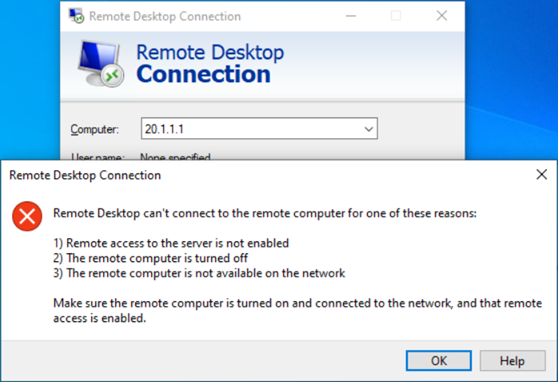
As you can see, I am unable to reach the RDP server. Since the RDP traffic would hit the outside IP of the Opnsense firewall, let’s go ahead and look at the firewall and see what’s going on.
Lets check the log’s to see what rule denied the traffic.
Click on Firewall>Log Files>Live View.
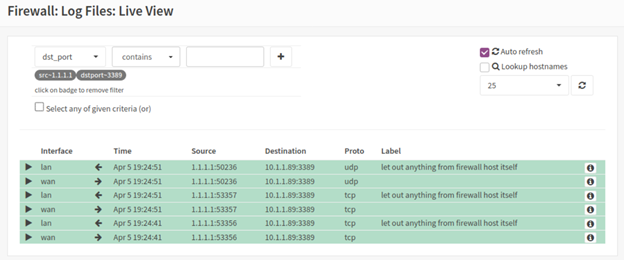
In the live view, you will be able to see plenty of traffic going across, and you may go crazy looking to find out the traffic and it would be a cumbersome task to see the rule that denied the traffic. To overcome that, we can use the filter with source IP and the destination port number. We know the traffic generated by the remote-user-1 and has an IP address of 1.1.1.1.
Note : Since this is a lab I know what is my public IP, in the production you will have check the NAT’d IP of the remote host and like I mentioned earlier the best way to check is what is my IP is using the link here.
So, the filter would be.
Source IP=1.1.1.1 Destination port =3089
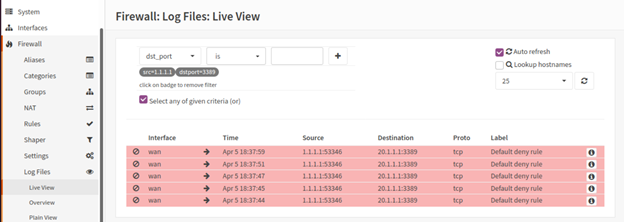
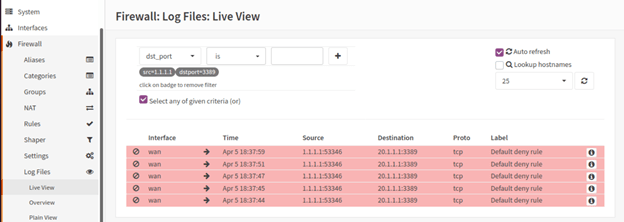
As you can see that there are multiple hits on the firewall for RDP traffic and it is denied by the default rule.
Configure the RDP port forwarding.
Let’s go ahead and allow the RDP port for the remote user-1.
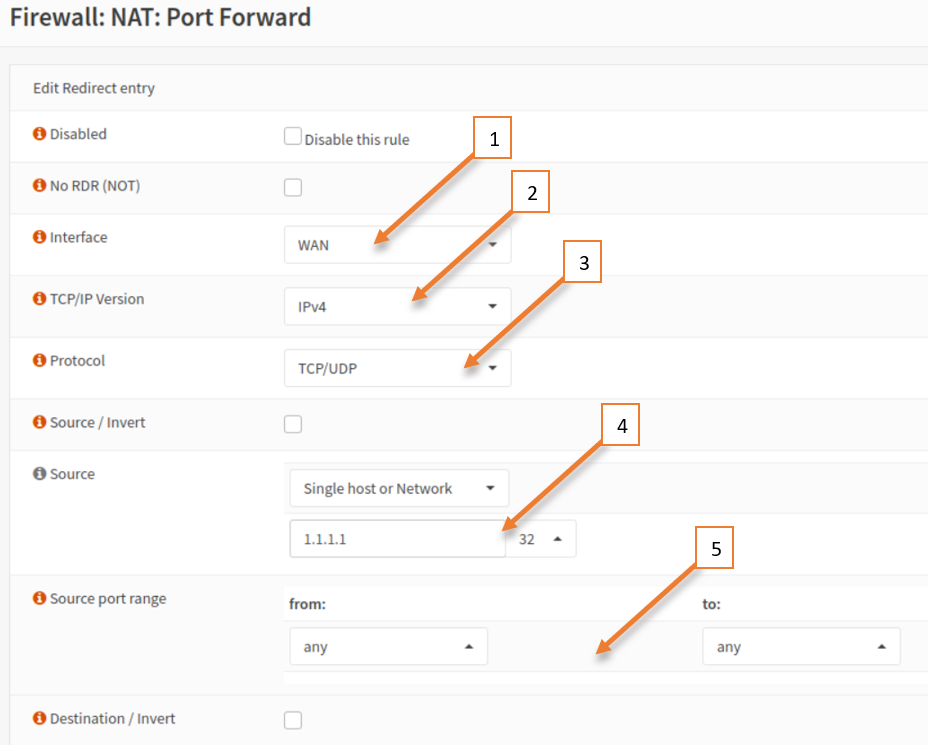
To configure the port forwarding, go to NAT and click on port forwarding.
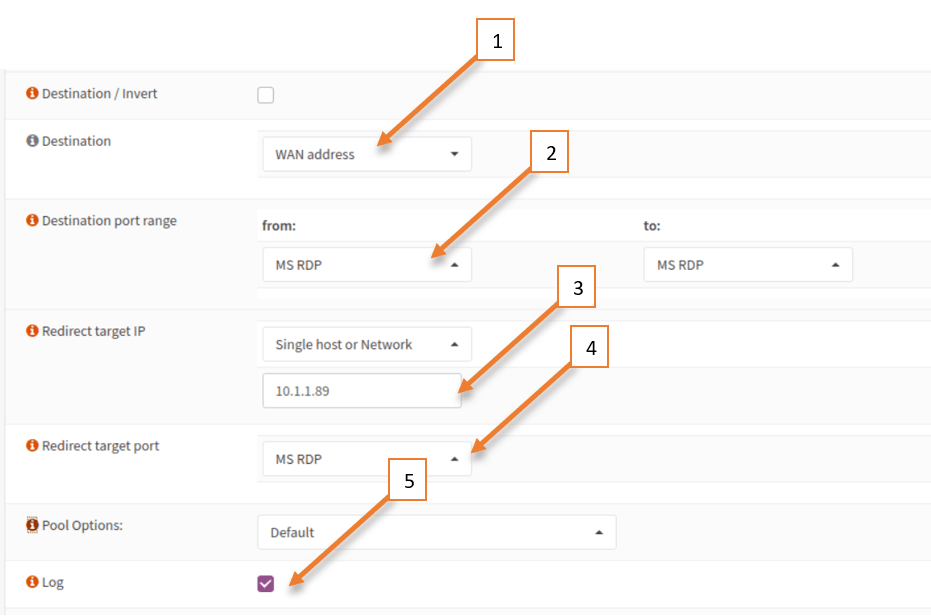
- Choose the interface as WAN.
- TCP/IP version IPv4.
- Protocol= TCP/UDP
- Source = Single host Network that would 1.1.1.1
- Since the source port would be random and we really don’t know we can keep it as any.

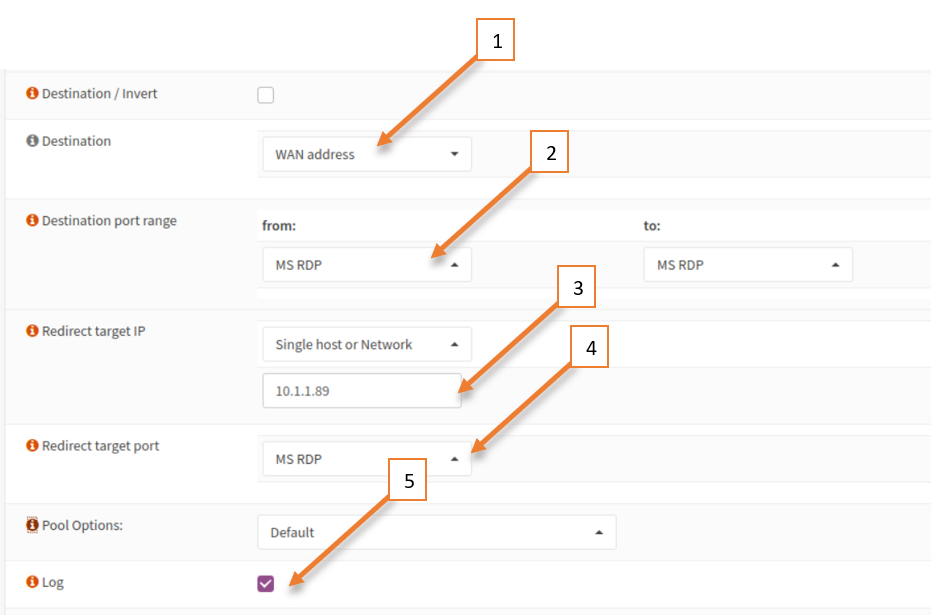
- Destination would be WAN Address.
- Destination port Range is MS RDP.
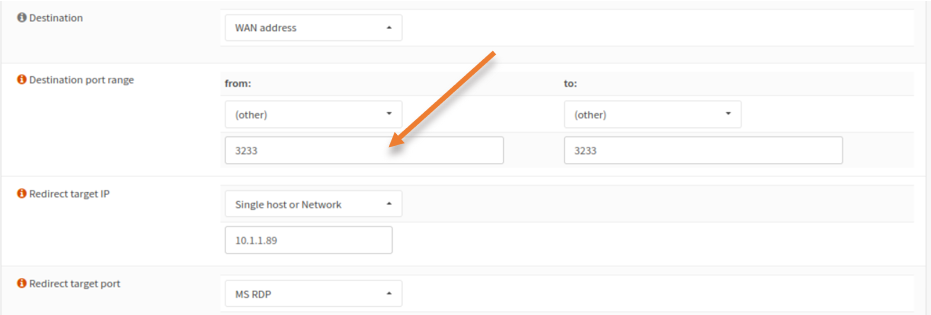
- Redirect Target IP would be internal IP address which is 10.1.1.89.
- Redirect targe port MS RDP. More on this, w will see later.
- Log the packet.
Test the RDP connection from Remote.
Let’s go ahead and test the RDP connection from remote again, and see what happens.

As you can see, it worked just fine.
To verify the access, we can check the activity on the firewall.

How to allow port 443 using port forwarding?
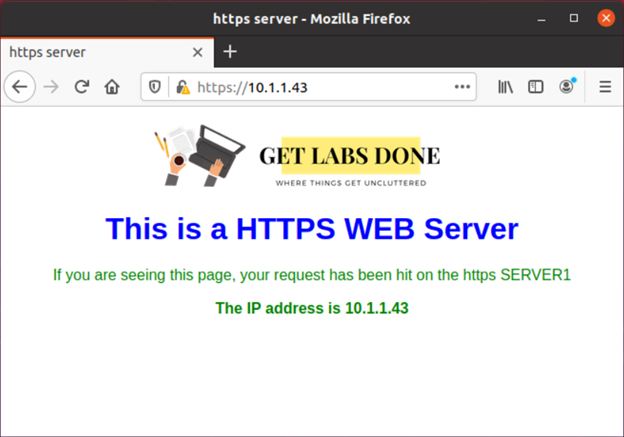
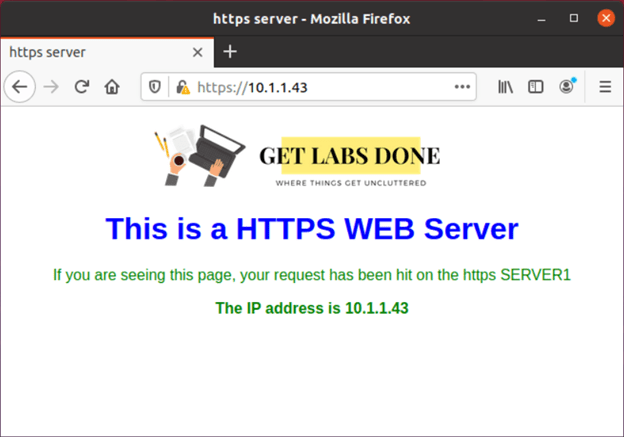
I have a web server with the IP address 10.1.1.43 in my network which is serving the HTTPS traffic, I selected the last octet as 43 so it matches with the port number 😊
From one of the internal machines let’s try to access 10.1.1.43.
As you can see, I am able to access the https server internally that is good.
Let’s also verify the same from the external user.
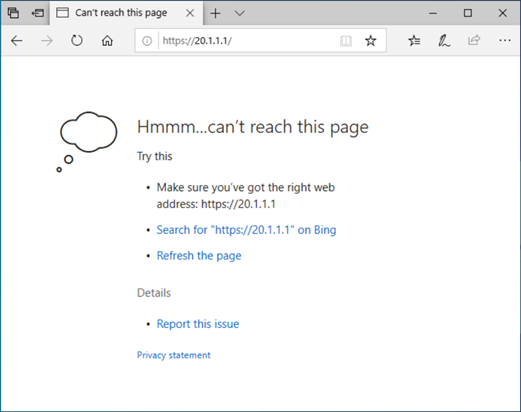

Well, I tried accessing the webserver using my external IP address and I do not get any response, so let’s go ahead and configure the port forwarding for the HTTPS port 443.
Configure the https port forwarding in Opnsense.
Head over to firewall>NAT>Port-forwarding.
Click on Add to create new port forwarding policy.
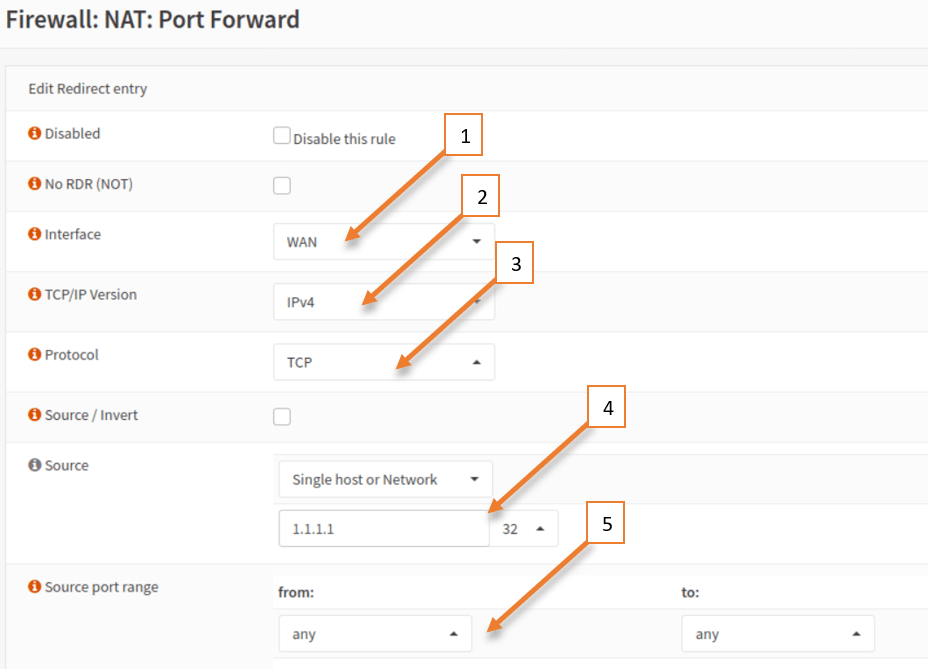
- Choose the interface as WAN, because there were you would get the hit.
- TCP/IP version IPv4.
- Protocol TCP.
- Source, select a single host or network, and type the source IP of our internet machine which is 1.1.1.1/32
- The source port will always be random so you may choose any.

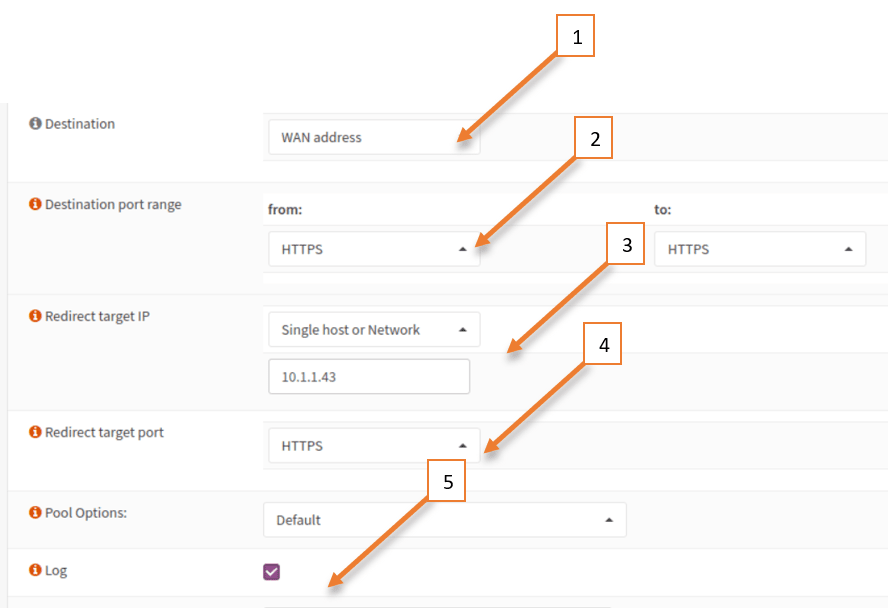
- On the destination choose the WAN address.
- Destination port ranges would be HTTPS to HTTPS.
- Redirect target port =https.
- You may also check the option that says log the packet.
Click on SAVE and apply the changes.

Test the https port connectivity.
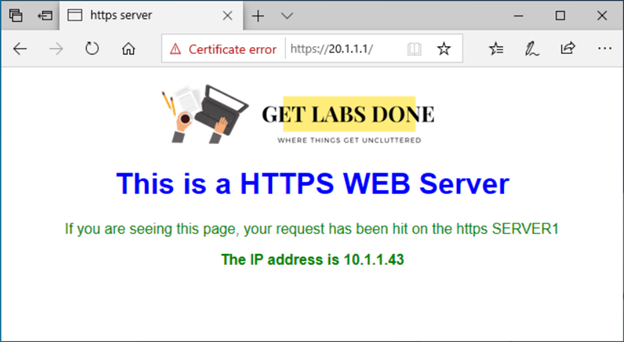
Go back to our internet host and reload the page again to see the magic.
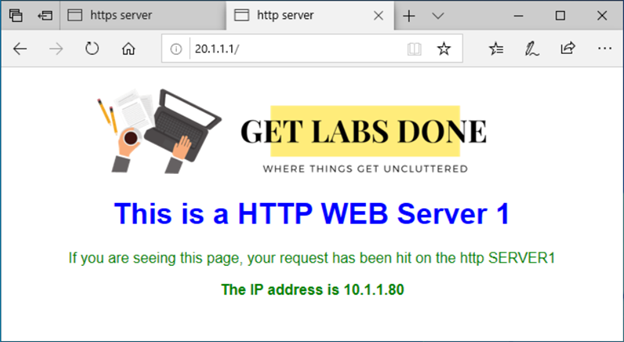
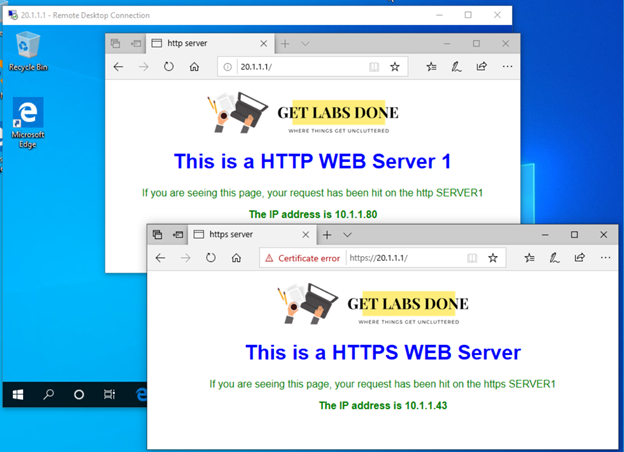
As you can see, I am trying to access 20.1.1.1 and my page shows my 10.1.1.43 web server static web page which our internal HTTPS server. This indicates our HTTPS port forwarding on Opnsense is working as expected.

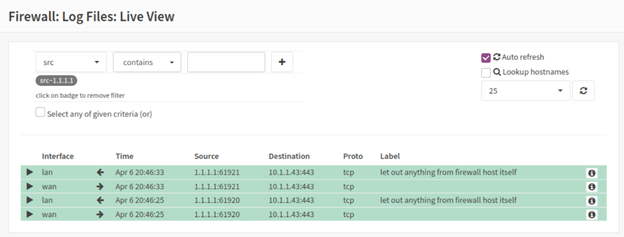
I can go back to the live view and observe the traffic.
As you can see the request came from 1.1.1.1 and going to the destination 10.1.1.43 over port 443.

How to configure the port forwarding for port 80.
Configuring the port forwarding for https traffic is not different than configuring it for http traffic, all you have to do is just create the same policy as the https and change the port number.
We are not going to all the steps that we performed for https traffic, instead we can clone the same https policy and change the port number.
Select the https policy that we have created in our last step, and just click on clone which is at the extreme right.
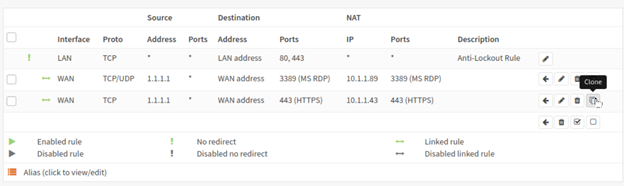

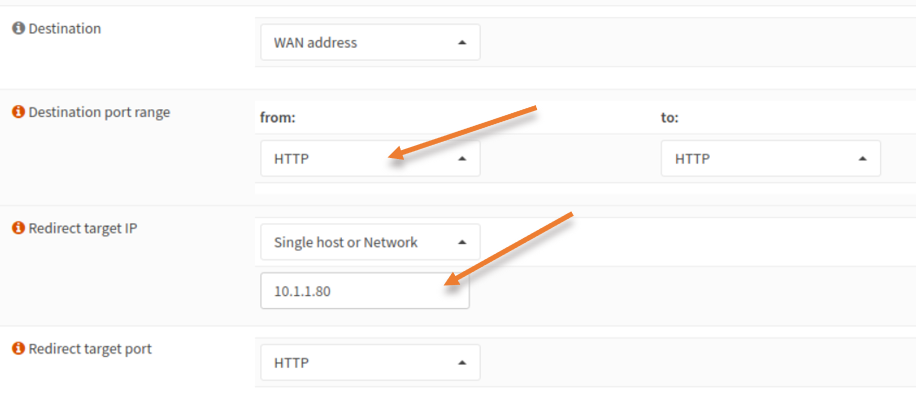
All you have to do is change the destination port to http and the target IP to the http web server and save the configuration and apply the changes.

Test the http connectivity.
After you made the changes, we are able to access http server as well from the outside host, which is great.

Allow multiple hosts to port-forwarding in Opnsense.
If you notice on the left of the topology, I have two more hosts that I wanted to share the port forwarding, so instead of creating separate rule for each one, what we can do is, create an alias group called external users and allow them to access the web servers and the RDP servers.
Create the Alias for multiple IP’s.
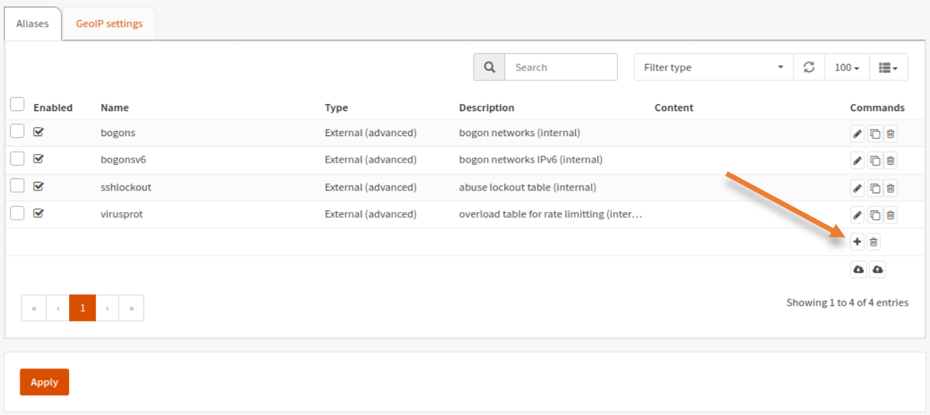
Click on firewall > Aliases.
Click on the plus icon to add the new alias.

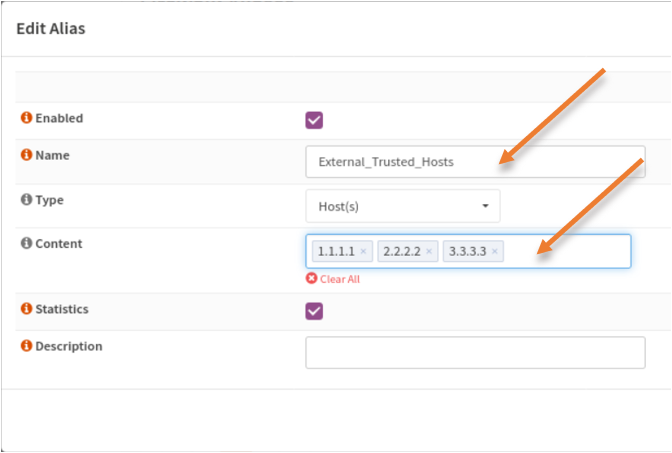
In the Name, enter some user-friendly name and in the content, add the external IP’s that you wanted to allow.
I am allowing all the three external remote hosts.

Add the alias to the port-forwarding rule.
Go to the port forward configuration again (Firewall>Nat>Port-forwarding) and edit all the port forwarding rule that we configured for RDP port and in the source IP, add the alias which we just created.


Test the connectivity from each machine.
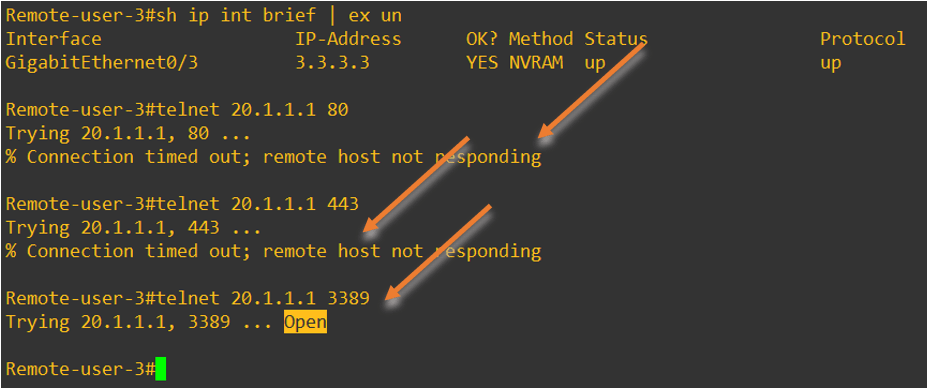
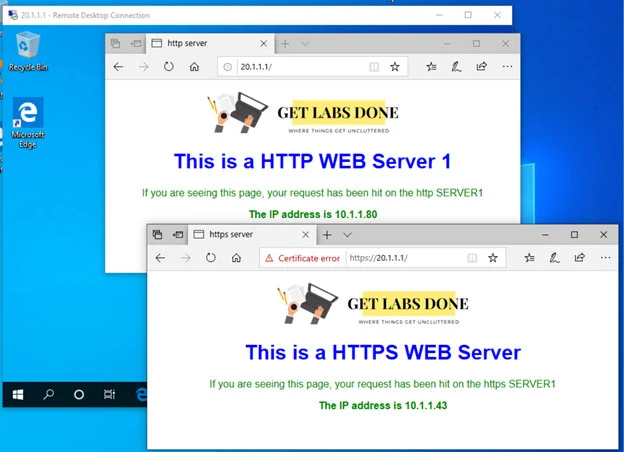
As you can see below, I cannot access both the http and https machines from the remote-user 3, however I can access the RDP because I have allowed all the three external users to be able to access the RDP service.

Even the RDP access works on the Remote user 2.


How about remote user 1 whom we have allowed all the three services ?
If you take a look at the screen below, you can see I can not only access the RDP server, but also the HTTP as well as HTTPS.
Configure RDP port-forwarding in Opnsense with different port number.
We have used RDP default port when we did the port forwarding using the Opnsense firewall, however it is possible to change the default port number to custom one. Let’s go ahead and enable RDP on port number 3233. And observe the behavior.
Go back to the Firewall>Nat>Port-forwarding.
Edit the rule we created for RDP.
In the Destination port range, select port to other and enter the port number 3233 and click on Save.

Test the RDP connectivity with different port.
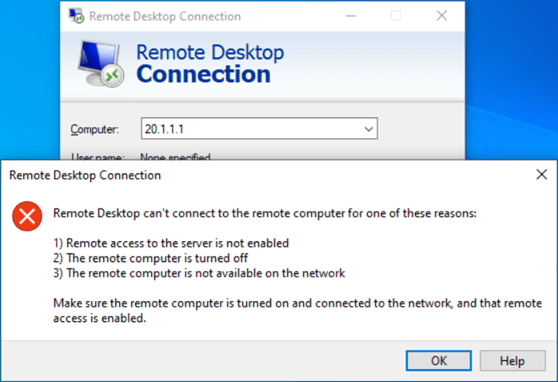
When I tried with the default RDP port, I got the error saying I cannot access the RDP.
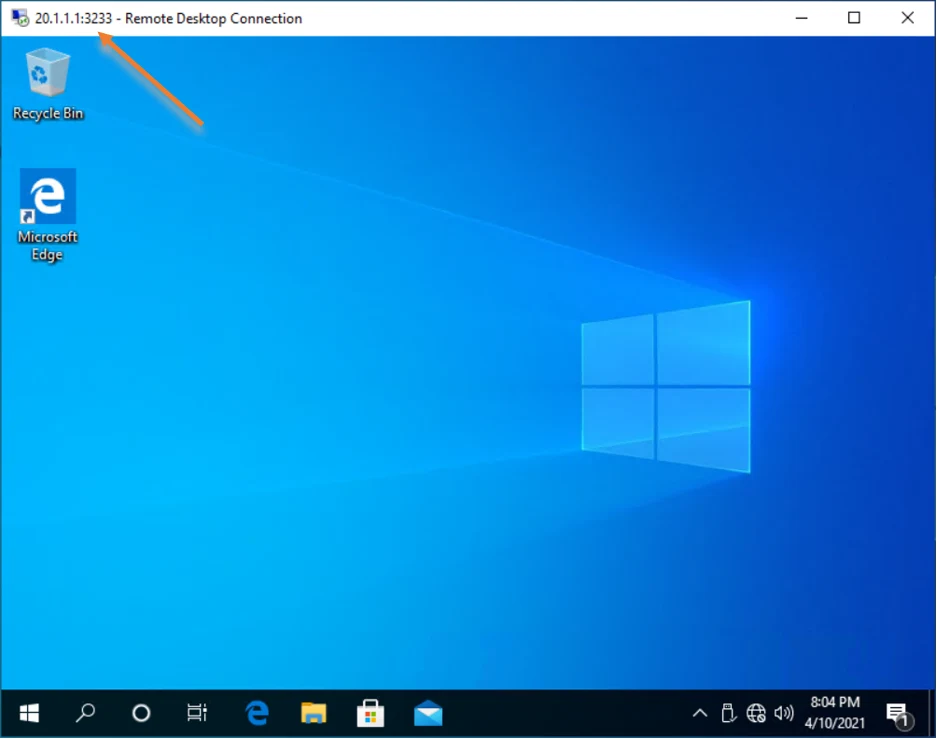
Lets try to access the RDP using the newly added port which is 3233.
Open the RDP and change the port number as ip address:portnumber.
As you can see that worked, and you can notice the new port number on top of the RDP screen.