
In a world where everything connected over the internet, it is quite common that we get to see many enterprise users connect the branch offices via the IPsec VPN. Moreover, the internet connection is getting cheaper and cheaper now as compared to the dedicated links. That is one of the reasons too the SD-WAN is becoming popular as well.
Connecting the branch offices over IPsec using the same equipment is easy, which we tried last time, Site to site IPsec Tunnel between Palo alto firewalls and also between PFsense firewalls.
But what if you get a request to configure IPsec on a multi-vendor environment, where each IPsec endpoints are different? Let’s look at that in this blog.
It is very common on an enterprise network you get a request to connect a 3rd Party vendor network using the IPsec VPN. Most of the time, the vendor might be using different hardware’s. So it is essential to know how you can connect another branch network over IPsec where the remote branches are using other network devices.
In this blog, we are going to build an IPsec Tunnel between Palo alto firewall that is sitting at the Headquarters, and Pfsense firewall is at Vendor network.
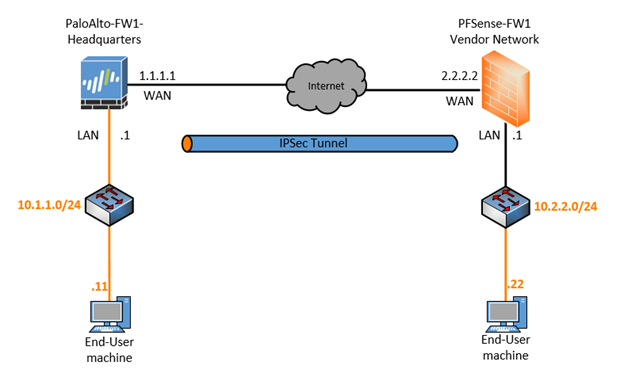
Below is the topology that we are going to use for this lab, and yes! It is the same topology that we have used in our previous blog, just that I replaced the Palo Alto on the Branch2 with Pfsense.

Please check out the previous article here, If you wanted to learn more about how I have set up the internet router as well as the end-host machine.
If you don’t have GNS3 setup, make sure you set up the topology as above.
Read also,
How to Setup IPsec Tunnel between Palo Alto and PFsense?
How To Configure Palo Alto Site To Site VPN Using IPsec?
How To Setup A Simple IPsec Site To Site Tunnel In Pfsense?
How To Configure IPsec VPN Between pfSense And Cisco Router?
Prerequisite before you proceed.
On the Palo Alto firewall, I have already configured the below.
- Three zones- Trusted (ethernet 1/2), Untrusted (ethernet 1/1), IPsec (No interface yet)
- An outside and the inside IP addresses.
- Default route towards the ISP IP – 1.1.1.1.
- Connected the local machine on the Palo Alto management interface (10.1.0.50) to access the GUI using a virtual adapter.
Pfsense Firewall.
- Configured the outside and inside IP address as per the topology.
- Pointed the outside default gateway towards the ISP.
The objective of the lab.
- Setup the lab as per the topology.
- Create an IPsec tunnel between the Headquarters and the Vendor network.
- Verify the reachability of remote hosts over IPsec tunnel.
How to configure IPsec between Paloatlo and Pfsense?
We will first configure the Headquarter where we have Palo Alto firewall and then Vendor network side, which is PFSense firewall. In a real-world, you would only configure headquarters assuming that you are managing the headquarters networks, and you should ask the vendor network team to configure the remote end.
Since this is a lab we have to configure both the sides. 😊
- Configure the Palo Alto firewall for IPsec.
- Create the tunnel interface.
- Palo Alto IPsec tunnel creation.
- Configure the Policy
- Configure the Static Route for the IPsec.
- Pfsense IPsec configuration.
a. Pfsense Phase1 configuration.
b. Pfsense Phase2 configuration. - Pfsense Policy configuration.
- Check the IPSec tunnel status.
- Final IPsec verification.
1.Configure the Palo Alto firewall for IPsec.
We will start the lab by configuring the Phase1 and then will go ahead and configure the Phase2.
In Palo Alto Phase 1 configuration will start with IKE Crypto and the Gateway, Lets start with the IKE Crypto.
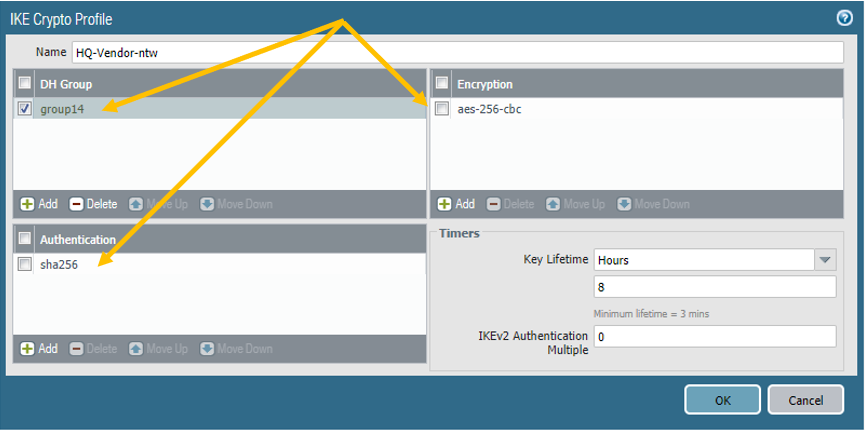
a. Palo Alto IKE Crypto configuration.
Click on Network, Network Profiles– IKE-Crypto, click on Add to create new IKE crypto profile
Below are the parameters that we are going to use.
Name: HQ-Vendor-ntw
DHGroup: Group14
Authentication:sha256
Encryption: AES-256-cbc
Key Lifetime:8 hours

Next let’s go ahead and configure the IKE Gateway.
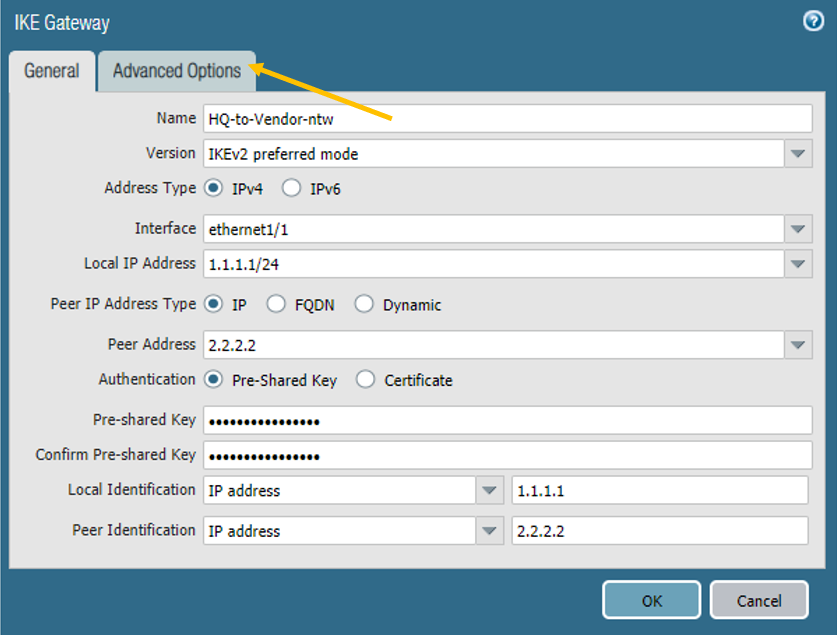
b. Palo Alto IKE Gateway configuration.
On the same Network Profile, Click on IKE gateways, click on Add.
Below are the parameters that we are going to use.
Name: HQ-to-Vendor-ntw
Version: IKEv2 prefered mode
Address type: IPv4
Interface: ethernet1/1 (Outside interface of the firewall.)
Local IP address: 1.1.1.1/24
Peer IP address: 2.2.2.2 (Pfsense Outside IP.)
Authentication (Preshared Key): Paloalto-pfsense
Note: Make a note of the Pre-shared key as we have to define the same on the PFsense remote end.
Local and Peer Identification: Add the respective IP addresses, this field is not mandatory though.
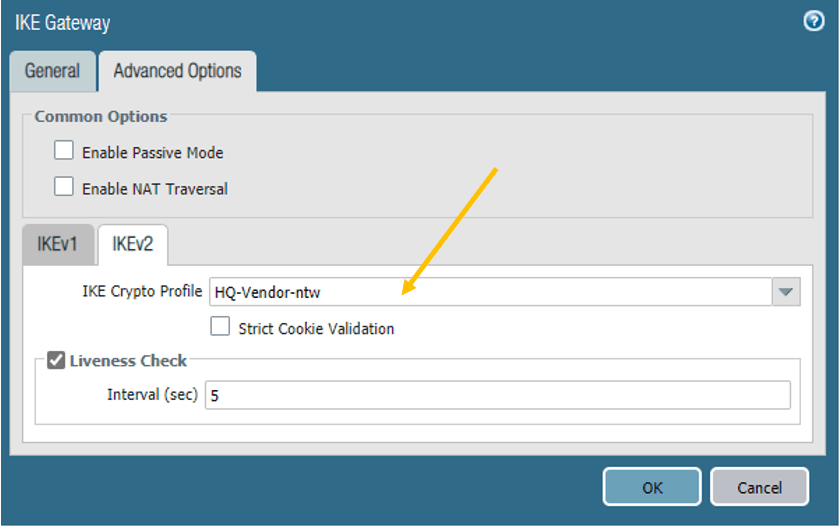
Click on Advanced Options.

In the Advanced options, select the IKE crypto profile that we have created.
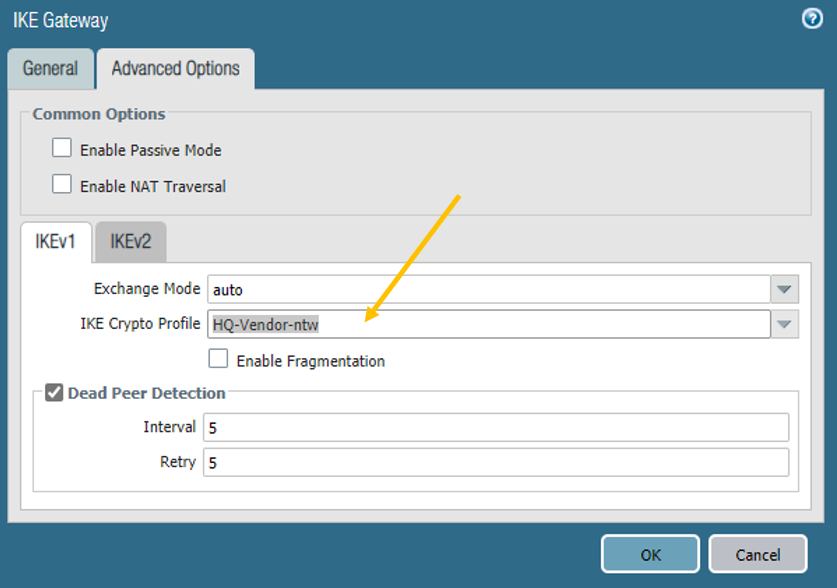

Similarly, click on the IKEv2 tab and choose the crypto profile here as well and click on OK.

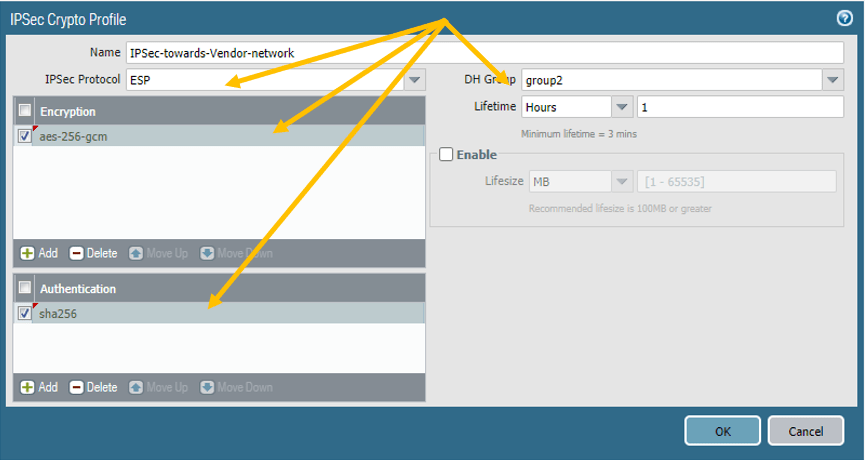
c. Palo Alto IPSec crypto.
Follow the below parameters.
Name: IPSec-towards-Vendor-Network.
IPSec Protocol: ESP
Encryption: aes-256-gcm
DH Group: group2
Lifetime :1 hour.
Authentication: sha256

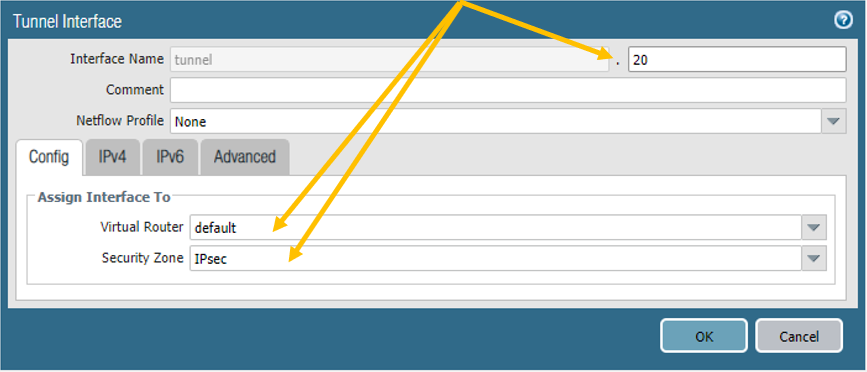
2. Create the tunnel interface.
You need to create the tunnel interface and add to the IPsec zone, that we have made in the beginning.
Click on Network, Interfaces– Tunnel.
Click on Add to create a new tunnel interface.
Add the tunnel interface to the default router and the IPsec security zone.

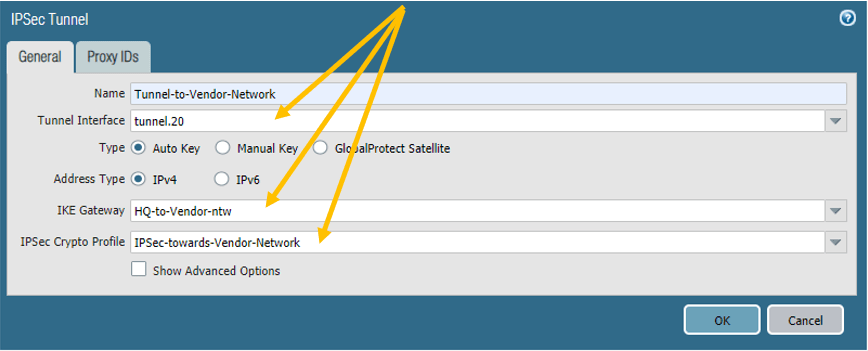
3. Palo Alto IPsec tunnel creation.
We have completed the prerequisite, now let’s go ahead and connect all the pieces and build an IPsec tunnel.
On the network tab, click on the IPsec tunnel on the left, and click on Add.
There nothing hard here; you need to name the tunnel and call each item that we have created.

4. Configure the Policy.
You need to configure policies to allow IPsec communication.
Click on Policies, under Security policies click on Add.
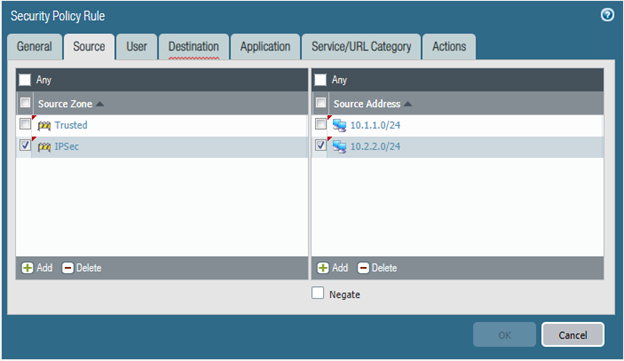
Rule name: Allow-IPsec.
On the source, select the Trusted and the IPsec zone and the address as 10.1.1.0/24 and 10.2.2.0/24

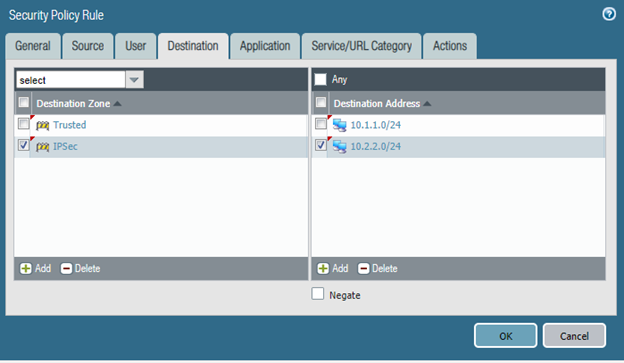
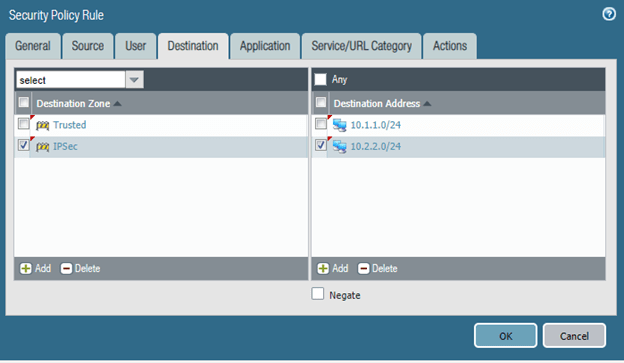
On the Destination, fill in the same details.
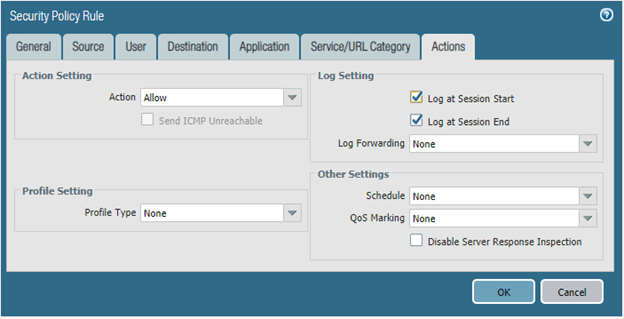
On the action tab, make sure you are choosing the Action as Allow and log settings are enabled.

5. Configure the Static Route for the IPsec.
We just configured the policies, and for the headquarters to talk to the vendor network, you need to tell the Palo Alto firewall to send the traffic via tunnel interface 20.
Click on Network.
And click on Virtual Routers.
I am using the default router, click on that.
And click on the static routes, and click on Add.

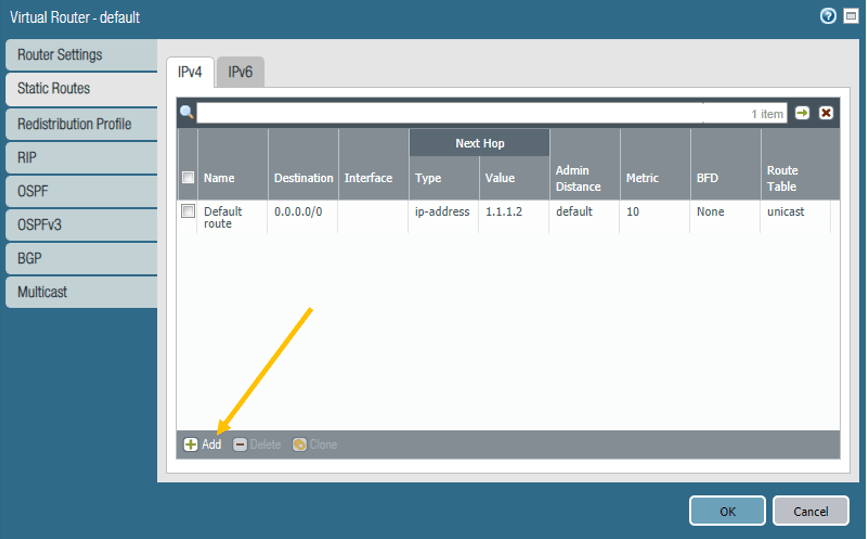
Add the Destination and the interface as the Tunnel interface 20 and click on OK.


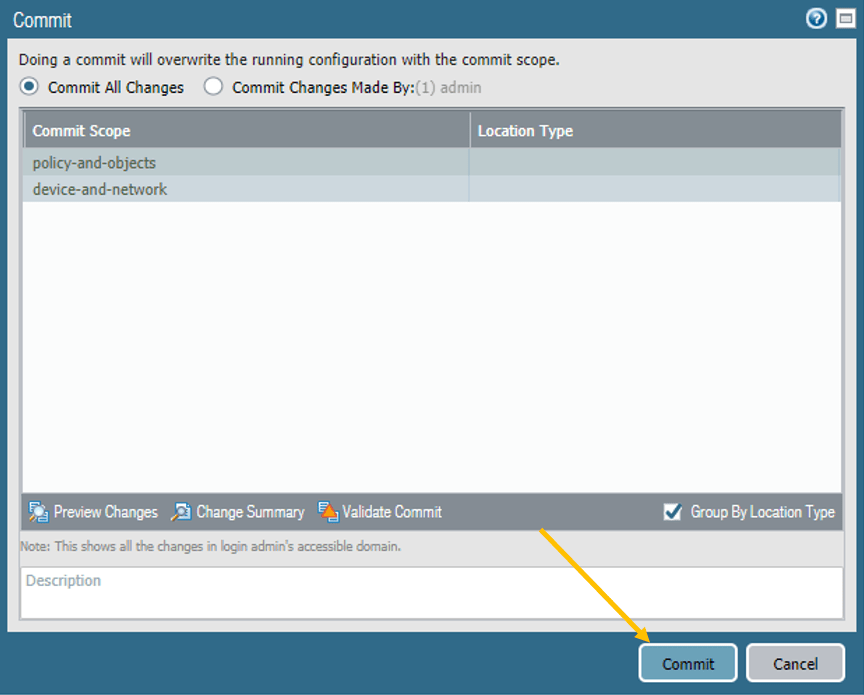
You can go ahead and commit the changes that you just made, for the changes to take effect

We have now configured headquarter side of the firewall, let’s proceed with the Pfsense side.
6. Pfsense IPsec configuration.
Like we did for the Palo Alto firewall, let’s go ahead and configure IPsec following the phase1 and Phase2 configuration.
Pfsense Phase1 configuration.
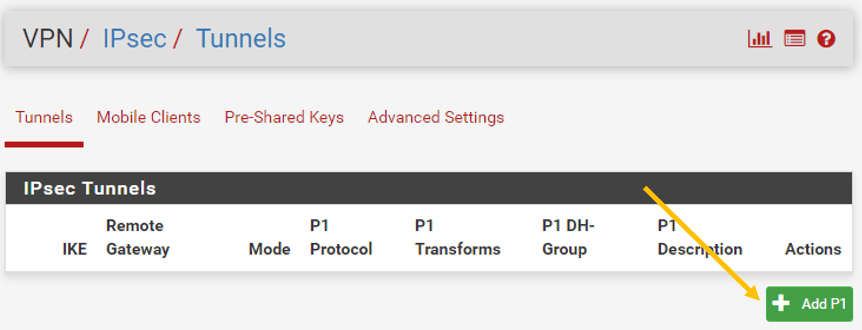
In the Pfsense firewall, click on the VPN and click on the IPsec.
Click on Add P1.

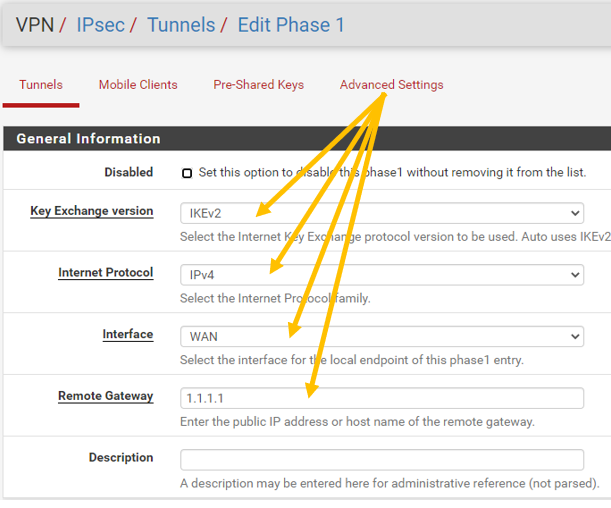
General Information.
Under Phase 1in general information, follow the below Parameters.
IKE Exchange Version: IKEv2.
Internet Protocol: IPv4.
Interface: WAN
Remote Gateway: 1.1.1.1

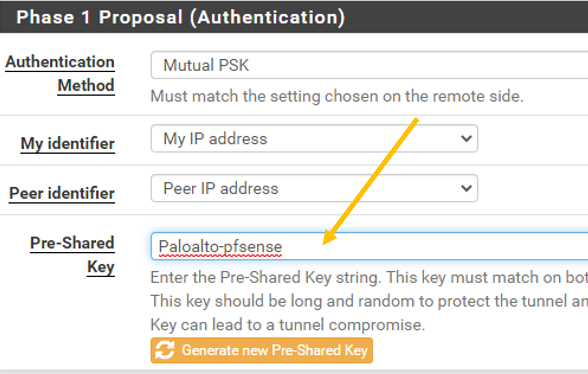
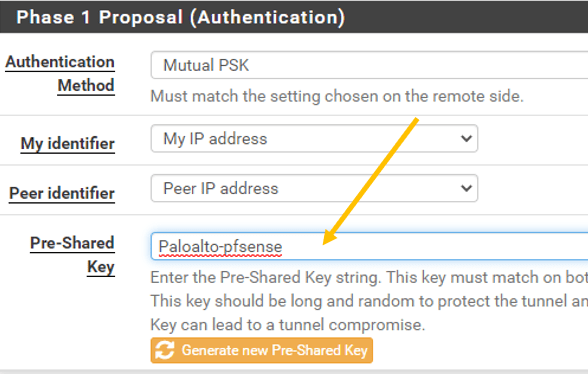
Phase1 Proposal.
In Phase1 Proposal (Authentication), Add the same preshared key that we have defined on the Palo Alto firewall, which is Paloalto-pfsense.
Note: Both sides should match.
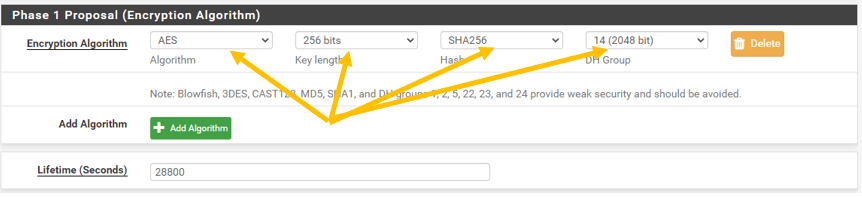
On The Phase1 Proposal (Encryption Algorithm)
Choose the below parameters.
Algorithm: AES
Key length: 256bits
Hash: SHA256
DH Group: 14(2048)
Leave the lifetime the default to 28800

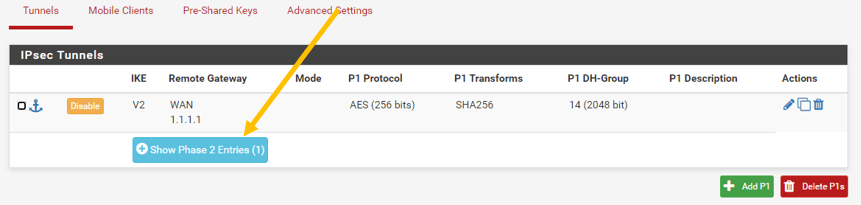
Click on Save, you should be able to see the Phase1 is complete.
b. Pfsense Phase2 configuration.
Click on Show Phase 2 Entries now.

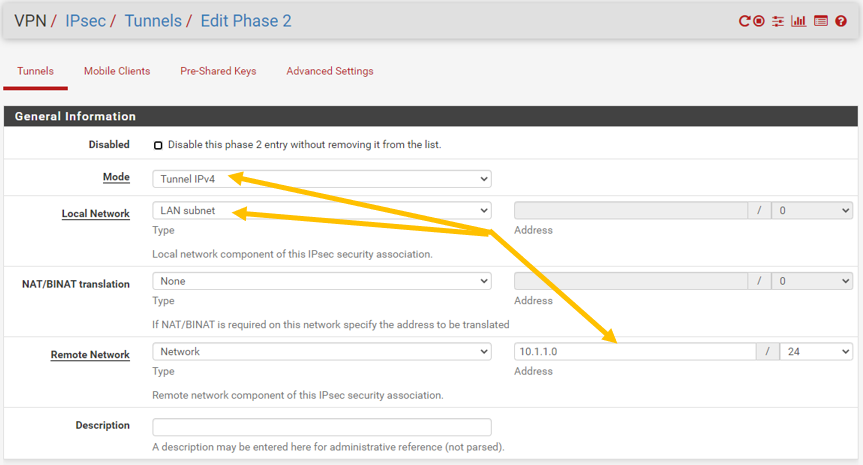
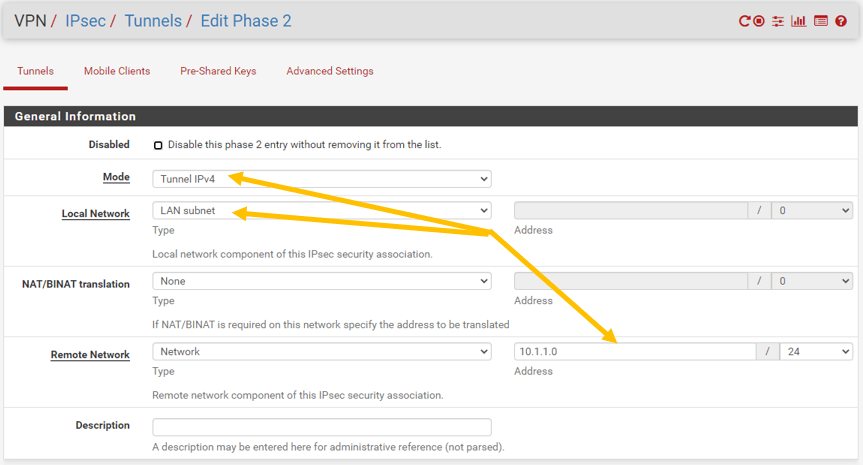
In the Phase2 General information, modify the following.
Mode: Tunnel IPv4.
Local Network: Lan Subnet.
Remote Network (Network): 10.1.1.0/24
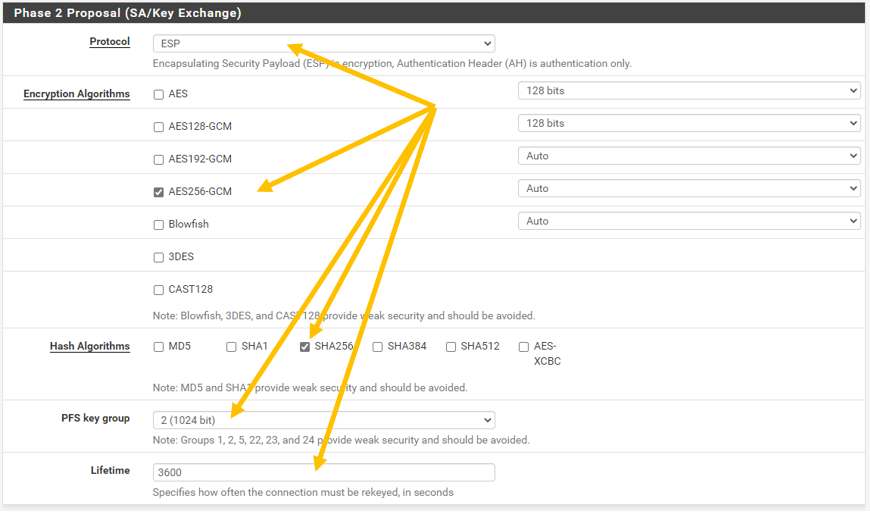
Phase2 Proposal.
On Phase 2 proposal (SA/Key Exchange) configure the below.
Protocol: ESP
Encryption Algorithm: AES256-GCM
Hash algorithm: SHA256
PFS Key Group:2(1024)
Liftime : 3600

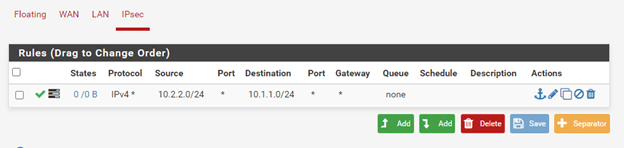
7. Pfsense Policy configuration.
Alright, we just configured the IPsec tunnel, let’s allow the remote traffic from the Headquarters to the vendor network.
Click on IPsec and click on Add rules.

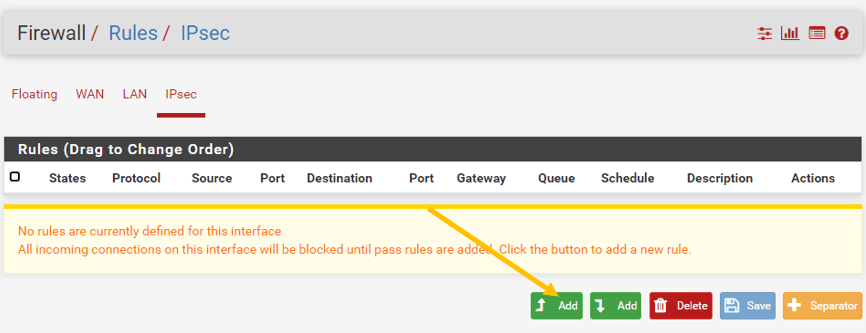
In the rules, allow any traffic from 10.2.2.0/24 to destination 10.1.1.0/24 apply the change.

8. Check the IPSec tunnel status.
Lets go ahead and check the IPsec Status on both the Palo alto and the Pfsense firewalls.Pfsense – Status— IPsec

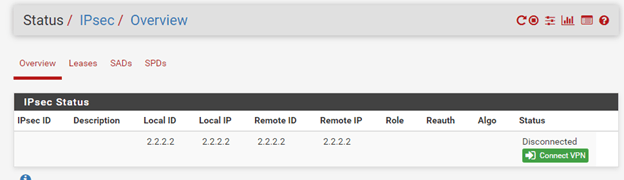
Palo Alto – Network – IPsec Tunnels.


Both the sides are not up yet.
The tunnel will only come up when there is traffic initiated towards it. Provided we have configured everything successfully.
So let me initiate a ping from the Vendor management network to the Headquarters.
As you can see, I lost some pings, but I got the response right after.


Let me also do the traceroute to understand what path it is taking.
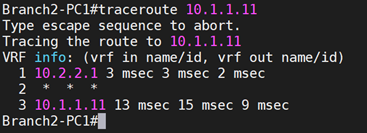
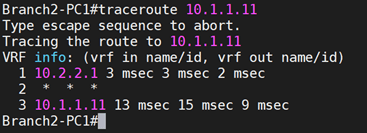
And that also shows it is taking the IPsec tunnel.
9. Final IPsec verification.
Let’s check the Status from both the firewall ends.


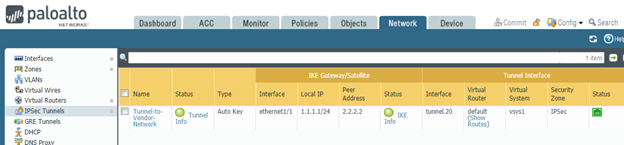
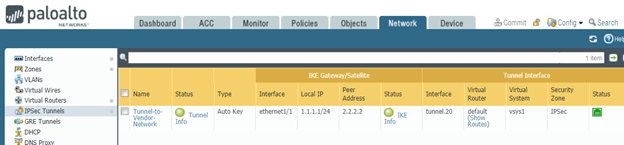
As you can see, my IPsec tunnel is up, on both the Headquarters and vendor network side as well.
sean
Wednesday 10th of September 2025
Thank you, what a wonderfully helpful document. You refer to the firewall as a "Paloalto". The name is Palo Alto Networks Next Generation Firewall. Palo Alto Networks is the company. Palo Alto is a city. There's no such thing as a "Paloalto".