
You got your network cloud setup in AWS, and the resources inside the VPC can go off to the internet. Everything works great, but what if you want to allow communication between the cloud and the on-prem network?
There are multiple options from AWS for that. You could use,
- AWS Site to Site VPN.
- AWS Direct connect.
The AWS direct connect is something we cannot simulate in an environment as it will require you to submit a form with AWS and connect with the partners, and the partners will let you connect to the AWS using a direct link. You will get a dedicated port at AWS partner to plug in your router fiber link in.
And by default, this direct link is not encrypted. You can think of direct connect as cable connected directly from your on-prem device to the AWS VPC. You can, however, encrypt the traffic if needed.
This blog will look at connecting the on-prem site using AWS site to site VPN, AKA IPsec VPN. We will cover the AWS side configuration on this blog, and on my upcoming blog post, I will connect each of the vendors that I could get access to connect to the AWS site to site VPN.
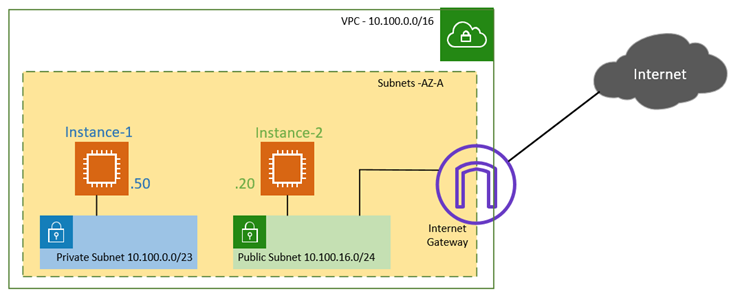
Below is the sample topology that we are going to start off. will use with the public and Private subnet. I have covered how to create a public and private subnet in aws here.
- A VPC with a 10.100.0.0/16 subnet.
- The private subnet range is in the 10.100.0.0/20, and the public subnet is the 10.100.16.0/24, in the same AZ. It is, however, recommended to have subnets spread across different AZ for redundancy.
- A Linux instance runs with the IP address 10.100.0.50 in the Private zone and the other one running in 10.100.16.20 in the public zone.
- The VPC also connected with Internet gateway with default route pointed to it, so The EC2 instance in public subnet can go off to the internet from AWS side.
- But the hosts in the private subnet cannot go off to the internet. Either there should be a route on the private subnet to the Internet gateway or NAT gateway, or like we did before, you need to use a firewall in between to share the internet access.
- Due to security reasons, we can offload the internet access from our onprem network after the IPsec tunnel build-up for some of the workloads. We will look into that as well.

What is site to site VPN in AWS?
When the internet was not so popular, the enterprise networks used a dedicated fixed line from the ISP to connect the branch sites. However, when the internet becomes popular and available in all parts of the world with more bandwidth. The enterprise network slowly started to adopt the internet as the cheapest alternate for connecting the branch office. But there is a problem. The carrying transport is not encrypted when you send data over the internet. Since no enterprise-level security, no confidential data can be sent over it. That’s when we started to use IPsec over the site-to-site VPN. Meaning, we can create a VPN tunnel between two sites. From your AWS cloud to your branch offices, and that tunnel gets encrypted using IPsec parameters.
So if someone were to sniff the packet and try to capture the data, they could only see the public IP of the AWS and the Oneprem network, the rest all will be encrypted.
The site-to-site traffic is not new to AWS. It has been used by the enterprise network for years now. And most of the network devices such as firewalls and routers do support the IPsec feature.
Building an AWS site-to-site tunnel is pretty easy. After the configuration, the AWS would create two tunnels from the AWS to your on-prem network. One will act as a primary, and the other one will be secondary. If the primary goes down, the secondary will take over the traffic.
So let’s create an IPsec site to site tunnel on aws.
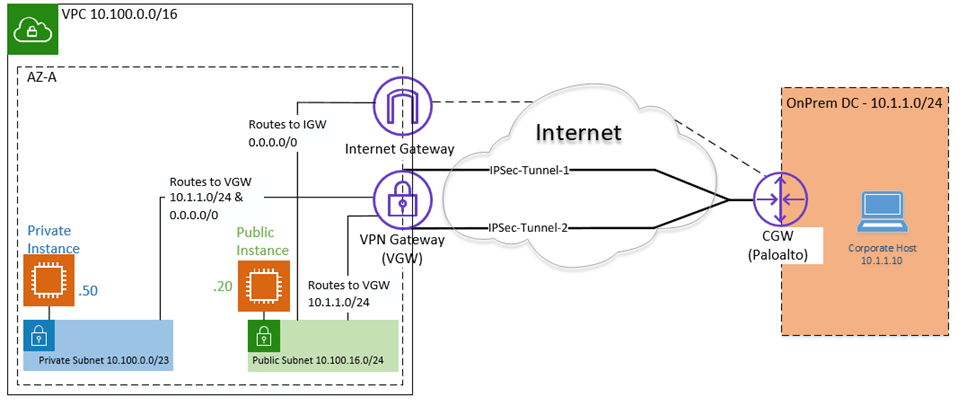
When our AWS cloud with private and public subnet connected to the on-prem it would look like below.
- We have Private and Public Subnets.
- The internet access to the private host is disabled within AWS VPC. If the Private hosts want to connect to the internet, they will have to offload from the Onprem via IPsec.
- The private host can reach the on-prem traffic via IPsec as well.
- The public host has internet access right out of the AWS cloud, only for on-prem traffic (10.1.1.10/24) it has to go via IPsec.

1. Creation of VPC in AWS with Private and Public Subnet.
We have already created a VPC with private and public subnet here, so if you want to replicate the same, you may choose a different Region and recreate the VPC with private and Public subnet by following the article here.
2. Customer Gateway (CGW) creation.
The customer gateway is the edge network device you use on the corporate network. It could be a firewall or a router. But you need to make sure that the on-prem device can handle the IPsec tunnel creation and traffic.
The AWS tested some vendors, you can check out the article here to see if your devices are under the supported list.
- Get the Public IP of the Customer Gateway.
You need to speak to the corporate network engineer to understand the public IP address of your edge network device. The IP address may be connected to the internet directly, or it may be connected to a NAT device, and if the IPsec device might be behind the NAT device. In that case you need to get the public IP address of your NAT device.
You may write down the public IP address.
- Goto VPC console.
- Under Virtual Private Network, click on Customer Gateways.
- Click on Create customer gateway.
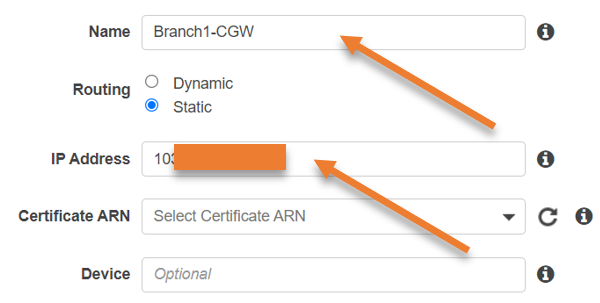
- Enter a name for your CGW.
- Routing: Choose static.
- You could either use dynamic or static routing. We are going to use Static routing here. If you choose dynamic, you will have to use the BGP routing protocol over IPsec.
- IP Address: Enter the Public IP address that you received from the on-prem network engineer.
- Certificate ARN: You need to select this when you use Certificate-based IPsec VPN. However, in most deployments, we choose the pre-shared key so you can leave the Certificate ARN settings.
- Device: Enter the name of your on-prem network device, For example, Paloalto, Cisco ASA or Fortinet etc, this again optional though.

- Click on create customer gateway. You will get a message customer gateway creation succeeded.
- And you should be able to see the CGW in the console now.


3. Create Virtual Private Gateways (VGW).
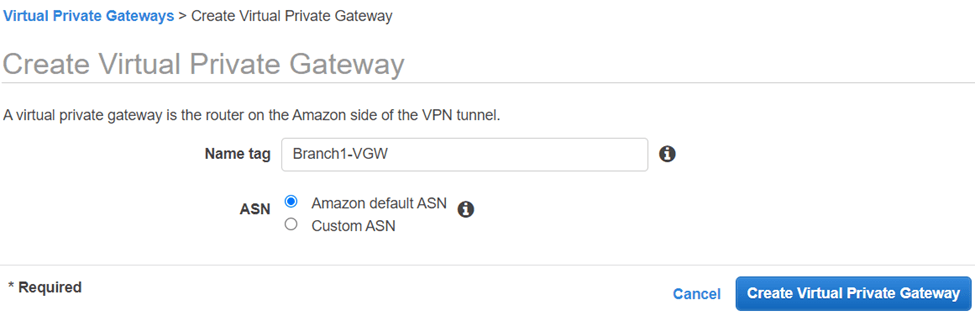
We will now create the virtual private Gateway here. Under Virtual Private network, click on Virtual private Gateway.
- Name tag : You may enter the name tag to identify the VGW easily.
- ASN – Choose Amazon default ASN. If you have your own BGP ASN, you could also choose Custom ASN here. However, this is not relevant in our setup as we use static routing for our tunnel.
- Click on Create virtual private Gateway.

- After some time you will get a message that says Create Virtual Private Gateway succeeded
4. Attach the VGW to the VPC.
You should now see the VGW that we just created. Like the internet gateway that we attached to the VPC, we also need to connect the VGW to the VPC. Then only we can manage the routing towards the VGW.
- Click on Action and click on Attach to VPC.


- Choose the VPC that we created from the list and click on Yes, Attach.

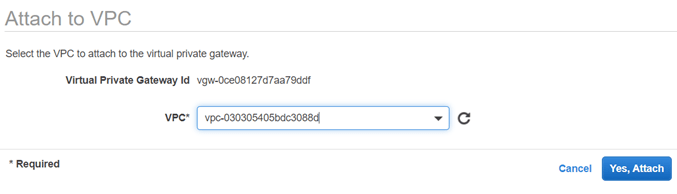
- After few seconds you should see that the VGW is now attached to the VPC.


5. Create a Site-to-Site VPN connection.
With the CGW and the VGW that we created, we will now create the site-to-site VPN on our AWS VPC.
- Under Virtual Private networks.
- Click on Create VPN connection.
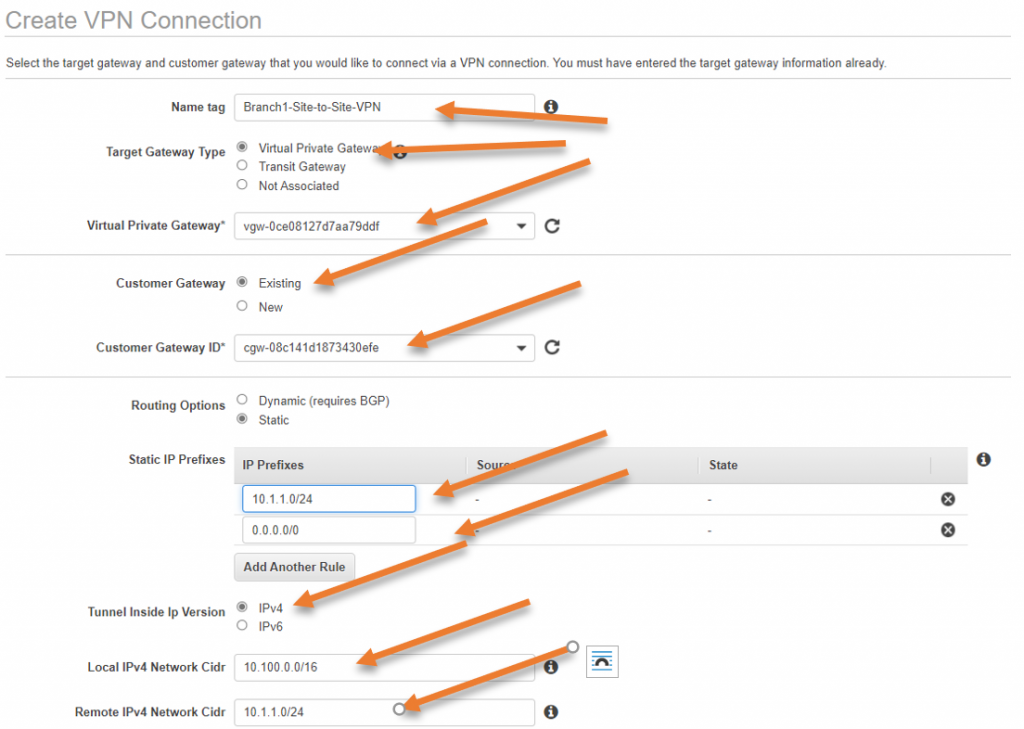
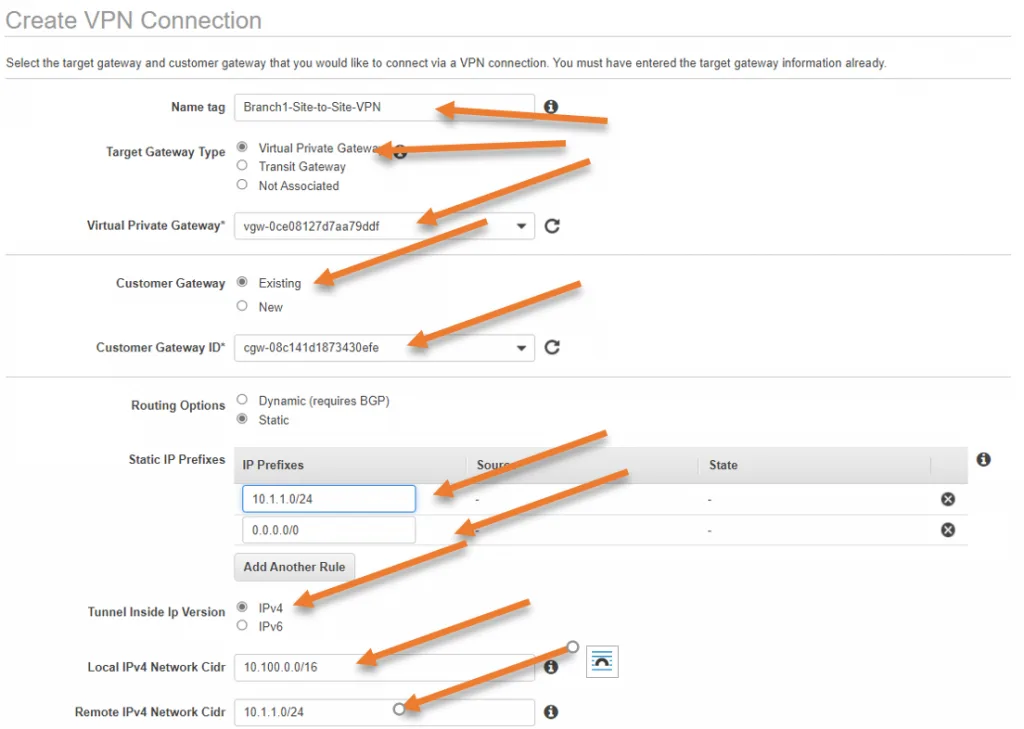
- Name Tag: Enter the name for your site-to-site VPN connection.
- Target Gateway type :
- Select Virtual Private Gateway.
- Virtual Private Gateway: From the drop-down, choose the VPG that we created before.
Note: You could also add the transit gateway as the Target gateway, however, we are not using transit gateway here. transit gateway will be helpful when you have multiple VPC’s. In our case, it is just a single VPC, so we should g good with a VPG.
- Customer Gateway: Select the existing customer gateway and in the Customer gateway ID, Choose the CGW that we created before.
- Routing option: Choose Static as the route.
- Static IP prefixes: This part is very important, from our diagram it is clear that our branch network is in 10.1.1.0/24 network, so in production before proceeding with the configuration, you need to identify the remote network subnet.
- Tunnel inside IP version : Choose IPv4.
- Local IPv4 Network CIDR : Enter the VPC local Subnet, which is 10.100.0.0/16.
- Remote IPv4 Network CIDR : 10.1.1.0/24
- We are also, getting receiving the default route from the remote, so add 0.0.0.0/0 as well.
- Routing option: Choose Static as the route.
- Under Tunnel Options, you can leave everything default. In case if you want to add your pre-shared key, you can do that here.
As you can see, there are two tunnel information, which means AWS will create two tunnels to your on-prem network. One is the primary and then the secondary.
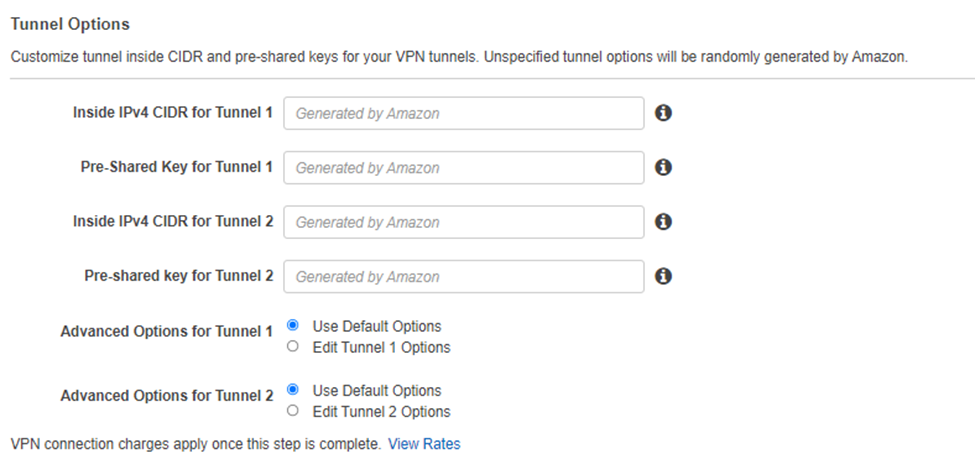

- Click on Create VPN connection.
You will get a message Create VPN Connection Request Succeeded.
6. Update the route propagation on the routing table.
We need to make sure when the tunnel comes up. The remote route propagated automatically into the routing table. This means that route 10.1.1.0/24 and 0.0.0.0/0 should appear on both private and public subnet routing tables pointing to the VPN gateway.
In VPC, click on Routing table,
Click on the Private route table.
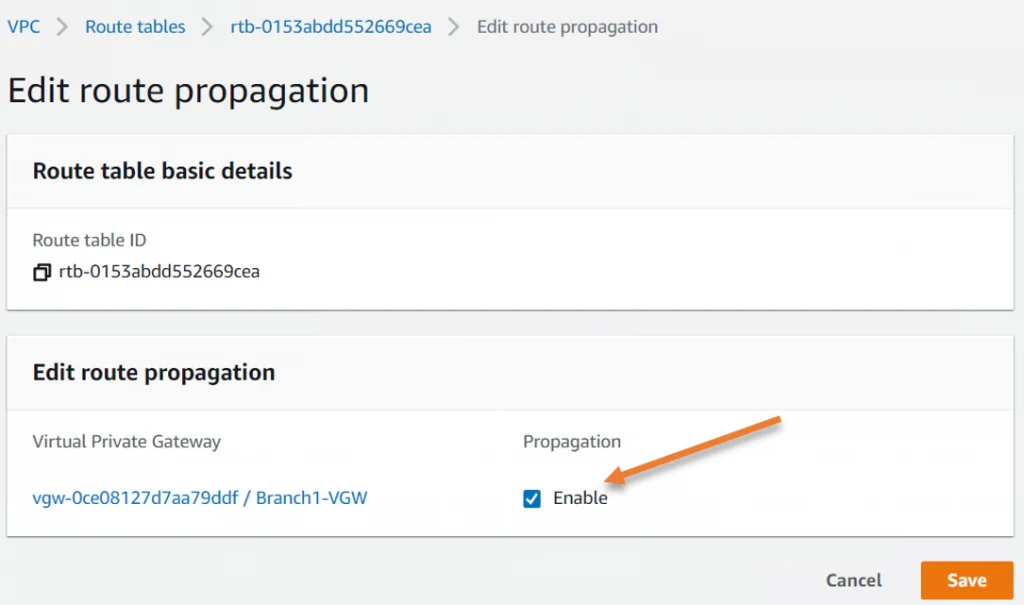
- Click on Route Propagation.
- Edit route Propagation.
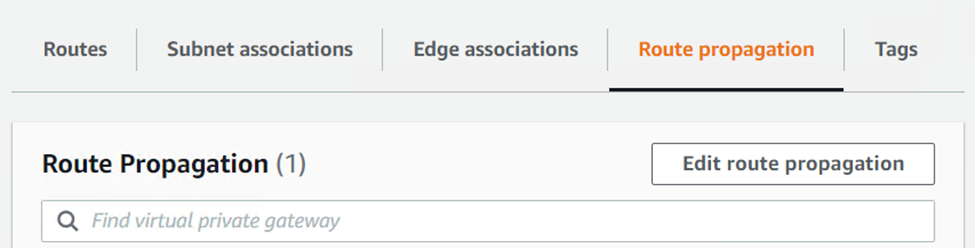
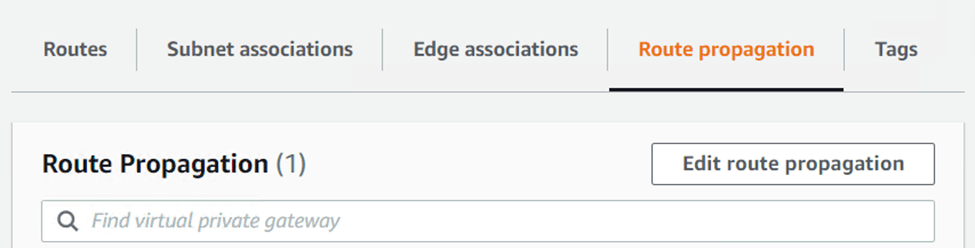
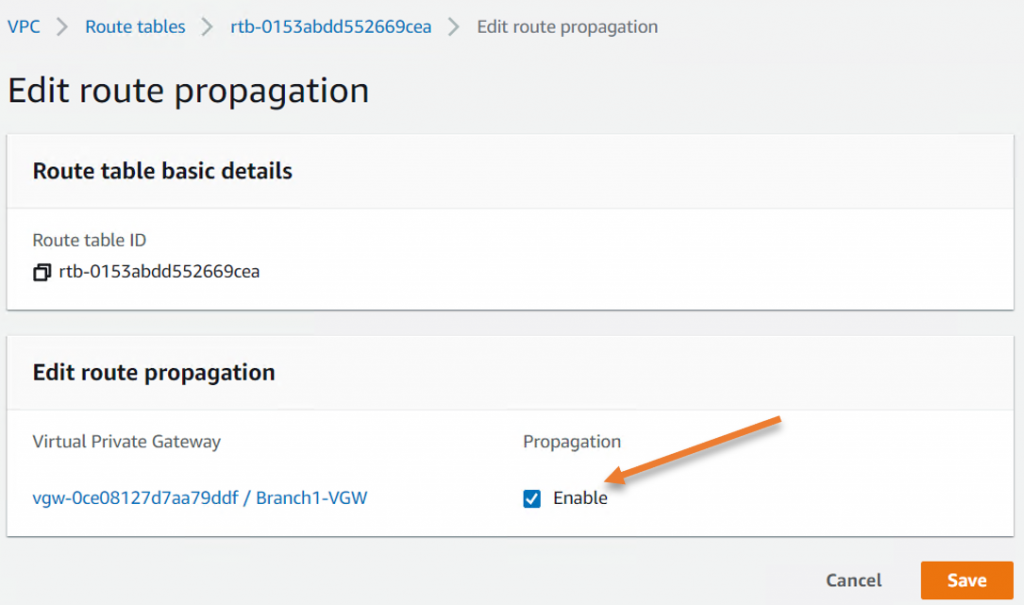
In Propagation, check enable and click on Save.

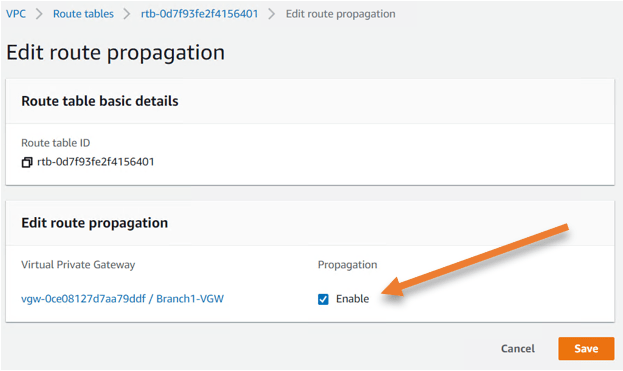
Perform the same steps for the public route table as well.
GO back to the routing table and click on the public route table.
Click on Route propagationàEdit route propagation.
Go back to the Virtual Private Network.
Click on site to site VPN connections.
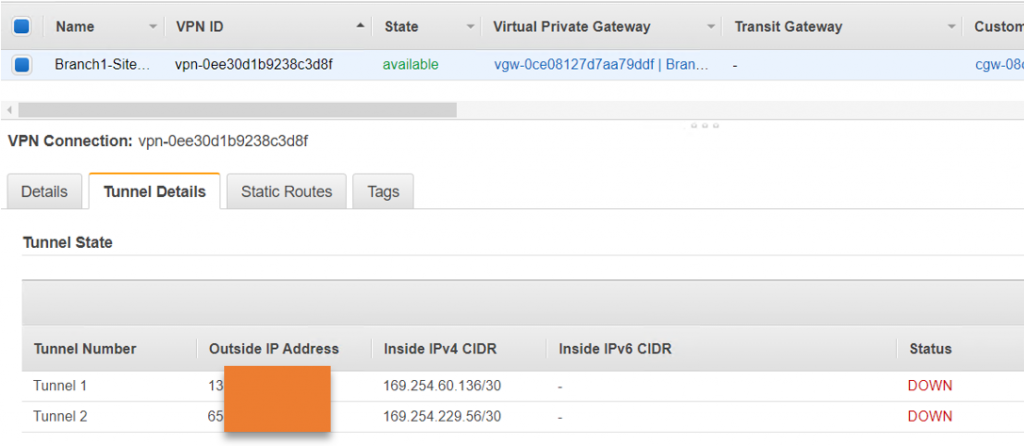
You should see the VPN state become available.
However, when we checked the tunnel status, we could see that tunnel 1 and 2 is down at the moment. Because we have not configured anything at the moment, only when we configure the corporate side the tunnel will come up.

Configure the Remote side.
We have completed the AWS side of the VPN configuration. One good thing about the AWS site-to-site VPN tunnel is that they mostly tested all the well know routers and firewalls out there. So when you download the configuration, it will not only have the IPsec parameters, you will also have the step-by-step instructions on how to configure the IPSec on the remote branch gateway.
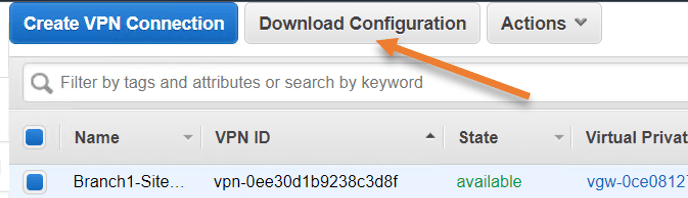
You can now go ahead and download the VPN configuration by clicking Download configuration.

When you try to download, you can see the list of vendors tested with the AWS Site to site VPN.
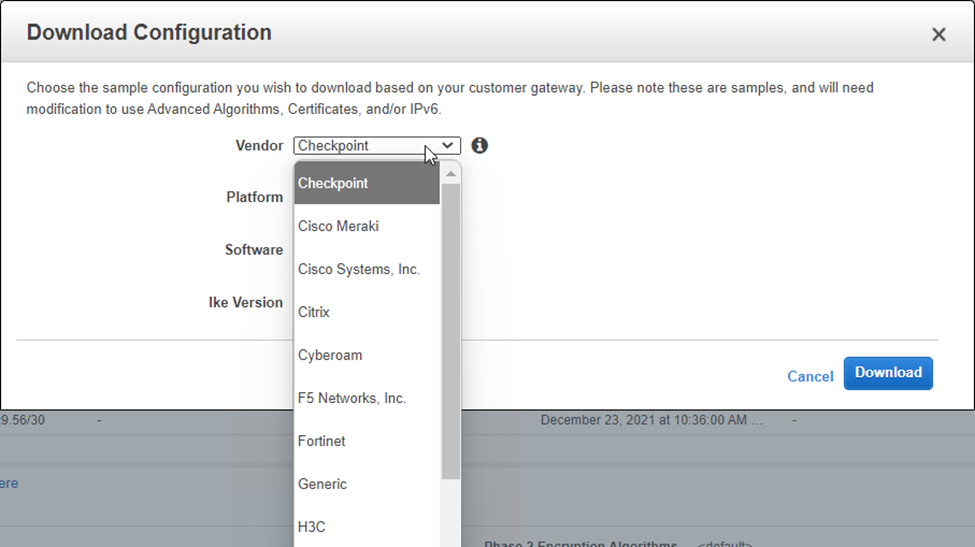

You can go ahead and download the configuration of your choice and send it to the on-prem network engineer. After the changes are made on the on-prem side, the tunnel will come up, and you should be able to initiate the communication from the Onpreme to the AWS side via site-to-site VPN over IPSec.