
Virtualbox is one of the free, open-source hypervisors that you can run on pretty much all the operating systems out there. It doesn’t matter whether you have a windows machine, mac or Linux. The VirtualBox can run on all the devices irrespective of the operating system.
We have covered how you can install Ubuntu Desktop 20.04 on Virtualbox in the last blog, In this blog, we will install the Ubuntu server 20.04 on a VirtualBox hypervisor.
After the installation is complete, we will install VirtualBox guest additions to improve the ubuntu 20.04 server operating system performance.
1. Create the Virtual machine.
Open VirtualBox and click on New to create a virtual machine in Virtualbox.
By default, you will be on the guided mode, for a simple virtual machine creation, that should be fine. However, if you want to have complete control of your virtual machine resources, you must choose the expert mode.

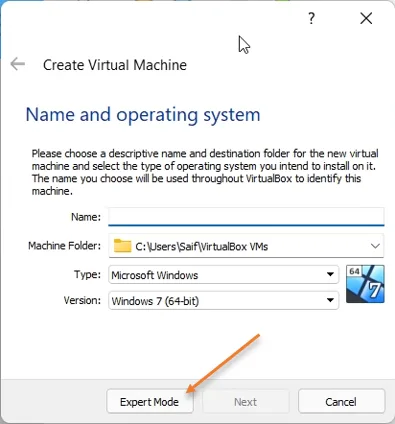
You will be taken to the Virtual machine creation wizard in Expert mode.
- Name : You will have to enter the name of your VM. For example ‘Ubuntu Server 20.04’.
- Machine folder: Location where you want to save the file.
- By default, when we typed the name, it picked up the Type as Linux and the version as Ubuntu.
- Configure the Memory- You could assign even 1 GB of memory. As I have close to 32GB of RAM and require good performance from the virtual machine, I am giving 4GB of RAM for the virtual machine. If you need more memory, you could add more as well.
- Hard disk – Choose create a virtual hard disk now option and click on Create.


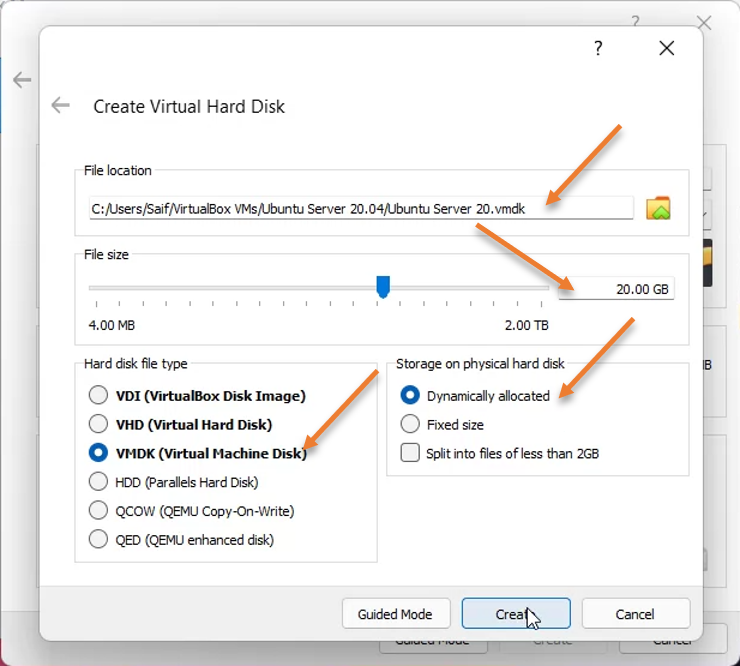
2. Create virtual hard disk for Ubuntu server 20.04.
The virtual hard disk creation wizard will now open.
- Location – You will be able to see the location of your virtual hard disk on the top based on the configuration you made before.
- File Size – By default, the virtual machine has assing 10GB of storage for the Ubuntu server, which is not enough for most of the users. Hence I am assigning 20GB of storage. Again, you could assign more storage volume depending on your usage and hard disk storage capacity.
- Storage on Physical hard disk – Choose Dynamically allocated and click on Create.

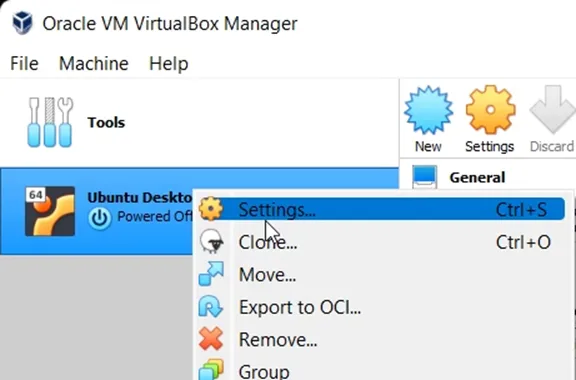
3. Configure the CPU.
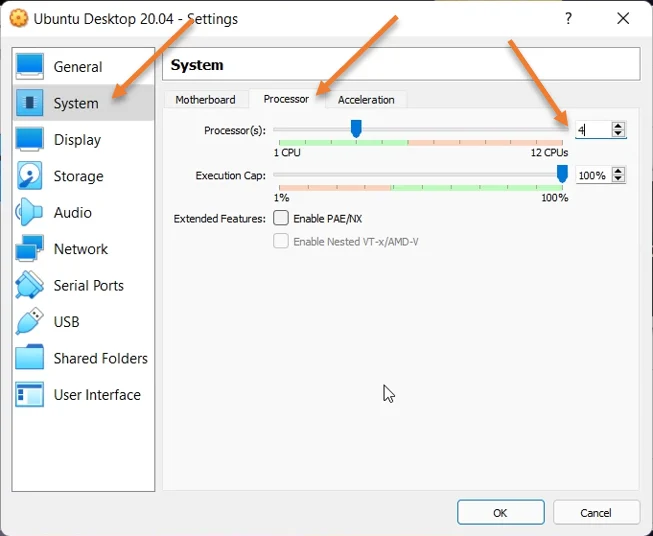
You will see the Ubuntu server VM created in the VirtualBox; by default, when we made the virtual machine, it picked up a single CPU. To get better performance, at least you should configure 2 CPUs. Since I have enough CPU on my machine, I assign about 4 CPUs.
So right-click on the VM and click on settings.

The virtual machine settings window would pop up, click on System àProcessor, Increase the CPU count as per your need.

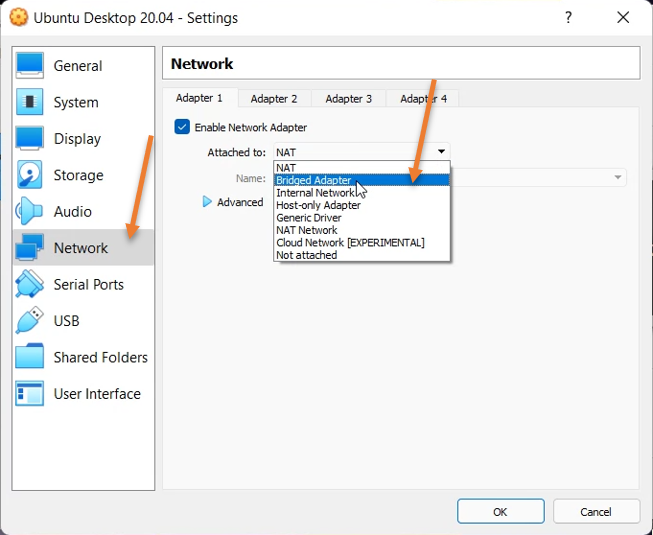
4. Configure the Network.
You can keep the Ubuntu server 20.04 in a separate network depending on your need.
For the VM to get to the internet, there are two ways. One is through the bridged networking, and the other is through NAT.
Bridged networking – If you would like the Virtual machine to be part of the same local area network and wanted your LAN router to assign a DHCP address, you could use this option.
NAT – With the NAT, the VirtualBox will assign a NAT IP address to your Virtual machine, with which it can go out to the internet. However, the local area network devices will not talk to the Ubuntu virtual machine.
Other network options are also available for your VM to use, which I covered in detail here.
In my case, I would want my VM to be part of my local area network. Hence I am going to choose the Bridged network.
I won’t recommend this option at the office network unless you consult with your network admin. As it will get an IP address from your office DHCP server. Some companies won’t allow connecting other machines to the office network as per the policy. So, It is always better to consult with the networking team before using this option.
For office networks, you could use NAT network, as the local area network devices won’t see the virtual machine; instead, they will see the host machine IP for any traffic that is generated from the VM.
You can learn more about different types of networks in VirtualBox here.

That’s it click on Ok, and you will be back to the VirtualBox window.
5. Initiate the Ubuntu Server installation.
Right-click on the Ubuntu server 20.04 and click on start.
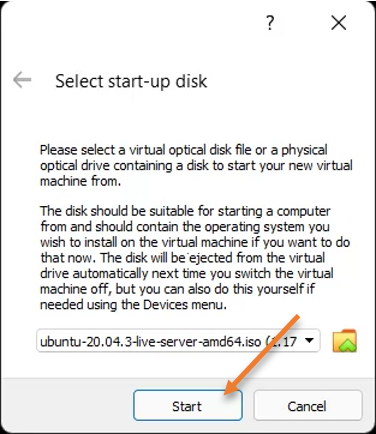
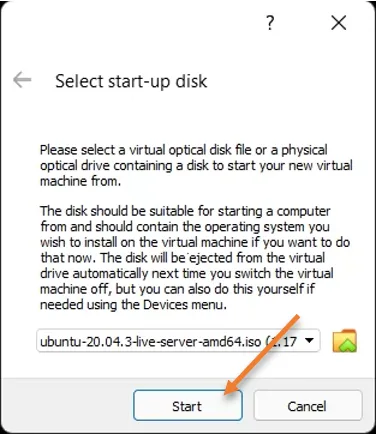
As soon as the booting process starts, you will be prompted to choose the Ubuntu Server 20.04 ISO image from your machine and click on the folder icon to attach the file.
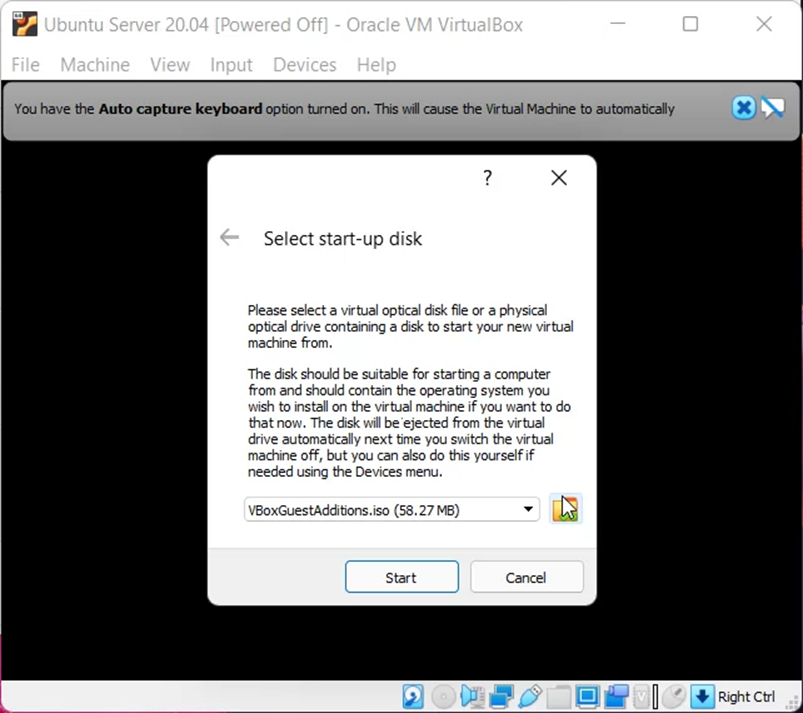
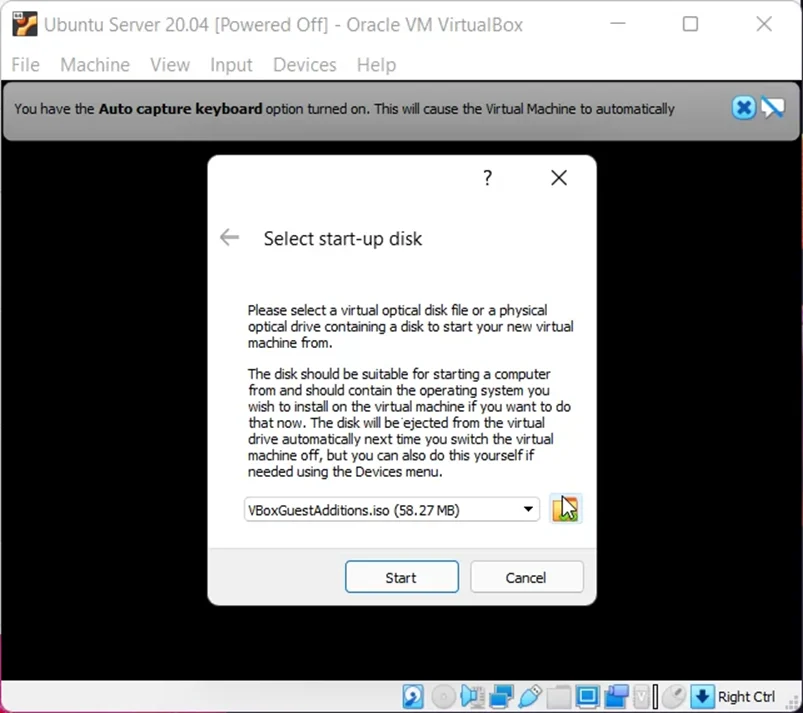
You will get a prompt again. In that, click on Add.
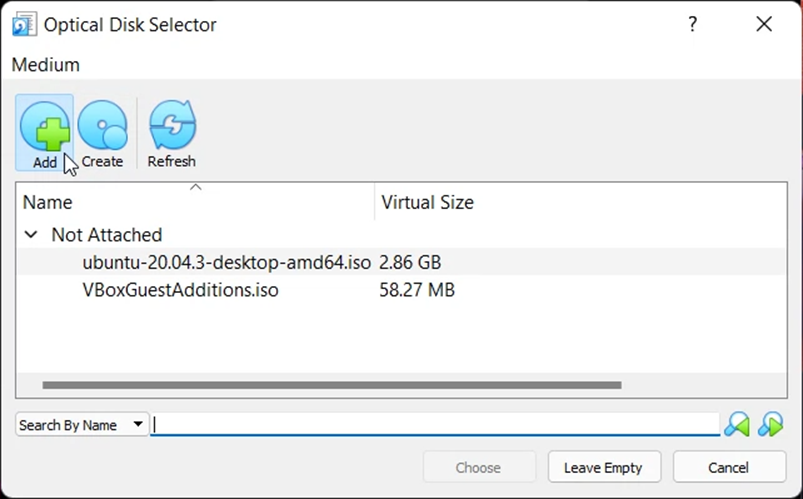

Browse for the file and attach it here, and click on start.
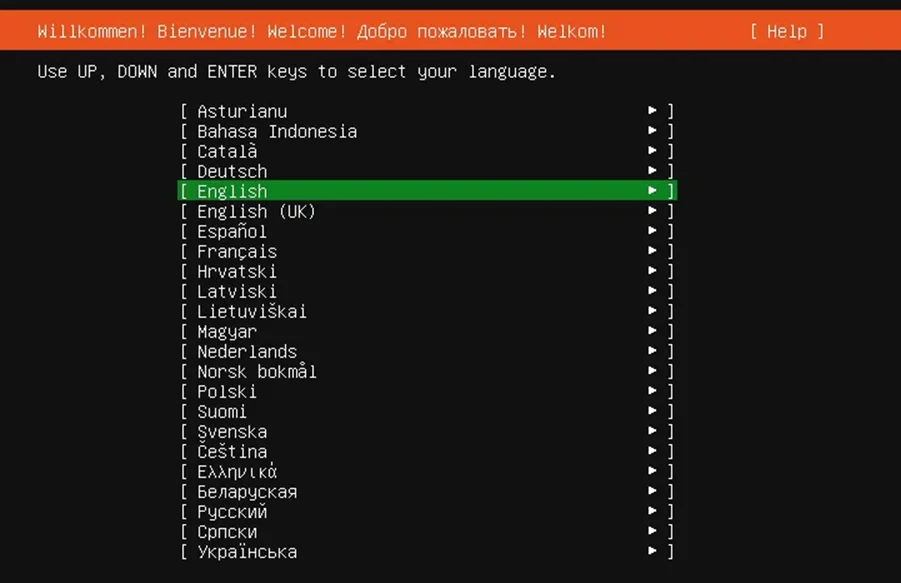
The Ubuntu Server installation will now begin. In the installation wizard, choose the language of your choice.

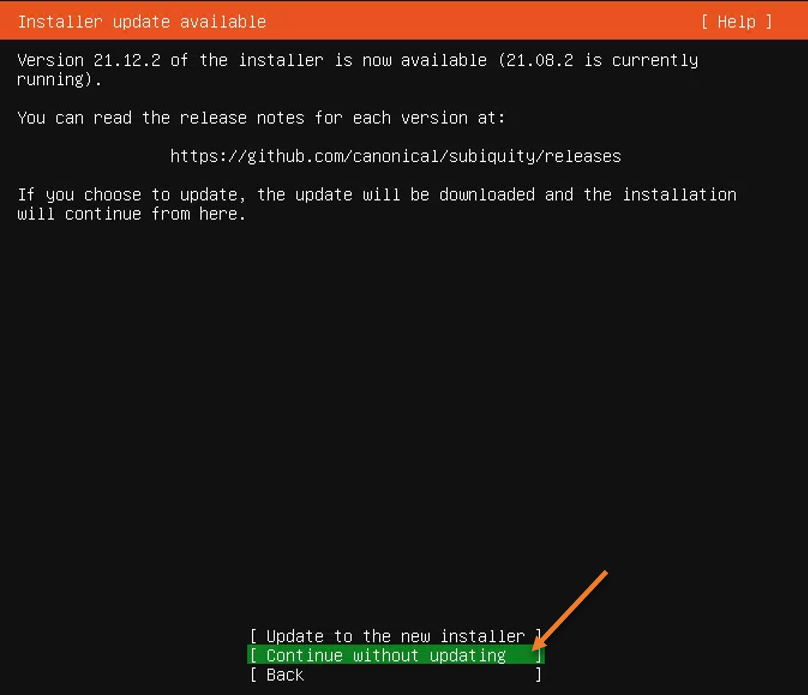
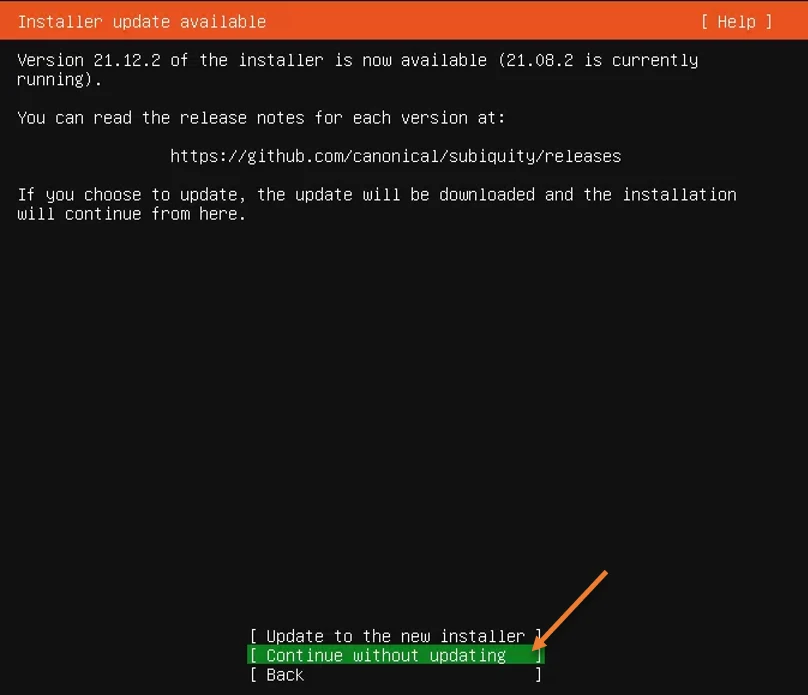
In my case, there was an installer update that was available. At this moment, I am not going to proceed with the installer update; hence I chose to continue without updating.
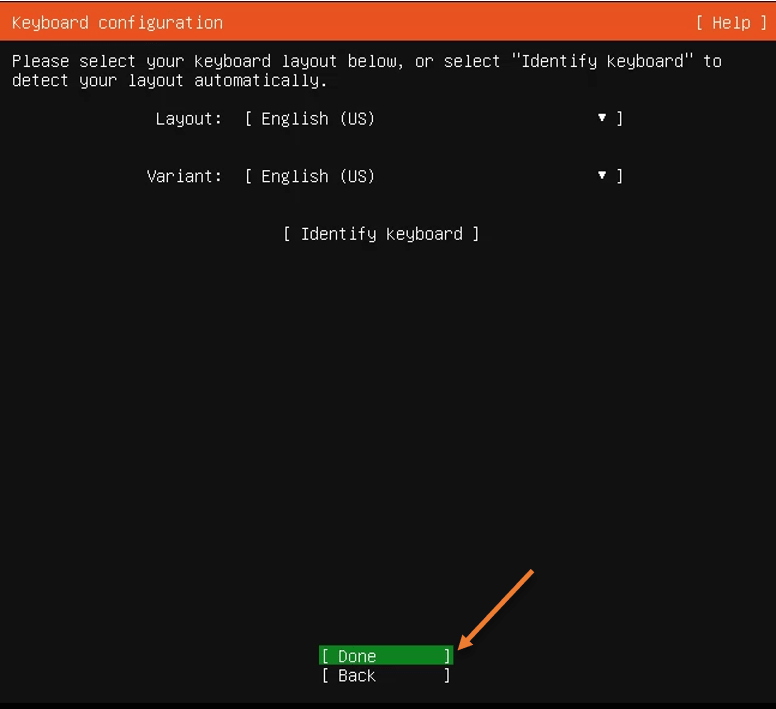
Configure the keyboard layout of your choice, and choose done.

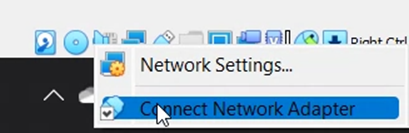
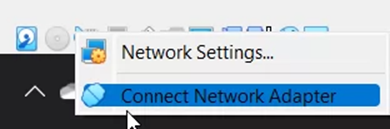
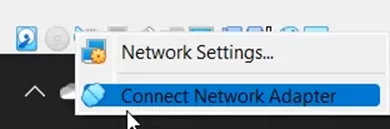
During this time, you may disconnect the virtual network adapter by right-clicking on the network icon and clicking on Connect Network Adapter. This will disconnect the VM from the network.
You can still avoid the Ubuntu update during the update, but this is the best and easiest option.
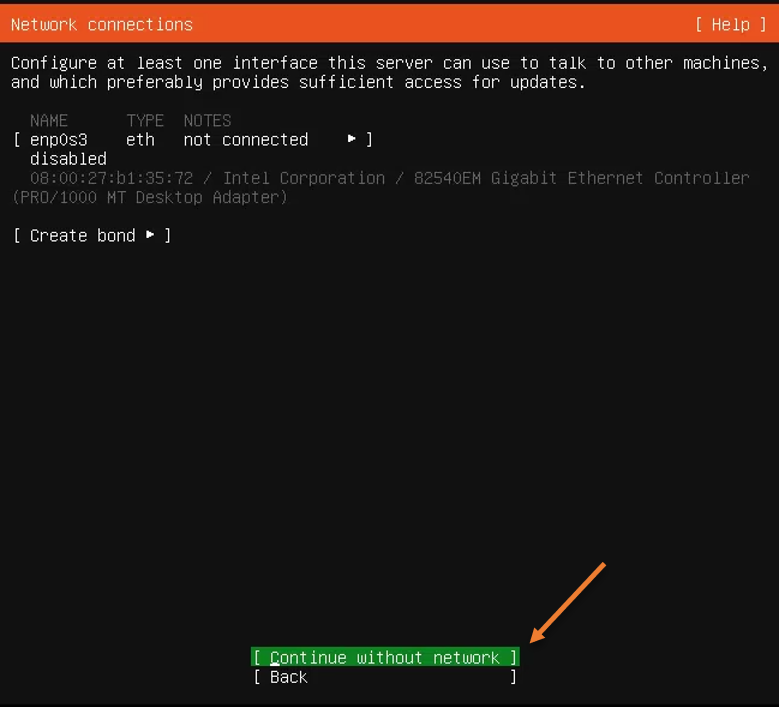
On the next screen, choose to continue without the network.

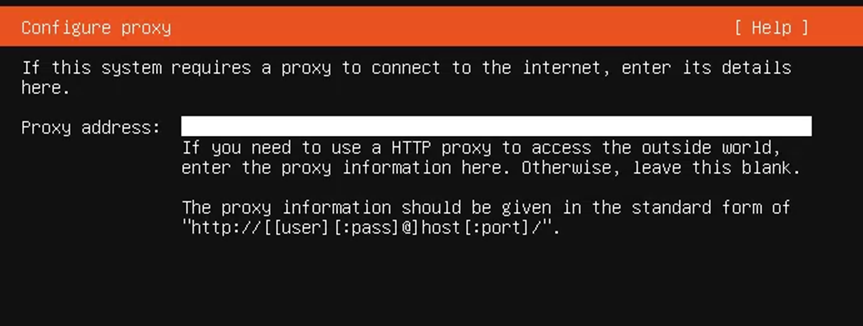
In case if you are using a proxy, you may enter them here and choose done.
If you don’t have a proxy that’s fine. You can leave it blank.

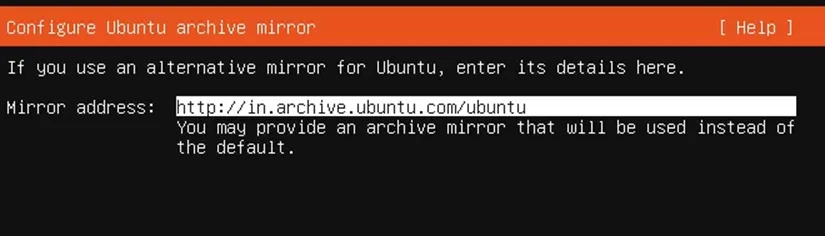
Configure the Ubuntu Archive mirror.
You can configure the Ubuntu mirror of your choice. I am just leaving the default and choosing done.

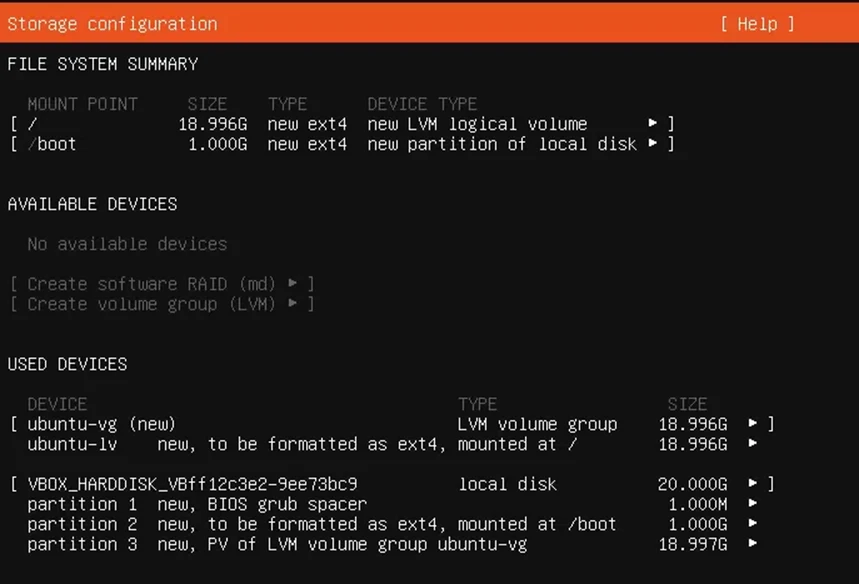
6. Storage selection.
In the storage selection, I am choosing the option Use an entire disk. If I want to, I could use the tab button on the keyboard and select the custom storage layout.


You will get a summary of your storage here. If you needed you can go back and modify. Else, you may proceed with the Done.
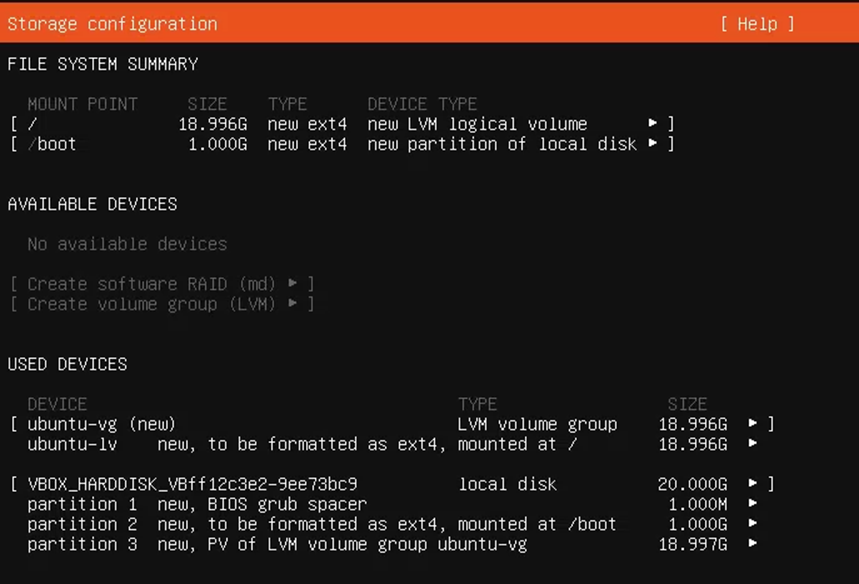
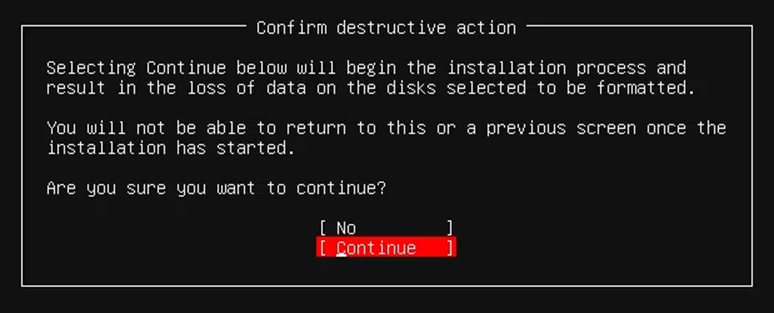
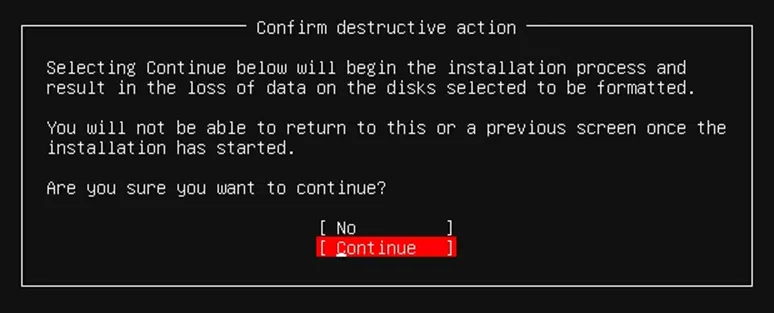
You will be prompted with a warning that says your storage will be formatted. Are you ok to continue? Choose continue here.
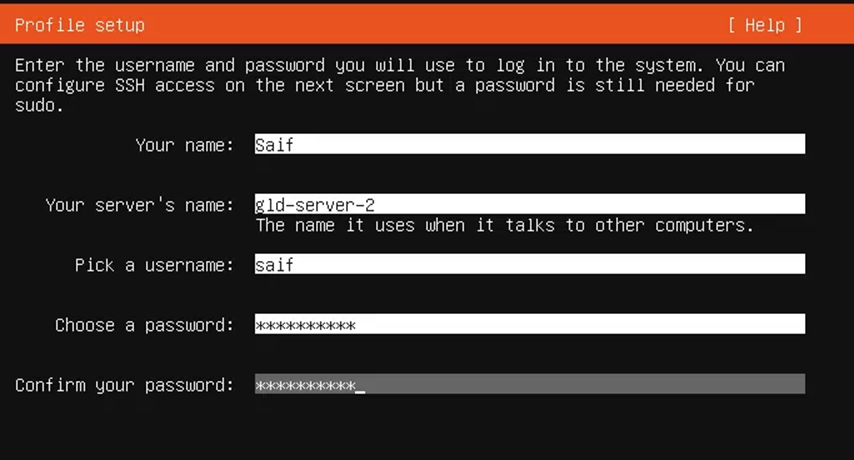
7. Ubuntu server profile setup.
You can set up your user account here along with the server profile.
- Enter your name.
- Provide a name for your Server.
- Specify the username of your choice.
- And the password, and confirm password.
This account is needed in order for you to connect to the machine again vis SSH.

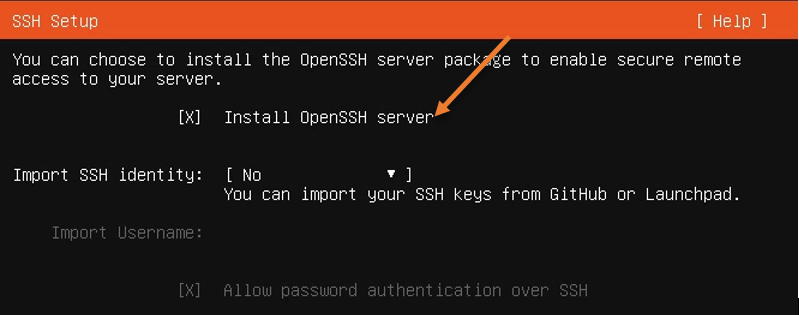
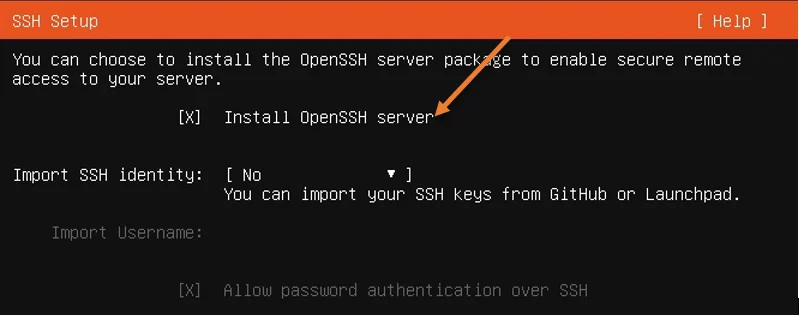
8. Ubuntu server ssh configuration.
You will be asked whether you want to install OpenSSH server or not. In most scenarios, you would remote into the server using an SSH protocol; hence it is recommended to leave the ssh setting enabled.
Choose Install Openssh server and click on Done.
If you don’t require ssh access, you may unselect the option and choose done.
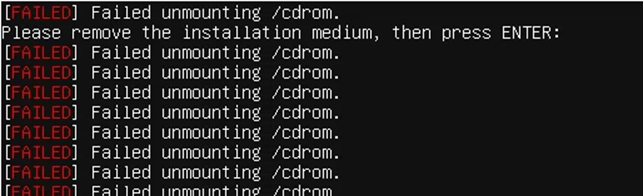
The installation will begin, and after sometime you will get an option that says the installation is now complete and the server is rebooting.
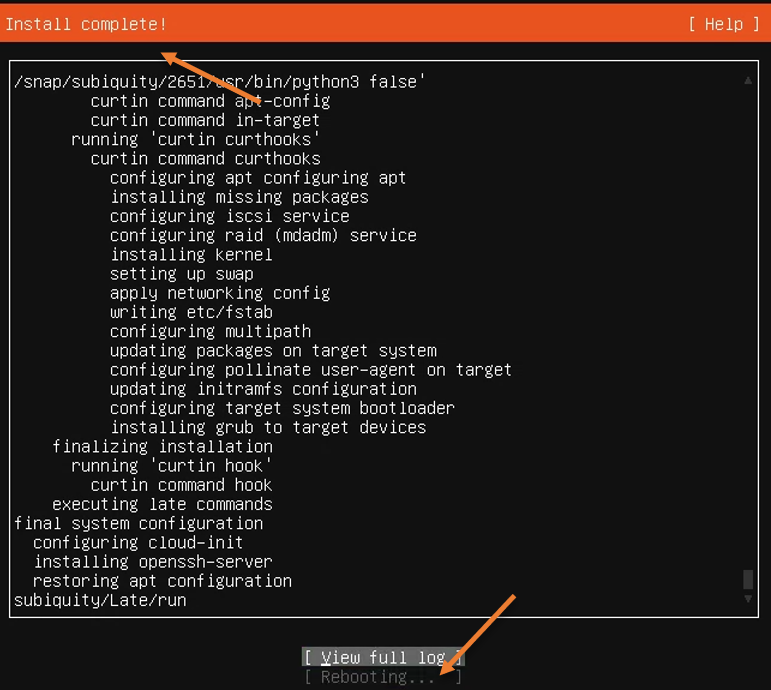

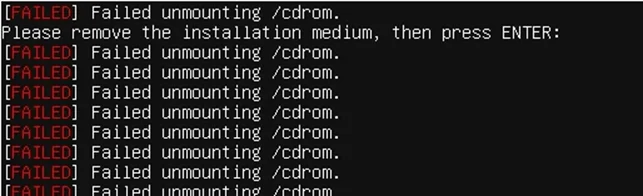
During the reboot, you will be asked to Remove the installation medium and then press ENTER, which is already done automatically, so you may hit Enter to proceed.
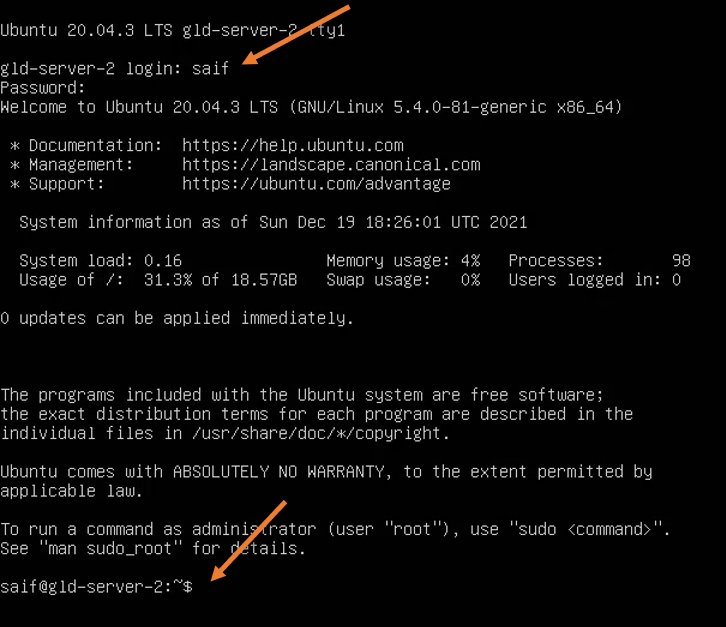
After the VM is rebooted, you will get a login screen to your virtual machine, enter the username that you set up during the installation, and the password. And you should be able to log in to the server just fine.
9. Connect the network back.
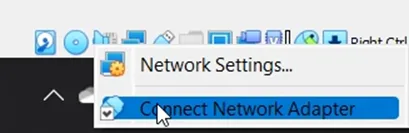
You now can connect back to the network back by right-clicking on the virtual adapter and clicking on Connect network adapter.
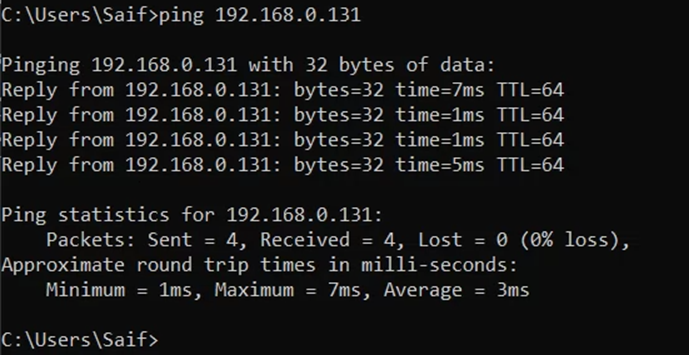
After you are connected to the network, you will get an IP address from your local area network, if you have chosen the bridged network, or NAtted IP if you have chosen the NAT network.


You can ping the virtual machine from your host and other devices on your local area network for Bridged network.
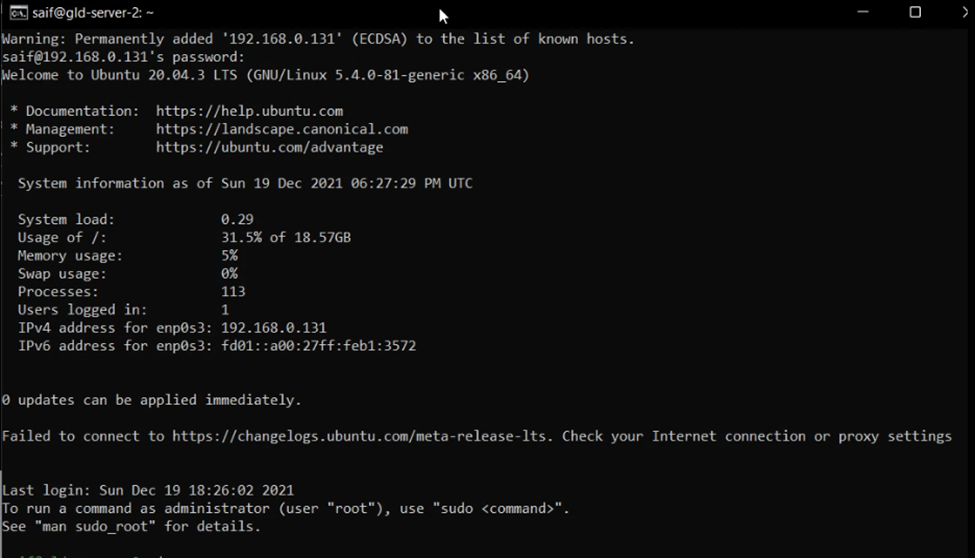
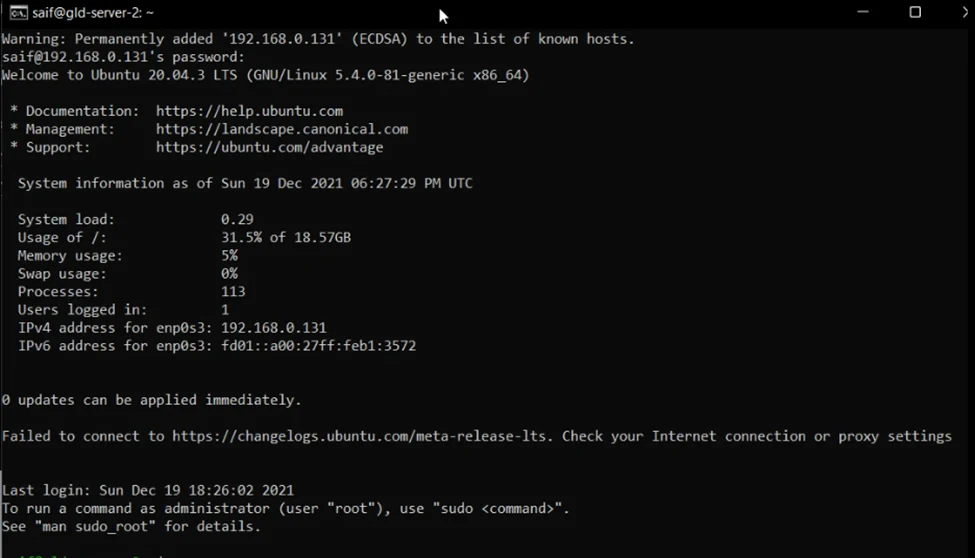
You can also SSH into the Ubuntu server just fine as well.
10. Virtual box guest addition installation on Ubuntu server 20.04.
Let’s go ahead and install the Virtual box guest addition on your machine.
On the Ubuntu Server terminal, enter the below commands to install the VirtualBox guest additions.
sudo apt-get update
sudo apt-get install virtualbox-guest-dkms -y
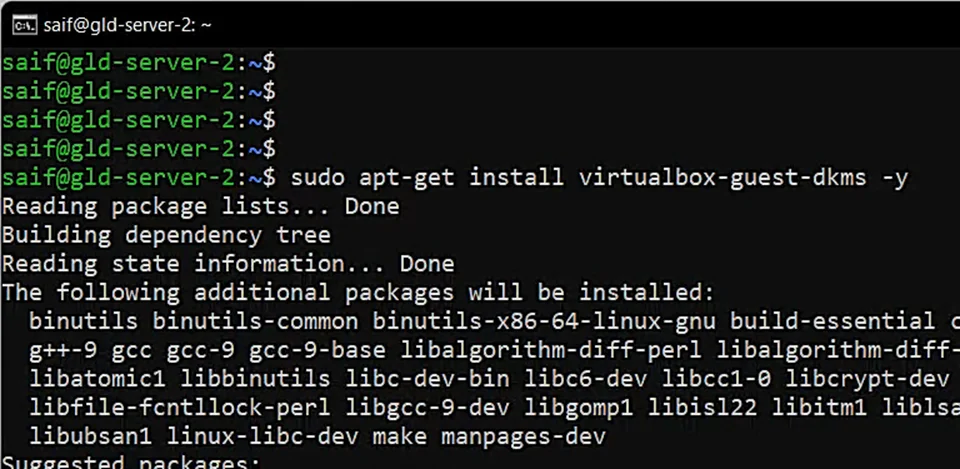
After a few seconds, the VirtualBox additions packages and all your dependencies will be installed on the ubuntu server 20.04 and you should be ready to start using the Ubuntu server.
Dav
Thursday 30th of November 2023
Thank you! How to activate port 25 to be able to send smtp emails from ubuntu server using virtual box (virtual box installed on my personal computer)