The windows server 2022 is the latest version of the server operating system from Microsoft. It provides good performance and a more cloud-centric design. Windows server is usually installed as a virtual machine, and it can be virtualized in almost all the hypervisors out there.
Can windows 2022 be installed on Proxmox?
Windows 2022 is now available for the public to download in either ISO or VHD file format. While installing Windows 2022 on Proxmox, you need to ensure that you provide recommended hardware requirements for the server to work without issues. Also, install the VirtIO drivers compatible with It. After the installation of the operating system along with the VirtIO drivers, you can use windows server 2022 on Proxmox without any issues.
Is TPM a requirement for windows server 2022?
When the windows 11 client operating system came out, Microsoft made TPM and secure-boot as the mandatory requirement to install the operating system on any PC hardware. However, it is not the same case with window server 2022. Although you can install Windows 2022 without TPM, certain features will not work, which requires a secure boot and TPM.
In this blog post, we will install the windows server 2022 with the TPM, and secure boot. If you plan to install windows server 2019, you may follow the article here.
Before you begin, you need to have;
A windows server 2022 operating system iso image – Click here to download the software image.
In the software selection, choose Download the ISO.

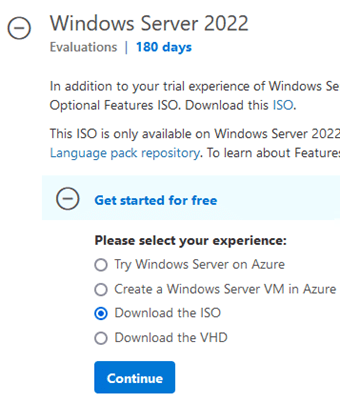
You will be asked to fill in the details to download the windows server iso file. After the form is filled, you can choose the language and download the server image.
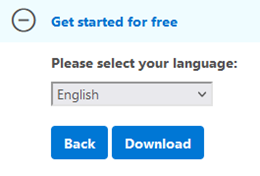

Note: The image size is about 4.3GB, so you need to be mindful of your internet usage.
- VirtIO Drivers – You can download the latest VirtIO Driver from here.
- Proxmox VE server installed and up and running.
Upload the windows server 2022 ISO file.
We have already downloaded the windows server 2022 iso image file on our management PC. Let’s go ahead and upload it to the Proxmox server.
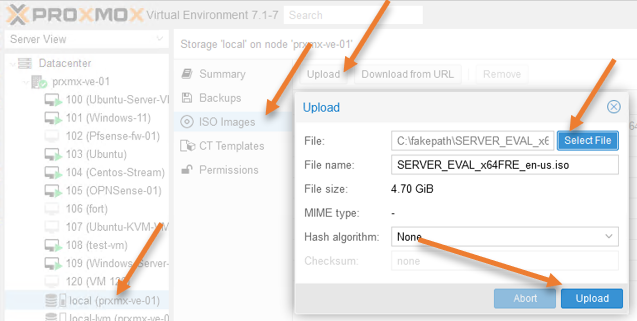
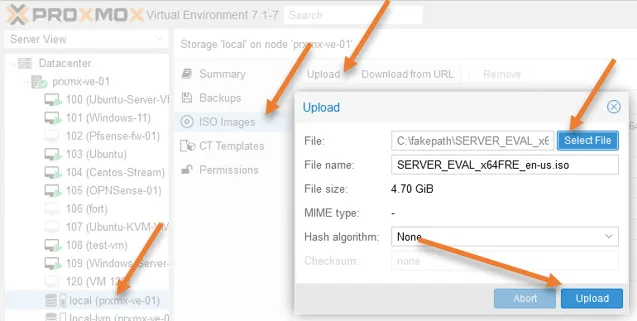
Login to the Proxmox server, and choose the node where you would like to install the operating system.
Choose the Local storage-> ISO images.
Click on Upload, and a new upload wizard window opens up.
Choose the iso image by clicking a select file, and then click on Upload.
Create the Windows server 2022 VM.
To create the virtual machine click on Create VM on the top right corner of the Proxmox VE server. You will be taken into the virtual machine installation wizard.
General configuration.
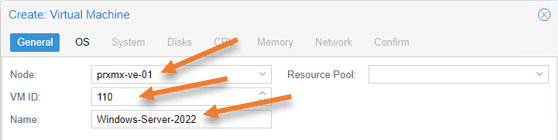
In the general configuration, configure the following.
Node: Choose the Proxmox node where you will install the windows server 2022.
VM ID: A new ID will be automatically created starting from 100. If you would like to change it, you may do so, else, leave the default.
Name: Enter the name of the virtual machine.
Click on Next.

OS configuration.
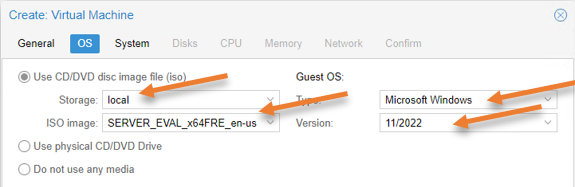
Here you need to point ISO image that we have uploaded on the Proxmox server.
Use CD/DVD disk image file
Storage: Local
ISO image: Choose the windows server 2022 iso image file.
Guest OS:
Type: Microsoft Windows
Version: 11/2022.
Note: If you don’t have 11/2022, which means you are not running the latest version of the Proxmox server, you may choose the latest version from the list, which must be 10/2016/2019. That will work just fine as well.

System configuration.
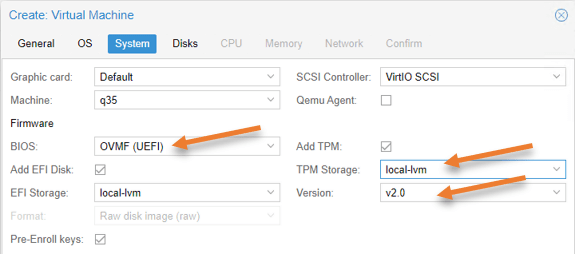
Usually, I leave the system configuration default. Since we are adding secure-boot and the TPM2.0 for the server, we have to make some changes.
Choose OVMF (UEFI) in the Bios, which enables secure boot.
TPM storage: local-lvm
Version : choose v2.0
Click on Next.

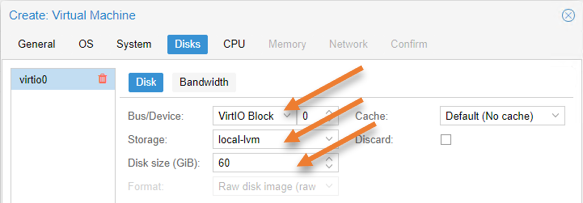
Configure the virtual hard disk.
BUS/Device: Change it to VirtIO Block.
Disk Size: By default, Proxmox would assing about 32GB of storage to the virtual machine. You may leave the default. Since I require more storage, I am choosing 60GB. So based on your requirement you may choose the size.

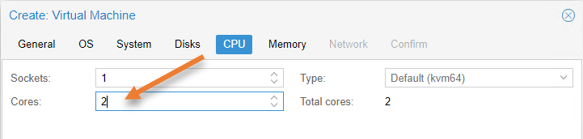
CPU configuration.
Choose two cores in the CPU configuration than the default single CPU, which will be enough.

Memory.
You can leave the default 2GB of RAM if you are not planning to do more tasks within the VM. I have given 4GB based on my requirement.


Configure the network.
Each Proxmox server setup would be different. Some use VLANs others won’t.
You can learn more about VLAN tagging on the Proxmox server here.
In my setup, I have vmbr0 configured with the management network and vmbr1 configured with VM traffic, separate using VLANs and VLAN 40 specifically for windows workloads.
Bridge: Chose the VMnetwork bridge interface.
VLAN tag: If you are not using VLAN, you may leave this blank, else, specify the VLAN tag.


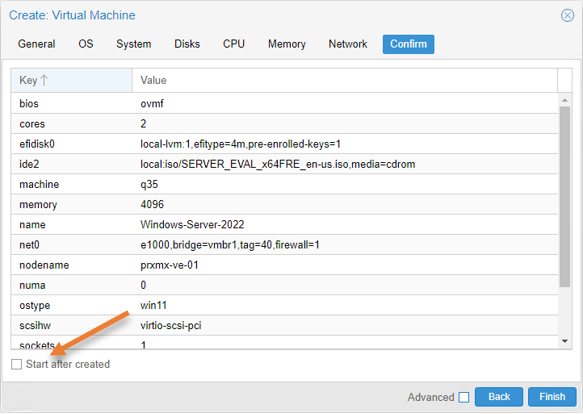
Finally, you will get the confirmation screen which will show you the configuration snap of what you have just made. If you would like to make any modifications, you can do that.
Make sure you uncheck the option Start after created.
Click on Finish.

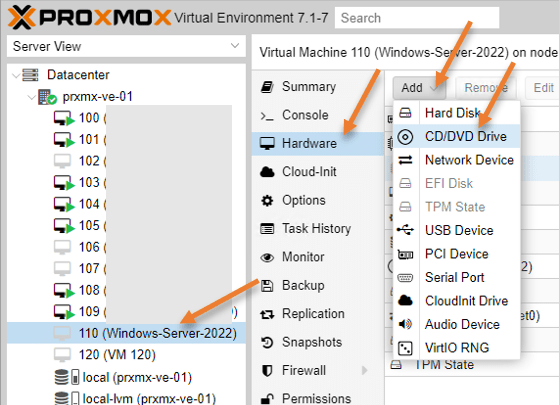
Attach the VirtIO drivers to the Windows server 2022 VM.
For the windows server installation to proceed well, you must attach the VirtIO Driver that we downloaded earlier.
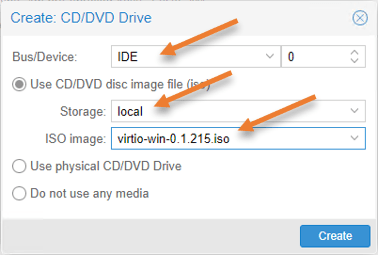
You will now see the windows server 2022 deployed in the Proxmox server. Choose the virtual machine and click on hardware-> Add-> CD/DVD Drive.

In the pop-up;
Use CD/DVD disk image file.
Storage: local
ISO image: attach the VirtIO iso file from your local machine and click on create.

Start the windows server 2022 installation in Proxmox.
We have completed the configuration on the Proxmox side. Let’s now proceed with the installation of the operating system.
Select the virtual machine and click on start the VM. The Proxmox will boot into the virtual hard disk. because it doesn’t have anything in it, it will then switch to the second boot device which is the Windows server 2022 iso CD/DVD we attached.
The VM installation wizard will now open.
Choose the following;
The Language
Time and Currency format
Keyboard layout and click on next.


Click on Install Now.
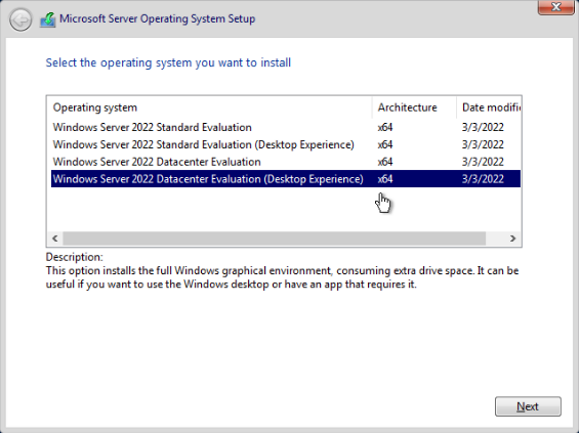
Choose the windows server addition.
The windows server is available in two additions, Standard or Datacenter, and in those additions CLI and GUI-based installations are available.
As I require Datacenter with GUI access, I have chosen Datacenter with Desktop experience and then clicked on Next.

Accept the license agreement and click on next.
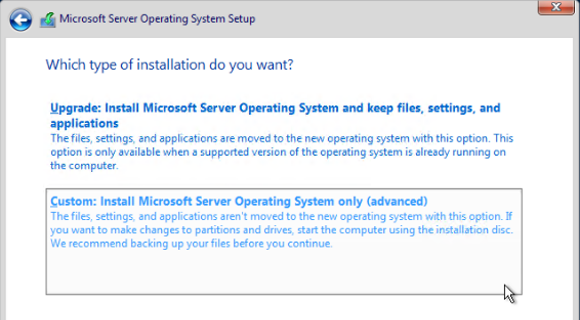
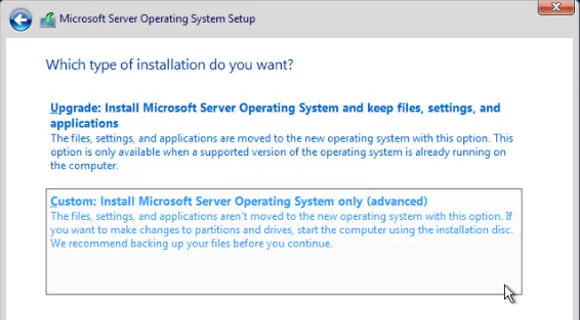
Choose custom installation.
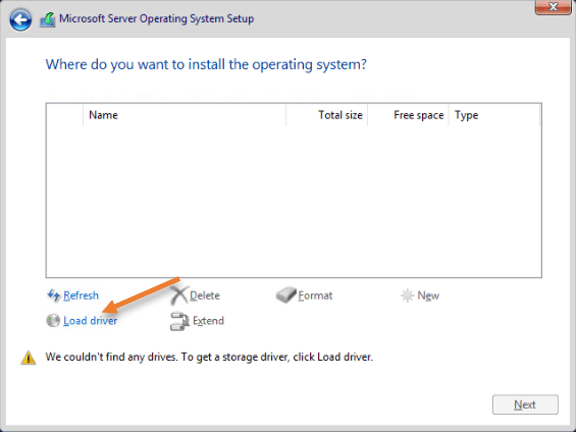
Configure the virtual hard disk.
We have defined the virtual hard disk size of 60GB in Proxmox. However, it’s not available in the windows installation wizard. That’s because there is no driver to detect the virtual hard disk.
Click on Load driver.

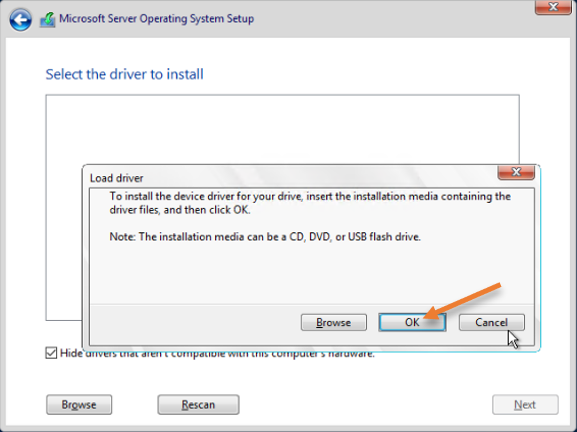
As we have already added the VirtIO Driver as CD/DVD in the windows server vm in Proxmox, you can click on Ok, which will detect the Driver from the CD drive automcatilcally.
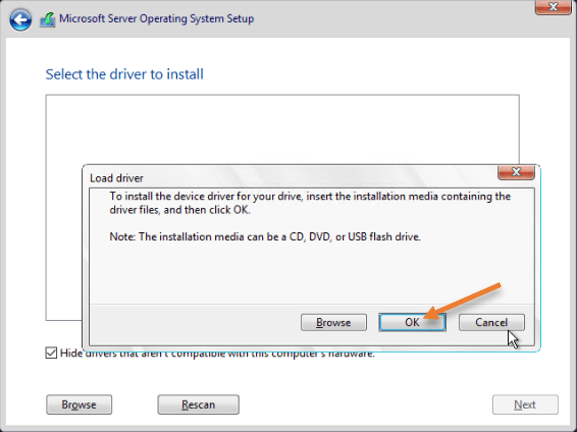
Choose Windows server 2022 from the list and click on Next.


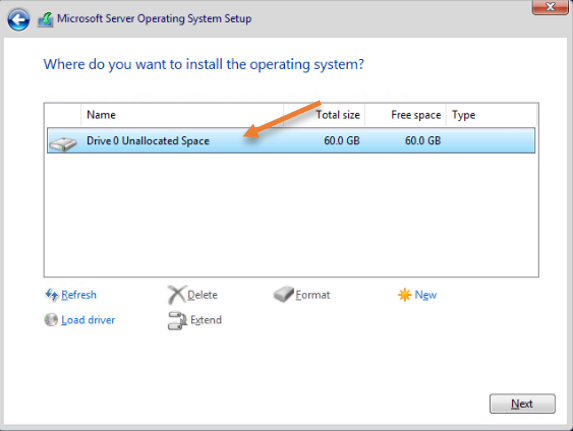
After a few seconds, you should see the virtual hard disk added automatically.
Choose the hard disk and click on next.

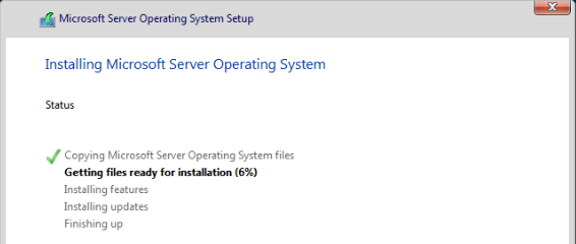
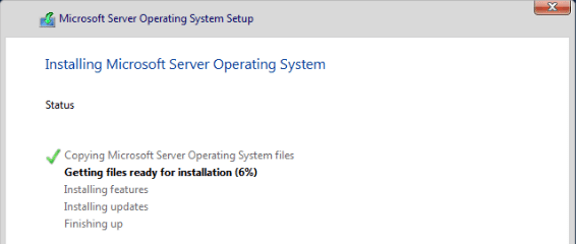
The installation will begin, and it will take some time to finish.
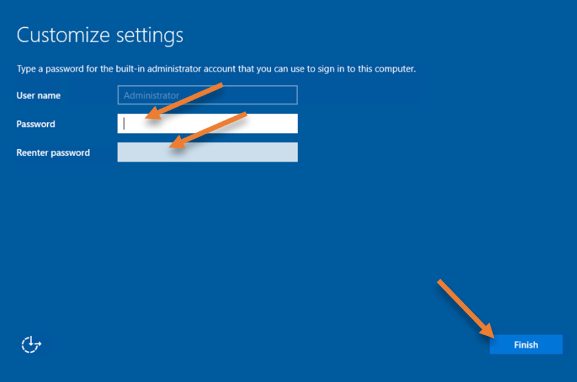
After a couple of reboots, you will see the installation is complete, and you will be asked to set the password for the administrator. Set the password and click on Finish.

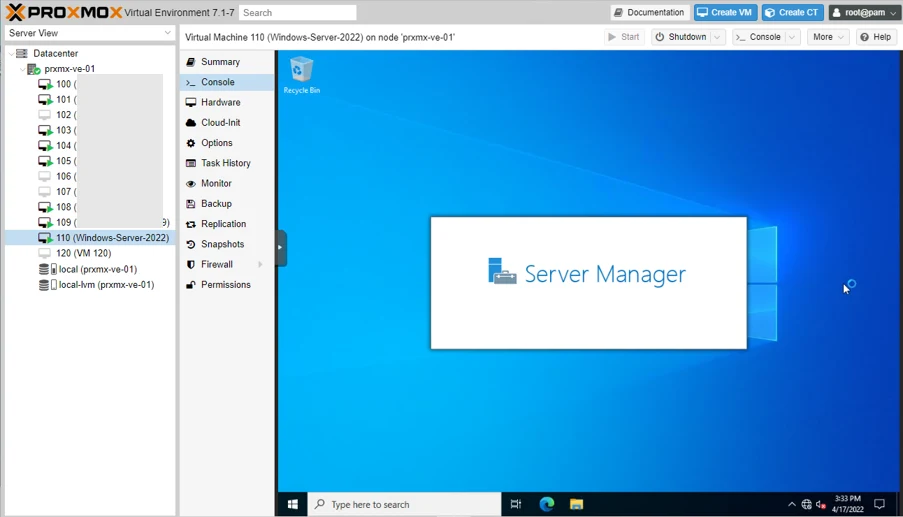
Log in to the Windows Server 2022 on Proxmox.
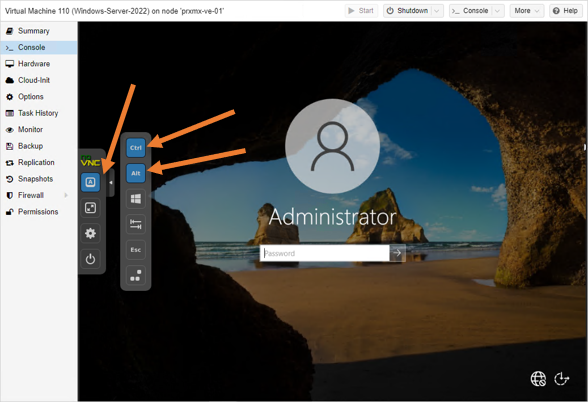
You will be taken to the windows lock screen, asking you to press CTRL+ALT+DEL.
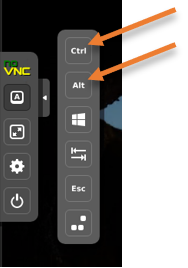
If you press that on your Windows host, it will take you to the windows host machine settings, so in the console screen, press the A button and select ctrl and Alt from there.
And press the Delete key on your keyboard.
You will be prompted with the password. Since we have already selected the CTRL and ALT on the Proxmox VNC console, we need to unselect that to enter the password.
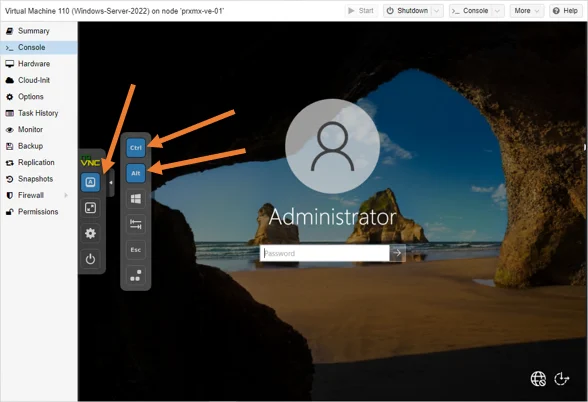
Unselect the Ctrl and Del and go ahead and enter the administrator password.

Update the Driver on the Windows server 2022.
With the help of VirtIO Driver that we added, we need to update the drivers for the windows server VM.
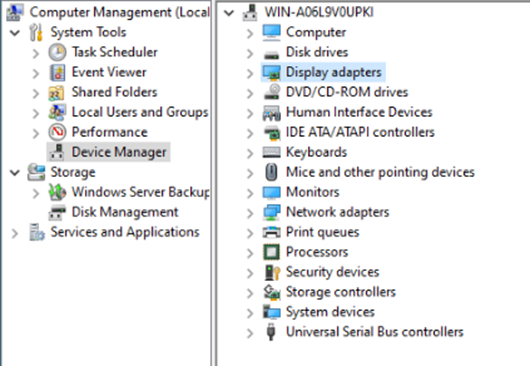
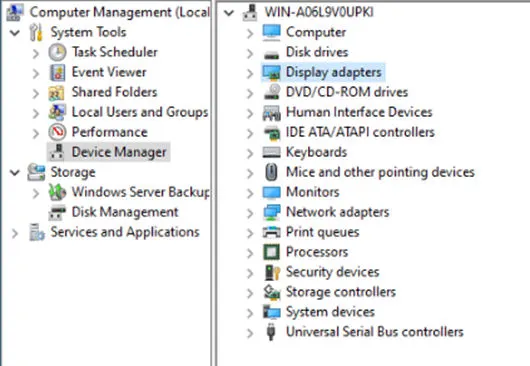
Click on the start menu, and search for computer management.
Alternatively, you can go to server manager-> Tools-> Computer management.
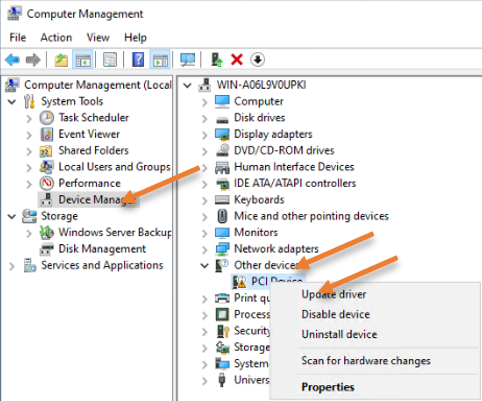
In the computer management window, choose Device manager.
You can see a driver is missing under Other devices-> PCI device.
Right-click on the device and click on Update driver.

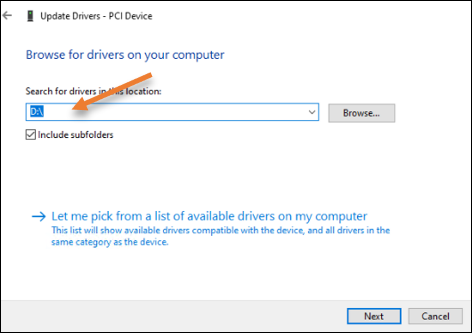
In the pop-up, click on Browse my computer for drivers.
And choose the VirtIO CD Drive for Driver by clicking browse and click on Next.
In my configuration, it is the D drive.

After a few seconds, you will get a message that says the installation is now complete successfully.

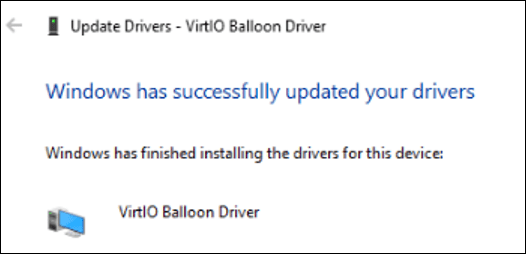
As you can see, there are no other drivers left to be installed, and all looks good.
Install the Guest Agent on windows server 2022.
Finally, we need to install the KVM guest agent on the windows server.
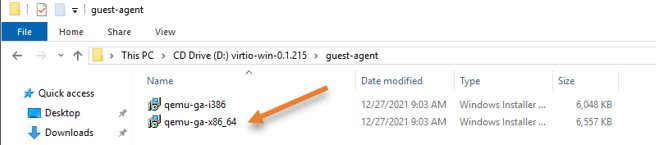
Open VirtIO CD drive in windows explorer.
As we install the 64bit operating system, you may double click on qemu-ga-x86_64 to install the qemu agent on Windows 2022.

You may now reboot the virtual machine, and it should boot right into the windows server 2022.
And it is ready to use on the Proxmox VE.