When you wanted to test something in your machine its better to use a virtual environment. you can play around with the machine and even if you mess up something with the virtual machine, you can still restore them.
Since the VM environment and the physical host environment is separate, whatever you do on the VM environment stays at the VM environment.
In this article, we are going to install windows 10 on a VMware workstation pro. We will also install the VMware tools at the end to get a good performance from the machine.
Even though we are installing the Windows machine on VMware workstation, the steps mentioned here are identical for VMware fusion for MAC as well.
Read also,
Windows 11 on VMware workstation – How to install it?
Windows 11 on KVM – How to Install Step by Step?
How to Fix VMware Bridged Network Not Working in Windows 10?
How to Configure Port Forwarding in VMware Workstation?
10 Easy steps to install CentOS 7/8 on VMware workstation
Before you proceed there are certain prerequisite for this, those are,
- You need windows bootable ISO. You can follow the guide here to download.
- And VMware workstation 15.5, which you can download from here.
Steps to install windows 10 on VMware workstation pro.
- Create New virtual machine.
- Choose Custom option.
- Choose the hardware compatibility.
- Attach the Windows ISO file.
- Select the operating system.
- Select the Firmware Type.
- Configure the system CPU and Memory.
- Setup the network interface.
- Select the I/O controller.
- Setup the virtual Hard disk.
- Verify the configuration.
- Start the Windows installation.
- Install VMware Tools on Windows machine.
1. Create New virtual machine.
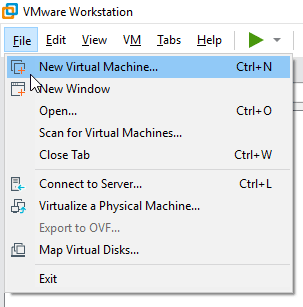
First, open the VMware workstation that you have installed and click on Create a new virtual machine. This will open up new virtual machine wizard.
2. Choose Custom option.
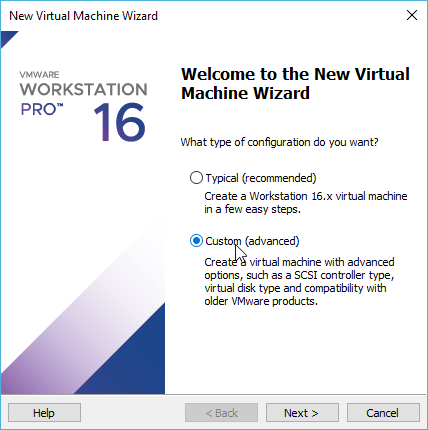
There are times when you try to choose the default option Typical, the windows machine may not load well during the boot, so to avoid that choose Custom (advanced) and click on Next.
3. Choose the hardware compatibiltiy.
Note : This option may not be available, if you are using VMware workstation pro 15 or below, So if you are VMware workstation 15 or below, you may skip this step.
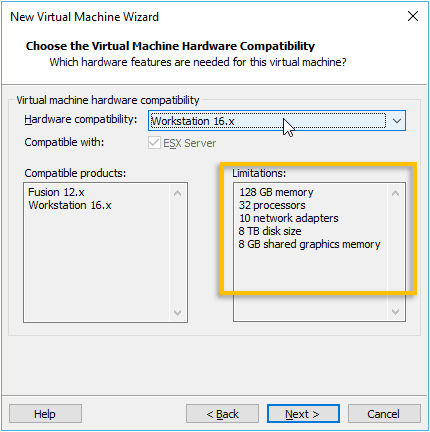
If you are using VMware workstation Pro 16 like me, you will get this option that says to choose the Virtual machine Hardware compatibility.
Since I am using version 16, I would choose Workstation 16.x. as the Hardware compatibility.
As you can see VMware workstation 16 support more hardware features.
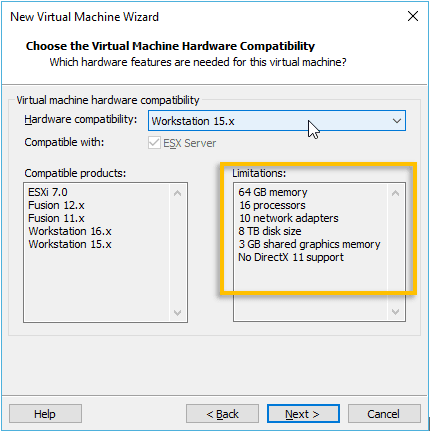
Just for comparison, let’s see VMware workstation 15 hardware compatibility.
Just look at the amount of RAM and the Processors supported, thats amazing.
Though for an average user it doesn’t matter much, my high-end PC has only 12 Core and 32GB of RAM, so you know what I am talking about 🙂
You may choose the desired option based on the requirement, I am choosing VMware workstation 16.
4. Attach the Windows ISO file.
We have already downloaded the Windows ISO file you need to attach them now.
If you have not not downloaded the ISO file already please go ahead and download them right now.
Let’s go ahead and attach the windows iso that you have downloaded earlier by clicking on Browse.
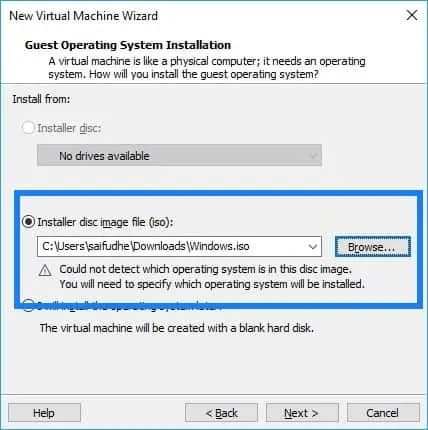
5. Select the operating system.
By default, it should pick up the hostname windows10, if not you may manually choose them.
In the Guest operating system choose Microsoft windows and the version is windows 10.
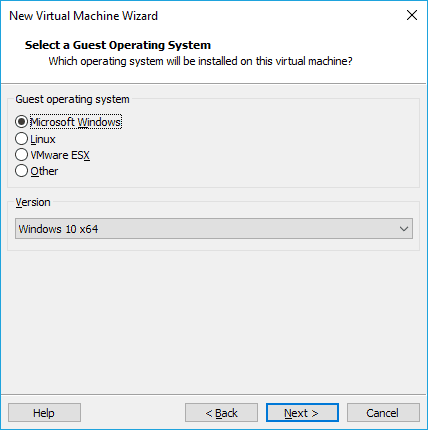
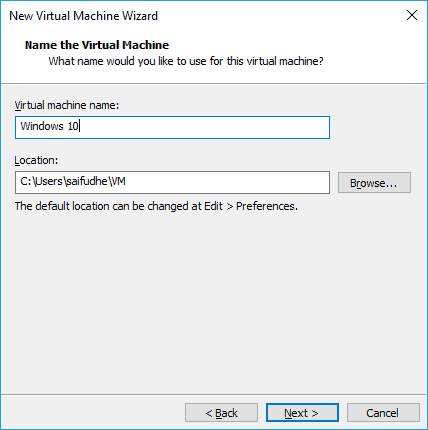
Name the virtual machine name, and location where you wanted to install the new operating system, you may click on Browse if you would like to change the location.
6. Select the Firmware Type.
Select the firmware type as BIOS and click on Next.
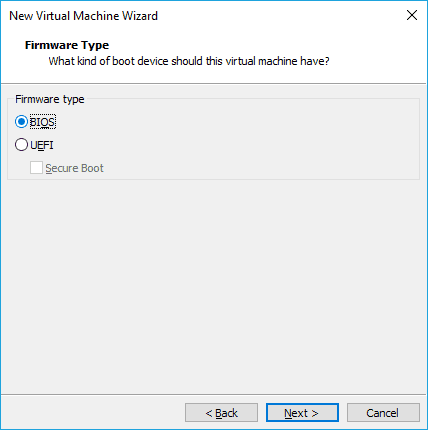
7. Configure the system CPU and Memory.
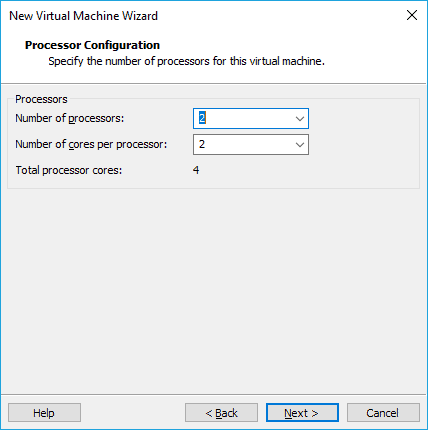
Next, you have to configure the CPU for the system, I am assigning 2 processors and 2 cores per processor. If you have more core you may increase to get better performance.
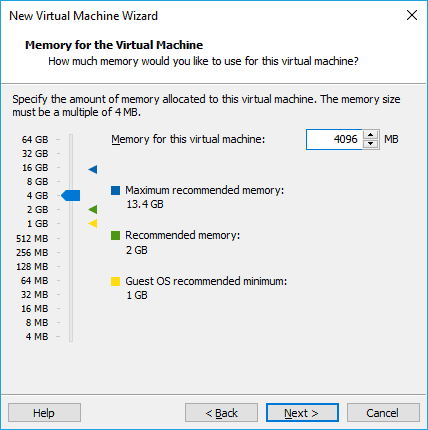
In the memory configuration, I am assigning 4096, though I could assign more I am just sticking with it for now. I will change it later if I want to.
8. Setup the network interface.
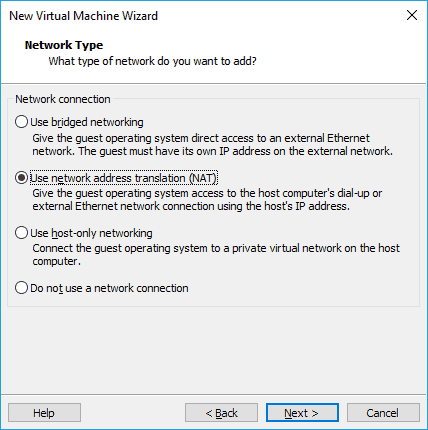
I want my Windows guest to allow access to the internet, to access the internet I will have to use the NAT interface. So Choose the NAT interface and click on next.
9. Select the I/O controller.
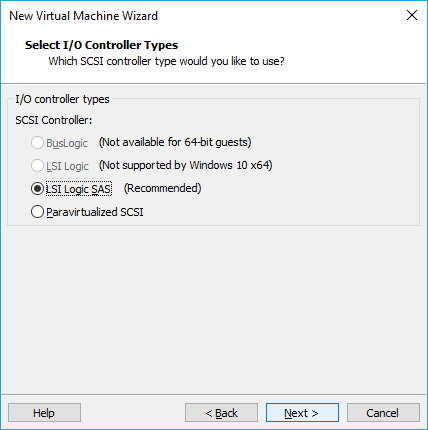
In the I/O controller, Types select the recommended option in this case LSI Logic SAS. Which is the default option.
10. Setup the virtual Hard disk.
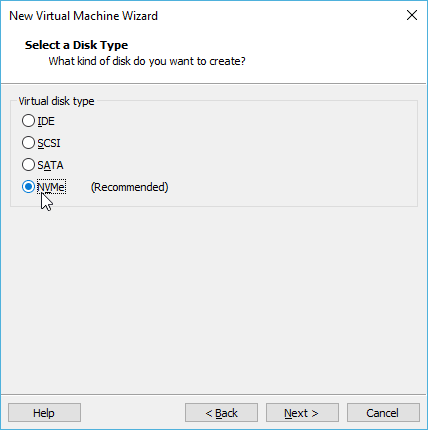
We are now going to set up the virtual hard disk for the Windows machine. Choose NVMe as the Disk type and click on Next.
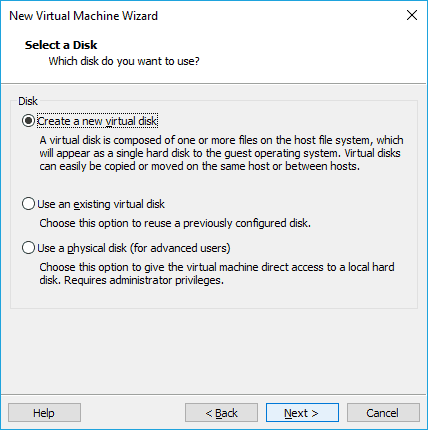
Choose to Create a new virtual disk and click on Next.
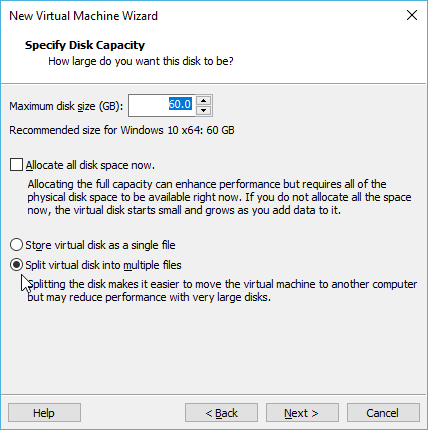
We now need to configure the storage capacity for the machine, by default it would pick up the storage as 60GB, I am leaving the default option, you may change it depends on your requirement.
Also, choose the option, Split Virtual disk into multiple files.
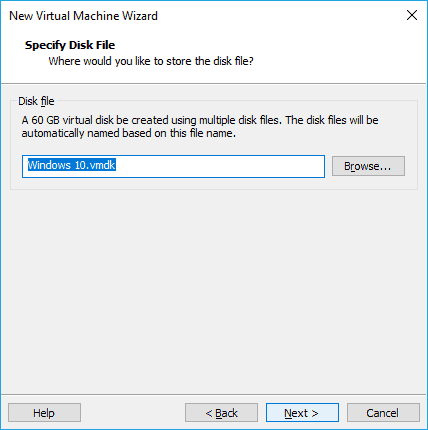
For the virtual hard disk that we have created, you can change the name now. I am leaving the default name for the VM disk hence I clicked on Next.
11. Verify the configuration.
Here you can see the properties of the VM that we are going to deploy, just check and make sure everything looks good. If you found something is not right you may click on customize hardware and modify it.
I am not changing anything hence I clicked on the finish.
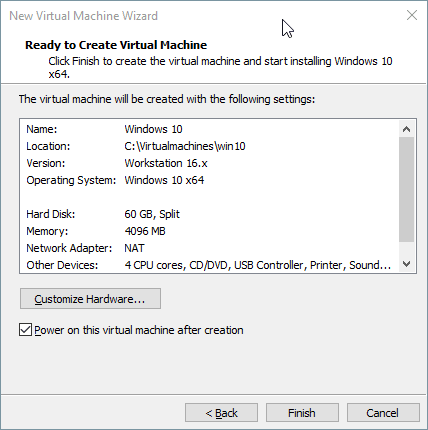
12. Vmware install windows 10.
It will take few seconds for the virtual hard disk to create. After the Hard disk creation, You now should be able to see the windows 10 virtual machine has been created and it will now power on because you already checked the option Power on this virtual machine after creation on the previous step.
We are now going to install windows 10 on the VMware workstation pro, on the windows installation menu click on Next.
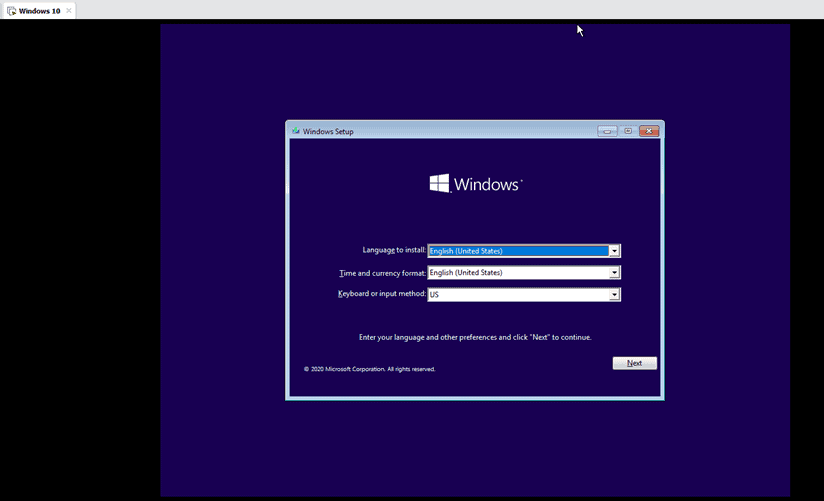
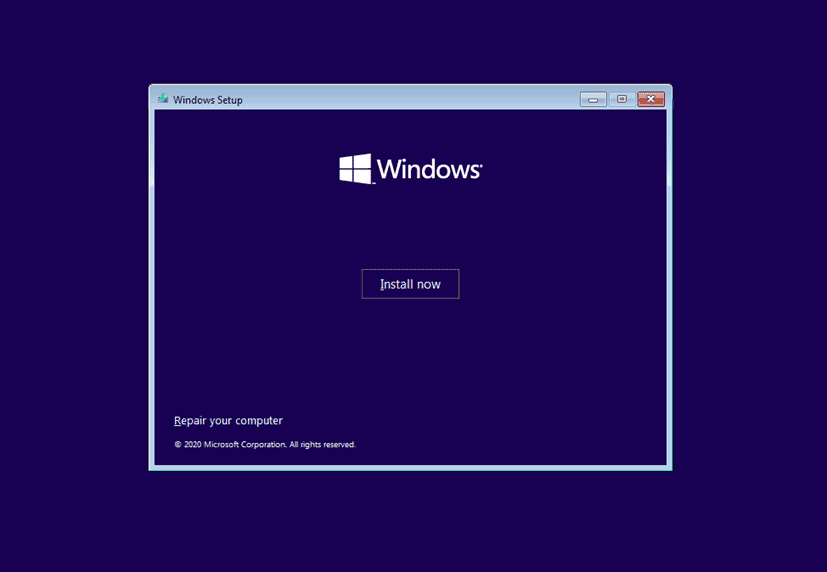
The windows installation screen appears now, click on Install Now button.
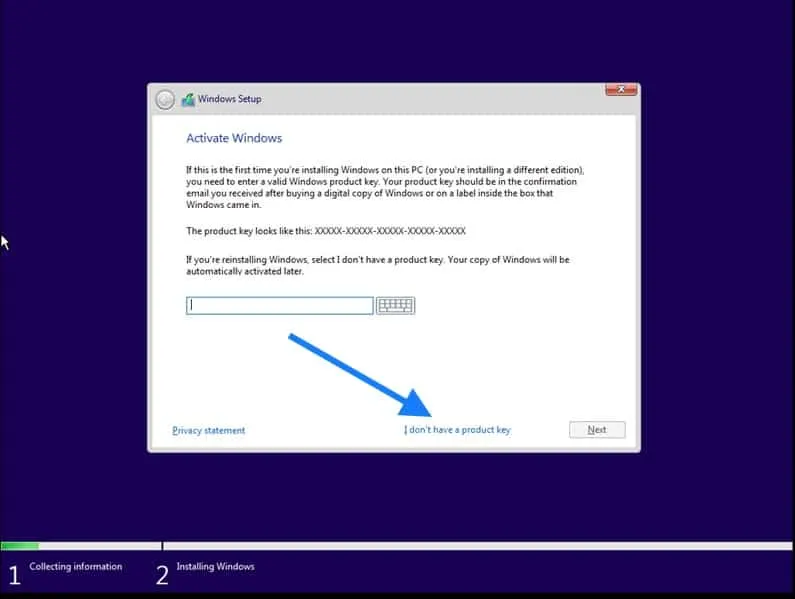
If you have a product key, you may enter it now here, else click on the ‘I don’t have a product key’ option and click on Next.
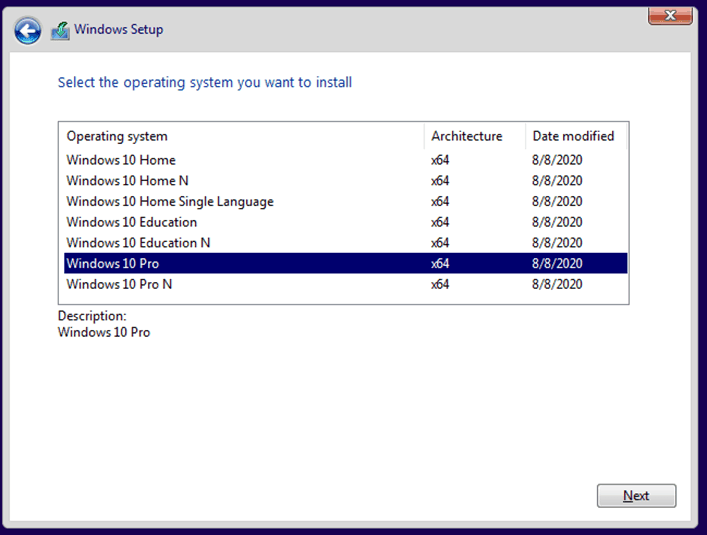
Choose the version of windows that you wanted to install, I am choosing Windows 10 pro and click on next.
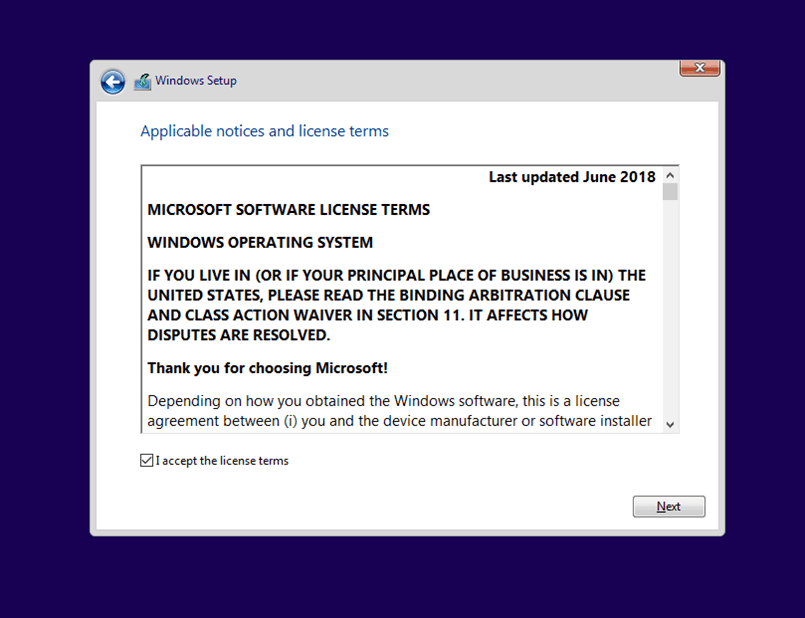
Accept the license agreement and click on Next.
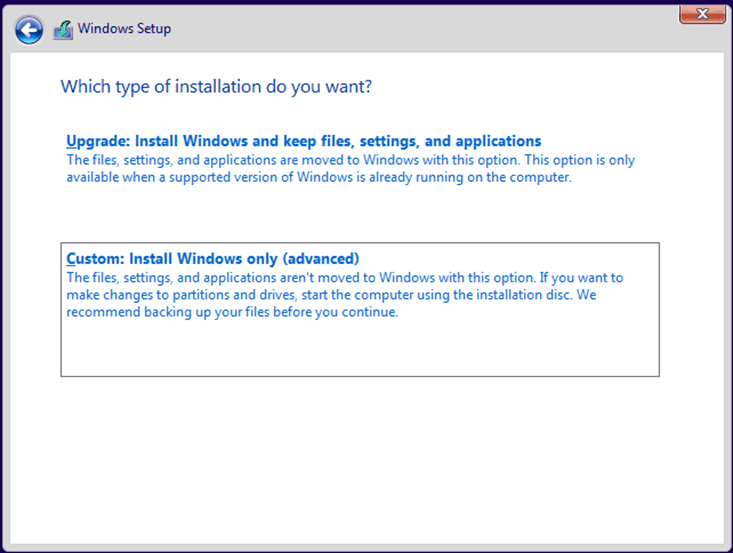
In the type of installation click on Custom.
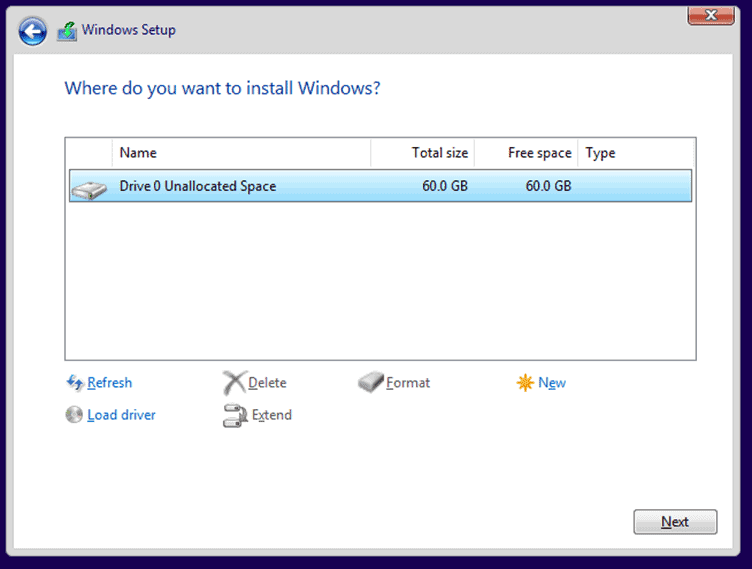
You will now be presented with the virtual hard disk storage that you have defined earlier. Click the Drive and click next.
The installation of windows now begins and you will be able to see the progress.
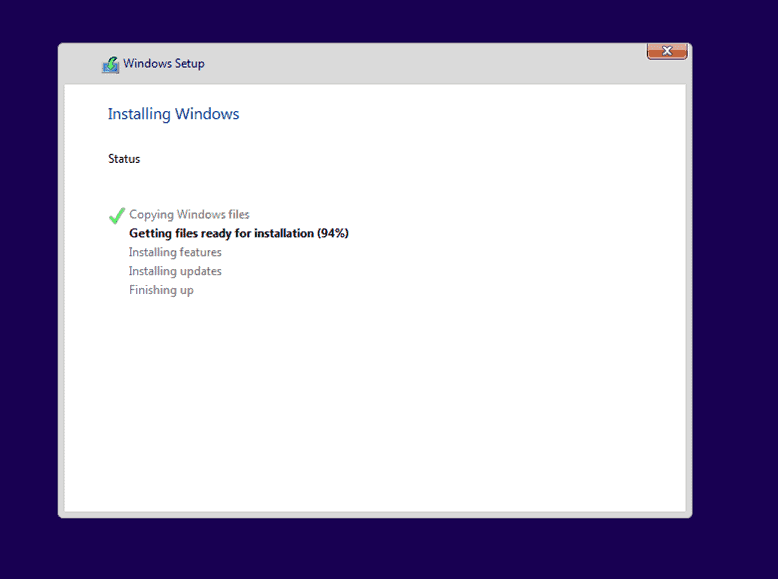
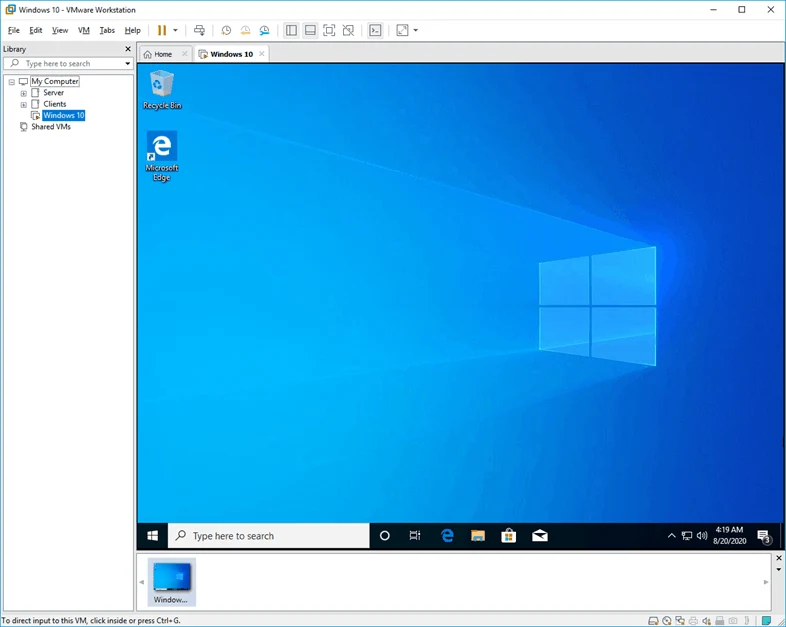
After the initial setup, you now have windows 10 pro installed on the VMware workstation pro. You can now click on I finished installing on the bottom of the screen.
13. Install VMware tools on windows machine.
We have now successfully installed the windows 10 operating system on VMware workstation pro. However, to get good performance you will have to also install the VMware tools on the machine.
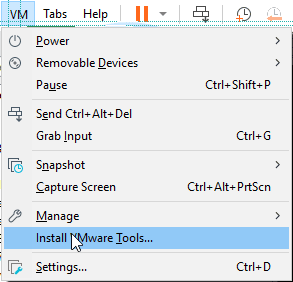
Click on VM and choose the option that says Install VMware tools..
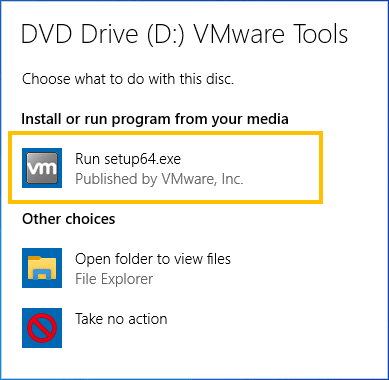
Wait for few seconds, you will get a notification on the bottom right of the screen that says DVD Drive (D:) VMware Tools. Click on that.
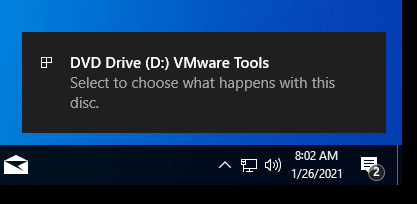
That would open up prompt, choose Run setup64.exe, this is the VMware tools software package.
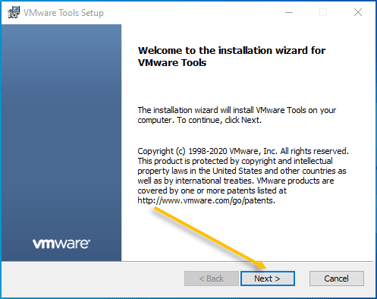
The VMware tools installation now will begin, you can click on Next here.
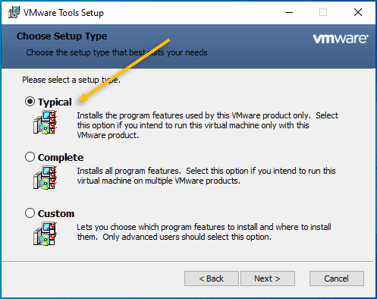
On the next screen choose Typical and click on Next.
After few seconds the VMware tools will be installed on the windows machine. You will also notice the display resolution gets adjusted according to the VMware workstation windows size, which is really cool.!
You may click on Finish and you are required to restart the machine to complete the VMware tools installation.