
We have covered how you can install the ubuntu-desktop 20.04 on the VMware workstation in our last blog. That was the desktop version of Ubuntu, so what about the Server?
In this blog, we will take a look at how you can install Ubuntu server 20.04 on a Vmware Workstation.
In the Ubuntu server, we usually use CLI to manage the Server. You can still install the GUI on the Server, but we are just going to install the Ubuntu server with VMware tools. After the installation is complete, we will get a Ubuntu Server 20.04 operating system with the CLI.
So if you are not looking for a Server and want to use a desktop experience, just for browsing the internet or working on some files, I would say Ubuntu desktop would be the place for that.
So let’s begin.
Before you proceed with the installation, there are some pre-requisites.
- Download Ubuntu 20.04 server – you can follow the article here to download Ubuntu faster.
- Vmware workstation pro – Click here to get it.
Steps to install Ubuntu server 20.04 on Vmware workstation.
1. Launch the VM creation wizard in the Vmware workstation.
Open the VMware workstation and click on Create a new virtual machine.
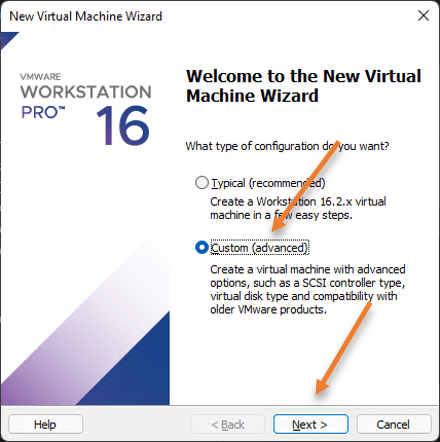
The new virtual machine creation wizard will now open.
Choose Custom(Advanced) from the two options and click on next. I chose custom instead of Typical cos that way. I have more control over the system and network resources on my virtual machine.

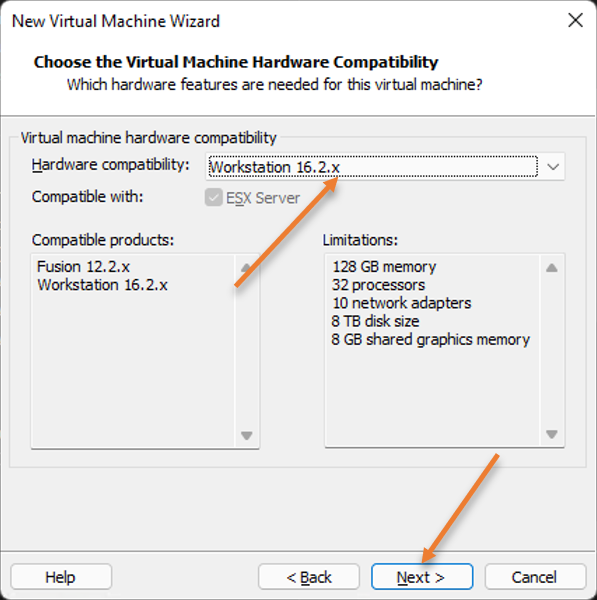
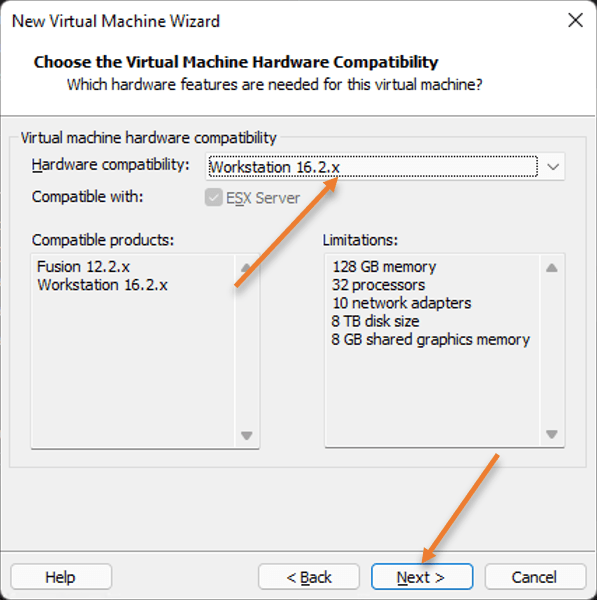
In the hardware compatibility, you can leave the default one. In my case, it is Workstation 16.2.x
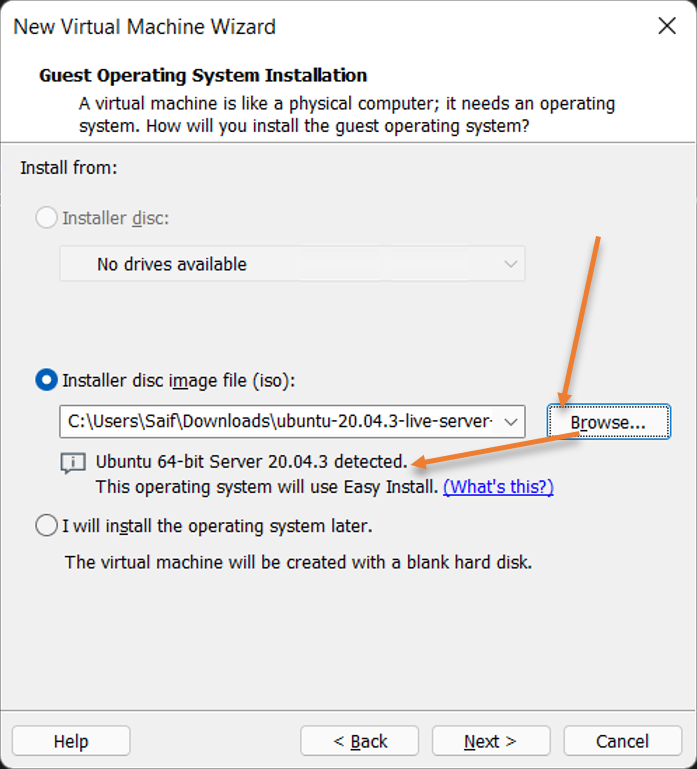
Choose installer disk image file (iso), and you have to attach the iso image here by clicking on browse. The VMware automatically detects the Operating system as an Ubuntu server for you, click on Next here.

You will have to enter the credentials here and click on Continue.
Note: Unlike ubuntu desktop, when I enter the creds here for the Ubuntu server, I don’t see VMware able to add those creds into the Ubuntu server, because I see during the installation, it will ask you to set up credentials again. So at this time, I don’t think this option has much relevance here, but you still have to fill in to go forward.
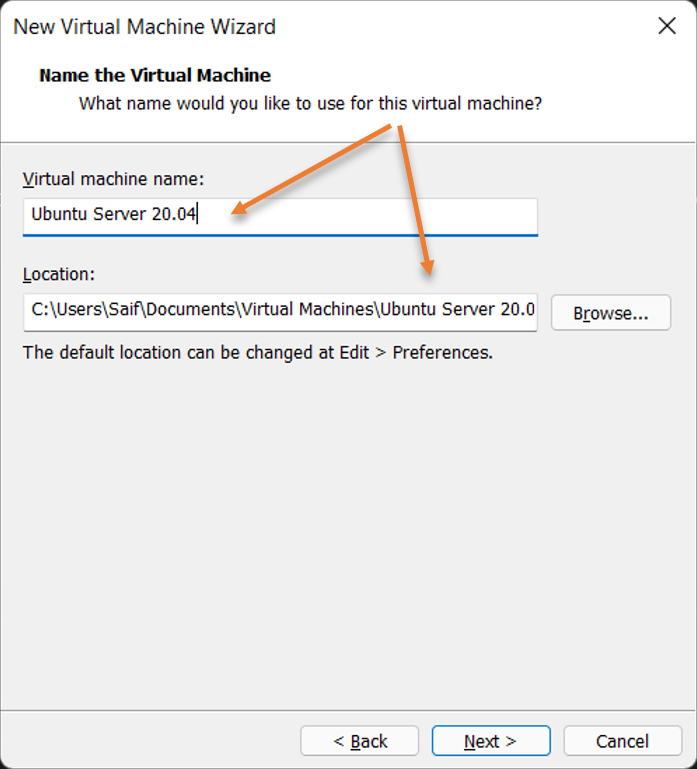
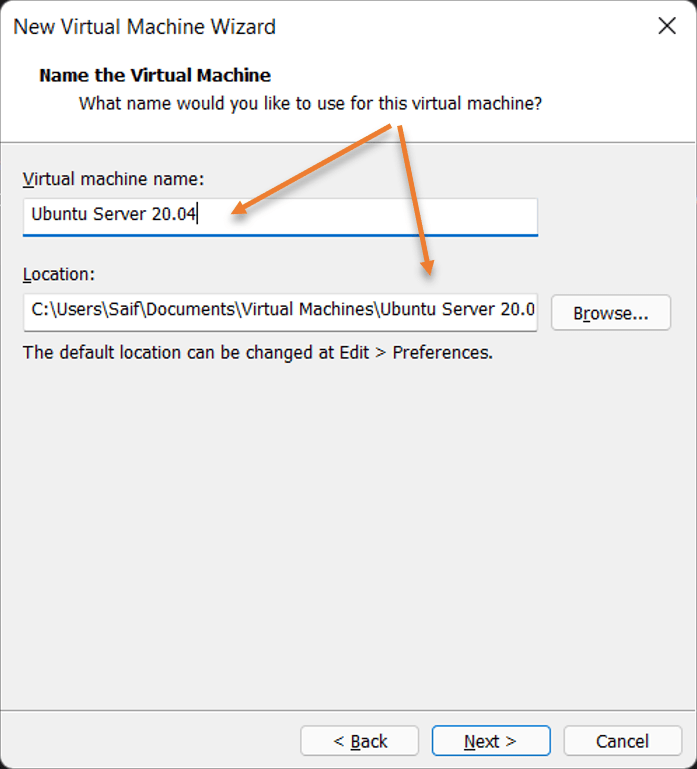
2. Name the Ubuntu server and choose the location.
You have to enter the virtual machine’s name and the location where you can save the virtual machine file. If you would like, you can change the location of your VM here and click on Next.
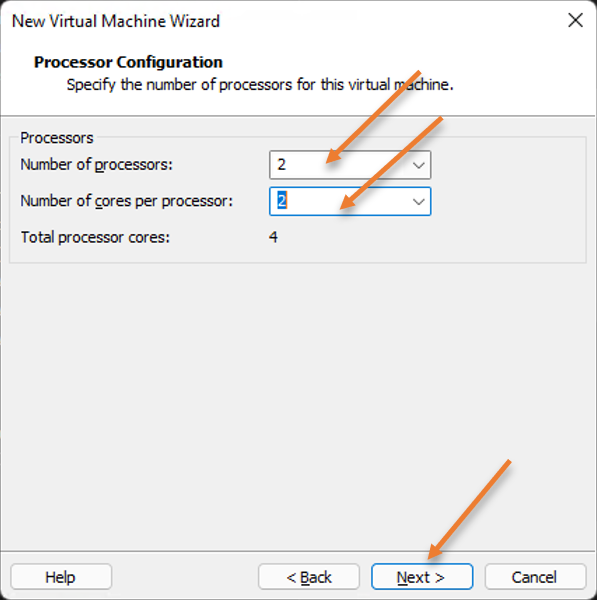
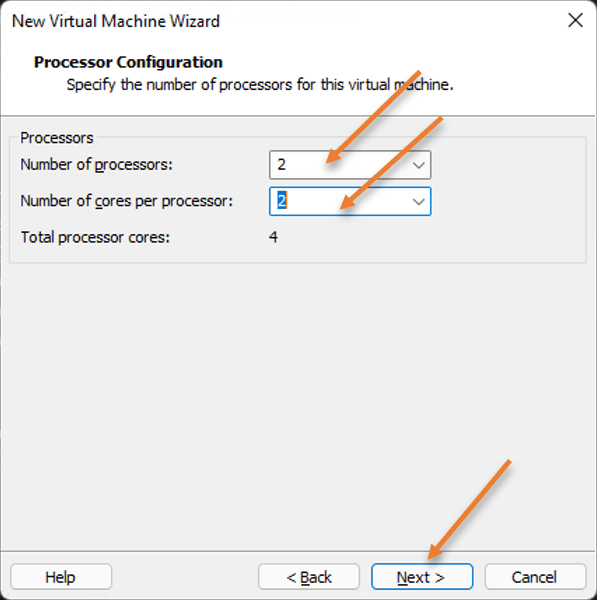
3. Configure the CPU.
I am configuring about 4 CPUs here. Depending on your system’s CPU, you may allocate the CPU.
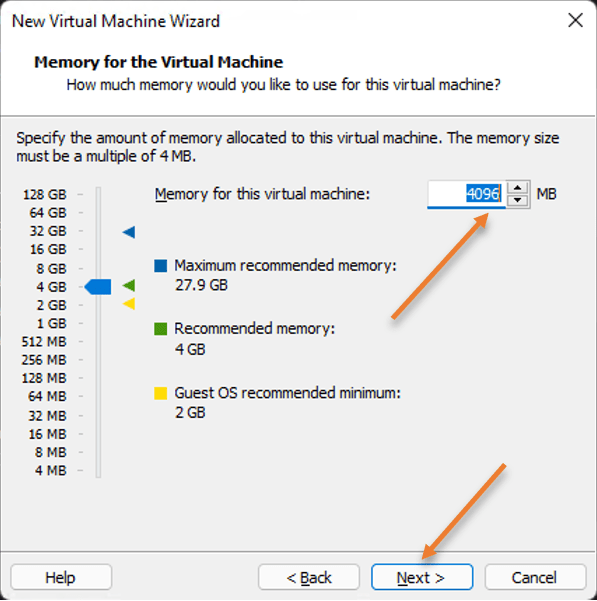
4. Configure the Memory.
My system has about 32gigs of Ram, so I can allocate 4gigs or More to the virtual machine, so depending on your requirement, you may add the memory and click on Next.

5. Choose the network configuration.
Since I want to keep this VM to be part of my local area network, I could use the bridged networking option, and my router will start assigning the IP address to the VM’s. The problem with this setup is that others on your local area network can talk to your VM.
I won’t recommend the bridged network option on your office network 😊
So if you want to keep your machine in a private network and want to access only the internet, then NAT will be the best option.
You could also spin up a firewall in Vmware workstation, and with which you can allow internet access through the host-only adapter to the virtual machine as well. That is little advanced case I know, in case if you are interested, Check out this article here to spin up a firewall in the VMware workstation.


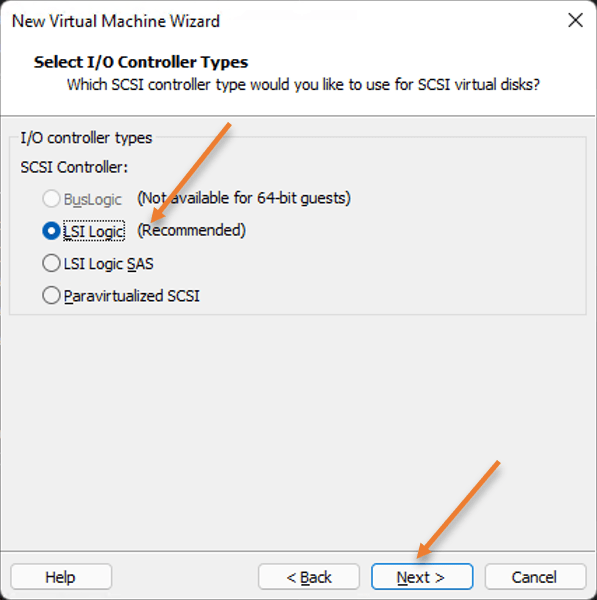
6. Choose the I/O controller types.
You can leave the I/O controller type to LSI logic and click Next.

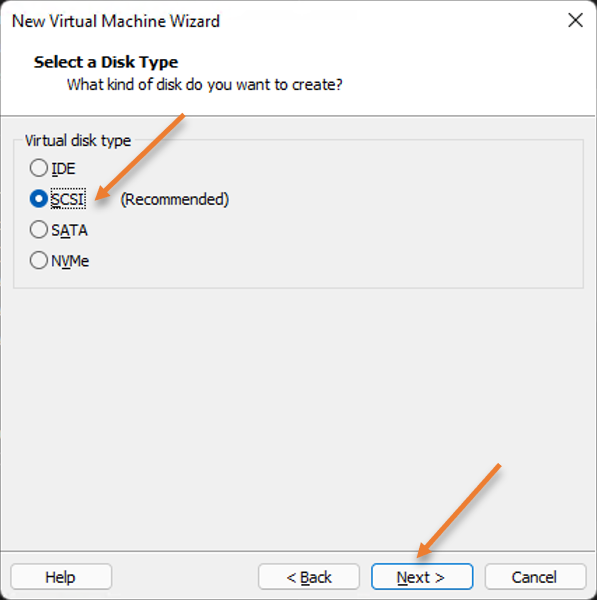
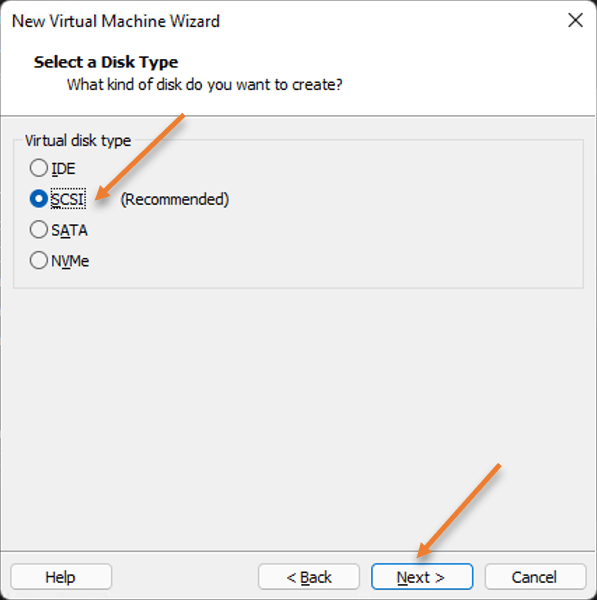
And the disk type, you may select the SCSI option and click on Next.
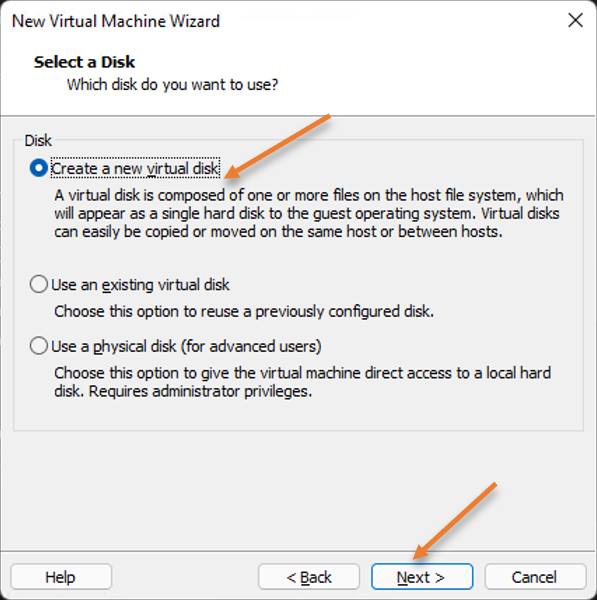
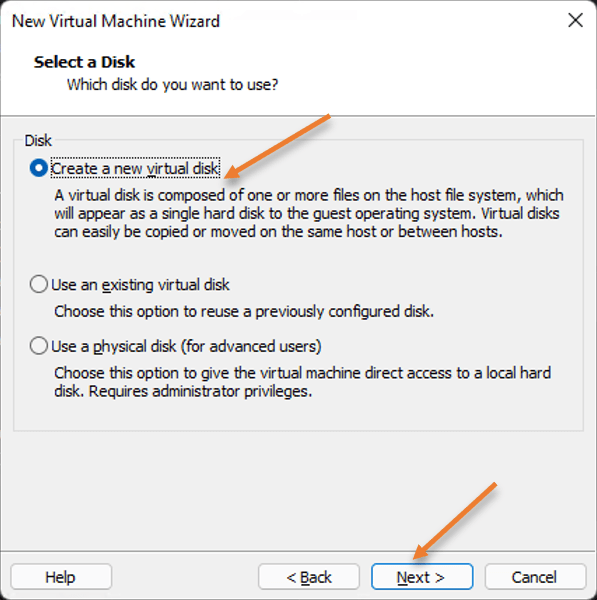
7. Create a virtual hard disk.
The ubuntu server requires a virtual hard disk to be created, so under Disk, choose create a virtual hard disk and click on next.
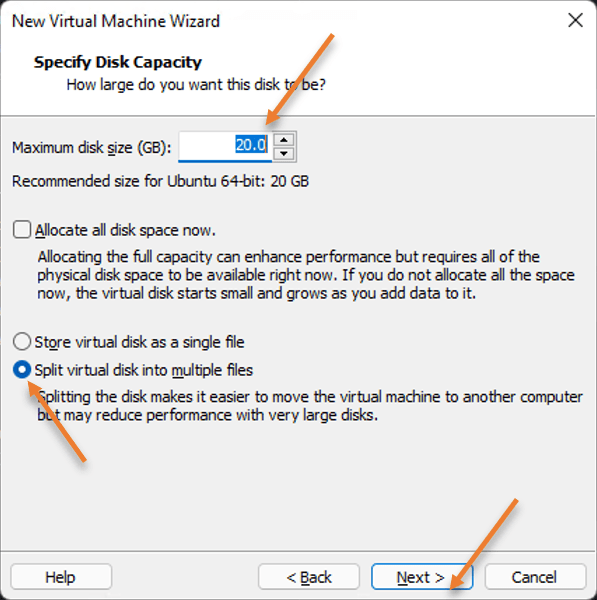
8. Configure the storage volume.
Here we need to configure the storage volume for the virtual machine. By default ubuntu server will pick up the storage as 20GB, so I am leaving the default.
If you require more storage, depends on your physical host, you may increase or decrease here.
And choose split virtual Disk into multiple files.
Click on Next.

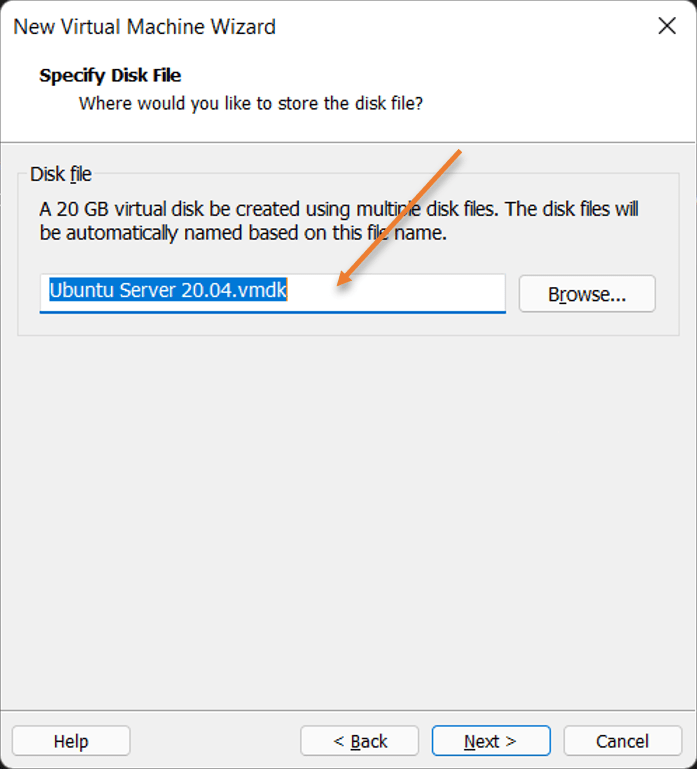
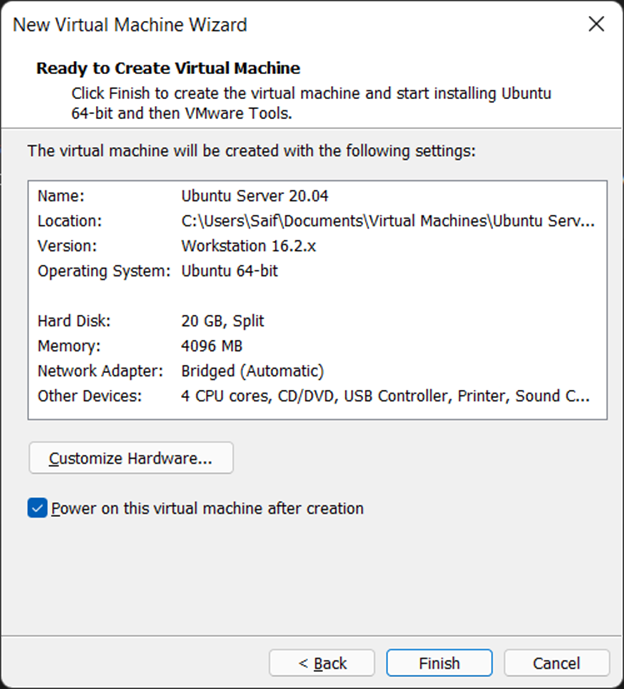
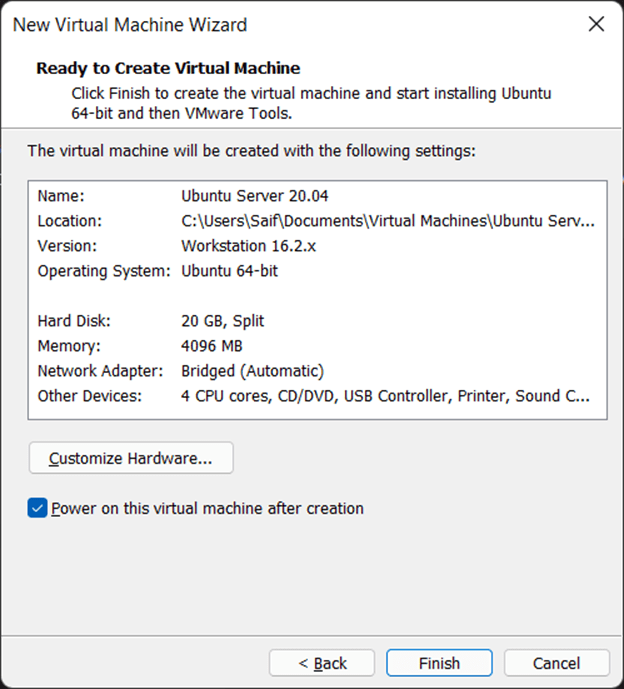
Finally, name the virtual machine, leave the default name and click on Next.

You will get the summary of the virtual machine that you are going to install, after verifying all the details are correct, you may click on next.
If you require any changes, you can click on the customize hardware option.
9. Proceed with the Ubuntu server 20.04 installation.
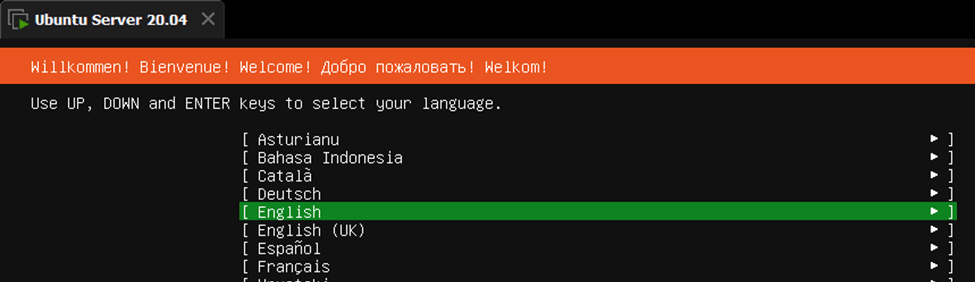
After a few seconds, the Ubuntu installation will now begin.
Choose the language of your choice, and click on Done.

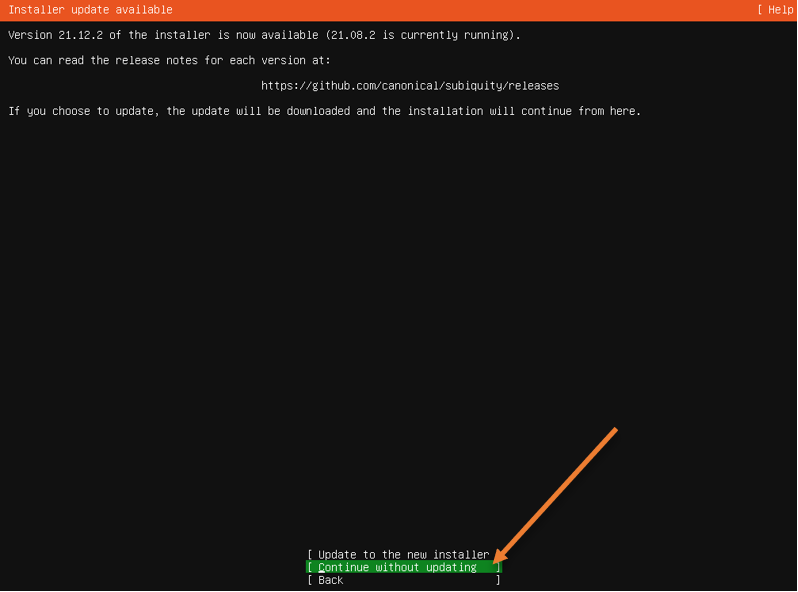
An installer update is available for the Ubuntu server. We are not going to update that, hence continue without updating.

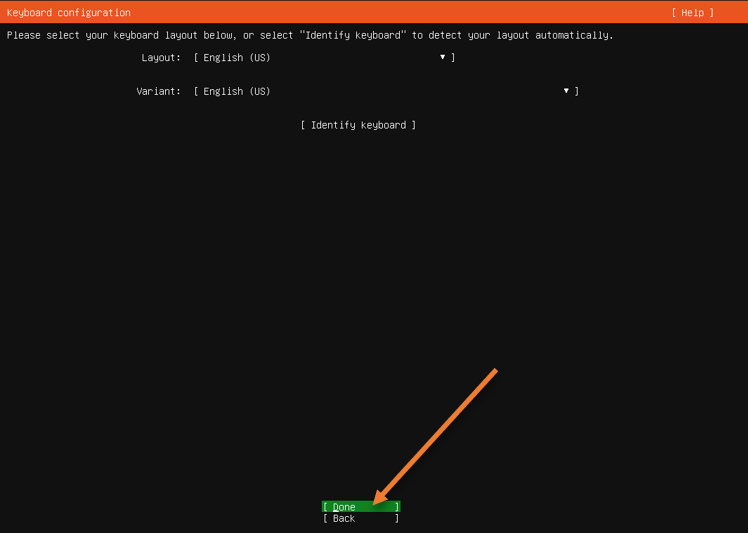
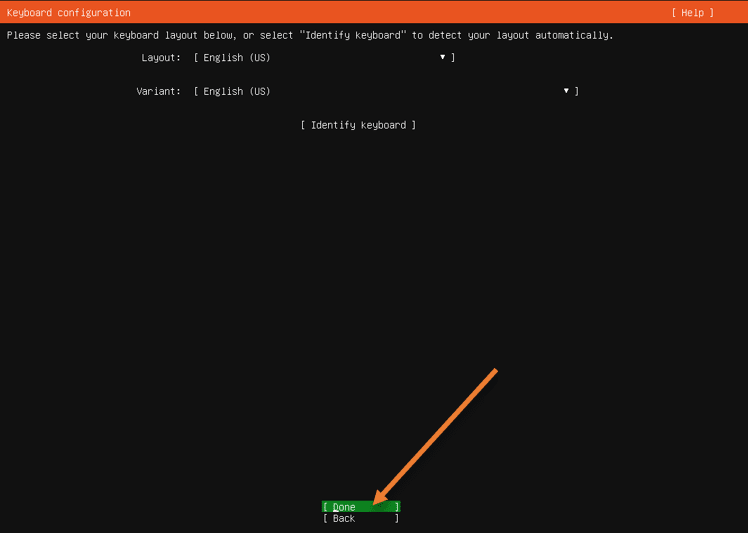
Choose the keyboard layout of your choice.
To make changes, use the tab key and down arrow key to make changes.
I am okay with the default. Use the tab button again and choose done.
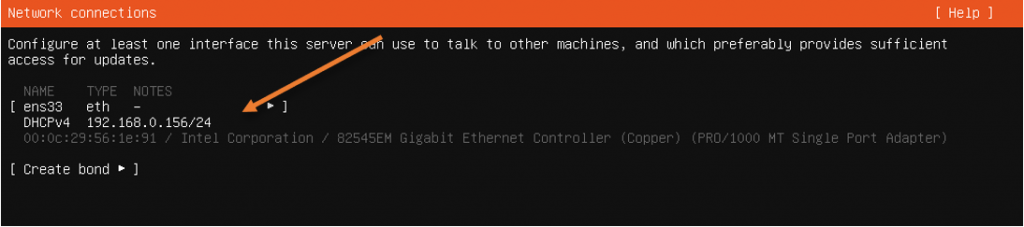
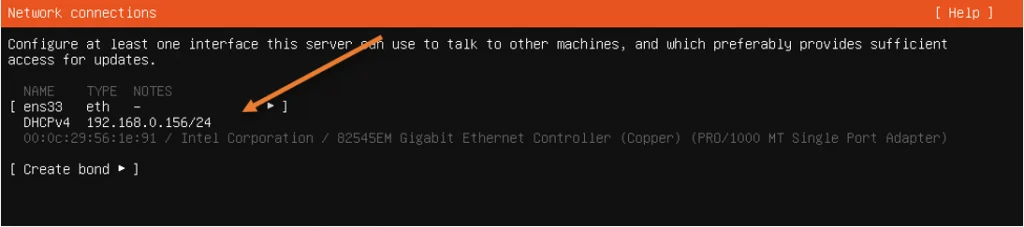
Configure the network.
As we have configured the bridged interface, my router has already assigned an Ip address to the Server. If you want to make any changes to the IP address, you can do that here.
Choose Done after the changes.
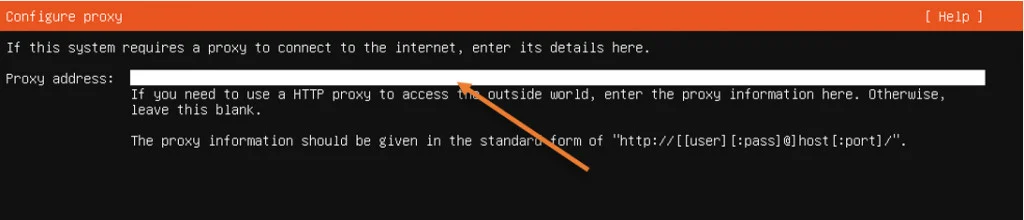
In case if you are using a proxy address, you may enter them here, if not you can leave blank, and choose Done.

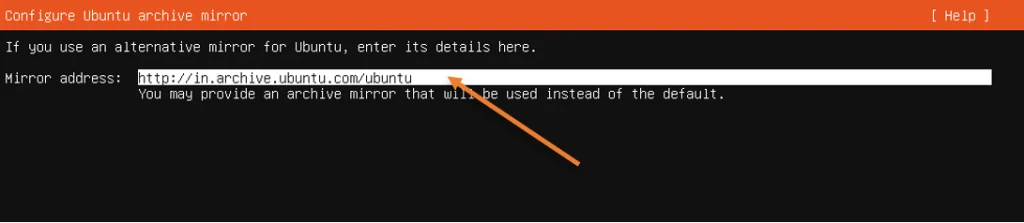
Choose the Ubuntu Mirror.
I am leaving the default mirror from Ubuntu. In case if you are using a different mirror you can update them here and choose Done.

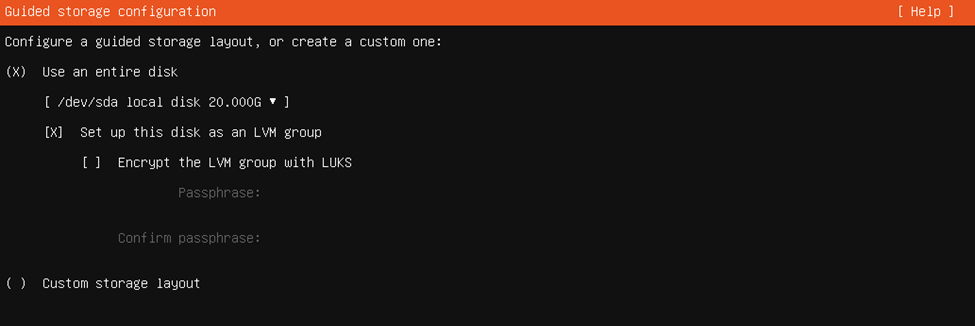
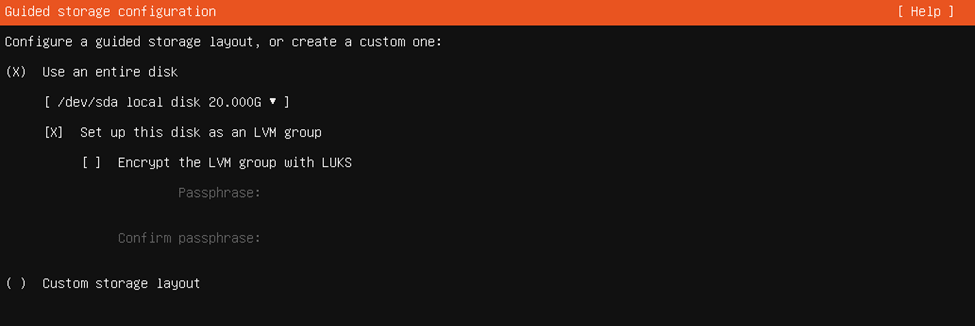
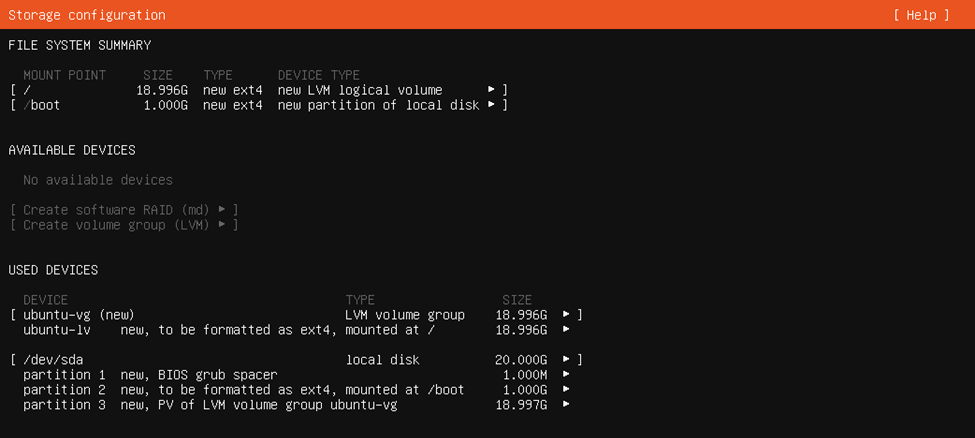
Configure the storage.
Any changes need to be made to the storage. You can make changes here. I am happy with the default hence chose Use the entire Disk and select Done.
You will get the summary of the storage; if you want to modify, you may do so else go ahead and select Done.

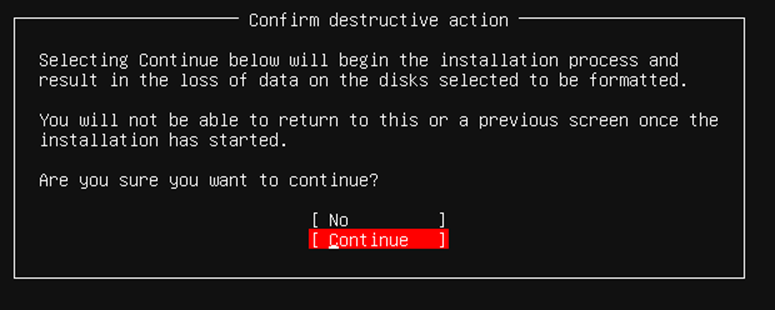
You will get a warning that you will perform format on the virtual hard Disk and data will be lost, so you may choose to continue here.

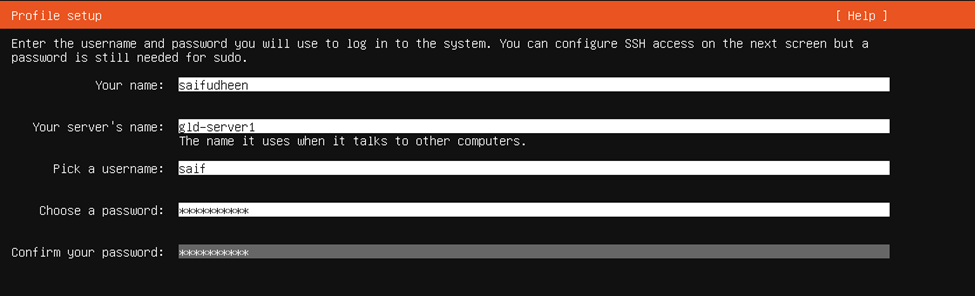
Setup your server account.
Remember, VMware didn’t not add the account to the Server, so you have to create one, but that was not the case with the Ubuntu Desktop.
You need to configure the user account for you to log in to the Server here. You also need to enter the name for the Server.
- Enter your name.
- Enter your Server’s name.
- Enter credentials.
After you have configured the account, you can choose done.

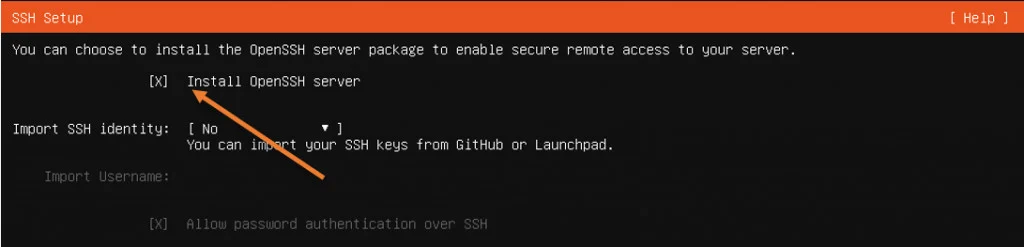
Configure ssh server.
As a server, you will be required to ssh to the virtual machine at times. Some users always work over the SSH connection. So I recommend installing the OpenSSH Server during the installation. So select the install Openssh server option using the space bar. You will be asked if you would like to import any SSH identity, I have none.
If you have to import any ssh identity, you may do so.
After that, choose Done.
In case if you don’t require ssh access, you can skip this and choose Done.

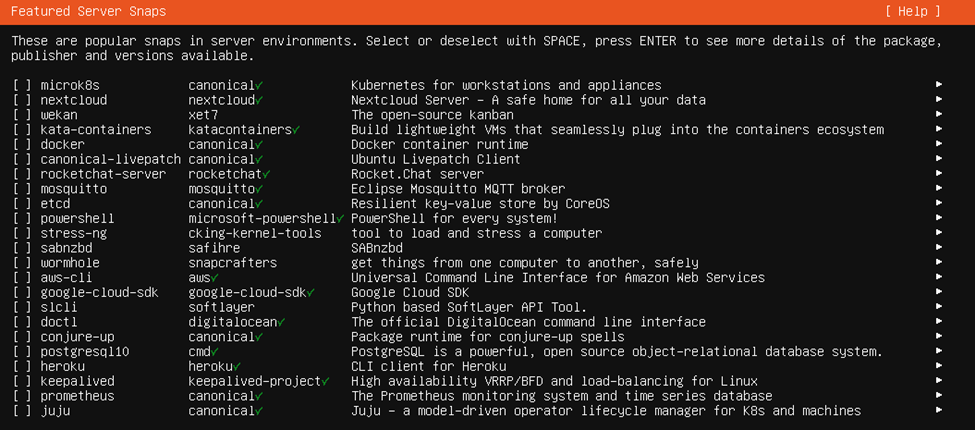
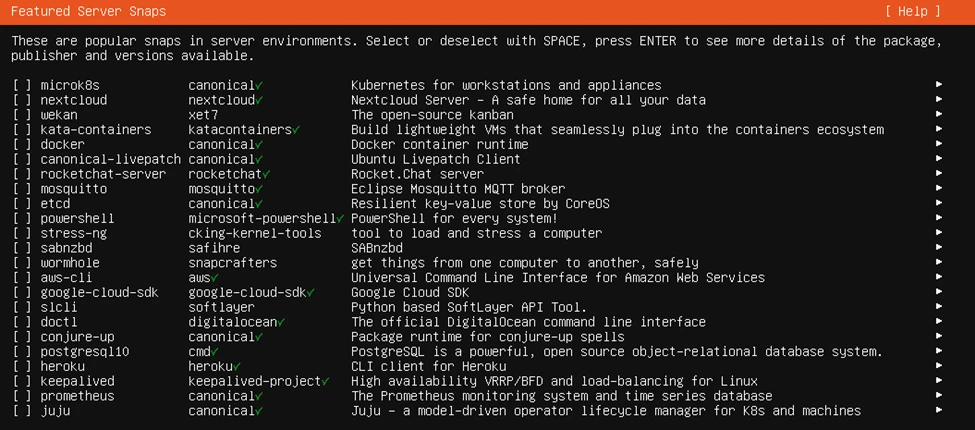
Select the featured snaps.
When you use a ubuntu server, each user can customize the Server depending on what they do. So choose the desired snap from below and Done.
I am not choosing anything at this moment, you can make the selection using the spacebar.
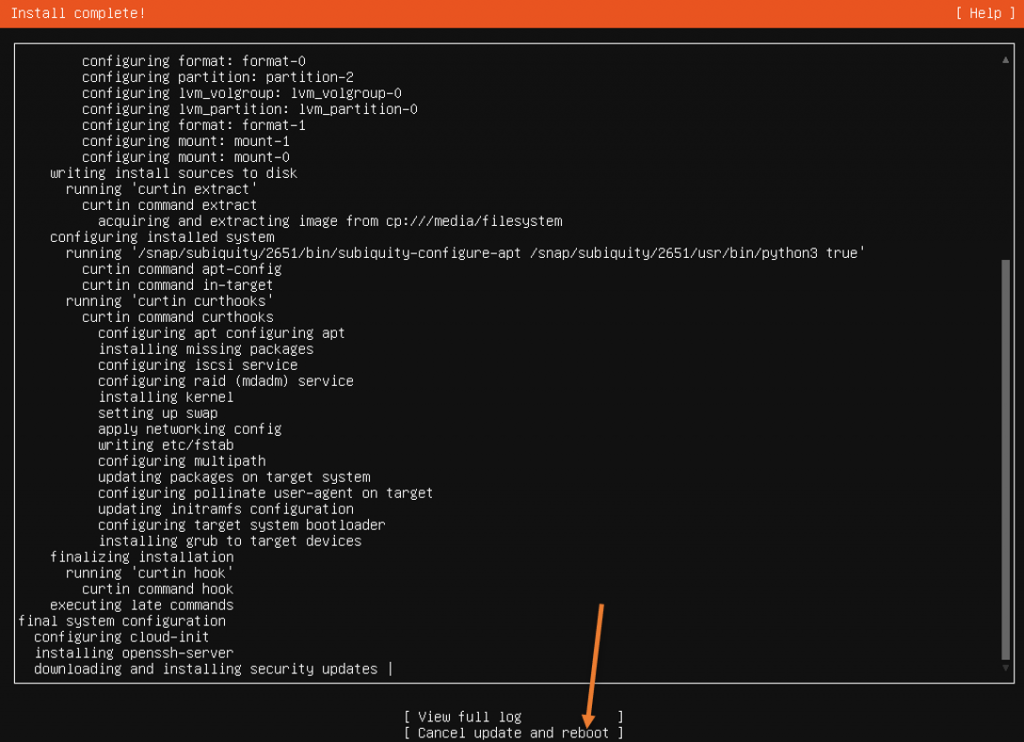
The installation will now begin. During the installation, you will see downloading and installing security updates.
If you want to install the security update at this time, you can do that. However, it will delay the installation time that it will take.
As I will install the update later, I will cancel the update from the bottom. And after a few seconds, the update will be canceled, and the ubuntu server will proceed for a reboot.

Once the system is back online, you can log in to the ubuntu server with the credentials that you had set up earlier.
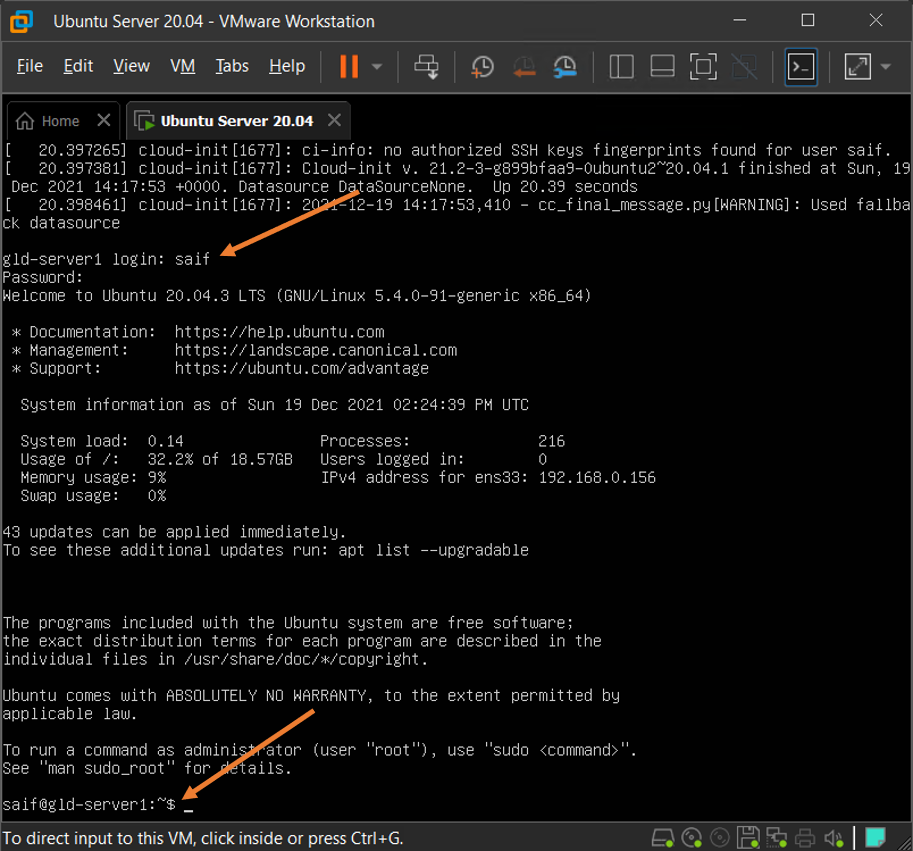

10. SSH into the Ubuntu Server.
You can type the command ip addr to get the IP address of your machine, and with which you will be able to ssh into the Server.
As you can see, I can ssh into the Server, and congrats, you have now installed the Ubuntu server 20.04 on VMware workstation.

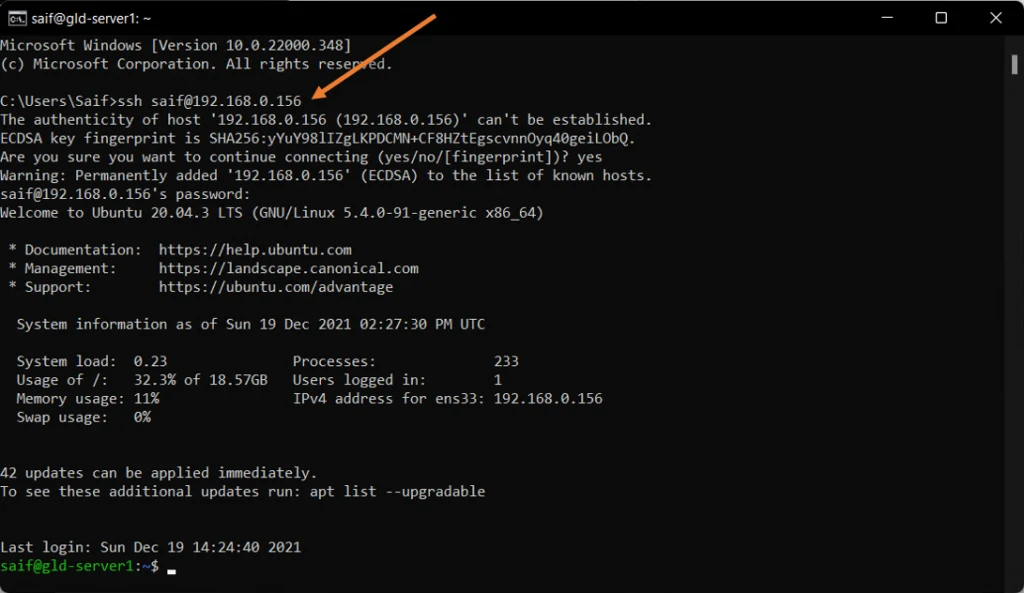
Note: I have chosen the network as a bridge; hence I can ssh into the server, but if you have selected the NAT network, you cannot ssh from other machines in your Local area network. So you need to keep that in mind.