
We have taken a look at how you can install ubuntu 19.04 in our previous blog, and this time we are going to install ubuntu 20.04 on VMware workstation pro. I am also using Ubuntu 20.04 as my alternate operating system on my PC, where I did a dual boot of Ubuntu 20.04 with windows 11. Been using that for a while and haven’t faced many issues with it, but the only problem I can say is if I need to switch between the operating system, I will have to shut down the Windows 11 and get into Ubuntu and vice versa. So to avoid that I could virtualize the Ubuntu 20.04 desktop on my VMware workstation in my Windows host.
So any basic task can be performed by the virtual machine and if I have to perform a heavy task then I could use my bare-metal option which is my PC. That’s my reasoning for why I choose Ubuntu VM, you might have some other reasons as well. Anyways lets get started.
In this blog, below is what we are going to do.
We will install Ubuntu 20.04 desktop on the VMware workstation; after the VM installation is complete, we will install the VMware tools and connect the Ubuntu to the bridge interface; that way, it will act like another host in your local area network.
Prerequisite:
Before you proceed with the installation, you need to have.
- Ubuntu 20.04 version- you can follow the article here to understand how to download Ubuntu faster.
- And Vmware workstation pro – Click here to get the latest VMware workstation.
1. Create the Ubuntu 20.04 virtual machine.
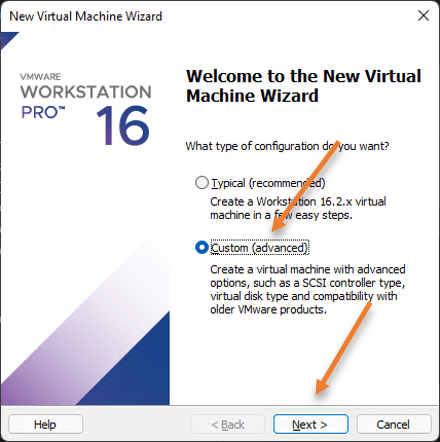
Click on File -> new virtual machine.
You can also type, Ctrl+N as well.
A new virtual machine creation wizard will now open.
You can either choose Typical or custom.
As I require more control on my VM, I would choose a Custom option to proceed.

.
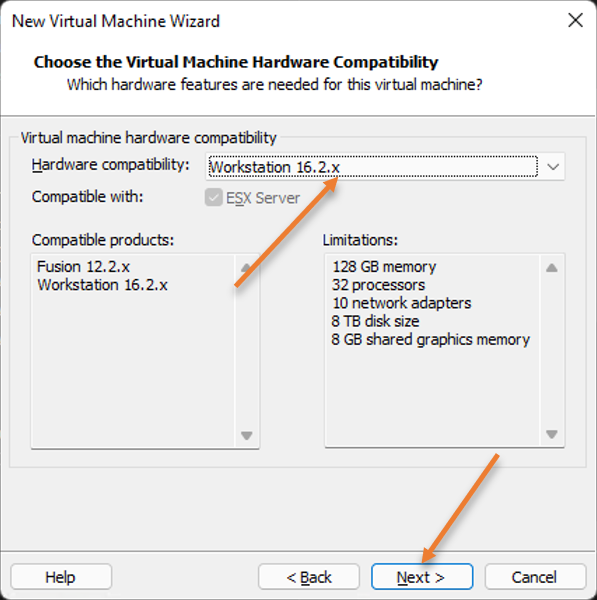
- Choose the hardware compatibility.
I am using the VMware workstation 16 here, so it does make sense to keep the same version in hardware compatibility. Ubuntu 20.04 is compatible with the 16.0 version, so we should be good. Based on your workstation version, you may make a choice.
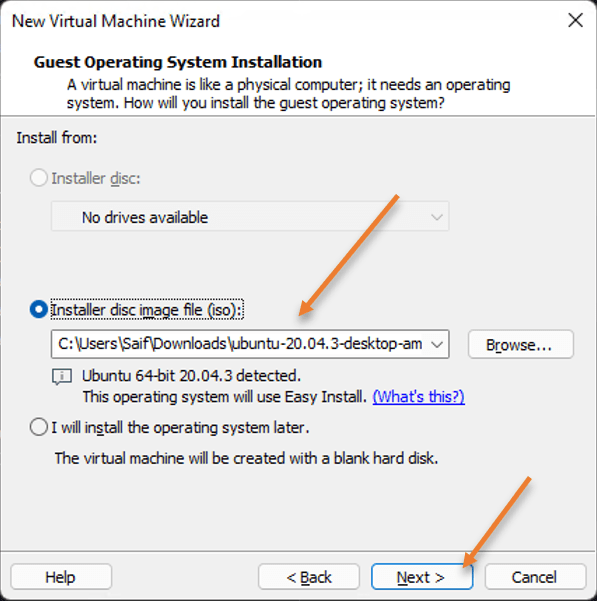
2. Attach the ISO image.
We have already downloaded the Ubuntu 20.04 desktop on our machine; let us attach them under ‘Installer disk image file (iso);
And click on Next.

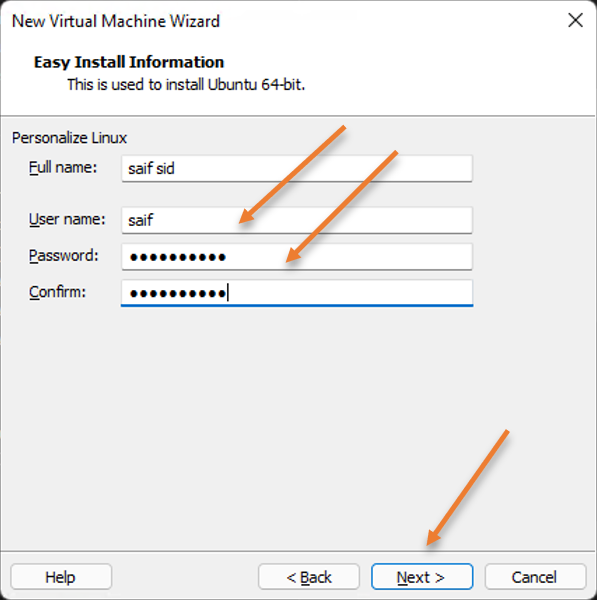
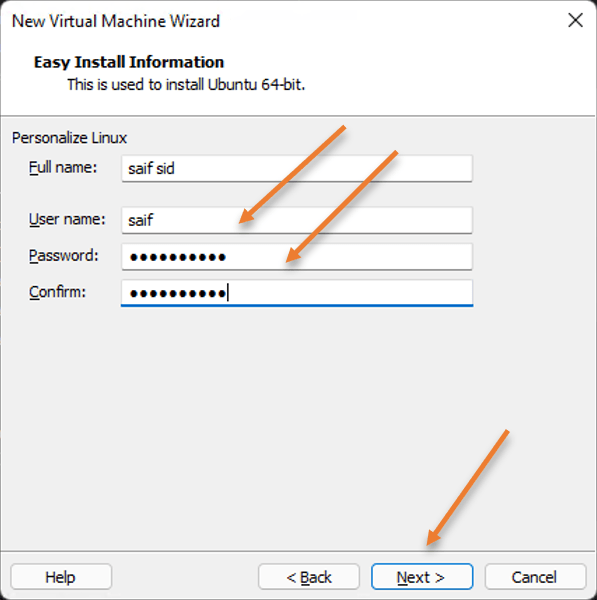
3. Set up the user credential for ubuntu 20.04.
Here you need to set up a username and password for your Ubuntu VM; after the installation is complete, you don’t have to set up a credential again, as it will take the credentials we are setting up now.
After that, click on Next.
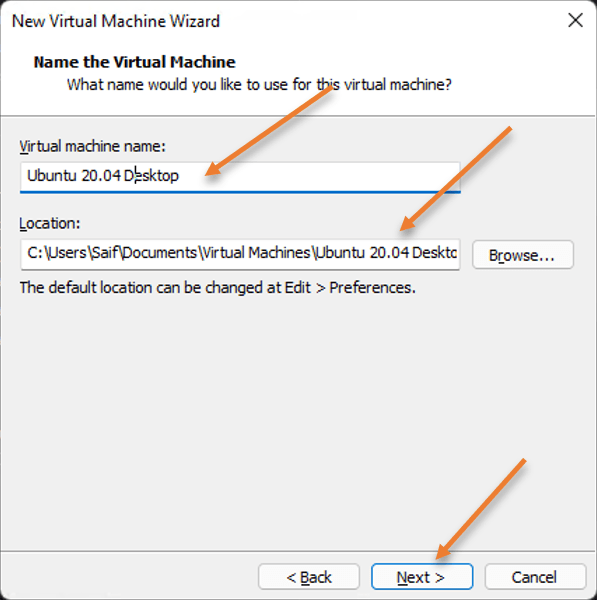
4. Name the VM and the location.
We need to name the virtual machine and the location to keep the virtual machine files.
I will name the virtual machine as Ubuntu 20.04 desktop and leave the default storage location.

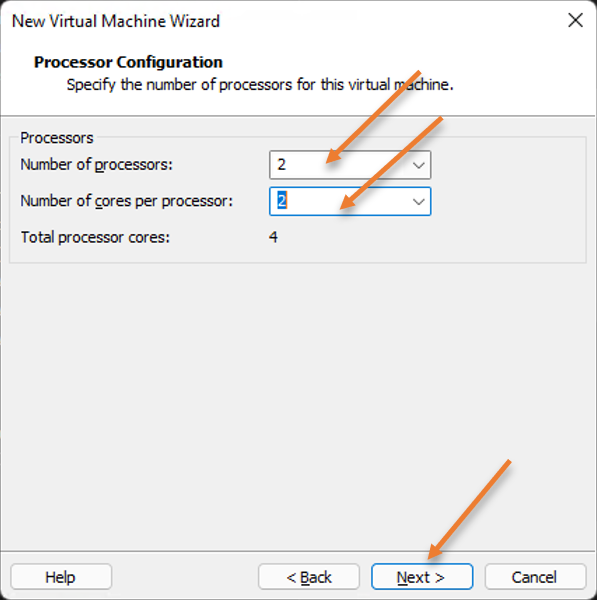
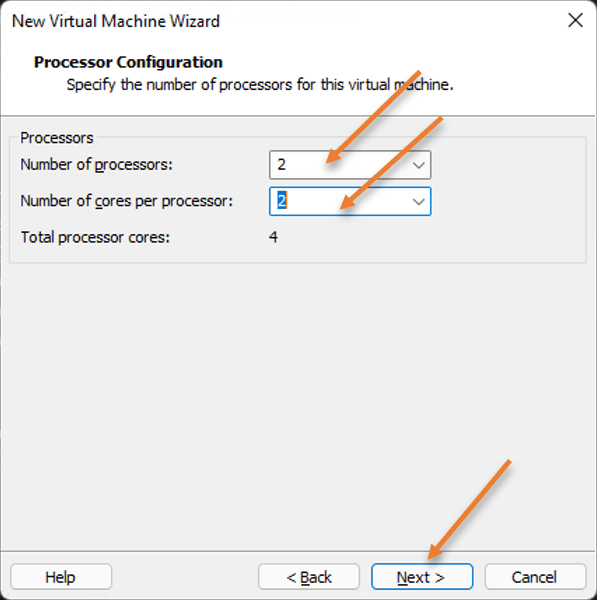
5. Configure the CPU.
I have about 12 cores of CPU in my PC, so I can safely provide 4 CPUs to the virtual machine as I require good performance.
So choose the Processors as 2.
Select the number of cores per processor as 2, and you will get a total of 4 processors.
Note: If your machine doesn’t have many resources, you can give less than 4 CPUs, as it will be based on the requirement.
After the selection, Click on Next.
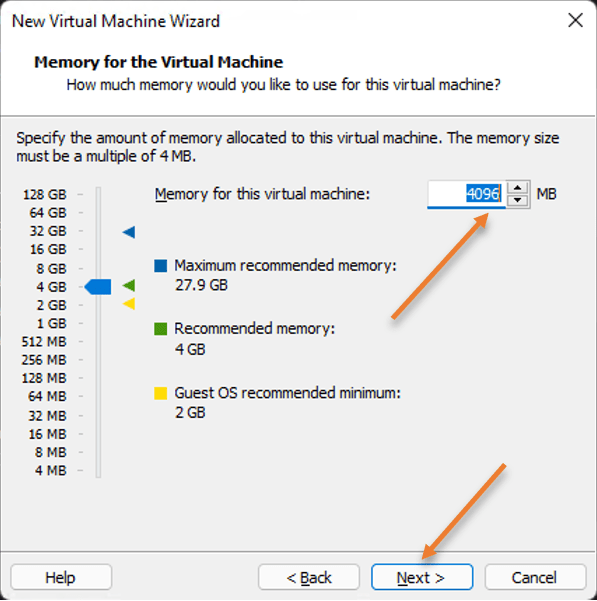
6. Configure the Memory.
If you will use this virtual machine for daily tasks and require you to open multiple applications, I would recommend giving 4GB of RAM. However, 2GB of ram will work just fine as well.
Click on next.

6. Configure the networking.
As I mentioned earlier, I would like this VM to be part of my Local area network, and my router should hand out the IP address to the VM directly.
Hence Choose – Use Bridged networking.
In case if you have difficulties getting the IP address to your VM using the bridge networking, you may read the article on how you can fix it.
If the fix doesn’t work, your alternate option will be to use Network address translation, and here your VM will get a NAtted IP from the host machine, with which the VM can go out to the internet.
Click on Next.


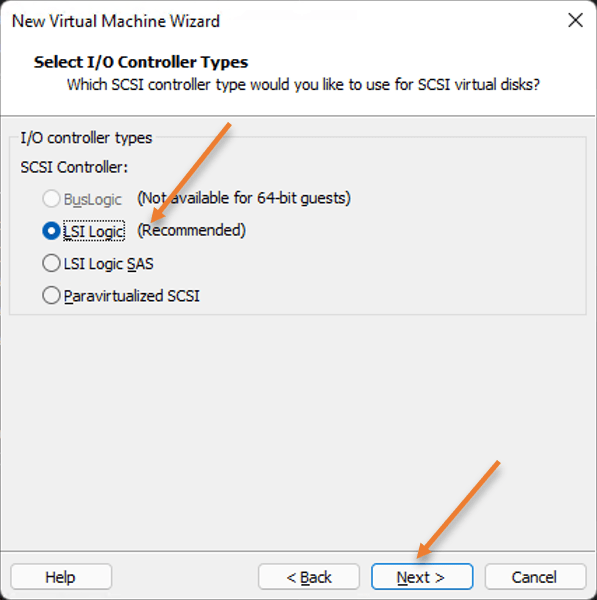
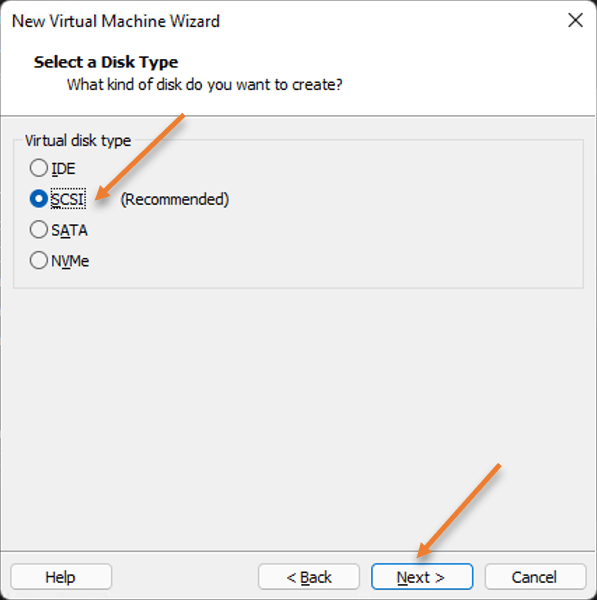
7. Choose the I/O Controller Types.
You can leave the default option here, i.e., the LSI logic, and click Next.

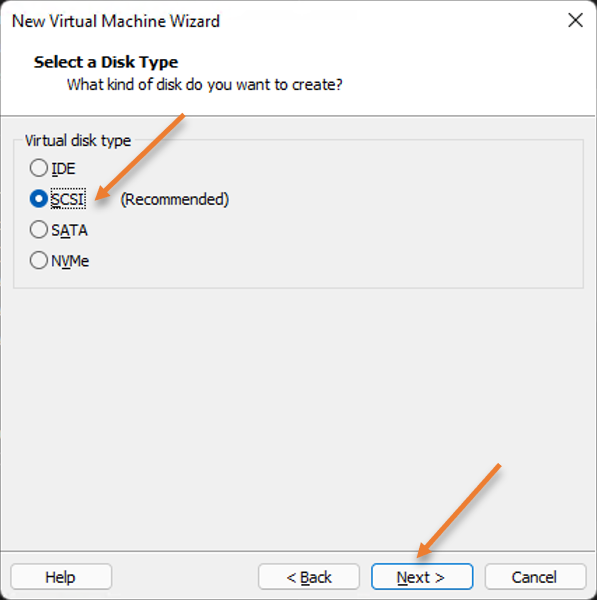
Choose SCSI as the disk type as well.
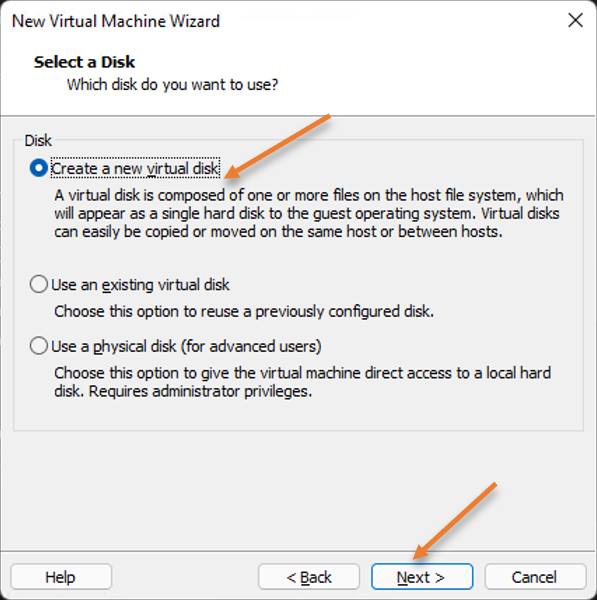
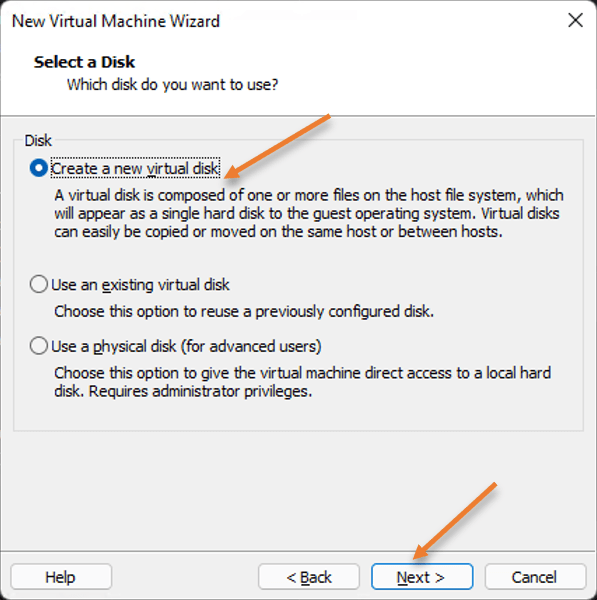
8. Create a virtual hard disk.
Just like a physical operating system requires a hard Disk, your virtual machine also requires a virtual hard disk to function.
Under disk, Choose Create a new virtual hard disk and click Next.
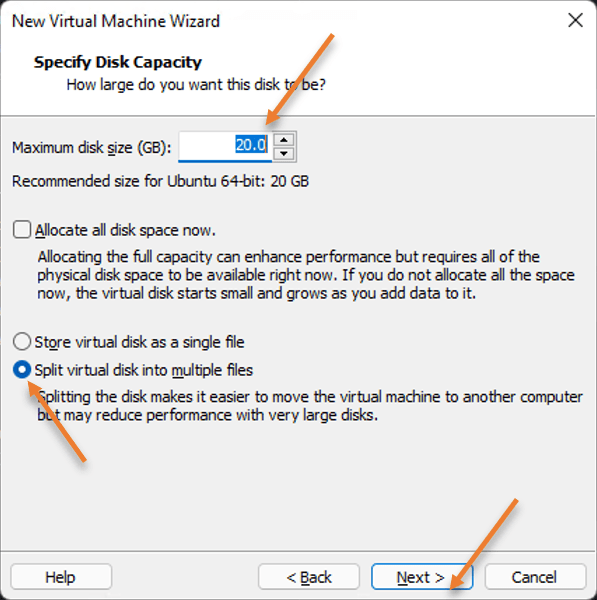
9. Define the storage size.
By default, VMware would assign 20GB of storage to the Ubuntu VM, and you can either increase or decrease the storage depending on your need.
I am okay with the 20GB of storage and choose Split virtual disk into multiple files and click Next.

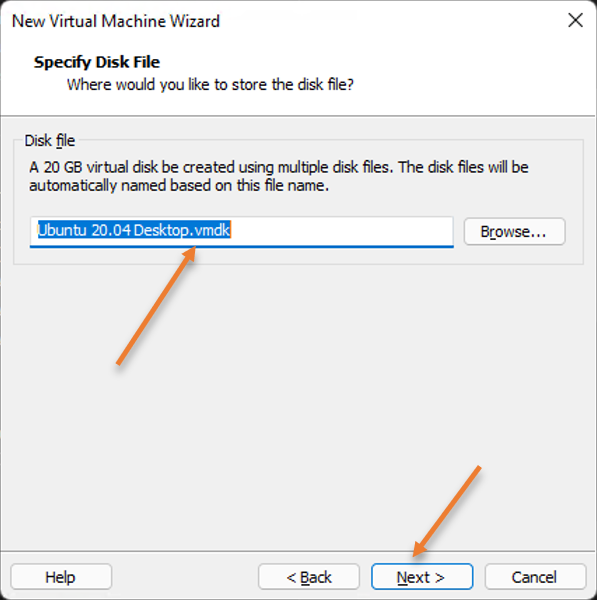
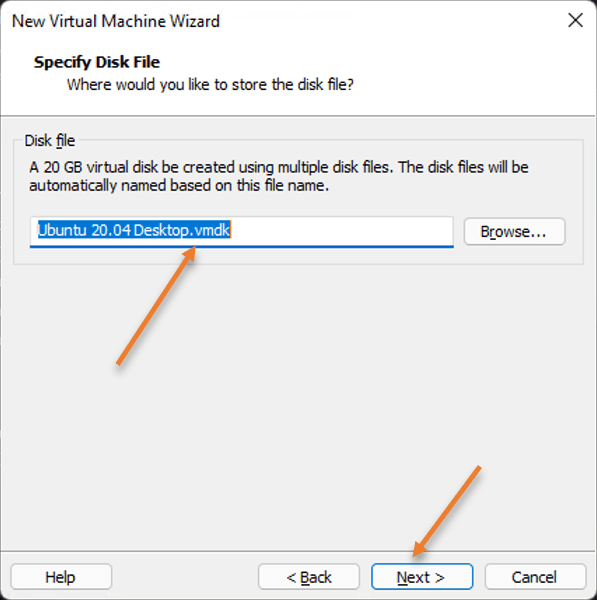
Specify the disk file.
You will be able to change the location of the virtual Hard disk files for your Ubuntu VM; if you want to make changes, you can do that else, leave the default and click Next.
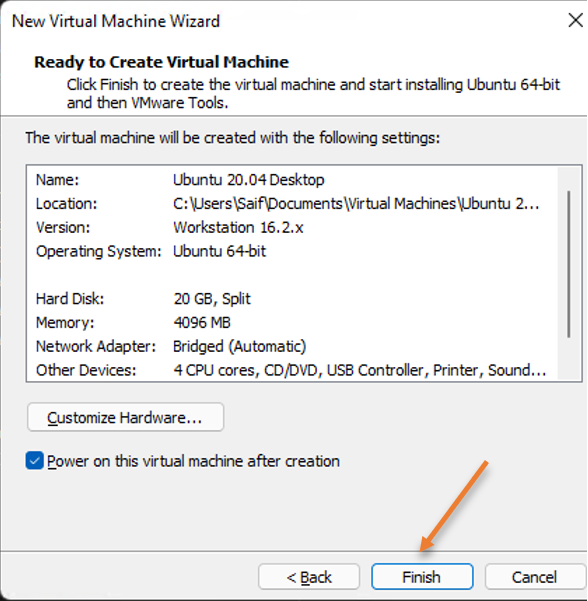
On the ready to create virtual machine window, you will get the properties of the ubuntu virtual machine that we will build, verify whether everything looks perfect, leave the power on the Virtual machine after creation checked, and click on Finish.

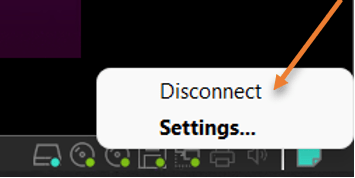
The Ubuntu 20.04 installation will begin; wait for a few seconds for the installation screen to load, after the Ubuntu will proceed with the installation automatically. While the installation is going on, you will have to disconnect the network because when the internet becomes available to the VM, it will start downloading the update automatically during the installation, further delaying the installation process.
To disconnect the network, right-click on the network icon on the VMware workstation and click on Disconnect.

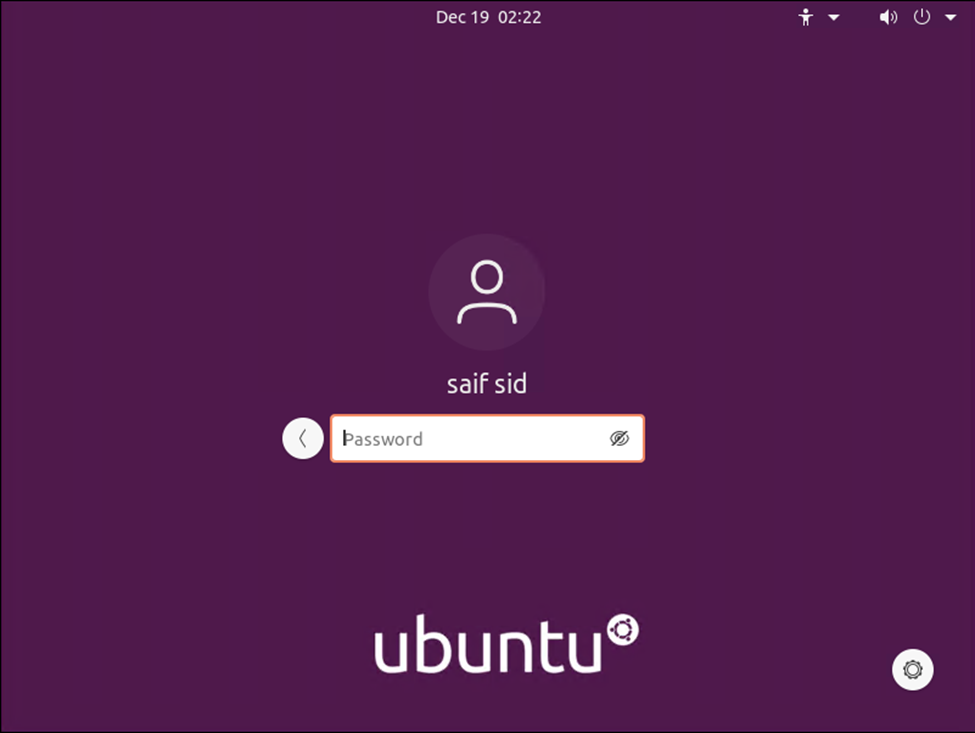
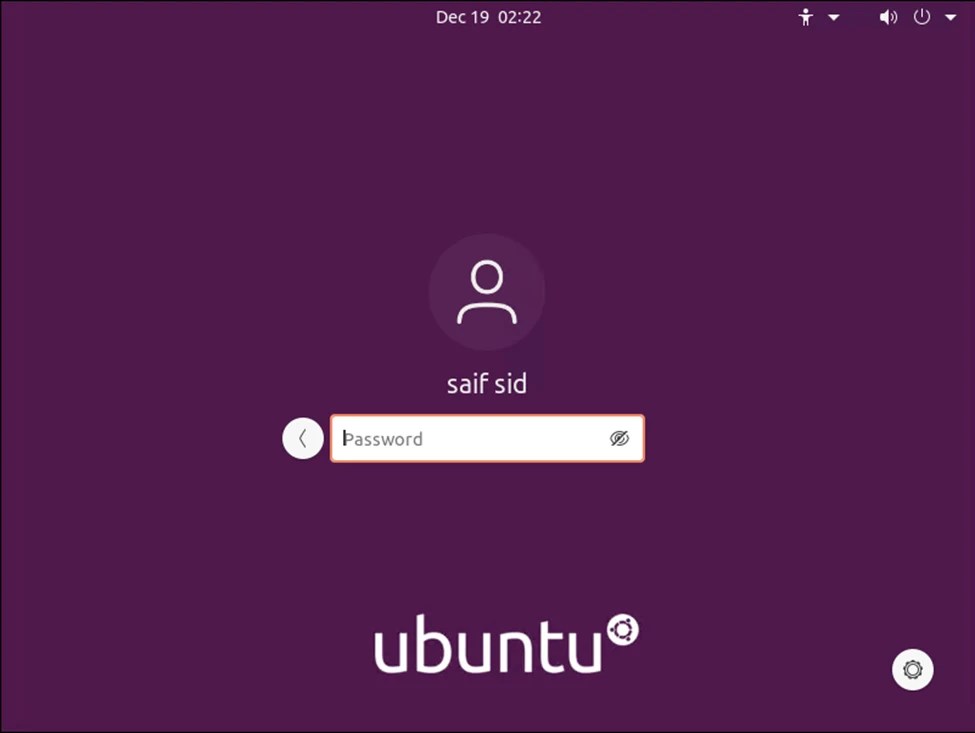
The installation is now complete, and you will be prompted to enter the credentials.
10. Install the VMware tools.
The VMware tool is a software package that acts as a driver, improving the virtual machine’s overall performance. The actual way to install the VMware tool is by clicking on VM on the top menu and Installing the VMware tools; however, that option will be grayed out in most cases.
So the only way we can install the VMware tools is by installing them via CLI, but that will have to go through the internet, and the network connection was disconnected during the installation; we will have to connect them back to begin the installation.
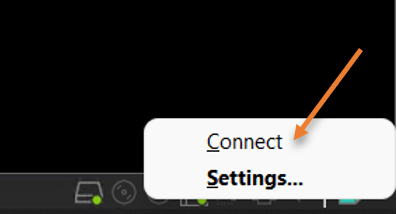
You may now connect to the internet.
Right-click on the network icon on the VMware workstation window and click on Connect.

Open the terminal and enter the below commands.
sudo apt update
sudo apt install open-vm-tools -y
Depending on your internet speed, the process will take some time, so please stand by.
In my installation, the install command couldn’t get all the dependencies; hence I had to run the command with –fix-mixing.
sudo apt install open-vm-tools -y –fix-missingAfter the installation is complete, you will see the desktop size gets resized to the actual screen, which is really cool.
That’s it, You have successfully installed Ubuntu 20.0.4 Desktop on your Vmware workstation.
Next, you can enable SSH access here by following the article here.
You could also change your IP address statically following here.