FortiGate is one of the popular NextGen firewalls used by many enterprise networks. In this blog, we will install the FortiGate firewall on the VMware workstation. After the installation, access the firewall via the management interface. We will enable DHCP configuration on the LAN side and create basic security and NAT policy to allow the inside users to go out to the internet.
How can we download the FortiGate firewall image for VMware?
Unlike other vendors, you don’t need a service agreement with FortiGate to download the software images. All you have to do is go to the FortiGate website here. If you have an account, you may type the email address and the password to sign in.
If you don’t have one, click on Register to create an account; sign back into the portal after your account is created.
- Choose VM images- You will be redirected to the download page of the FortiGate images.
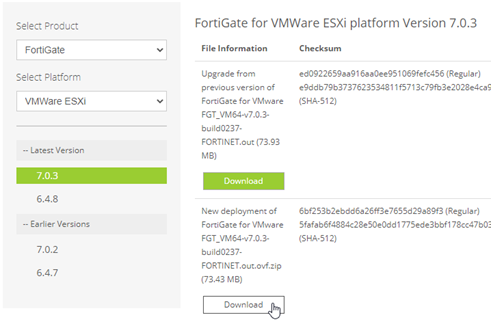
- Select product: choose Fortigate.
- Select Platform: VMware ESXi – You will get the links to download the new images.
- Do not choose an upgrade image. Select the new deployment one and click on Download.
At the time of this writing, 7.0.3 is the latest version.

Save the file in your machine.
Before you proceed, you need to have;
- Fortigate firewall ova image – we have already covered that.
- VMware workstation/Fusion – Click here to get VMware workstation and VMware fusion.
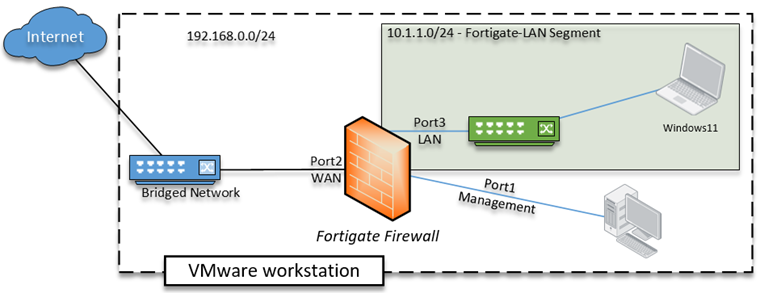
Below is the topology that we are going to use.
The FortiGate firewall deployed on the VMware workstation, with three networks, internet connectivity, is provided by my local area network. The VM’s in the LAN area will go out to the internet via the Fortigate firewall. Let’s see how we can do that.

Steps to install FortiGate virtual machine on VMware workstation.
1. Import FortiGate VM appliance.
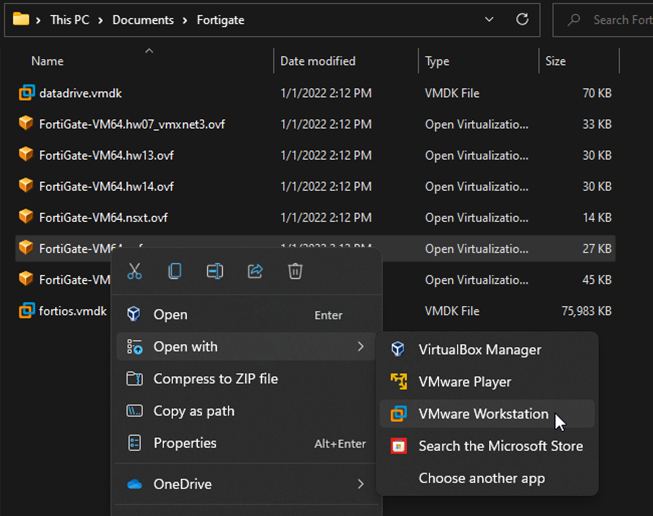
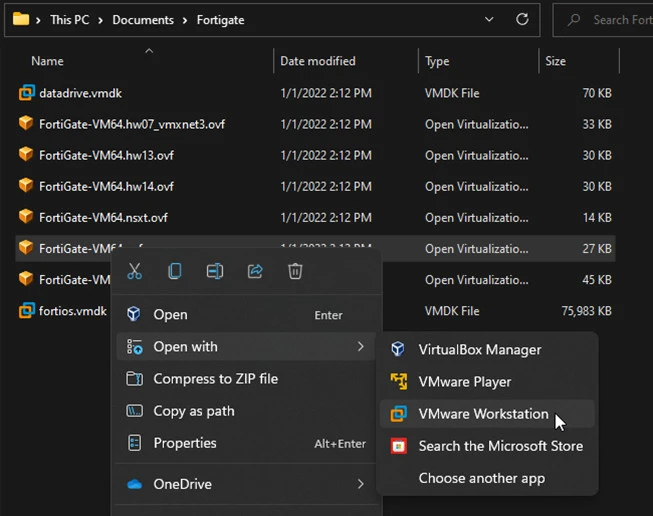
Open the downloaded file, and extract the files to a directory.
You will see a file called ‘FortiGate-VM64.ova’ right-click on it and click on open with VMware workstation.
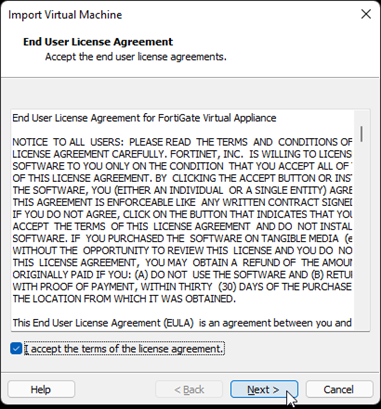
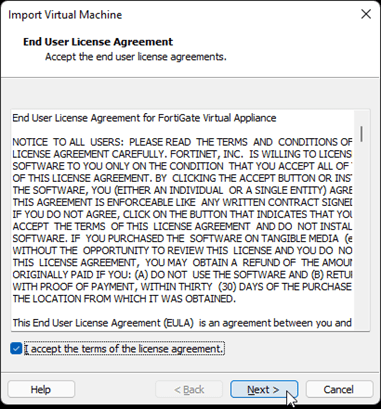
The VMWare application will now open up, and it will prompt you to accept the license agreement.
Accept the license agreement and click on next.
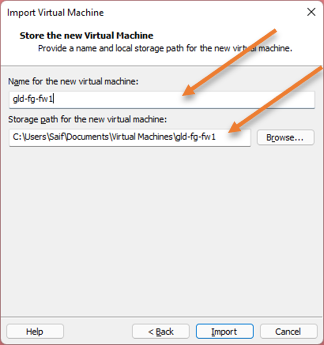
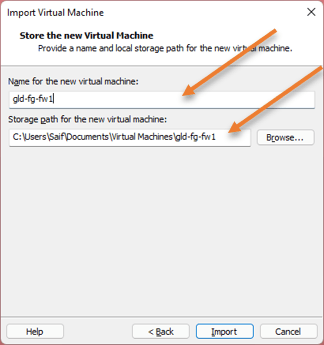
You will be asked to name the VM. And the location where you want to save the VM files. If you would like to change the location, you may do so here.
Click on import. The importing of the VM will begin.
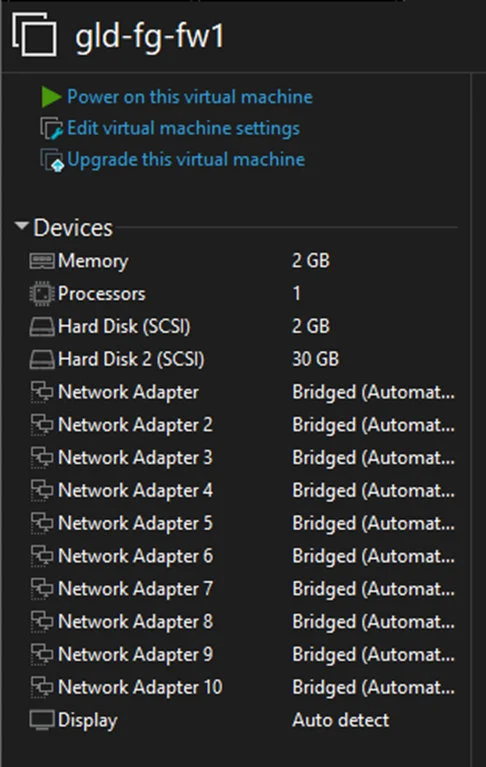
After a few seconds, the FortiGate VM will be imported to the VMWare workstation with ten bridged interfaces.

2. Configure the network interface.
As we have looked at the diagram, we don’t need all those 10 interfaces, instead, we will use three interfaces. The first one (Port1) for the management, the second one (Port2)for the WAN, and the third one (Port3)for the LAN.
Configure the Management interface.
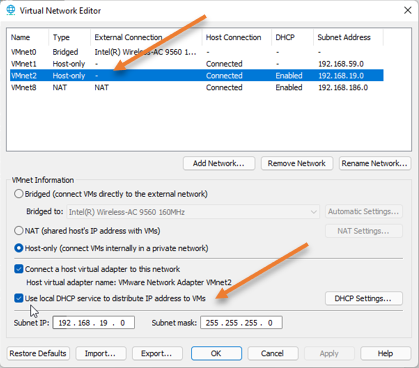
For the first interface we will use for management, hence we will use VMnet2 host-only adapter. Just make sure that it has DHCP service enabled on it.
- To verify the DHCP services are enabled for the VMnet2, In VMware workstation ->Edit-> Virtual Network Editor.
- In the pop up click on Change settings.
- You will be able to see all the details are now editable. You can confirm that the VMnet2 has DHCP enabled, You can also verify the VMnet0 is configured as Bridged mode, so we should be good.
In case if you don’t have VMnet2, you may click on Add network to add the VMnet2. While adding, make sure you choose host-only adapter and DHCP service is enabled.

Click on Ok.
Configure the WAN interface.
For the second interface, we are going to use bridged mode. That way, my local area network router will automatically assign an IP address to the WAN interface. Select the second interface. And leave the bridge interface default.
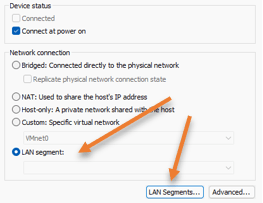
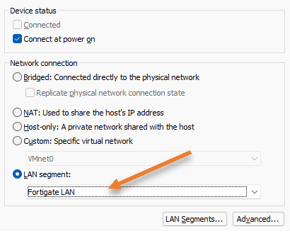
Configure the LAN interface.
We wanted to create a network where only the Virtual machine could communicate with each other and not with the host machine. So we need to create an isolated network here. If the virtual machine wants to go out to the internet, it has to go via the FortiGate appliance LAN interface that we will implement.
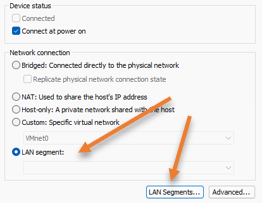
- Choose network adapter 3.
- On the right side, choose the LAN segment.
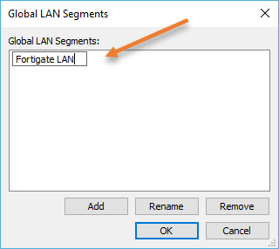
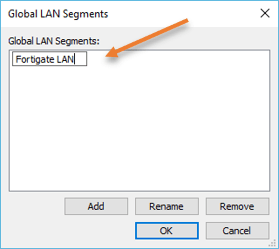
- Click on LAN segments, this will give you the pop up to create new LAN segment.
- I have named it as Fortigate LAN, and click on Ok.
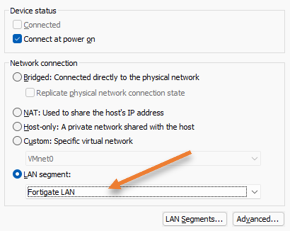
Choose the LAN segments as ‘Fortigate LAN’ and click on OK on the interface.
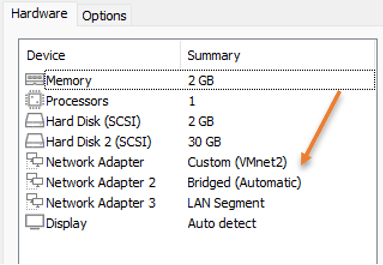
We configured all three interfaces, Hence let’s remove all the interfaces except those three.
- Remove the bridge interface from 4 to 10.
After the changes, the hardware configuration will look like below.

3. Power on the Virtual machine.
That’s it, we have completed the interface configuration on the VMware side.
Let’s go ahead and power on the FortiGate virtual machine.
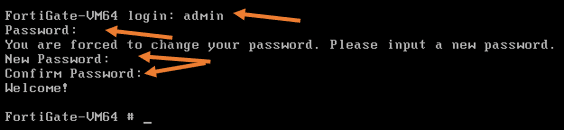
It will ask you to log in to VM after it is powered on.
The username of the VM will be admin, and the password is blank. So you can leave a blank password and hit enter. It will prompt you to set a new password, so enter the password and confirm the password again.

port 1 will get a management IP from the VMnet2 interface from the VMware DHCP service.

Port 2 still doesn’t have an IP because that port hasn’t been configured as a DHCP. Neither static, which we will look at it later.
4. Reset the license.
When you spin up the virtual machine, by default, it will have its license expired, and when you try to access the GUI using the management IP, you will get an error Evaluation license has expired. Upload a new license.

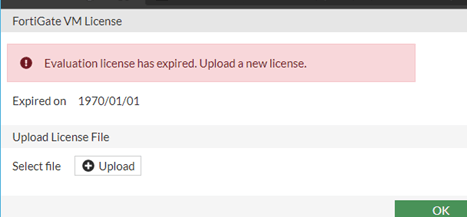
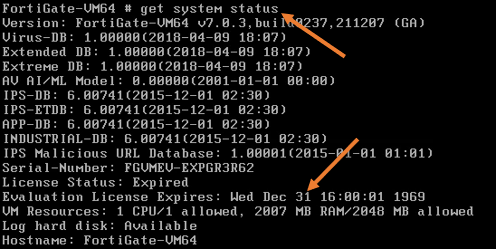
You can also see the system license status by typing the command get system status.
As you can see, the license is expired.

Let’s go ahead and reset the VM to factory default. After which the license will reset for another 16 days.
You may enter the command, execute factory details
After the VM has completed the factory default, it will be rebooted.
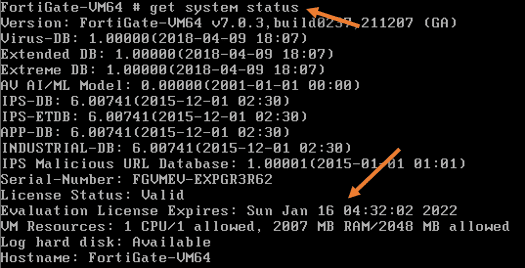
You may recheck the license status, and you should see it is extended for the next 16 days.

5. Configure the management access.
After the system is rebooted, you will be asked to enter creds. However, your old creds will not work cos we reset the VM, so you will have to reset the credentials again as we did before.
let’s go ahead and configure the management interface to access the firewall GUI and the SSH into the firewall from remote.
Let’s configure the management interface.
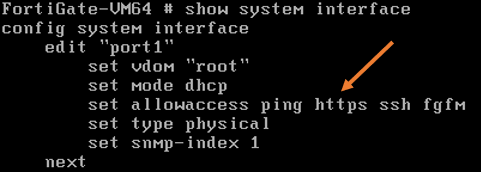
By default, it will have the following service enabled on the port – ping, HTTPS, ssh fgfM.
To see the running configuration of the interface, you may enter the command show system interface.

Because we are running the trial version of the FortiGate firewall, you cannot access the firewall GUI using the HTTPS protocol. Hence you will have to use HTTP instead.
Add the protocol along with the others on port1.
FortiGate-VM64 # config system interface
FortiGate-VM64 (interface) # edit port1
FortiGate-VM64 (port1) # set allowaccess http https ping ssh
FortiGate-VM64 (port1) # set distance 10
FortiGate-VM64 (port1) # end
FortiGate-VM64 #
Note: Setting the distance to 1You cannot add just http and hope other services will work. You will have to add all the services any time you modify the services on the management port.
6. Configure WAN interface
While at the CLI, Let’s configure port2 as DHCP service for IP.
Config system interface.
edit port2
set mode dhcp – enabling the dhcp service on the port2.
set allowaccess ping– Allowing icmp traffic.
set role wan
end
7. Configure the LAN Address.
Config system interface.
edit port3
set mode static
set ip 10.1.1.1/24
set role lan
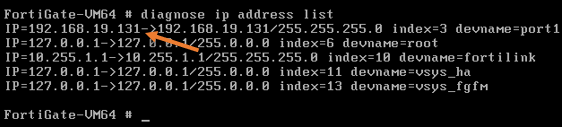
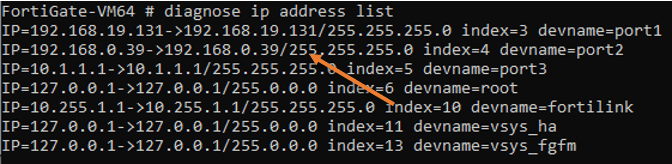
endYou may check the IP address list now with the command diagnose IP address list, and you should see the IP address for all three ports.
The port 2 IP address was received from the local DHCP server. And the FortiGate WAN has become part of my local area network.
Finally, port3 will be configured with my Virtual machine LAN segment network.

In case if you have trouble getting the IP address on the bridged interface, follow the article here to troubleshoot it.
8. Access the FortiGate GUI.
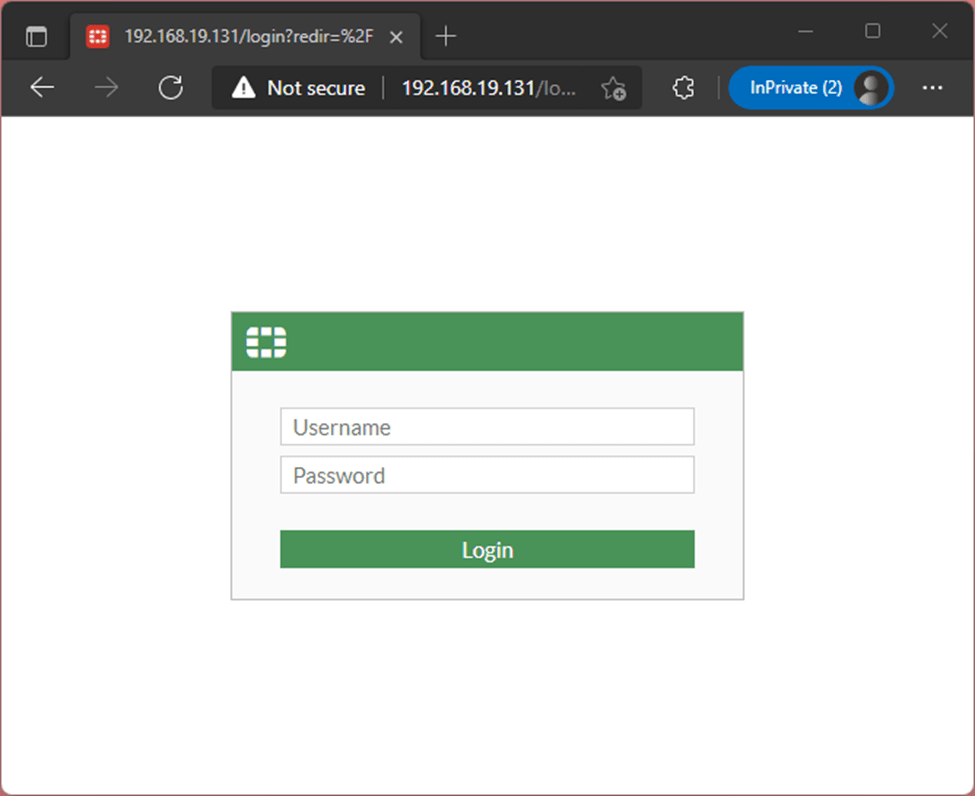
We have already got the IP address on the management interface. Let’s go ahead and access the Web GUI using the management interface on port1. Which is 192.168.19.131
So you have to type http://192.168.19.131
As you can see, we now got the login prompt for the Fortigate firewall GUI.
You may log into the VM using the username as admin and the password that you have set using the CLI.

On the FortiGate Setup, you may click on Later.
You can now access the FortiGate GUI without any license error this time.
9. Test the VM with a LAB.
Let’s put all these things together, create a lab, and see if everything is working the way it should.
We already have a windows 11 machine running on the FortiGate, connected to the LAN segment network that we created.
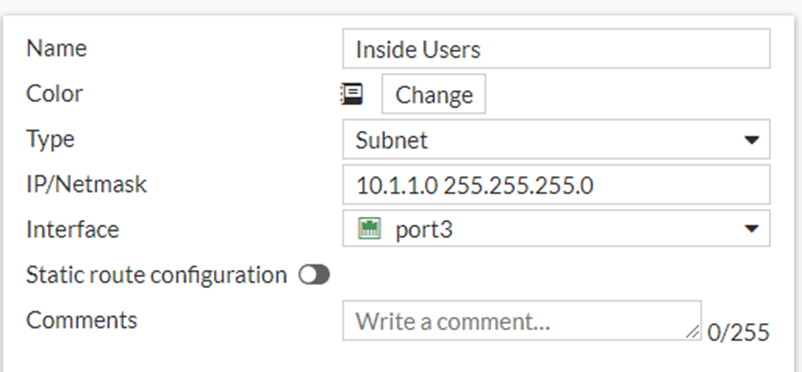
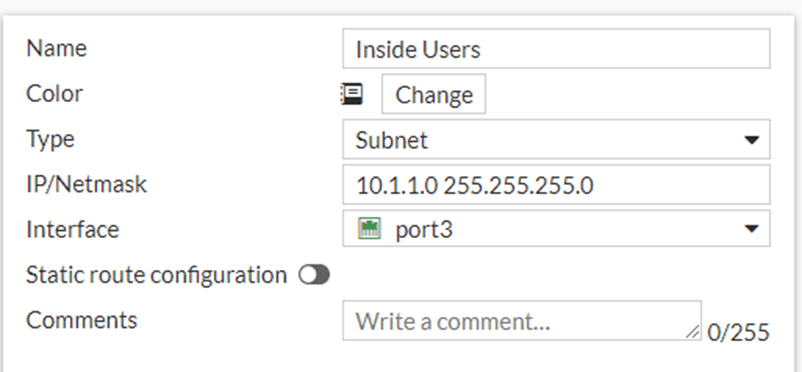
Configure the Address object.
Before we go ahead and create a policy, lets go ahead and create an Address object, which you can call later into the policies.
Policy&Objects -> Addresses -> Create New-> Address.
Configure the Policy.
We will create a security and NAT policy so the VM’s on the LAN side will go out to the internet.
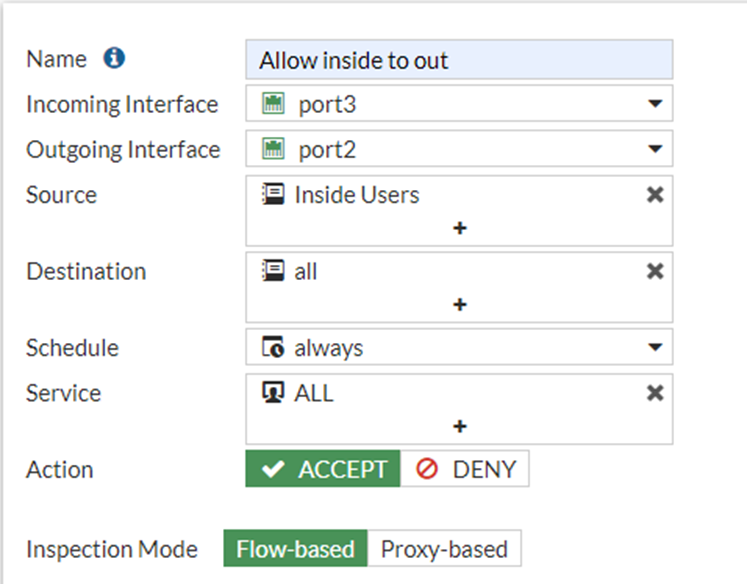
Goto Policy& Objects-> Firewall Policy-> Create Policy.
Name : Provide a name for example ‘Allow inside to out’
Incoming interface : We get the traffic from the LAN side on port3, hence choose port3.
Outgoing interface : The outgoing interface is where the internet is connected to, which is port2.
Source : You could keep it as All, however, I created an address called Inside hosts, so call the address group here.

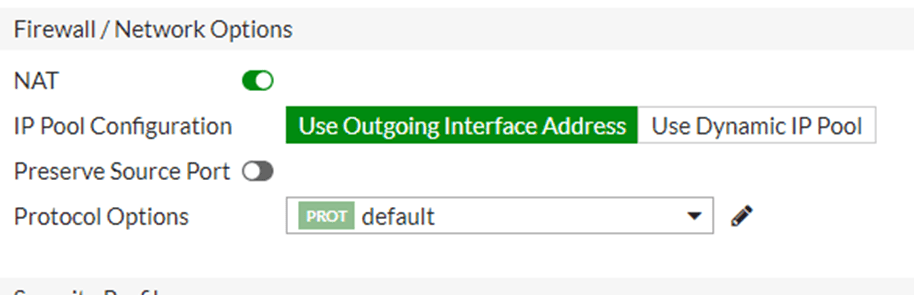
Configure the NAT.
One good thing about FortiGate is that we can define the NAT policy right within the Security Policy.
You don’t have to basically do anything here, just leave the default that will take care of the NAT configuration.

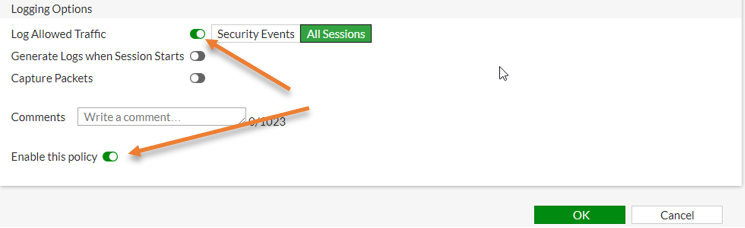
You can also, enable the logs for this traffic that will be handy during the troubleshooting.
I am choosing All sessions and clicking on OK.

Configure the LAN/Inside network.
Finally, let’s configure the LAN side of the firewall.
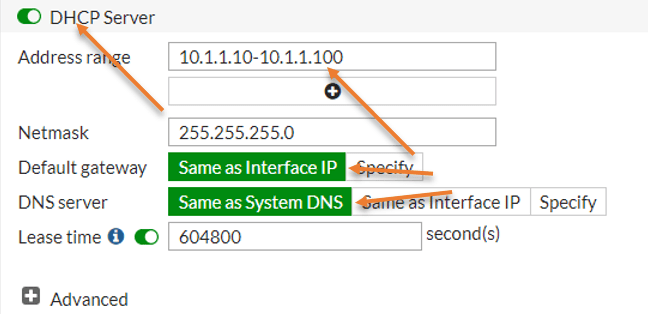
We have already configured the IP address for the landside. We just have to enable the DHCP service for the VM network.
Network-> Interfaces -> Port3
Scroll down and Enable the DHCP server.
- Address range – Though I could configure over 250 IP addresses for the DHCP service, I am adding only 90 Addresses, so type 10.1.1.10 – 10.1.1.100, you may change it based on your requirement.
- Ntmask : 255.255.255.0.
- Default Gateway : Same as interface IP.
- DNS server : Same as System DNS.
Click on Ok.

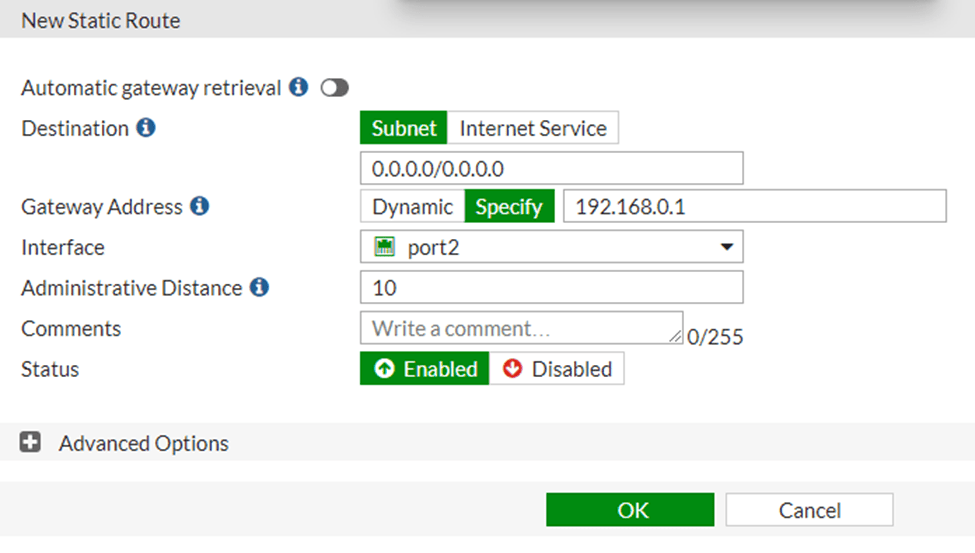
Static route configuration.
For the hosts in our LAN network to go out to the internet the security and NAT policy won’t be sufficient, you will also have to define the default route for the same.
If you are using the DHCP Ip address on the firewall WAN side, it will have by default picked up the default gateway that will act as the next hop for all the traffic.
However, if you have a static IP address, you need to make sure you added a static route for the internet.
Which you can do it by going into Network -> Static routes-> Create New.

Test the configuration.
If we have done everything perfectly thus far, the LAN side host will get an Ip address automatically, and it can out to the internet automatically.
Let’s spin up a virtual machine in the VMware workstation.
Read also,
Windows 11 on VMware workstation – How to install it?
Install Ubuntu On VMware Workstation pro
Install Linux Mint On VMware Workstation.
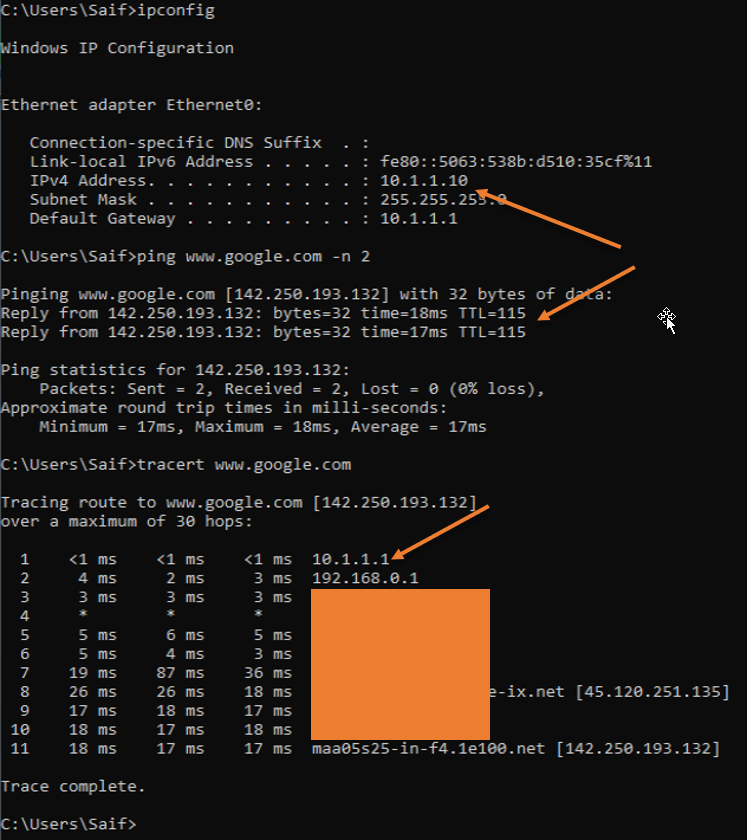
As soon as the windows 11 VM started, it has got an IP address 10.1.1.10 from the DHCP range 10.1.1.0/24 that we configured on the firewall LAN side.
I can also reach the internet.
Traceroute shows my internet traffic is going via my FortiGate firewall inside the interface.