
When I first delved into Ansible automation, my curiosity led me to explore the process of backing up my entire infrastructure. However, I couldn’t help but feel overwhelmed by the amount of work it entailed, causing me to hesitate for quite some time. Eventually, I mustered up the courage to give it a try, and to my surprise, using Ansible to take backups wasn’t as daunting as I had initially imagined.
In this blog article, I want to share my journey of learning how to take backups of Cisco IOS devices using Ansible. Moreover, I’ll guide you through automating the entire backup procedure using a cron job, ensuring that you always have the most up-to-date file whenever you run the backup.
To make it easier to distinguish between different versions of the backup files, I decided to include the date, time, along with the device name in the file names. This way, you’ll know exactly which file corresponds to which date.
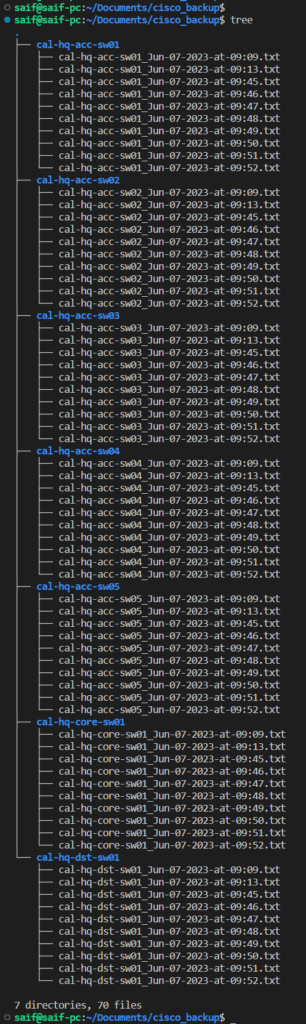
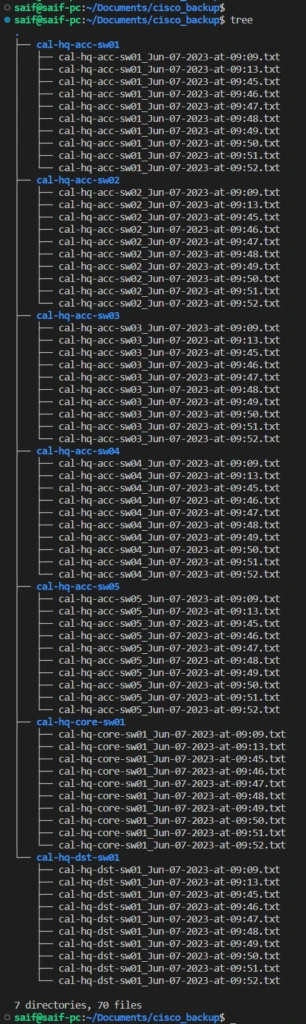
Below is the example of a backup that we have taken using ansible every 1 mins 😀
    ├── cal-hq-dst-sw01_Jun-07-2023-at-09:45.txt
    ├── cal-hq-dst-sw01_Jun-07-2023-at-09:46.txt
    ├── cal-hq-dst-sw01_Jun-07-2023-at-09:47.txt
    ├── cal-hq-dst-sw01_Jun-07-2023-at-09:48.txt
What are the things you need before taking an ansible backup?
As we discussed in our previous article, the first requirement for taking a backup of a Cisco switch/router’s running configuration is to have a functioning ansible control node that is always operational. If you haven’t set up ansible for Cisco ios automation yet, you can refer to the article mentioned here on how to setup ansible control node for network automation.
Additionally, the devices you intend to back up should have SSH enabled, along with either local credentials or radius authentication. It is important to have the enable secret or password properly configured.
The reason behind these prerequisites is that when we execute a playbook, ansible establishes an SSH connection to the device to retrieve the necessary information. In order for ansible to issue the ‘show running config’ command, privileged access is required.
Can we restore the switch using the host_vars?
When you migrate your Cisco network infrastructure to infrastructure as code with Ansible, you’ll discover that most of the running configurations are also stored in YAML format in the host_vars directory. This essentially means that you have the complete running configuration in the host_vars directory as well, but in YAML format.
Now, you might be wondering why you should bother taking a backup of the entire running configuration when you already have them in host_vars. Well, even though you have the running configuration in host_vars, it will take a few minutes to restore the entire configuration using host_vars in case of a switch restore using Ansible.
On the other hand, if you have a backup, you can simply SSH into the device and paste the running config, which is much faster.
In conclusion, utilising host_vars allows you to store the running configurations, but having a backup handy can save you time when it comes to restoring a switch. However, when it comes to configuration changes, Ansible is the winner.
Steps to automate cisco IOS backup using ansible.
1. Create a directory for the backup.
When it comes to backing up Ansible, it’s crucial to have a designated directory where you can securely store your files.
Select a location that suits your preferences.
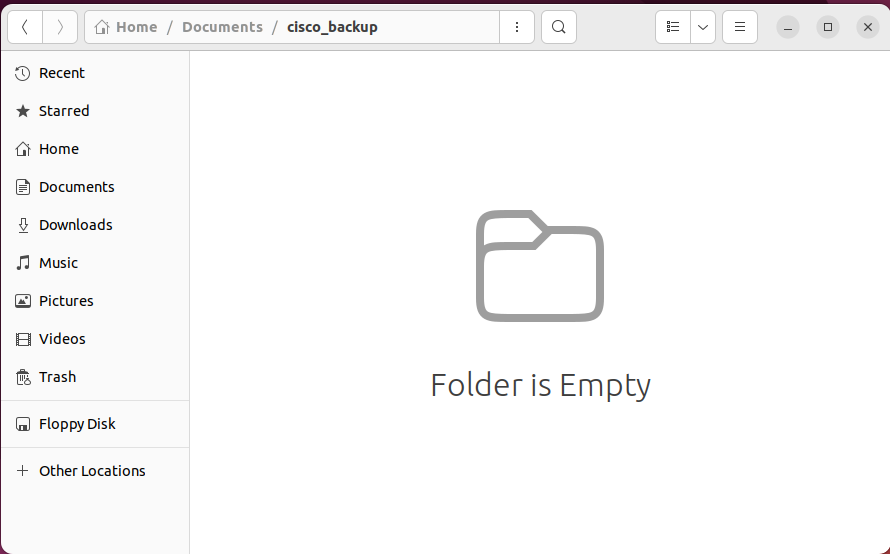
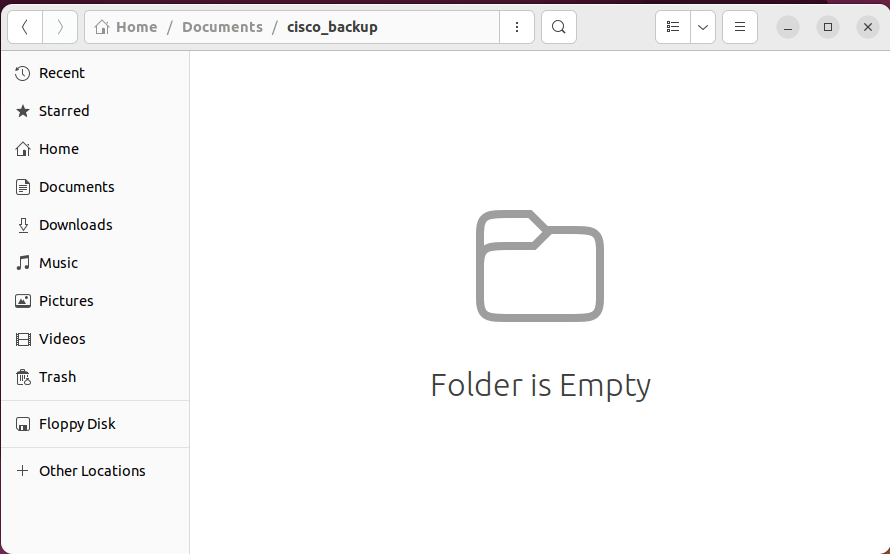
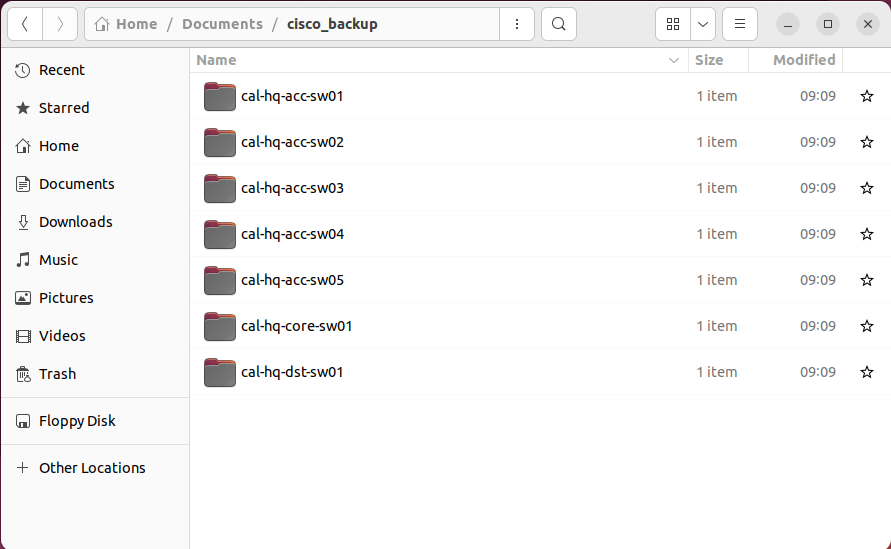
In my case, since I’m using an Ubuntu machine for backup, I opted for the “Documents” folder and created a separate directory named “cisco_backup.”
Therefore, we’ll define this destination as the target storage location for the backup.
2. Setup the playbook for Cisco IOS backup.
Here’s my ansible directory structure. You can find detailed information about how I’ve configured the ansible control node for network automation along with the folder structure in this blog post.
For this lab, I’m utilising a switch, but the steps outlined here are also applicable to routers. To begin creating the playbook for Cisco IOS backup, navigate to the playbook directory.
├── host_vars
│   ├── production
│   │   ├── blr
│   │   ├── cal
│   │   └── lon
│   └── staging
│       └── cal_lab
├── inventories
│   ├── production
│   │   ├── blr
│   │   ├── cal
│   │   └── lon
│   └── staging
│       └── cal_lab
├── playbooks
└── roles
Create a file called cisco_ios_backup.yml and add the following code:
In this playbook, we’ll capture the current date and time and take a backup of the hosts group, saving it in the documents folder.
---
- name: take the switch backup specified
hosts: cal # here you mention the group name that would like to backup
gather_facts: no
tasks:
- name: Capture backup date and time
set_fact:
backup_date: "{{ lookup('pipe', 'date +%b-%d-%Y') }}"
backup_time: "{{ lookup('pipe', 'date +%H:%M') }}"
- name: Backup the entire config
ios_config:
backup: yes
backup_options:
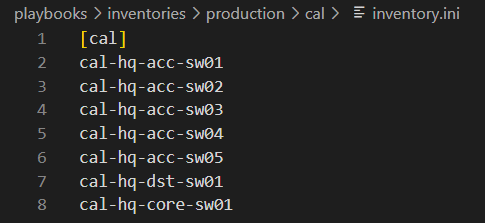
filename: "{{ inventory_hostname | lower }}_{{ backup_date }}-at-{{ backup_time }}.txt"At the moment, I have about 7 switches in my ansible inventory file, as we are running the playbook against ‘cal’ group, we will have the backup of all the switches.

And the destination folder you can see, it is empty at the moment.
3. Backup Cisco IOS running config using the ansible playbook.
Lets run the playbook, if we have done everything correctly, we should get 7 configuration files from each device in the cal directory.
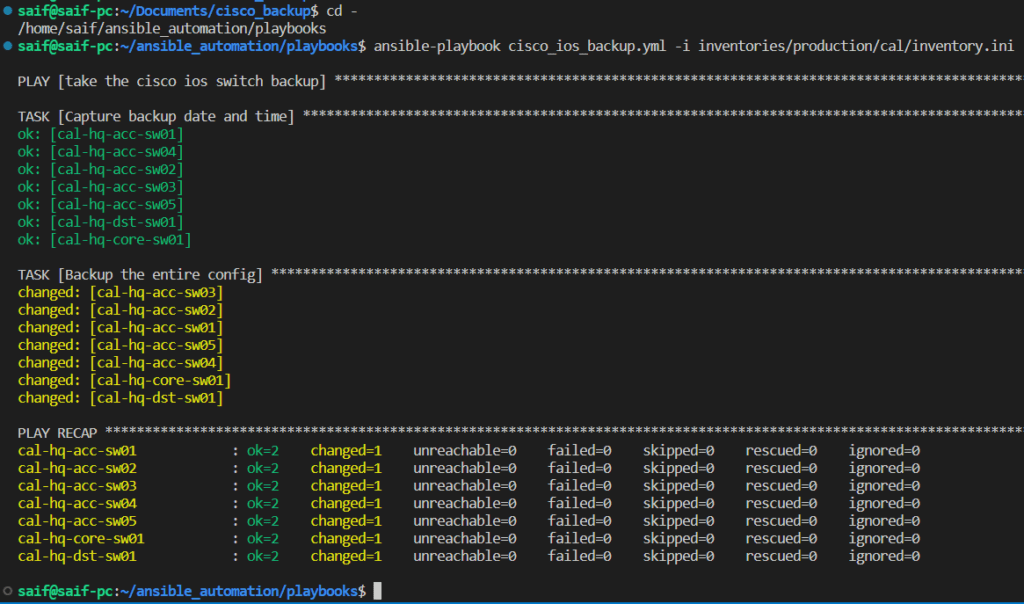
To run the playbook, you can run ansible-playbook cisco_ios_backup.yml -i inventories/production/cal/inventory.ini
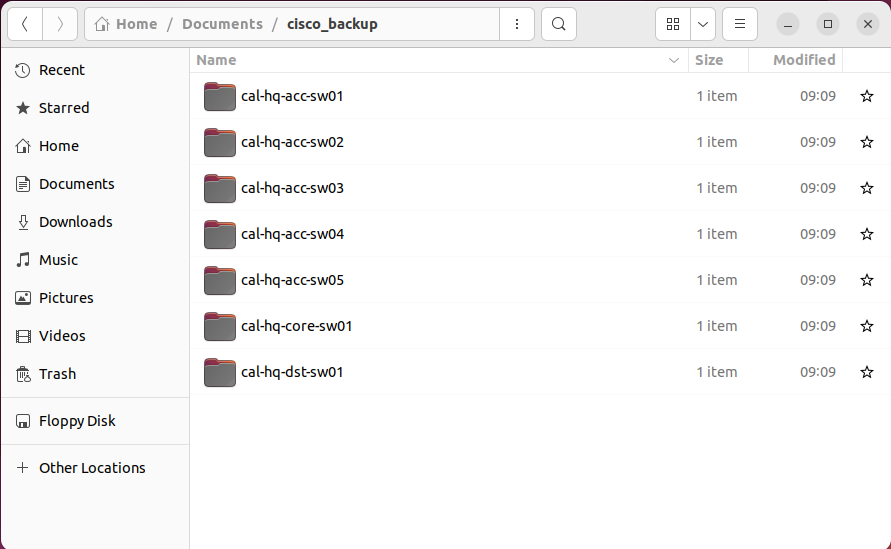
As you can see, all the tasks went successfully. Let’s look at the backup folder.


4. Verify the Cisco IOS backup.
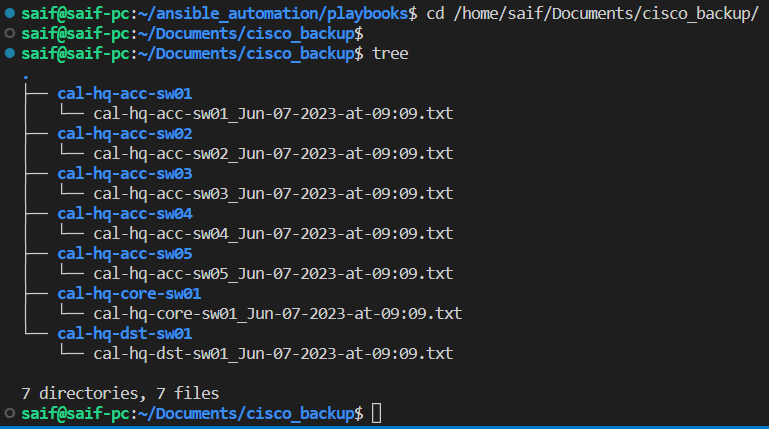
In the backup folder, you’ll find individual directories dedicated to each device. And if you take a glance at the modified time, you’ll notice they’re all the same. Now, let’s dive into the content of each directory by using the trusty “tree” command.
From the playbook folder, let’s move to the backup folder and as you can see, each directory has a device backup file as text format with device name plus the time.

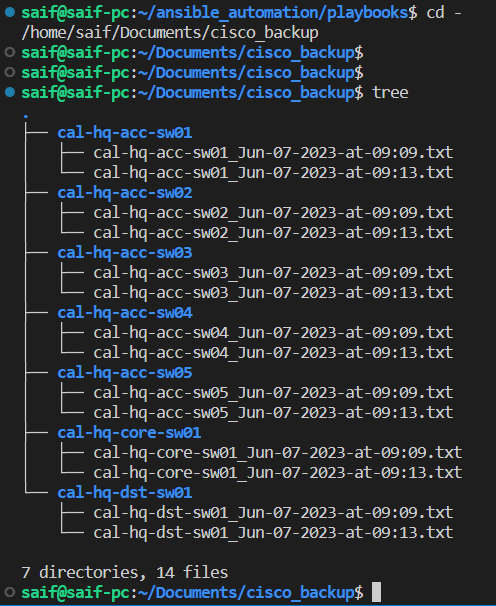
Let’s go back to the playbook directory again and run the playbook.
And we have run the playbook successfully again.

When you look at the files now, you see another backup file created with different time. This is good, because, you dont want to replace the existing file, each time when you run the backup, it will create a separate file because the name has time in it and it will different at each time.

5. Automate the ansible backup.
We’ve executed the playbook flawlessly, and now it’s time to streamline this process through automation.
To automate the procedure, you can employ a Linux tool known as cronjob.
By utilizing cronjob, you can schedule when you want to back up the configuration file.
The frequency of backups varies depending on the environment. It could be set for every midnight or once a week. Each environment has distinct requirements for backup frequency.
Begin by locating the exact path of the playbook file.
While in the playbook directory, execute the command “pwd” to determine the current directory, and then run “ls -l” to list the files.
Take a note of both the playbook directory and the playbook file.
saif@saif-pc:~/ansible_automation/playbooks$ pwd
/home/saif/ansible_automation/playbooks
saif@saif-pc:~/ansible_automation/playbooks$ ls -l
total 12
-rw-rw-r-- 1 saif saif  604 Jun  7 09:01 cisco_ios_backup.yml
-rw-rw-r-- 1 saif saif  514 Jun  5 22:19 cisco_ios_playbook.yml
-rw-rw-r-- 1 saif saif 1014 Jun  4 17:44 cisco_switch_playbook.yml
lrwxrwxrwx 1 saif saif   12 May 30 09:50 host_vars -> ../host_vars
lrwxrwxrwx 1 saif saif   14 May 30 09:50 inventories -> ../inventories
lrwxrwxrwx 1 saif saif    8 May 30 09:50 roles -> ../roles
saif@saif-pc:~/ansible_automation/playbooks$
In my case, the playbook file location will be /home/saif/ansible_automation/playbooks/cisco_ios_backup.yml
1. Run the ansible cronjob.
For the testing, I’ve decided to run the backup every 1 minute. Once I’m satisfied with the backup, I can change the timing to 24 hours.
Note: Please be very careful when running it every 1 minute because if you forget to stop it, the backup process will continue and eventually fill up the server.
To set up the cronjob to run every 1 minute, use the following command:
*/1 * * * * ansible-playbook /home/saif/ansible_automation/playbooks/cisco_ios_backup.yml -i /home/saif/ansible_automation/inventories/production/cal/inventory.ini >> /home/saif/cron.log 2>&1
When running the cron job for the first time, type crontab -e. It will prompt you to choose an editor of your choice, which will be the default editor going forward. Select the desired editor.
I personally choose the first option, which is nano.
saif@saif-pc:~/Documents/cisco_backup$ crontab -e
no crontab for saif - using an empty one

Select an editor.  To change later, run 'select-editor'.
  1. /bin/nano        <---- easiest
  2. /usr/bin/vim.tiny
  3. /bin/ed

Choose 1-3 [1]: 1
A new file will open.
At the bottom of the file, paste the following:
*/1 * * * * ansible-playbook /home/saif/ansible_automation/playbooks/cisco_ios_backup.yml -i /home/saif/ansible_automation/inventories/production/cal/inventory.ini >> /home/saif/cron.log 2>&1
By doing this, not only will the cron job run, but it will also create a log file at /home/saif/cron.log and capture both the output and errors. This way, if anything goes wrong, we can review it in the log file.
After setting up the cronjob, I left it for 8 minutes, stepped away, and then came back to check my log folder.
In the logs, I could see that the ansible playbook was run successfully.
saif@saif-pc:~/Documents/cisco_backup$ tail -f /home/saif/cron.log

PLAY RECAP *********************************************************************
cal-hq-acc-sw01            : ok=2    changed=1    unreachable=0    failed=0    skipped=0    rescued=0    ignored=0
cal-hq-acc-sw02            : ok=2    changed=1    unreachable=0    failed=0    skipped=0    rescued=0    ignored=0
cal-hq-acc-sw03            : ok=2    changed=1    unreachable=0    failed=0    skipped=0    rescued=0    ignored=0
cal-hq-acc-sw04            : ok=2    changed=1    unreachable=0    failed=0    skipped=0    rescued=0    ignored=0
cal-hq-acc-sw05            : ok=2    changed=1    unreachable=0    failed=0    skipped=0    rescued=0    ignored=0
cal-hq-core-sw01           : ok=2    changed=1    unreachable=0    failed=0    skipped=0    rescued=0    ignored=0
cal-hq-dst-sw01            : ok=2    changed=1    unreachable=0    failed=0    skipped=0    rescued=0    ignored=0
I noticed that around 8 files were created in each directory, from 9:45 to 09:52, awesome, that is great! And that is what we expected.
However, running the backup like this continuously is not feasible. Imagine if I were to run it every single minute, it would create 1440 files in the directory for the next 24hours, which is not desirable.
2. Run the backup for every 24 hours.
I need to run this cron job every 24 hours, every day. Now that I’ve confirmed the ansible backup job is working smoothly in the cron job, I’ll go ahead and update the command to schedule the backup every 24 hours.
To execute the cron job daily at 24-hour intervals, you can use the following command in the cron job:
- Type “crontab -e” to open the cron job editor.
- Scroll to the very bottom and add the command below:
0 0 * * * ansible-playbook /home/saif/ansible_automation/playbooks/cisco_ios_backup.yml -i /home/saif/ansible_automation/inventories/production/cal/inventory.ini >> /home/saif/cron.log 2>&1That’s how you can conveniently back up Cisco IOS devices, whether they are switches or routers, using ansible. The best part is that you only need a Linux host to run the cron job, a playbook, and sufficient storage. Once you have these, you’re all set! Moreover it is free and open source too!