
In my previous blog post, we installed the PFsense firewall on the AWS cloud. When you have Psense firewall installed on the AWS side, you might want to connect to it over VPN as an admin and allow VPN access to your end-users if they are required to get into some AWS resources through pfsense. The solution for that is to use OpenVPN from PFsense.
With OpenVPN, anyone on the internet with the VPN configuration can securely connect to the pfsense firewall. It is ideal for those who connect from home and people who frequently travel to access the AWS resource securely.
There is, however, another VPN solution from pfsense called IPsec, which is not the same thing, though both are Virtual private networks and use the internet transport to secure the VPN tunnel. IPsec is mainly used to connect two different sites, and the remote site edge router should support IPsec.
One of my previous blog posts covers how you can install OpenVPN on an Onprem data center or a branch. This blog will establish an OpenVPN on AWS Cloud using PFsense.
Does OpenVPN on pfsense add more cost on AWS?
We already deployed PFsense plus on the AWS, and you will be charged for the pfsense AWS subscription and the instance fee, based on the size you use. Apart from that, there will be a very minimal cost you have to pay for bandwidth usage. There won’t be any charge for data coming into the AWS. However, the charges are applicable only for the data that goes out.
And that’s the only charge you have to pay, the OpenVPN is a built-in feature of pfsense, and you don’t have to pay anything extra for that.
Let’s go ahead and configure pfsense OpenVPN on AWS.
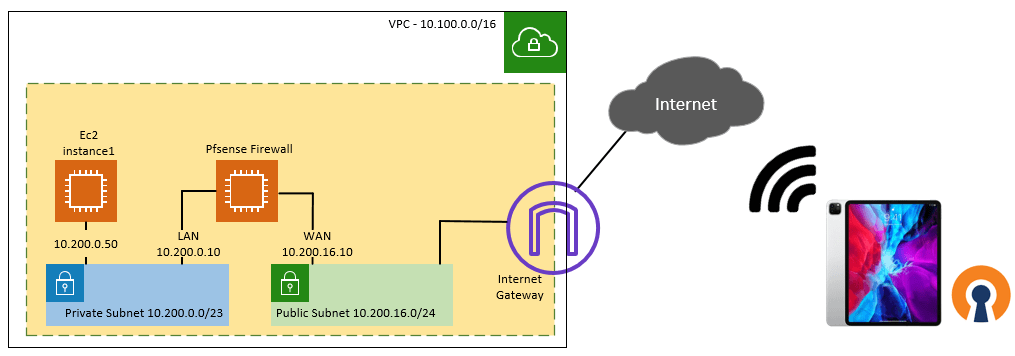
Below is the topology that we are going to use.
We have AWS VPC with a private and public subnet, a pfsense firewall WAN side connected to the public subnet, and the LAN side connected to the Private subnet. We also have another ec2 host (10.200.0.50) in the private subnet. After we build the OpenVPN setup, your client will be able to connect to the pfsense firewall from anywhere around the world as long as it has internet access. Afterwhich it can reach any devices in the AWS VPC. In this case, we will connect the VPN on my iPad and test the reachability to the host in the private subnet over VPN.

Steps to configure OpenVPN on pfsense in AWS.
1. Deploy the Pfsense on AWS.
We have already deployed the Pfsense on the AWS side. If you have not done it already, you may follow the article here to deploy the pfsense firewall on the AWS cloud.
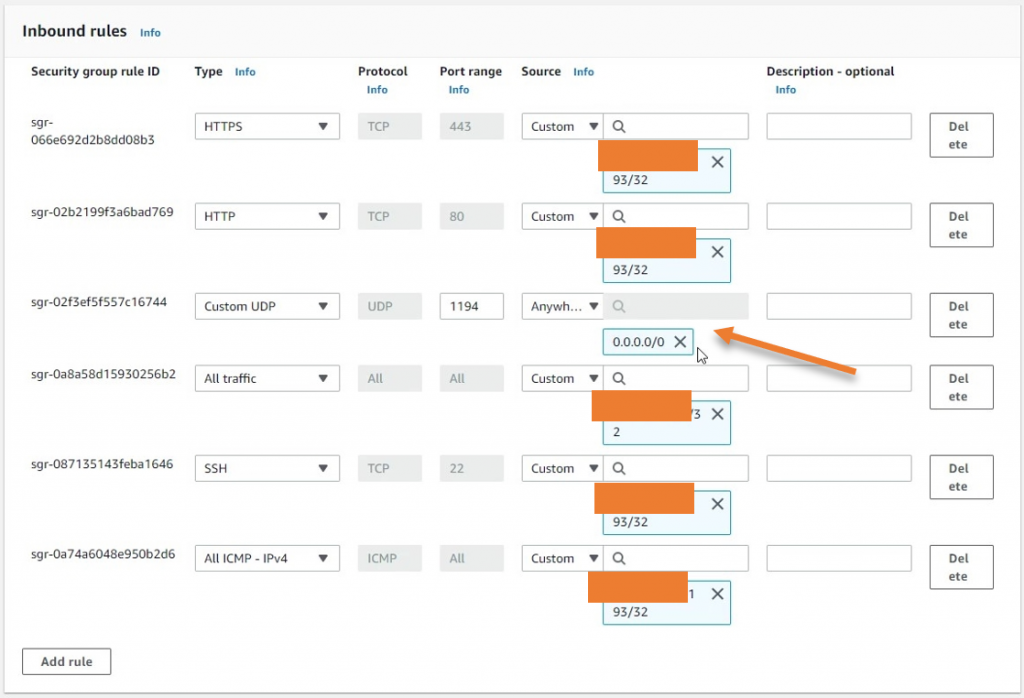
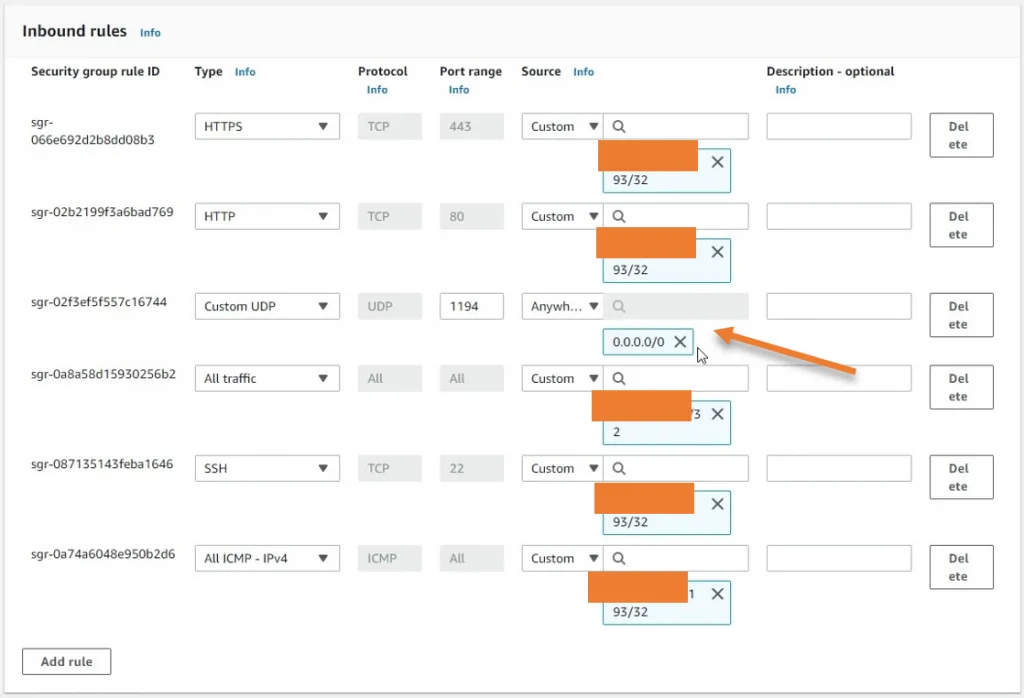
- Allow OpenVPN port 1194 on the AWS side.
If you have already allowed the OpenVPN on the WAN side of the security group, then you are good, otherwise, you have to add a rule that should allow traffic coming from anywhere outside with the port number 1194.
I have allowed everyone on the internet, which means anyone on the internet can connect. If you would like you could restrict the access to trusted IPs again that’s your choice.
Note: You can further restrict the access on the pfsense side as well on the policy level.
3. Enable the OpenVPN services in Pfsense.
In AWS pfsense plus, the OpenVPN configuration is already present, and you don’t have to configure everything from scratch.
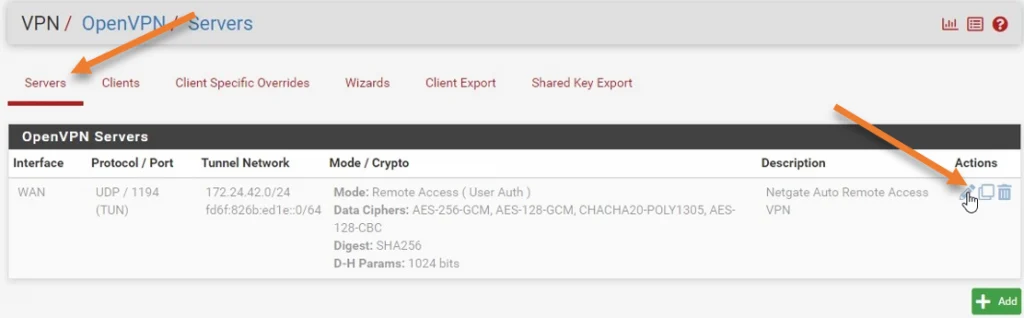
Goto -> VPN-> Openvpn
Under servers, you will see the OpenVPN configuration present. By default, it is disabled because not many users would use OpenVPN by default.
- The network is configured with 172.24.42.0/24, meaning the client will get an IP address from this pool.
- The default port number is UDP – 1194. You can change that if you want to. If you change the port number, you must also change the rules accordingly.
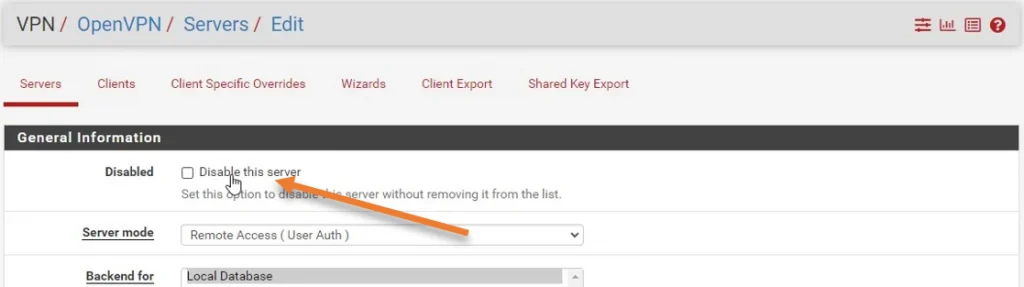
To enable the OpenVPN service, you may click on the Edit icon.

Uncheck the disable this server option and click on Save and Apply changes.
If you would like to make any changes to the configuration, you may do so here. If you are enabling it for the first time, it is best to leave the default, test the connectivity, and change the configurations later if you need to.

4. Enable the OpenVPN security policy.
Even the security policy for the OpenVPN, you don’t need to define. As it is already available in the pfsense, you need to enable it.
Firewall ->Rules->WAN.
You will see a disabled rule with port number 1194(OpenVPN). Click on the pencil icon to edit the rule.

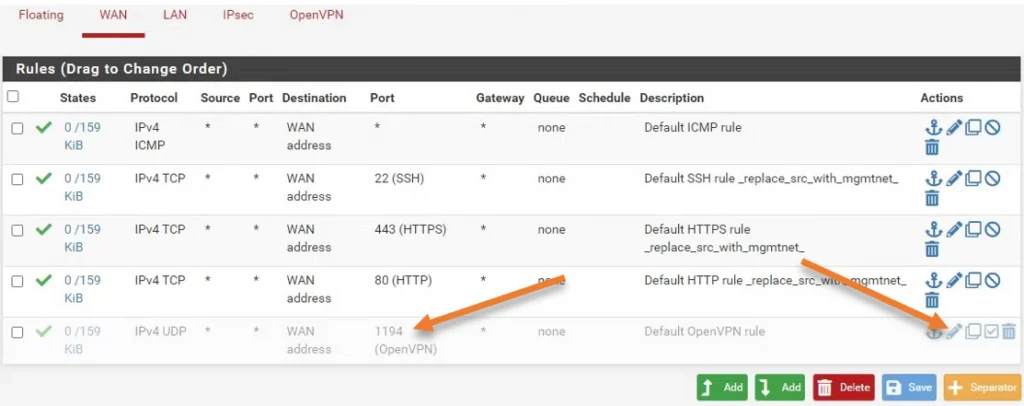
In the edit rule section, you may uncheck the disable this rule option, click on Save->apply the configuration.
5. Download the VPN configuration.
You have completed the configuration on the pfsense side. You must now download the configuration and export it to your desired devices. Some changes need to be made on the configuration file before exporting it into the VPN device. We will look into that next.
VPN->Openvpn->Client Export
Scroll down.
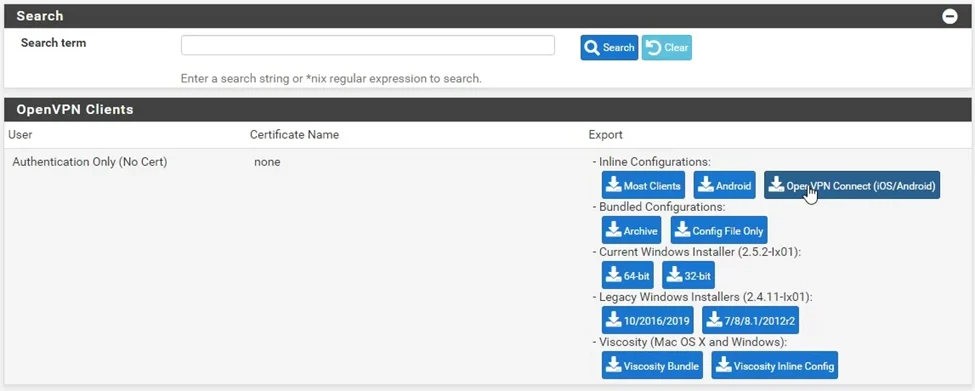
In the OpenVPN clients section, you may choose the operating system to download the config file.
I am going to test the VPN with my IPad; hence I choose OpenVPN Connect (iOS/Android)

6. Change the IP address in the configuration.
By default, you will have the private IP address present in the configuration. For the users to connect over the internet, you need to have the public IP address of your pfsense WAN interface defined under the configuration that listening on port 1194.
So let’s go ahead and change the private IP address to the public address.
- Once the OpenVPN configuration file is downloaded, double click on it to open it.
- You can see the pfsense WAN side private IP address in the remote field, which is 10.200.16.10.
- Delete that address and add the public IP from the AWS side.
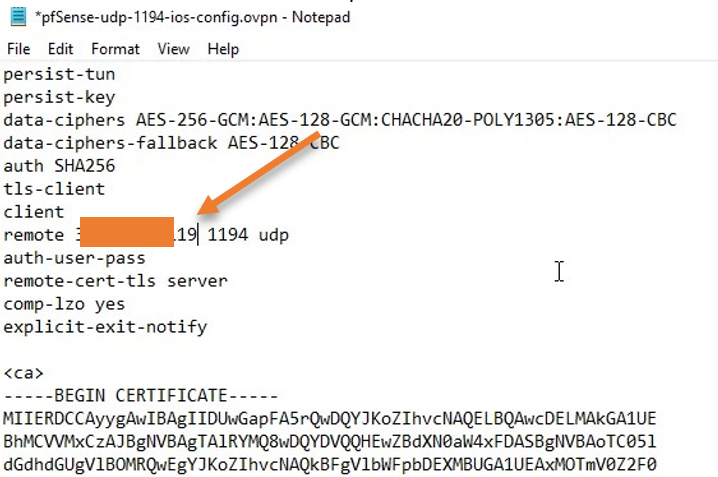

I have masked my public IP for security.
If you are using a different port number, you will have to change that here as well. However, I am using the default port number 1194 hence do not require any port change.
Save the file and export into the device.
7. Import the configuration to the OpenVPN client.
I have already covered how you can connect to OpenVPN on Ipad in one of my previous articles. The steps here are identical to that.
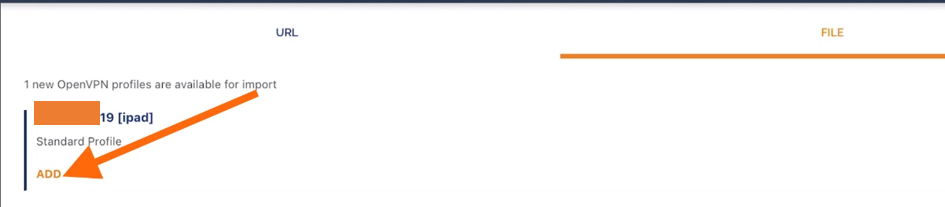
Open the OpenVPN configuration file on the OpenVPN client on Ipad.
Click on Add.

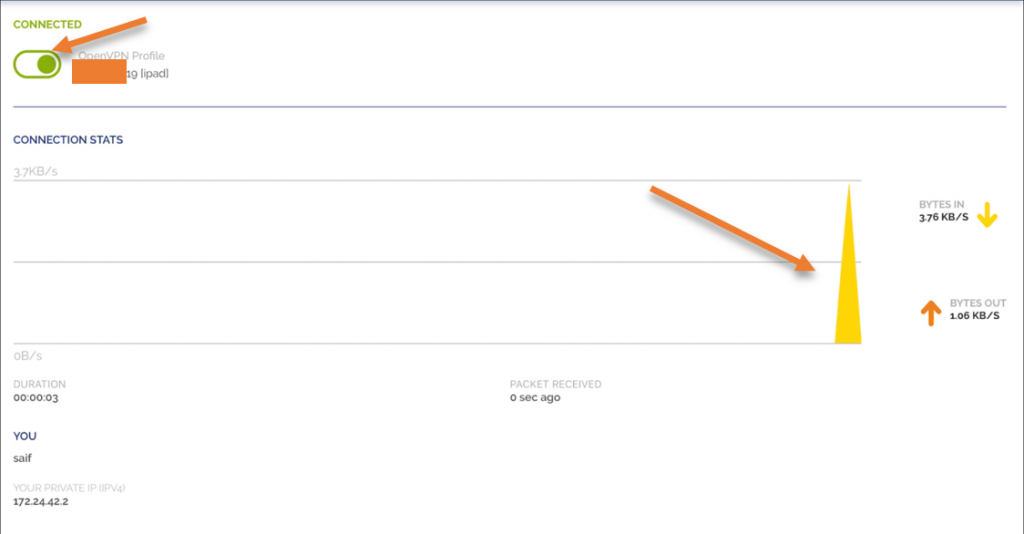
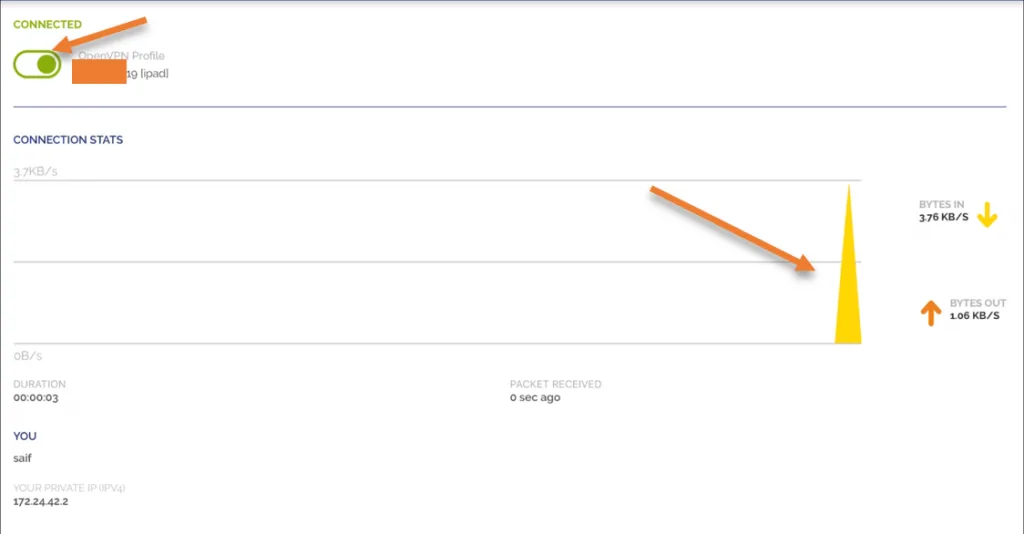
After tht you may click on the toggle button to connect, you will see it will start loading.


After a few seconds, you will see the VPN is connected. It means your iPad can access all the allowed resources on the AWS side using the OpenVPN tunnel.
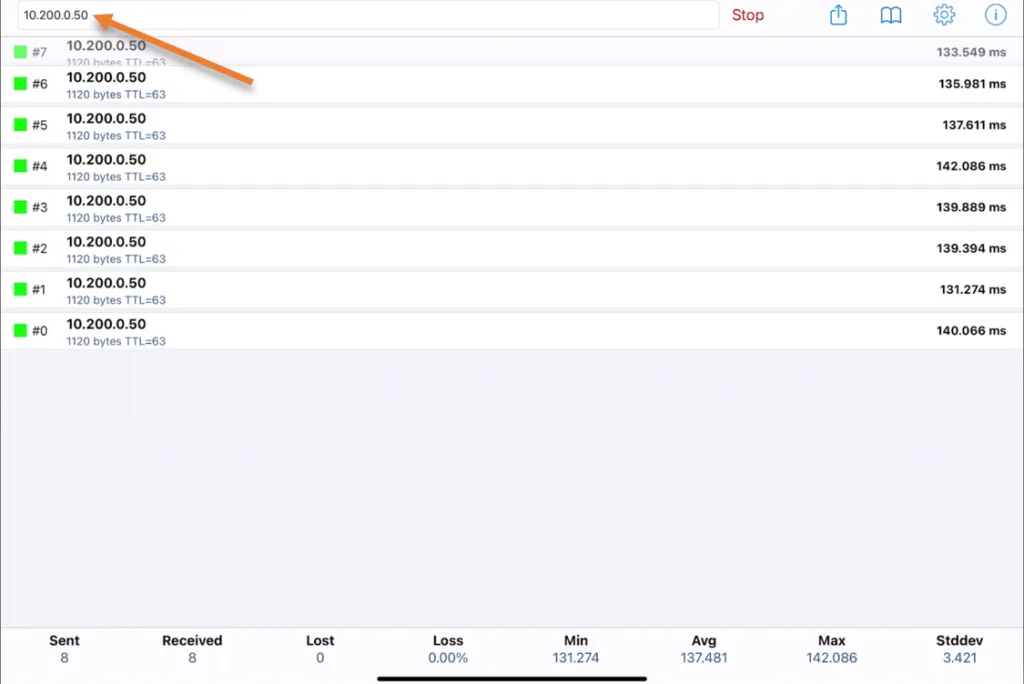
Using a ping utility app on my iPad, I initiated some ICMP traffic towards the AWS host 10.200.0.50 on the AWS private subnet, and as you can see, I can reach the host just fine.

Like the IPad, I can also use any other operating system, install the OpenVPN client in it, and connect to the pfsense on the AWS side. After the VPN connection gets established, you can access the permitted resources on the AWS side just like we did before.