One of the annoying aspects of traveling overseas is that you cannot access specific local network services from your country when you arrive in a new place.
For instance, Some network services you have utilized in your home country might no longer function in the country you traveled to since those services might only be allowed in your local country.
Everyone knows that a VPN service can be used as a workaround, but it incurs a fee. I have tested free VPN services, and I can guarantee they are not at all good. And when it comes to speed, forget about the streaming services.
What if you can set up your own VPN service for Free with the help of AWS cloud?
Yes, you can do just that. In this blog article, I will show you how to set up a VPN service on AWS for free. This service can be scaled up to accommodate more users, but you’ll need to purchase a license to do so.
Up to two users may utilize the setup for free, which we will create.
We’ll use an OpenVPN server on AWS to create a VPN service.
Note: Be aware of the laws and regulations of the destination country, as there are certain restrictions on VPN usage in some nations unless it is for work-related purposes.
If your AWS account is on the free tier, you may utilize the VPN service without paying; otherwise, you’ll have to pay for the openVPN instance you’ll be running.
Choose the country of your choice.
Selecting the country you wish to use the service is the first stage in the procedure.
You can connect to the region (datacenter) of your choice on the AWS cloud, which has several locations across the globe (that would cover most of the countries). India will be my location for the VPN server deployment since I would like to access services available in India.
AWS would then allow you to connect directly to your preferred location when you connect to the VPN. Once connected to the VPN, you may access the resource as if you were physically present in your own country.
So I have chosen Mumbai as my AWS region.
Create the Public subnet.
In a default VPC, AWS would create subnet 172.31.0.0/16, which would be public, have an internet gateway linked, and have the default route point to the internet gateway. You only need to install the services on the same subnet.
If you don’t have a default subnet and do not intend to use one, you can build a public subnet with the following.
- Because the incoming connection will be initiated from the internet, an internet gateway is required.
- The default route in the route table must point to the internet gateway. So all the traffic except your local subnet will go to the internet gateway.
Create an elastic IP.
The default VPC subnet will automatically assign the instance a public IP address when you launch instances in AWS. You can enable the automatic assignment of public IP addresses inside the subnet if it isn’t already enabled.
The issue with automatic public IP assignment is that it would change every time you shut down and start the instance, thus, it’s crucial to have a static IP address for your instance that wouldn’t ever change.
Elastic IP is the term used in AWS to describe static public IP addresses that are allocated.
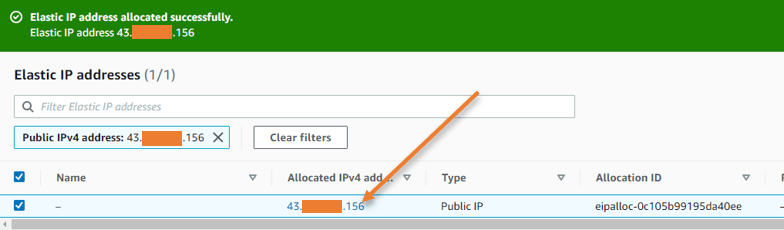
Goto EC2-> Network & Security -> Elastic Ips.
Click on Allocate Elastic IPs -> Choose Amazon pool of IPv4 addresses and click on Allocate.
You will see an IP address allocated under the Elastic IP address, which will never change.

Deploy the OpenVPN server.
It is now time to deploy the VPN service on AWS, So we will use the OpenVPN server on the AWS EC2 instance.
In EC2-> Instances-> Launch instances.
Name: OpenVPN server.
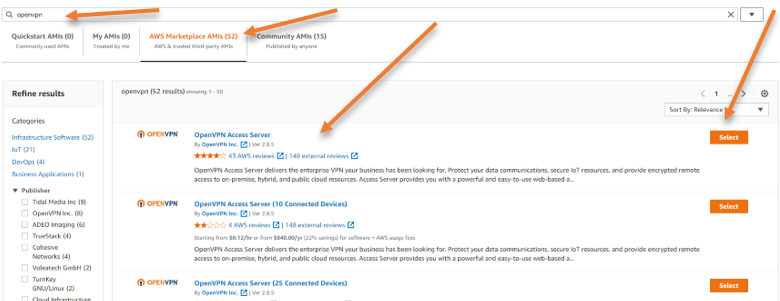
Under Application and OS images, search for OpenVPN .
In AWS Marketplace AMI’s you will see OpenVPN access server, click on Select and Continue.

Under instance type, please choose your required EC2 instance, by default it would pick t2.small.
As my requirement is not so heavy, and my account falls under the free tier, I will use the t2.micro instance instead, which is free tier eligible.
Key Pair.
You may use the existing key pair or create a new one.
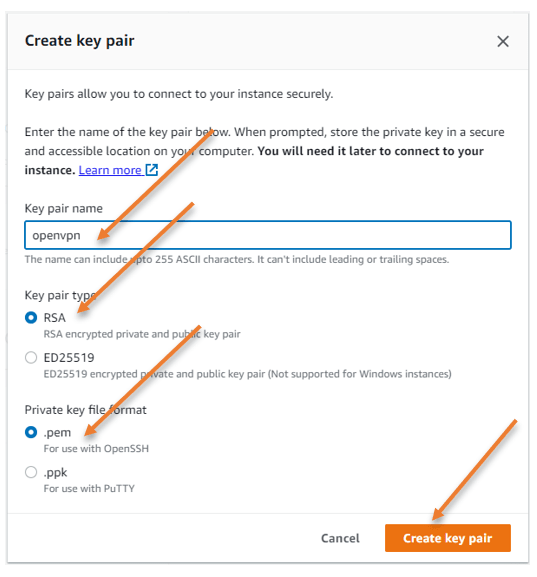
I will create a new one, by clicking on Create new key pair.
Name the key pair, leave the default values and click on create key pair.
You will be asked to save the key pair, and you need to ensure that you keep this file in a secure location where you won’t lose it.

Configure the Network.
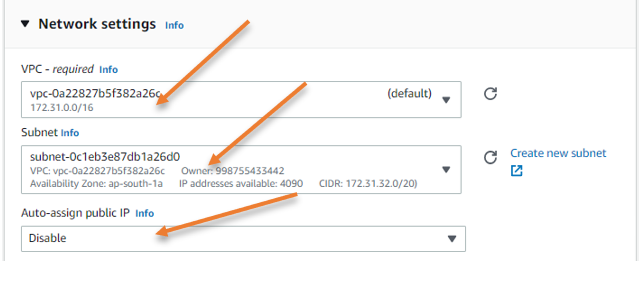
Edit the network.
As I indicated, I will set up the OpenVPN server on a public subnet that is accessible from the outside. So pick the public subnet.
VPC: you need to choose the correct VPC here.
Subnet: I will use Az-a as my subnet; you may choose the public subnet based on your setup.
Auto Assign Public IP: Change this field to disable, as we will assign the Elastic public Ip address which we reserved for this instance.

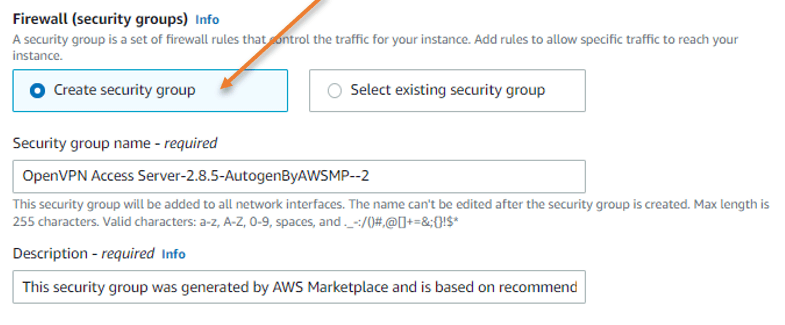
Security group creation.
Under Firewall security group, Choose Create security group.
Leave the default security group name or modify it as per our requirement.
We need to modify only the inbound security group rules.

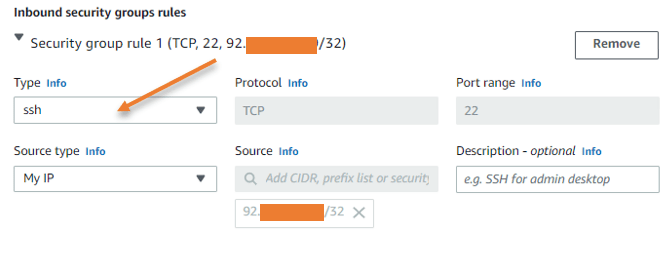
Inbound security group rules.
A few ports must be opened on the AWS side to administer and access the OpenVPN service. Click Edit under Network settings.
Port 22 for SSH: To login to the CLI of the OpenVPN server, you need to enable SSH service, it is highly recommended that you allow ssh service to the Ip address that you trust. In my case, I will choose my own IP address. My requirement is to manage OpenVPN from my own IP instead of allowing all (0.0.0.0/0) so that I can modify the service only from my side.
After the initial deployment, you rarely need to use SSH service towards the OpenVPN server, so you can remove this security group rule later.

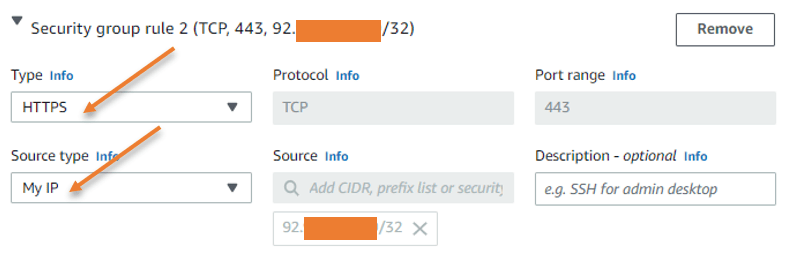
Port 443 for web access: Once the OpenVPN server is configured, all of your client devices, such as Windows, Mac, iOS, Android, etc., can download the OpenVPN application from the web portal. Because I cannot predict which IP address will attempt to connect to the web interface and download this software, I will allow everyone here.
However, suppose you have already downloaded the required software on the devices. In that case, you may want to disable this rule as a good security practice. Unless you frequently connect from different devices.

Port 943 for Web admin access: As we need to visit the admin page to make some changes using the web GUI, this access is crucial. I would leave this choice to the same trusted IP address once more.

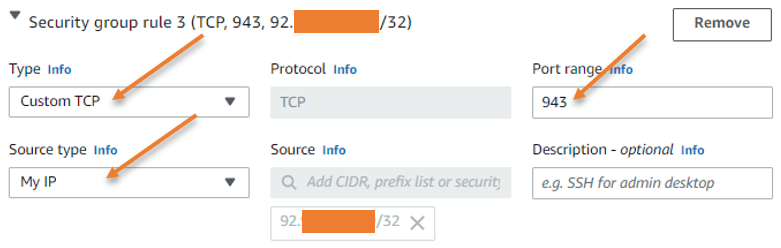
Port 945 is not needed for now unless you may want to create a cluster setup.
OpenVPN port.
We utilize the OpenVPN port number, which is 1194 according to rfc standard, to connect to the VPN. I can connect to OpenVPN from any network worldwide, as long as you open port 1194 to any source IP address.


After that, click on Launch instance.
Assign the Public IP address.
Since we have stopped automated IP address assignment, the OpenVPN server now has no IP address. However, we have allotted the public IP addresses via the AWS elastic IPs. We will now assign those addresses to the OpenVPN server.
Goto Elastic IPs.
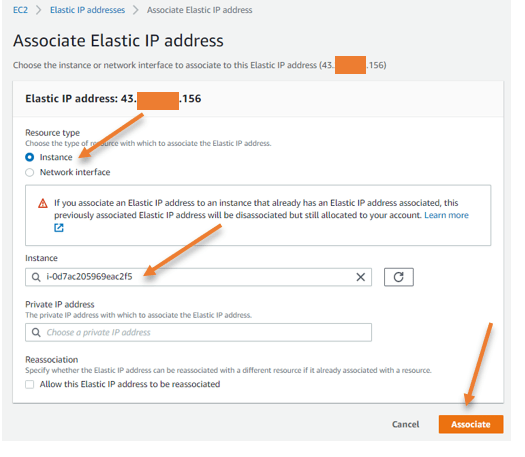
Select the Elastic IP and click on Actions -> Associate Elastic IP address.
Choose the OpenVPN instance and click on Associate.
After this change, you can access the OpenVPN instance using the elastic IP we just associated.

Initial OpenVPN setup.
We are not ready to begin yet, as we need to set up a few more changes starts to use it.
Goto key pair file you downloaded from AWS and open cmd from there.
SSh into the server using the below format.
For example, in windows..
Ssh -i openVPN.pem root@<elasticIP>
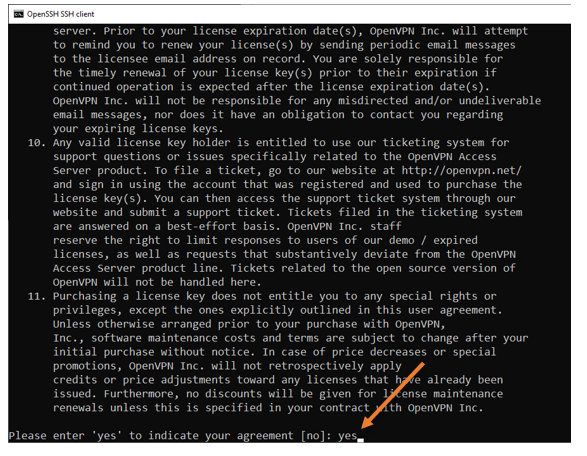
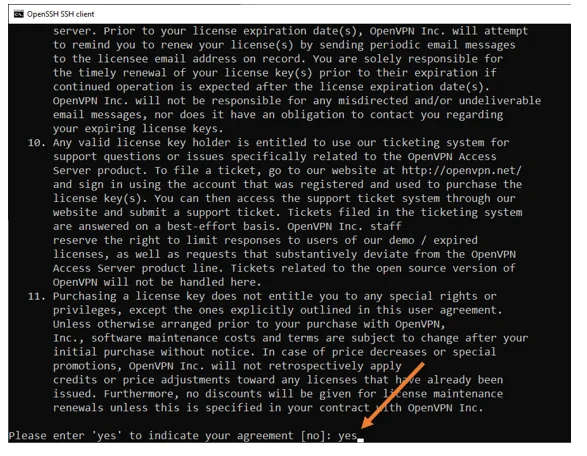
Once you ssh in, accept the license agreement by typing yes.
Please pay close attention to the lines; we must stick to the default settings on almost all of the lines except one, where it says should client traffic be routed by default through the VPN. For that, you need to say yes.
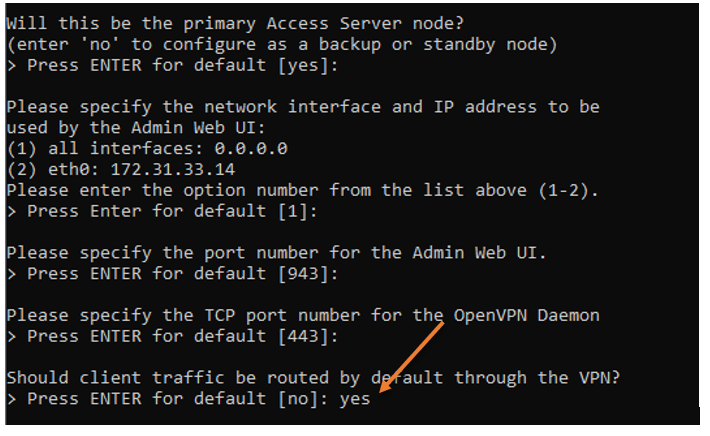

What does that mean?
We just turned off split tunneling on the VPN. When you set this to yes, your local nat IP will change to an AWS IP address when you connect to the VPN, and all traffic going to AWS and the internet will pass through the tunnel itself.
All internet traffic will travel through your local ISP’s IP address if you keep this parameter to no. Only AWS traffic headed for 172.31.0.0/16 will use the tunnel in that case.
We must keep the split tunnel option deactivated because we’ll be accessing the internet via AWS, and that’s the whole point of this VPN setup.
Don’t worry if you missed changing this option to yes; I’ll also show you how to do it from the OpenVPN admin GUI interface.
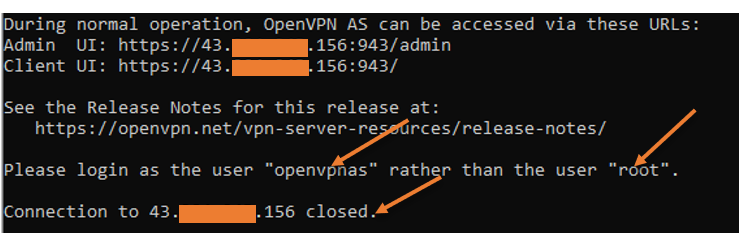
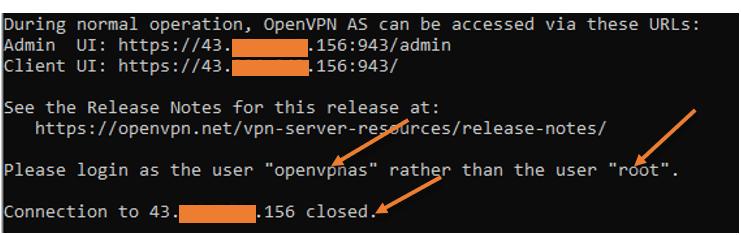
After changing the initial settings, your ssh access to the server will be disconnected with the below message that says ‘please login as the user “openVPNas” rather than user “root“
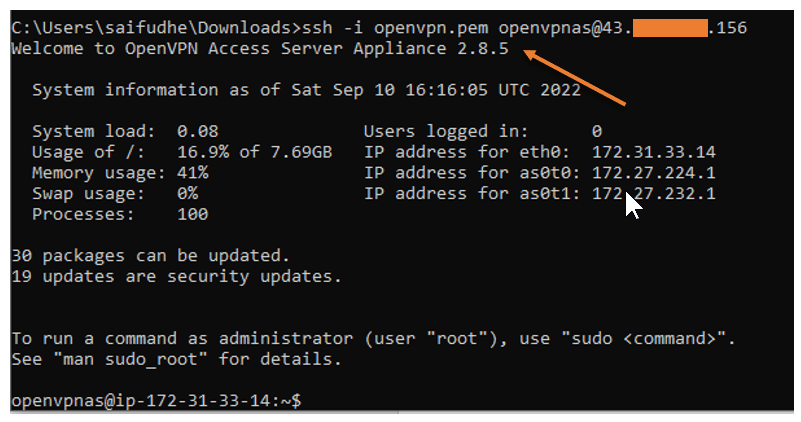
This time open the ssh session to the server using the openVPNas username as shown below. As you can see, I have logged in right now.

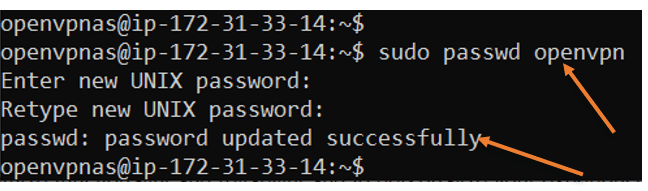
Set the password for the OpenVPN username.
When you connect to the VPN, we use something called OpenVPN username. We need to set the password for the same.
To change the password enter the command sudo passwd openVPN
It will prompt you to change the password to the new one. Change the password according to you.

You are now set, and you can now access the client portal from your end user machine and starts downloading the file. But before that, we need to access the admin page and make one more change.
Ensure the split tunnel is disabled.
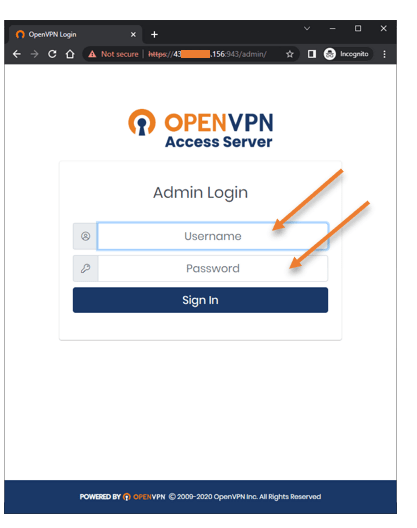
We disabled the split tunneling using the CLI, we can ensure whether those settings took place from the GUI as well. To access the admin page, type https://elasticIP:943/admin
Enter the username and password that you set.

You will be asked to Accept the license agreement, click on Agree.
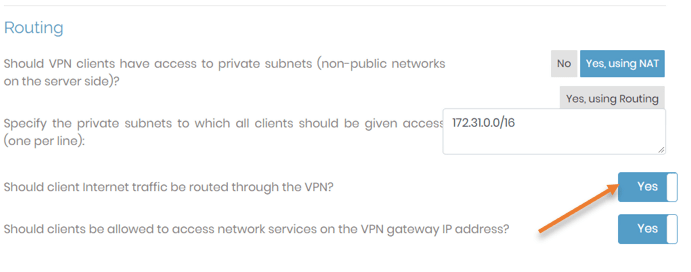
Once logged in, Goto Configuration->VPN Settings
Under routing, should client internet traffic be routed through the VPN, choose Yes.

Add a new VPN user.
Though You can connect to the VPN using the default OpenVPN as the username, which will also be the admin user by default, let’s create a brand new user just for VPN access.
Goto User management -> User Permissions.
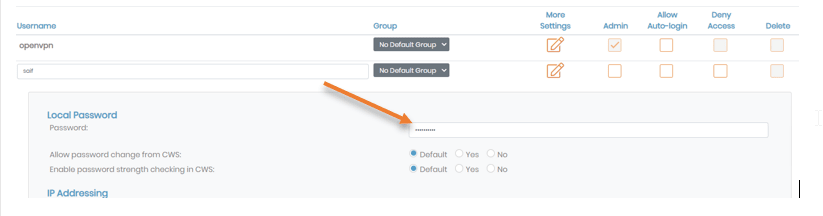
Below the OpenVPN username field, enter the username of your choice and click on the Edit button to set the password.
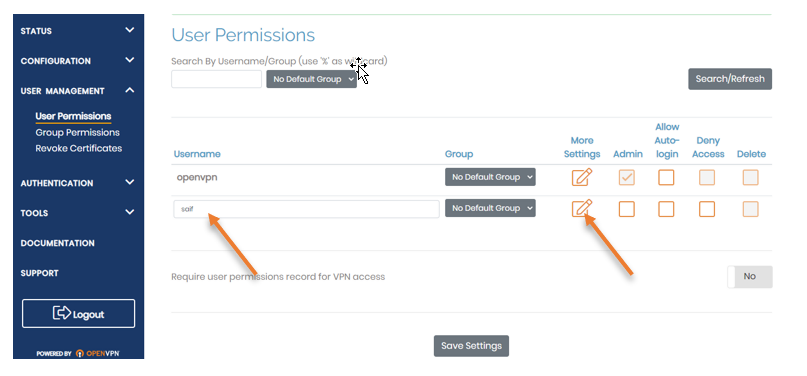

In the local password, enter the password you will use, click on Save settings at the bottom, and click on Update running server on the server.

Deploy the VPN on your local machine.
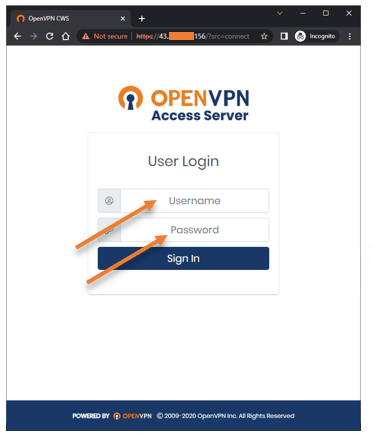
You may access the OpenVPN service using the web GUI on your client machine.
Enter the username that you created and the password.

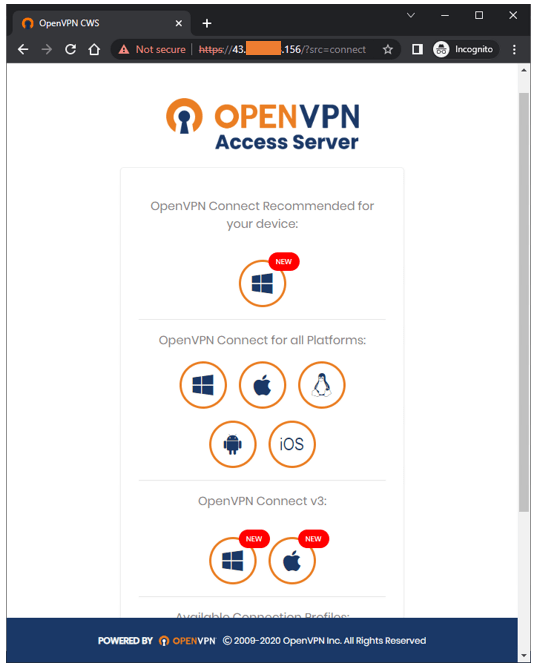
Download the required package by clicking the appropriate link based on the operating system and install the OpenVPN package, and you are good to go.

Test the OpenVPN connectivity.
I am going to test the connectivity from my android phone.
I already have a VPN app installed on my android phone. Click on the plus icon on the bottom to import the profile.
In the import profile, enter the VPN url which is https://<elasticIP>
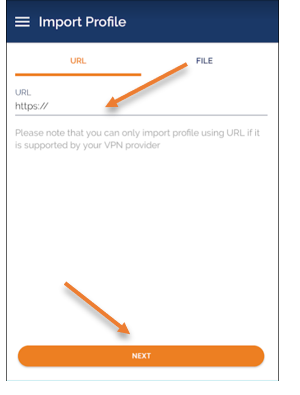
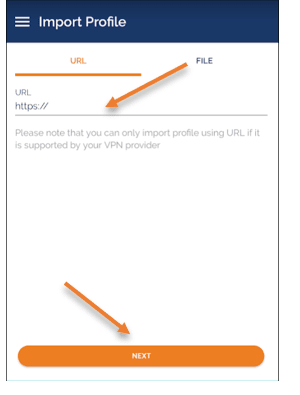
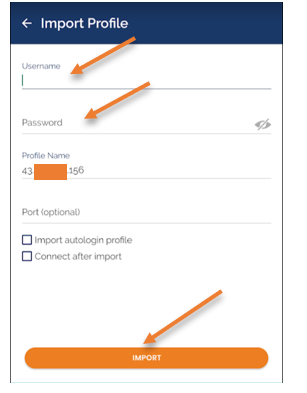
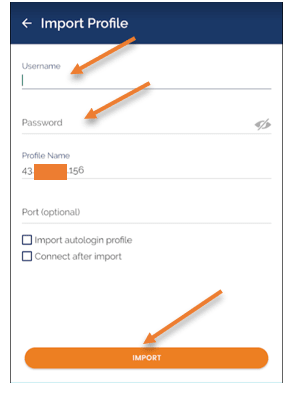
You will be prompted to enter the username and the password, enter then and click on import.
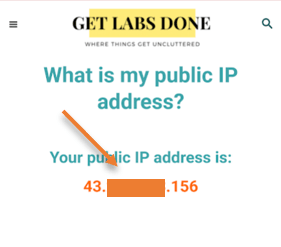
Before I connect, let me check my public IP address by clicking here to ensure the split tunnel is disabled, and I will show you the current NAT IP.
As you can see my public IP starts with 2.x.x.x, which is my local ISP IP.

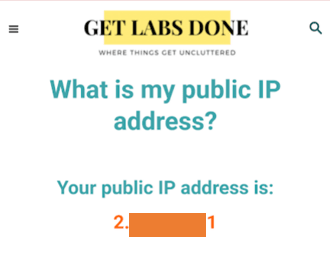
If you get the same local IP after connecting to the VPN, then you don’t have a split tunnel disabled. You must have the NAT’d IP address of the OpenVPN access server from AWS to switch the country virtually.
Connect to the VPN.
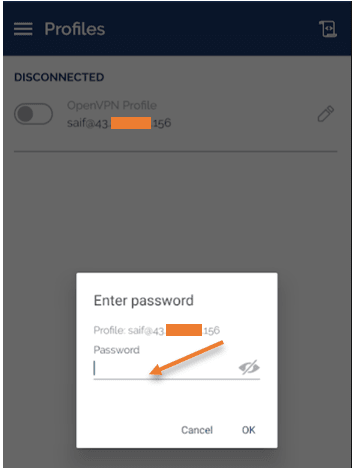
You will see the new profile added in the OpenVPN app. Click on the toggle icon on the profile to connect.
You will be prompted again to enter the password for the VPN, enter them and click on Ok.

Here you go, we are now connected to the VPN successfully.

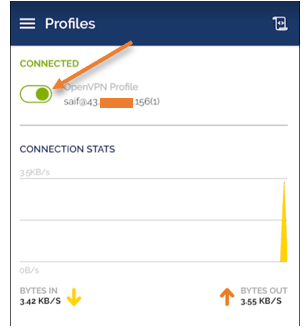
As you can see, my NAT IP now shows the IP address from AWS, which is good.
Now I can access the Internet resources as if the traffic were initiated from India. Pretty cool.