
There are several firewall vendors, and Sophos is one of them, when it comes to network security. Many Enterprise customers utilize Sophos Firewall at the network’s edge, and it can also be used in a home lab.
But not many of us have the resources to purchase expensive equipment and install it in our home networks, so what do we do?
We can virtualize the Sophos firewall in a hypervisor as one solution, and in this blog post, we’ll show you how to do it with VirtualBox.
The VirtualBox is a free open source hypervisor that can be installed in any operating system for free because of which, anyone can virtualize Sophos firewall.
The configuration we’ll employ is shown below; we’ll install Sophos Firewall in VirtualBox, then link the LAN interface to the virtual machines and the WAN side to the Internet to provide network connectivity.
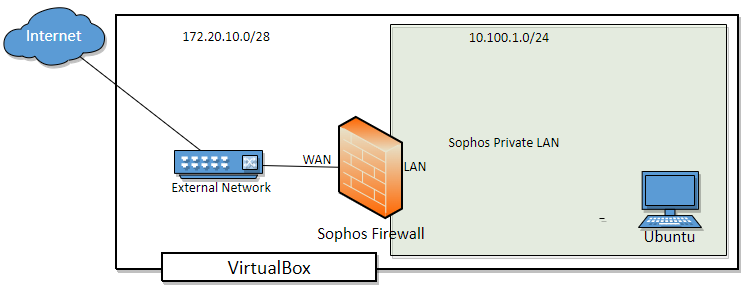
This configuration is ideal if you want to set up a home lab for development purposes, keeping the physical LAN network and your development environment separate behind the firewall.
In essence, this configuration creates a virtual LAN that is completely isolated from your physical LAN.
We will test the network connectivity from the LAN virtual machine to the outside world after the deployment.
If you want to utilize Ubuntu as the client machine, you are welcome to do so because I already have it installed in the VirtualBox.
So lets get to it.
Steps to install Sophos virtual machine in VirtualBox.
1. Download the Sophos firewall image for VirtualBox.
Go to Sophos website by clicking here and clicking download.
Under downloads choose the Virtual Installers: Firewall OS for VMware.
You will be asked to fill in some details, fill them in and click on Submit.
The Sophos virtual image will be downloaded automatically now.
2. Download and install the VirtualBox hypervisor software.
You can download the VirtualBox hypervisor by clicking here. So depending on your operating system you may download the software and install it on your machine.
Once you have both the Sophos virtual image and the VirtualBox hypervisor installed you are ready to go.
3. Move the virtual images to the VirtualBox directory.
Before we move the virtual images to the VirtualBox directory, we need to identify the location of the VirtualBox VMs.
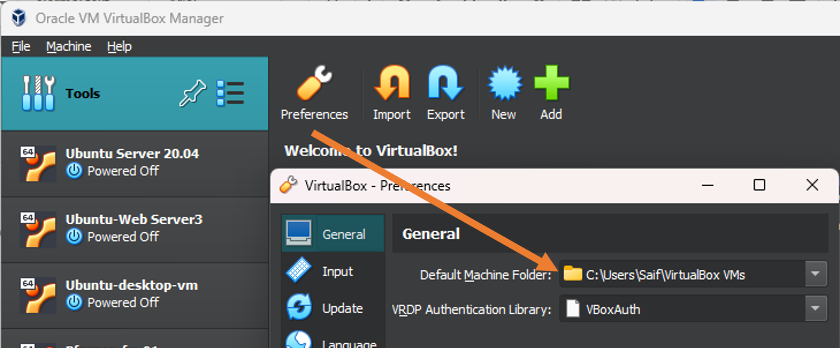
Find the VirtualBox storage location.
Open the VirtualBox and click on Tools->Preferences->General Tab.
Here you will see the default location of the VirtualBox VMs under the Default machine folder. Make a note of that.
automatically.

Extract the file to the VirtualBox directory.
Go to the VirtualBox directory and create a folder, maybe sophos-fw.
Open the zip file you downloaded, and extract the files to the new directory that you created as you can see below.
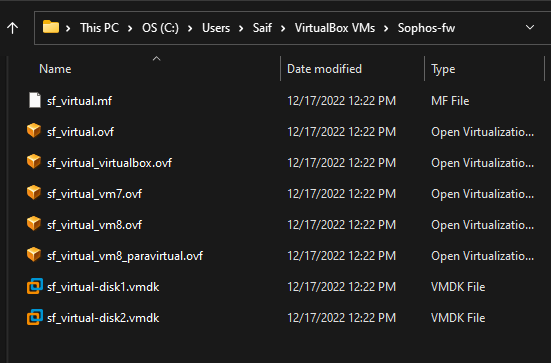
4. Deploy the VirtualBox VM.
To install the Sophos VM it is very simple, just double click on the sf_virtual.ovf file
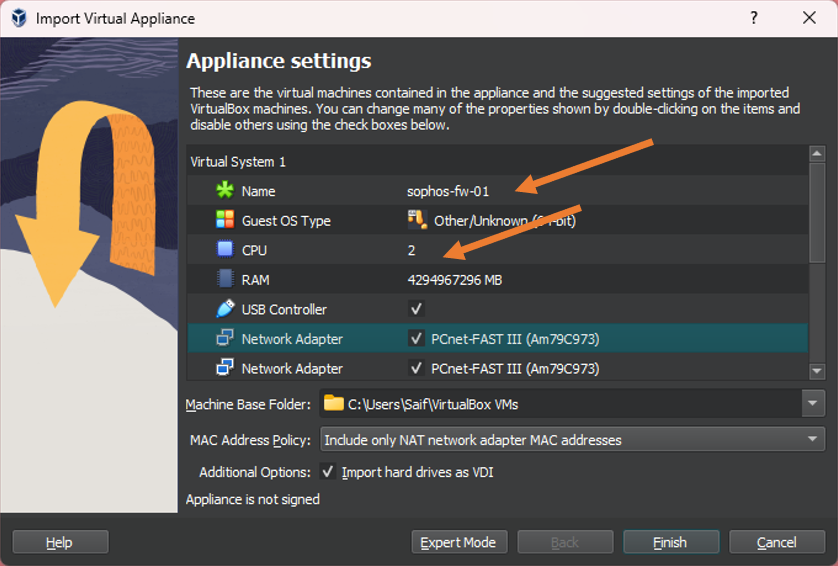
It will show you the VirtualBox import properties of the Sophos VM that you are going to install, there are some changes that we need to make though.
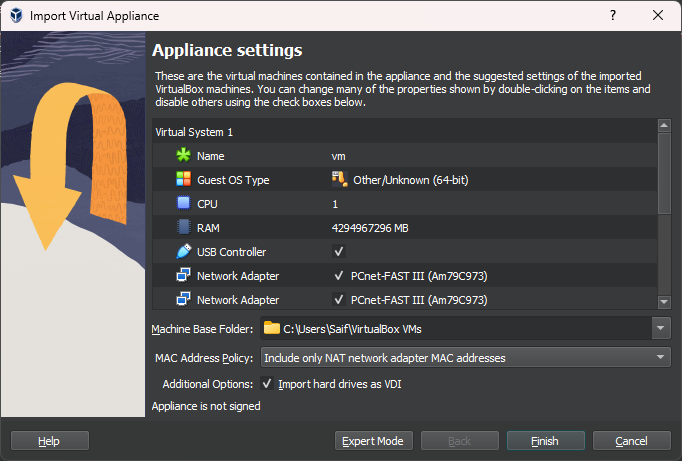
- First click on the name and change it according to your setup.
- CPU, change it to 2.
Note: If you give only single CPU, the firewall installation may fail and you will end up getting a reboot loop
Click on Finish for now.

5. Update the network adapter.
As discussed, the VirtualBox should provide two interfaces to the VM, one provides the internet connectivity and other is the LAN.
So right click on the VM and click on settings-> Network
The first adapter represents the LAN and the second is for the WAN.
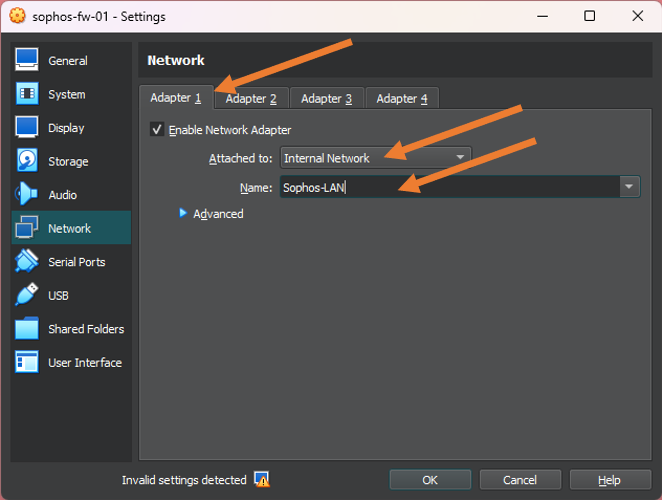
Configure the first Adapter.
Check the box Enable network adapter if it’s not already checked.
Attached to: Choose internal Network.
Name: You may name the private network that you choose. For example, Sophos-LAN.
This will be the virtual private LAN that we are creating only for the Sophos LAN side.

Configure the second Adapter.
Click on Adapter 2.
And choose a bridged adapter, and select the network adapter on your host machine that you are using for the internet access.
In my case I am using the wireless adapter, hence I have chosen that.
In case if you are using wired network, you will have to choose ethernet from the list.
That’s it click on OK.


6. Power on the virtual machine.
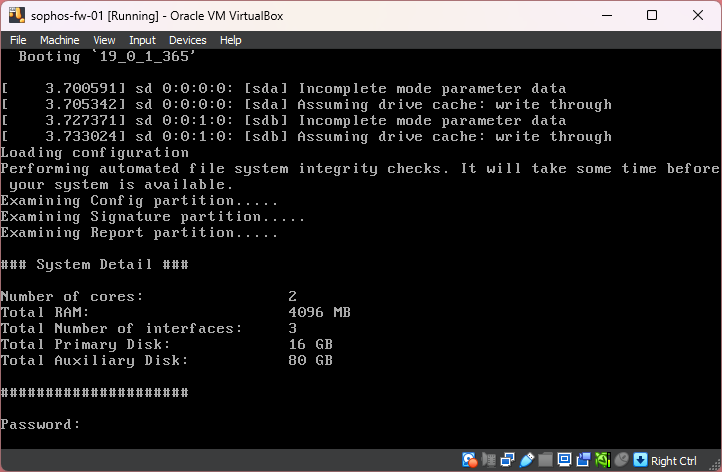
Double click on the VM to start the virtual machine.
It will be prompted for password, enter the password as admin and hit enter.
You will be presented with a license agreement page, accept that by using the Tab key.

You will now be presented with a main menu screen
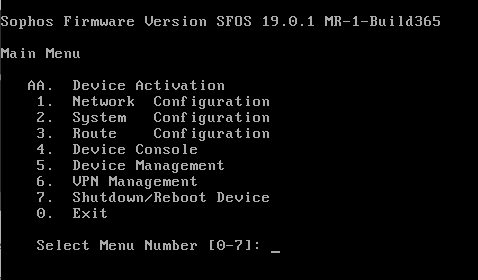
7. Get the Sophos IP address.
We are required to get the IP address of the system, for that choose 1 and hit enter, this will take you to the network configuration menu.
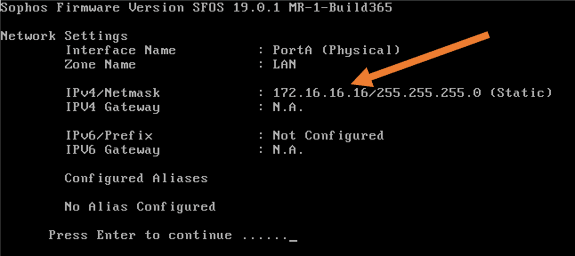
Press 1 again for interface configuration.

Here it will show the configuration PortA which represent the LAN network which has an IP address of 172.16.16.16/24.

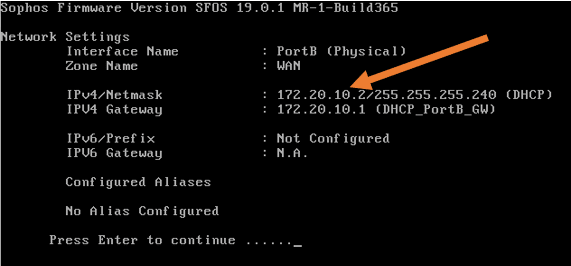
Hit enter, you will now see the WAN IP address, which is configured by the DHCP server from your Physical LAN network.

8. Access the Firewall GUI for initial setup.
Connect a client to the Virtual LAN network we created for Sophos.
As I mentioned earlier, I already have the Ubuntu desktop configured, and I am going to connect it to the Sophos LAN in VirtualBox.
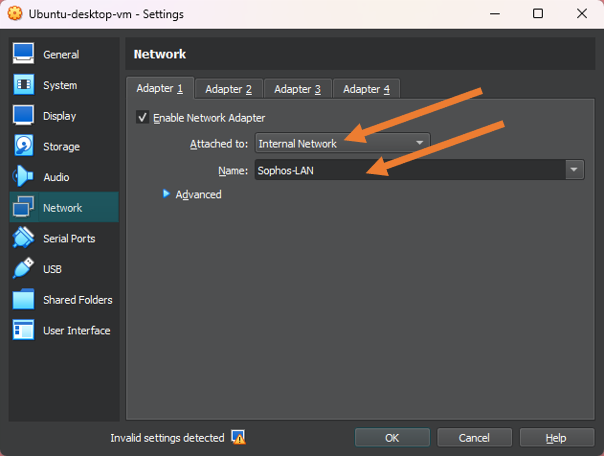
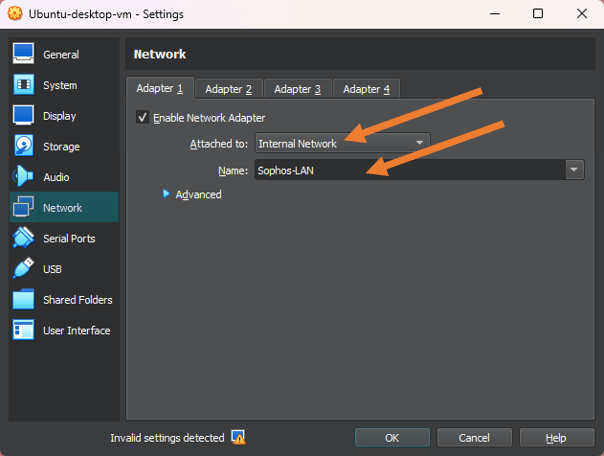
Right click on the client and click on Settings-> Network
In the Adapter 1, choose internal Network , and choose Sophos LAN from the drop down and click on Ok.
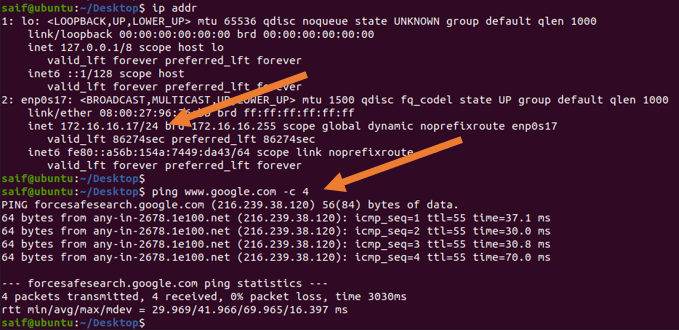
Power on the client virtual machine, if you have set up everything correctly until this point the Ubuntu machine will have an IP address from the Sophos LAN side and it should be able to go out to the internet.
As you can see, I got an Ip address 172.16.16.17 from the Sophos LAN side and it can go out to the internet as well.

Complete the Sophos Initial setup wizard.
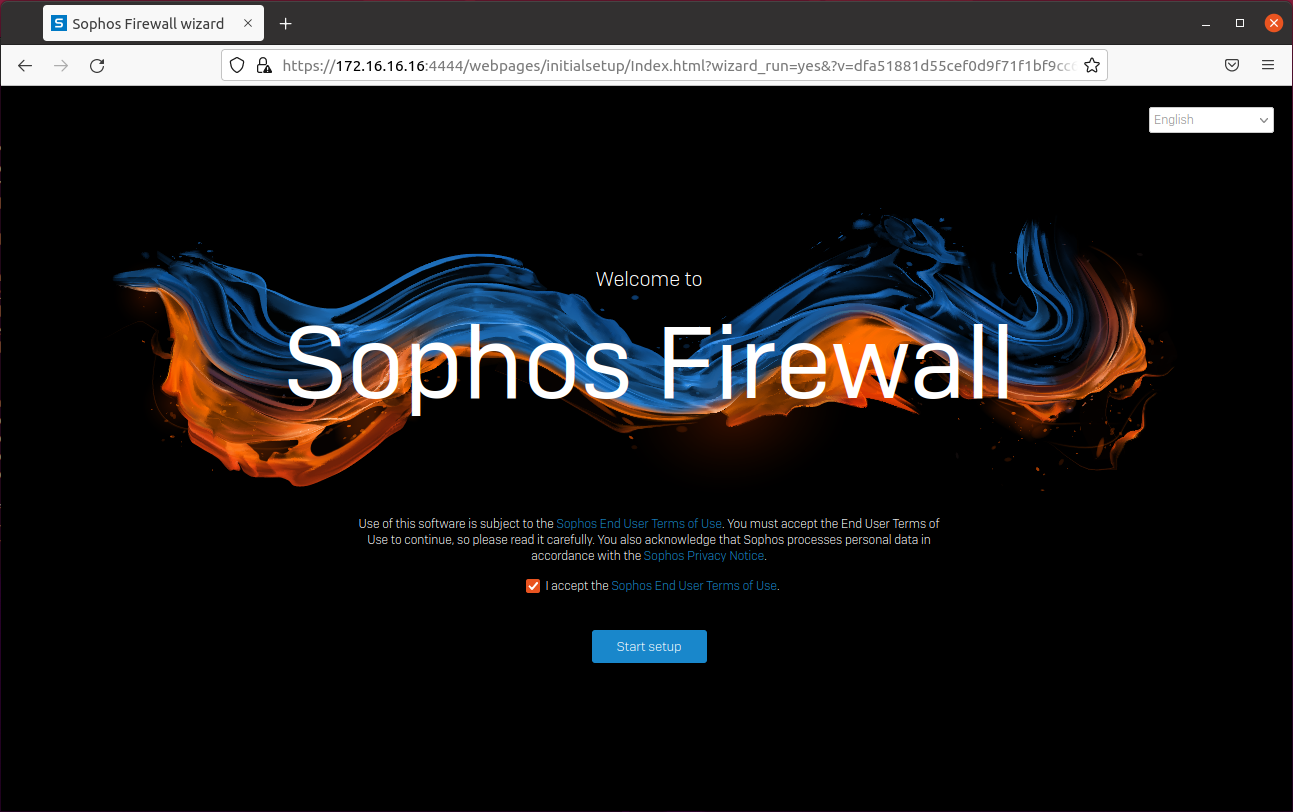
To finish the initial setup wizard, you will have to access the Sophos firewall GUI.
To access the GUI, type https://172.16.16.16:4444 and hit enter. You will be taken to the welcome screen, accept the license agreement and click on Start setup.
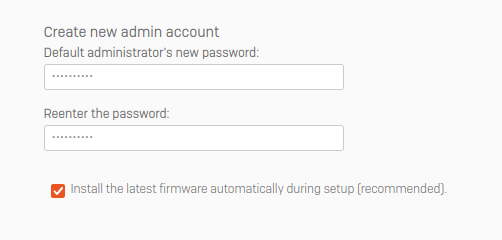
Reset the password.
It will ask you to reset the password, enter the password and confirm the password and click on Continue.
Make sure to uncheck the option that says install the latest firmware, which is not needed at the moment.
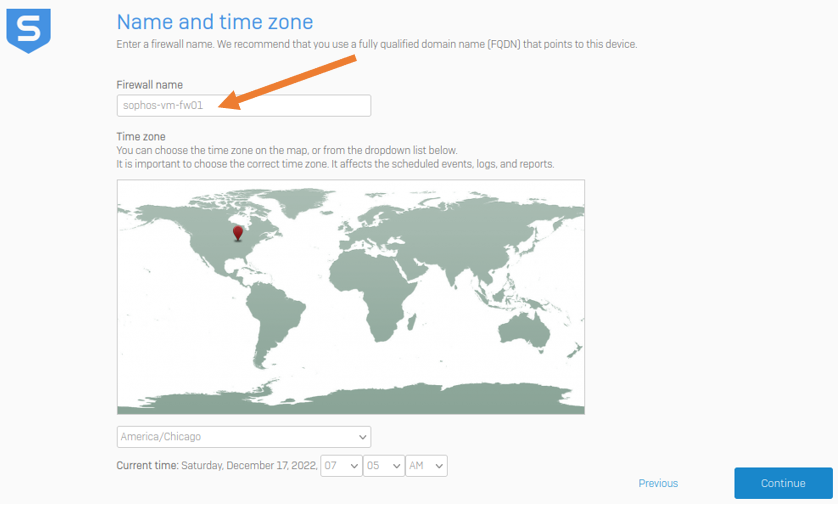
Name the firewall and choose the Tim zone and continue.

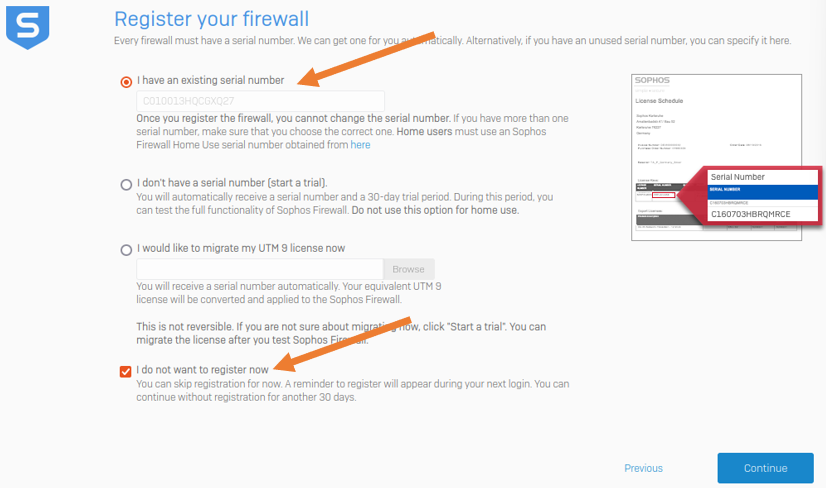
When you registered for the software download, you must have received a serial number, you could use the same serial number, and select I have an existing serial number, or I don’t have a serial number (start a trial).
After that choose I do not want to register now and click on Continue.

You will get a below screen that says Basic setup is complete, you may opt in or out customer experience program and continue.

9. Configure the LAN network.
Sophos will now direct you to configure the LAN network.
When we installed the Sophos firewall, it by default picked up the 172.16.16.0/24 subnet as the default LAN network, in most cases you would not want to use that.
If you want to stick with the same range, you may skip this step.
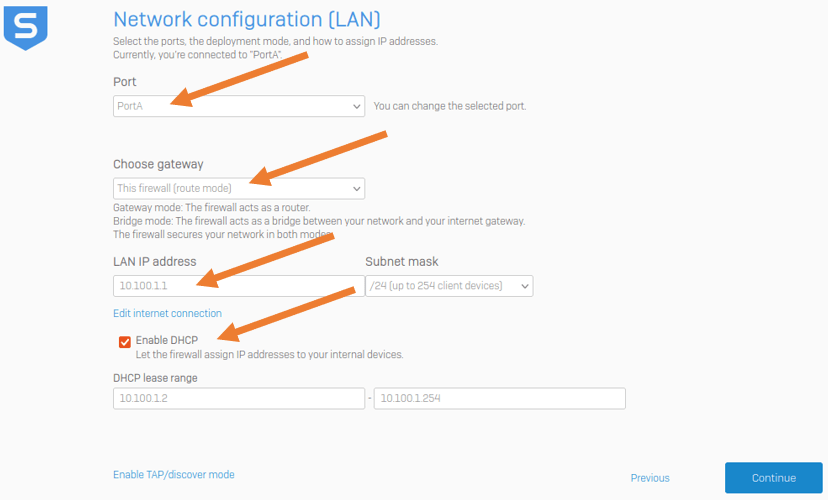
In our setup we already mentioned that we would be using 10.100.1.0/24 as the LAN network.
In port choose PortA.
Choose Gateway -> Firewall Routed mode.
LAN IP address :10.100.1.1 Subnet mask /24
Leave the default DHCP settings, unless you modify the same as well.
Click on Continue.

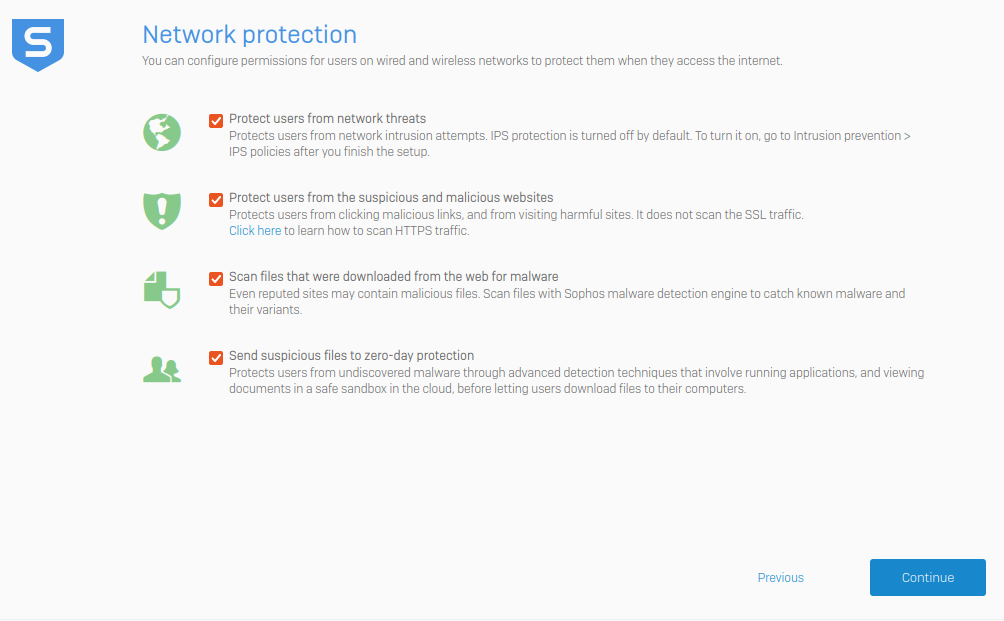
Network protection.
In the network protection, choose your desired options and continue.
Notifications and backup.
You will have to enter an email address to take backup of the firewall, enter an email and confirm the same and click on continue.
You will get the summary of the configuration that you are going to commit, ensure everything looks good and then click on Finish.

The setup will show finishing and it will take some time
You can continue to ping the old gateway 172.16.16.16 and when it stops working you know that the IP address has been changed to a new one, because we changed the IP address to the 10.100.1.0/24 subnet.
On your client machine do ip release and renew.
On window, ipconfig/release
ipconfig/renew
Ubuntu : just disable the network and enable it back.
As you can see, I have now got a new IP address from the Sophos firewall. Which is 10.1.1.2/24.

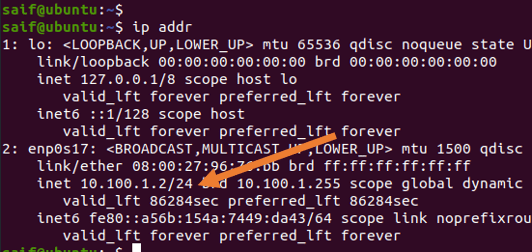
And you should be able to access the firewall GUI with the new LAN IP address now.
Note: It took a couple of mins for me to get the firewall GUI access back.
Once done you will be able to see the Sophos firewall admin page.

Kamil
Tuesday 1st of July 2025
Have you tried set up sophos on kvm (ubuntu hostem)sucessfully? Network config is killing me. Running more smoofly overall as kvm is lvl 1 supervisor.
Colin Appleby
Thursday 6th of February 2025
Hi
I need some assistance I think.
I wish to set up a dedicated firewall - tried pfsense on VirtualBox but really struggled with gaining access from local LAN.
This is what I want to achieve
Internet Primary Router Firewall Second Router WAN 192.168.188.1 LAN 192.168.50.1
Static IP for Firewall or perhaps DHCP on firewall.
Firewall on VirtualBox accessible from LAN?
Is this doable?