
When you want to start a brand new website you might be wondering, is there a way you can spin up a web server in the cloud for free. The answer is yes. You can actually run a WordPress website on the AWS cloud for free. In this blog, we will see how we can create a basic WordPress site using the AWS cloud.
You need to remember one thing here, this is a basic setup, and if you want to start your first WordPress site on the cloud, this will be the right choice. If you are already running a website and have a lot of traffic, this guide may not be for you. It is recommended that you get a good hosting provider like the one I am using here.
You can also check out the article I created here on how you can set up a web server at your home.
How can I start a website in AWS for free?
The AWS does provide free trial services for the new users for up to 12 months. They call it AWS free tier. You can run some of the AWS free tier eligible resources in the AWS and see if it is the right fit for you. Some other services are free forever. However, we cannot use them for WordPress sites. To name a few features that are needed for WordPress,
750Hours Amazon EC2 per month– The 750 a month is equivalent to a month. But you need to make sure you are running only a single instance. by mistake, if you have launched two instances, your usage will end in 15 days and fall under pay as you go model until next month.
5GB of Amazon S3 – You can utilize this to store your website static files, for example, PDF, Ebook files, or even software that you want to share with your users. You may note that this is not WordPress storage. For that, we will use EBS volume. I know some users run their static web pages using the Amazon S3.
30GB of Elastic Block storage – This is where all your WordPress data will be saved. There is also a slightly better EFS volume which is also part of the 12months free tier. However, we will use the EBS volume because if you decide to stick with the AWS after 12 months, the charges will be lower than EFS. If you have more traffic and planning for redundancy and availability and budget is not a concern, you cannot depend on the AWS free tier. In another article, I will try to create another blog on spinning up advanced WordPress hosting on AWS. You might as well check out the WPX hosting which I use for my WordPress hosting.
750 hours of Amazon RDS Database – WordPress uses something called MySQL for the database, and we have an Amazon RDS database for that purpose.
Note: Running a basic WordPress on AWS is free. However, if you want your domain name to be registered with a name and SSL certificate, that will incur some expenses.
You can either spin up a WordPress server or an Ubuntu server on EC2. And convert the Ubuntu server into a web server. In this blog, we will see how you can deploy an official WordPress instance from bitnami on AWS using the free tier.
Steps to install and configure WordPress on AWS free tier.
- Get a free tier account.
- Deploy the WordPress EC2 instance.
- Setup a SSH Keypair for wordpress.
- Spin up wordpress instance.
- Configure the security group.
- Launch the instance.
- Access your WordPress site on AWS.
- Get the WordPress password.
- Login to the wordpress dashboard.
- Connect the IP address to a domain name.
- Remove the security warning from aws wordpress site.
1. Get a free tier account.
By now, you must have an AWS-free account created, and you are ready to get started. If you still haven’t created the account, please go ahead and create a new one by clicking here.
2. Deploy the WordPress EC2 instance.
If you don’t know what AWS EC2 is, The AWS EC2 does the compute function in the AWS. You can think of it as a virtual hypervisor server such as VMware ESXi, Linux KVM, or even VMware workstation, VirtualBox, or hyper-v. In the end, you can run virtual machines on those servers.
In the case of EC2, we are running the VM in the server itself, however, instead of you owning the server, you use somebody else’s server in the cloud, and you pay for what you use. In this case, AWS would provide the server and its resources. And you have to pay for what you use.
The cool thing about AWS is that you can spin up a VM any time you want, and if you don’t like it, you can either stop it or terminate it, and you will not be charged if you are not running the virtual machine.
In EC2, VM is called instances.
So let’s go ahead and spin up a WordPress EC2 instance from AWS.
Note: If you are new to AWS, it should have the VPC, and its subnet created for you in the 172.31.0.0/16 range, so if you have removed the default VPC and subnets, make sure you create a VPC and a subnet before you proceed. The requirement is the subnet should have reachability to the internet using the internet gateway.
3. Setup a SSH Keypair for wordpress.
Before you spin up an EC2 instance, it is important that you create an SSH key pair for your instance, which is needed for you to ssh into the WordPress instance later on. By default, due to security reasons, the ssh access is restricted using the SSH KEY, and you cannot log in using the user credentials. However, you can enable them using the SSH configuration, but I would recommend you keep it that way.
Goto AWS services and look for EC2, you can also search for EC2.
- Under Network & Security, click on Key Pair.
- Click on Create a keypair.
- Provide a name for your keypair.
- Choose the keypair type as RSA.
- Private key format as .pem.

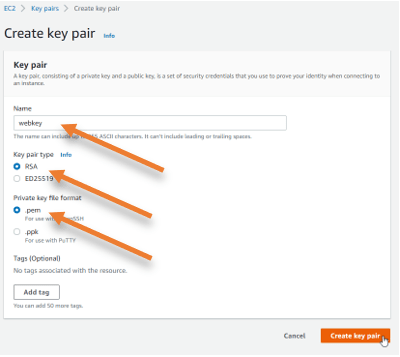
- Download and save the key pair in a safe location. You will need this key pair to log in to the webserver CLI from now on. Let’s proceed to spin up the Virtual machine.
4. Spin up the WordPress instance.
After the key pair is downloaded, it’s time for us to spin up the WordPress instance, there are multiple choices available from the AWS when it comes to WordPress, but we will use the official one.
- On the EC2 Screen, look for instances on the left side click on it.
- Click on Launch instance.
It will take you to a place where you can choose the instance of your choice.
- Click on AWS Marketplace and search for WordPress.
Choose the one that says WordPress Certified by Bitnami and Automattic. This is the official image from WordPress for AWS cloud. You can also see it is free tier eligible.


You will be shown the prices of each instance. In our setup, we will run t2.micro, which is a free tier. However, if you cross the free tier, you will be charged for the regular price.
- Choose T2.micro from the list. Click on Next: Configure instance details.


- In the configure instance details, you need to ensure the public IP assignment, for instance, is enabled.
For example, in my case, you can see it is enabled.


Leave everything else default, and click on Next: Add storage.
- In the storage, selection leaves the default and click on next: Add tags.
The tags are just for you to identify your virtual instance. I have given a name as my tag.


- Click on Next: Configure security group.
5. Configure the security group.
If you want to access any website on the internet, you must allow port 80 for http and 443 for HTTPS to be enabled to the internet, so anyone on the internet should be able to access your web page. The web page you are reading now is also enabled for http and HTTPS access to the public.
I already took care of the http and HTTPS ports in the security group creation wizard. You can see one more rule says anybody on the internet can connect to my virtual instance using port ssh. Meaning anybody on the internet with the private key of your VM should be able to get in, which puts your server to a security risk. You should never expose SSH to the public internet.
I always recommend you get your public IP from here and assign that public IP as a source here. You don’t have to ssh into your host now and then. Whenever you work on something on the server using the CLI, you may open the ssh port, if you are not using the SSH, you may enable it as and when needed.
The problem with the public IP is that most of the users out there will have a dynamic public IP from the service provider that changes now and then. The public Ip you have currently will be assigned to other subscribers by the service provider the next day. Open this port only if it is necessary.
Below is my security group. As you can see, I have given my public IP for the ssh access, and my public IP is static, so it will never change, so only I can ssh into the webserver from the internet rest all will be blocked. If you have a static IP address, then it is good.
We will SSH into the server in this tutorial to get the password for the WordPress dashboard.
The final two rules says, anybody (0.0.0.0/0) on the internet access HTTP and HTTPS.


6. Launch the instance.
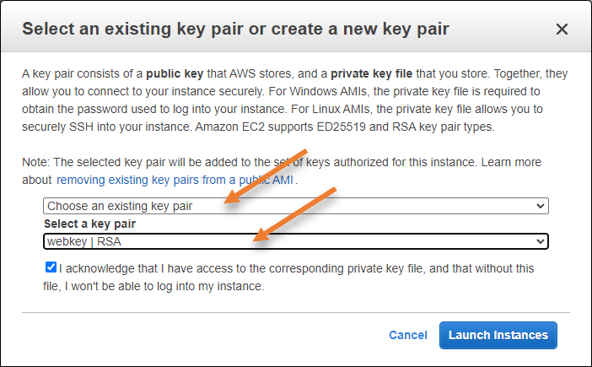
Click on Review and launch. On the pop-up, choose an existing key pair and choose the key pair we created in the first step. Check the acknowledge box, and click on Launch instances.

The instance will now launch, and it will take some time to load. Click on View instances to get back to your instances.
7. Access your WordPress site on AWS.
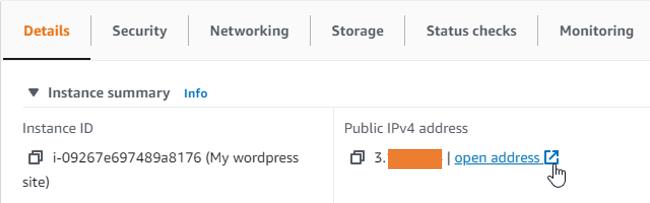
The instance will take some time to load, so you can’t access the web page right away. Under details, instance summary, you will see the public IPv4 address here.
You may click on the open address to access your WordPress site.

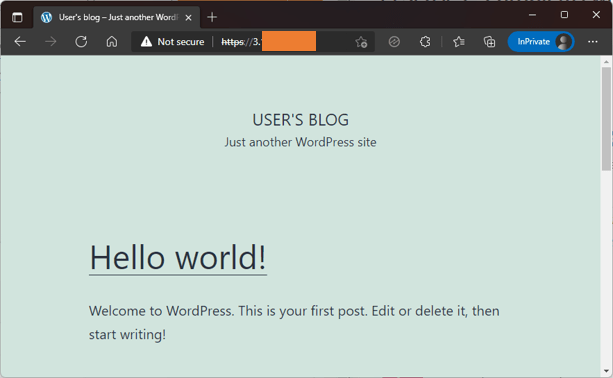
Once the instance is entirely ready, you will get the below screen.

8. Get the WordPress password.
The page we accessed above is the front end, we will create and manage the website on the backend which is restricted using the username and password. So before you access the backend, you will have to get the password for your WordPress instance.
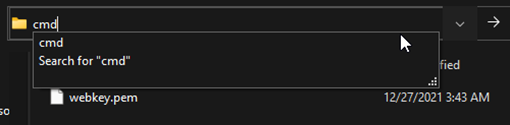
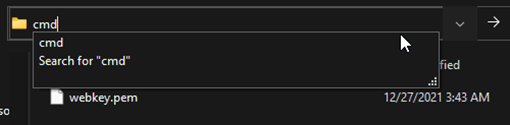
Go to the keypair location to SSH into your aws instance from your windows host.
Type CMD and hit enter.
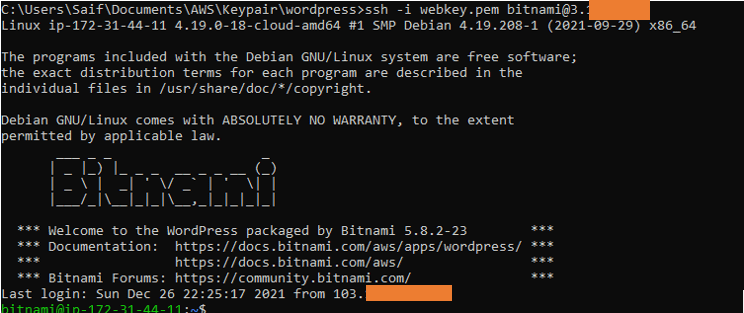
Type ssh -i <keypair> bitnami@<public IP>
Note: the default ssh username for the wordpress is bitnami, as you can see, I am able to login.

By default, you will be on the home screen, type ls, and see the list of files.

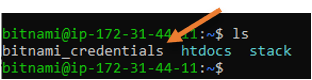
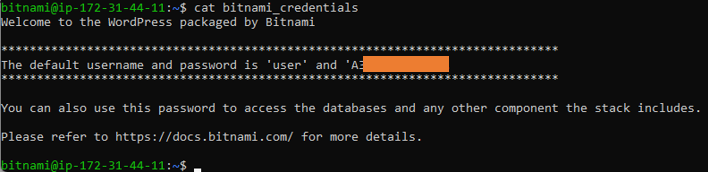
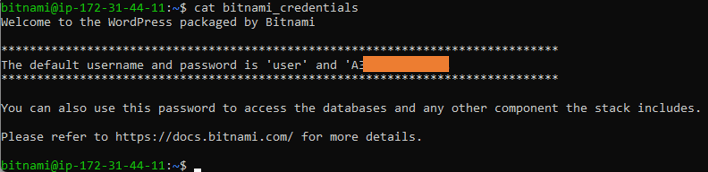
In that bitnami_credenttials file will have the password for your WordPress.
Use the command cat bitnami_credentials to get your password.
Get the password.
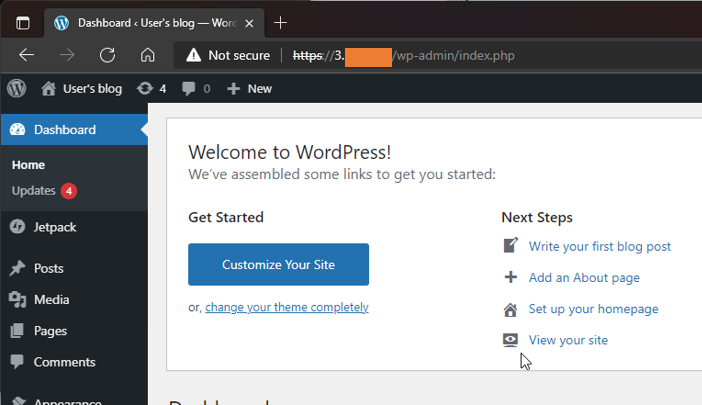
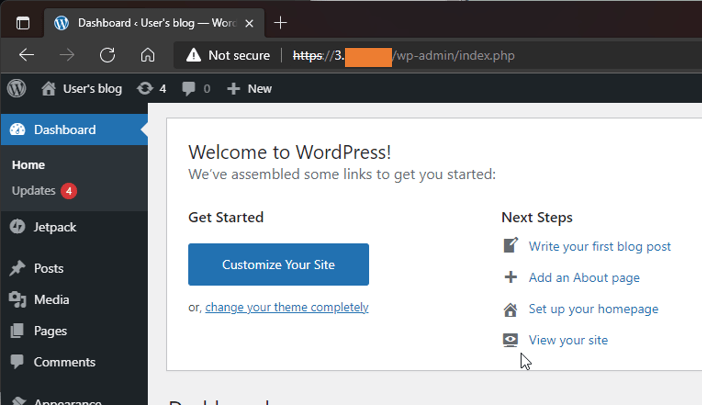
9. Login to the wordpress dashboard.
To login to your WordPress dashboard type https://<public IP>/wp-admin, ignore the security warning.
You will be prompted with the username and password, enter the username as user and password that you got it from the SSH screen.
But wait, you are accessing the webpage using the IP address, I want to access it using the website name. How do I do that?
Well, that’s a good question and we are going to look into that next.
10. Connect the IP address to a domain name.
We need some names for the website, and that name should be tied to the IP address.
We already have an IP address of your instance. We are going to register a domain name now.
1. Register a domain name.
The DNS service from AWS is called route53, but that’s not free in the free tier, and I don’t want to keep my domain name plus the hosting with the same provider because I already use another domain name provider, and I could map my IP address with my domain name or FQDN from there itself.
There are some free DNS providers out there. For temporary purposes, you could try them. However, I will assign a domain name that I registered in the past. And I am going to use the below for that purpose.


You could go to Namecheap and search for your domain name there. Once you find the one that meets your requirement, you may go ahead and register it.
2. Connect the domain name with the IP address.
We have the IP address and the domain name, you may follow the article here to know how you can map your IP address to your domain name. Once completed, you may wait for 30 mins for the DNS to propagate.
Below is the example for my domain name mapped to the public IP address of my WordPress site.
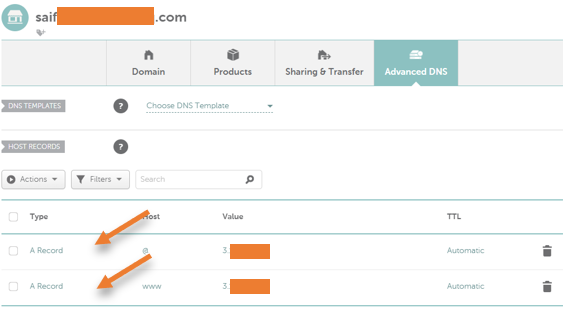
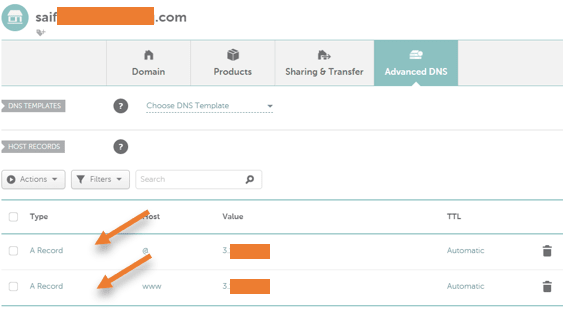
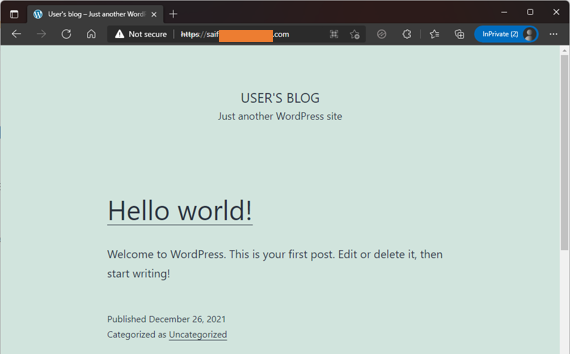
After the DNS propagation is complete, you can start using your website name.
Awesome! The webpage is now accessible to the public.

11. Remove the security warning from AWS wordpress site.
When we accessed the website using HTTPS did you see a security warning?
That won’t be a good user experience. We need to use an SSL certificate to bypass the security warning and secure the website. The certificate is also not for free, so you need to get a certificate and attach it to your website.
You can go back to the Namecheap here and purchase an SSL certificate, after you made the purchase you can activate the SSL with your website following the guide here.
That’s it, we have successfully hosted a WordPress site using AWS. It will just work fine just like any other hosting provider, and you also get AWS cloud reliability.