You wanted to test something in the windows server operating system; maybe you want to create a domain controller, a DHCP server, or even a DNS server.
The best way to test the windows server configuration is to perform them on a LAB environment. And Some of you may not have lab access, so your available option would be to virtualize the windows server on a hypervisor.
That way, whatever you do on the machine will stay in a virtualized environment. There are multiple hypervisors you can use to spin up the Windows server. And in my last article, we had covered how you can install the windows server on a KVM host. And In this blog, we are going to install the windows server on a VirtualBox.
Can you run Windows Server in VirtualBox?
You can run most operating systems with VirtualBox, provided it should be bootable or a virtual hard disk. Most of the users out there will have Windows server ISO file, and it works perfectly fine. However, you have a choice from Microsoft to download the virtual hard disk in VHD format. You can use that as well to install the windows server on the VirtualBox. And the windows server works great with the VirtualBox.
To get better performance after the installation of the windows, you will also have to install the VirtualBox guest additions. We will cover that as well in this article.
How do I download windows server images for VirtualBox?
You can go to Microsoft windows server evaluation center and download the Version of your choice. When you choose the Version, you will have multiple options; you can either select ISO or VHD. After choosing the Version, you will have to submit the form and post which you will get a link to download the software.
When it comes to the installation, compared to the ISO installation, the VHD file is the easiest way; however, the VHD file size is about 8GB, so you need to be mindful of that.
We will see how we can install the windows server 2019 with both the ISO file and the Virtual hard disk file.
Though we are installing the windows server 2019 in a VirtualBox, the steps mentioned here are identical for other Version of windows as well, such as windows server 2016,2012 and so on.
Prerequisite.
Steps to install windows server 2019/2016 on Virtualbox.
- Installation using the ISO file.
- How to install windows server using virtual hard disk (VHD) in VirtualBox?
Installation using the ISO file.
1. Creation of Windows server VM in VirtualBox.
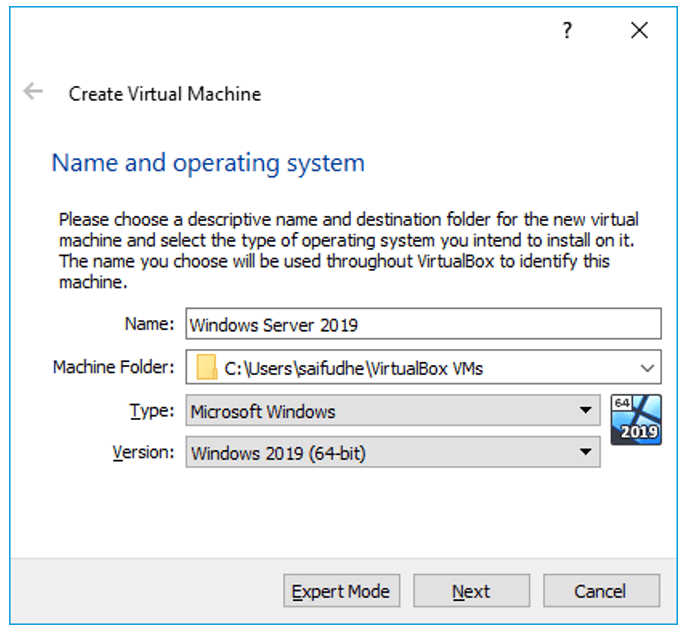
Open VirtualBox and click on New or CTRL+N to start the windows server VM installation.
A new Create Virtual machine window will pop up; you can choose either Guided Mode or Expert Mode. We are using the Guided Mode for our lab.
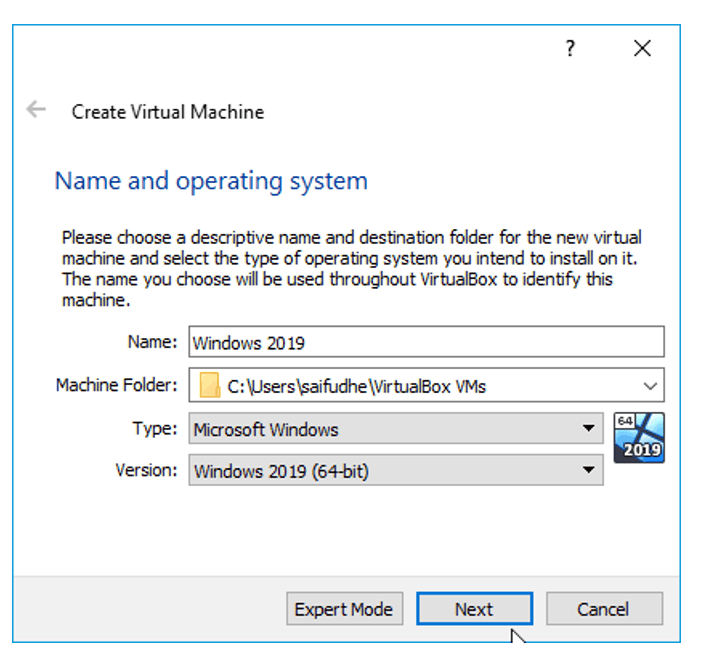
- Enter the name of the VM.
- Select the folder where you want to keep the VM Hard disk files, I left as a default folder.
- Choose the Type as Microsoft Windows.
- Version as Windows 2019 (64bit), for other Version of windows server you may choose them here. For Example, Windows 2016 (64bit)
After specifying the above, you may Click on Next.

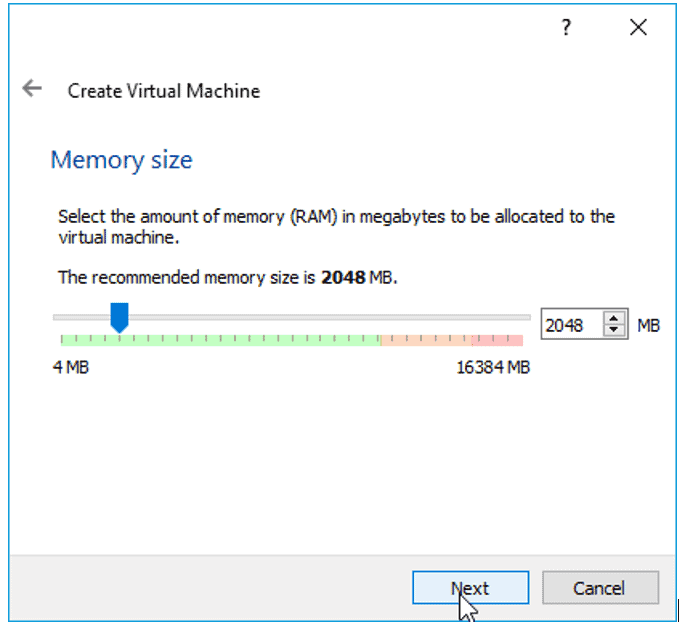
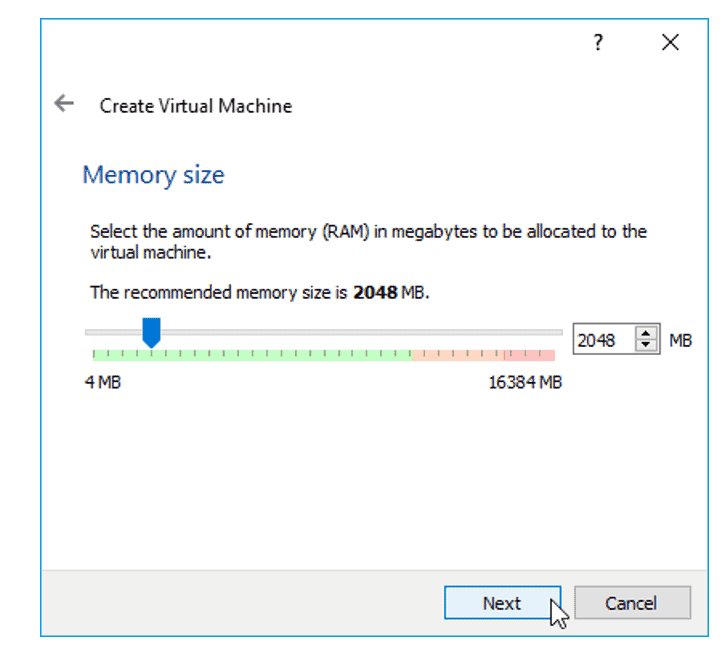
2. Specify the Memory.
You now have to define the Memory for the VM; since I most likely use it for a small Lab, I am fine with 2gigs of RAM. However, if you plan to do more stuff with it, you may need to increase the RAM accordingly.

3. Create virtual Hard disk.
We will create a virtual hard disk for our VM; in the hard disk wizard. Select the option à Create a virtual hard disk now and Click on create.

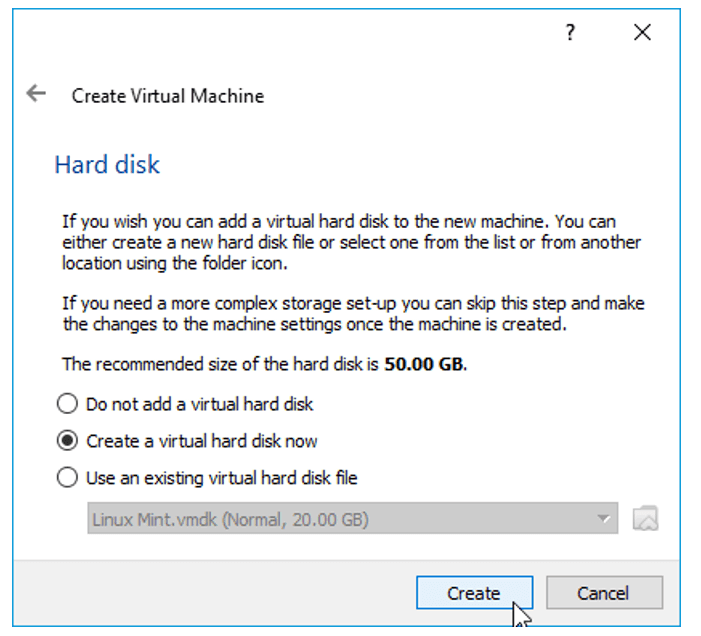
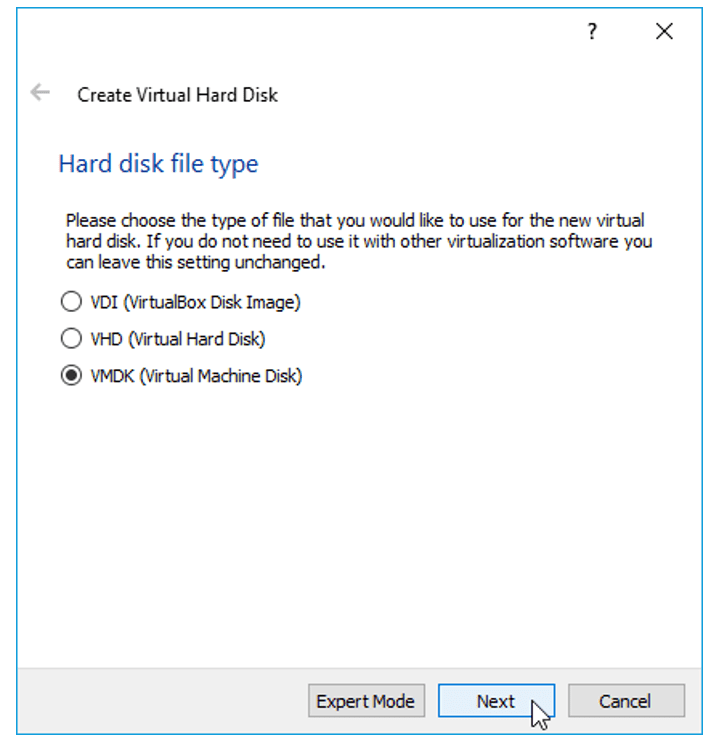
By default, the hard disk type would be VDI, and you may choose the default Value itself if you are planning to use the VirtualBox as your permanent hypervisor.
But I would recommend choosing VMDK so that you have an option to move from the VirtualBox to other hypervisors of your choice. Now Select VMDK and Click on the option Next.

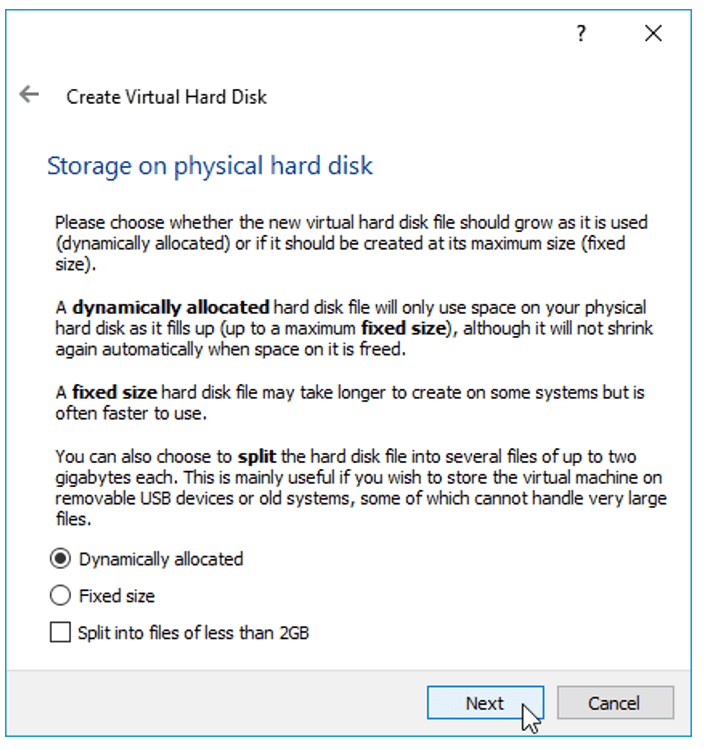
On Storage on Physical hard disk, Choose the default value Dynamically allocated and Click on Next.

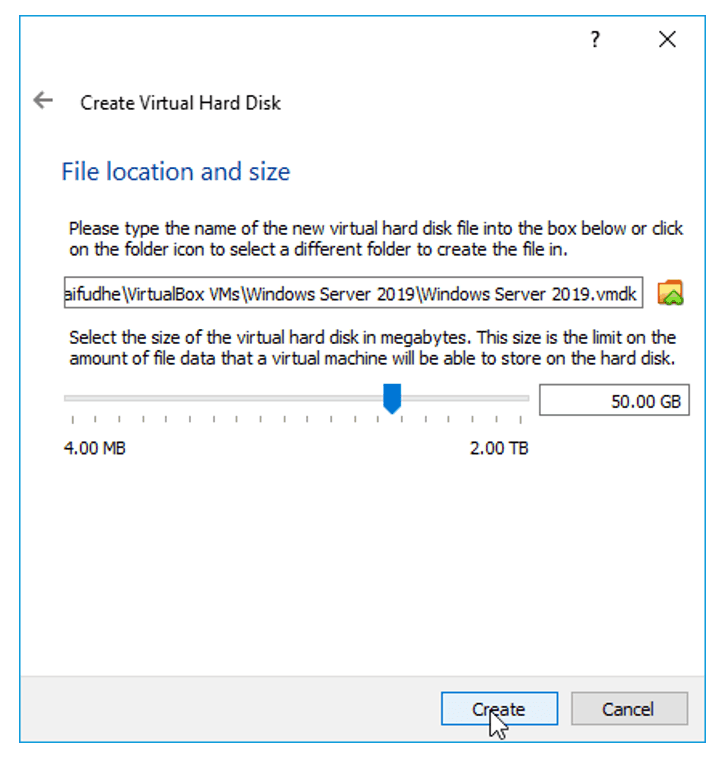
We will now define how much storage you want to provision for the windows server; I choose 50GB which is more than enough for me.
If you feel that you might need some extra space, you choose more based on your requirements and Click on Create.

You will be able to see the windows server VM instance is created.
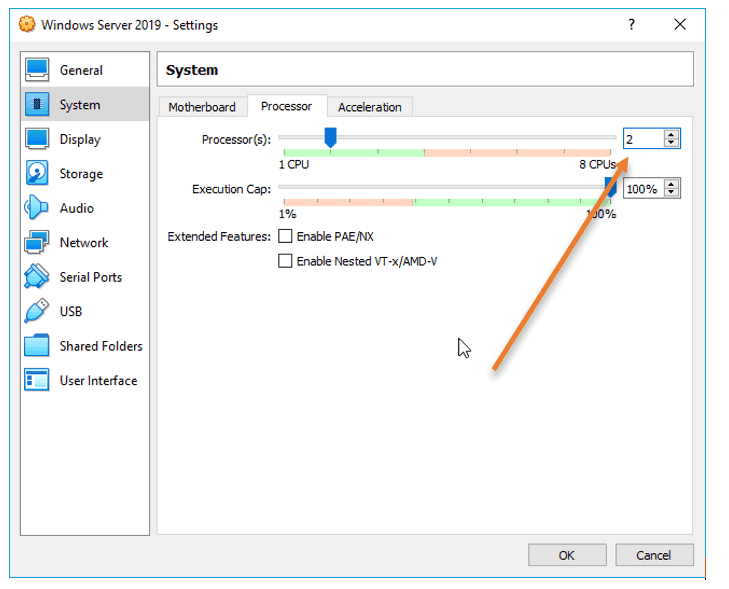
4. Increase the CPU.
By default, the VirtualBox would assign only one processor to the VM, and I need to add one more processor. That way, then the performance would be good. If you do not need more CPU, you may skip this step.
Right-Click on the VM and Click on settings.
Click on System and choose the Processor tab, and in the processor count, increase it to two.

5. Attach the windows server image to the virtualbox.
On the same VirtualBox settings, Click on storage.
Under storage devices, Choose the Empty Disk.
In the attributes, Click on the Disk icon to choose a disk file.

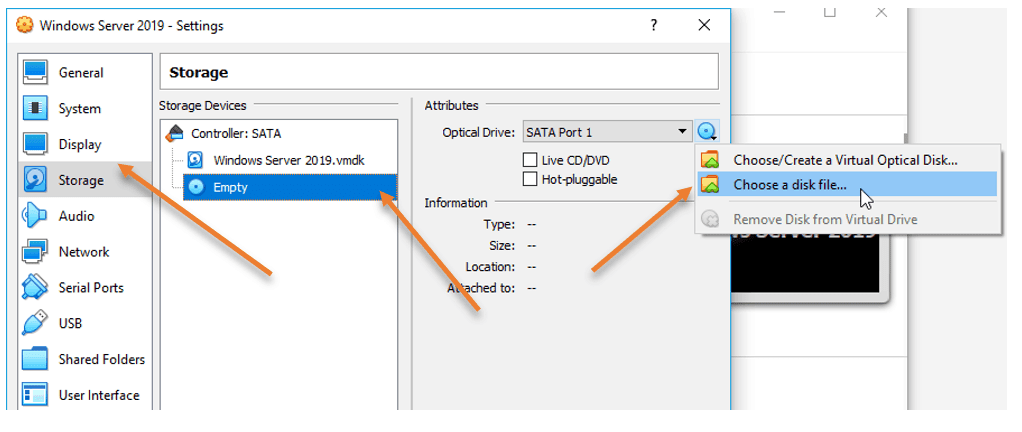
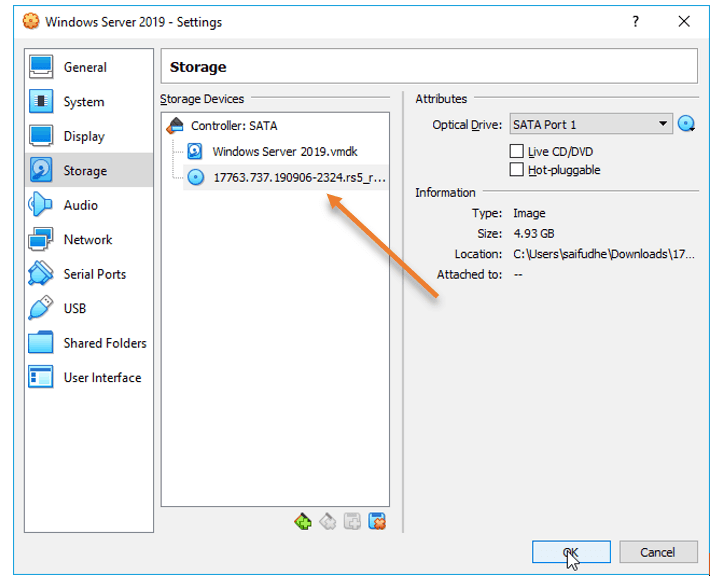
And attach the ISO that we have downloaded earlier and Click on Ok.

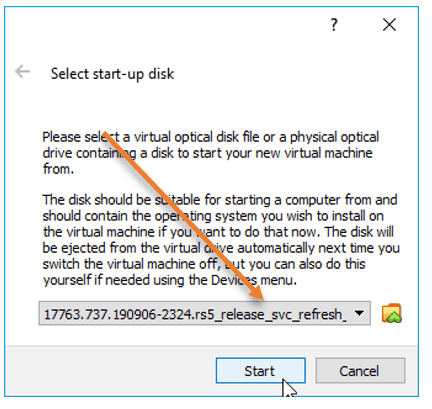
Right-Click on the VM and Click on start.
From the start-up disk, choose the ISO image that we have attached and click on start. The VirtualBox instance will boot the windows server image.

6. Begin the windows installation.
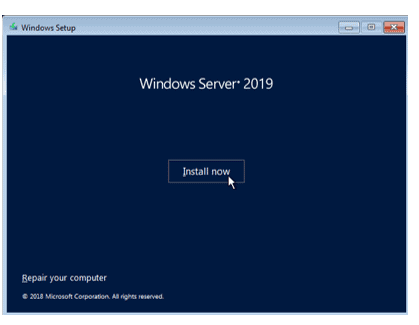
After a few seconds, you should see the windows installation screen, Choose the language, and Click on Next.

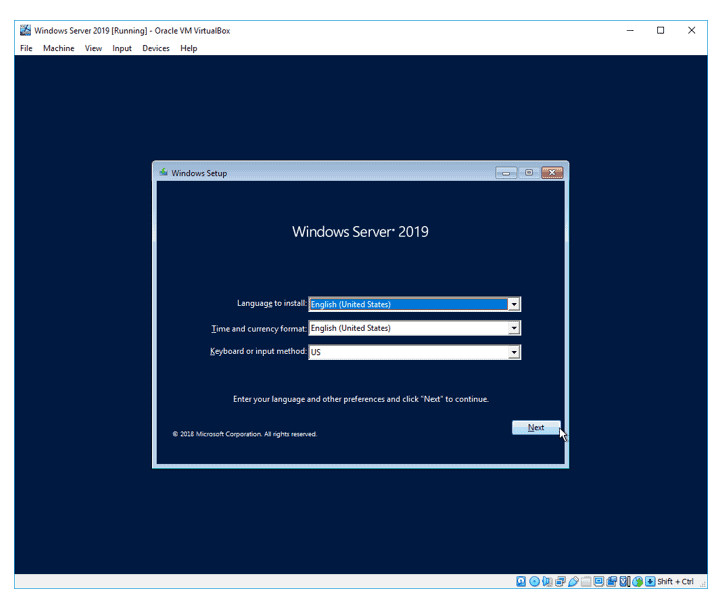
You can click on Install now.

7. Choose the Version – GUI or CLI.
You will be presented with the different Versions of windows server 2019 on the screen. You must be a little careful here.
If you want to install the windows server with GUI, you may choose Desktop experience, or if you are ok with CLI, you may select the other options.
I need GUI access; hence I selected Windows server 2019 Datacenter evaluation (Desktop Experience)
After you decided on the versions, you may Click on Next.


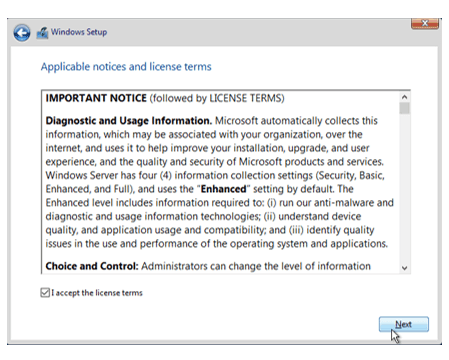
Accept the license agreement and Click on Next.

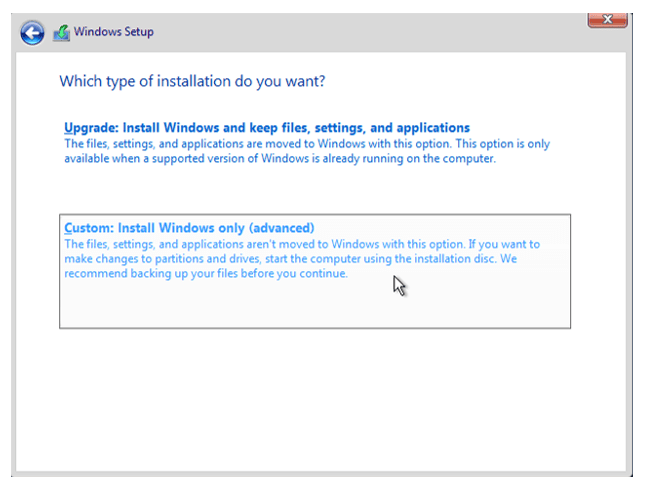
Choose the installation as Custom.

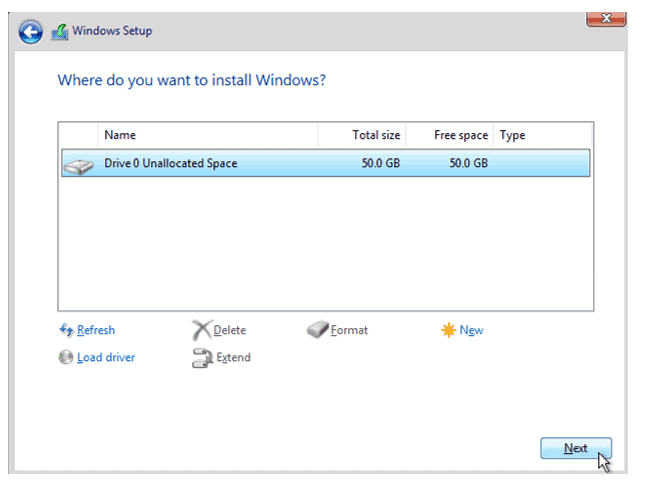
Choose hard disk that we have defined earlier, Click on Next.

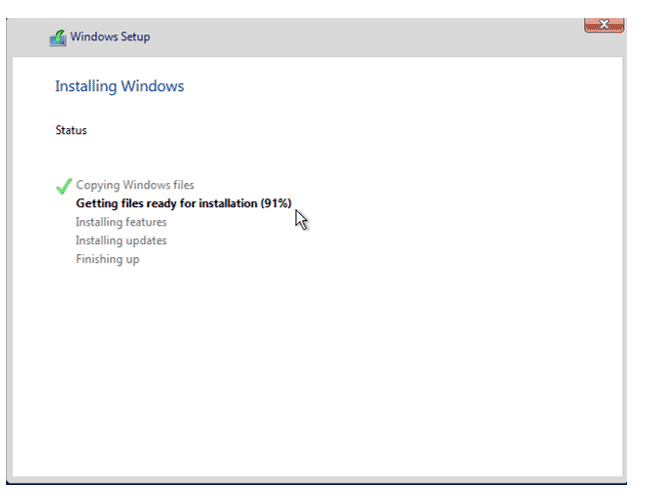
The windows server installation will now begin; this will take some time to finish.

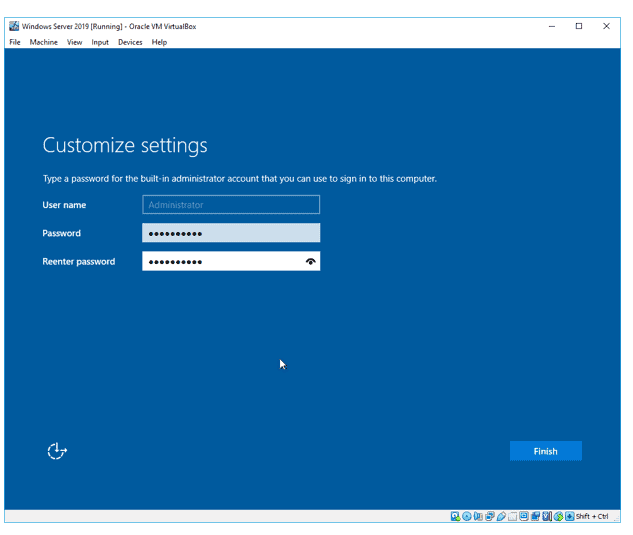
8. Setup the admin password.
After the installation, you will be prompted to enter the Administrator password. Set the administrator password and Click on Finish.

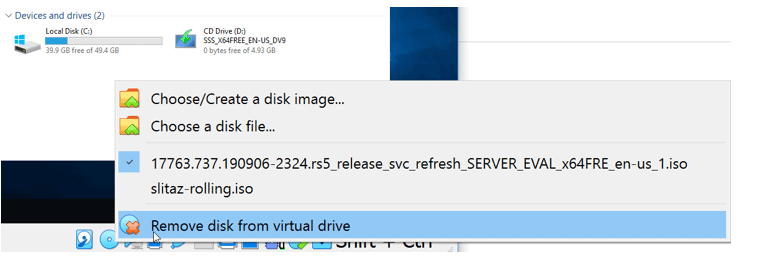
9. Remove the ISO file.
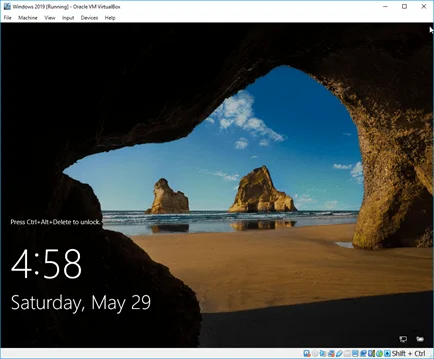
Installation of Windows server 2019 in Oracle VirtualBox is completed; you may now log in to the windows server.
Let’s remove the windows server ISO file that we had attached during the installation.
On the bottom corner of the VirtualBox window, right-click and click on the disk icon and click on Remove disk from virtual drive.

10. Installation of VirtualBox Guest additions.
Finally, we will have to install the VirtualBox guest addition, which will improve the performance of the windows server VM.
To install the VirtualBox guest additions, you may log in to the windows host.
Click on Input–> Keyboard–> Insert Ctrl+Alt+Del
You will be prompted to enter the admin password that we had set up earlier.
After logging in, Click on Devices > Insert Guest Additions CD image…

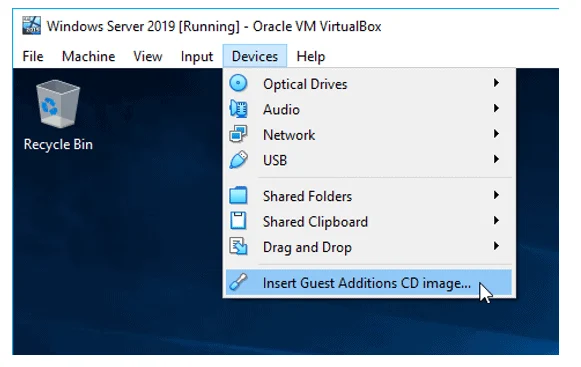
It will attach the Guest addition installation disk to the Windows server VM.
Open This PC, and you should see the VirtualBox Guest additions CD drive and double click on it.

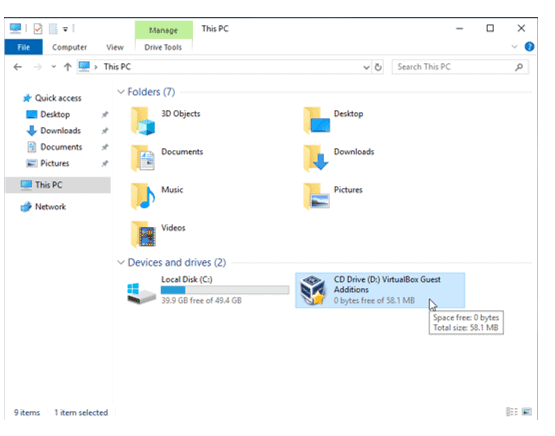
Double click on the Virtualbox Guest addition installation setup file to install the VirtualBox guest additions on your windows server machine.

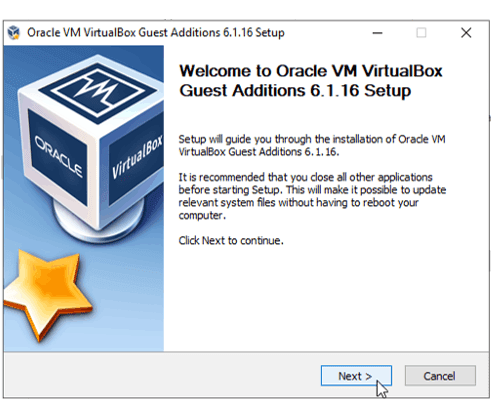
It is a typical software installation and nothing too complex here; you may click on next on all the drive installation prompt that you get.
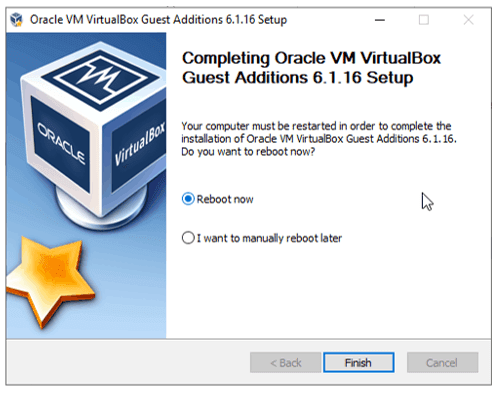
After the installation, you may now go ahead and reboot the VM, and you should be good to go.

How to install Windows Server using Virtual Hard Disk (VHD) in VirtualBox?
We have successfully installed the windows server 2019 on the VirtualBox hypervisor using ISO image. We now will go ahead and install the virtual machine using the virtual hard disk. We already have a VHD file downloaded from the Microsoft site.
1. Creation of the VM.
On the VirtualBox, Click on New.
- Name the VM and the location where you want to save the virtual machine.
- Type as Windows.
- Version: Windows 2019 (64bit)

2. Define the memory size.
We can provide a Memory of 2GB or more, and I am choosing 2GB for now.

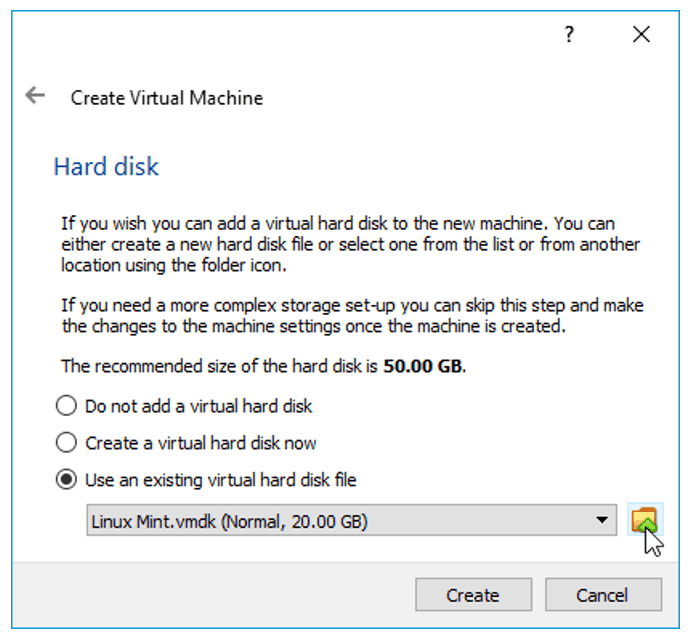
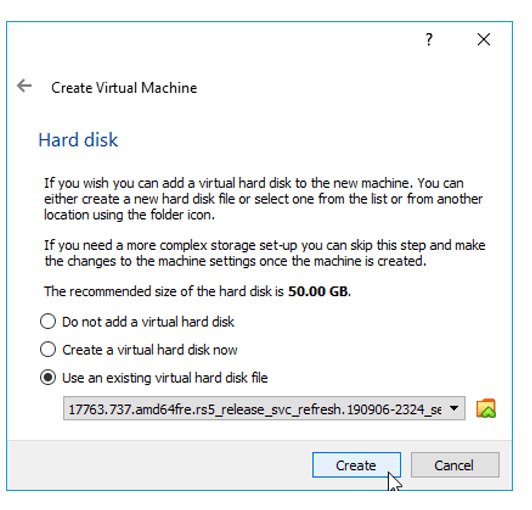
3. Attach the Virtual Hard disk.
When we chose the ISO method of installation, we created a new hard disk in the VirtualBox.
But right now, we already have the virtual hard disk file, We need to attach that here.
Select use existing virtual hard disk file and click on the browse button next to the drop-down.

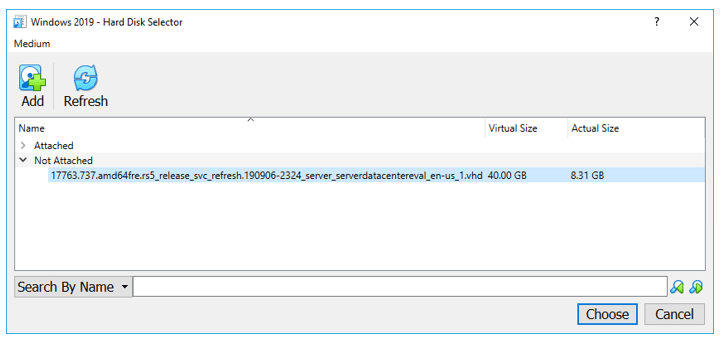
You will not see the virtual hard disk in the new pop up; Click on Add.

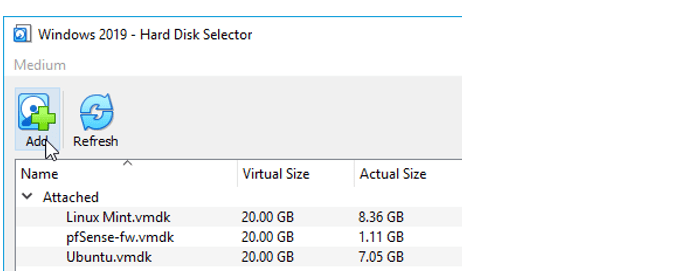
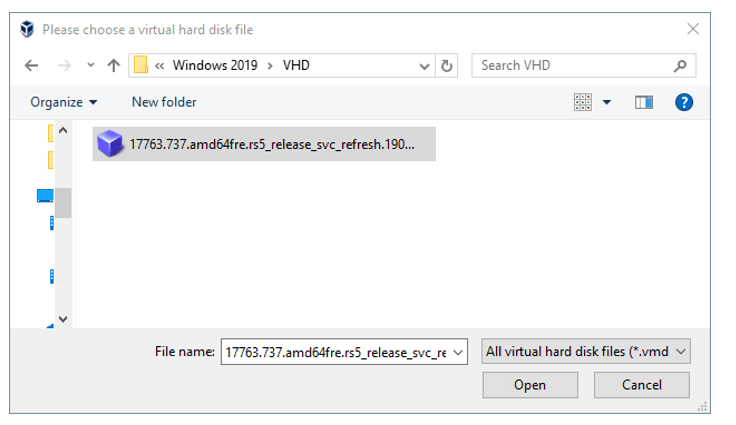
And Select the VHD file which we downloaded from Microsoft.

The new image is added under the not attached section.
Select the image and Click on Choose.

You need to make sure the new virtual hard disk is selected under ‘use existing hard disk file’
Click on Create.

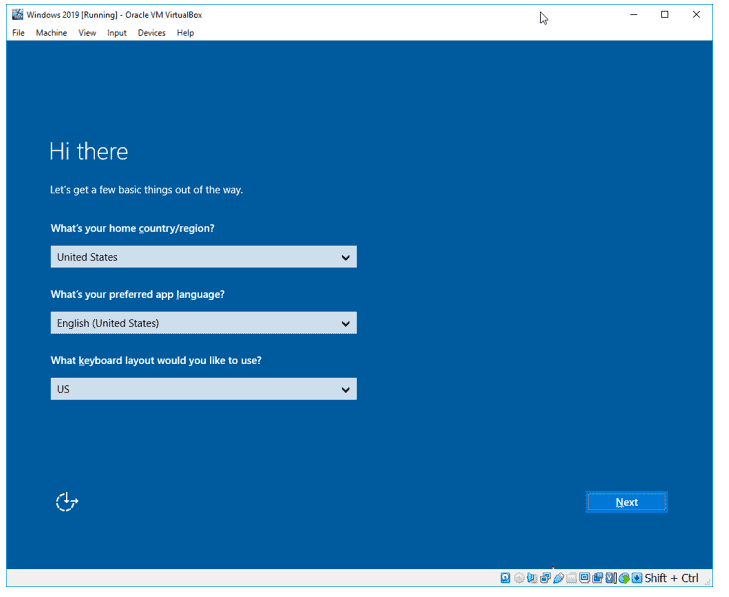
4. Choose the region and Accept the license.
Once you power on the machine, you will get an option to Choose the region, Language, Layout and Click on Next.

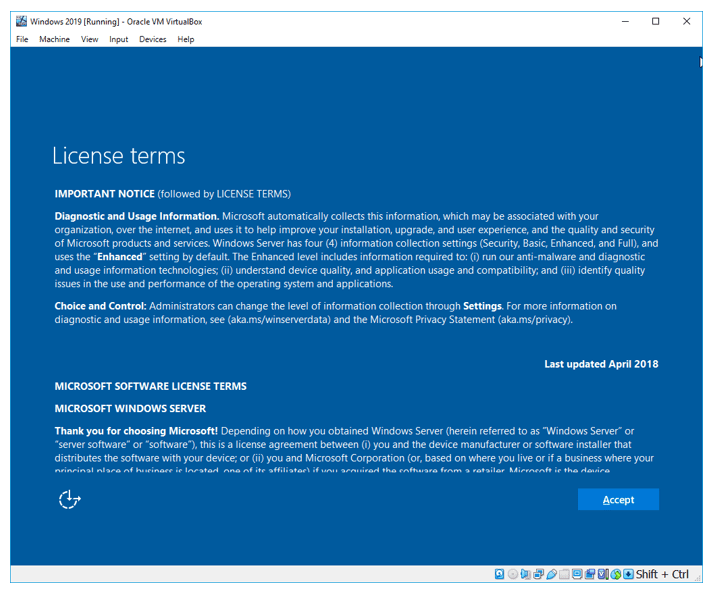
You have to accept the license before you continue.

Follow the Step 8 above to set the admin password. Enter the password and Click on Finish.
Your VirtualBox is ready to use, and you still need to install the VirtualBox guest additions following Step 10 above which is important.