The VMware tool is a software package from VMware that you can install on your Virtual machine. You can think of VMware tools as software drivers that you would usually install on a PC.
Installing the VMware tools package will improve the VM’s overall performance and manageability.
We have covered the installation of Windows operating systems on VMware hypervisors such as Esxi and VMware workstations. In this blog, let’s look at how you can install VMware tools on Windows machines installed in ESXi and VMware workstations.
Are VMware tools required for the Virtual Machine?
The VMware tool is a program that is available for all the hypervisors made by VMware, including ESXi, Workstation, and even fusion for MAC. After the virtual machine installation is complete, you will install these VMware tools inside the Virtual machine.
Even if you don’t have VMware tools installed in your virtual machine, you can still access your virtual machine just fine. However, it is recommended that you install VMware tools to improve the Virtual machine performance and ease of management. Also, during your virtual machine upgrade cycle, you should consider upgrading your VMware tools.
In this blog, we will install VMware Tools on a Windows machine in ESXi and VMware workstation environments.
Note: Though I am showing the Windows 11 version here, the steps mentioned are identical to Windows servers and other Windows versions. Also, the steps mentioned for the Vmware workstation are the same for VMware fusion for MAC as well.
Install VMware Tools on Windows in ESXi.
Install VMware Tools on Windows in VMware workstation.
Install VMware Tools on Windows in ESXi.
We have already installed a windows virtual machine in ESXi, following the article here. And we will start from there.
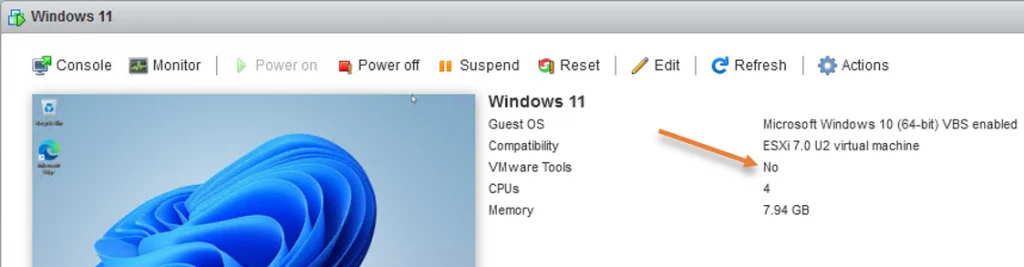
In the Windows virtual machine dashboard, you will see the status of VMware tools.
If you have already installed the VMware tools, you will see ‘Yes’ on the VMware tools section otherwise, it will show ‘No’.
Since we have not installed it, it says No.

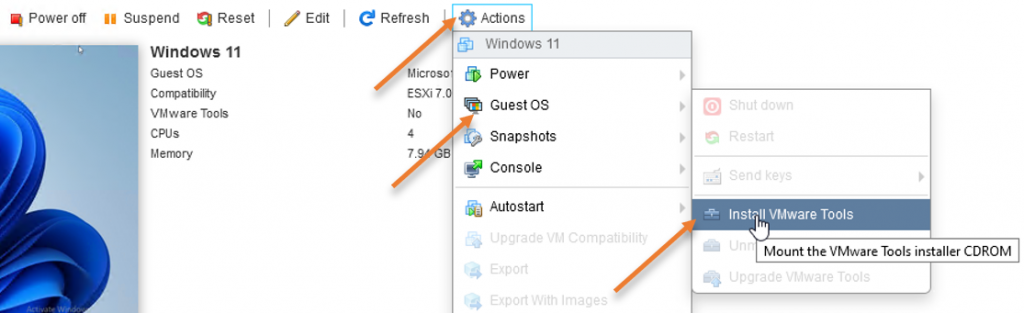
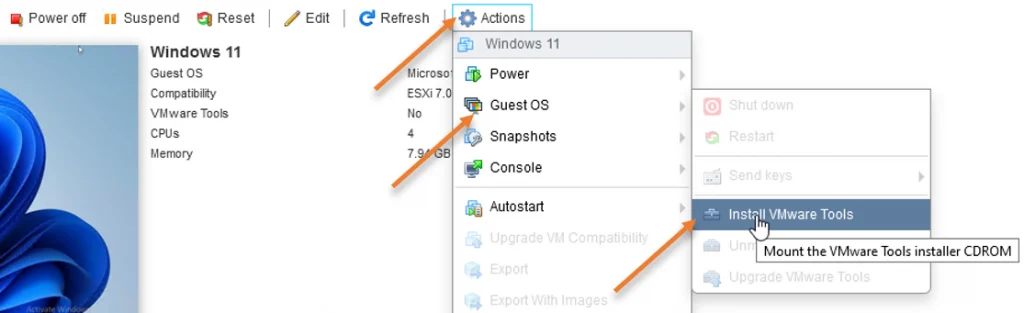
To install the VMware tools, in the same dashboard, click on Actions->Guest OS-> Install VMware tools.
The VMware tools CD-ROM will now mount onto the Windows operating system.
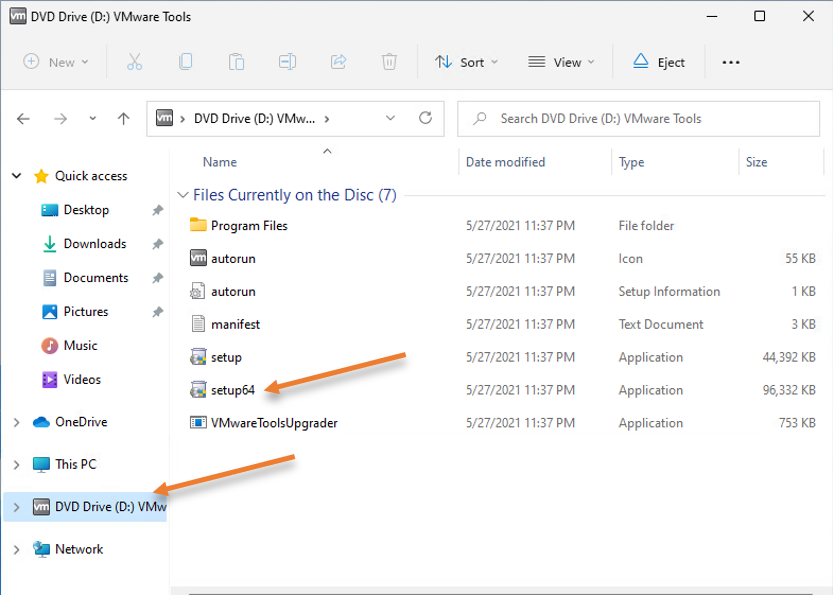
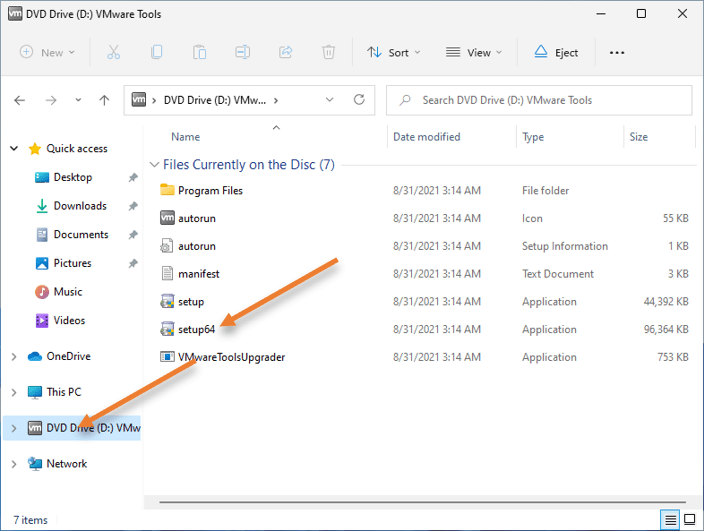
Open File Explorer, and you should see DVD Drive attached on the left side.
Open the DVD drive in that double-click on Setup64 to install the VMware Tools on the Windows 11 machine.

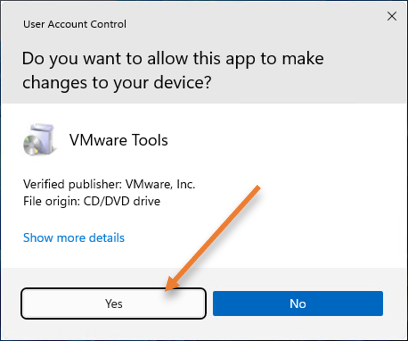
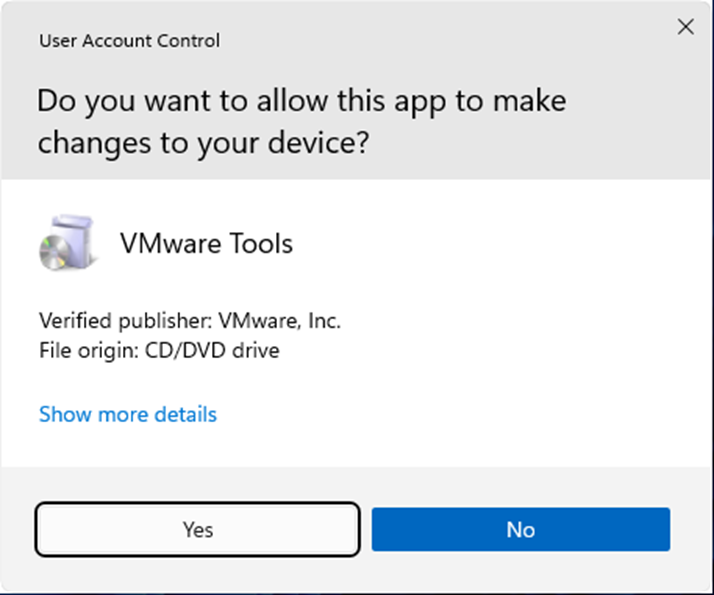
The installation wizard for the VMware tools would now open. Click on Yes.

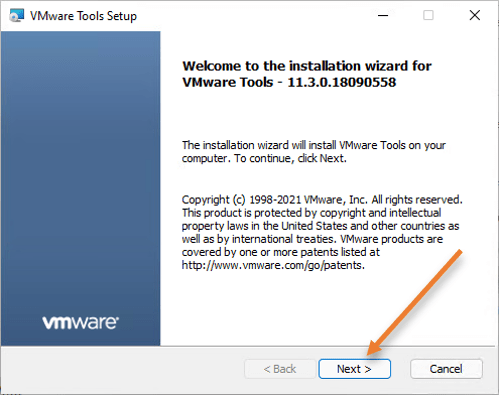
Click on next.

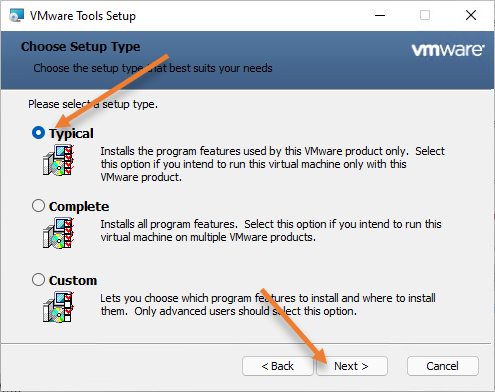
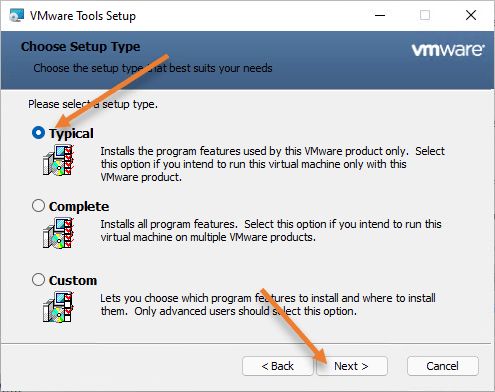
Choose Typical and click on Next, and click on next and install.
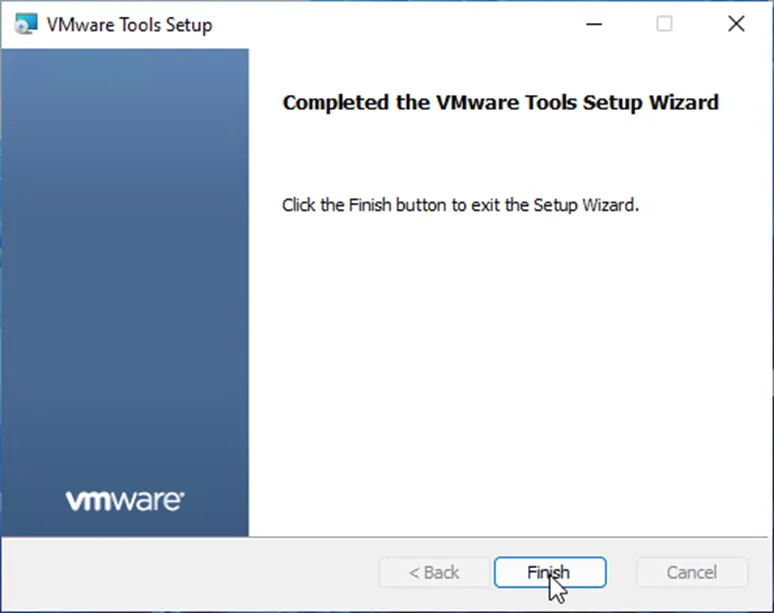
Once the installation is complete, you may click on Finish.

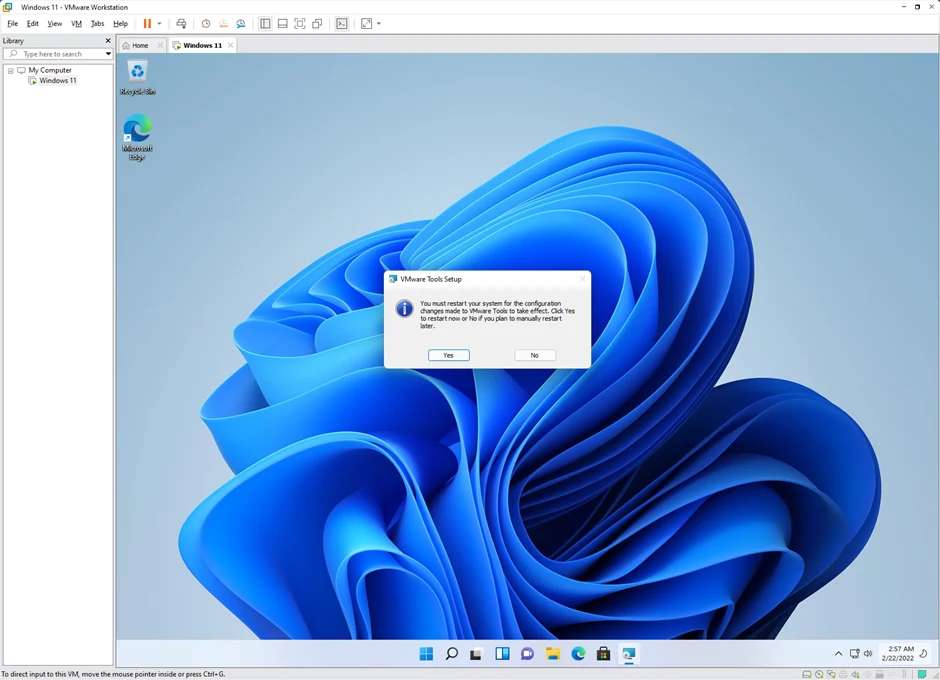
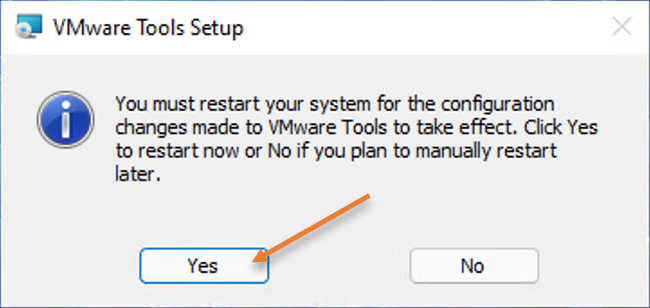
After the installation, you will be required to restart the machine click on Yes on the VMware Tools setup pop-up.

After the system is restarted, you will see the VMware tools shows yes, which means it is already installed.


Install VMware Tools in Windows in VMware workstation.
We have taken a look at how you can install VMware tools on the ESXi host; next, let’s take a look at the same from the VMware workstation perspective.
As I mentioned before, the steps discussed here are identical to the VMware fusion.
It is assumed that you have already installed the Windows operating system in the VMware workstation. Any windows operating system would work. We are going to show you the example with the Windows 11 operating system. Which is covered in this article.
Before we proceed with the installation, let’s see how the Virtual machine behaves when you don’t have the VMware tools installed.
As you can see from the screenshot below, I have not installed the VMware Tools on the Windows 11 machine. Because of that reason, the operating system doesn’t resize when I resize the Vmware workstation window.
It just shows black borders.


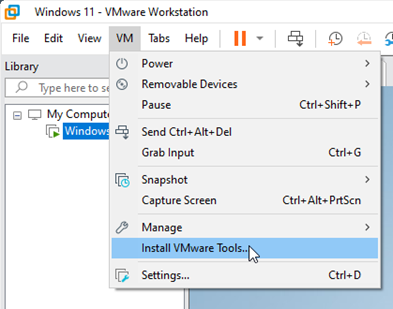
Let’s go ahead and install the VMware Tools on the windows operating system and see how it behaves. To install the VMware tools in Windows, select the virtual machine.
Click on VM->Install VMware tools.

You will get a notification on the bottom that says the DVD Drive with VMware tools has been inserted.


Open File Explorer.
You would see DVD Drive on the left pane. Click on that.
And double click on the setup64 to install the VMware Tools on the Windows 11 machine.

Click on yes on the installation prompt. And follow the onscreen instruction to install the VMware tools.
I just completed the installation of VMware tools on my Windows 11 virtual machine, and I can now go ahead and reboot the virtual machine. But before you reboot, you may resize the VMware workstation Windows, and you should see the Windows 11 resolution gets adjusted along with the Hypervisor window. This means you don’t have to manually adjust the screen resolution when you increase the window size. No longer does it show the black borders. That is not the only benefit, that is one among the benefit of installing the VMware tools.