Ubuntu server is the common Linux operating system found in most server infrastructures. Maybe you want to run a web server in your environment and allow access to end-users. You could also use it as an FTP server, mail server, and so on. When I started with KVM, I initially installed the Ubuntu server on the ESXi; with the help of Nested virtualization, I could spin up Virtual machines inside the Ubuntu KVM host Play around with it. Though the performance was not so great compared to the bare metal KVM, you can get the job done.
In my case, I was going to build a home lab in ESXi with a firewall and everything, and for a small webserver, I would want to install Ubuntu server 20.04 in ESXi.
We have covered plenty of blogs about how you can install Ubuntu server 20.04 on various hypervisors. In this blog, we will install Ubuntu Server 20.04 on ESXi. After the installation, we will ssh into the Ubuntu remotely and check the internet connectivity and the other virtual machine in the same network.
Below is my topology diagram;
I have a layer3 switch connected to the ESXi host, and that link is configured as a trunk carrying multiple VLANs. In my setup, the management VLAN is VLAN 100 to access ESXi web GUI or SSH, and the VM VLAN, VLAN 40, which provides network access to the virtual machine.
The management PC is connected to the same switch, and I can manage the ESXi GUI from the management PC. After the VM deployment, I can access the Ubuntu machine from the management PC as the inter-vlan communications are enabled.


Before you begin, you need to have;
- VMware ESXi installed on a host.
- Ubuntu server 20.04 downloaded – You can follow the article here to download the Ubuntu faster.
1. Setup the ESXi network.
We will use an ESXi host with a default network configuration for this lab. The only difference is the ESXi management traffic on a different VLAN- VLAN100 and the VM traffic will be on a separate VLAN – VLAN40. The link connected from the ESXi host to the switch is a trunk port, and it carries multiple VLANs as tagged.
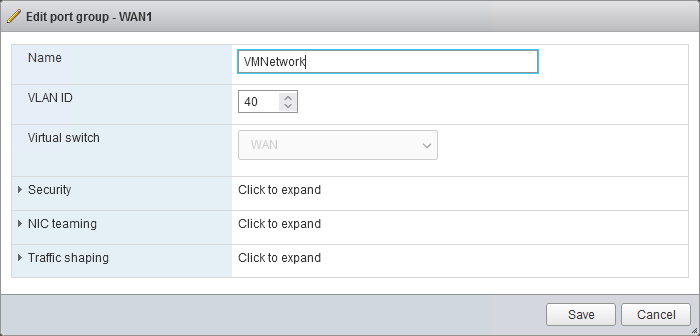
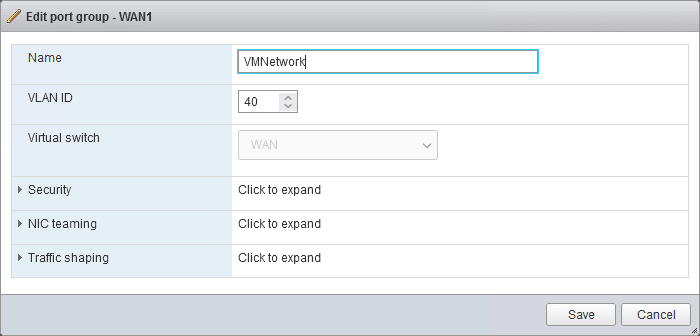
As you can see, in the vSwtich0, I have configured a port group called VMNetwork with VLAN 40 as tagged. I have also configured the VLAN interface on the switch and configured it with the IP address 10.0.40.1/24. We will configure the IP address from the same subnet for the VM’s.
2. Create the virtual machine.
Log in to the ESXi host and click on Virtual machines-> Create/Register VM.
A new VM creation wizard will open up.
Choose to Create a new virtual machine and click on Next.


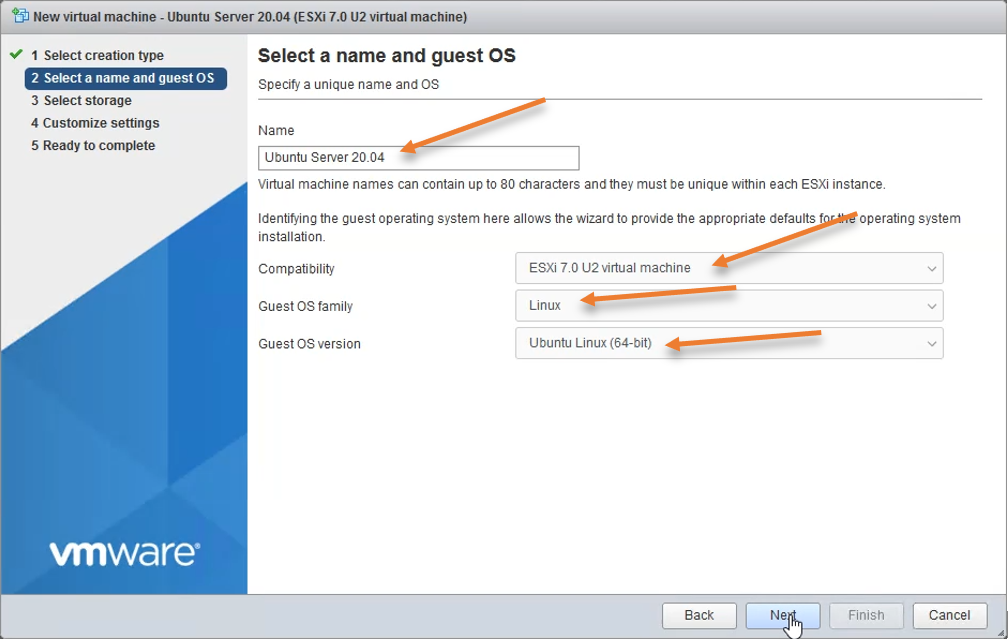
3. Select a name and guest OS.
You have to instruct the ESXi what type of virtual machine we will install.
- You may name the Virtual machine.
- Compatibility : Esxi 7.0 U2 Virtual machine- if you use an older version of ESXi, you have to choose that one instead.
- Guest OS family: Linux
- Guest OS version: Ubuntu Linux (64-bit)
Click on Next.

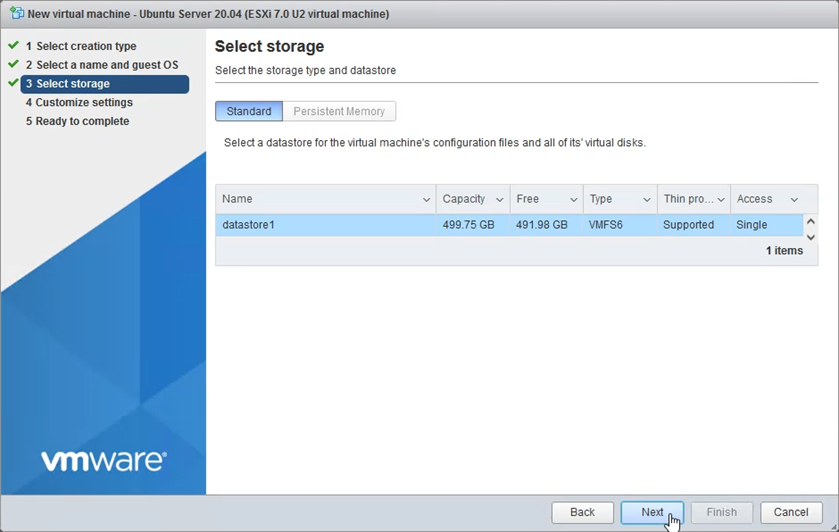
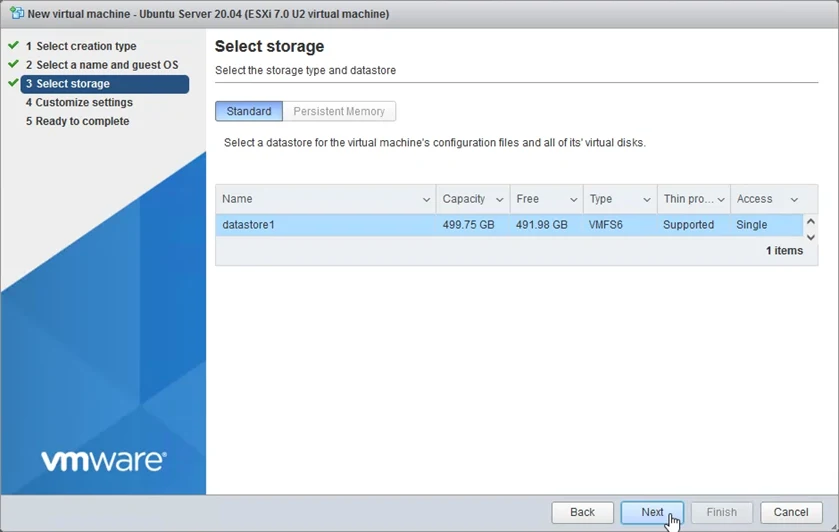
4. Select storage.
Under storage, choose the datastore and click on Next. That’s where you save all the files.
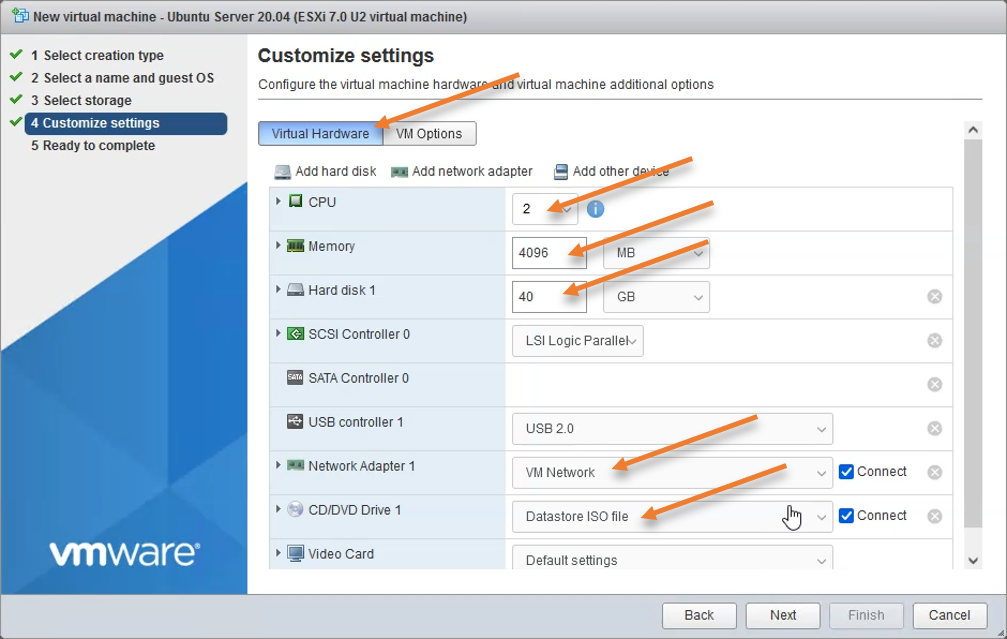
5. Configure the Ubuntu virtual machine resources.
The next is to configure the Ubuntu virtual machine resources, such as memory, CPU, and virtual HDD.
In the virtual hardware screen, you may configure it as below.
CPU: 2
Memory: 4096
Hard Disk1: 40 GB
Network Adapter 1 : VMnetwork – The port group we defined with the VLAN 40.
CD/DVD Drive1 : I have already uploaded the Ubuntu ISO file to my datastore hence I can choose the Datastore ISO file and point the ISO file from the datastore.
Click on Next.

You will get a summary of the virtual machine, verify everything looks good, and click on Finish.
6. Proceed with the Ubuntu server 20.04 installation on Esxi.
Go back to the virtual machine, you will see Ubuntu server 20.04 added in there, double click on it, after a few seconds, it will power on the VM, and the installation will begin.
- Choose the language of your choice and hit enter.
- Chose the keyboard configuration of your choice and select done.
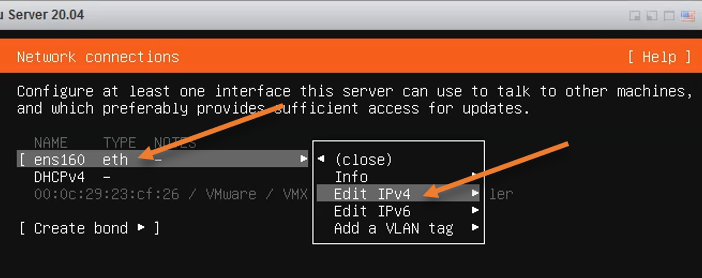
- Configure IPv4 address.
We will configure the IP address statically on the virtual machine, selecting the ethernet interface using the arrow key and choosing Edit IPv4.

You also can continue without a network and configure the network later. This will speed up the installation speed as the Ubuntu server won’t talk to the internet to download its update during the installation. Later you can follow the guide here to set up the IP address using netplan here.
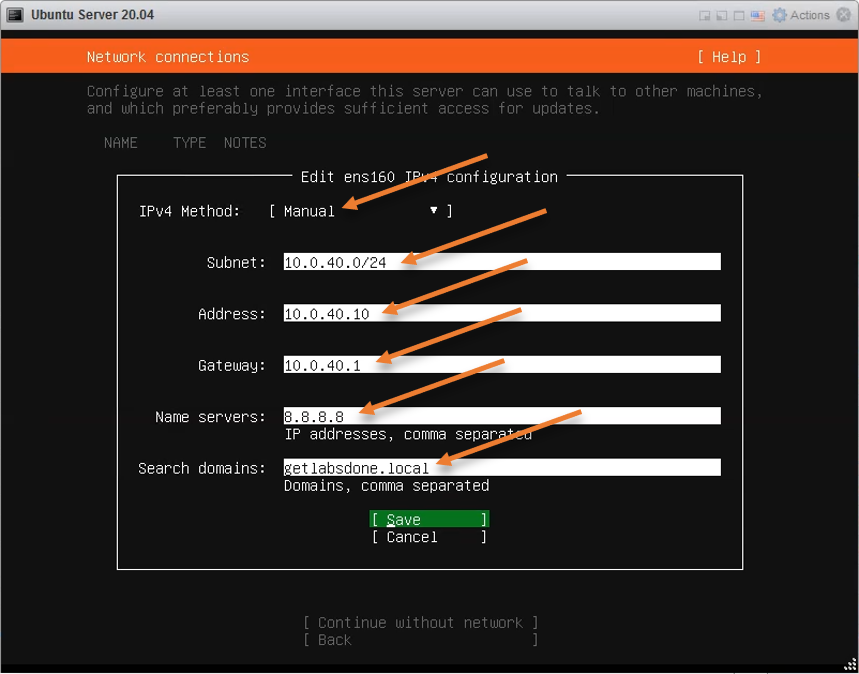
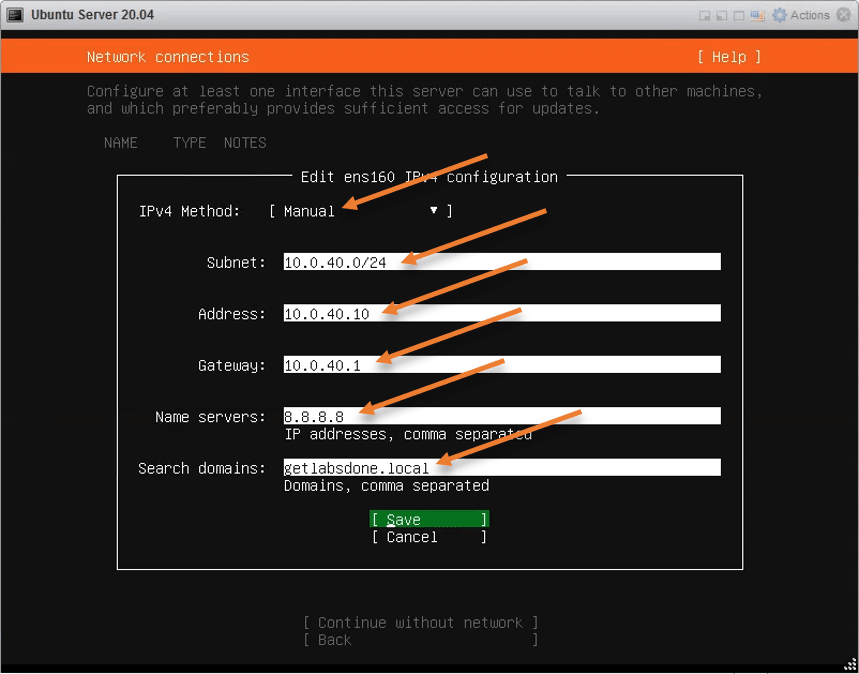
In the IPv4 configuration. By default, it is configured with DHCP, you will have to change it to manual.
Subnet: 10.0.40.0/24 – define the vlan 40 subnet address.
Address: 10.0.40.10 – This is the address we will use for the Ubuntu host.
Gateway : 10.0.40.1 – The IP address from the VLAN 40 SVI from the layer 3 switch.
Name server: If you have a local DNS server, you may enter them here separately.
Since I don’t have a DNS server in this network, I am configuring the google Public DNS server 8.8.8.8.
Search domain: use your local domain name.
After the selection, click on save and done. As soon as you made the changes, you can now ping from your switch to the ubuntu host.
- Configure Proxy.
If you use the proxy to get to the internet, you may enter the proxy address here. I am not using any proxy; hence I can leave this field blank.
- Update the Ubuntu mirror.
If you would like to use a different mirror for Ubuntu, you can change it here, I am okay with the default configuration here.
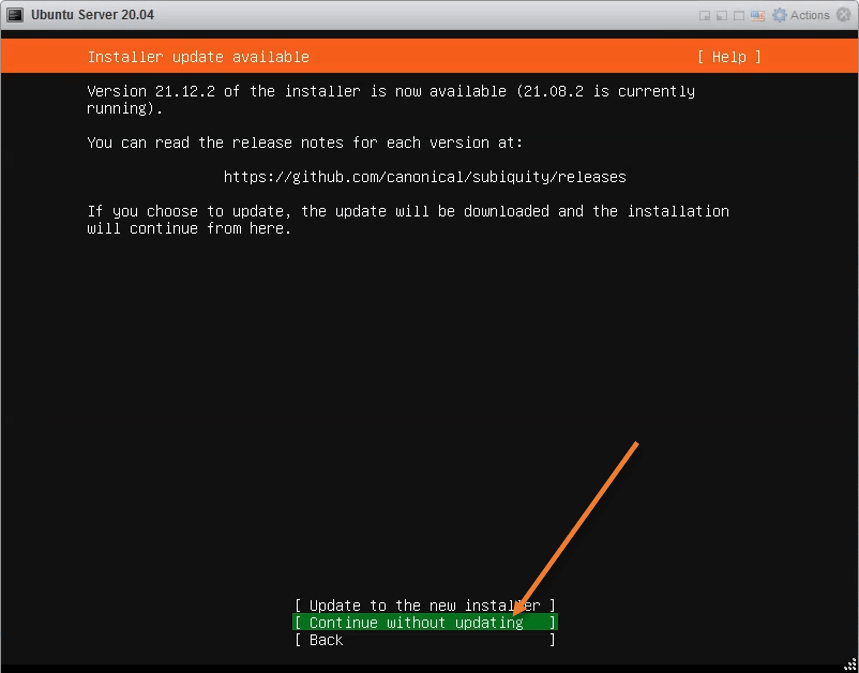
You will see a new installer update available, I will not update hence choosing Continue without updating.

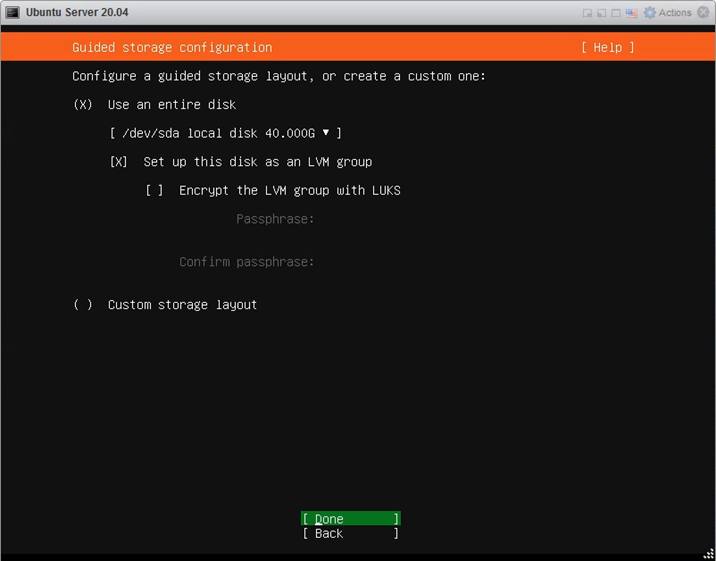
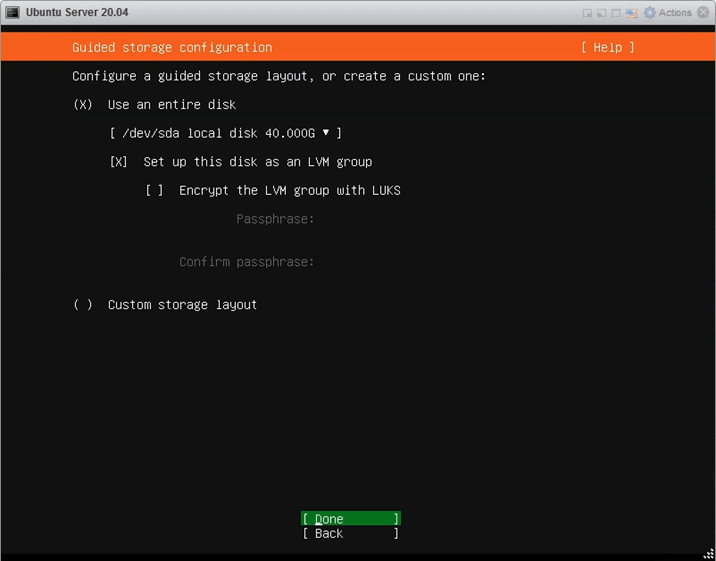
- Configure the storage.
You will get the option to make changes to the storage. I am not making any changes here and leaving the default value and choose Done.
If you would like to reconfigure the 40GB virtual storage that we defined from the ESXi, you can do that here.
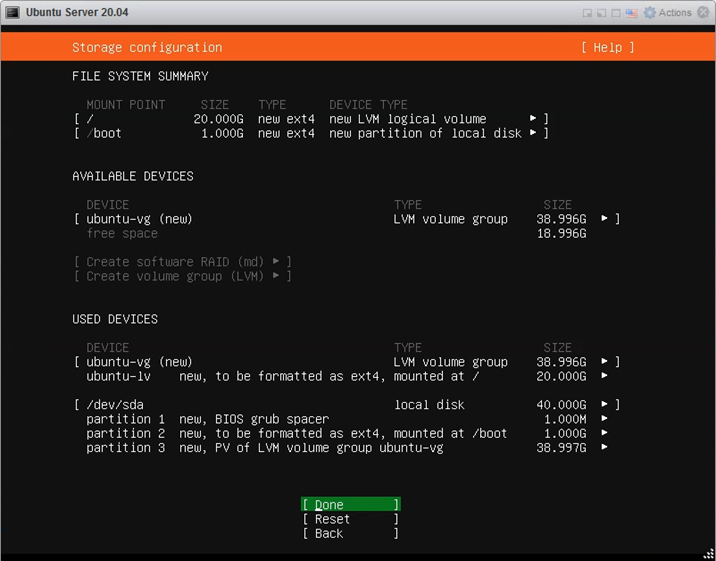
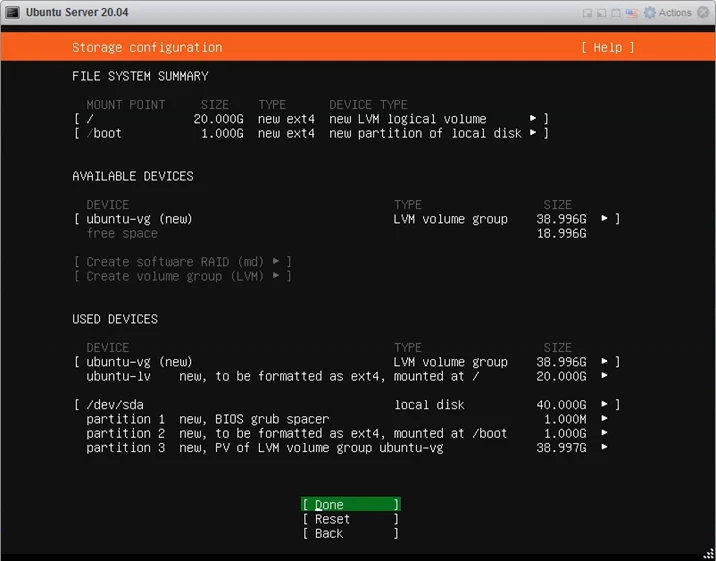
You will get a summary of how the storage is configured on the Ubuntu server. If you are okay with everything, you may choose done to proceed.
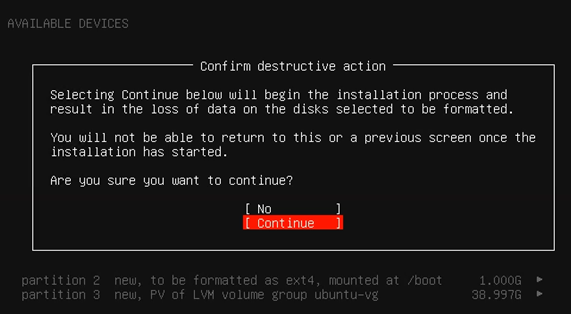
You will get a warning for the disk format, and we know that there is nothing in the virtual hard disk; hence choose to continue.

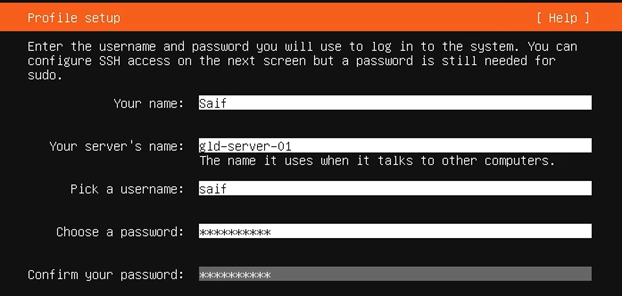
- Profile setup.
You have to set up an account on this server. Enter your name, Server name, username, and password.
After the credentials are set up select done.

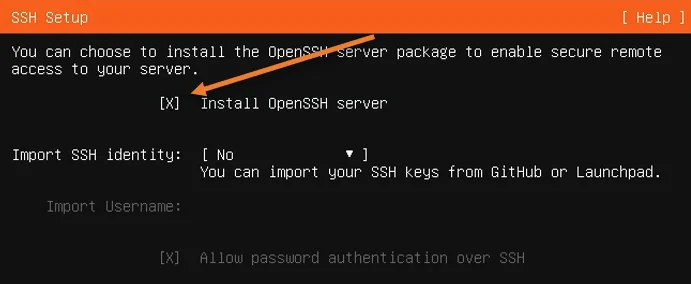
- Configure OpenSSH server.
After the installation, you won’t return to the ESXi console to log in to the Ubuntu server anymore. You most likely would use an SSH protocol to connect to the server and make changes.
Check the option Install OpenSSH server using the space bar in the SSH setup.

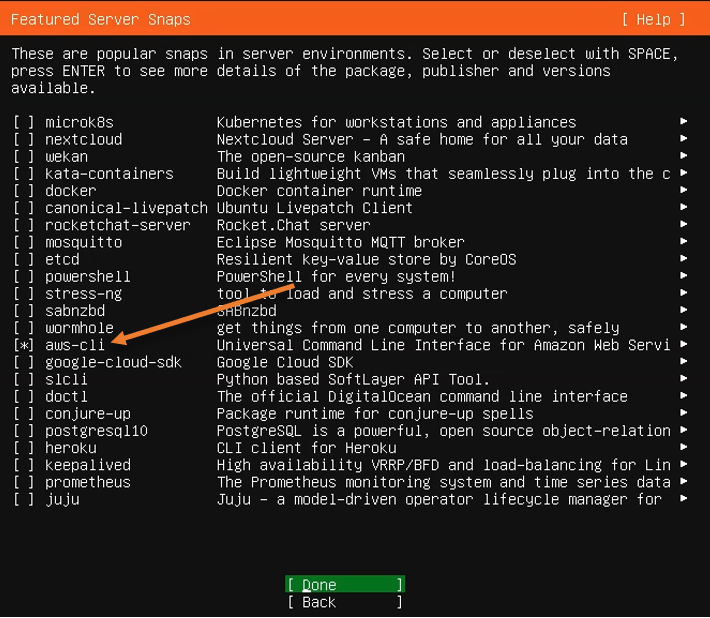
- Choose required snaps.
You have an option to choose different packages at the beginning of the virtual machine.
Since I would be using this virtual machine to access my AWS environment, I choose only the aws-cli snap and select done.
So based on your requirement, you may select the snaps.

The installation will now begin.
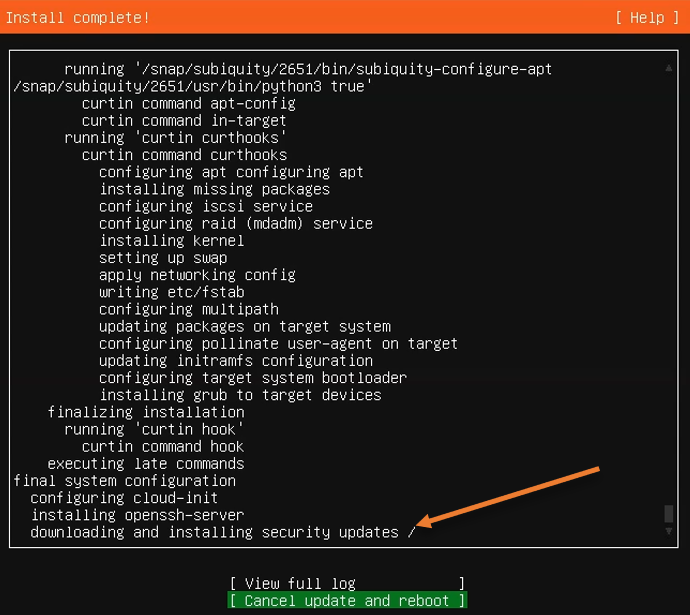
After the installation is complete, you will see downloading and installing security updates below. This will take some time, so you can either cancel the update and reboot or wait for the update to finish.
As I will be installing the update later on, I have chosen cancel update and reboot.
After a few minutes, Ubuntu installation canceled the update and rebooted the machine.

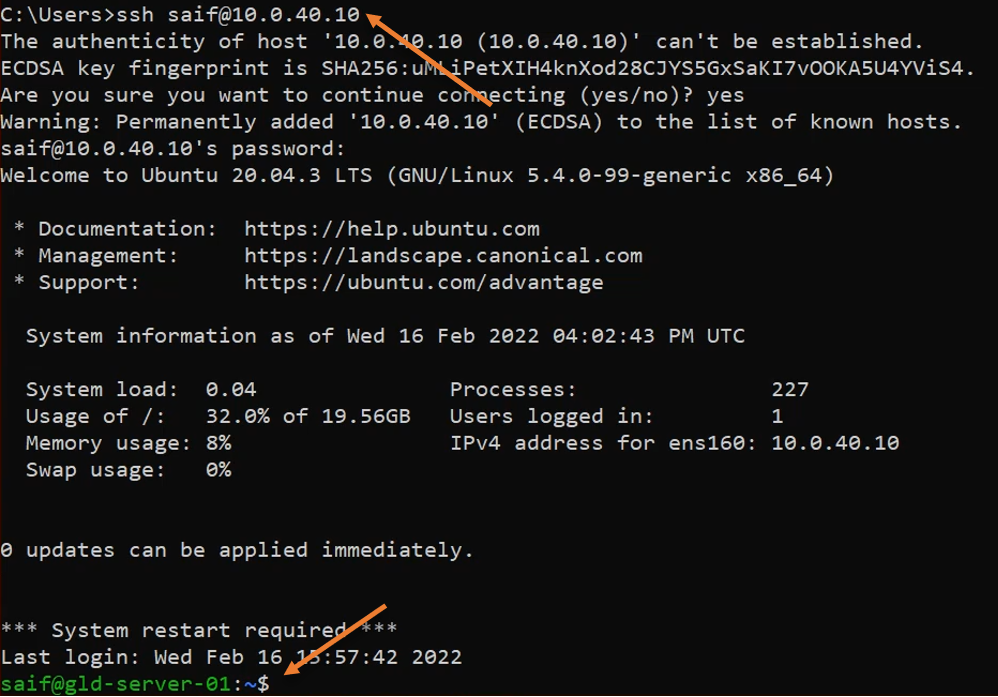
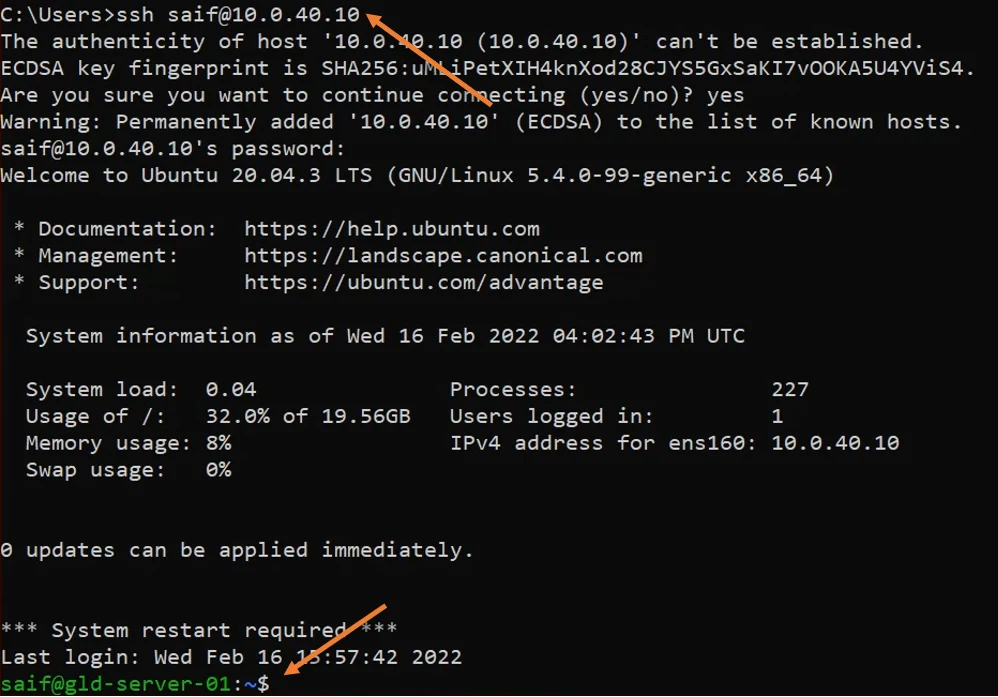
7. SSH into the Ubuntu server.
After the VM back online, I can now log in to the Ubuntu virtual machine from my management PC using the SSH protocol we defined earlier.