
The Pfsense firewall is a good alternative for your home network router. It can even replace the high-end commercial routers at the enterprise network as well. Moreover, it is open source and free too. Unless you are opting for support from netgate.
Can I install pfSense on Ubuntu?
Pfsense is an open-source firewall based on FreeBSD operating system, and since it is not a service, you cannot install it directly on the ubuntu machine as a service. So the only option is to virtualize them in your Ubuntu machine.
And for virtualization, you don’t need to use any third-party hypervisors such as VMware workstation or Virtualbox (though you can use them). You can use Linux-based KVM virtualization, and it is for free.
The KVM is the native hypervisor in Linux, so the recommended method is to use the KVM installation.
After you have installed the KVM packages on Ubuntu, you should be good to begin the Pfsense installation.
You can install the Pfsense firewall on most Linux operating systems, including the centos and the Redhat.
In this blog, we will install the Pfsense firewall on Ubuntu Linux, and the steps are similar to any other version of Linux as well.
Prerequisite;
- Install the KVM packages on your machine.
You can install the KVM packages on Ubuntu by following the below commands.
sudo apt update
sudo apt install qemu-kvm bridge-utils virt-manager libosinfo-bin -y
Note: To get better performance, you may have to enable the Intel VT or AMD virtualization option on your bios.
- Download the Pfsense software.
You can go ahead and download the file by going to the link here.
- A layer2 switch – I am using inexpensive TPlink 8 port unmanaged switch for this.
Steps to install Pfsense Firewall on the Ubuntu KVM hypervisor.
- Prepare the Network.
- The pfsense KVM network setup.
- Install the PFsense on KVM.
- Configure the Pfsense VM in KVM.
- Pfsense Web GUI initial setup.
- Pfsense pppoe wan setup
- Configure the Pfsense to start at boot in KVM.
- Verify PFSense firewall connectivity.
1. Prepare the Network.
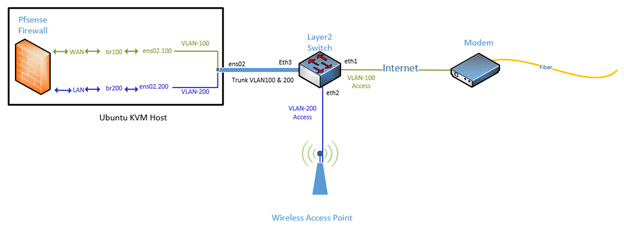
The Pfsense firewall uses two interfaces, one is for the WAN, and another is for the LAN. In a virtualized environment, to simulate those two networks, you can use VLANs.
Let’s go ahead, and set up our underlay network, and below is the topology that we are going to use. As you can see, my modem on the right is connected to a layer2 switch. And the Switch is splitting the Network using VLANs.

Configure the Layer 2 switch.
- I am using a PPPoE connection from my internet service provider, and the link from the modem needs to be extended till the PFsense VM WAN interface on the left.
- The modem is connected to the Switch via VLAN 100.
- The Switch’s connection to the access point is VLAN 200, where all the home users can connect via wifi.
- The Switch’s connection to the Ubuntu machine is a trunk, which carries both the VLAN 100 and 200.
- I am using TP-Link Layer2 8 port switch for this lab, and the model that we are using here is TL-SG108E
Note : Any layer 2 switches would work with this topology, as long as you can achieve the above.
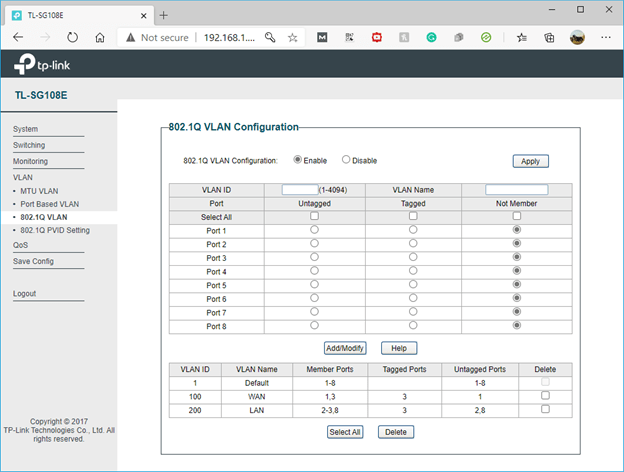
Configure the VLAN’s on TPlinkTL-SG108E
The actual physical topology look like below.
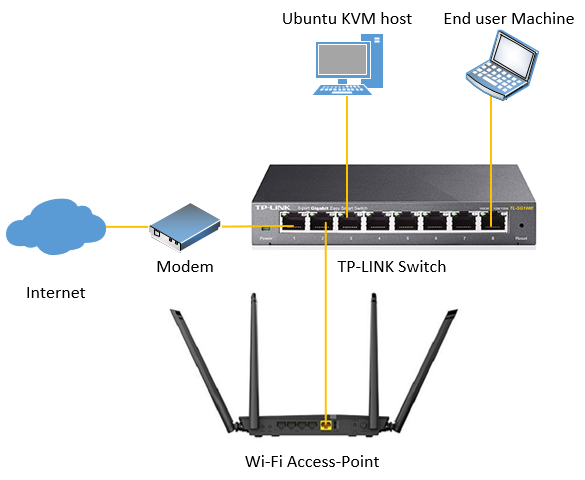
If you look into the topology above, we need to configure four ports.
- The first interface (Port1) is connected to the internet on VLAN 100 as an untagged port.
- The second interface (Port2) is connected to the access point on VLAN 200 as an untagged port.
- The third port (port 3) is connected to the Ubuntu KVM, which carries both tagged VLAN 100 and 200.
- The fourth port (port8) connected to the PC is on VLAN 200 as untagged.
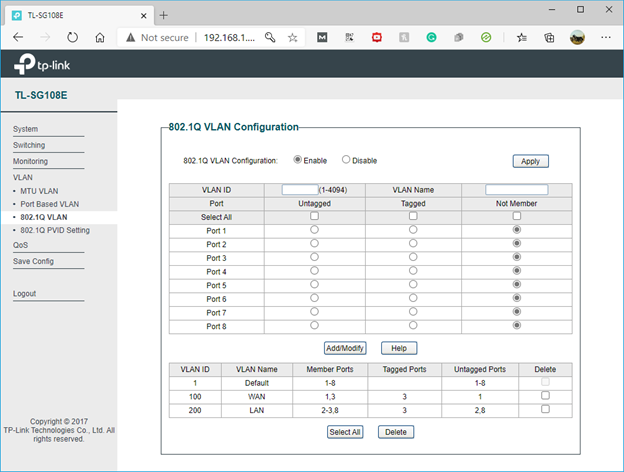
We will configure the interface (Port3) that goes to the Ubuntu KVM host as Trunk. This interface should tag VLAN 100 and 200.
- First, you enable the 802.1 Q VLAN and configure the VLAN as follows.
- On VLAN 100, port 1 is untagged, and port 3 is tagged.
- On VLAN 200, port 2 and 8 are untagged, and port 3 is tagged.
Below is the actual configuration. You may now click on Apply on the TP-Link Switch.
After you applied the configuration, you may click on 802.1Q PVID settings.
- Configure the PVID as follows.
Port 1 PVID = 100
Port 2 and 8 PVID = 200
Here is the configuration from the Switch.


That’s it, the configuration on the TPlink switch side is completed.
2. The pfsense KVM network setup.
We just completed the network configuration from the modem to the Switch to the KVM host. How about the Network from the KVM host to the internal VM network.
That’s where we are going to use the bridge interface
Configuration of the KVM Network Side.
In KVM, you need to create bridge networks for the VM to connect to the Network. The Bridge interface is like a virtual switch, where you can connect multiple VM’s to it.
Since the pfSense Firewall will be using two interfaces, such as the WAN and the LAN, you need to create the WAN and LAN bridge interfaces. Those two bridges again get connected to the VLAN interfaces in the KVM.
Configure the VLAN interfaces.
We have split the VLAN into two in the Switch. Similarly, we need to split the host interface into two, representing VLAN 100 and 200. Let’s define the VLAN interface using the netplan, as the netplan is the default network configuration tool in Ubuntu. I have covered an extensive guide on configuring different types of network devices using netplan here.
Here is the VLAN configuration.
vlans:
      eno2.100:
          id: 100
          link: eno2
      eno2.200:
          id: 200
          link: eno2
Configure the Bridge interfaces.
After the VLAN is configured then you can create the bridge interface for each VLAN, br100 connected to the VLAN interface eno2.100 and the br200 that connects eno2.200.
Here is the Bridge configuration.
bridges:
      br100:
         interfaces: [eno2.100]
         dhcp4: no
         dhcp6: no
         parameters:
             forward-delay: 0
             stp: true
      br200:
         interfaces: [eno2.200]
         dhcp4: yes
         dhcp6: no
         parameters:
              forward-delay: 0
              stp: true
All the VM’s inside the KVM hosts can now connect to the bridge interface br200 to access the Pfsense LAN side.
Since we have the same VLAN 200 that goes across via the interface to the Switch as Trunk from the KVM host, and your access point is also on the VLAN 200, all the users will start receiving the same DHCP address from the PFsense directly.
Did you notice I turned on the br200 for the DHCP?
This means as soon as the Pfsense firewall comes online and starts to become the DHCP server, the KVM host would also receive the IP address from the pfsense LAN side.
Note: Here, on my Ubuntu host, I have only a single interface. Hence I am using the single interface for both VLAN interface configurations and the KVM host network. If you have multiple interfaces, you could configure one interface for the VLAN trunking and another just an untagged port on VLAN 200 to start to receive the DHCP address for the KVM host.
Similarly, the KVM host can now reach the WAN interface via br 200 through the Switch.
Here is the final configuration.
network:
  version: 2
  renderer: networkd
  ethernets:
      eno2:
          dhcp4: no
          dhcp6: no
  vlans:
      eno2.100:
          id: 100
          link: eno2
      eno2.200:
          id: 200
          link: eno2
  bridges:
      br100:
         interfaces: [eno2.100]
         dhcp4: no
         dhcp6: no
         parameters:
             forward-delay: 0
             stp: true
      br200:
         interfaces: [eno2.200]
         dhcp4: yes
         dhcp6: no
         parameters:
              forward-delay: 0
              stp: true
3. Install the PFsense on Ubuntu KVM.
Our underlay network is now configured. It is now a matter of installing the PFsense on the ubuntu KVM host and attach the Network.
There are two ways you can configure the PFsense on the Ubuntu, via CLI and GUI. We are going to follow the GUI method as you would require GUI output to install the Pfsense.
Configure the Pfsense VM.
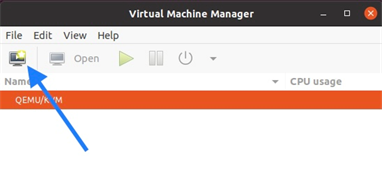
Open terminal, and type virt-manager.
The virtualization manager window now open. You can Click on New VM.

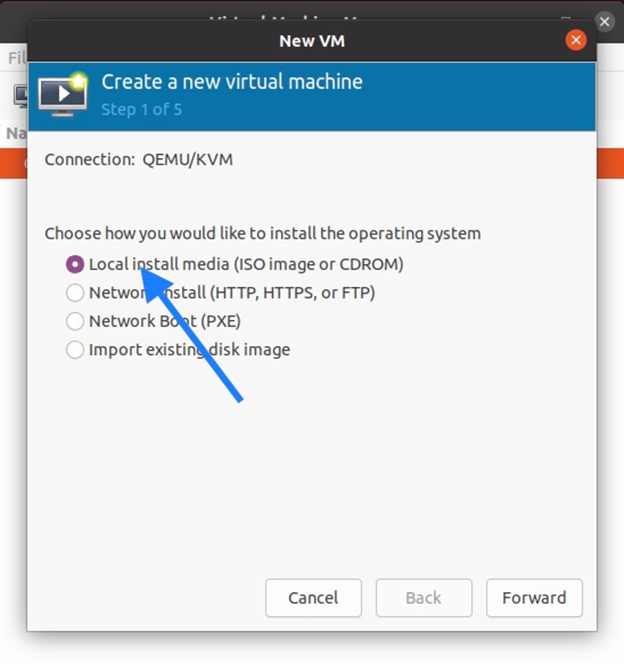
Select local install media (ISO image or CDROM) and click on forward.
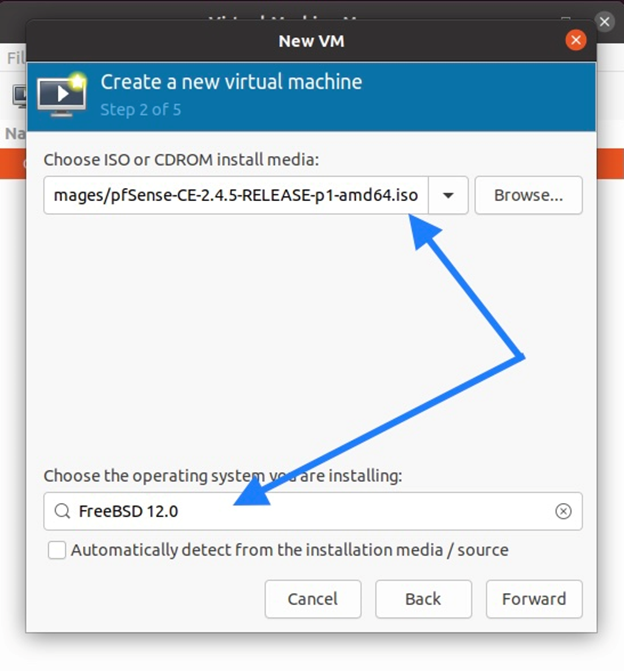
You need to browse for the Pfsense iso image that you have downloaded, and uncheck the option which says Automatically detect from the installation media, and select Freebsd12.0 from the list and click on Forward.

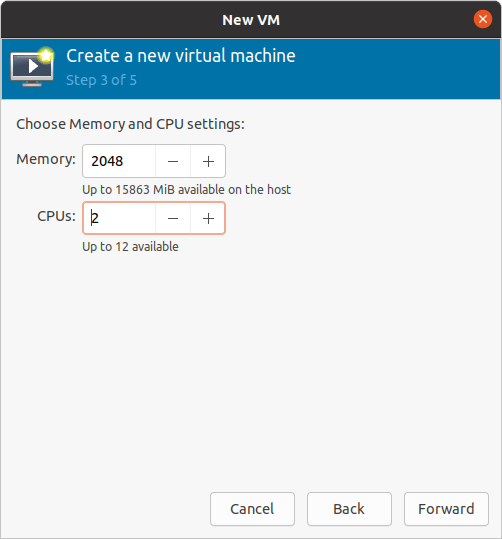
Configure the system resources.
In the Memory, you can give 2086, and on the CPU, I am sharing about 2 cores, which is more than enough.

You now need to define the virtual hard disk size. I am okay with 20GB and click on forward.
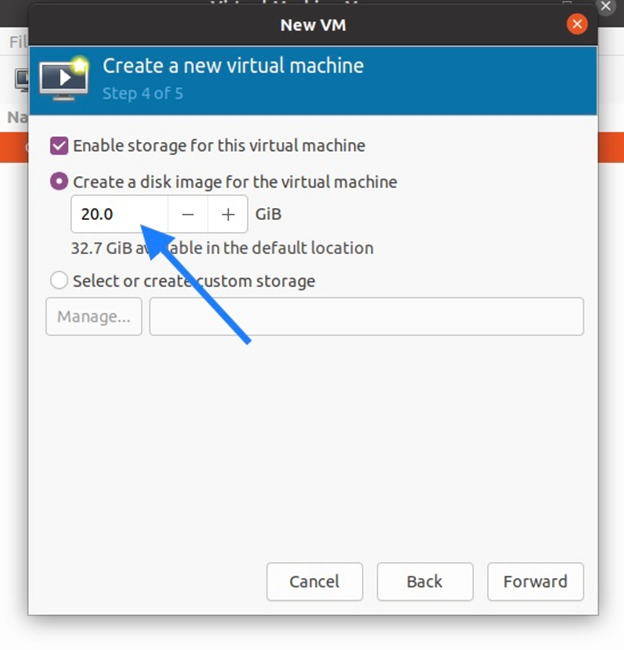

Note: If you need more storage, you may increase the size.
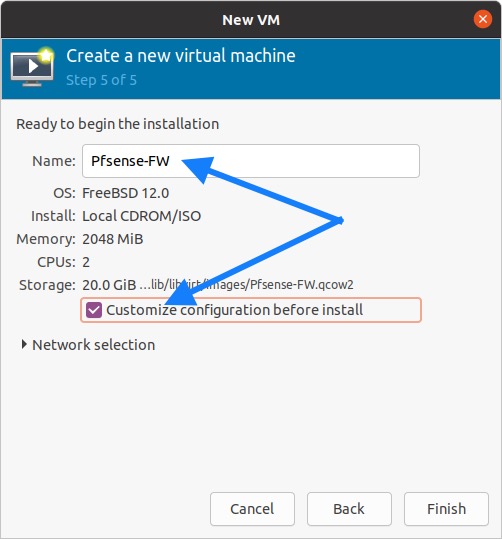
Change the VM name to whatever you like. I am changing it to Pfsense-FW, checking the option that says Customize configuration before install, and clicking on Finish.

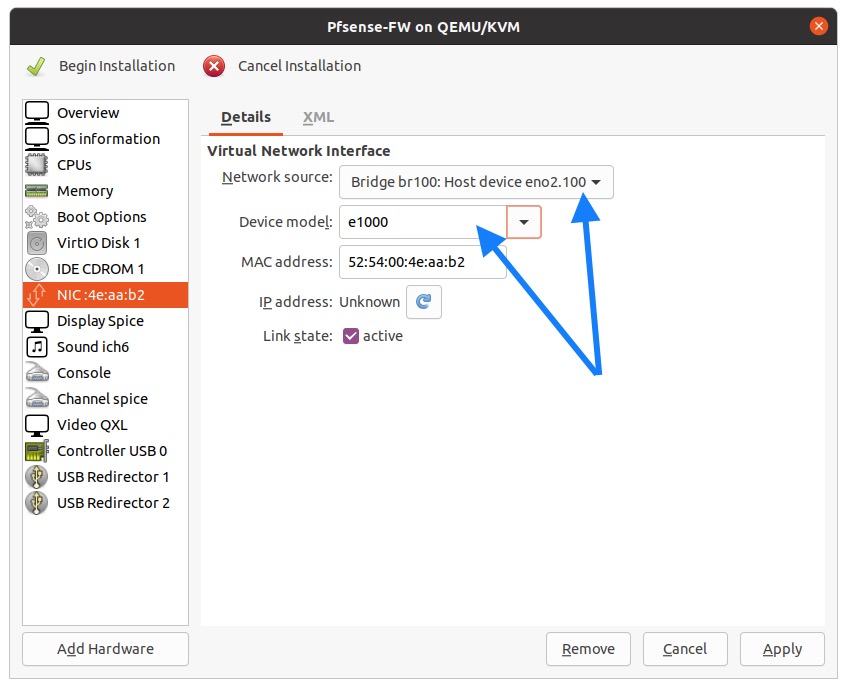
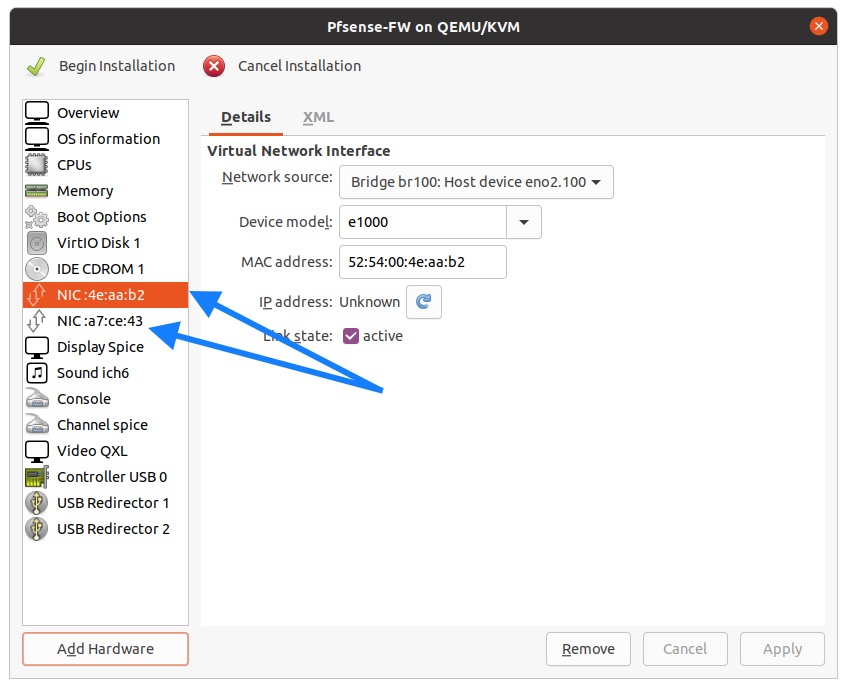
Configure the Network link for the Pfsense.
The installation window now pops up.
Remember that we have created two bridge interfaces, one for the WAN br100 and one for the LAN br200. You may attach them here.
The default interface is the WAN, so you may select the bridge interface 100 here and make sure the device model is set to e1000m, and click on Apply.

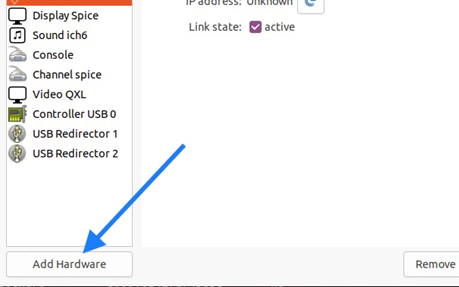
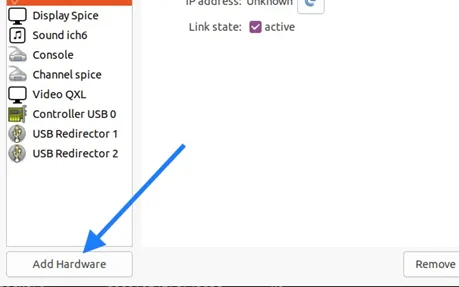
You may now click on add hardware.
Choose Network from the list, and select bridge interface 200 as this new network interface is for the LAN side.

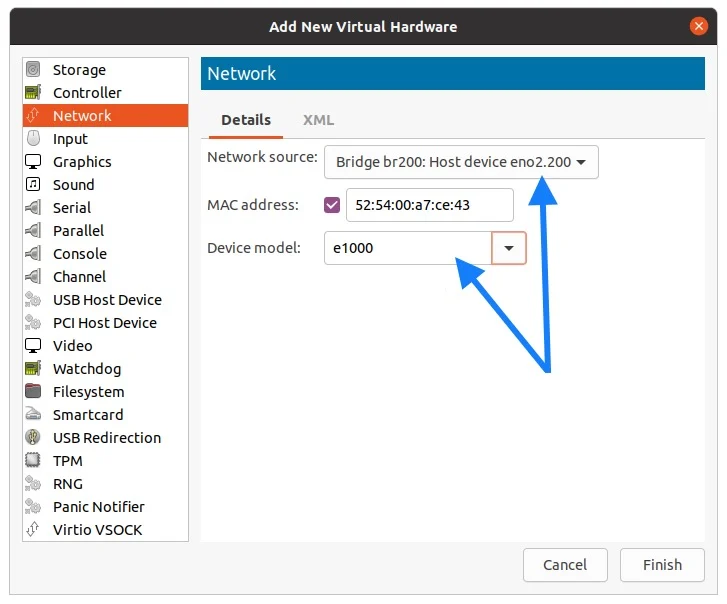
At this point, you will have two interfaces attached to the Pfsense VM, one is for the WAN and another one is for LAN.

Begin installation.
You may now click on Begin installation.
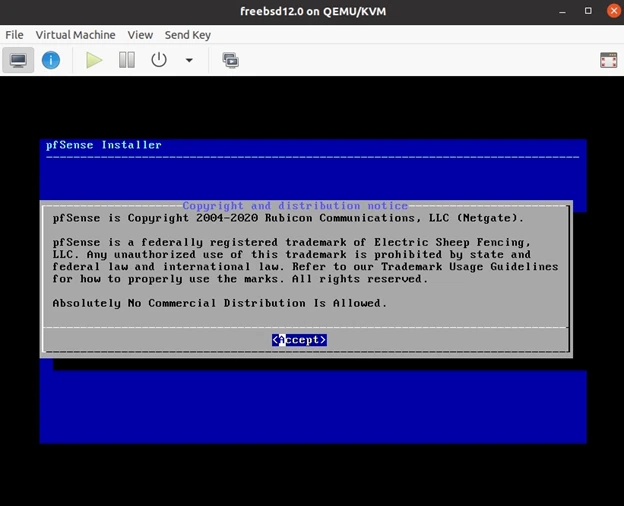
After a minute or two, you would get a pfsnese installation prompt. You may hit Enter to Accept the copyright and the distribution notice.

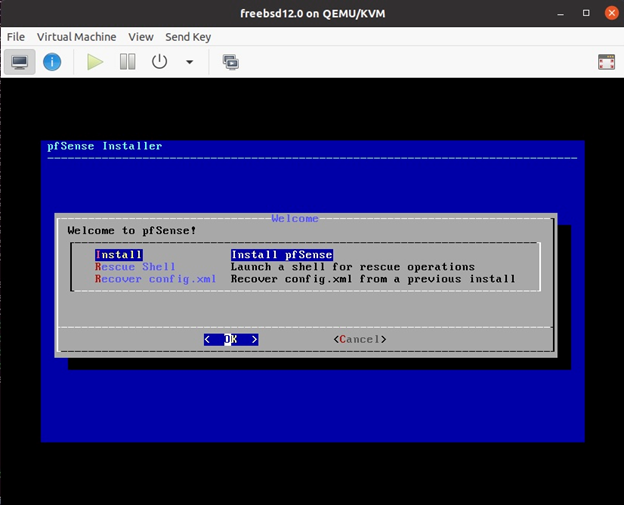
On the installation wizard, choose install.
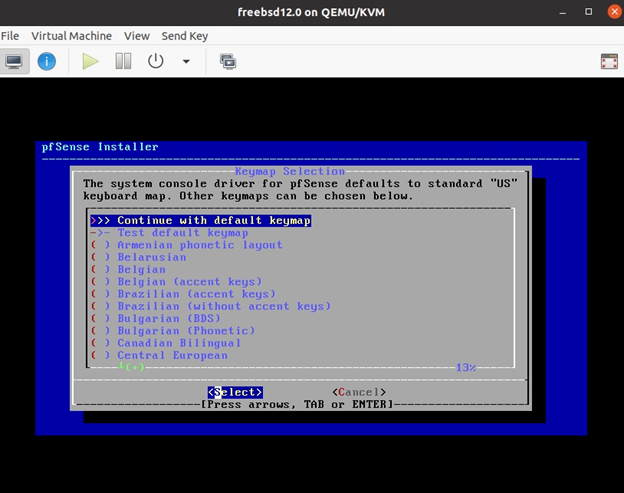
Next you may have to choose the keyboard layout, I am selecting the default keymap.
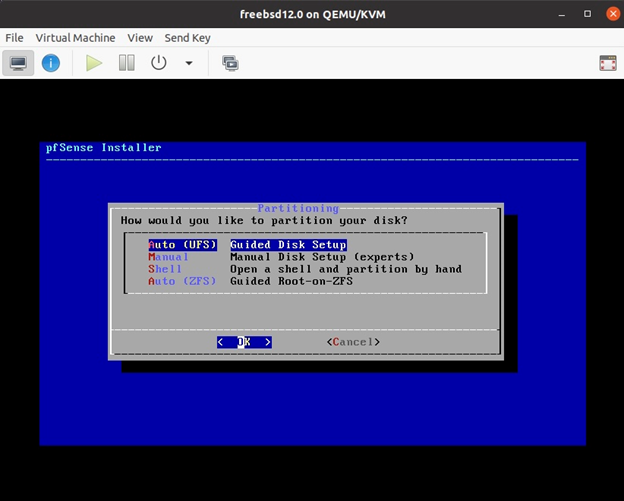
In the partitioning step, choose Auto (UFS) and continue.

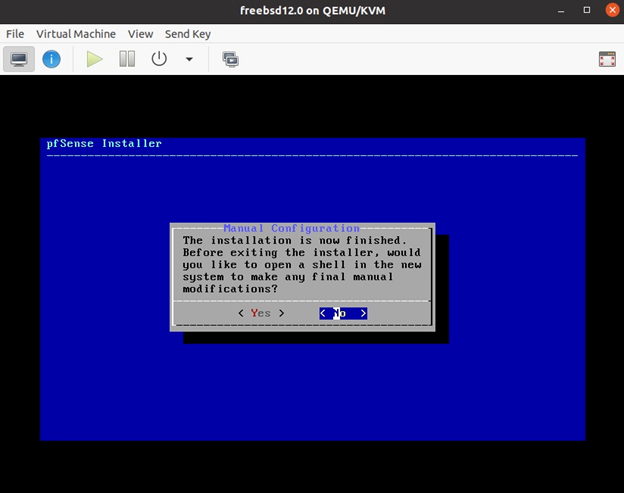
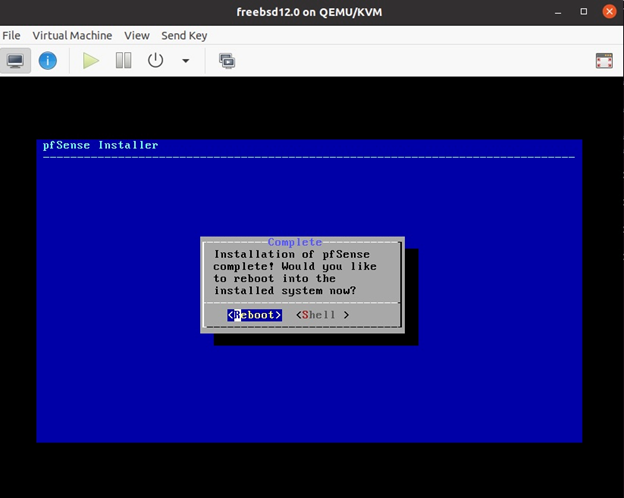
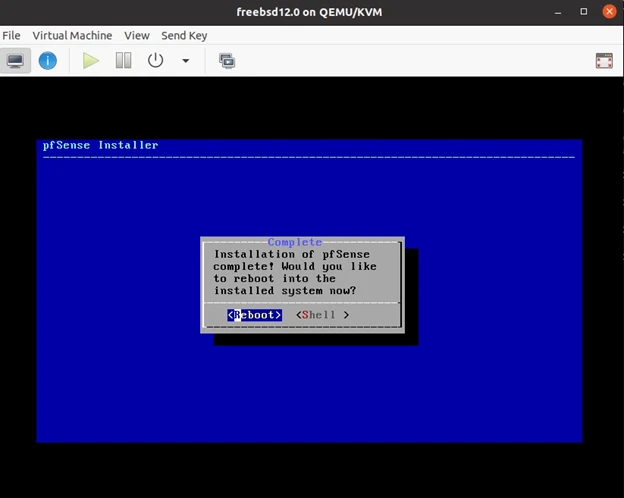
You will get the prompt that says, the installation now completed. Since I don’t want to go back to the shell to make further changes, I would click on No.

And reboot the Pfsense firewall in KVM.
4. Configure the Pfsense VM in KVM.
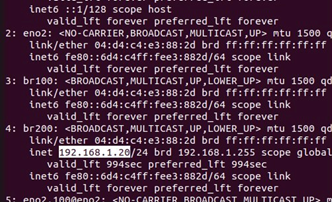
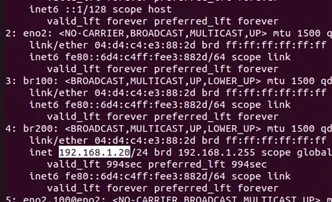
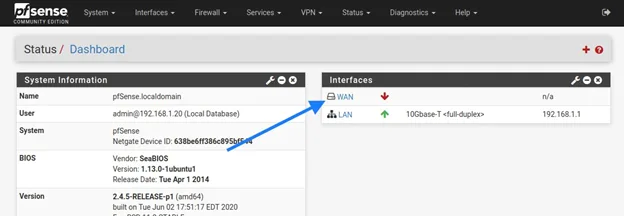
After the reboot, you will be prompted with the pfsense initial CLI setup wizard, where you should be able to see both the interfaces that we have added as em0 for WAN and em1 for the LAN.
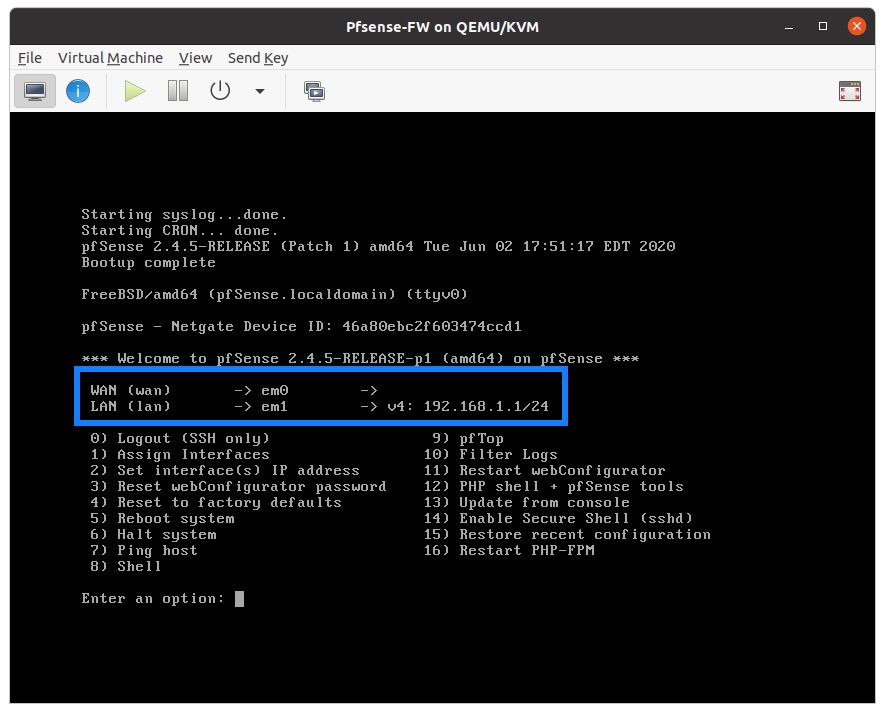
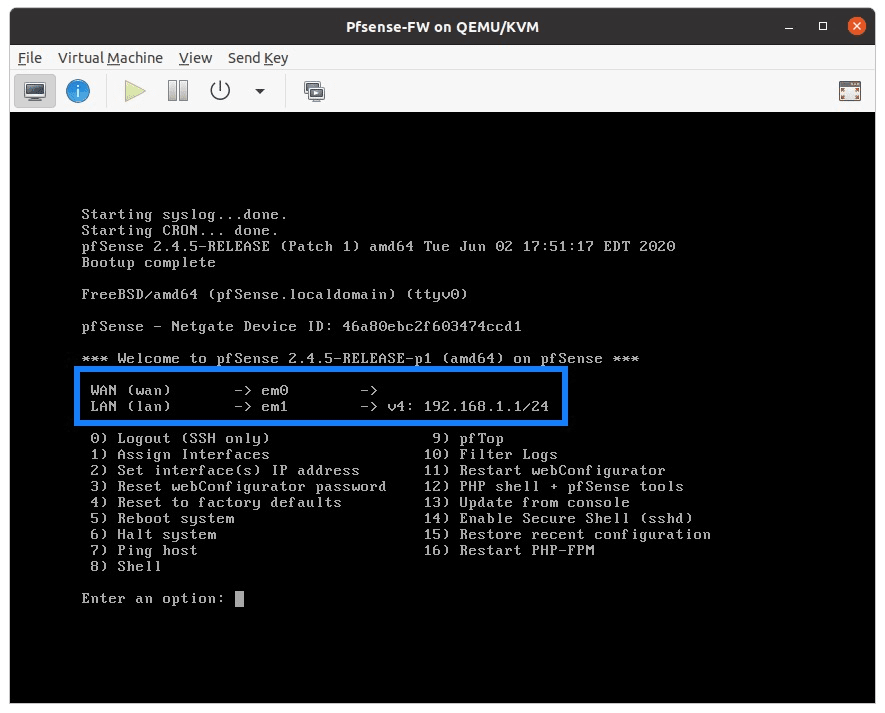
As you can see, pfsense is now configured with an IP address 192.168.1.1/24 on the LAN interface, and you don’t see any WAN interface IP address at the moment. We will fix that next.
That’s it. You just completed the pfsense installation also the initial CLI configuration.
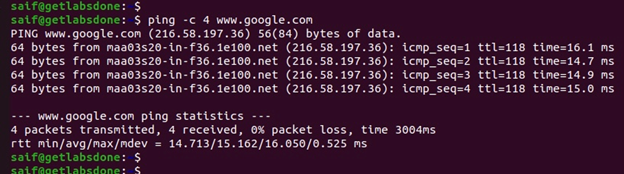
By default, the LAN side users now should start getting an IP address from the Pfsesne DHCP server, you would also receive an Ip address on the bridge interface 100 on the KVM host. As you can see, I got an IP address of 192.168.1.20.
This also means you now should be able to communicate the LAN gateway from your Ubuntu KVM host, and the KVM host can access the internet as well, to verify. Let’s try to ping www.google.com. As you can see, we are getting a response.

5. Pfsense Web GUI initial setup.
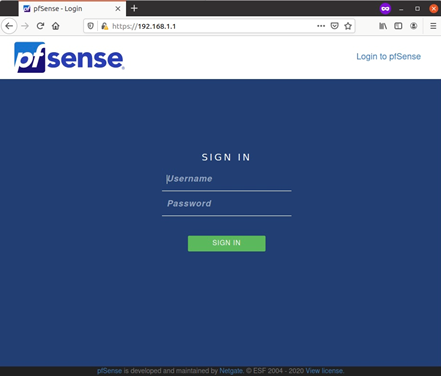
Open a browser, and access the PFsense firewall using https://192.168.1.1
You will get a security warning about the certificate. You may accept the risk and continue.
You may enter the username as admin and the password as pfsense and click on Sign in on the login screen.
You now will be prompted with the pfsense GUI initial setup wizard.

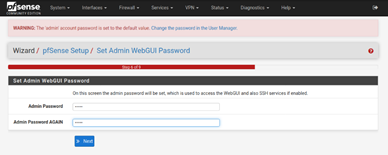
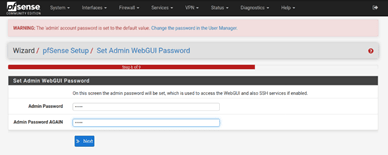
Except for setting the password for the Web GUI, I am not making any changes here, you may click on next, eventually, on the screen where it’s asking you to set up the Admin WebGUI password, you may type the password in and click on Next.
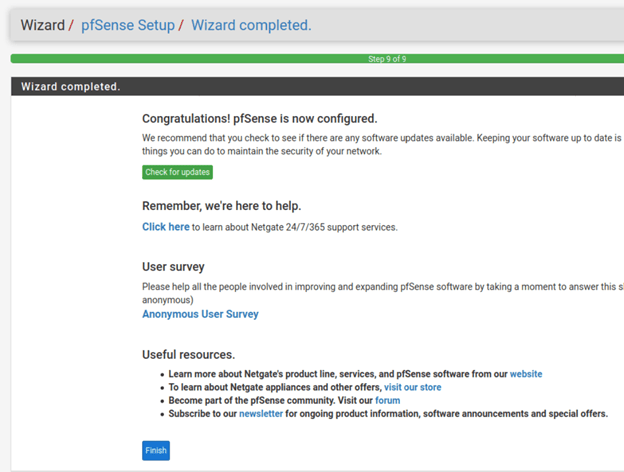
After that, you may click on Reload. You would get a message that says, Contratulations, Pfsense is now configured. You may click on Finish.

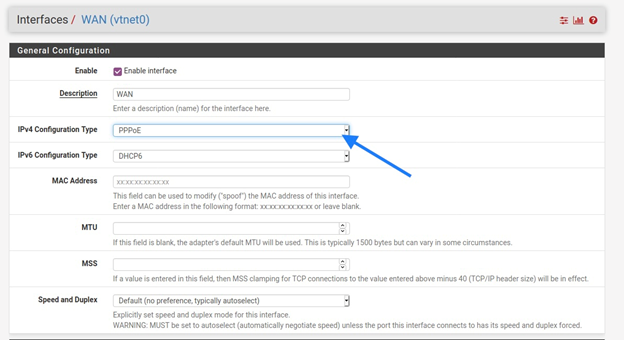
6. Pfsense pppoe wan setup
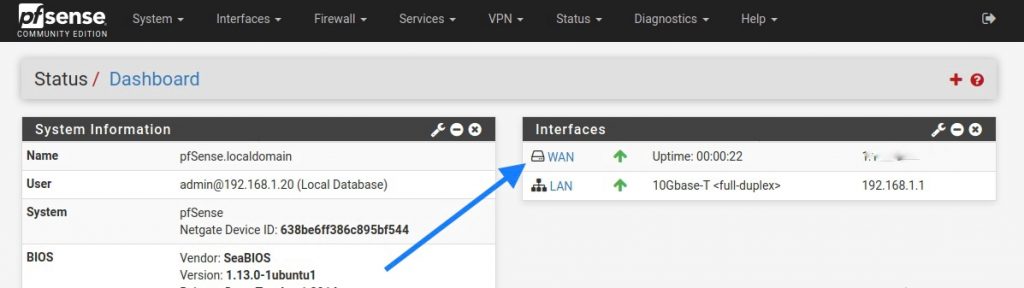
As you can see, I am on the homepage now, and I have both the LAN and the WAN interface, which is up right now but with no IP.
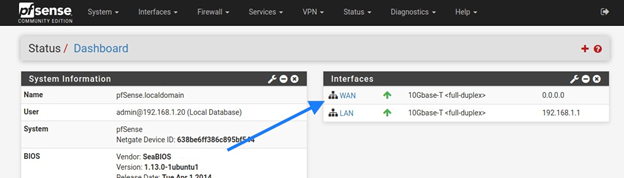

We need to configure the WAN interface that is facing the public internet. Click on WAN.
Note: I am using PPPOE for the WAN connection, so the configuration is based on that, you may have to change it according to your Network.
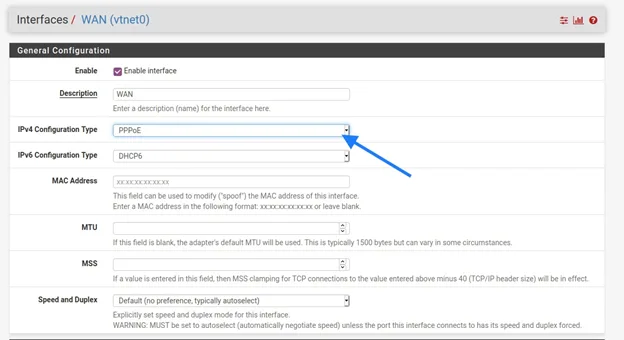
In the IPv4 configuration type, select PPPOE.
By default, in the PPPOE network, there will be routers mac address cached at the service provider side, so you may have to call the ISP to either reset the MAC address or Get the mac address and type it under MAC address.
Under PPOE configuration, type the username and password that you received from your ISP.

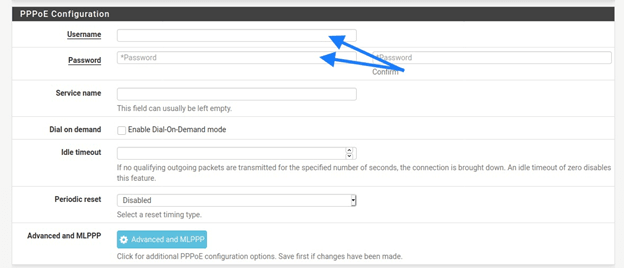
Apply the configuration.
As soon as you applied the configuration, you should now see the WAN interface is down.
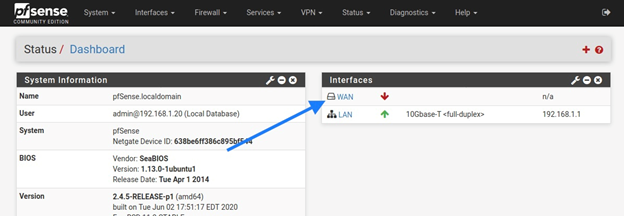
Just give it about a minute or two, and you should be good to go.
As you can see, my WAN interface has come up with a public IP address.
How come pfsense wan pppoe down?
In PPPoE, the interface would take a bit of time to come up, so if you followed the above configuration, that is enough for you to bring the interfaces up. And please do not rush through and keep changing the configuration just because the WAN interface is not coming up. Unless directed by the ISP.
7. Configure the Pfsense to start at boot in KVM.
The PFSense configuration is now complete, and you should be good to go. However, it is better to give a reboot before we proceed, so go back to the CLI and shutdown the Pfsense firewall using the number 6. Halt the system.
If you are using the PFsense firewall as your primary router in KVM, it is highly recommended that you make the VM start when the KVM Host reboots.
To autostart the VM, you may type vrish autostart Pfsense-FW1 on the Ubuntu terminal.
You may now start the VM.
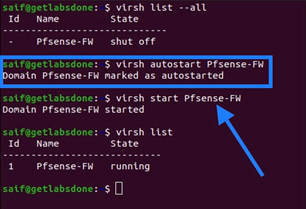
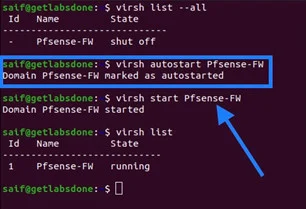
Alright, we now have configured the Pfsense firewall in KVM successfully. Let’s start testing the connectivity.
8. Verify PFSense firewall connectivity.
We are going to test the PFsense firewall connectivity by using different methods.
- Using the VM inside the KVM, it would simulate the VM access to the Firewall.
- A wireless device connected to the Firewall.
- A device connected via Wired to the switch.
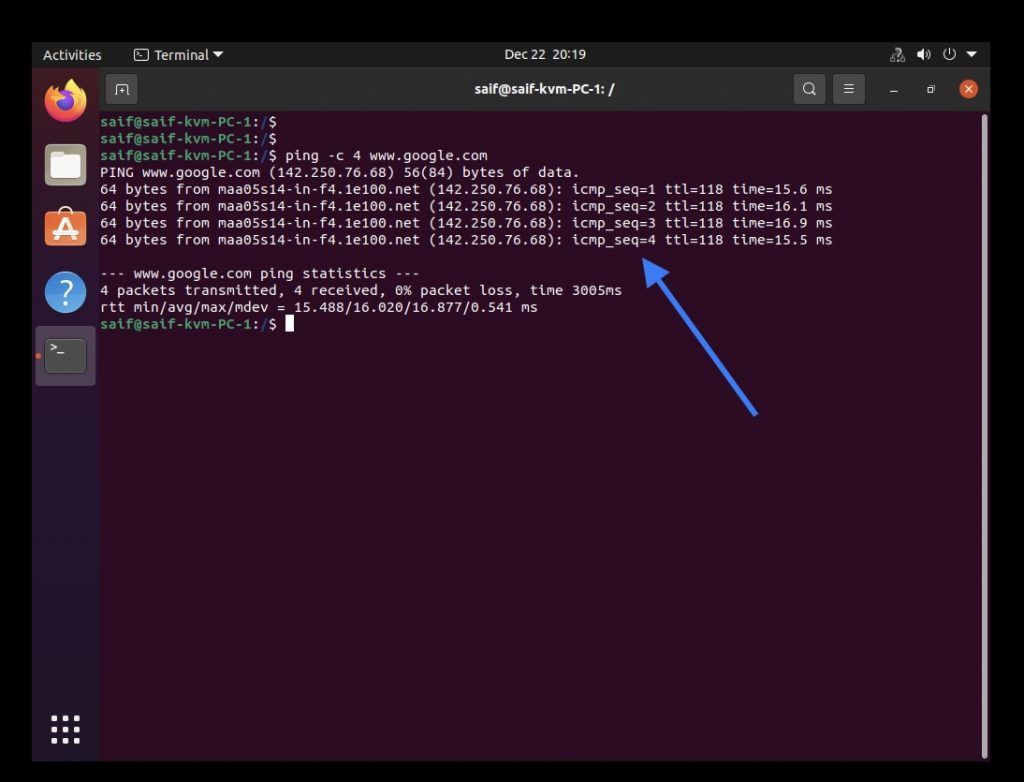
Using a VM.
I deployed a Linux VM in the same KVM host and connected it’s the interface to the br200, the LAN side of the Firewall.
- Ping the google.com, as you can see, that worked just fine.
- Do a speed test to analyze the speed.
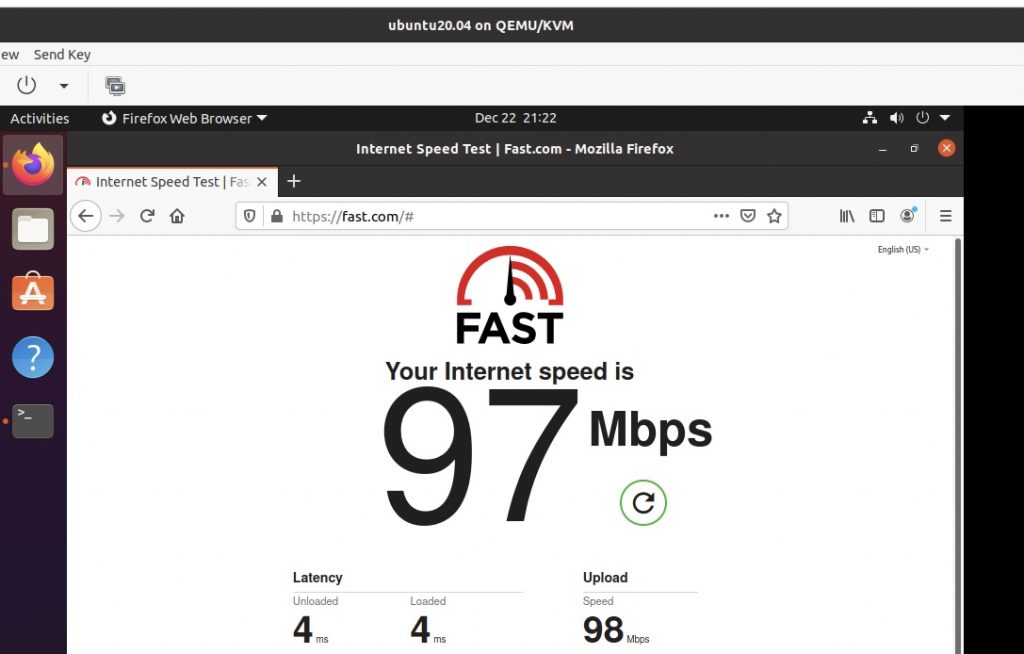

As you can see the VM performance is pretty decent.
Connect the wireless device to the PFsense firewall.
I have configured my wireless access point to work as an access point than a router during the initial setup wizard, and I am using Dlink 825 wireless router for this setup.

On my iPad connected to the wifi, I can also access the internet.
But the speed test was showing not so great results.
On the wired.
We have configured the switch side port 8 as access port 200. I have connected my secondary laptop to it, though I can access the internet, the performance was no so good.
Final verdict:
We have configured the Pfsense firewall successfully on the KVM environment, and do I recommend this method in your home internet setup?
If you have a good server with a higher 10GB network link, also a good layer2 switch then yes, but not on a desktop or laptop like I did. Though I have an internet bandwidth of 100Mbps, I am not getting enough bandwidth with it. Moreover, since we are also virtualizing the network stack using a bridge, you won’t get the same throughput as the hardware network interface.
How to improve pfsense kvm performance?
So in the end, the pfSense Firewall virtualized on KVM wasn’t giving me much performance as my standard Dlink router does.
Yes, it is more protected with the Firewall than the normal consumer router, but I don’t have internet connectivity when I shut down my KVM host.
With i7 9750h CPU with 1GB network card that shares both the LAN and the WAN side traffic, the performance wasn’t so good. I have used it for about two to three days, and I decided to go back to my Dlink router.
To get good performance on the Pfsense KVM firewall, you can use PCI passthrough on both the WAN and the LAN uplink. So if you have two physical NIC on your machine then that would works great.
I am now planning to configure a spare laptop as the Pfsense firewall to keep you posted.
Stimrol
Friday 17th of November 2023
I have been reading this and want to try this setup, but I have computer with two nics so I would like to try to configure that. Would that mean that I would put the switch after the KVM host? Also what I am wondering is it safe to have the switch connected straight to the fibre modem from the ISP. I am wondering this because of mentioned vulnerability in this switch --> https://www.chrisdcmoore.co.uk/post/tplink-easy-smart-switch-vulnerabilities/
Saifudheen Sidheeq
Sunday 19th of November 2023
Thanks for sharing that, let me review it..
If you have a computer with two NICs, it's advisable to connect the ISP's WAN directly to port 1 of the computer for the WAN connection. Configure this port as the pfSense WAN interface. Then, configure the second port for LAN use. Finally, connect a switch to the pfSense LAN side (the network you trust) to extend the LAN network.