
The other day, I was planning to install the Proxmox server on my laptop, and the problem with the Proxmox is that you cannot install Proxmox alongside windows 11. When you try to dual boot, the Proxmox ends up taking all the hard disk space deleting the windows files, and you end up with the Proxmox server. So I decided to install Debian 11 on my windows 11 machine as dual boot. So anytime I want to play games, work with office 365 I could use my windows 11 machine and if I want to accomplish some Linux-related stuff, I could shut down the windows 11 operating system and switch to Debian 11.
In this blog, let’s look at the installation of Debian 11 alongside windows 11 using dual boot.
Before you begin, you need to have;
- Debian 11 iso image – we need to create Debian 11 USB bootable image with the iso file. Click here to download it. Make sure to choose the AMD64 DVD iso image.
- Rufus software- click here to get it. This tool will make the USB a bootable drive.
- USB drive with at least 4GB of storage to make the Debian 11 bootable.
- A machine with windows 11/10 – The steps mentioned here are identical to Windows 10, so either windows 11 or 10 would work fine.
1. Make Debian 11 bootable USB.
We have already downloaded Debian 11 on my machine. Let’s go ahead and make the bootable USB out of it.
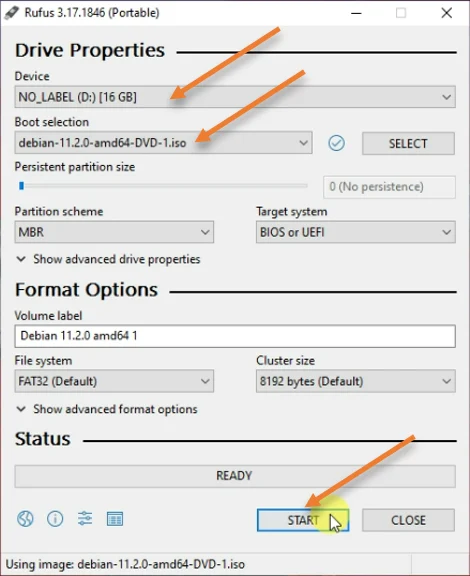
Plugin the USB thump drive and open the Rufus software.
- Select the device – Under device, make sure you choose the right USB drive to make it bootable.
Note: All the files in the USB drive will be deleted upon creating a bootable drive. So please take a backup before you proceed.
- Boot selection – This is where you need to attach the Debian 11 iso image to the rufus software. Click on select, and choose the ISO file you downloaded.
- Click on Start.

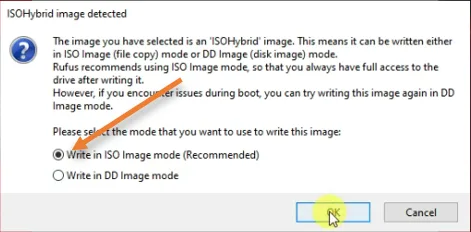
You will get a prompt that says ISOHybrid image detected, so from the list, choose Write in ISO image mode and click on Ok.

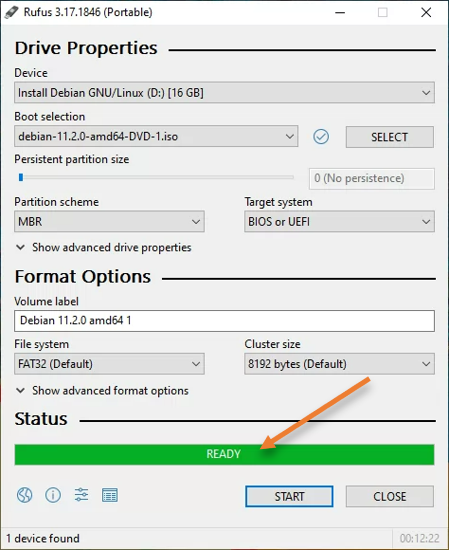
After a few seconds, you will get a warning, which says all the data in the drive will be formatted, so ensure that you have taken the backup of all your files from the USB drive and then click on Ok.


After this, the USB drive will be formatted, and the Debian ISO image will be copied to the USB drive and convert it as bootable.
Depending on your machine hardware and the USB speed, this process will take some time
Once it is completed, you will see the status changed to Ready, and you may safely remove the USB drive now from your machine.

2. Allocated drive space for Debian 11.
I have a machine with 500GB of storage, completely used by windows 11 OS. We are now going to split the Drive into two, in which on the second partition, we would give about 200 GB out of 500GB for the Debian storage.
Click on Start and type computer management, and open it.
The computer management windows would now open up.
Click on Device management.
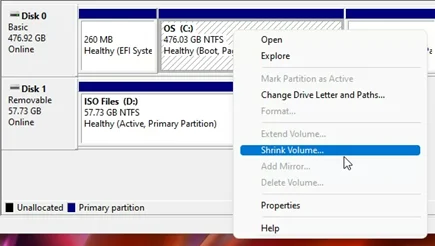
In the disk management, you will see the OS is occupied mostly by the SSD hard disk, we are going to shrink the volume and get 200GB out from windows 11 and assign it to Debian.


Right-click on the OS Partition, and click on Shrink Volume.
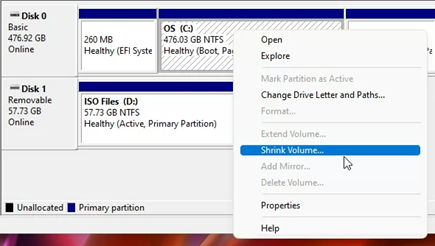
In the shrink volume pop-up, under Enter the amount of space to shrink in MB, we enter 204800, equivalent to 200GB.
After that, click on Shrink.
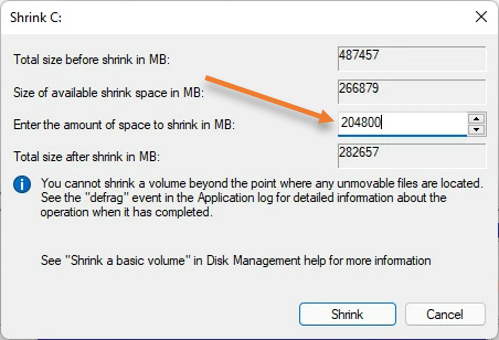
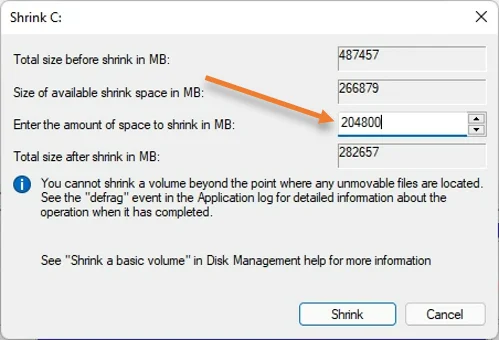
After a few seconds, you will see the windows hard disk size reduced to 276Gb and you have free unallocated space of 200GB, which you can use to install the Debian in it.
During installation, ensure to select the newly created bootable media.


3. Change the bootable media from HDD to the new USB drive.
On the machine where we are going to do dual boot with Debian 11 and windows 11. plugin the bootable USB device. Your windows 11 operating system will boot from the hard disk storage where you have installed the operating system. So we need to tell the bios that, instead of booting into the hard disk where you have installed the windows 11 OS. Choose a USB bootable drive instead.
You may start the machine and press f2 to get into the bios.
I am using an Asus machine, and I could get into the bios by long-pressing the f2 key during the system startup.
Each vendor has a different way to get into the bios.
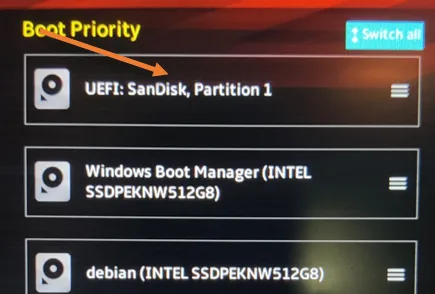
Under boot selection, choose the newly created USB drive as the bootable location and save it in the bios. My USB drive name is Sandisk and as you can see, I changed the priority of the boot by moving up.

The system will now boot into USB drive, and the Debian 11 installation will now progress.
4. Start the Debian 11 installation.
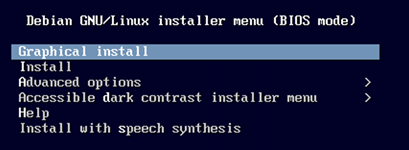
On the Debian installation screen, choose Graphical install.

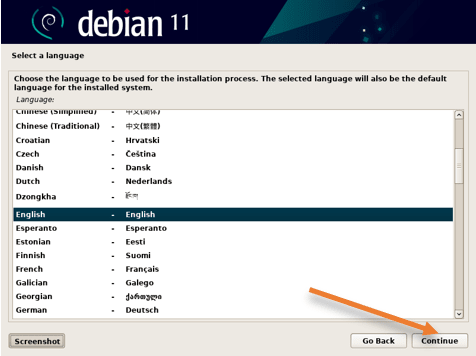
Select a language of your choice.

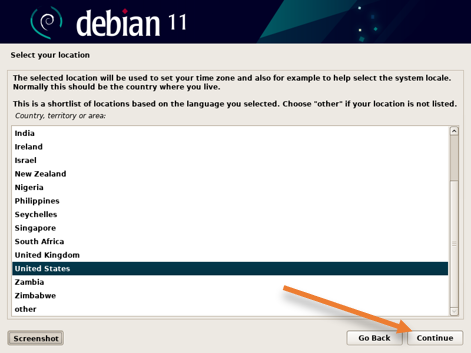
Specify your location.

Configure the keyboard language.
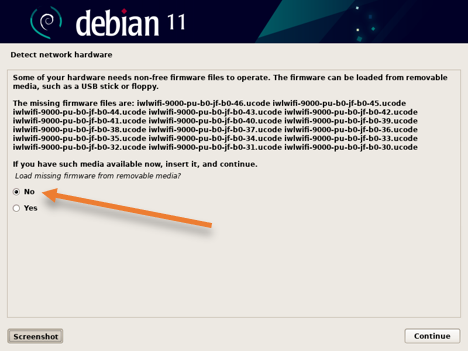
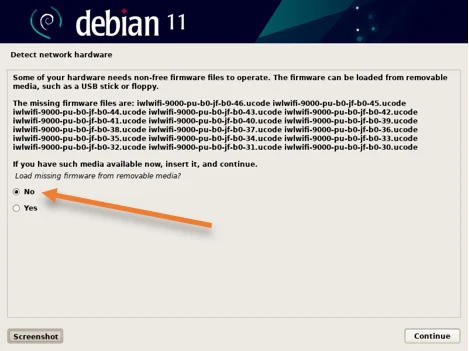
In the Detect network hardware windows you will see some of the wifi drivers are missing, you may choose no here, which we can take care of it later.
You need to make sure that you are connected to the LAN cable. After few seconds you will see the network is configured on the Debian 11 machine and it will get an IP address from the DHCP service.
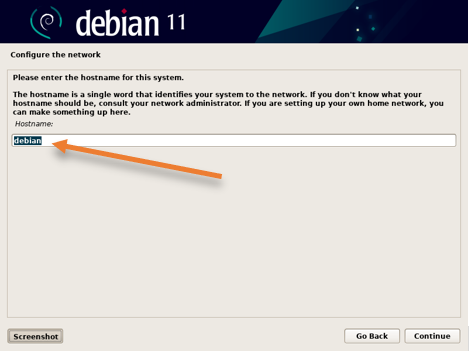
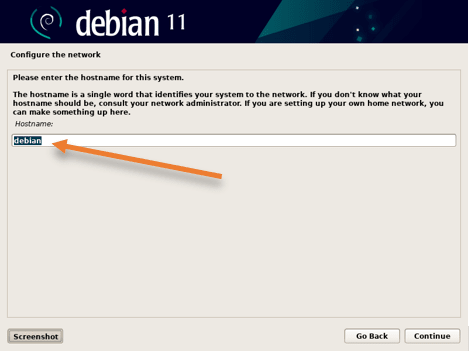
5. Configure the hostname and DNS.
By default, the installer would choose Debian as the hostname, and you may change it according to your environment.
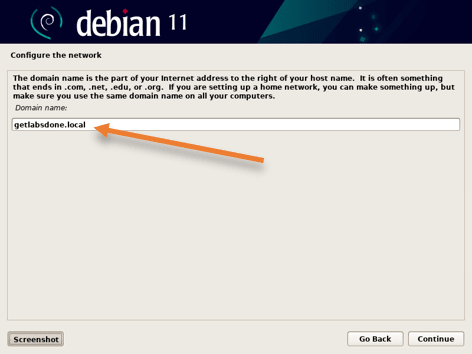
Enter the domain name.
If you have a domain name in your network, you may enter it here and click on Next.

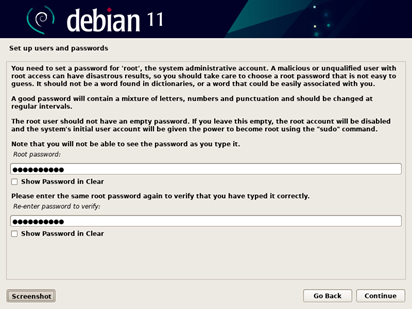
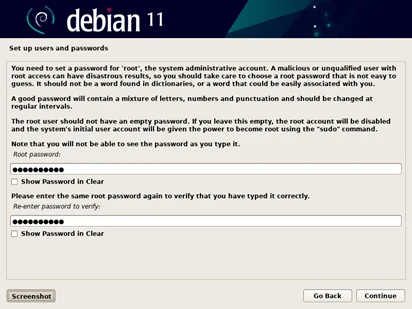
6. Configure the Root password.
In Debian, you will create two accounts; one is for the root and another for a regular user. Let’s go ahead and set up a password for the root account.
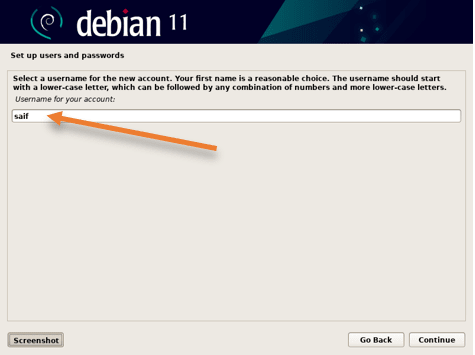
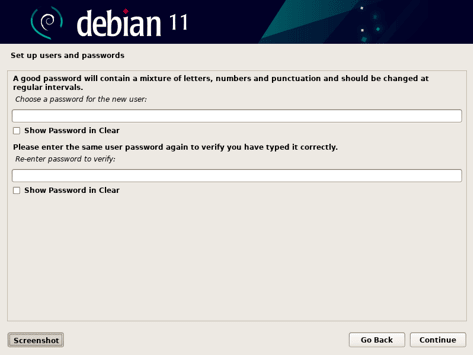
7. Setup user account.
We have set the password for the root account. Let’s set up the normal user account.
Enter the user’s full name that you will create and click on Continue.
Set the username.
You will require to set the username of the normal account and click on Continue.

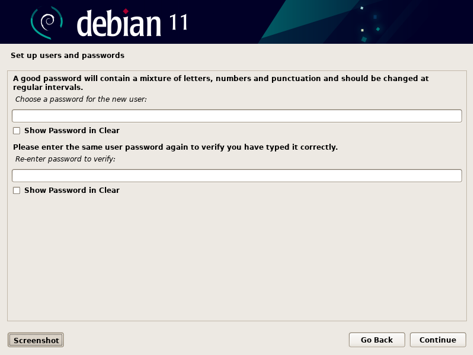
Set the password for the newly created account.
8. Set the timezone.
We now have to set the time for your Debian machine, and it is done using the NTP service.
In the configure clock section, choose the desired time zone. And click on continue
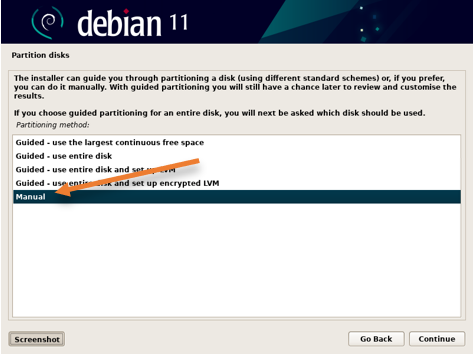
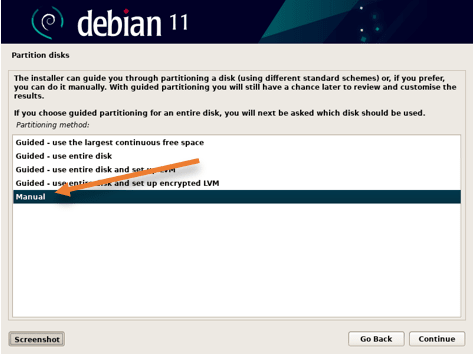
9. Configure the hard disk.
The disk partitioner wizard will now open up. Here we need to configure the hard disk that we allocated in the Windows disk manager for the Debian 11, which is 200GB.
In the partition disks,
Choose Manual and continue.
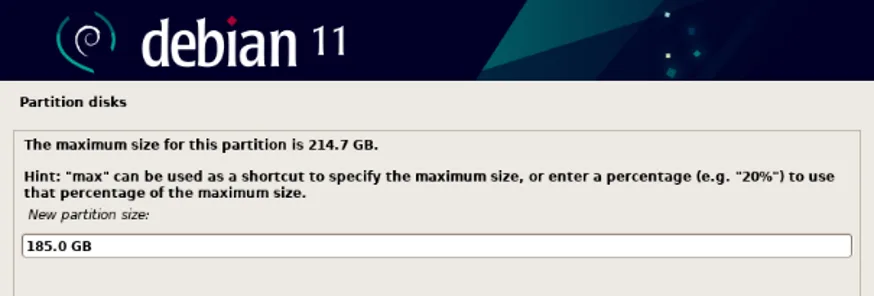
As you can see, we have 214.7 GB available for free, where we can install Debian 11.
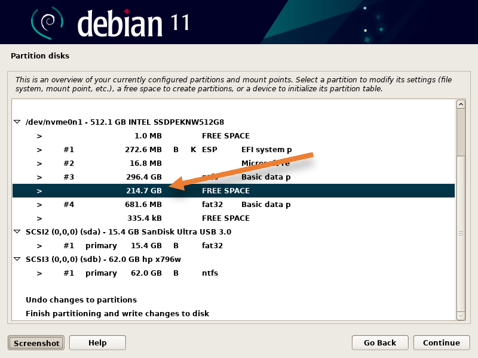

We will give 185GB for the ROOT and 22GB for HOME rest for the swap memory in our setup.
Setup Root storage.
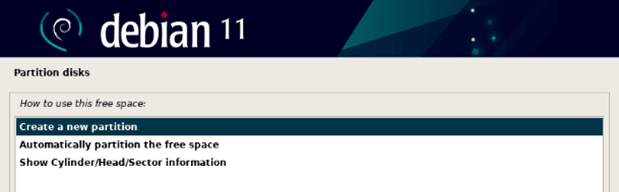
By selecting the free space, click on Continue.
Create a new partition and click on Continue.

In the new partition size, enter 185.0 GB and click on Continue.

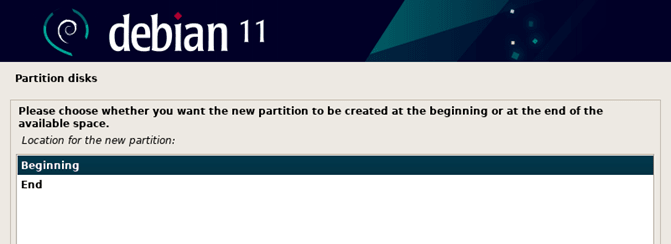
Choose Beginning, for the location for the new partition. And click on Continue.

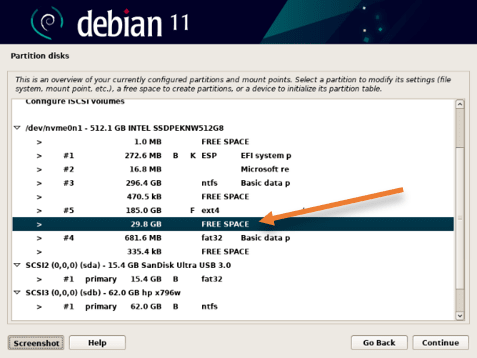
You can see, the new hard disk size allocated to the root directory, you may now click on Done setting up the partition.
If you would like you can resize the partition based on your requirement.


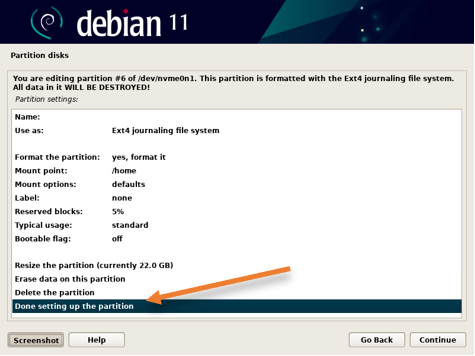
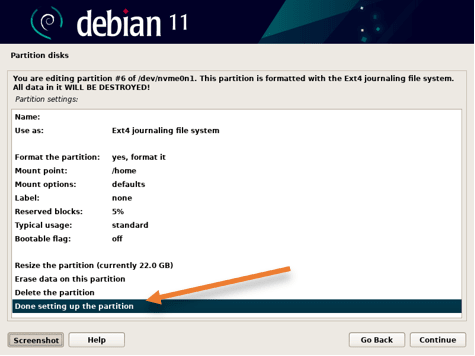
Configure the home storage.
The home directory creates all the user accounts, and the user files are saved. Since it will be a single user on this machine, I will allocate only 22GB for the home directory. Which is more than enough.
As you can see, still we have 29.8 GB of storage available to use, select the free space and click on Continue.

Choose create a new partition and continue.
I have given 22.0GB of storage, and click on Continue.


Choose Beginning for the new partition location and continue.
You can see, by default the newly added partition mapped to the home directory.
You may click on Done setting up the partition.
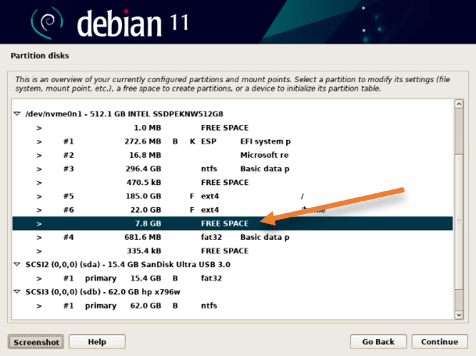
Configure the SWAP memory.
You are now left with 7.8GB of free space, which we will allocate to the swap memory.
Select the free space and click on Continue.

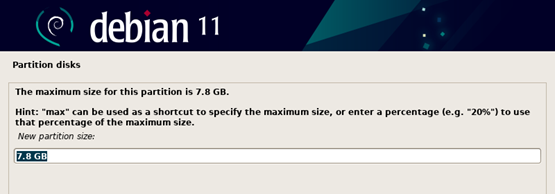
Choose create a new partition and click on Continue.
Select the new partition’s size as 7.8GB, which is left in our hard disk, and click con continue.

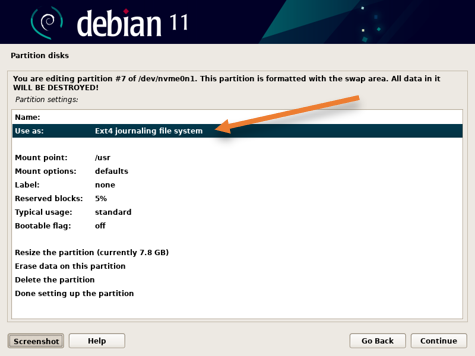
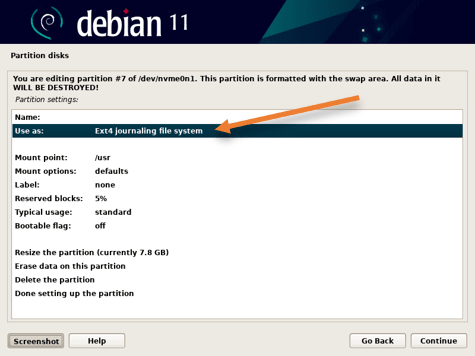
In the partition summary, you can see the newly added partition mapped to /usr directory. We need to tell Debian to use the new partition as a swap area.
Choose the Use as Ext4 jounaling file system and click on Continue.
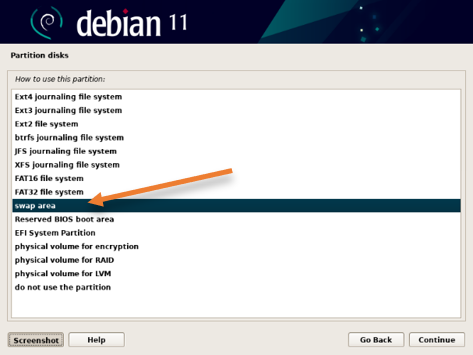
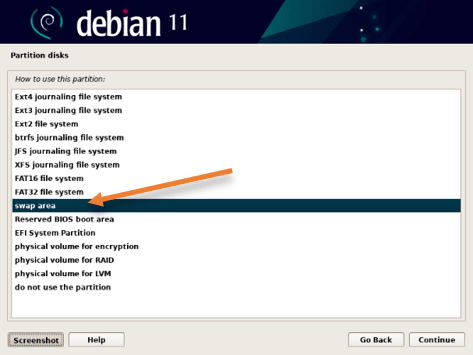
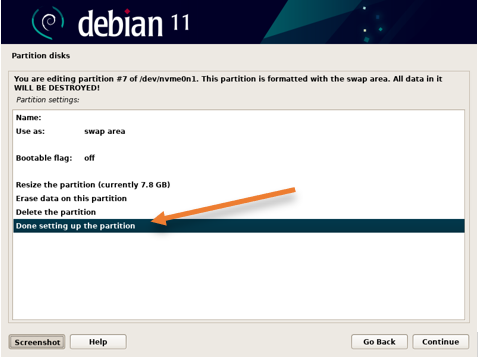
In the how to use this partition, choose the SWAP area from the list and click on Continue.
In the swap area partition summary, choose done setting up the partition and click on Continue.
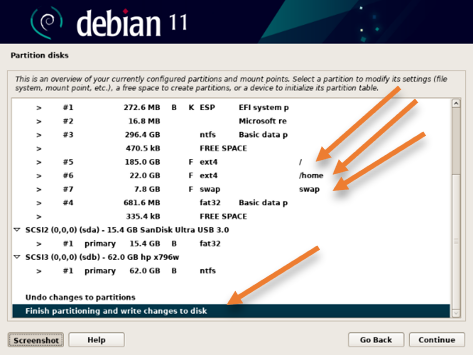
We configured the storage for the Debian 11 machine, and you now have the hard disk configured with root, home, and swap directories.
Scroll down and select Finish partitioning and write changes to disk, and Continue.
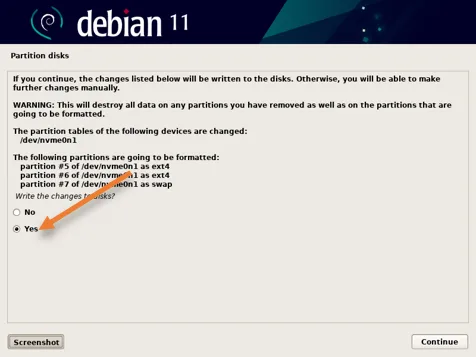
You will be asked that the hard disk will be formatted. You may choose yes here.

The partition formatting will start now, after which the installation will continue.
10. Continue with the Debian installation.
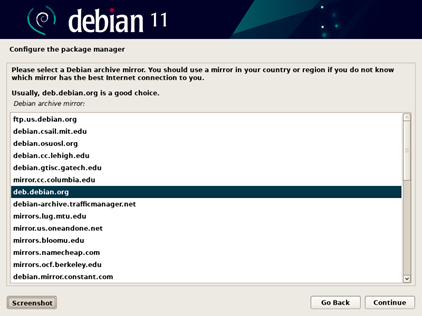
The installation is now started. You will be asked to configure the package manager, which is required to install the software packages and dependencies.
Choose yes, and continue.

Choose the mirror nearest to you.

Select db.debian.org, which is the good choice.

In the proxy configuration, enter the proxy address if you are using a proxy; else just leave blank and click on Continue.
In the popularity contest, choose no, unless you want to participate.
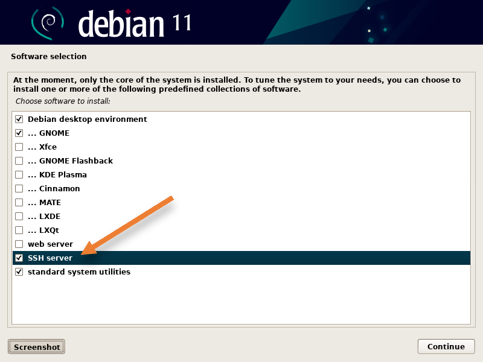
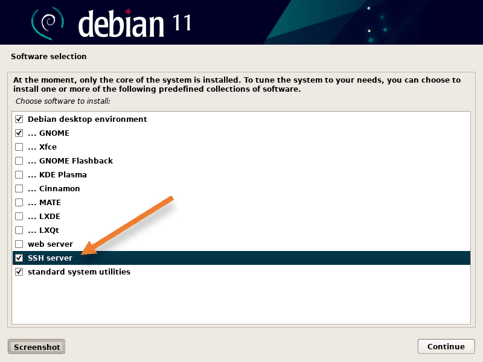
The installation will continue, and you will be required to choose what packages you would like to install.
Apart from the default selection, I have also selected the SSH server, which required for me to ssh into the Debian machine.
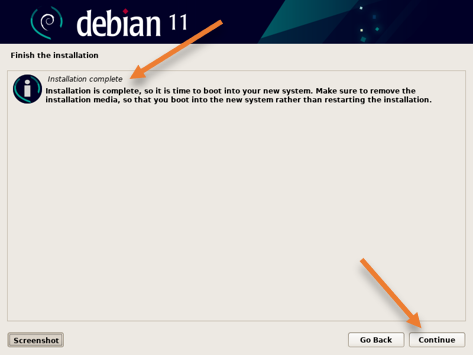
After a few seconds, you will get the installation is complete message, and when you click on Continue, it will reboot the machine.

When the Debian system is restarted, it will use its bootloader and ask you which operating system to load.
If you choose Debian GNU/Linux you will get the Debian operating system. If you choose windows boot manager, then it will take you to the windows operating system.
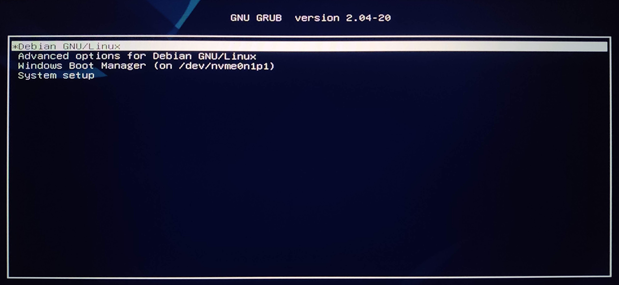
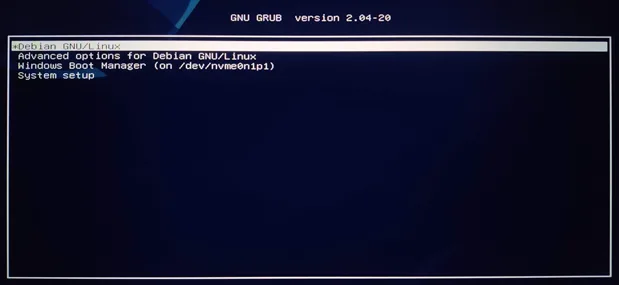
If you don’t choose after a few seconds, it will auto-select the Debian11.
Congrats! You have successfully installed Debian 11 on your machine using the dual boot. Anytime you want to switch to windows11, you just reboot the Debian operating system and choose windows boot manager at the boot screen.