
Quick Answer / CLI Summary: If you prefer the terminal, paste this command to create the PPPoE interface immediately:
/interface pppoe-client

add name=pppoe-out1 interface=ether1 user="YOUR_USERNAME" password="YOUR_PASSWORD" disabled=no use-peer-dns=yes
(Read below for the full WinBox guide, including VLAN tagging and troubleshooting)
When connecting a MikroTik router to an ISP, you generally have two options: DHCP (Plug & Play) or PPPoE (Username & Password). While DHCP is automatic, many ISPs still require a PPPoE dial-up connection to authenticate your device.
Configuring this on MikroTik gives you more control than a standard ISP router, but it requires a few specific steps. This guide covers both the QuickSet method (easiest) and the Manual method (for VLANs and advanced control).
Below is the topology we will be working with:
As you can see, ether1 is connected to the internet using the PPPoE network, and the Ethernet 2 link is connected to the switch, providing LAN access. Finally, there is a wireless network that will offer Wi-Fi connectivity to all the other devices. All the LAN devices will use the 10.1.1.0/24 address range.

Prerequisites
- ISP Credentials: You need the Username and Password from your ISP.
- VLAN ID (Optional): Some fiber providers require a VLAN tag (e.g., VLAN 10 or 100) on the WAN port. Ask your ISP if this is needed.
Step by Step to configure the PPPoE network on MikroTik router.
Here is the step by step guide Video.
Method 1: The “QuickSet” Way (Easiest)
If you are using a default MikroTik configuration, the QuickSet wizard is the fastest way to get online.
- Login to your router via WinBox.
- Click Quick Set in the top-left corner.
- In the Internet section (right side), change the “Address Acquisition” mode to PPPoE.
- PPPoE User: Enter your ISP username.
- PPPoE Password: Enter your ISP password.
- PPPoE Service Name: (Optional) Leave this blank unless your ISP specifies one.
- MAC address: Usually you leave this blank, however if you would like to change the Mac address of your router you can do that, may be you want to use the old router Mac address, that you can copy and paste it here.
- Click Apply.

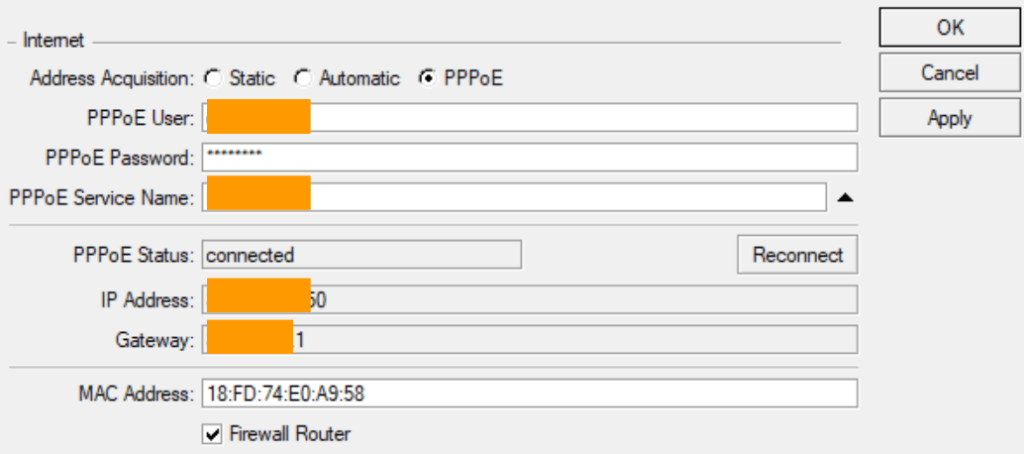
If the credentials are correct, you should see the status change to Connected immediately.
Method 2: Manual Configuration (Best for Custom Setups)
If you want full control or need to configure a specific interface (like ether1, or ether2), do it manually.
Step 1: Create the Interface
- Open WinBox and go to the PPP menu (left sidebar).
- Stay on the Interface tab and click the Add (+) / New button.
- Select PPPoE Client.

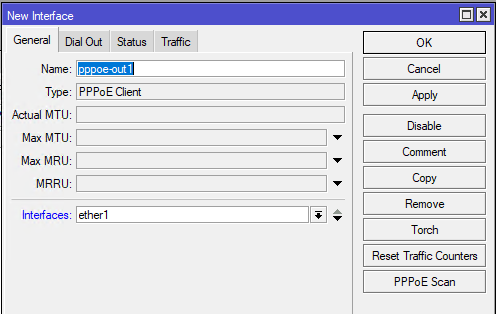
Step 2: General Settings
- Name: Leave as default (pppoe-out1) or rename it (e.g., WAN-PPPoE).
- Interfaces: Select the physical port connected to your modem (usually ether1).
- Note: If your ISP uses a VLAN, do not select ether1 here. See the “VLAN” section below.
Step 3: Dial Out Settings
- Click the Dial Out tab in the same window:
- Service: Enter the service name
- User: Enter ISP Username.
- Password: Enter ISP Password.
- Use Peer DNS: Check this box (✅). This allows your router to use the ISP’s DNS servers automatically.
- Add Default Route: Check this box (✅). This creates the route to the internet.

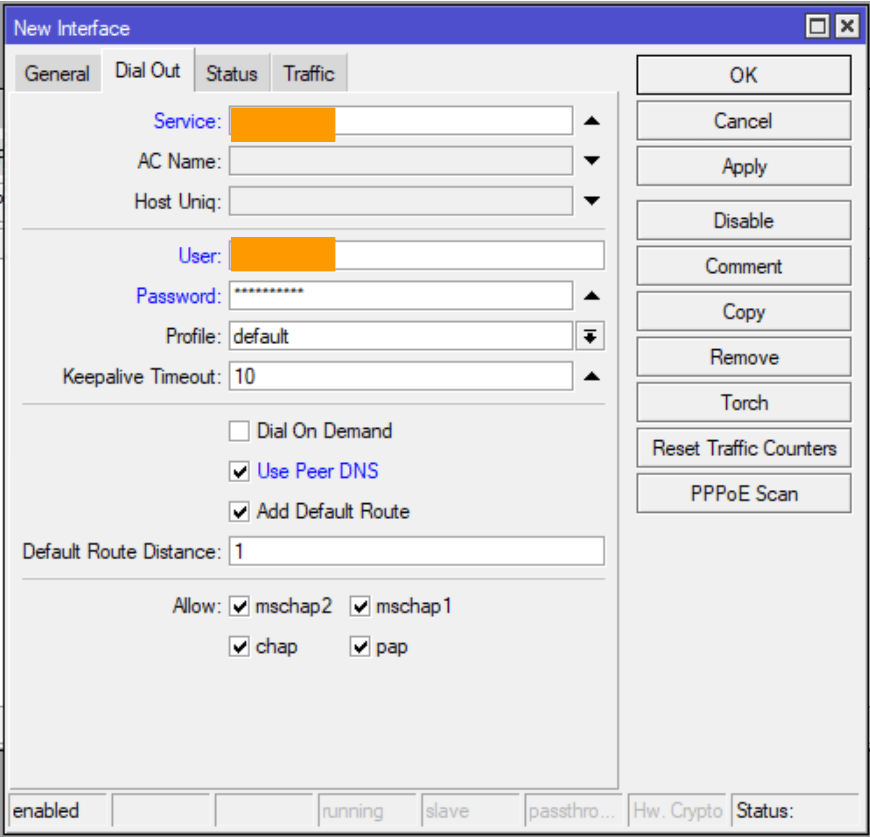
Click Apply. If successful, the status at the bottom right will say “connected”.
To delve deeper into the status, simply click on the recently created PPPoE configuration and navigate to the traffic tab. Here, you can observe the real-time traffic activity.

Click on Ok, and you will see the traffic flow as follows under interface.

If, for any reason, you are unable to access the Winbox, you can attempt to reach the MikroTik router using the WEB GUI through the HTTP service.
Simply open your preferred browser and type in the following URL: http://192.168.88.1 or your router lan side IP and follow the same steps mentioned above.
Note: that it should be “http” instead of “https.” In order for HTTPS to function properly, you must have a valid certificate installed which is for another topic of discussion.
Special Case: PPPoE with VLAN Tagging
Many modern fiber ISPs (FTTH) require you to tag the WAN traffic with a specific VLAN ID (e.g., 10, 20, or 100) before dialing the PPPoE connection.
If your ISP uses VLANs, follow this order:
The connection will look like below with the PPPoE vlan.
Internet—>Ethernet1
                |
                VLAN100
                     |
                    PPPoE_interface.
Create the VLAN:
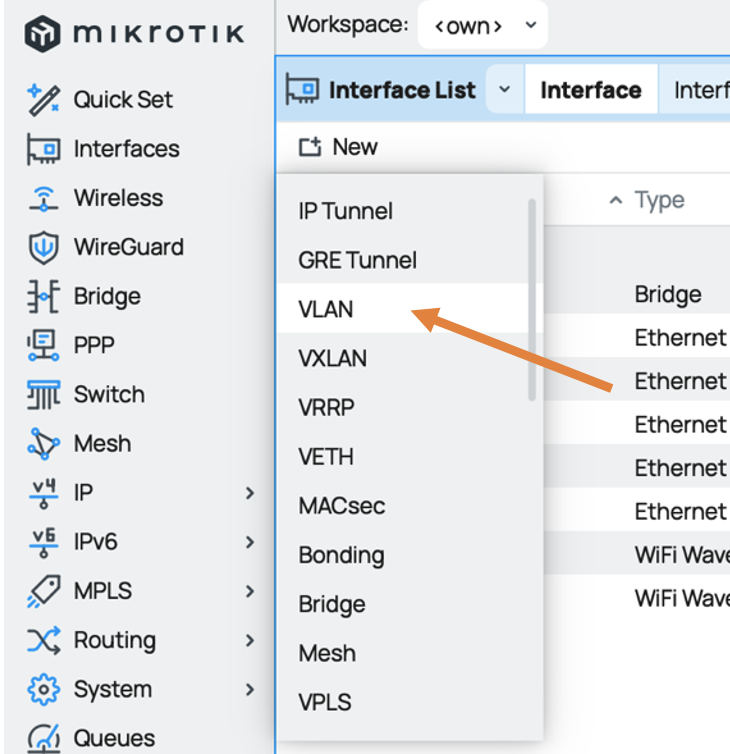
- Go to Interface -> Click (+) New.
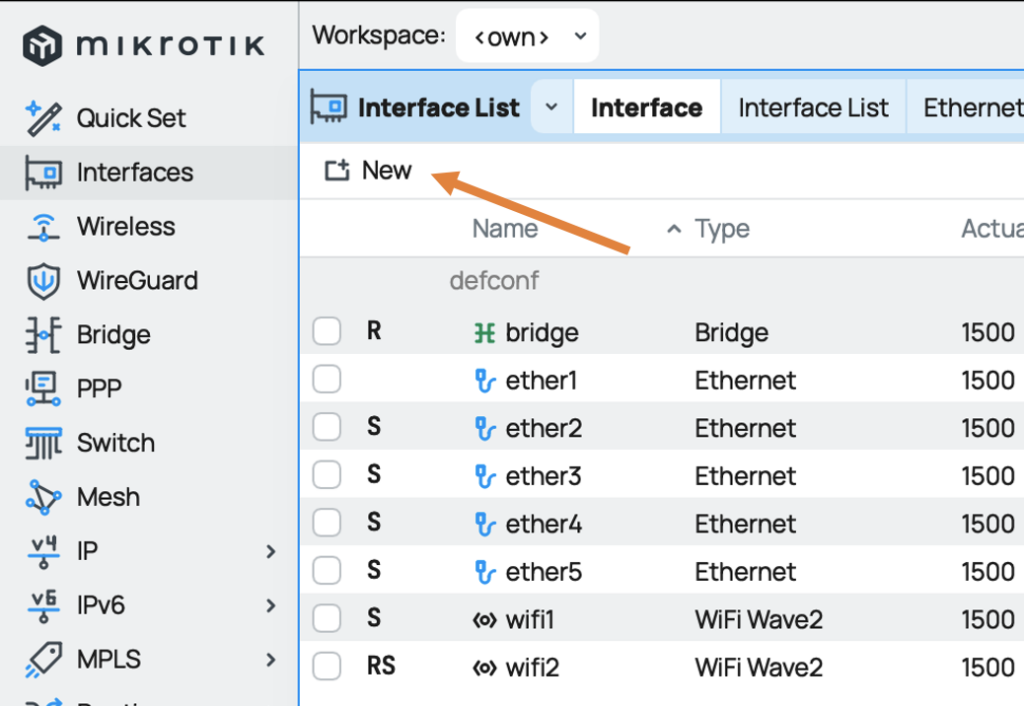
- Select VLAN.
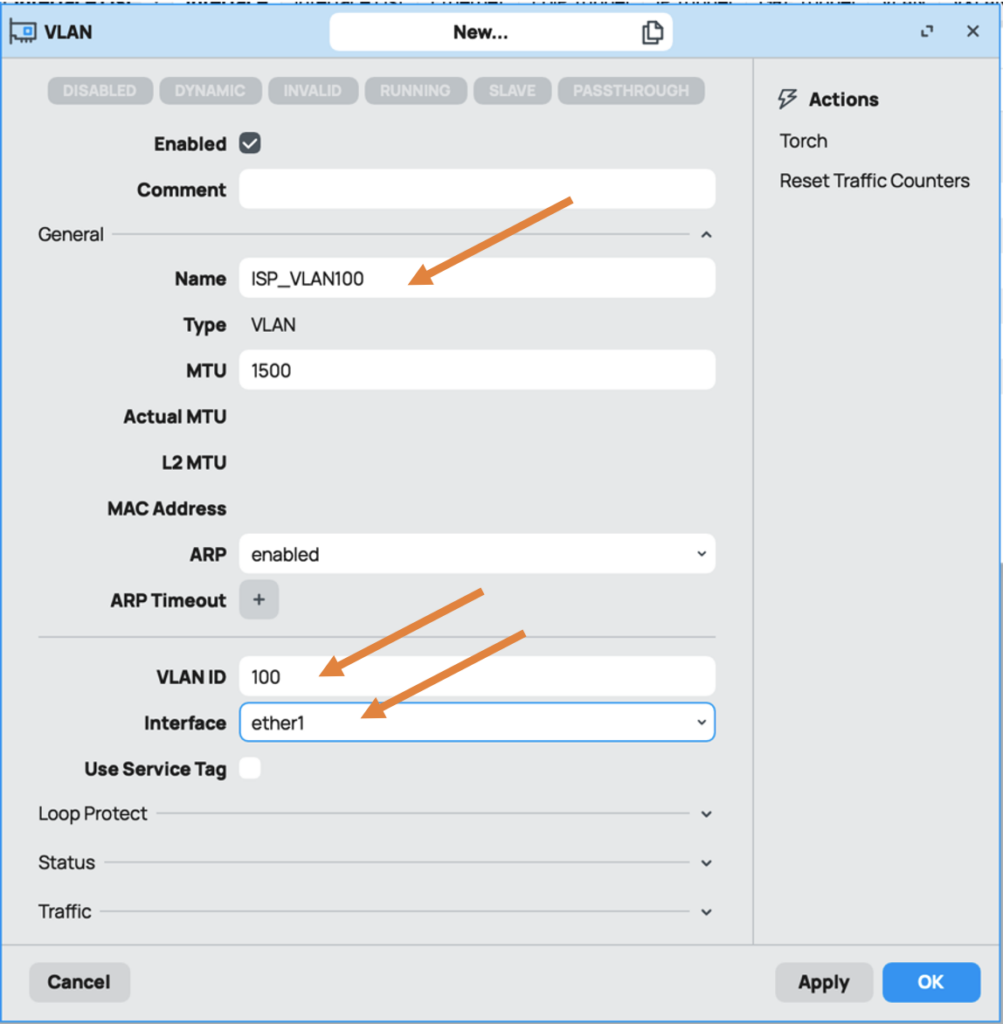
Configure the interface as follows.
- Name: ISP_VLAN100 (or similar).
- VLAN ID: Enter the ID provided by your ISP (e.g., 100).
- Interface: Select the physical port (ether1).
- Click on Ok.
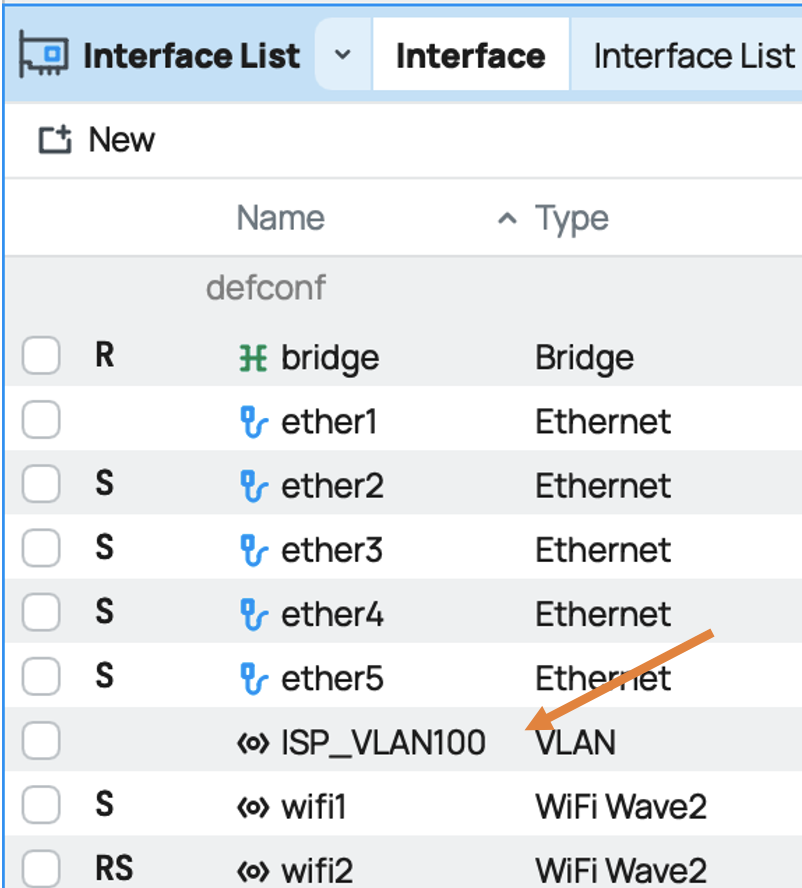
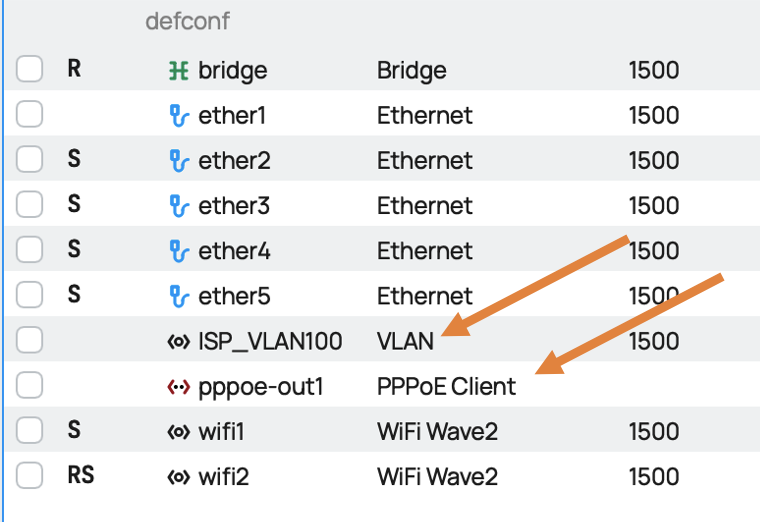
You can see the vlan interface is now created.
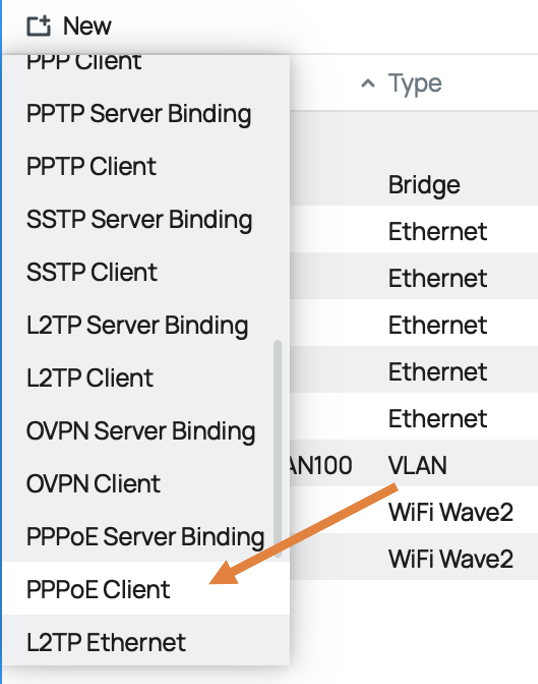
Create the PPPoE Client:
While on the interface configuration screen, click on New to create new interface.
And then choose PPPoE client from it.
- Interface: Select the VLAN Interface you just created (vlan100-wan), NOT ether1.
- Enter credentials in the “Dial Out” tab as usual.
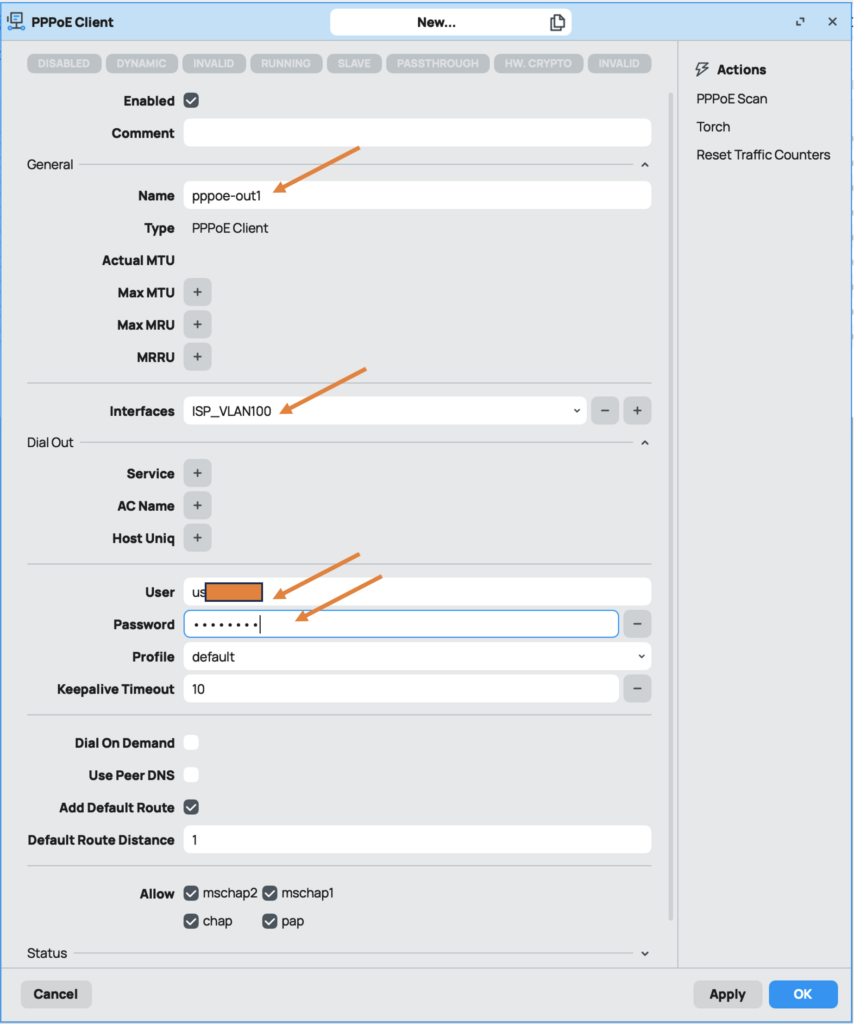
You can now see the PPPoE interface is now configured, and if the creds from the ISP and the VLAN is correct you should be able to connect to the internet successfully.
Lets look at the traffic on ethernet1, vlan interface and PPPoE interface.
To see the traffic, you could goto interfaces, and click on specific interface and go all the way down to the traffic section.
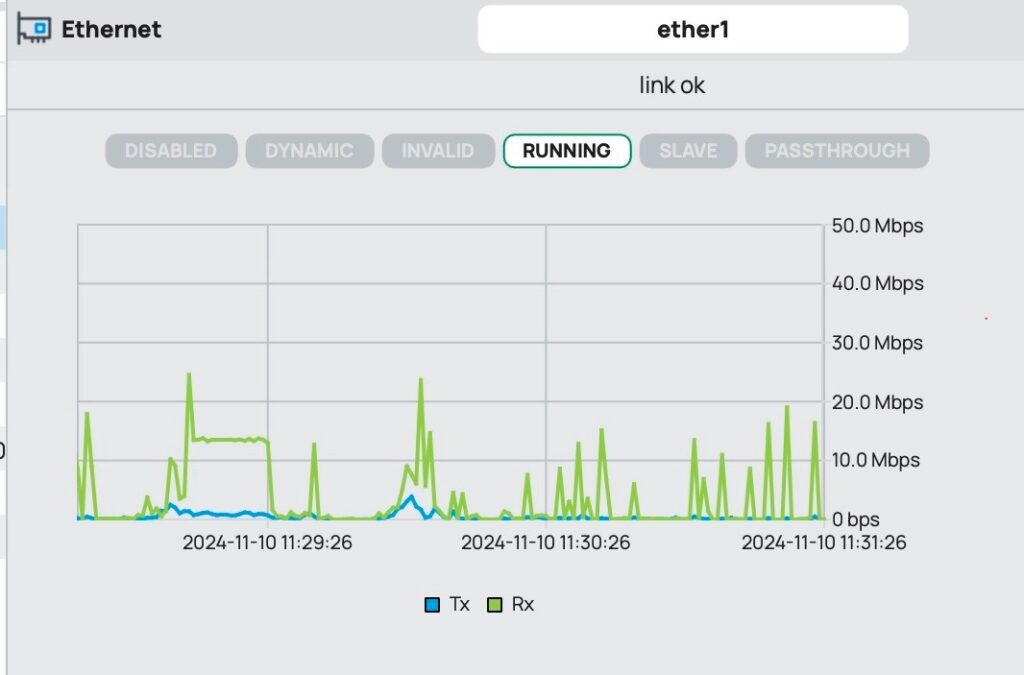
Ethernet 1 is the physical interface connected to the ISP uplink.
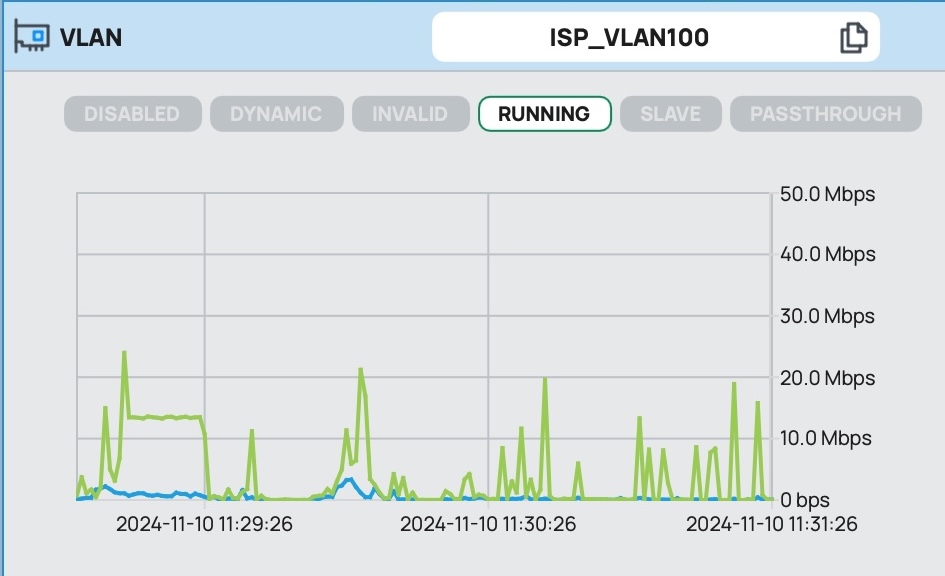
VLAN interface.
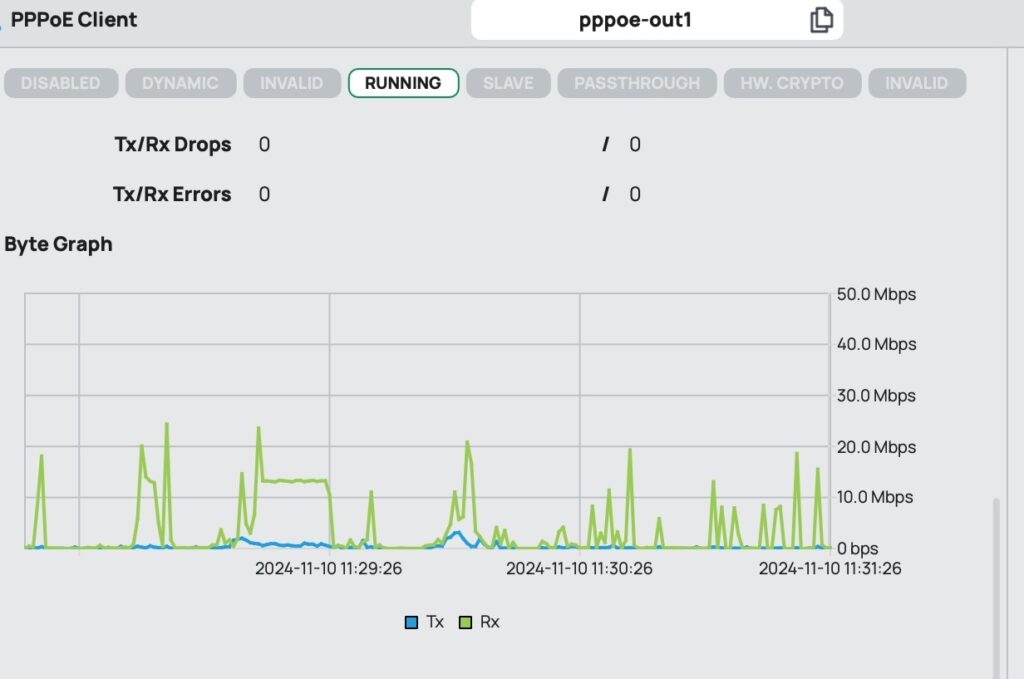
PPPoE interface
Did you notice the traffic pattern, all of them are same, which indicates the VLAN interface and the PPPoE interface are part of ethernet1.
⚠️ Troubleshooting & Common Issues
Issue 1: “Authentication Failed”
- Double-check your username/password.
- Some ISPs lock the connection to your old router’s MAC Address. You may need to call them to “release the MAC” or clone your old router’s MAC address onto ether1.
Issue 2: Connected but No Internet on LAN
- Ensure NAT is enabled.
- Go to IP -> Firewall -> NAT.
- Add a rule: Chain: srcnat, Out-Interface: pppoe-out1, Action: masquerade.
Note: The out-interface must be the PPPoE interface, not ether1.
Issue 3: Websites loading slowly or partially (MTU)
- PPPoE adds overhead (8 bytes). Standard MTU is 1500, but PPPoE usually requires 1480 or 1492.
In the PPPoE Client settings, check Change TCP MSS (✅). This automatically fixes packet size issues for most users.
Ali
Saturday 10th of February 2024
Very good informations. ...Thanks Bro
Saifudheen Sidheeq
Saturday 9th of November 2024
Glad to know it helped :)