
In the previous blog post, we discussed how to set up different user permissions in pfSense. Now, we’re going to take it a step further and configure pfSense to communicate with the RADIUS server.
This configuration allows for user authentication into the pfSense dashboard. If you’re planning to use OpenVPN on pfSense, you can use this setup as a centralized authentication server. So, when someone who manages pfSense is no longer part of the team, you only need to remove their account from the Active Directory (AD), instead of having to remove it from every local account.
To proceed with this configuration, we assume that you already have AD and NPS services installed on a Windows Server 2019. If you want to learn how to set up the same thing, you can follow the instructions in this article. In this blog post, we’ll focus on setting up pfSense user access using Windows NPS servers.
We’ll create two types of users: one with read-write permissions and another with read-only access.
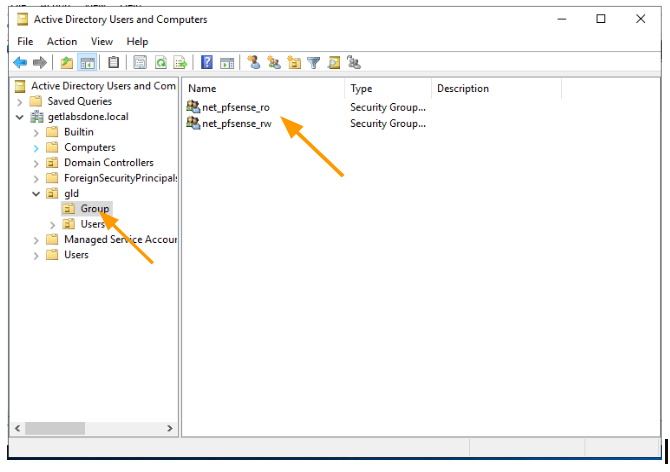
1. Configure AD pfSense read-only and read-write groups
Before we proceed, make sure you have already set up the AD and NPS server. Now, we’re going to create a group in our AD that will define the policies. I have created two groups:
“net_pfsense_ro” : read-only access
and “net_pfsense_rw”: read-write access.
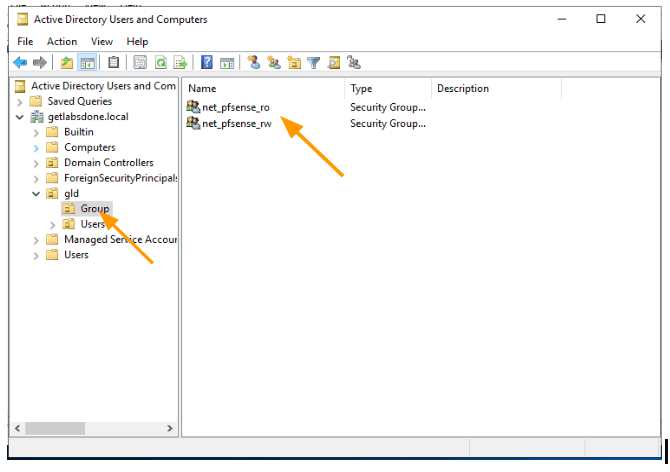
Add users to the groups
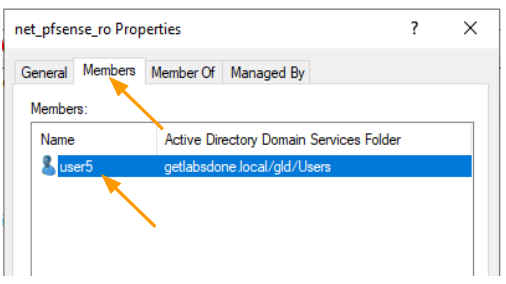
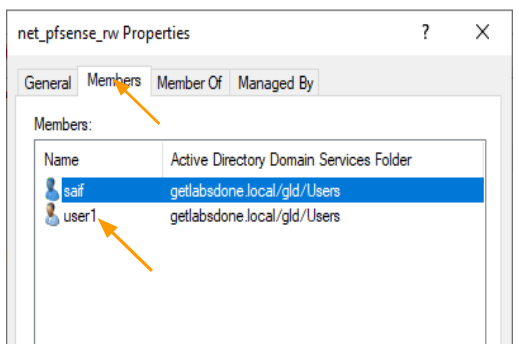
We have “user1” who will be part of the read-write group and “user5” who will have read-only access. Add these users to their respective groups.
Click on the AD group, members, and add the users.
Net_pfsense_ro properties.

Net_pfsense_rw properties.

2. Add the pfsense shared secret.
To enable communication between the RADIUS client (pfSense firewall) and the RADIUS server, you need to set a shared secret key. This key must match on both sides for the communication to occur. You can add the shared secret every time you add a pfSense firewall, or you can add it as a template and reuse it.
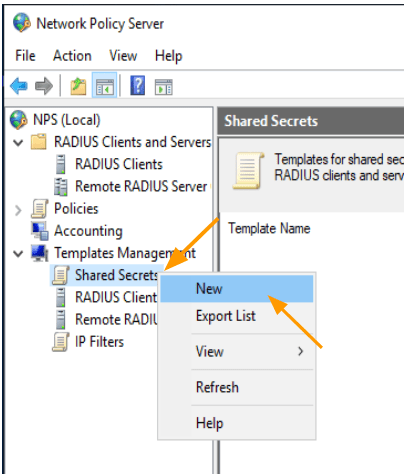
To save time and make shared key management easier, it’s best to add the shared secret under a template. Expand “Template Management,” right-click on “Shared Secret,” and select “New.”

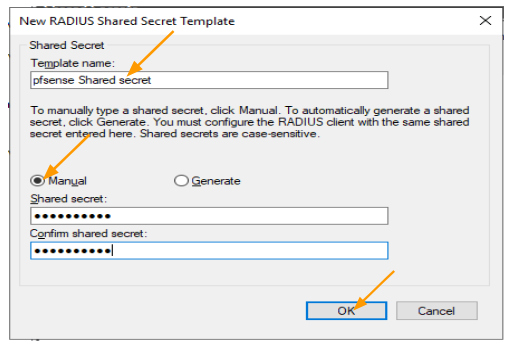
In the “New Radius Shared Secret Template” window:
- Enter a name for the template.
- Choose whether to select manual or generate a new key. Here, I’ll use manual entry and type the access key. Click “OK.”

3. Add the NPS RADIUS server in pfSense
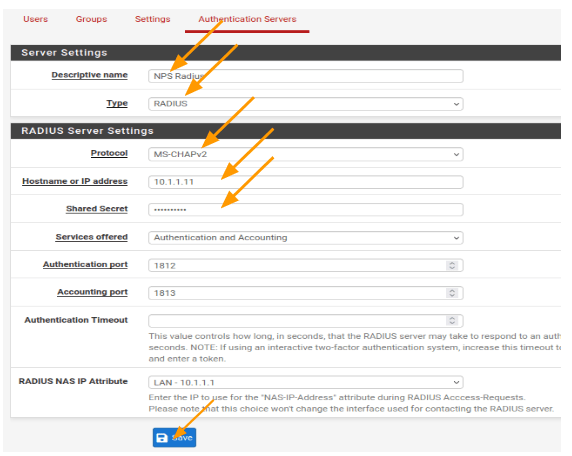
Now that we have the shared secret key, let’s add the RADIUS server to the pfSense firewall.
- Log in to the pfSense firewall with admin privileges.
- Go to “System” -> “User Manager.”
- Click on “Authentication Servers” and then “Add.”
- Descriptive name: Enter the name.
- Type: Choose Radius from the drop down
- Protocol: MS-CHAPv2
- Shared secret: The same shared secret we defined in the NPS radius server.
- Leave everything else default and click on Save.

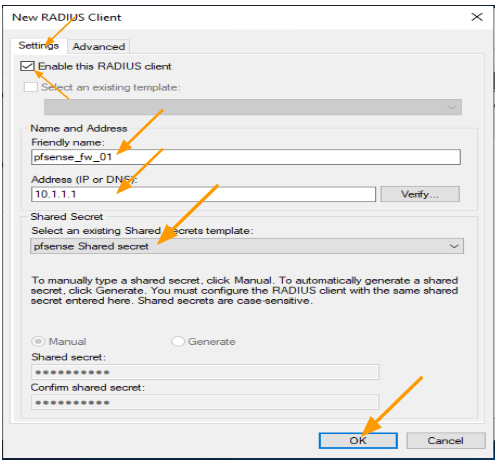
4. Add the Pfsense As radius client.
In the NPS server, expand “Radius Client and Servers” and right-click on “Radius Clients.” Select “New.”
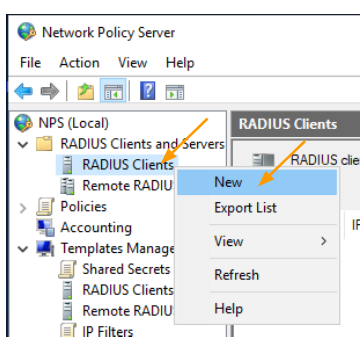

In the “New Radius Client” window:
- Leave the default option checked: “Enable this RADIUS client.”
- Enter the name of the deployed pfSense firewall as the friendly name.
- Enter the IP address of the pfSense firewall. The RADIUS server will use this IP address to communicate with the RADIUS client, so make sure you select an IP address that both the server and pfSense can talk to.
- Choose the shared secret you added earlier from the drop-down menu.

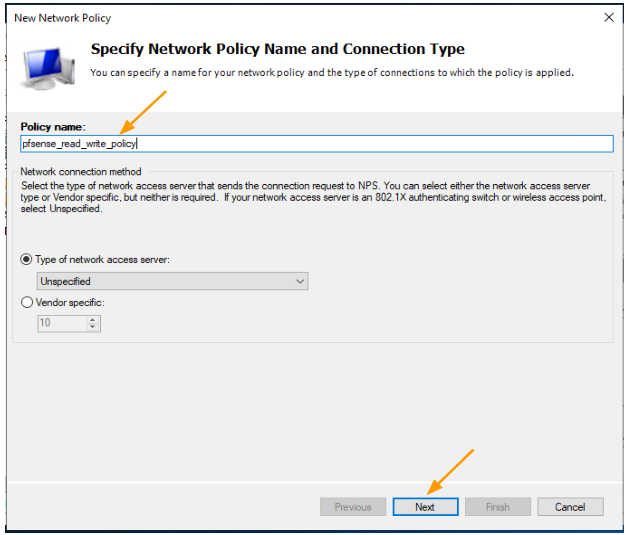
5. Configure the pfsense read-write policy.
First, we’ll create a policy for admin users. Before we continue, we need to note the admin user group in pfSense. By default, there is a user group called “admins” in pfSense that has full privileges.
Goto system-> User manager->Groups As you can see below, this admins group is showns below.


We need to create an admin policy in such a way that, when someone who is part of net_pfsense_rw group tries to authenticate, they should be tagged to the admins group, as a result they will have full privileges.
Lets see how we can create the policy for the same.
Note: You can even define the Connection policies to specify who can authenticate and all that, but we are not using that at this moment.
Right click on Network policies.
In the pop up Enter the policy name:
And click on next.
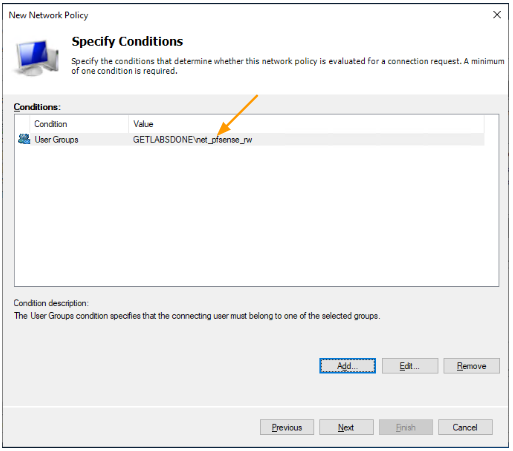
- In the conditions, click on “Add” and select “User Groups.”
- Click on “Add Group” and select the pfSense group by typing the first few letters of the group, checking the name, and adding it to the list.
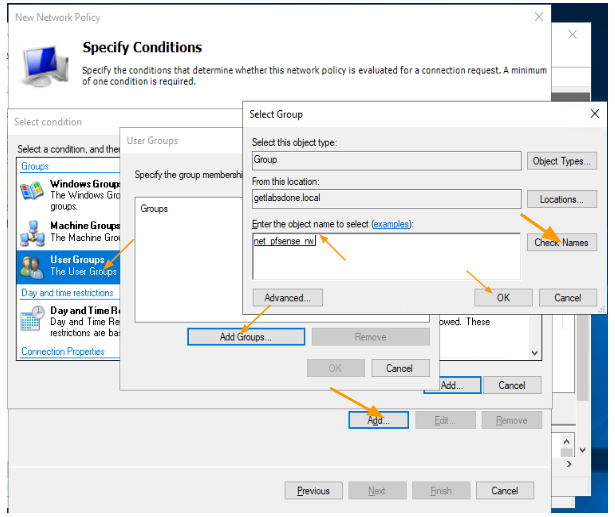

After selecting the conditions click on Next.

- Choose “Access Granted.”
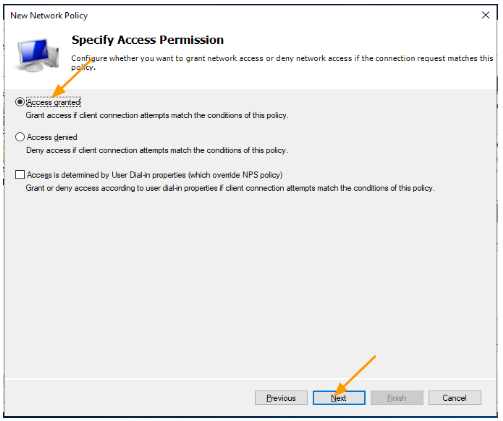
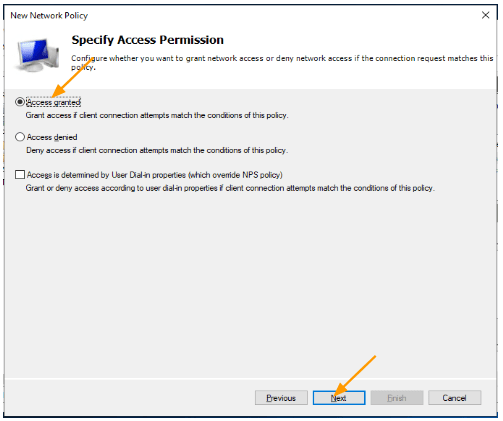
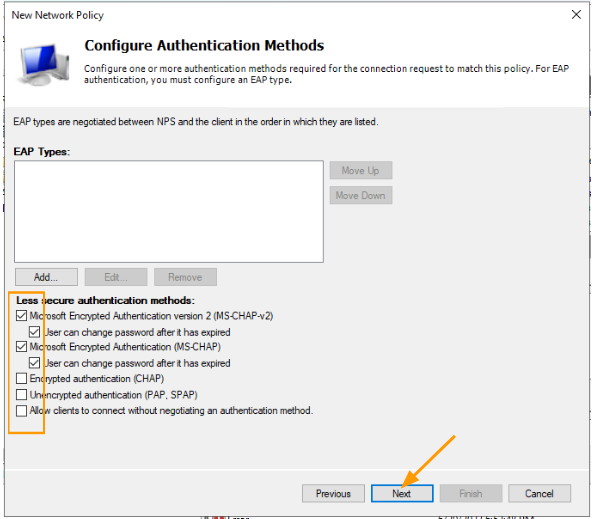
- Leave the default authentication methods and click “Next.”

Leave everything default in the configure constraints and click on Next.
Configure settings.
- In the settings, select “Standard” and click “Add.” In the pop-up, choose “Class” and click on add.
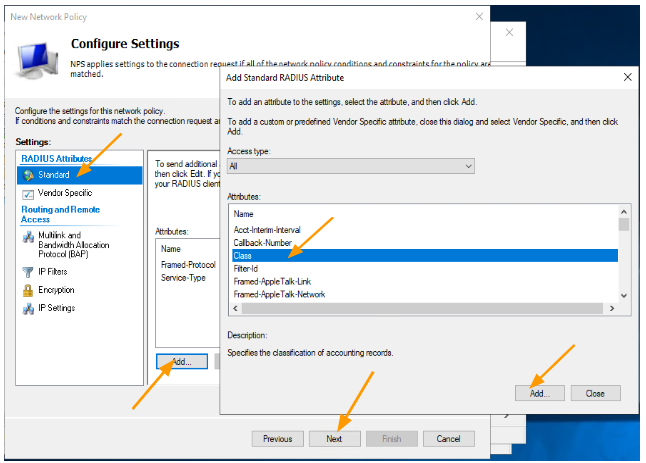

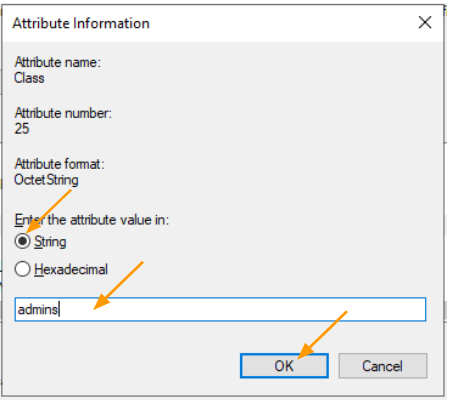
In the attributes information, select string and add pfSense group name, which is “admins.” and click on Ok.

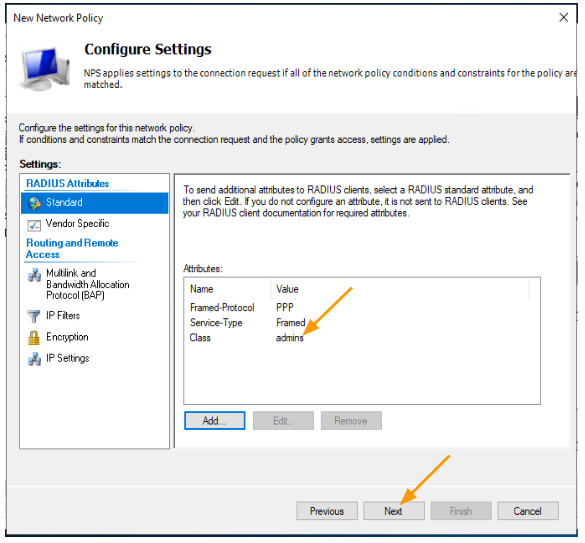
As you can see, the class has been selected as admins below and click on next and Finish.
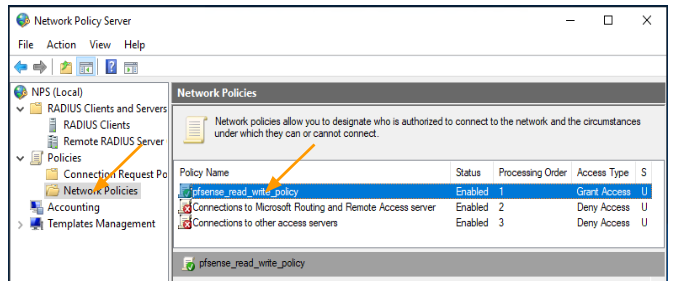
We have successfully created the pfsense read-write policy, by default it will be all the way at the bottom, you need to move it to the top. By selecting the policy and right click and click on Move up.
As you can see, the policy has been defined as below and it is at the top.

6. Test the NPS radius admin authentication with pfsense.
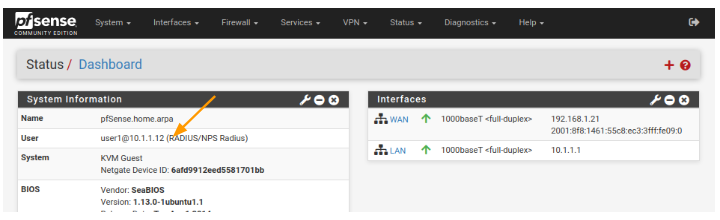
If you’re already logged in with the admin account, log out from pfSense and try logging in with “user1.” You should be able to log in with full admin rights.
As you can see, I am able to login with the user1 with full admin rights.

You can also check the authentication logs in the Windows Server Event Viewer: Custom Views -> Server Roles -> Network Policy and Access Services.
You should see a successful login for “user1.”


7. Configure pfsense read-only policy.
Before you create a read-only policy, it is important that you create a read-only group in pfsense, which then can be accessed by the pfsense for the radius authentication.
You may follow the article here to learn more about how you can set up a read-only group with specific permissions in pfsense, once you have done that, come back here to continue.
Once you have the read-only group set up, proceed with the policy configuration:
Creating a read-only group is pretty straightforward, you have to change only few settings.
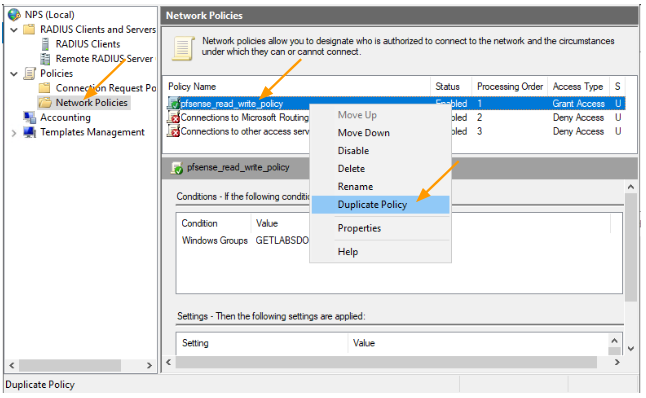
We are going to duplicate the existing read-write policy and create new one with read-only privileges.
In the windows NPS server, right click on the pfsense_read_write_policy that we already created, and click on Duplicate Policy.
You will see a new policy defined, however it is disabled, move the policy to the top and double click on it open it.


In the new policy properties.
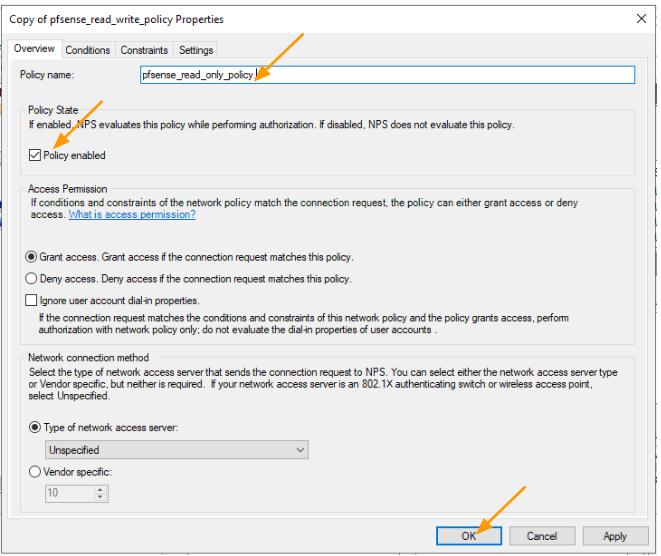
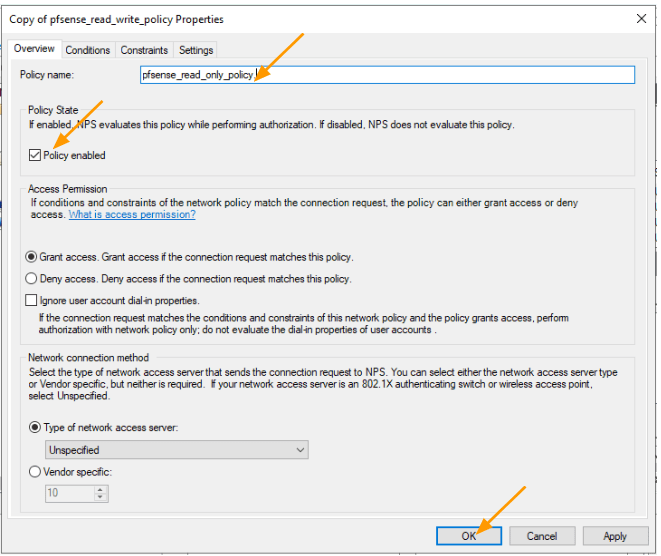
Policy name: Enter the name of the policy which pfsense_read_only_policy.
Check the box that says Policy enabled.
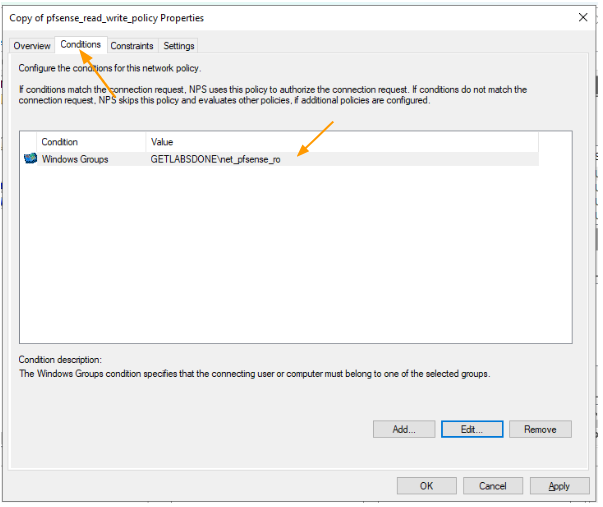
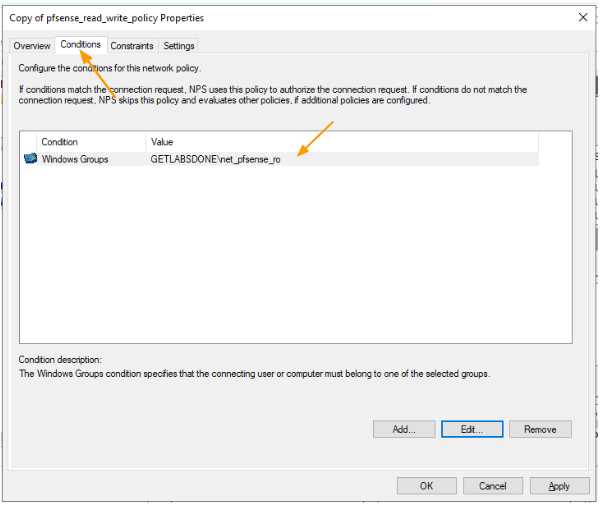
Click on Conditions,
In the Conditions, you can see that the net_pfsense_rw group is selected, you need to change that to net_pfsense_ro group.
There is no need to make any changes on the constraints, however we need to call the read-only group from the pfsense in the settings.
Click on settings.
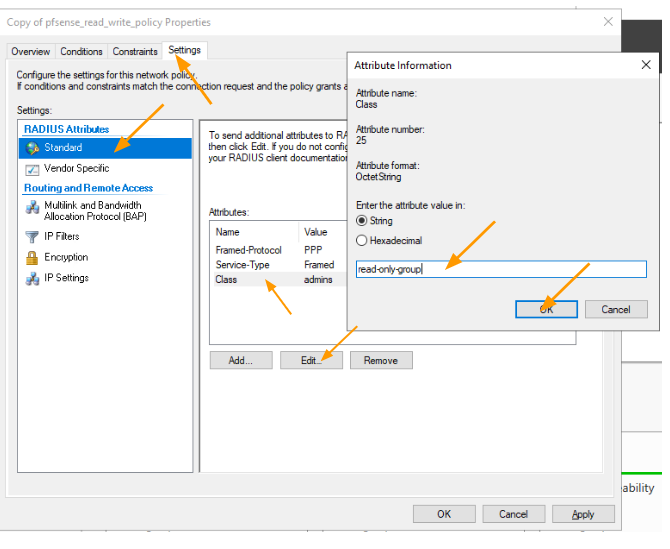
Here you can see under standard that the Class admins are now selected, which we have to change to read-only-group from pfsense that we created.
Select the class, and click on Edit.
In the pop up, add the read-only-group that we created in pfsense and click on Ok.
Note: you need to ensure that you select the right group that we defined in the pfsense, else it will not work.

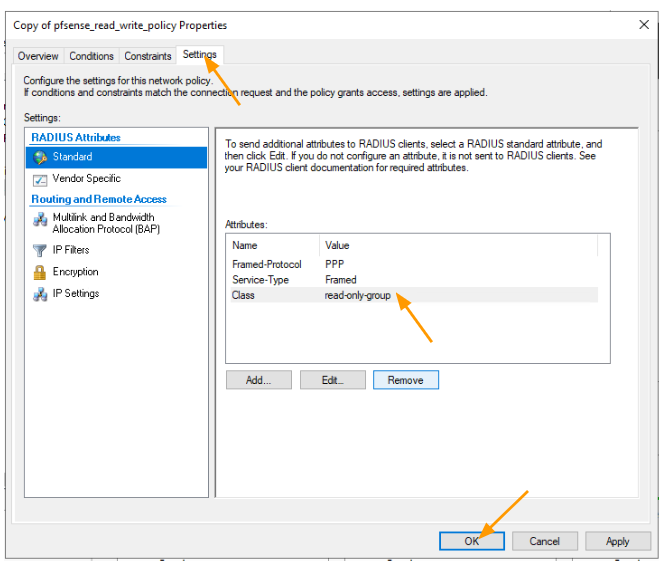
You will now have a policy with read-only-groups like below.
Click on Ok here.

As you can see, you now have two policies: the first one is the read-only policy, and the second one is the read-write policy.


Now, let’s proceed and test the pfSense authentication.
8. Test pfSense read-only RADIUS authentication.
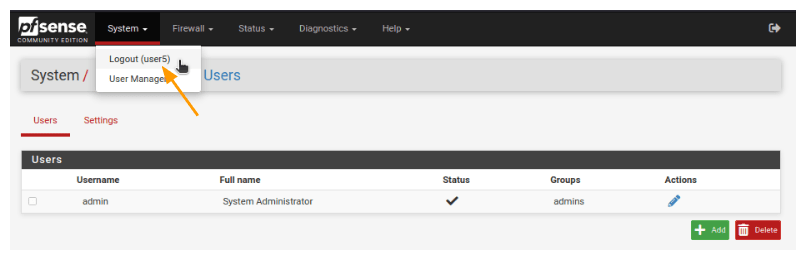
As I mentioned earlier, user5 is a member of the read-only group. So when user5 tries to log in, they will only have read-only access.
As you can see, I was successfully able to login with user5 and it is limited to read-only access.

Conclusion.
We have successfully configured pfSense to communicate with a RADIUS server for user authentication. By setting up different user groups and policies, we can control access privileges within pfSense. This centralised authentication approach offers convenience and security, allowing us to easily manage user accounts and revoke access when needed. With read-only and read-write permissions in place, we can ensure appropriate access levels for different users. By implementing these configurations, we have enhanced the overall security and efficiency of our pfSense firewall.