
I have been working with KVM for a long time now. I stuck to it because it is open-source and free for anyone to use it. I recently moved some of my KVM virtual machines to my newly built Proxmox server. As you may know, Proxmox is a virtualization hypervisor based on KVM itself, and it is free. And you need to pay only for the support if you want to.
If I ever need to copy/move a VM from one KVM server to another, I usually take the qcow2 image of the virtual machine out and create a new VM with that image, which is pretty easy.
Initially, when I tried to move the KVM VM to the Proxmox server, I thought it would be a cakewalk, and I could easily create a VM with the QCOW2 image within Proxmox. However, by default, there is no option to import a VM from a virtual hard disk in Proxmox, as we have in KVM. The default option is to use only an ISO image and boot from it. The challenge here is that I am from a networking background. If I want to spin up any virtual firewall or network appliances, most of them are not available in iso format. It is primarily available in virtual Hard disk formats such as QCOW2, OVA, VHD, etc.
To use KVM virtual hard disk (qcow2) as the VM hard disk in Proxmox, some changes need to be made on the Proxmox server to load the KVM VM successfully.
In this blog, we will install a Proxmox virtual machine using a qcow2 image. After the installation, you should be able to log in to the virtual machine and starts to use it. The steps I mentioned here are pretty easy.
Before you begin you need to have;
- A server that is running Proxmox.
- A qcow2 image- we are using a Ubuntu KVM VM qcow2 virtual hard disk exported from a KVM server. Any other qcow2 image would work just fine.
1. import Qcow2 image to the Proxmox server.
You could import the qcow2 file to any directory. I will move the qcow2 image to the Proxmox server directory – /var/lib/vz/template/qemu
Using the SCP command from KVM, I have transferred the file.
scp ubuntu.qcow2 [email protected]:/var/lib/vz/template/qemu
If you don’t have direct SCP access, you could transfer the file using Filezilla or WinSCP softwares.
As you can see, the Ubuntu.qcow2 image is now available in the directory, with a size of 21GB.


2. Create a VM without OS.
Let’s go ahead and create a virtual machine in Proxmox without specifying the os.
Click on create VM.
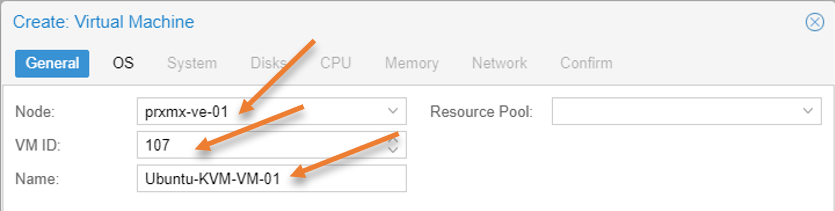
In the general properties;
Node: Specify the node.
VM ID: It will be auto-created.
Name: Provide a meaningful name.

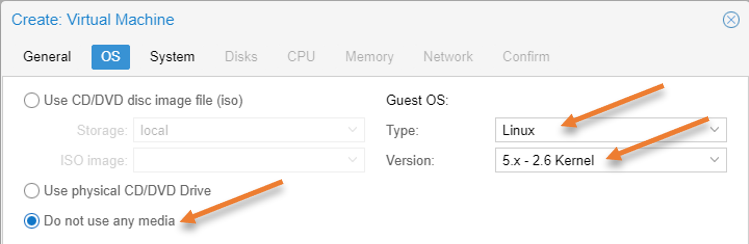
OS configuration.
In the OS configuration, by default, it would choose Use CD/DVD disk image file (iso)
We are not specifying the OS now, hence choose Do not use any media.
Guest OS:
Based on what operating system you are going to install, you need to choose the type and the version.
Since I am installing Ubuntu which is based on Linux, I choose Linux and the version as 5.x

Leave system settings to default and click on Next.
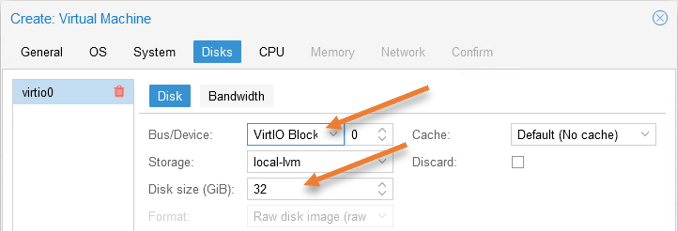
Add/Remove the virtual hard disk.
There will be a default hard disk created with 32GB of storage by default in the virtual hard disk selection. If you have enough storage on the qcow2 image, you don’t need to add this virtual hard disk. Since I require more storage, I will keep the entire 32 GB.
Change the Bus/Device to VirtIOBlock.
Depending on your storage requirement, you may increase, decrease, or even remove the storage here. After adding the qcow2 image, you will have two virtual hard disks. The first one you are adding here, and the second one is the qcow2 image that we import.

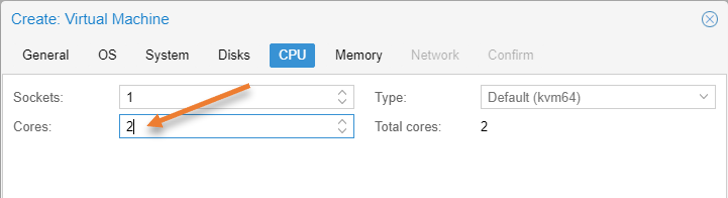
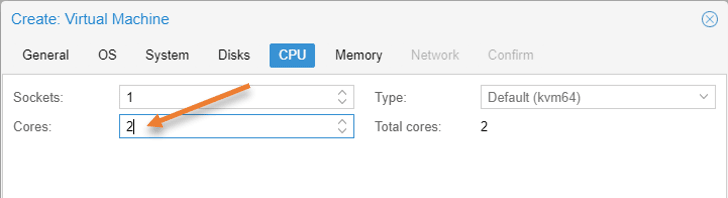
Configure CPU.
Configure the CPU based on the operating system requirement.
I am providing 2 CPUs.
Memory configuration.
Finally, the required memory depends on your operating system. You may provide the recommended memory size and click on next.


Choose your network and click on next.
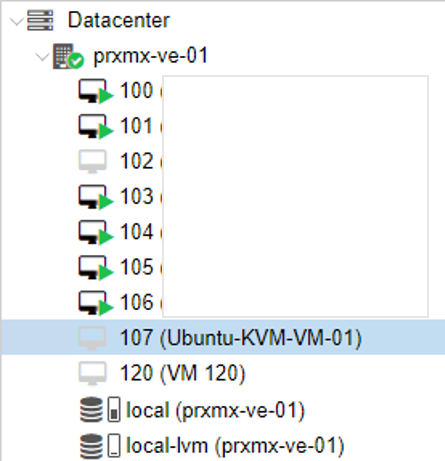
You will see the new virtual machine created with ID 107.

3. Import the qcow2 image to the virtual machine in Proxmox.
We will now import the qcow2 image as the virtual hard disk for Proxmox.
Login to the Proxmox CLI and switch to the qcow2 image directory we imported.
root@prxmx-ve-01:/# cd /var/lib/vz/template/qemu/
root@prxmx-ve-01:/var/lib/vz/template/qemu# pwd
/var/lib/vz/template/qemu
root@prxmx-ve-01:/var/lib/vz/template/qemu# ls -l -h
total 21G
-rw------- 1 root root 21G Apr  1 22:38 ubuntu.qcow2
root@prxmx-ve-01:/var/lib/vz/template/qemu#
Issue the below command to import the qcow2 virtual hard disk to the newly created virtual machine.
qm importdisk 107 ubuntu.qcow2 local-lvmTip: You can use the tab key while entering the command. For example, after importing the disk, when I hit the tab, I could see all the VMIDs present in Proxmox.


This import virtual hard disk will take time depending on the size of the qcow2 image. For me to import 21 GB of qcow2 image, it took precisely 1 min and 3 seconds.
root@prxmx-ve-01:/var/lib/vz/template/qemu# qm importdisk 107 ubuntu.qcow2 local-lvm
importing disk 'ubuntu.qcow2' to VM 107 ...
  Logical volume "vm-107-disk-1" created.
transferred 0.0 B of 20.0 GiB (0.00%)
transferred 206.8 MiB of 20.0 GiB (1.01%)
transferred 411.6 MiB of 20.0 GiB (2.01%)
.
.
.
transferred 19.9 GiB of 20.0 GiB (99.58%)
transferred 20.0 GiB of 20.0 GiB (100.00%)
transferred 20.0 GiB of 20.0 GiB (100.00%)
Successfully imported disk as 'unused0:local-lvm:vm-107-disk-1'
root@prxmx-ve-01:/var/lib/vz/template/qemu#
4. Attach the newly added virtual hard disk to the VM.
Although you can make the changes on the CLI, we will make the following changes in the GUI.
Login to the Proxmox server web GUI.
Select the virtual machine created in step2.
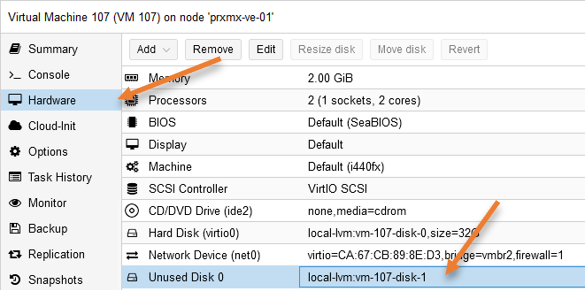
Click on Hardware
You will see the newly imported qcow2 image as Unused disk 0.
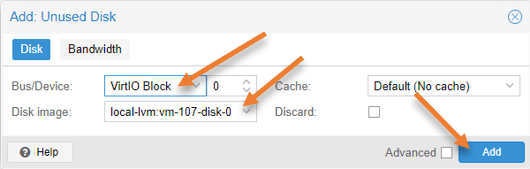
Double click on the Unused disk 0, or select the disk and click on Edit.

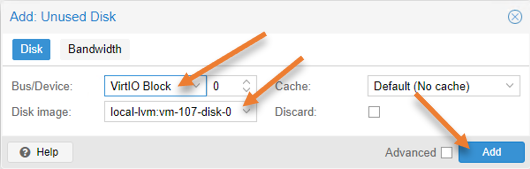
You will get a pop-up to add the new virtual hard disk.
It has picked up SCSI as the Bus/Device type by default. We need to change it to VirtIO block to get better performance. Rest all, leave it to default and click on Add.
You will see a new hard disk has been added with a volume of 20GB alongside the first virtual hard disk.
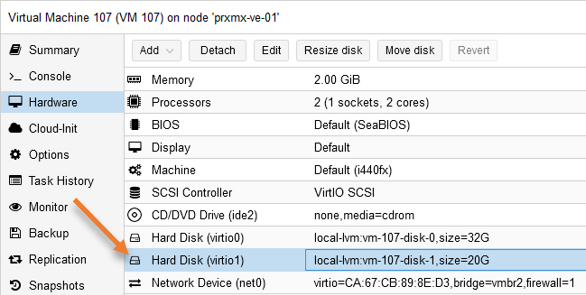

In my case, I defined 20GB storage in the KVM, the same has carried over to the Proxmox, which should be good.
5. Change the Boot Order.
For the Proxmox to start booting from the newly added qcow2 to storage, we need to define it in the boot order.
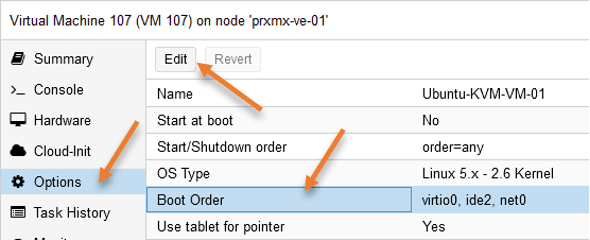
Select the Virtual machine -> Options-> Select the boot order and click on Edit.

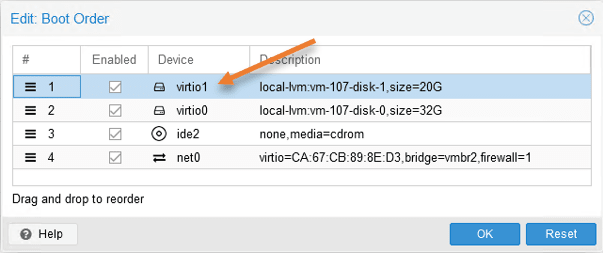
Change from the default order to the following.
The new virtual hard disk should be the primary boot device, select the newly added virtual hard disk virtio1 and click on the hamburger icon to drag to the top and click on Ok.

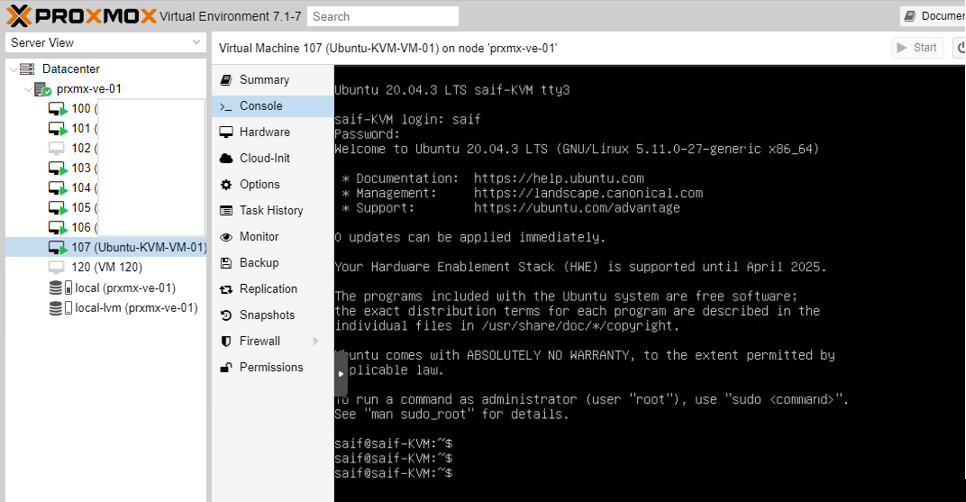
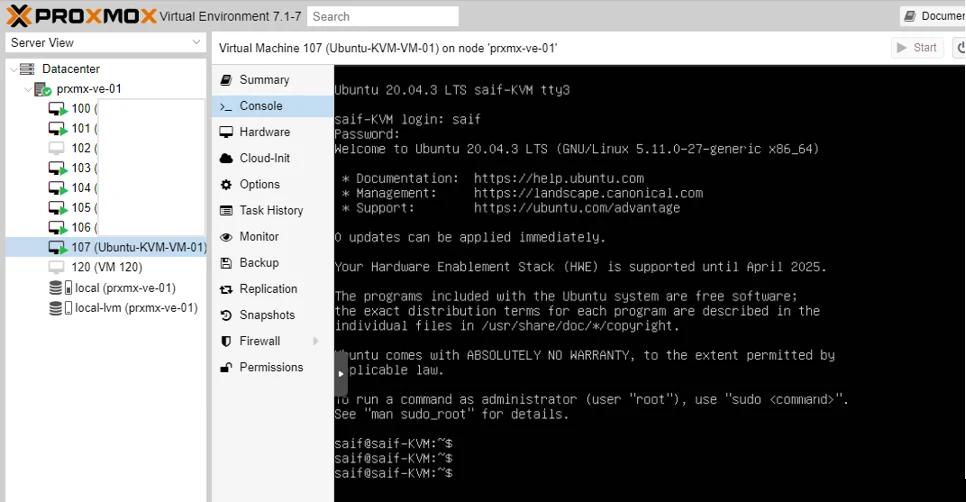
6. Boot the VM from the Imported QCOW2 image.
You may go ahead and select the virtual machine and click on Console and start the VM.
We have successfully booted into the Ubuntu machine, which we imported from the KVM using the qcow2 image.
Conclusion
You can now follow this article and import any appliances based on the QCOW2 format. After import, it will work fine, just like any other virtual machine you would install using iso in the Proxmox server.