You wanted to install the windows 2019 server on a hypervisor and the option that you have right now is to use the QEMU KVM hypervisor. Then you are in the right place.
And when it comes to virtualization I love KVM, as it is Open-source and free too. Whenever I had to choose between hypervisors I would always prefer KVM than anything else.
I was working for Palo Alto and Checkpoint lab the other day, and I wanted to test out the LDAP integration with the firewall.
The only way I can test LDAP configuration is by installing the windows server with its services in it. So I decided to spin up the window server 2019 in KVM.
Can I install Windows Server in KVM?
The Windows server 2016/2019 works really well with the KVM hypervisors. Since there are support virtio drivers, you get to install all the display, network, and graphics related drivers in it.
If you are new to KVM, don’t worry, I have covered some of the useful KVM commands here, I would highly recommend you check them out. It will be useful when you wanted to manage the VM’s with KVM.
In the past, I covered the installation of windows 10 on a Centos/Redhat and Ubuntu KVM hypervisors, and in this article, I am going to install windows server 2019 on a KVM hypervisor.
Prerequisite
You need to have a good configuration machine or a server with Linux installed in it, either Centos/Redhat or Ubuntu with GUI. And we can install KVM software in it.
To install kvm on Ubuntu you can enter the command below.
sudo apt update
sudo apt install qemu-kvm bridge-utils virt-manager libosinfo-bin -y
If you are using Centos then the command will be as follows.
yum install qemu-kvm libvirt virt-install virt-manager virt-install -y
Windows server 2019 ISO image.
If you have the server ISO image then great, or you can get a trail from the Microsoft site here.
Windows 2019 VirtIO drivers
You can download the VirtIO drivers here
How to install windows server 2019 in KVM?
- Creation of windows server VM.
- Setup windows resources.
- Customize configuration before install.
- Configure the CPU for the KVM windows guest properly.
- Add windows VirtIO driver.
- Change the boot order.
- Start the Windows installation.
- No windows harddisk in KVM ?, fix that now.
- Set the Administrator Password.
- Install the virtio drivers for windows server 2019.
1. Creation of windows server VM.
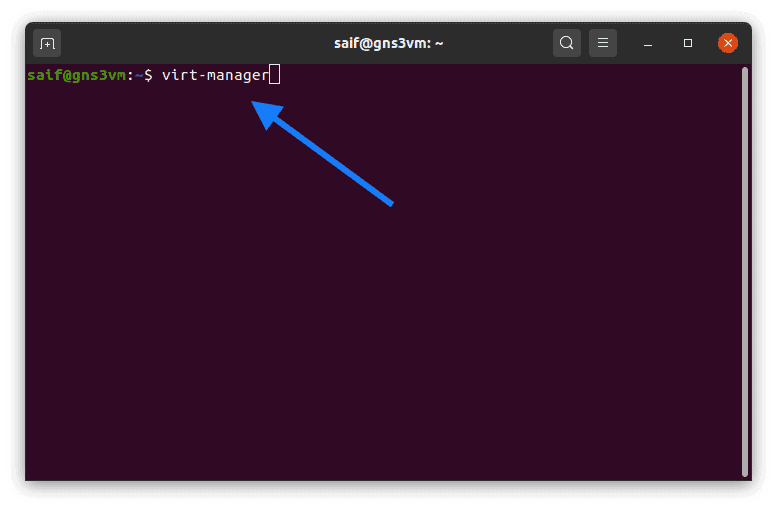
Open terminal and type virt-manager and hit enter.
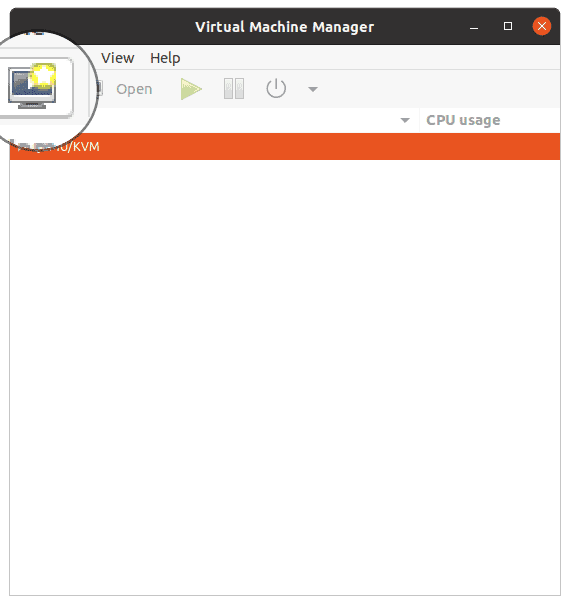
A new virtual machine manager window now pop up, click on create new virtual machine icon.
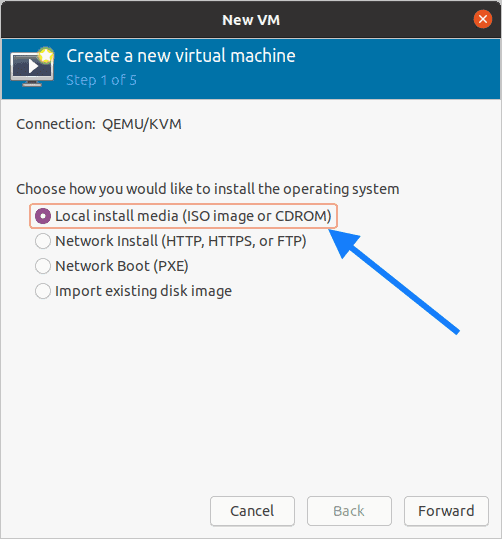
In the creation of New VM pop up, select Local install media (ISO image or CDROM), then click on Forward.
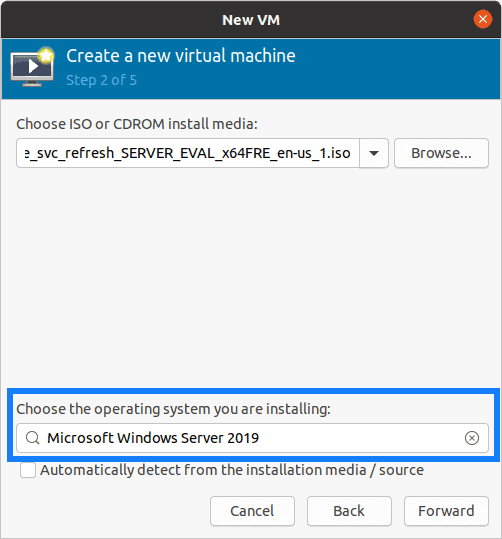
You now have to choose the Microsoft windows server 2019 as the operating system.
Uncheck the option which says Automatically detect from the installation media/source and start typing Microsoft window server 2019.
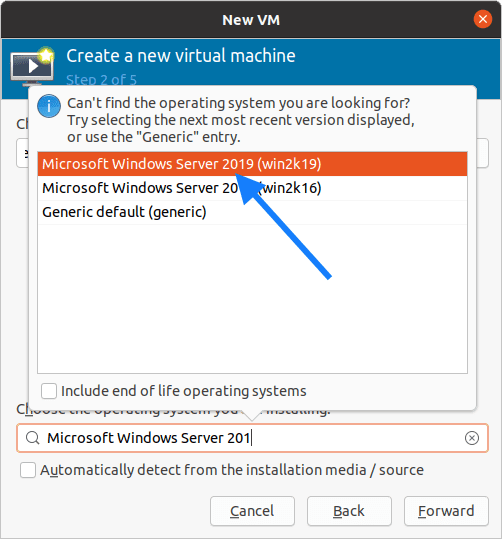
Choose the same from the list and click on Forward.
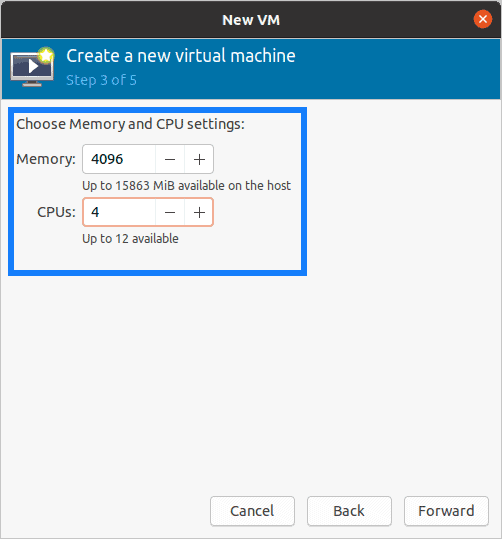
You can now configure the Memory and CPU for the machine, I am adding memory as 4GB and 4 CPU.
2. Setup windows resources.
Configure the the memory and CPU here and click on Forward.
You may add more if you require.
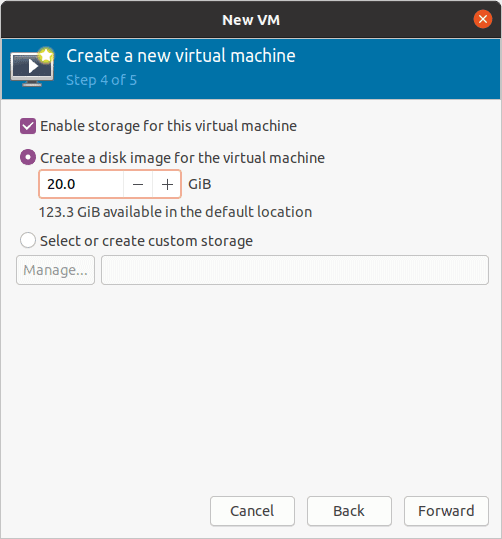
In the windows Storage, by default it would pick up the storage size as 40GB, I am changing it to 20GB.
You may select the default size or more, but don’t worry, you can change the storage size later by following the guide here.
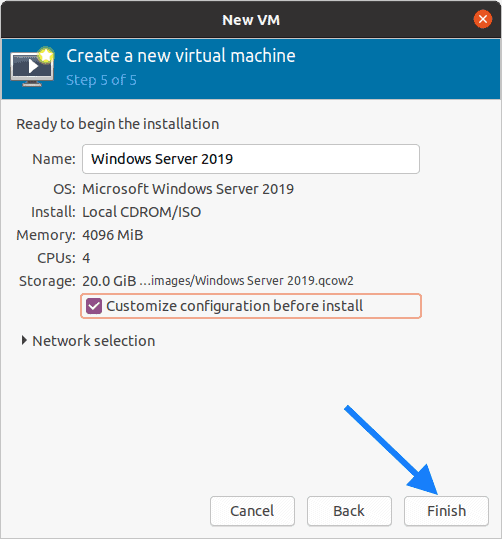
3. Customize configuration before install.
Check the option which says Customize configuration before install and click on Finish.
You will now be presented with QEMU KVM customization wizard.
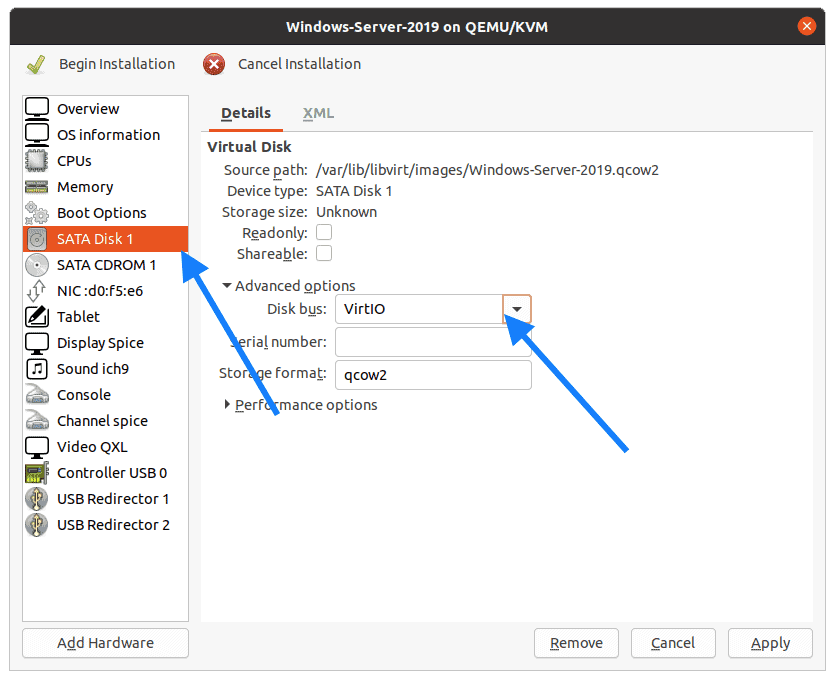
First lets go ahead and change the storage to VirtIO, click on SATA Disk 1 and in the disk bus select VirtIO and click on Apply.
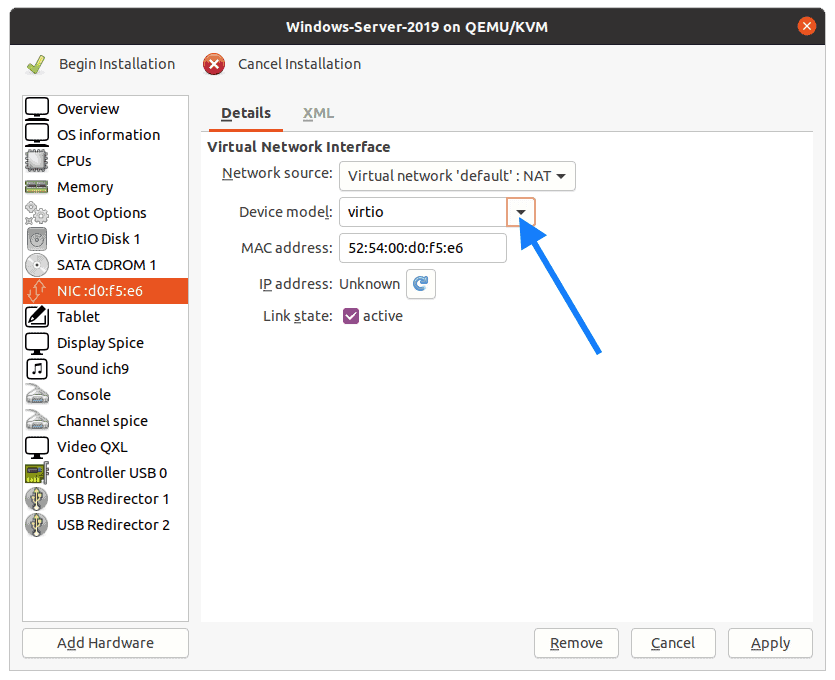
Click on the Network Interface Card and change it to Virtio here as well and click on Apply.
Notice that I have selected the NAT as the interface, this would help my server to connect the internet via the host machine.
In production, this must be different, as you might use a bridge interface that connects to the switch to get to the network.
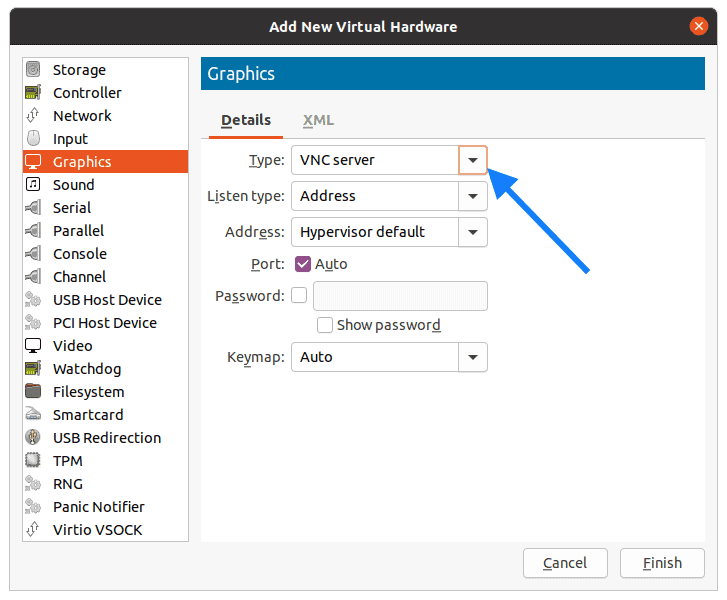
Next lets go ahead and add the VNC server as the Graphics.
Click on Add hardware again, and from the list select Graphics and in Type select VNC Server, then click on Finish.
4. Configure the CPU for the KVM windows guest properly.
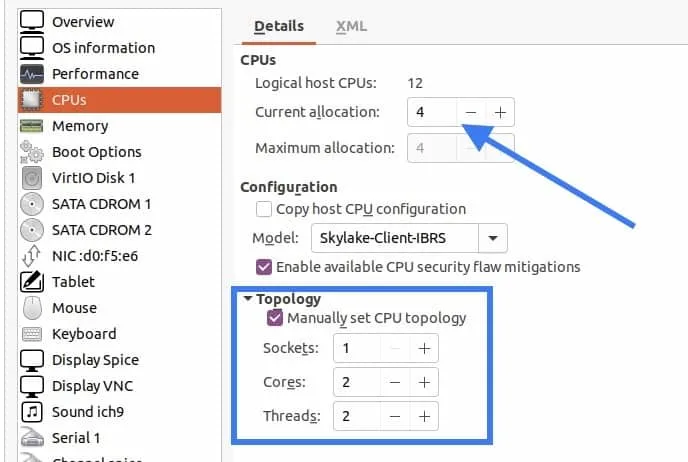
Though we configured the CPU as 4, it will actually not pick up all four cores until you specify in the configuration.
So make changes like below. Click on CPU’s and in the Current Allocation specify 4 CPU and in the topology check the options Manually set CPU topology and in Sockets type 1 and cores 2 and Threads 2 as well. You may change it as per your requirements.
5. Add windows VirtIO driver.
Remember that we have download virtio drivers for windows server 2019 at the beginning? Lets add that now.
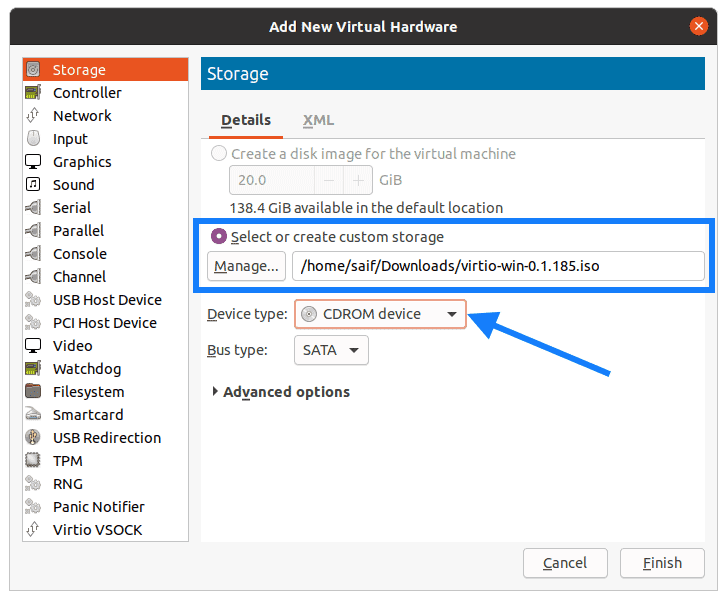
CLick on Add hardware and select storage.
Check the option Select or create custom storage and click on Manage to attach the windows kvm drivers to the configuration.
In the device type select CDROM device from the list then click on Finish.
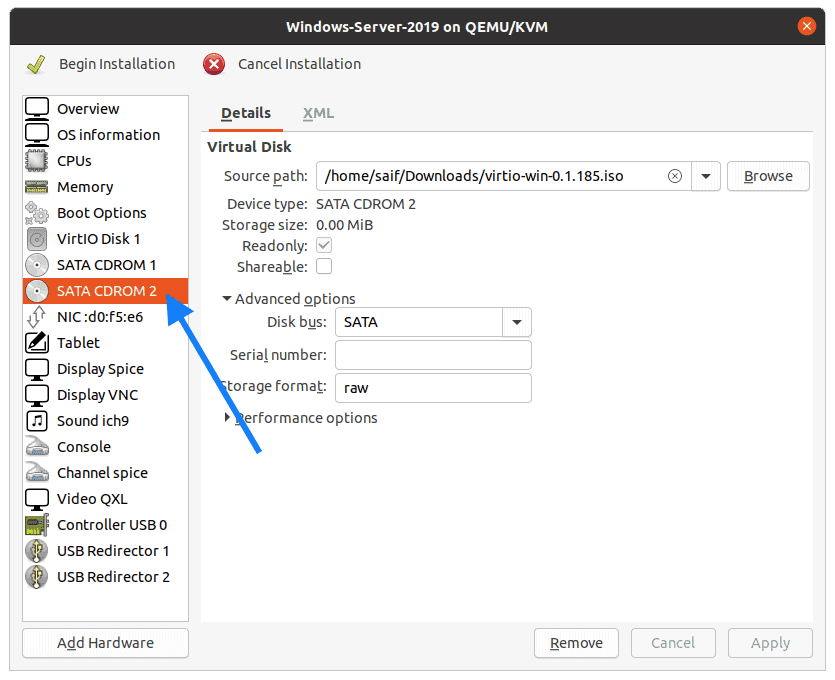
When you look VM configuration you should be able to see there are two CDROM’s.
CDROM1 is for the windows 2019 iso image.
CDROM2 is for the windows 2019 KVM Qemu drivers.
6. Change the boot order.
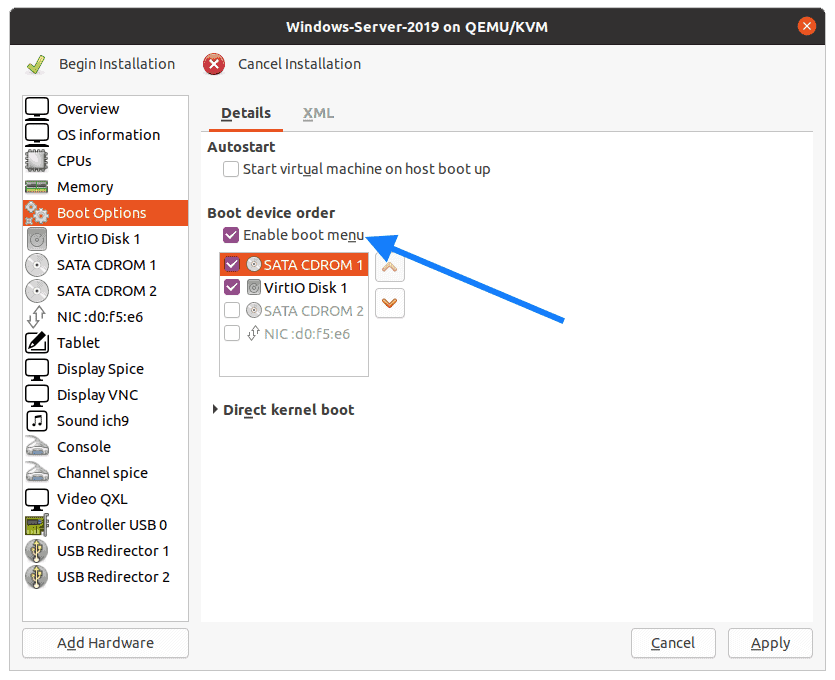
You need to make sure that you choose windows ISO image during the boot when you proceed with the installation.
Click on Boot options and check the options which says Enable boot menu.
And check the SATA CDROM1 and VirtIO disk 1.
Move CDROM1 to be the primary boot device.
7. Start the windows installation.
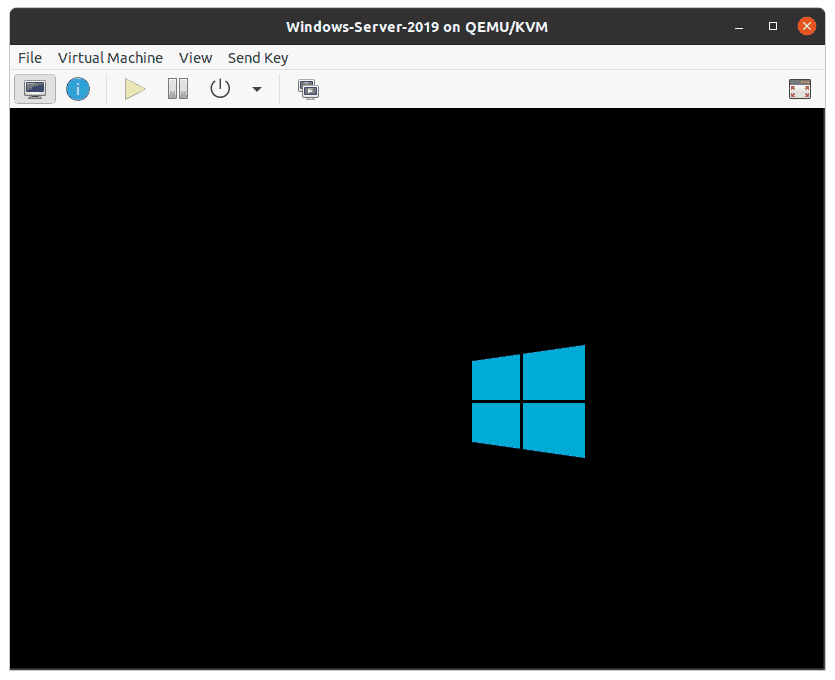
You may now click on begin installation and you should be able to see the windows 2019 installation screen appears with the windows logo.
In the setup wizard Choos the Langauge and the country then click on Next.
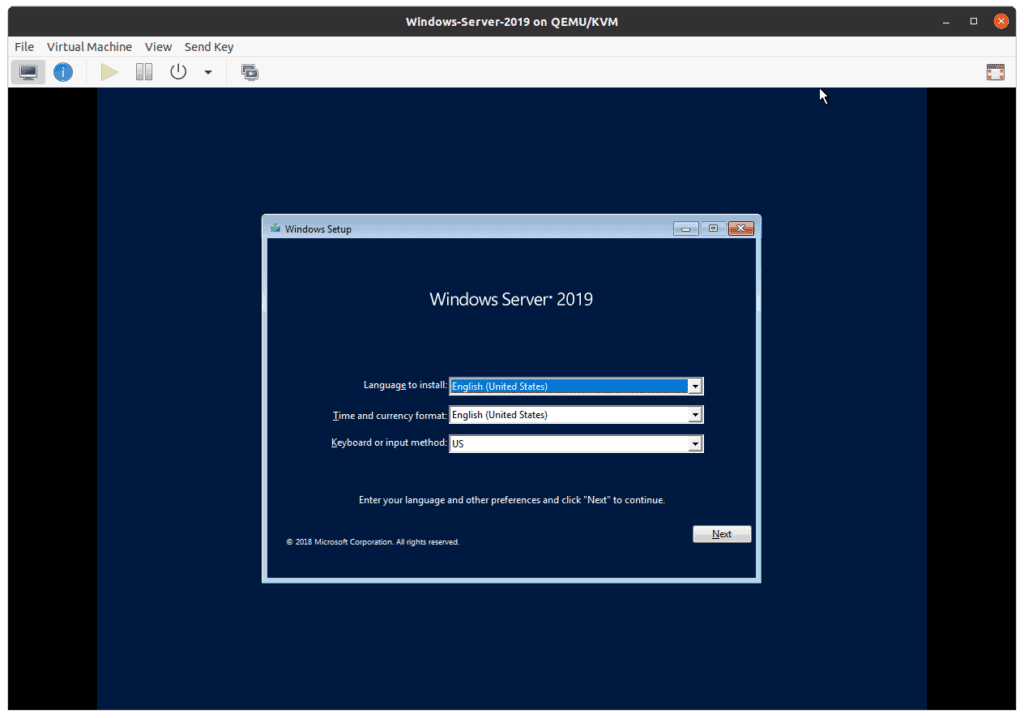
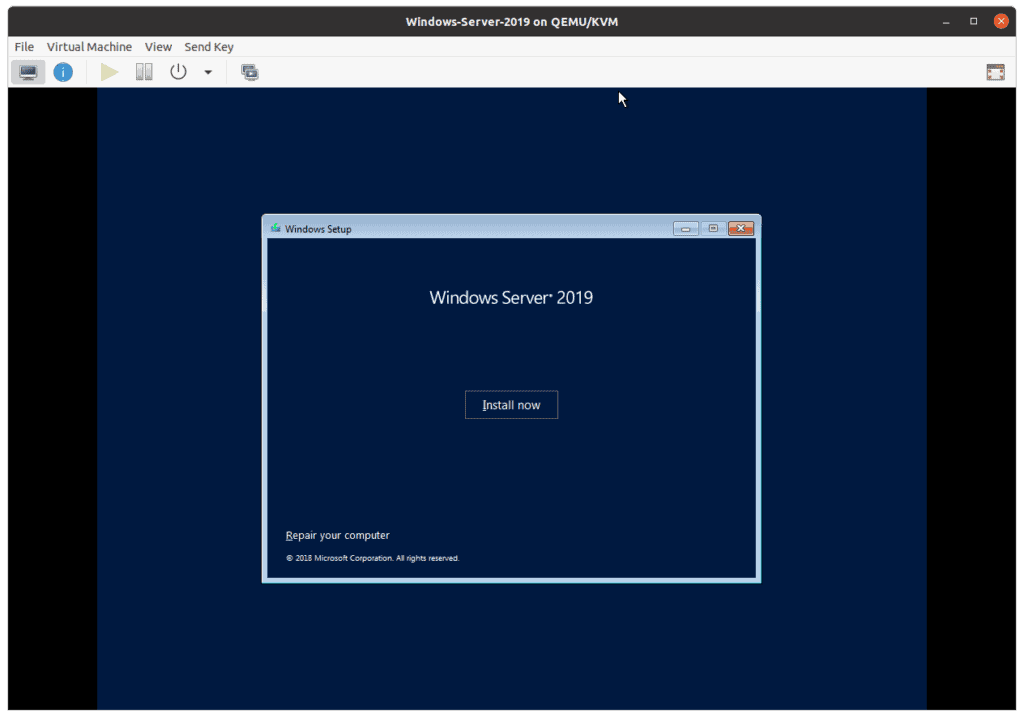
You may click on Install now on the windows Setup wizard.
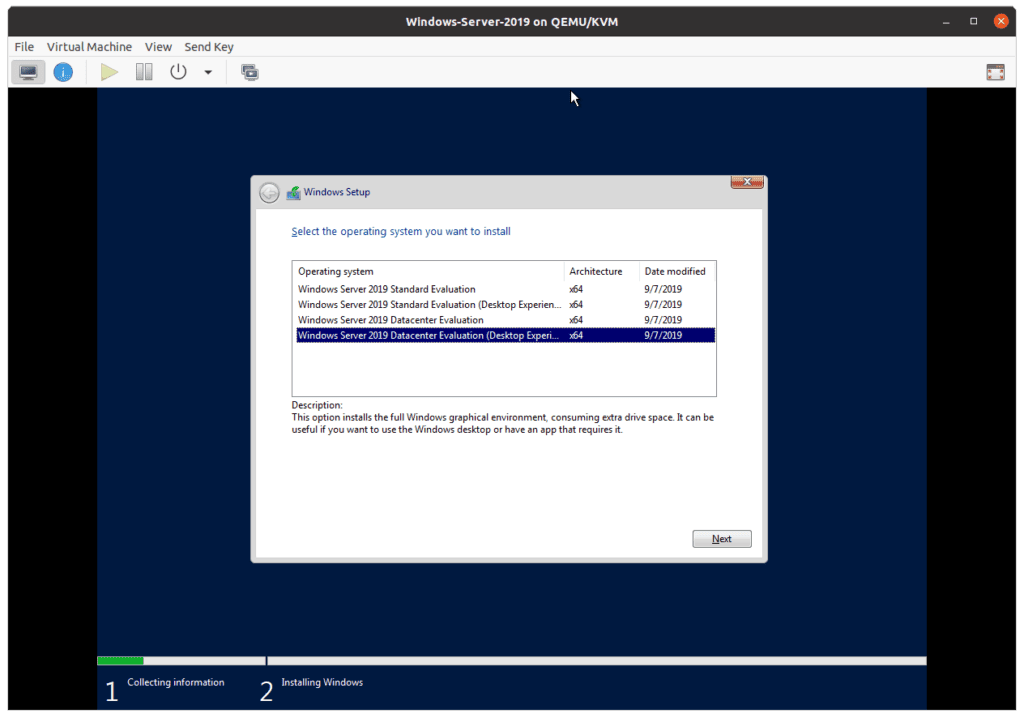
Choose the windows server version that you would like to install then click on Next.
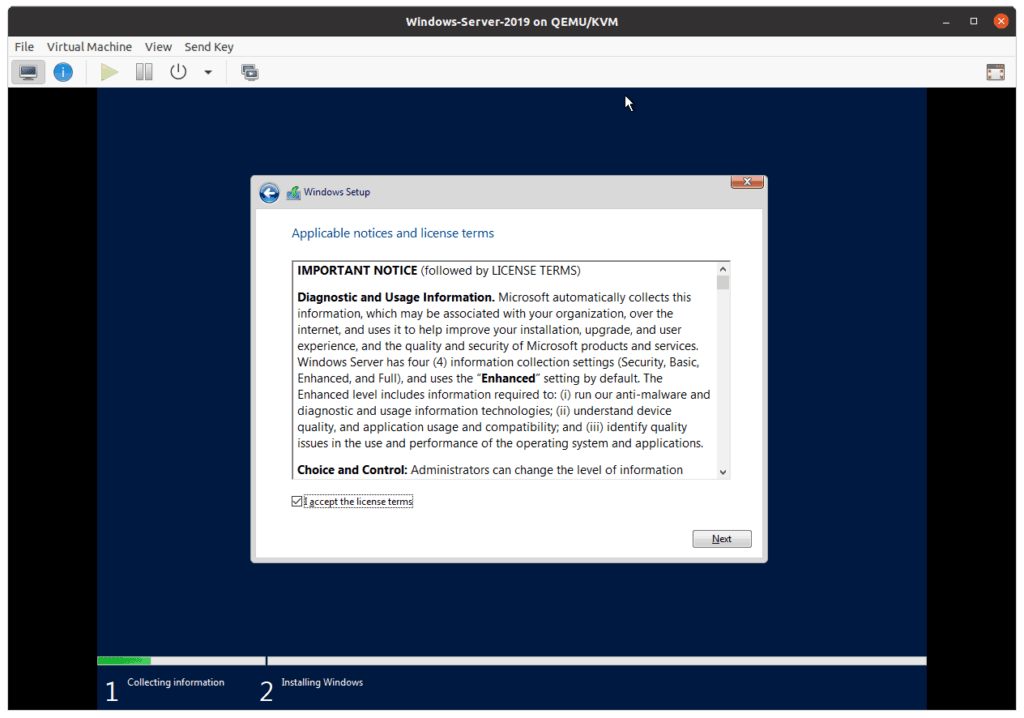
Accept the license agreement then click on next.
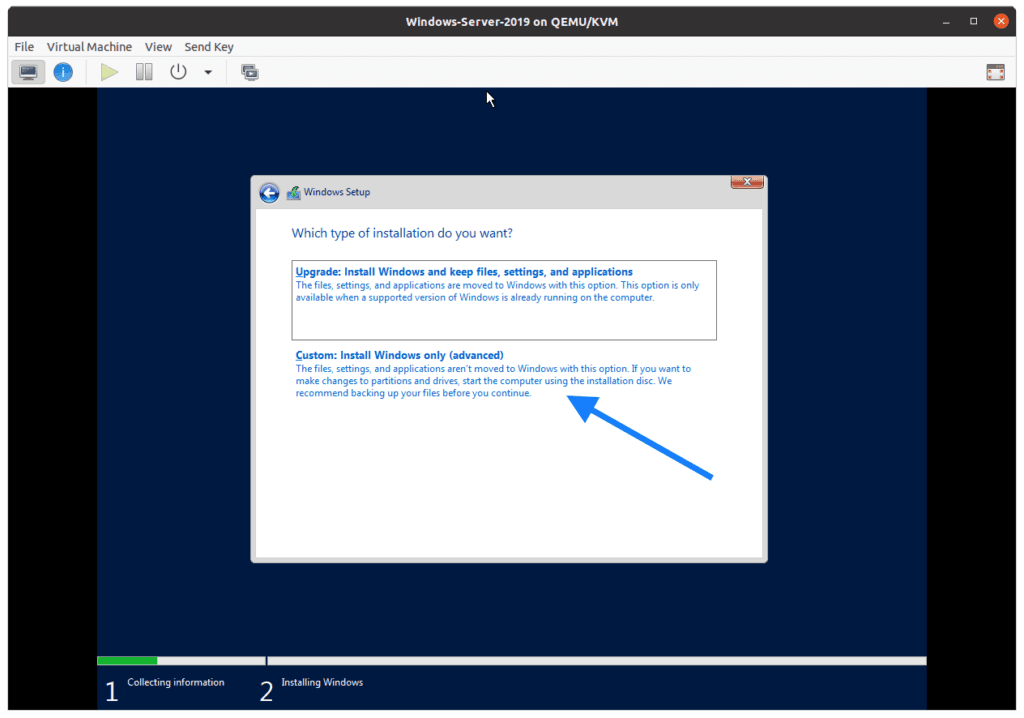
From the installation option choose Custom
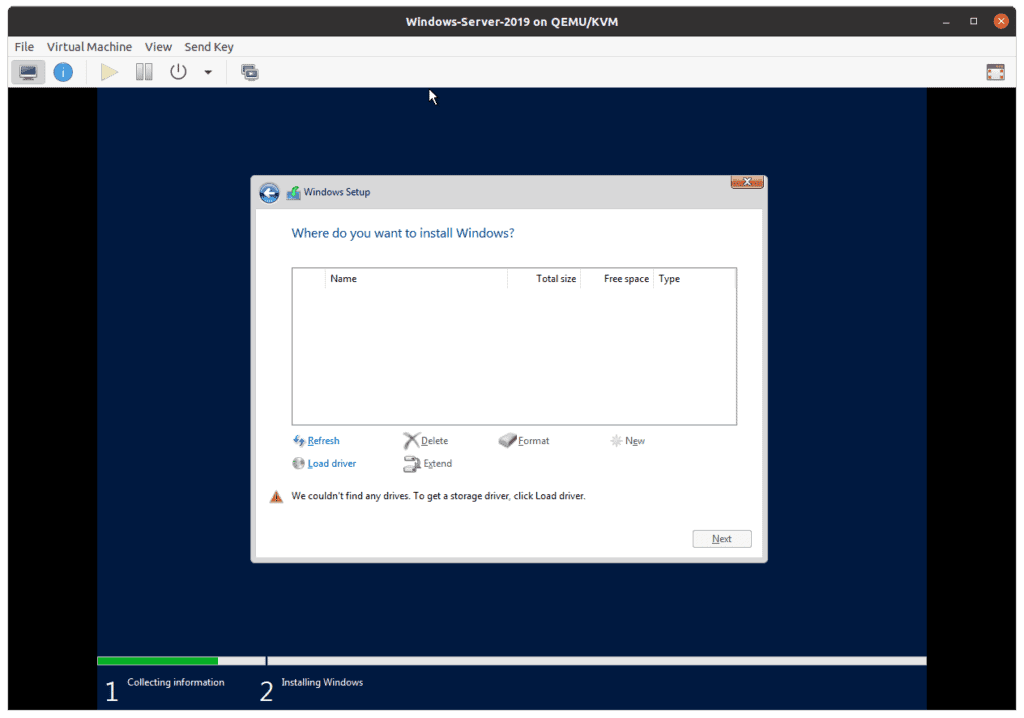
8. No windows harddisk in kvm ?, fix that now.
As you can see the we have added a hardisk of 20GB but we are not able to see them, lets go ahead and fix that by clicking Load driver.
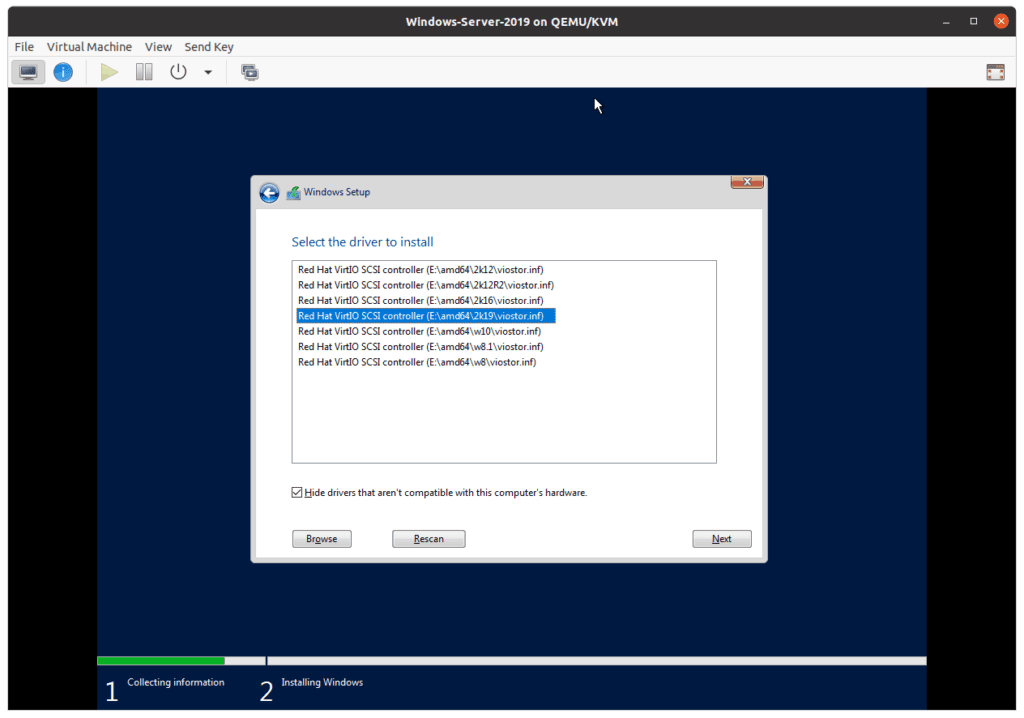
Since we already attached VirtIO driver for windows, the steup wizard will list out available drivers.
Select windows server 2019 from the list and then click on Next.
After few seconds, you should be able to see the harddisk that you have added, select the harddisk then click on Next.
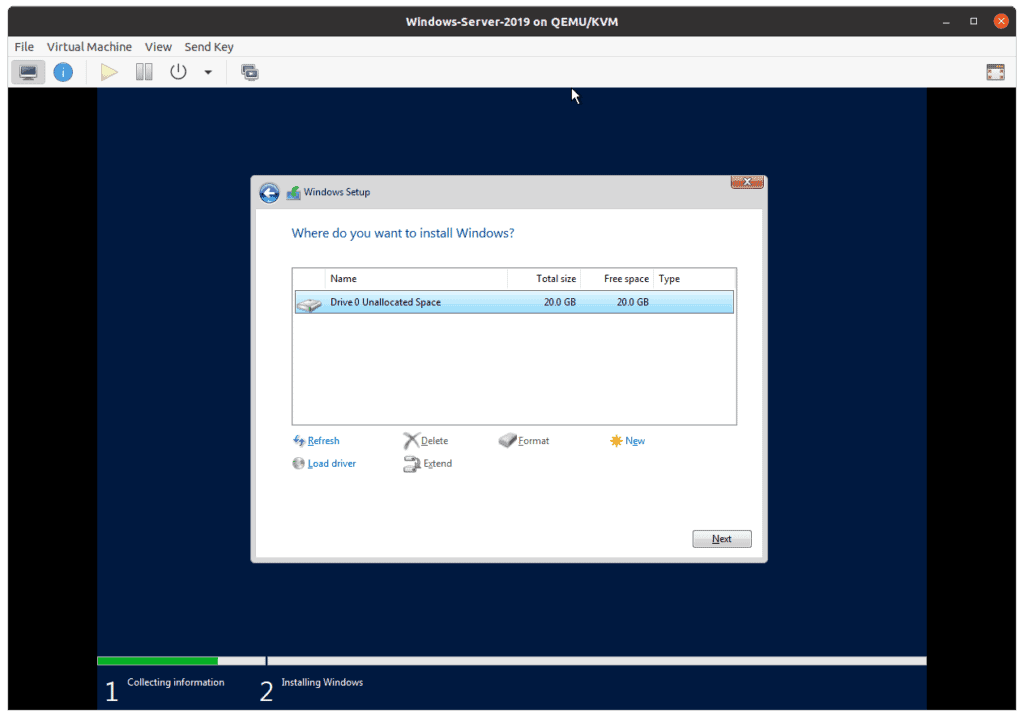
The installation now begin now.
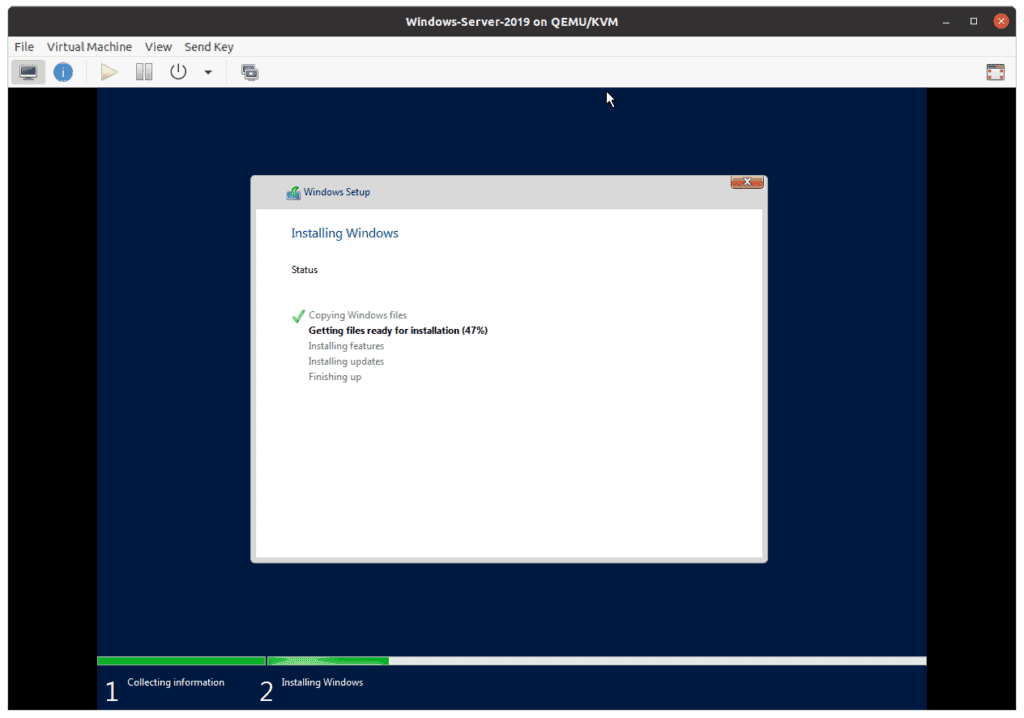
9. Set the administrator Password.
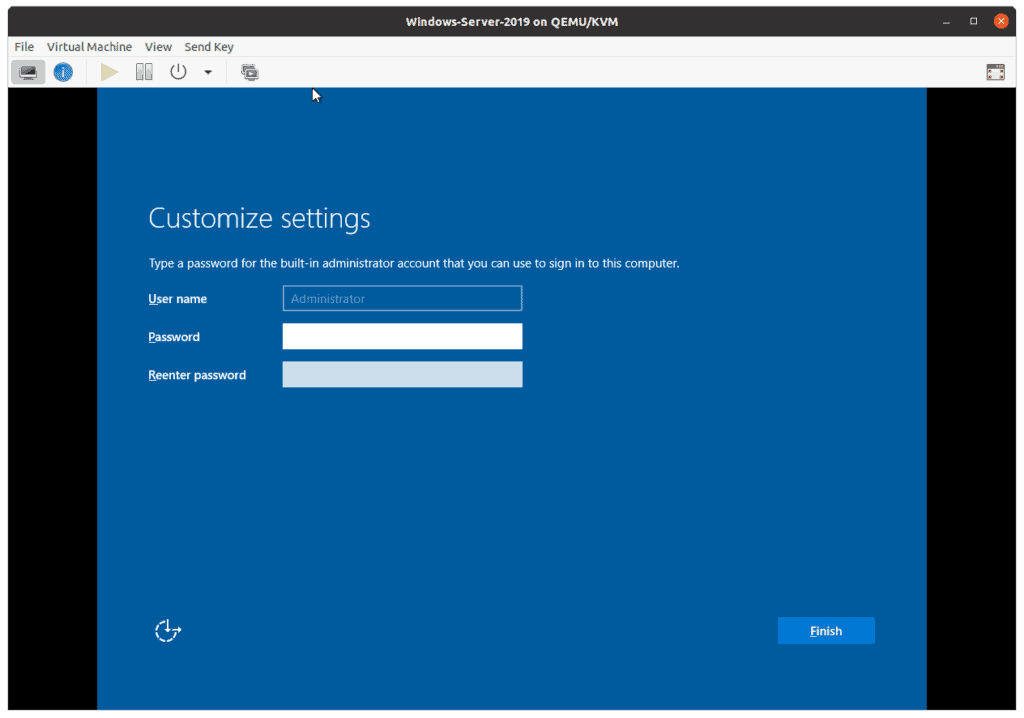
After the installation is completed, it will ask you to setup the Administrators password, type that in and then click on Finish.
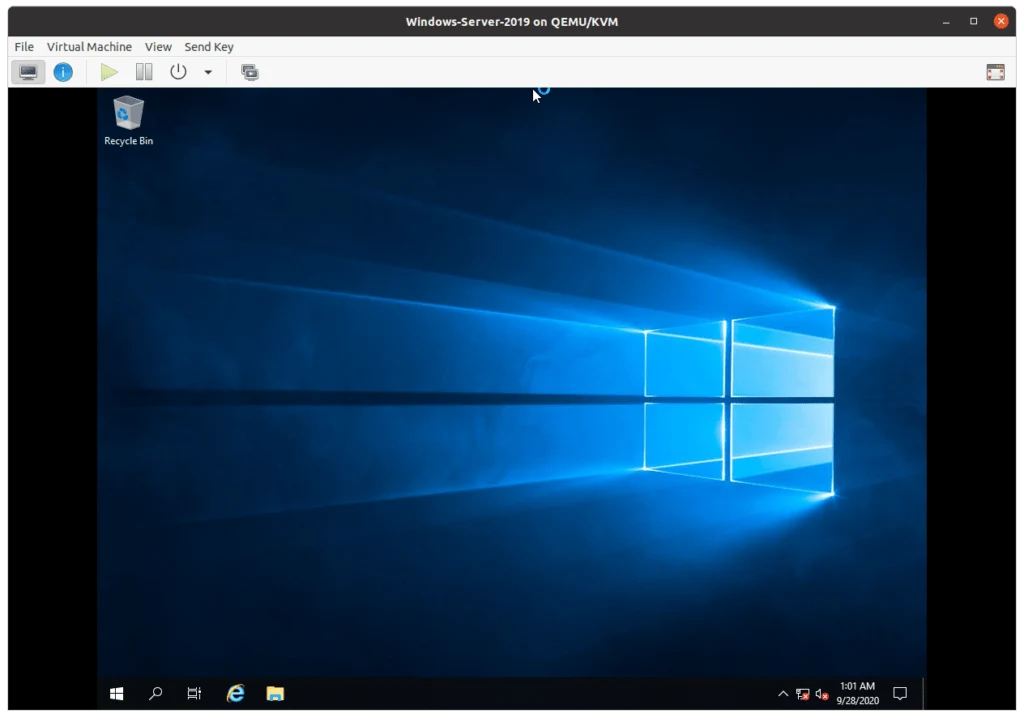
You now will be presented to the windows server 2019 homescreen.
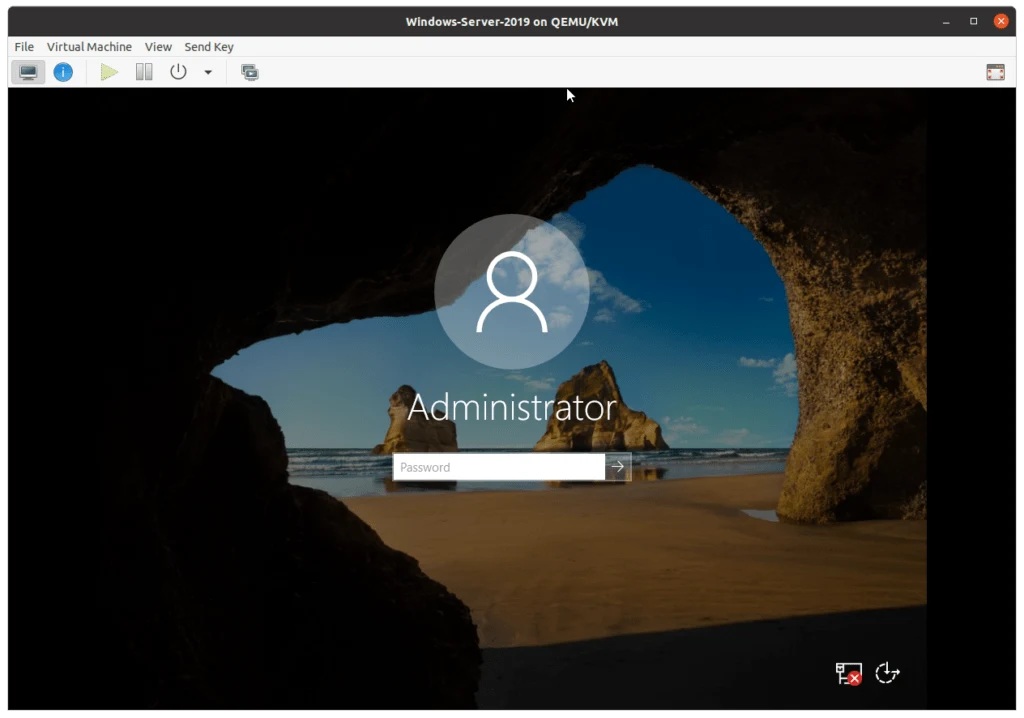
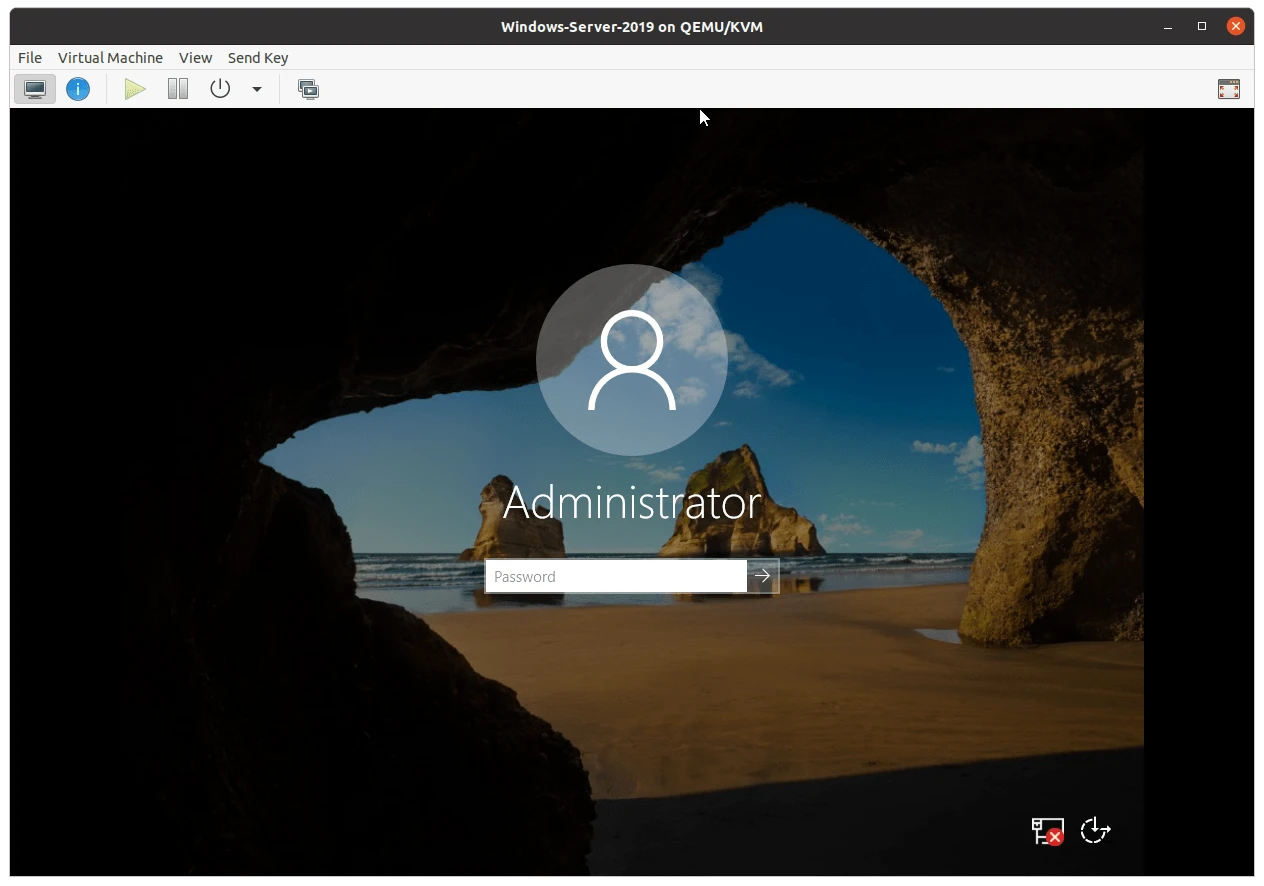
If you lock the machine, it would ask you to press CRL ALT DEL to log back in again.
Type the Administrator password then you should be able to login.
10. Install the virtio drivers for windows server 2019.
If you looked into the screen, you should be able to see that the network connection is showing x mark, which indicate there is no network confiurated.
Basically we haven’t installed the network driver in order for the windows server to communicate with the network.
In the server manager, click on Tools, then click on Computer management.
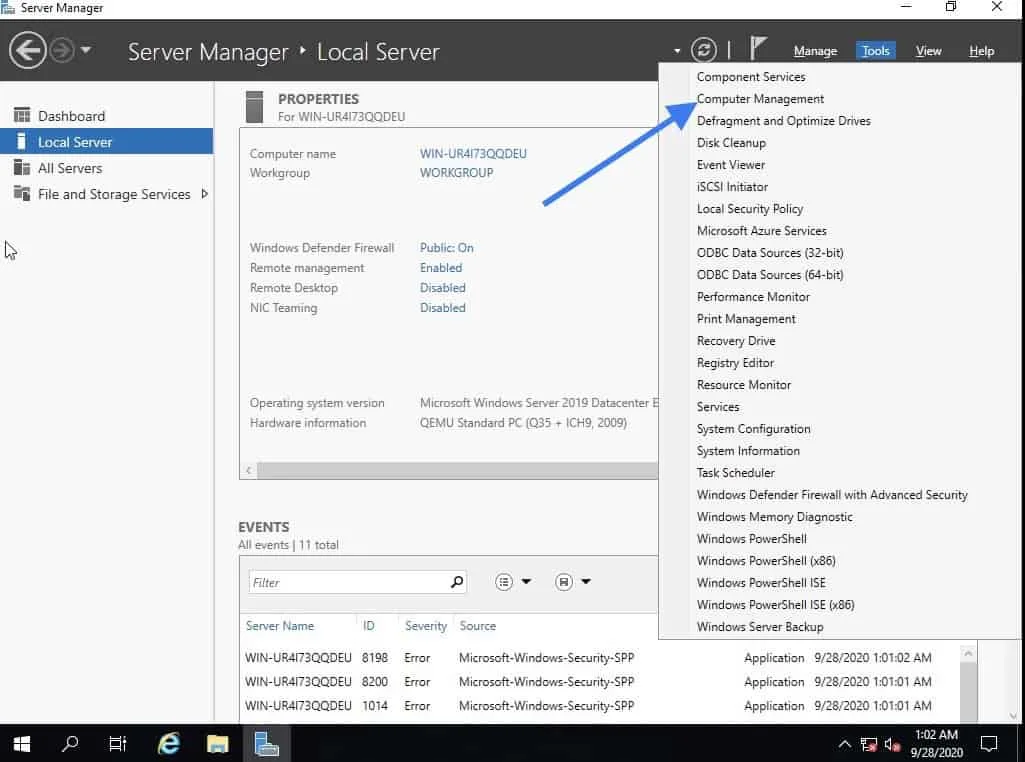
In the computer management, click on Device manager.
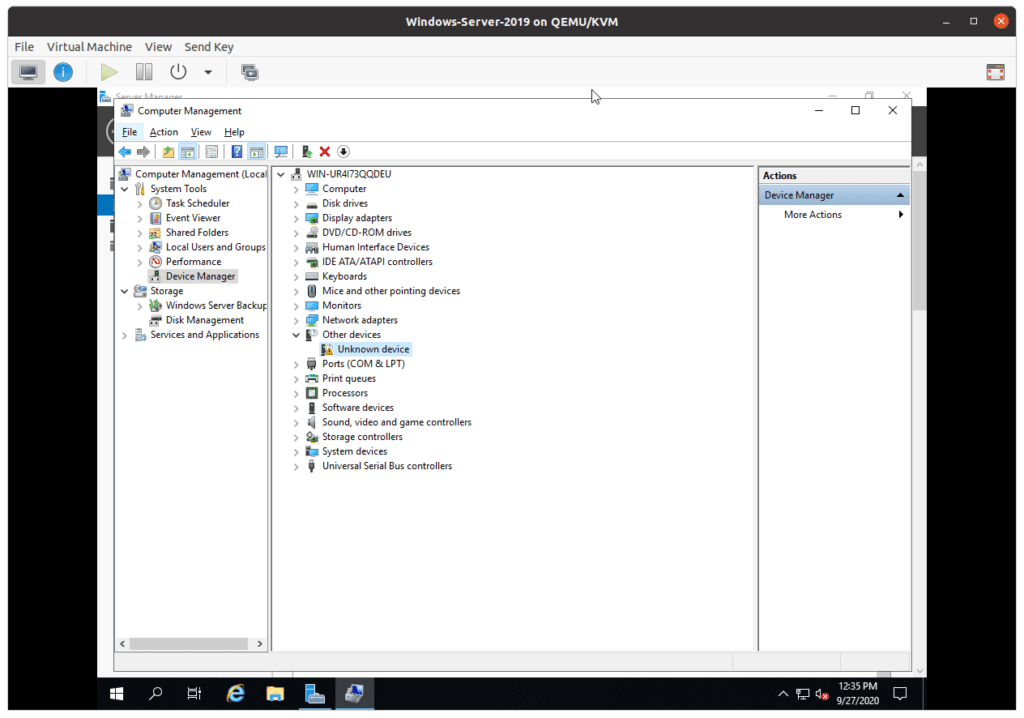
You can see under device manager, in Other devices list of drivers that needs to be installed.
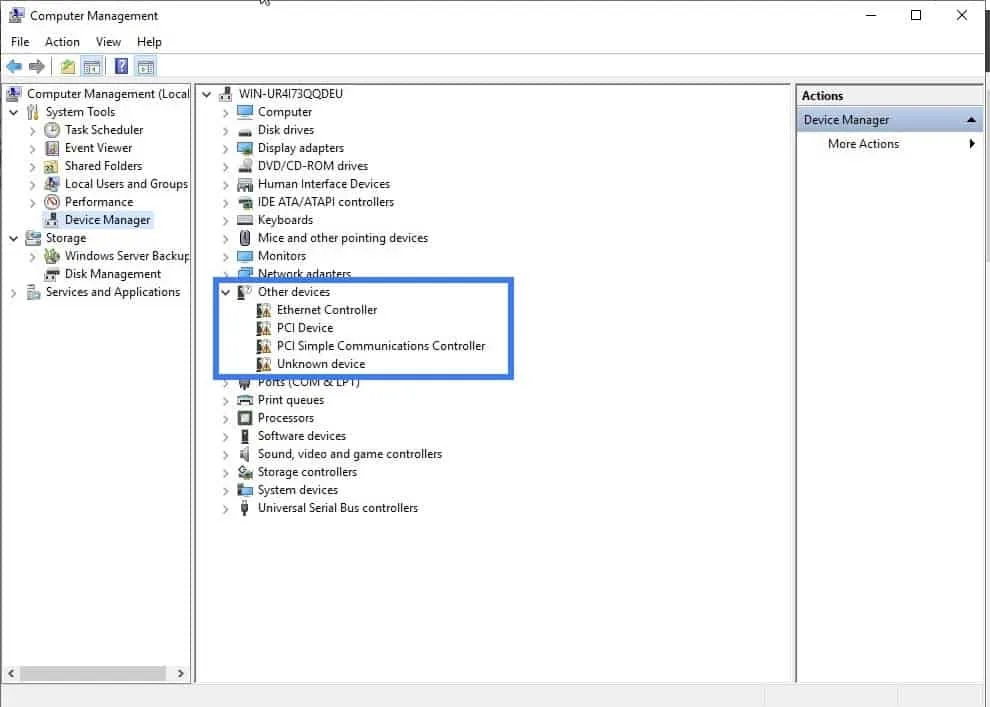
Lets go ahead and install the network driver first.
Right click on Ethernet controller and click on Update driver.
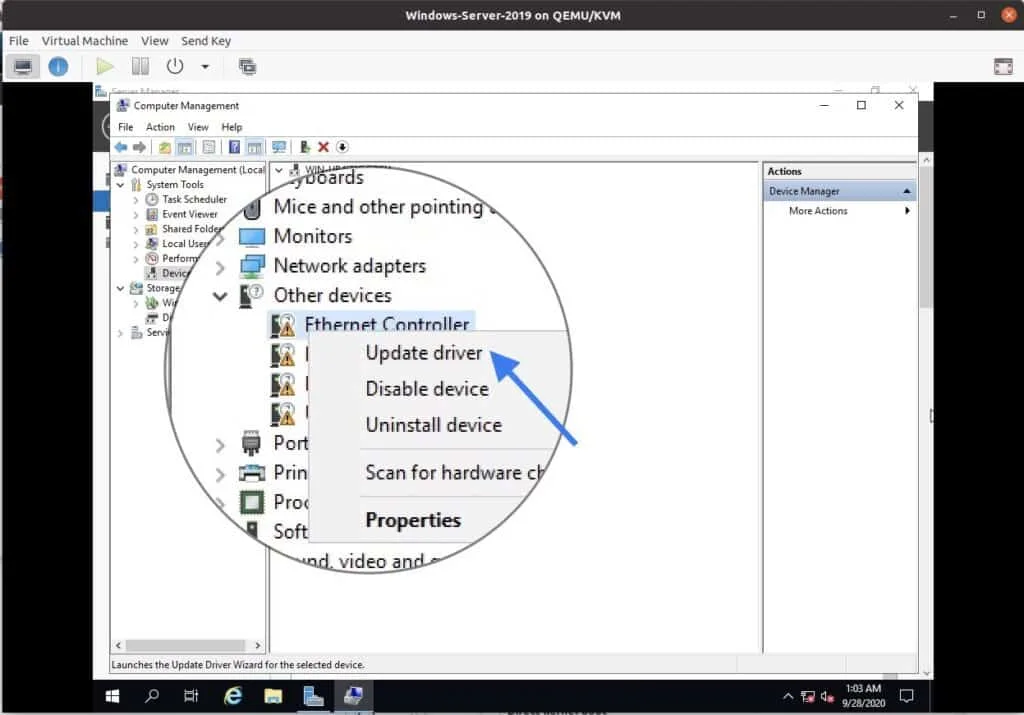
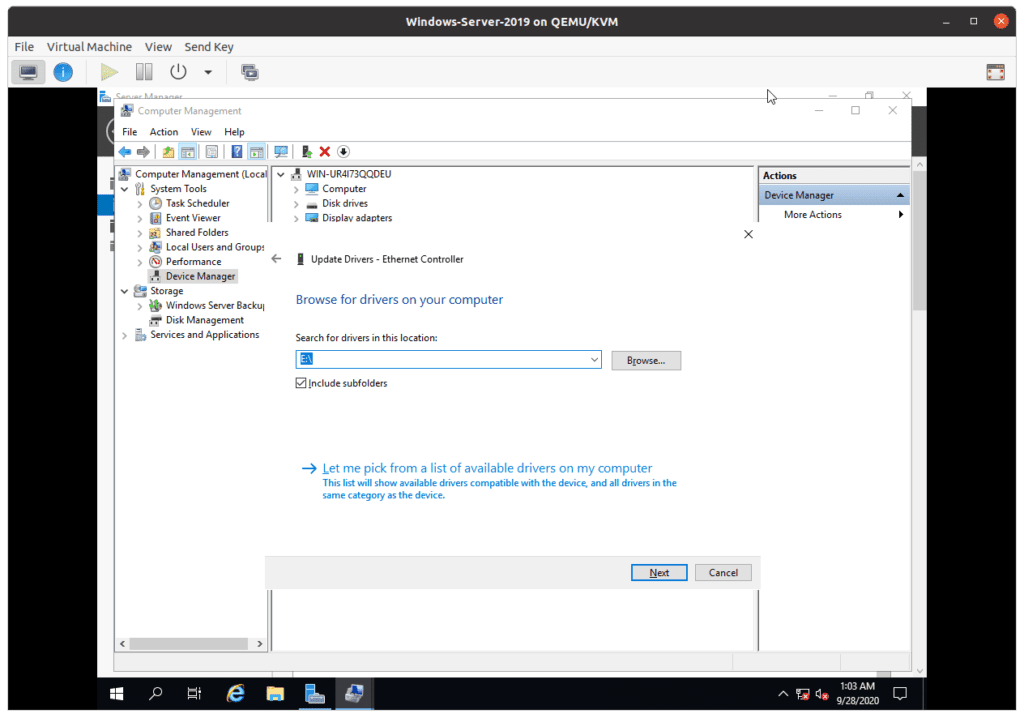
Select the option, browse for my local machine to install the driver.
In the browse attach the Windows qemu drivers that you had downloaded earlier in CDROM 2.
Click on next.
You will get a prompt to install the Redhat network driver, click install.
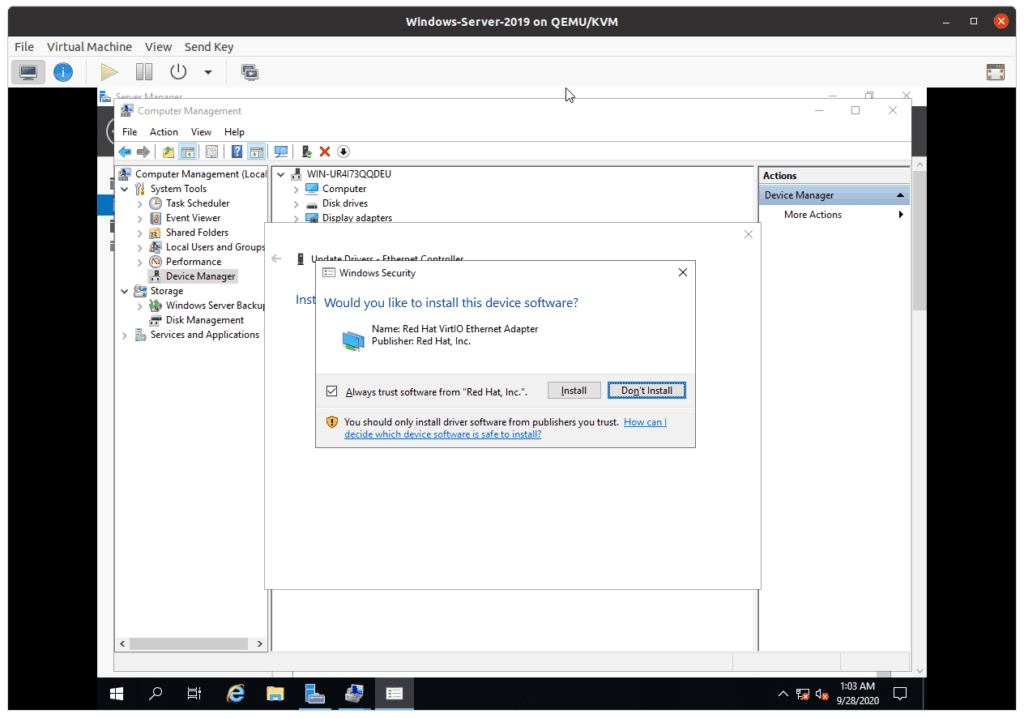
Once the installation is complete, you should now be able to see the netwokrs notification asking whether you want to share the network or not, which I clicked on No at the moment.
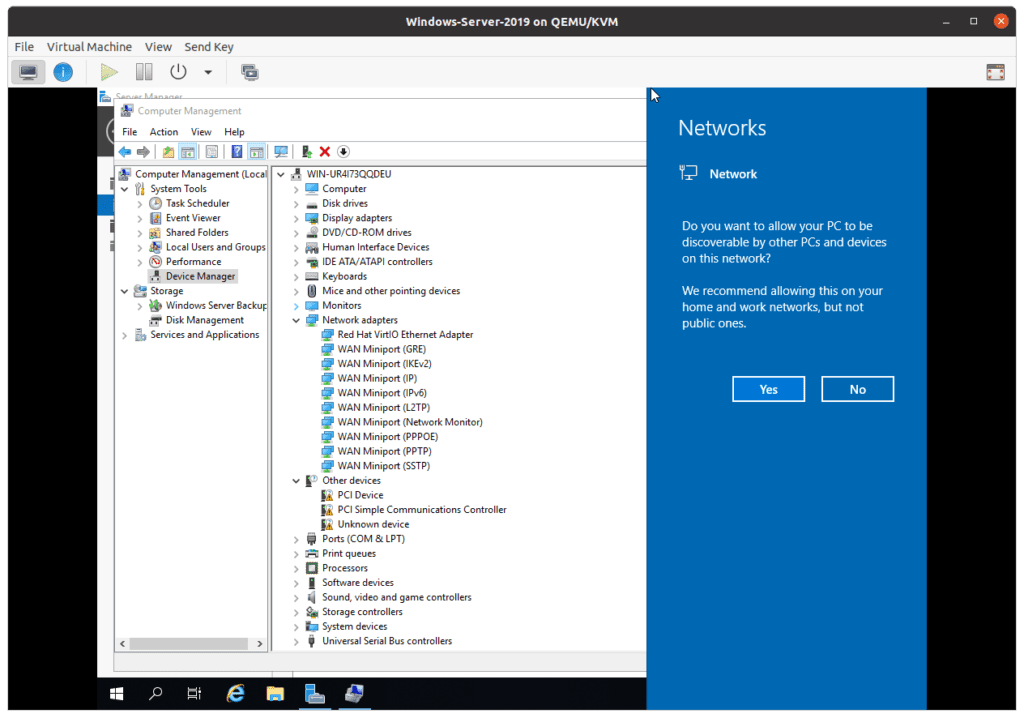
Install rest of other drivers as well.
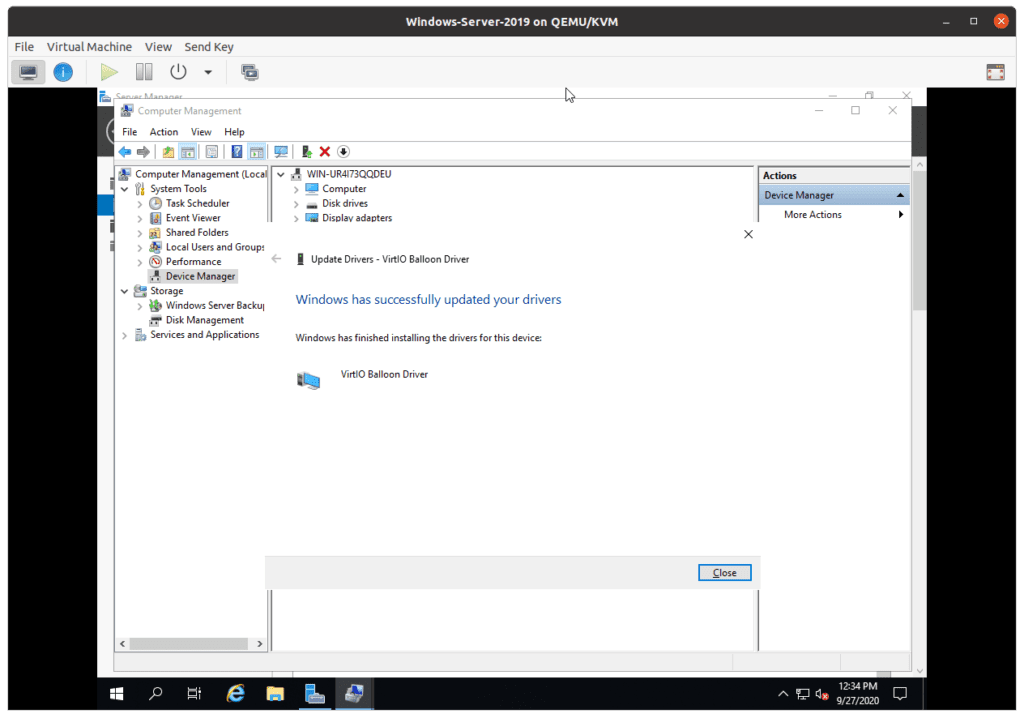
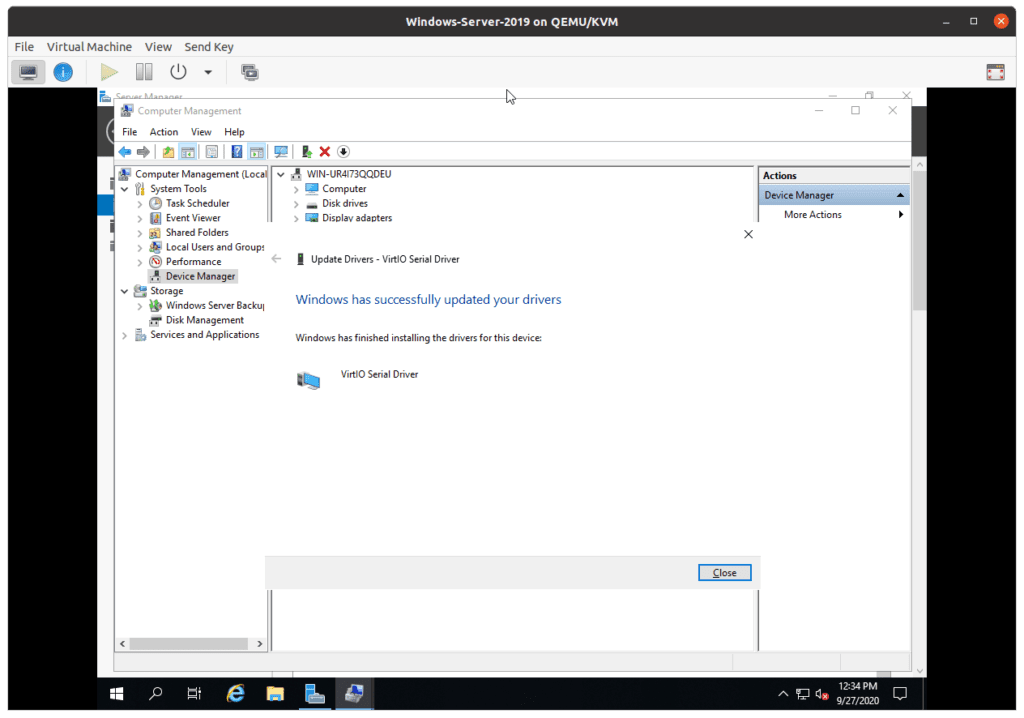
The only driver that you now left at last is Unknown device, even if you try to update it it wont get updated.
So you should be fine at this point.
When you wanted to access this VM again, you just open the terminal and do a virt-viewer and choose the windows server as the VM.
If you have remote SSH access to the KVM host with X11 forwarding then you can open this server using the virt-viewer as well, which is cool.
Roy
Tuesday 10th of December 2024
well done - it works