
One of the reasons people prefer to use VirtualBox over other hypervisors is that it is free for anyone to use it. It doesn’t matter what host operating system you use, whether its Windows, MAC, or Linux. The VirtualBox can be installed on it and run your favorite operating system virtually in it. Moreover, it is open source too.
When Microsoft officially launched the windows 11 iso to the public, it ‘was’ not compatible with the VirtualBox, As Microsoft made sure TPM and the Secure boot are the important pre-requisites even for you to proceed with the installation. without which you cannot install windows 11 on VirtualBox.
You will end up with the below error.
This PC Cant run windows 11.
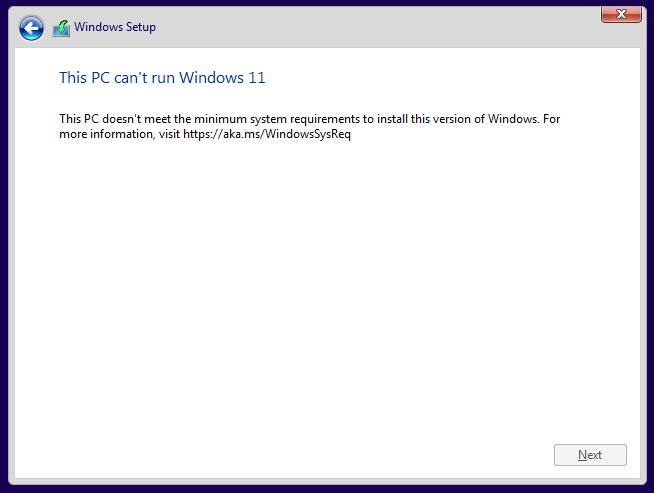

oops, that’s not good..
So people started to bypass TPM/secureboot as shown in the guide to install the operating system.
Soon after, there was an update from Oracle that they are working on it to provide the TPM and secure-boot to the VirtualBox.
And finally the virtualbox 7.x.x version came out, which supported the tpm and secureboot natively, that would then allows you to install windows 11 on virtualbox without any issues.
There are two ways you could install windows 11 on virtualbox attended (automatic way) installation, and unattended(manual way) installation.
In unattended installation, the virtualbox would automatically install the windows 11, so you just have to boot into the windows 11 by specifiying only the requried parameters and the virtualbox will do the rest.
however, in attended installation you would have to choose each and every option manually, in a any given day, I would chose unattended over attended installation of windows 11 on virtualbox.
In this blog article we will look at the both the unttended and attended way to install the windows 11 operating system on virtualbox.
If in case you are using a VMware workstation on your machine and wanted to install windows 11 on it, you may check out the article here to learn more, because VMware workstation 16 and later supports TPM and Secure boot.
If you are using a Linux host, instead of using VirtualBox, I would recommend you to use KVM instead, and you can see here how you can install windows 11 on KVM step by step, with TPM and secure boot enabled.
Prerequisites,
- Before you begin, you need to have VirtualBox downloaded and installed on your operating system.
- Windows 11 ISO image. Follow the article here on how to download the windows 11 iso image officially from Microsoft.
So let’s go ahead and install windows 11 on VirtualBox hypervisor.
Unattended Windows 11 installation (Automatic) on Virtualbox.
Lets start with the Unattended way to install the windows 11, and then we will proceed with the attended way.
If you would like to watch the unttended video, here it is.
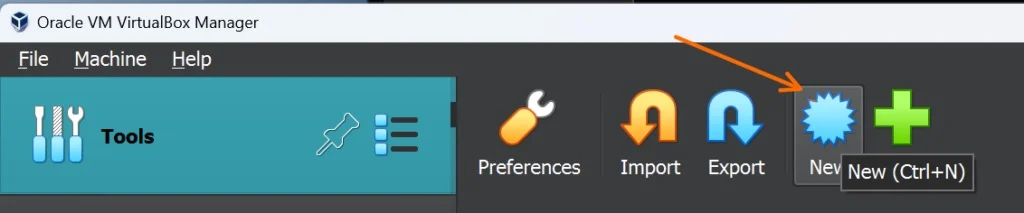
1. Create the Virtual machine.
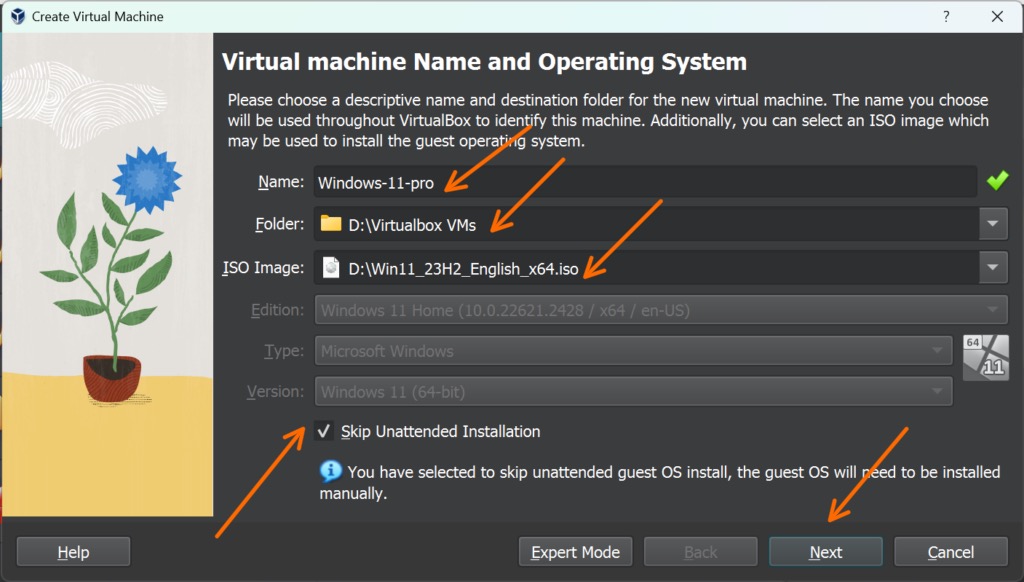
Open virtualbox on your machine, and click on New, alternatively you could press Ctrl+N

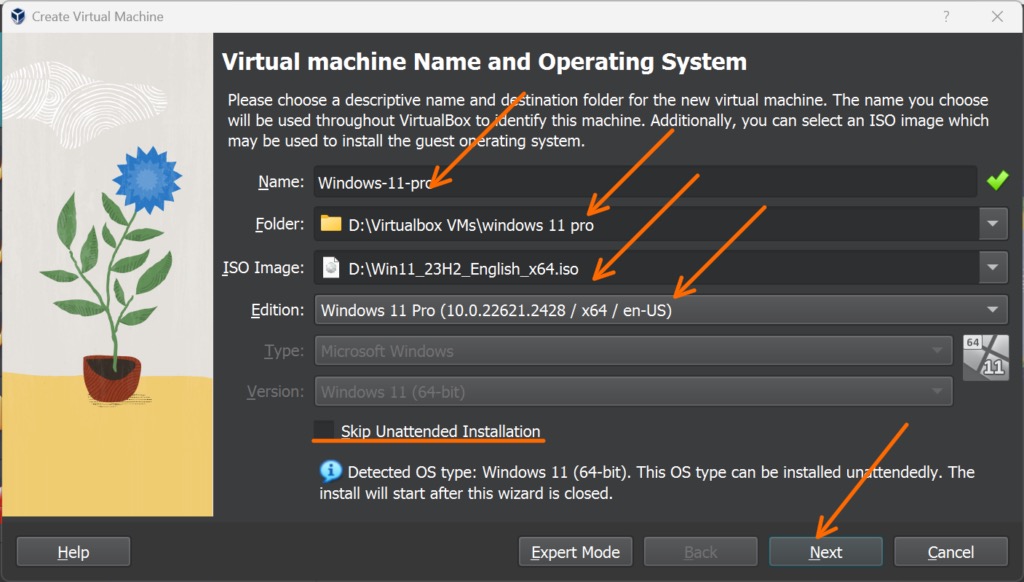
You will get virtual machine configuration window.
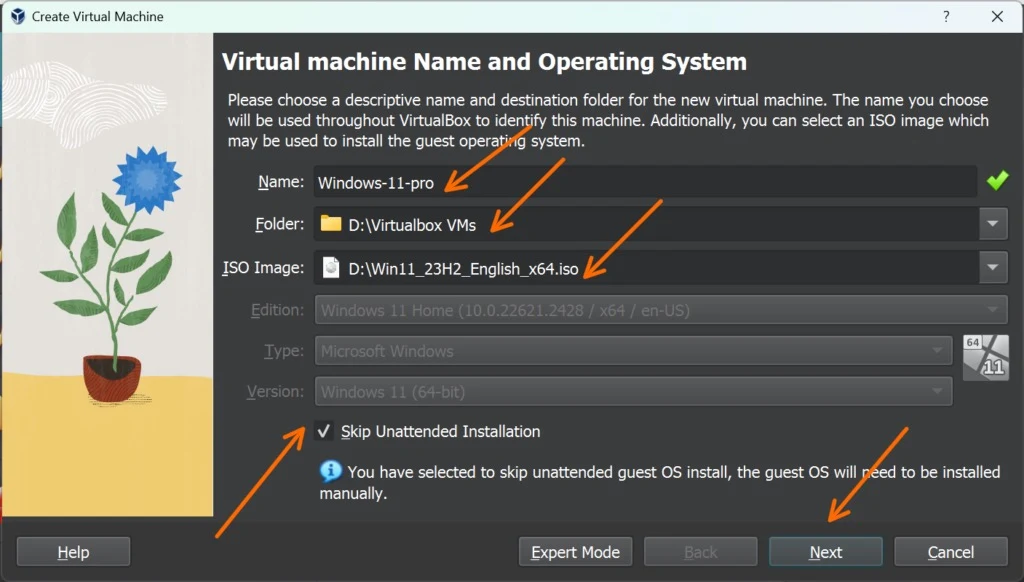
Name: Enter a name for the windows 11 virtual machine.
Folder: Choose the desired location where you would like to store the VM, Note: The size of the virtualbox windows11 files will be huge, so you need to be mindfull about where you are going install the OS, as it will eat up lot of the storage resources. Since I have less storage in the default C drive location, I have chosen my D drive.
ISO image: Choose the windows 11 iso image that you have downloaded eariler.
Edition: Contrary to manual installation, we have to choose the windows 11 edition during the vm creation, so choose the windows 11 edition of your choice, I have selected windows 11 pro here.
Leave the ‘Skip Unattended instalation’ option unchecked and then click on Next.
2. Configure the Windows 11 Operating system.
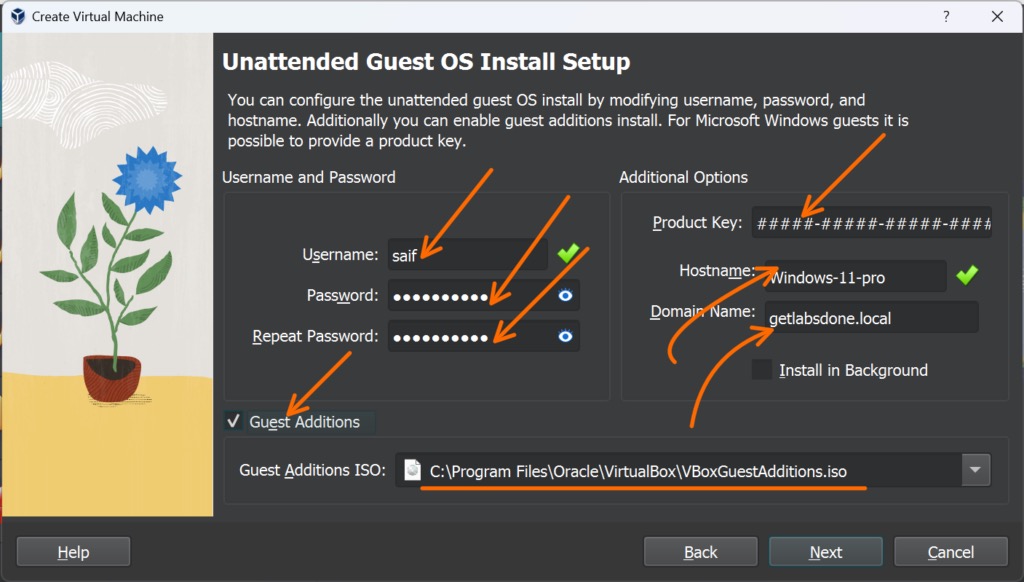
In the Unattended Guest OS install setup.
Username and password:
Configure the username and password for the windows11 vm, this will be used after the vm is installed, so make a note of that.
Additional Options:
Product Key: if you have product key that you want to use, you could specify here, if you dont have one, you may just leave it blank.
hostname: Enter the name of the virtual machine, make sure not to put any space in between.
Domain name: Enter the domain name, if you have any, else leave it default.
Guest Additions: Check this option, and leave the default Guest addtions iso location selected, afterwards click on Next.
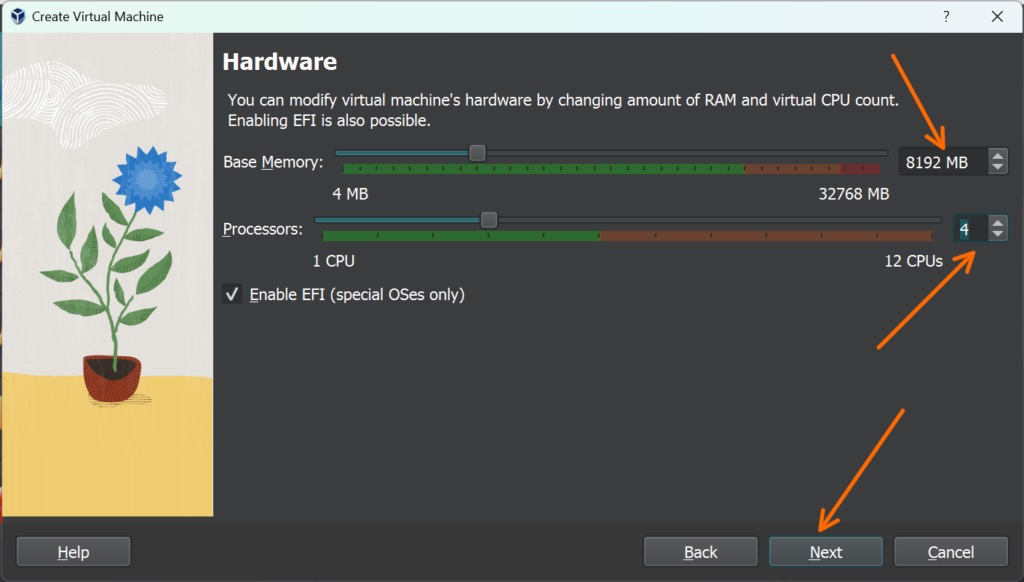
3. Configure the CPU and Memory.
By default virtualbox would assign 4gigs of RAM 2 CPUs, however to get better performance it is best to give 8Gigs of RAM and 4 CPU, as I have shown below.
So depending on your requirement, you may assign the memory and the CPU and then click on next.


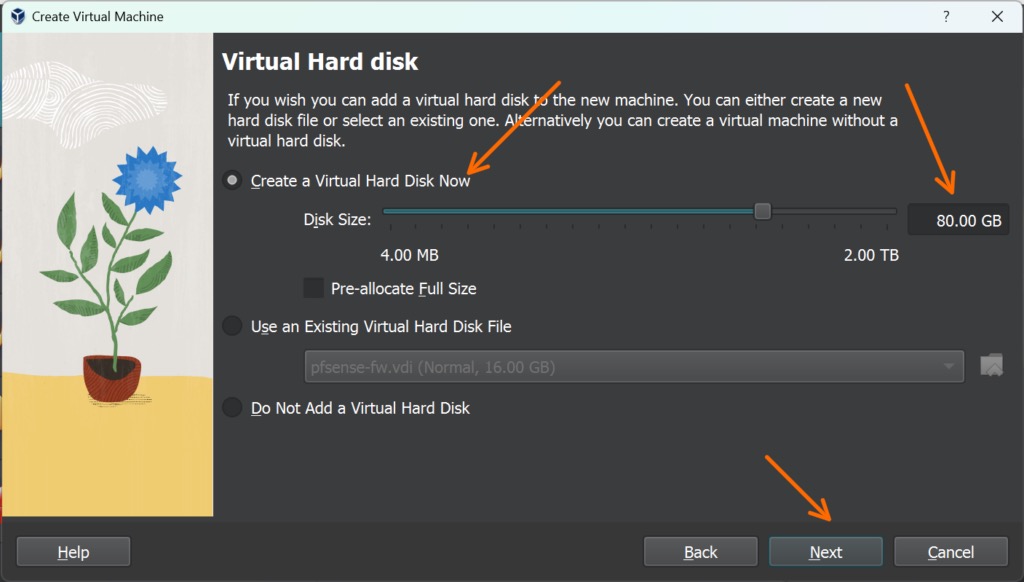
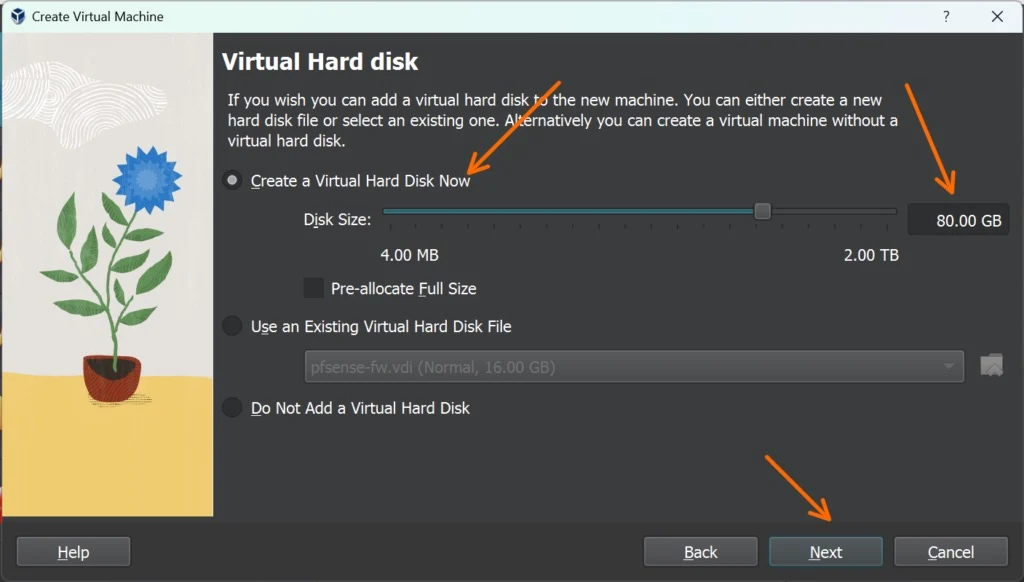
4. Configure the virtual hard disk.
In the virtual hard disk creation window, you could choose 80gb of default storage, however if your requirement is more, you may add more as well and then click on next.

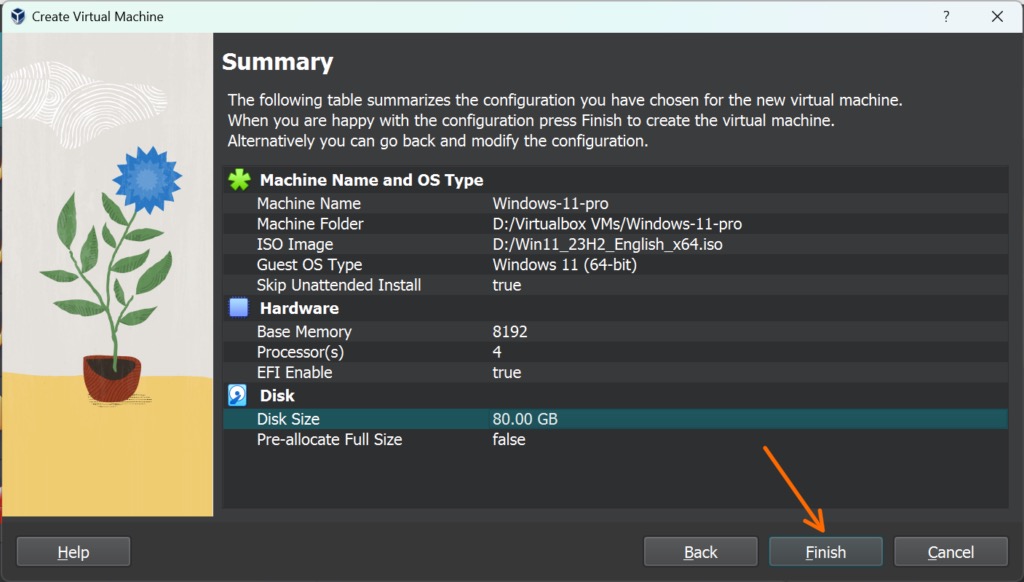
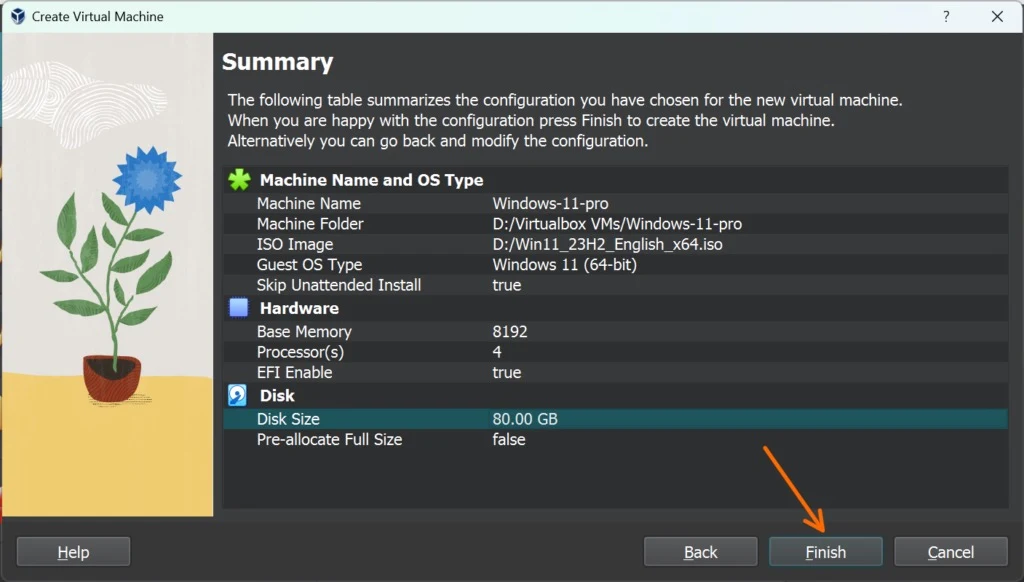
You will get the summary of the virtual machine installation, if you find everything looks good you may click on Finish. In case you required to make some changes, you may click on the back button to do so.
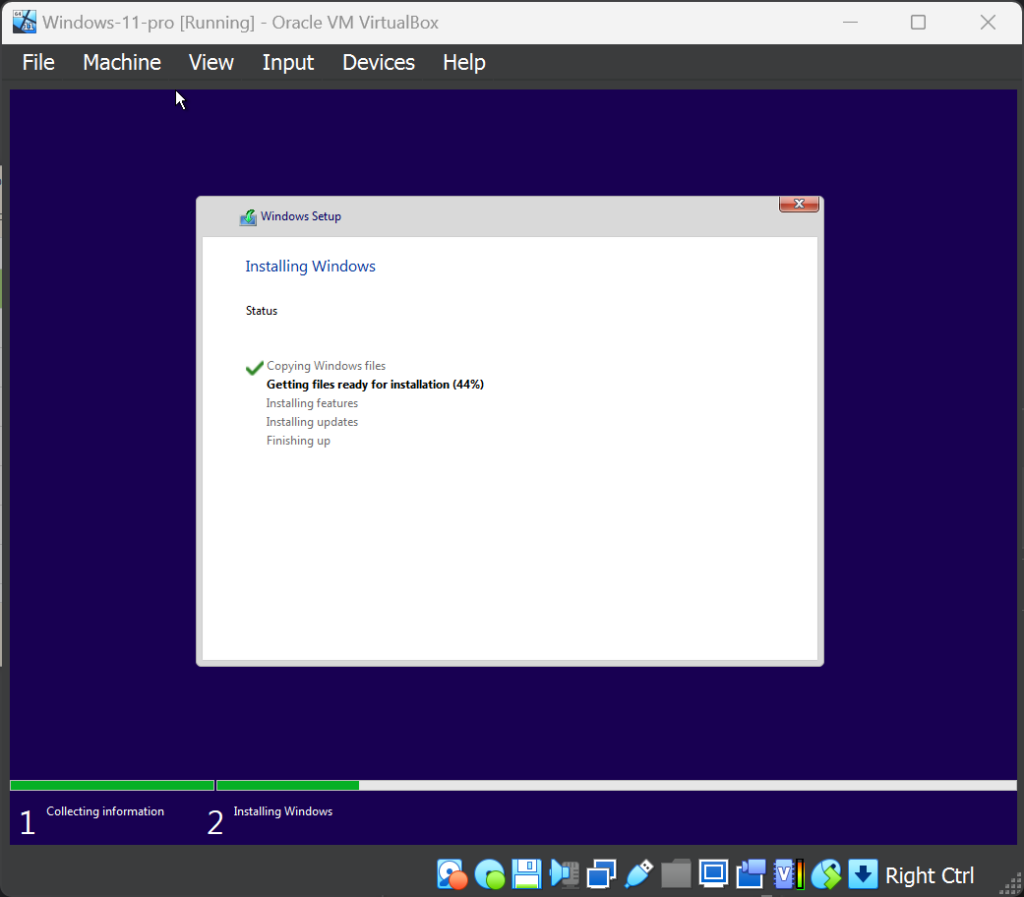
After few seconds you will see the windows 11 installation has began, and you basically dont have to do anything.


As you can see, I didnt have to fill in the normal windows 11 installation wizard, everything configured automatically, just go and grab a cup of coffe and then once you are back..

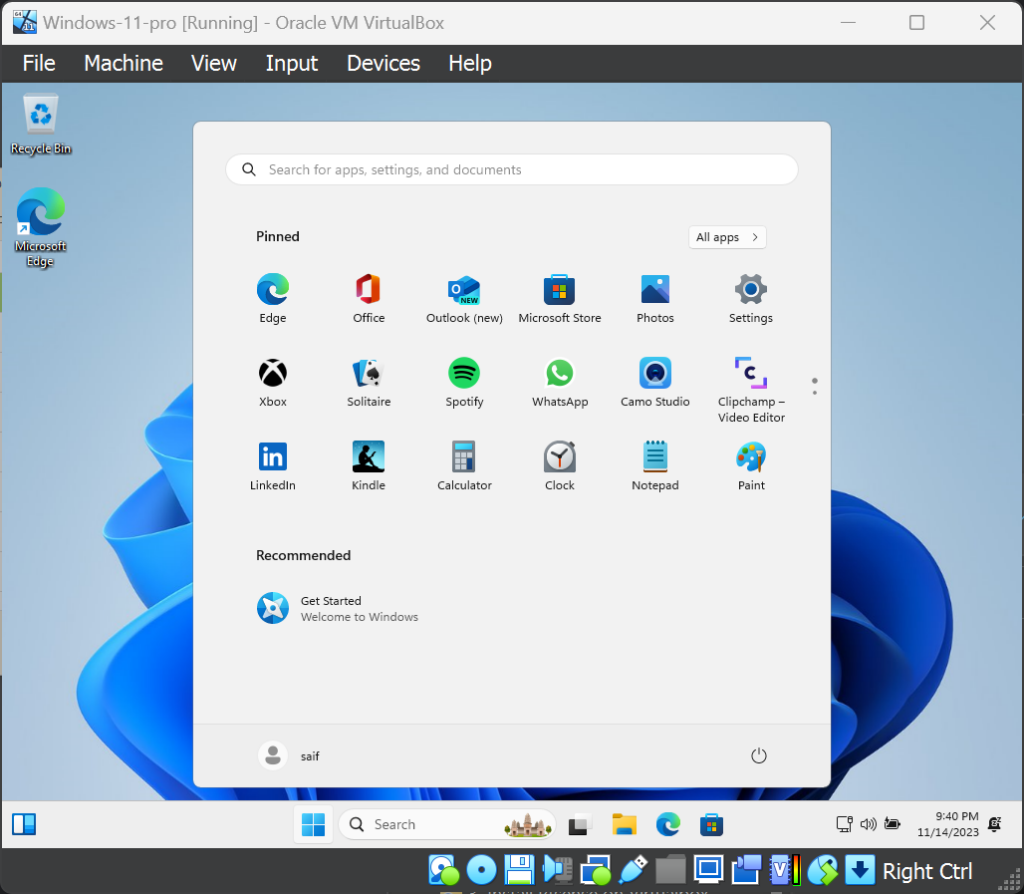
You will have a brand new windows11 virtual machine installed on your virtualbox hypervisor.
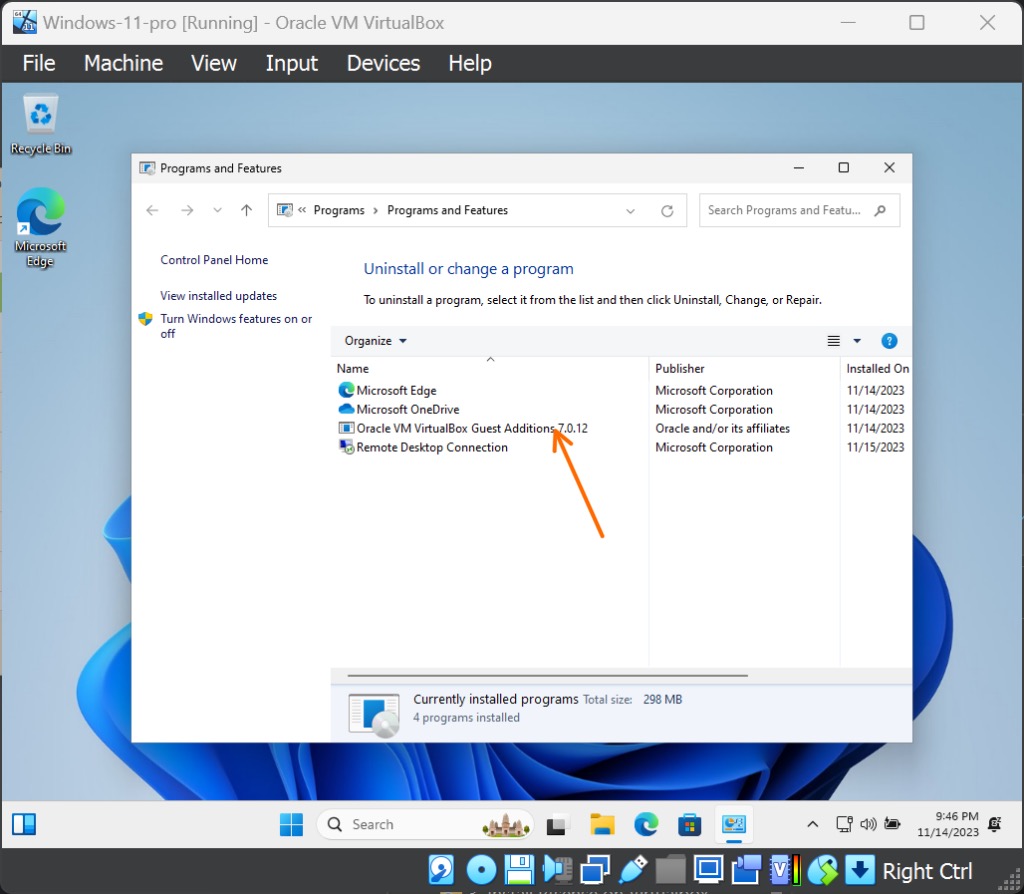
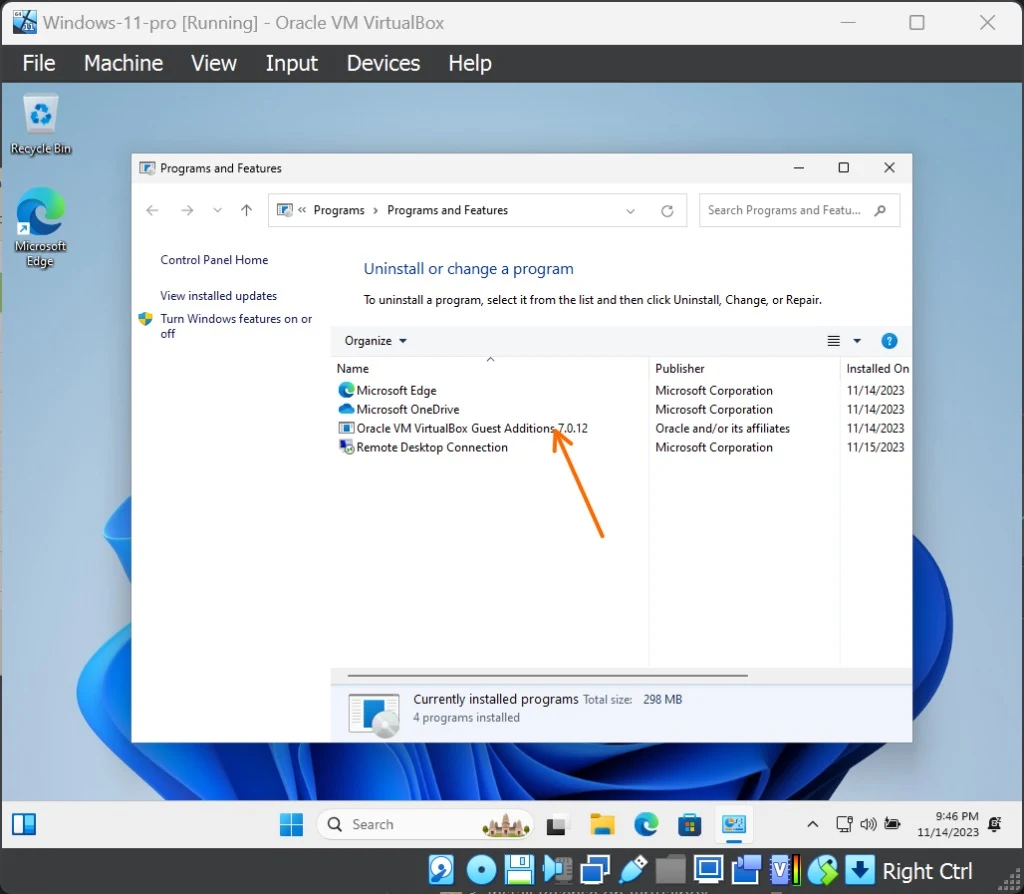
5. Verify the Virtualbox guest addition installation in Windows 11.
Once the Windows 11 Virtual machine is installed, wait for few minutes, and If you goto add or remove programs, you could see the windows 11 virtualbox guest additions are already installed.
Note: Dont expect the virtualbox guest addtiotion to get installed right away, after the installation give it a min or two and you will see the installation done successfully.
You may resize the windows11 Virtualbox screen, and you would see the windows 11 screen get resized automatically. This proves that the virtualbox guest addition was installed successfully and it is letting you resize the windows at ease.

Attended installation (Manual) of Windows 11 on virtualbox.
If you have followed the unattended way to install the windows 11 virtual machine in virtualbox, you may know how easy and effortless it is, however there are times someone wanted to install the windows 11 operating system manually that way they have full control on the virtual machine during the instalaltion without relying on the virtualbox automation script.
If you prefer to watch video, here is the video with step by step instructions.
1. Create the virtual machine.
Open virtualbox and then click on New.


Name: Enter the name of the virtual machine.
Folder: Choose the folder where you would like to save the virtual machine files.
ISO image: Choose the windows 11 image that you downloaded recently.
Skip Unattended Installation: Check this option for manul override.
Click on next.
2. Configure the Memory and the CPU.
Like we did in the unttended installation, we are going to use 8Gigs of RAM and 4 CPUs.
So depending on your requirement, you may add the CPU and Memory.
And then click on Next.

3. Setup Virtual hard disk.
Check the box that says Create a virtual hard disk now, you could leave the default 80Gigs of Storage or add more, However you may note that, you would require 40Gigs of minimum storage for the windows 11 to run as the operating system would take up some of the storage post installation.
and then click on Next.

You will get the summary of the installation, once you verified everything is fine, you may click on Finish, in case if you would like to make some changes, you might as well click on the back button.


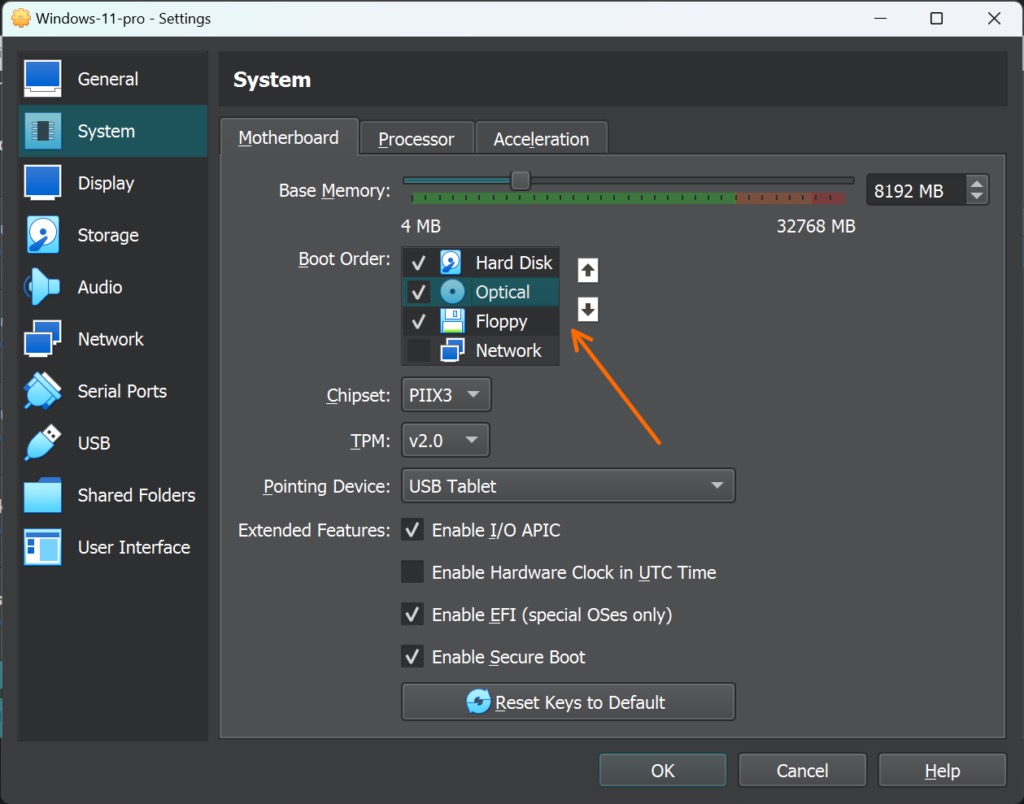
4. Change the boot order.
Before you start the windows 11 Virtual machine, it is important that you change the boot sequence for the correct way to boot the windows 11 virtual macine.
Right click on Windows VM that you just created, and click on Settings.
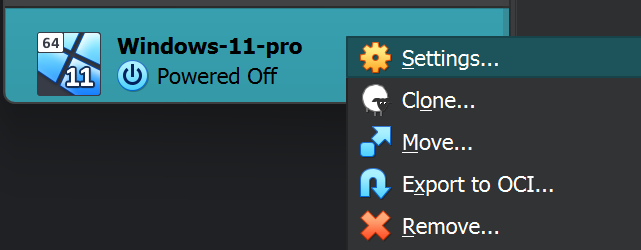

In the settings window.
Choose the System option, and under Motherboard tab, Boot order, change it as below.
Move the Hard diks to the Top, Optical to the second.
This way, when you boot the vm for the first time, it will try to boot from the virtual hard disk, since it will be empty, virtualbox will then move on to the virtual CDROM that we attached along with the windows 11 ISO image and boot from it.
And after the installation, when you boot into the VM again, this time it will boot into the hard disk successfully, as we have already completed the installation.
After changing the boot order click on Ok.

5. Initiate the Windows 11 installation.
To start the vm installation, double click on the VM, or right click on the VM and then click on Start.
As soon as you get a message “press any key to boot from CD/DVD” you may press any botton.
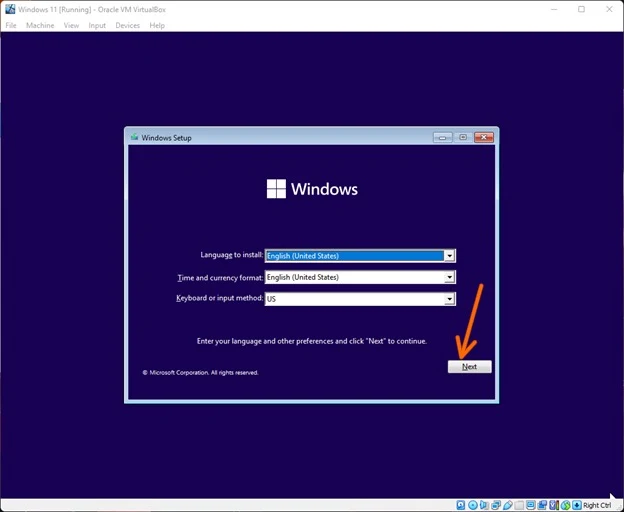
If you have configured everything correctly, you will get the windows 11 installation wizard after a few seconds.
Choose the Language, Time, and Keyboard layout based on your location and click on Next.

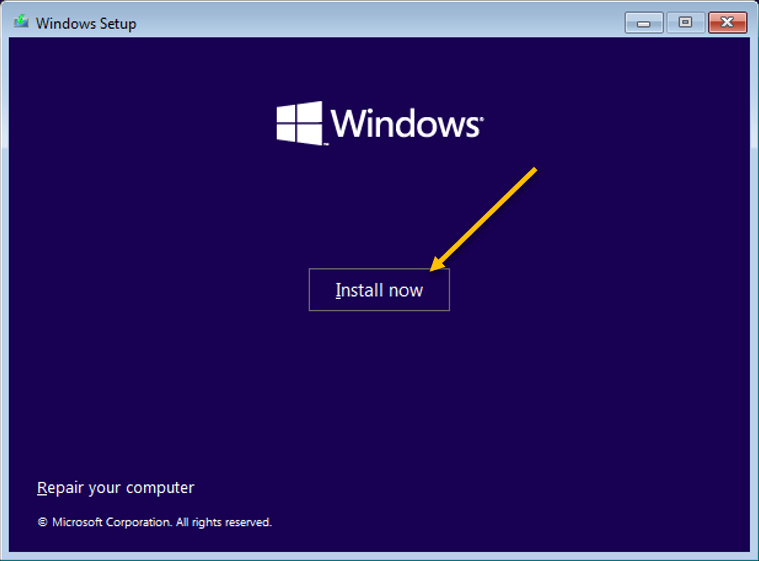
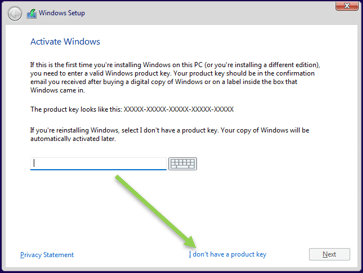
Click on Install now to start the windows 11 installation.

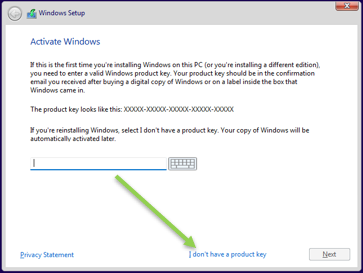
Since I am not using any product key now, I am choosing I don’t have a product key to proceed to the next step.
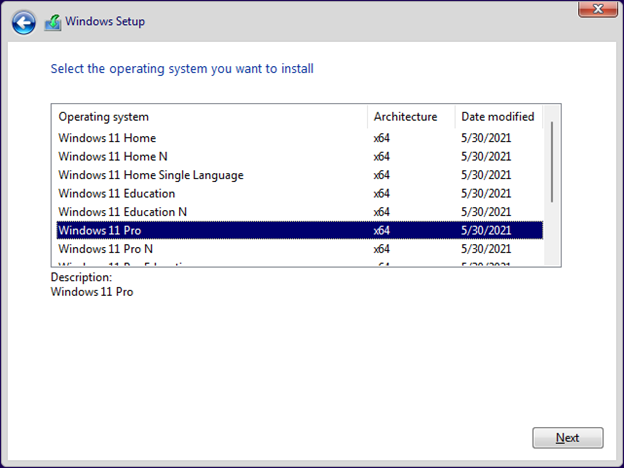
Choose the desired windows 11 version, and click on Next.
6. Choose the Windows 11 edition.
After selecting your desired windows 11 version, you may click on Next.

Accept the license agreement, and click on Next.
In the which type of installation, click on Custom.
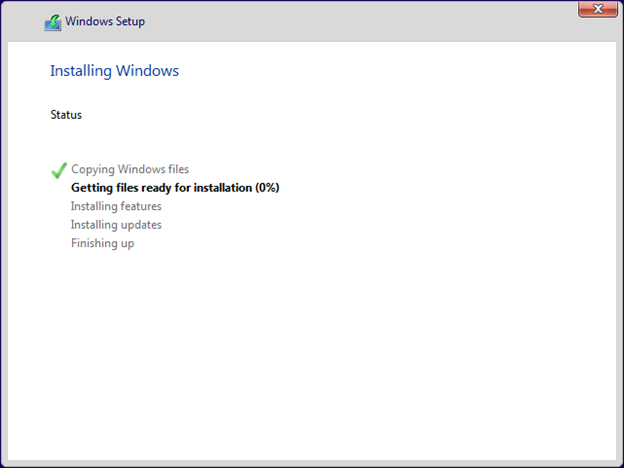
You should see the Virtual hard disk that we have set up during the VM creation. Choose the hard disk and click on Next.


The windows 11 installation will now begin. This process will take some time to complete.

`
7. Windows 11 initial setup wizard.
The Windows installation wizard will restart once the installation is completed.
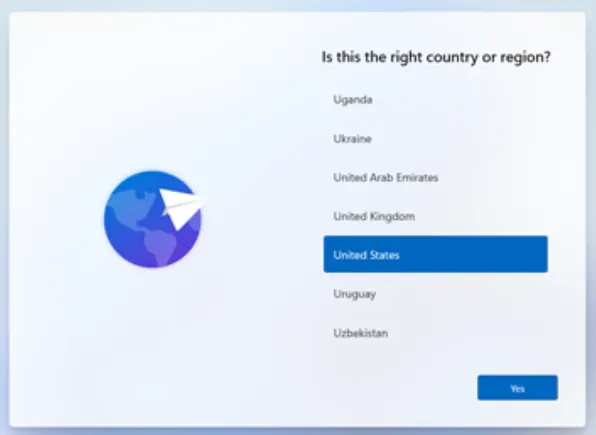
After a few minutes, you will be taken to the Windows 11 initial setup wizard.
Choose the location and click on Next.

Next, you will be asked to choose the keyboard layout of your operating system, you may choose that and click on Next.
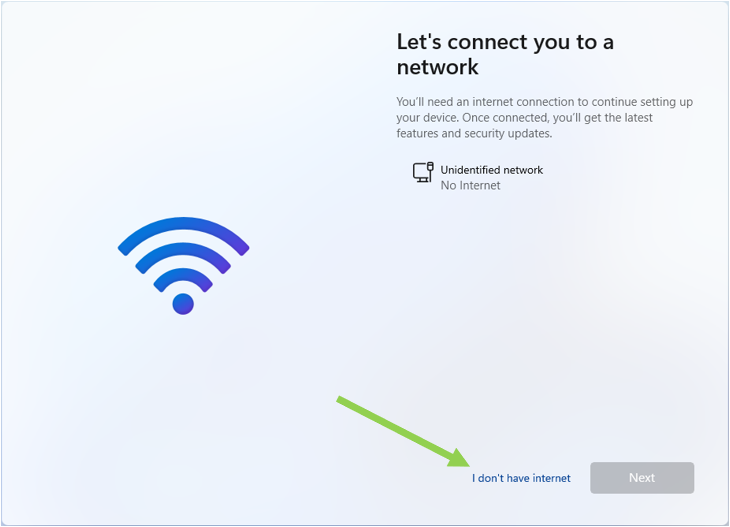
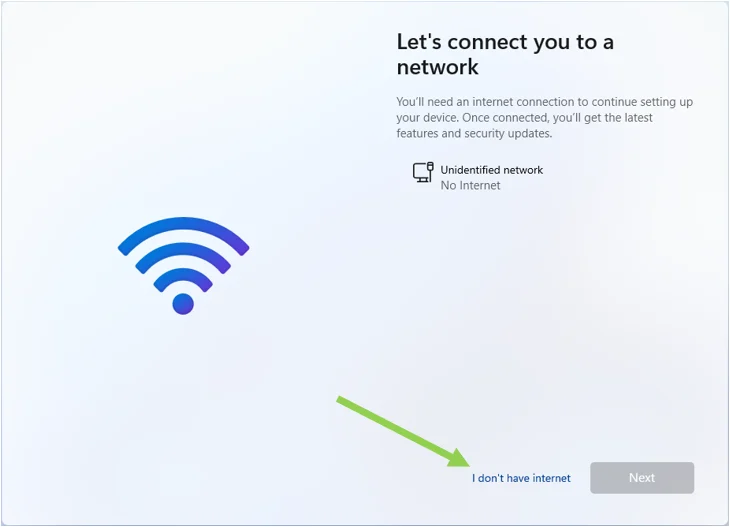
Disconnect the Windows 11 VM from the network.
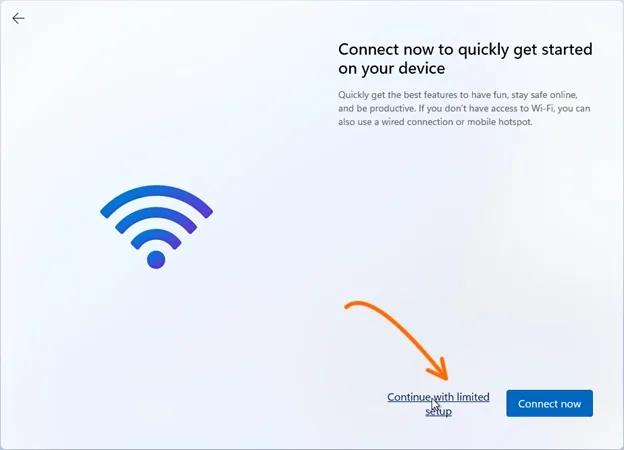
Before you proceed with anything, let’s disconnect your VM from the network.
We are not connecting to the network because, during the installation, Windows will start checking for updates that will cause delays for the windows installation to complete. Also, you won’t get an option to create a local account either. We can later link the Microsoft account post the installation.

Click on I don’t have internet.
Click on Continue with limited setup.
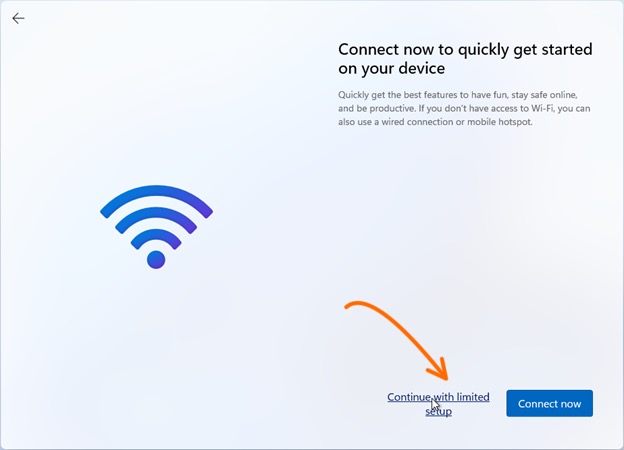
I dont see any option to ‘Continue with Limited setup’, in virtualbox windows 11 installation.
If you are stuck at Let’s connect you to a network screen, and dont see an option to ‘Continue with Limited setup’, you are not alone,this is common in newer version of windows 11 ISO images, so lets fix that.
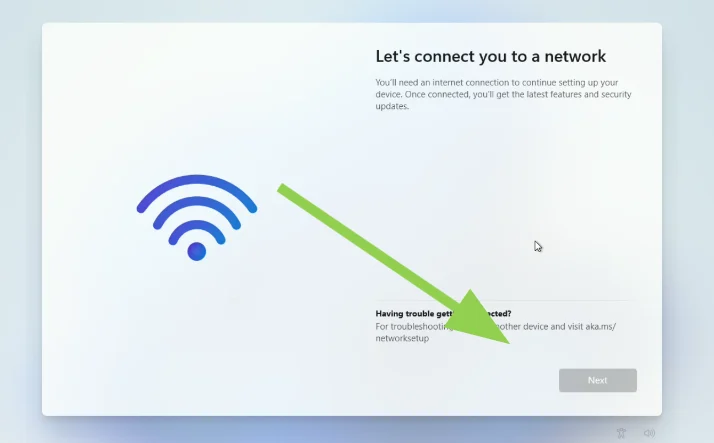
For that press shift + f10, (you might need to press the function key for this to work)
In the command prompt enter the following command and hit enter.
oobe\bypassnro
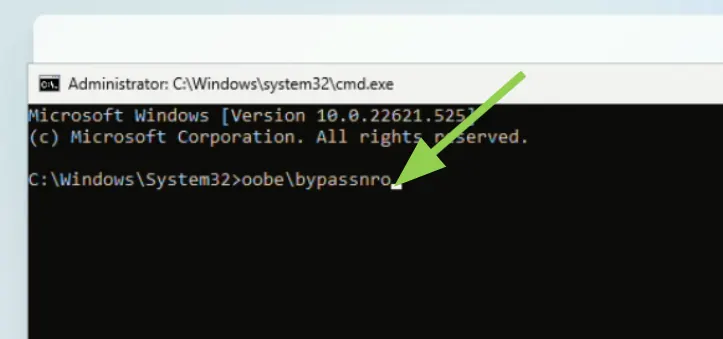
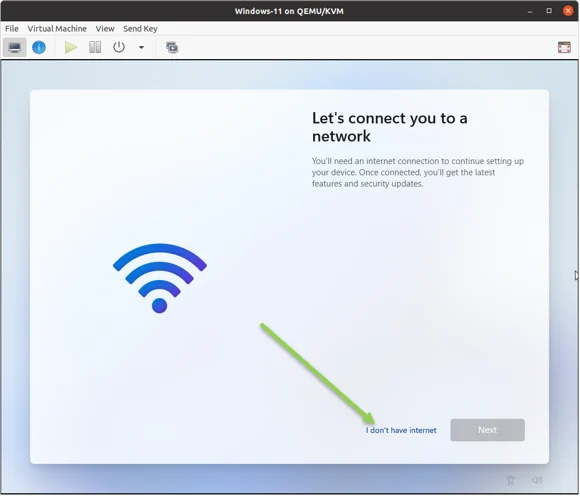
The system would now reboot and you will be back at the initial setup wizard, eventually you will get to a screen, where you could see ‘I dont have internet’ option, Click on that.
Setup your windows 11 local account and set the security questions.
You will be asked to set up a local account on your Windows 11 machine. Enter your username and password, and you will need to set up your three security questions as well.
Choose Privacy settings for your device.
You may choose the settings you like since I will not use any of them, let me disable all, and I click on Accept.
After a few minutes, the installation will be completed, and you will be taken to the windows 11 desktop page.
Connect your Windows 11 VM to the internet.
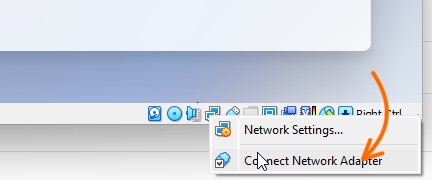
Now the installation is completed, you may go ahead and connect the network adapter back.
Right-click on the network adapter icon on the bottom right of the Virtualbox windows and click on connect network adapter.

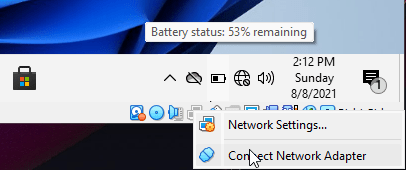
After few seconds, you should see the machine connected to the network.
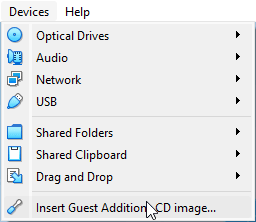
8. Install VirtualBox guest additions on windows11.
We have now completed the installation of windows 11 on VirtualBox. To get better performance out from any VM running on VirtualBox, you need to install something called VirtualBox guest additions.
Click on Devices, and click on Insert Guest Additions CD image…
This step will mount the VirtualBox guest additions CD image to the Windows 11 machine.

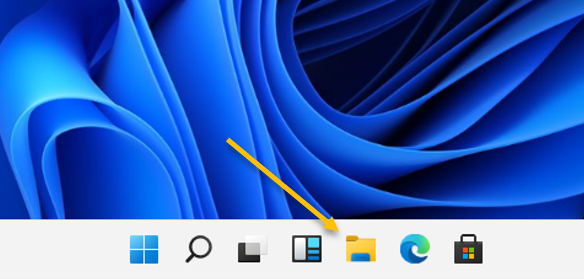
To access the image, click on the folder icon at the bottom of the screen.

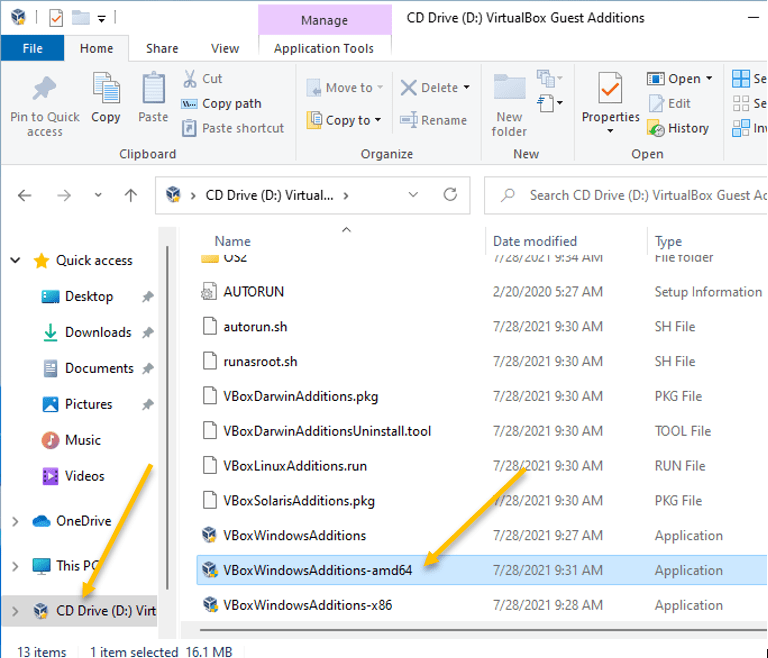
In the ‘This PC’ window, click on CD Drive on the left.
Doubleclick on Vboxwindows additions amd64 to install the VirtualBox guest additions.

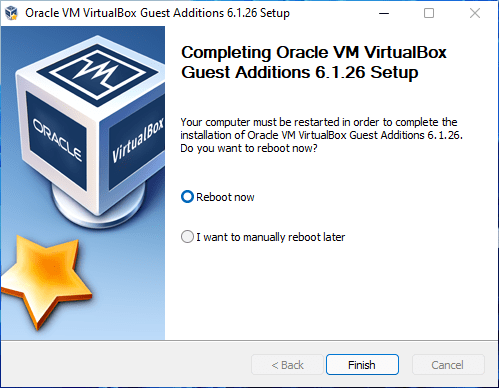
After the installation, you will be asked to reboot the machine, choose Reboot Now, and click on Finish.

That’s it. You have now successfully installed windows 11 on a Virtualbox hypervisor with the TPM and secure boot.