The other day I was working on adding some of the Redhat servers into production for monitoring. I also got the SNMP community string from the team that is managing the monitoring tools as well.
I was very confident that I even informed them that I would configure the SNMP on the server in another 5 mins :).
Do you know what happened when I logged into the server and went to edit the SNMP config file?
/etc/snmp/snmpd.conf
It turns out that “snmpd.conf” file doesn’t exist; oh man…
I went ahead and checked on another server I had added earlier to the production, and the SNMP configs were present on that server.
Since the SNMP file doesn’t exist on the server, I concluded that the SNMP package is not installed on my current RedHat server, and I decided to download and install them.
I made sure I have internet access to this box, and I tried to download the SNMP package by running the command below, which would download all the required dependencies to run the SNMP service on the server.
However, I got the below error message.
[root@GetLabsDone ~]# yum install -y net-snmp net-snmp-libs net-snmp-utils
Loaded plugins: langpacks, product-id, search-disabled-repos, subscription-manager
This system is not registered with an entitlement server. You can use subscription-manager to register.
There are no enabled repos.
 Run "yum repolist all" to see the repos you have.
 To enable Red Hat Subscription Management repositories:
     subscription-manager repos --enable
 To enable custom repositories:
     yum-config-manager --enable
Which means I don’t have a Redhat subscription!
Well, that can’t be happening, I already have a Redhat subscription, and I shouldn’t be getting the above error message. Let’s go ahead and fix it.
So In this blog, I will cover how to configure SNMP on the Redhat and Centos machine. And we should be configuring the SNMP version 2.
After this is done, you will have full visibility on your Redhat/Centos Linux server in production. I will also cover some of the troubleshooting steps when SNMP doesn’t work
How to add Redhat subscription to the server?
If you are a Centos user you may skip this step and go right into the SNMP installation and configuration here.
Since the error indicated that I don’t have a Redhat subscription, I went ahead and checked the Redhat subscription status by entering the commands below.
[root@getlabsdone ~]# cat /etc/sysconfig/rhn/systemid cat: /etc/sysconfig/rhn/systemid: No such file or directory
[root@getlabsdone ~] # sudo subscription-manager status
+-------------------------------------------+
   System Status Details
+-------------------------------------------+
Overall Status: Unknown
The output basically shows that I hadn’t added this server to the Redhat subscription.
I had a license to add this server to the subscription. Hence, I went ahead and added the subscription by running the below command.
[root@getlabsdone ~]# subscription-manager register --auto-attach
Registering to: subscription.rhsm.redhat.com:443/subscription
Username: your username
Password: your password
The system has been registered with ID: you will find your ID here
Installed Product Current Status:
Product Name: Red Hat Enterprise Linux Server
Status:       Subscribed
Let me check the Redhat subscription status now.
[root@getlabsdone ~]# sudo subscription-manager status
+-------------------------------------------+
System Status Details
+-------------------------------------------+
Overall Status: Current
Aha! Some sign of relief as I just added the Redhat server to the Redhat subscription now.
Note: Can you run this command while the server is in production?
Of course, you can, as it’s just attaching the subscription and won’t make any further changes on the server.
What if I have a test environment where I don’t have Redhat subscription?
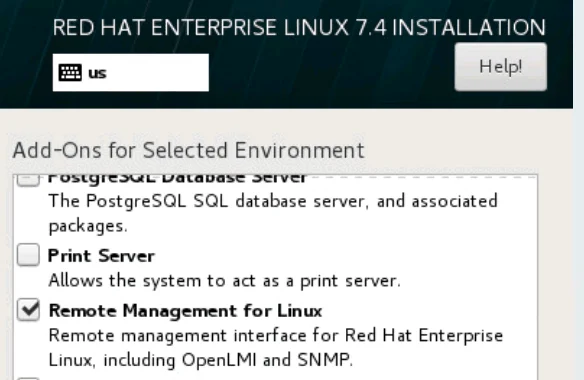
If you are in the lab, you must enable ‘Remote Management for Linux’ during the Redhat OS installation. That way, the server would enable the SNMP package before the installation, and you would have the package ready to use. If not, you would need to attach the Redhat subscription to download the SNMP package to the system, which you usually may not have on lab servers, or you may need to find alternate ways to download and install the SNMP package on the Redhat server later on.

Why do we need SNMP?
The SNMP protocol helps you to monitor Redhat / Centos servers or any other network hosts on the network. With the help of the SNMP protocol, the monitoring tools can show you many device performance parameters. Such as CPU utilization based on each core, memory utilization, hard disk utilization, network interface utilization, and so on.
If you wanted to learn more about what is SNMP and how it works, you can check out the article here.
Read also,
httHow to Create a bridge interface in CentOS/Redhat Linux?
How to Install RedHat Linux 8 on VirtualBox? | Step by Step.
How To Install And Configure SNMP on Ubuntu?
What is SNMP and how it works?
How to configure SNMP on Redhat /Centos Linux?
The below are the steps that we are going to use to configure SNMP Linux. Specifically for the Redhat/Centos, you may check out the blog here if you plan to configure SNMP on Ubuntu.
These steps are the same for both Redhat and CentOS versions.
One great thing about CentOS is that you don’t need to have any subscription as it’s community-based.
1. Installation of SNMP Linux package.
- After adding the subscription to the Redhat server, you can install the SNMP files by running the below command.
Note: To install snmp on centos 7/8, you should use the same commands as well.
[root@getlabsdone ~]# yum install -y net-snmp net-snmp-libs net-snmp-utils
Eventually, you would be able to see the below message saying that the SNMP package installation has completed.
Installed:
  net-snmp.x86_64 1:5.7.2-37.el7      net-snmp-utils.x86_64 1:5.7.2-37.el7
Updated:
  net-snmp-libs.x86_64 1:5.7.2-37.el7
Dependency Updated:
  net-snmp-agent-libs.x86_64 1:5.7.2-37.el7
Complete!
- You can check the status of SNMP on the server by running the below command.
[root@getlabsdone ~]# service snmpd status
Redirecting to /bin/systemctl status snmpd.service
● snmpd.service - Simple Network Management Protocol (SNMP) Daemon.
   Loaded: loaded (/usr/lib/systemd/system/snmpd.service; disabled; vendor preset: disabled)
   Active: inactive (dead)
As you can see, the SNMP status is inactive at the moment. Even though we have installed the package, we are going to fix that soon.
The steps mentioned here is same for Centos as well except the subscription.
2. SNMP configuration in Redhat and CentOS.
Now that you have SNMP service installed on both Redhat or Centos servers. Next, you would have to add the server to the SNMP monitoring.
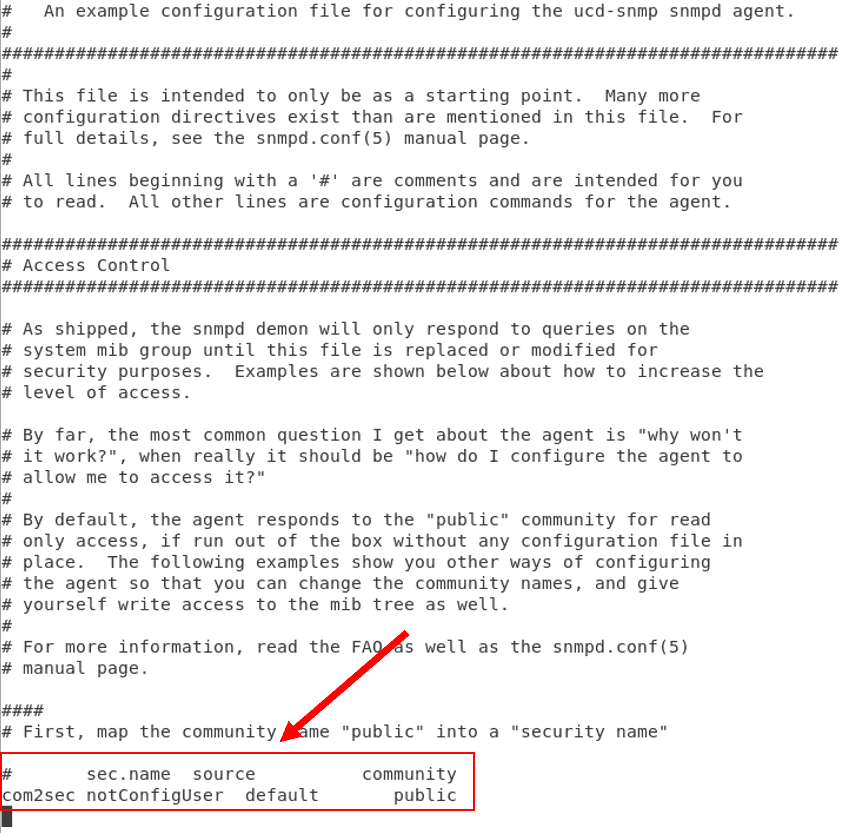
To do that, you need to change the SNMP community string under /etc/snmp/snmpd.conf
- Let’s go ahead and edit the SNMP configuration file and add the string.
vi /etc/snmp/snmpd.conf
- Goto the below line and edit the string ‘public’, which is the default to whatever the community string you may have received from the team.
com 2sec notConfigUser default public

- Once you added the string to the config, save the configuration and restart the SNMP service using the below command.
[root@getlabsdone admin]# service snmpd restart
Redirecting to /bin/systemctl restart snmpd.service
[root@getlabsdone admin]
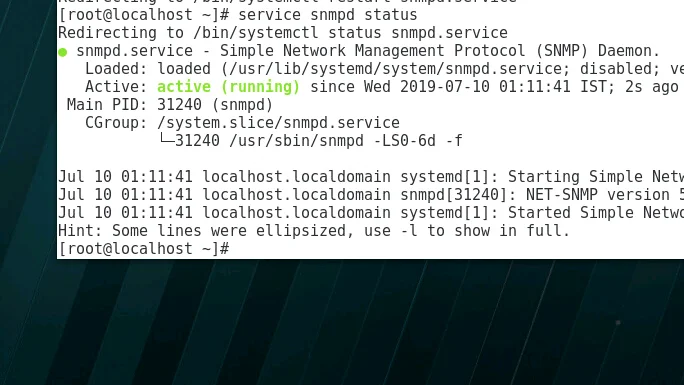
- SNMP service now restarted and it should be active now, you can check the status by the command
service snmpd status
Change the default SNMP configuration.
The configuration we just made above is the default SNMP configuration, and it should be fine for testing. However, if you plan to set up SNMP in production, you should use either rocommunity, a read-only community, or rwcommunity, which is SNMP with read-write access.
You should also specify the monitoring server address or subnet to enhance the security.
- Open SNMP configuration again, and comment the SNMP public string

Then add the read-only community string along with the monitoring server IP address. My monitoring server IP address is 192.168.127.1.
so the configuration should look like this, As you can see I also changed the community string to a different one.
rocommunity mysnmp1! 192.168.127.1

This way, only the server with IP address 192.168.127.1 can poll the device through SNMP; the rest of the IPs will not be allowed.
For most of the deployments, the read-only community access should work.
If you require to have SNMP read-write access then you may change the configuration like below. And restart the SNMP service again.
rwcommunity mysnmp1 192.168.127.1
What is SNMP traps ?
SNMP traps are sent to the SNMP collector in case of any issue that occurs on the host. Which will be useful in any situation, so how do you set up one?
How do you set up SNMP traps?
While configuring the SNMP, it is recommended to configure SNMP traps as well so that it can send traps from the host to the monitoring server in the event of anything goes down.
Trapsink 192.168.127.1
Below is my final SNMP configuration.
rocommunity mysnmp1 192.168.127.1
rwcommunity mysnmp1 192.168.127.1
Trapsink 192.168.127.1
After you modified the configuration restart the SNMP service as well.
3. Add SNMP service at the startup.
After the SNMP restart, the service should be up and running. However, you don’t want the SNMP service to be inactive whenever the system reboots.
You can add the SNMP service to start whenever the system boots itself by running the below commands to avoid such situations.
chkconfig snmpd on
And you don’t have to manually start the SNMP service later on.
a. Restart the SNMP service.
Sometimes your monitoring team may say that redhat snmp monitoring still not working even after it has been configured. The problem could be either the SNMP service is not running or the SNMP port 161 is not allowed on the Redhat or CentOS Linux server firewall or iptables.
Remember, In step 1, when we installed the SNMP package, it was inactive. If the SNMP service is not running or if it is in an inactive state, you can type service SNMP startorrestart to activate the service.
5. Allow SNMP port on Linux firewall.
Firewalld is the firewall service on Redhat 7/8 and CentOS 7/8.
If you are running an older version than that, it uses IPtables. To see which version you are running, enter the command cat /etc/redhat-release
- Check the status of the firewall service on Rhel 7/8 or Centos 7/8.
For the older version tryservice iptables status, basically, replace firewalld with iptables.
By Default, firewall on the RedHat would be active, as you can see below.
[root@getlabsdone ~]# service firewalld status
Redirecting to /bin/systemctl status firewalld.service
● firewalld.service - firewalld - dynamic firewall daemon
   Loaded: loaded (/usr/lib/systemd/system/firewalld.service; enabled; vendor preset: enabled)
   Active: active (running) since Tue 2019-07-09 21:51:15 IST; 18h left
     Docs: man:firewalld(1)
 Main PID: 922 (firewalld)
   CGroup: /system.slice/firewalld.service
           └─922 /usr/bin/python -Es /usr/sbin/firewalld --nofork --nopid
There are two ways you can fix an issue with SNMP that doesn’t work.
a. Allowing SNMP via Firewalld.
- First, you can stop the firewall service on Redhat by issuing the below command to test. This should allow SNMP port 161 and snmp, starts to work.
service firewalld stop
Note: Stopping the firewall service is not a recommended solution in the production environments. Only do this when you are in a non-production environment.
- Second, you can allow the SNMP port number 161 on the Redhat firewall.
To allow the SNMP port 161 on the Linux firewall, you can type the below command to allow SNMP service on the system, which would ideally enable the port as well.
[root@getlabsdone ~]# firewall-cmd --add-service=snmp --permanent
success
[root@getlabsdone ~]#
- And restart the firewall service.
[root@getlabsdone ~]# service firewalld restart
Redirecting to /bin/systemctl restart firewalld.service
[root@getlabsdone ~]#
b. Allow SNMP port on IPtables.
If you are using iptables instead of firewall you may enable the SNMP port as below.
# iptables -I INPUT -p udp -m udp --dport 161 -j ACCEPT
# iptables -I INPUT -p udp -m udp --dport 162 -j ACCEPT
And save the config
# iptables-save > /etc/sysconfig/iptables
6. Test the SNMP configuration using snmpwalk.
You are all set now to monitor the device; if you would like to test the configuration you just made from your end, you can do so by running the snmpwalk command.
I am also checking the SNMP configuration whether it is working or not when my string was ‘public’
snmpwalk -Os -c public -v 2c 192.168.127.132
As you can see I am getting a response which means it is working now.

I re-run the same command again after I changed the default SNMP community string ‘public’.
As you can see I am getting an error Time out: No response from the client.
Which is expected as I no longer use the community string public anymore.

When I changed the community string to a new one mysnmp1! and I run the command again to can see that I am getting a response now through SNMPWALK

Always keep in mind the below points, whenever you make any changes to SNMP on Linux.
- Make sure the SNMP service or ports 161 and 162 are allowed on the firewall.
- Each time when you make changes, restart the SNMP services.
- Make sure that you are using the right community string.
