
If there is no SNMP protocol, monitoring the Network hosts would have been difficult tasks for the admins. SNMP is a protocol that helps you identify the host availability with many parameters such as network health, hardware resources such as CPU utilization, memory storage, etc.
In this blog, let’s discuss how to configure SNMP on an Ubuntu server and specific things to keep in mind if things don’t work well. If you are using Centos or Redhat, then I have covered the SNMP configuration for that here.
We are going to set up the SNMP configuration on a Ubuntu machine. We will be using version 2 in this step.
Finally, we will also make sure everything is working the way it should.
Table of content:
- The different version of the SNMP ?
- How to check net-snmp version in linux?
- Configure SNMP version 2 in Ubuntu
The different version of the SNMP ?
There are three major version of SNMP, version 1,2 and 3.
When the SNMP initilally came out it was with the version 1, and later there was an improved SNMP version 2 came out which has become more popular.
Though SNMP version 3 came out a few years back, you can still see admins are using the version2, as it is effortless to use and not so complicated. But an issue with SNMPv2 is that it doesn’t support encryption. It just uses a cleartext community string to talk to the management server.
If you wanted to learn more about each version in more detail you can check out the article here.
How to check net-snmp version in linux?
There is no definite way to check SNMP version in linux. When you install the SNMP package it support all the versions.
However, you can read the SNMP configuration file and if you see the community string is used in the configuration then it is either version 1 or two, if you see the username then it is version 3.
Both the version 1 and 2 uses the community string, whereas the SNMPv3 uses username to communicate and it also provide authentication and encryption which means it is more secured.
Configure SNMP version 2 in Ubuntu
So let’s go ahead and configure SNMP version 2 in an Ubuntu machine.
I am using Ubuntu server 20.04 for this. The configuration will look identical for other versions of Ubuntu as well, including Ubuntu desktop.
The first step that you have to do is to install the SNMP package in the Ubuntu machine.
How to install SNMP in Ubuntu?
The installation of the SNMP In Ubuntu is straightforward, you got to type only two commands, and you are done.
First, sudo apt update
Then
Sudo apt-get install snmpd-y
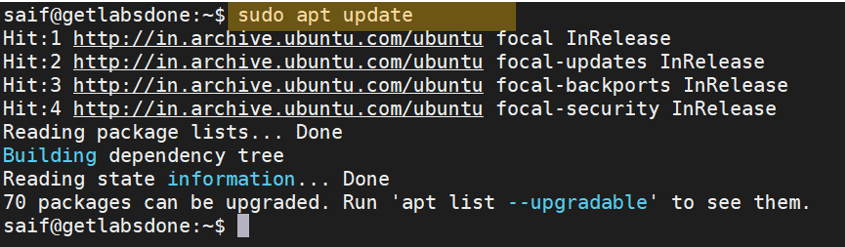

Some of the output below has been truncated
saif@gld-server:~$ sudo apt-get install snmpd -y
[sudo] password for saif:
Reading package lists... Done
Building dependency tree
Reading state information... Done
The following additional packages will be installed:
  libmysqlclient21 libsensors-config libsensors5 libsnmp-base libsnmp35 mysql-common
Suggested packages:
  lm-sensors snmp-mibs-downloader snmptrapd
The following NEW packages will be installed:
  libmysqlclient21 libsensors-config libsensors5 libsnmp-base libsnmp35 mysql-common snmpd
0 upgraded, 7 newly installed, 0 to remove and 65 not upgraded.
Created symlink /etc/systemd/system/multi-user.target.wants/snmpd.service → /lib/systemd/system/snmpd.service.
Processing triggers for libc-bin (2.31-0ubuntu9) ...
Processing triggers for systemd (245.4-4ubuntu3.2) ...
Processing triggers for man-db (2.9.1-1) ...
saif@gld-server:~
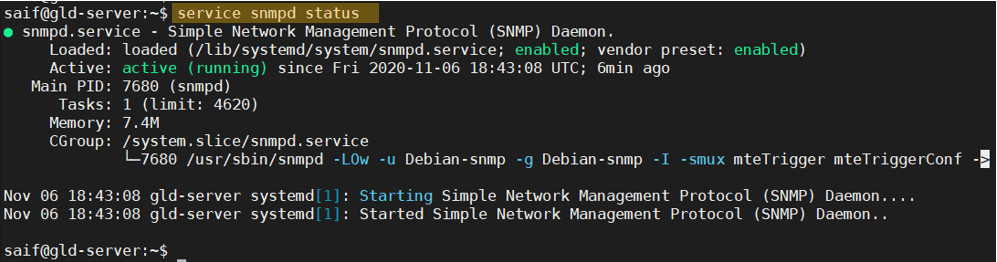
How to check SNMP status in Linux?
Once you installed the SNMP service, you may check the SNMP service by typing service SNMP status. As you can see, the SNMP service is currently running. At this point, you should be able to talk to the Ubuntu machine using the SNMP protocol on port number 161.

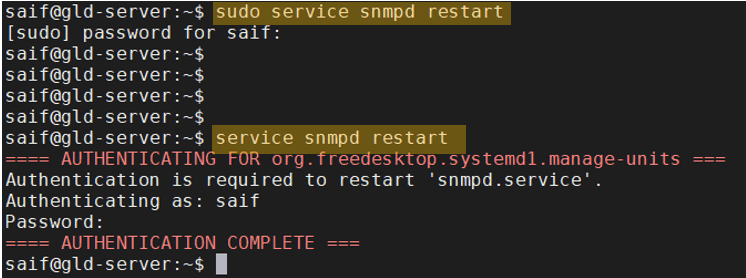
How to restart SNMP service in Ubuntu Linux?
In Ubuntu Linux, you can type the command sudo service snmpd restart to restart the SNMP service.
Once you authenticate with the password, if you wanted to restart the service again, you can type the command without sudo.

How do I know if SNMP is working with Ubuntu Linux?
I installed the SNMP package on my Ubuntu successfully. How do I verify if the SNMP service is working or not?
You can verify if the SNMP service is working or not with the default SNMP settings right after the installation.
After the test, you can determine if the SNMP service is running or not, and if the ubuntu firewall allows the SNMP port 161 and 162 on the network. After I verify that, I can go ahead and change the default value as per our network.
You can go to /etc/snmp/snmpd.conf file to see the SNMP default community string.
And scroll down, where you should be able to see the readonly community string public.


If you have a network monitoring tool, you can test the connectivity with the same community string as well, and the method I will use to verify the SNMP service is by using the snmpwalk.
Snmpwalk is the tool witch which you can get the SNMP information out from the agent server. It will show all the OID values and the MIB trees as well.
snmpwalk v2 example
Let’s perform the snmpwalk from the same machine (localhost) by entering the command below.
To run the SNMPwalk on the SNMP version 2 you can run the below commands, if you are getting the response which means it is working good, otherwise there is an issue.
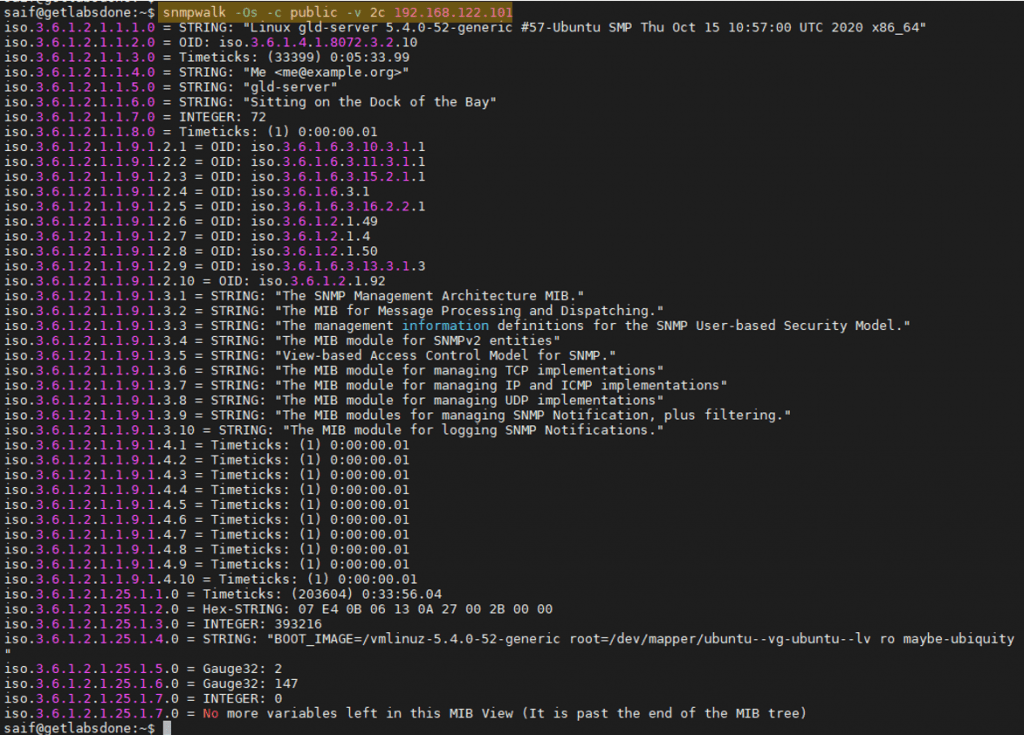
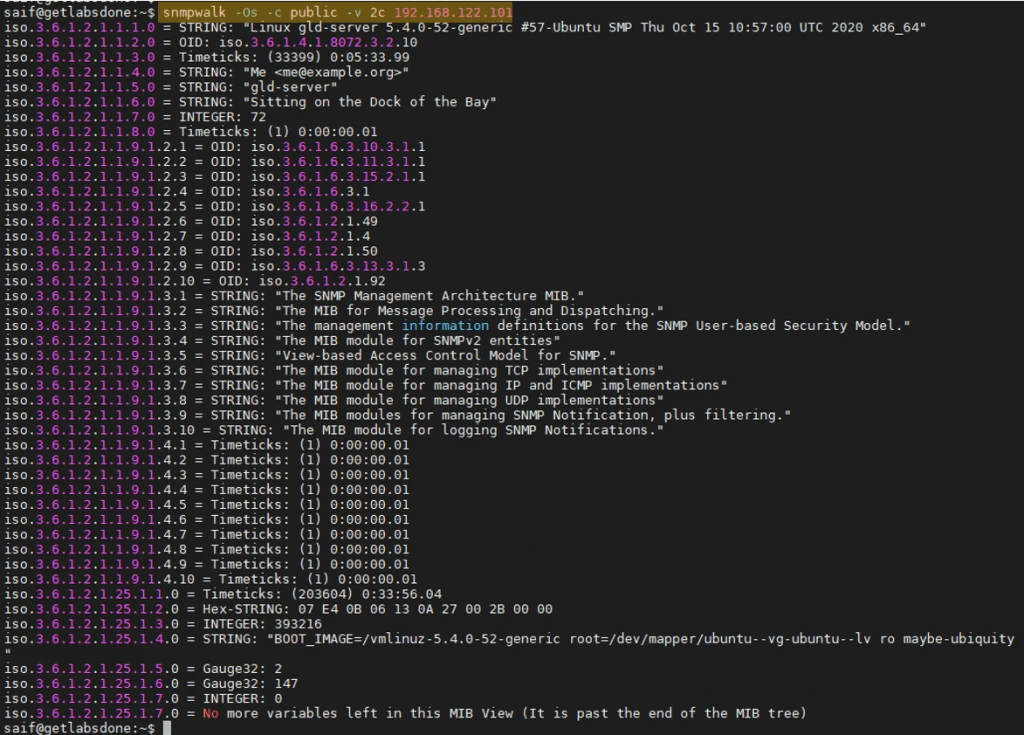
snmpwalk -Os -c public -v 2c localhost
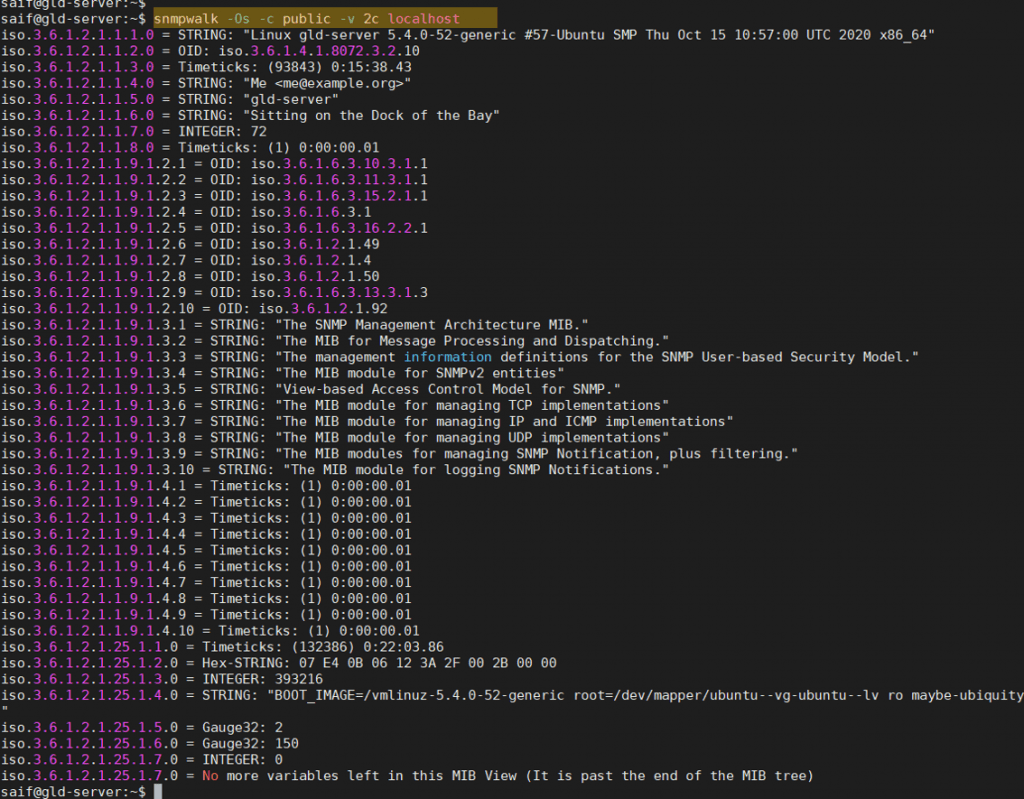

As you can see, I am getting the response, which means it is working fine.
If you are getting an error Timeout: No Response from host, there seems to be some issue which you have to take a look.
When I ran the snmpwalk on the local machine, it worked fine, what happens if you run the same test from the remote host ?
I am going to another remote ubuntu machine and try to do the same test from there.


And it was timed out from the remote host.
Why do you think the SNMP didn’t respond to the remote server?
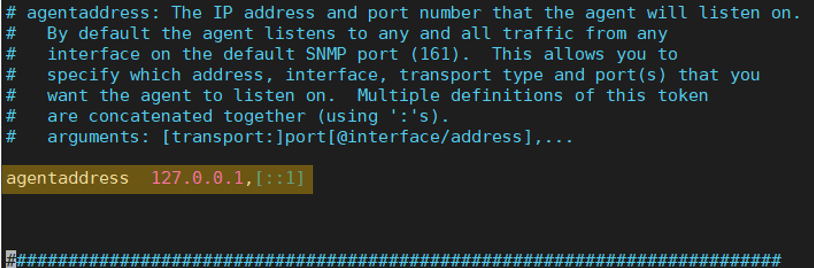
It is because, by default, the agent is configured to listen only from the loopback address. If you open the SNMP configuration file, you can see that the agent address is pointing it to 127.0.0.1,[::1]

Ubuntu SNMP listen on all interfaces
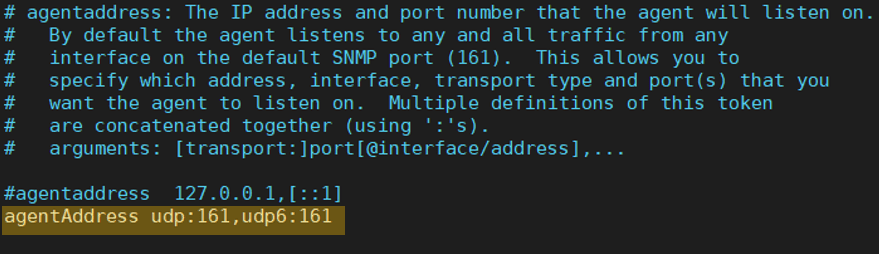
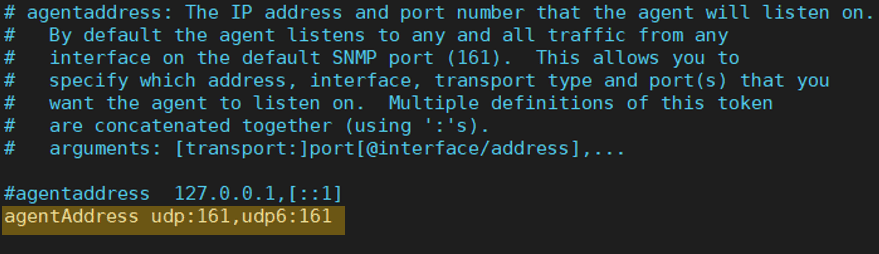
To make Ubuntu listen to SNMP on all the interfaces, comment or modify the agent address below.
agentAddress udp:161,udp6:161
It means that I am listening to port 161 for both ipv4 and ipv6 addresses.
I just made the changes. Below is the new configuration look like.
Restart the SNMP configuration with the command, service snmpd restart
After the service has restarted, you can go to the remote host and try to do an SNMP query, and you should be good to go.
As you can see, after I made the changes, I am now able to talk to my SNMP agent server from my remote machine over SNMP.
How to secure your SNMP setup in Ubuntu.?
Allowing all the interface to listen for SNMP can put your server at risk as anybody can query with SNMP to your machine.
To secure the access, first, you need to change the default community string and second, restrict the SNMP query to specific hosts in the network, mainly to the SNMP manager host or your monitoring server.
To configure that, open the SNMP configuration file /etc/snmp/snmpd.conf
By default, you should see the snmp configuration with the default community string public and allow access to any IP addresses, both ipv4 and IPv6.


To tighten the security,
First, change the community string from the public to something else.
Second, allow only the SNMP manager address, which is in our case 192.168.122.1, so based on your SNMP manager or monitoring server IP, you may add them.
Finally, an optional setting, this again depends on your network.
- If you are using both IPv4 and IPv6 in your network, change the both default SNMP string, and not only update the ipv4 but also ipv6 manager address.
- If you are using only IPv4 like me, then comment on the IPv6 settings starts with rocommunity6. And you should be good to go.


Alright, the changes are done. Let’s go ahead and restart the SNMP service again for the changes to take effect.
After the service restarted, do the SNMP query again from both the local host and the remote host.
If you have done everything correctly, then you shouldn’t be able to query the SNMP from the localhost, but only from the remote hosts with the IP#192.168.122.1
Remember that we have changed the default SNMP string from default to mysnmp#!

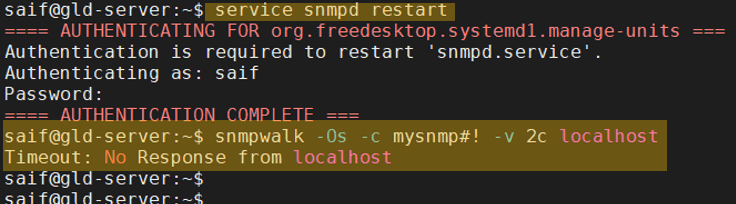
As you can see, I just restarted the SNMP service now, and I can’t talk via the localhost on SNMP.
However, everything looks from the remote hosts.
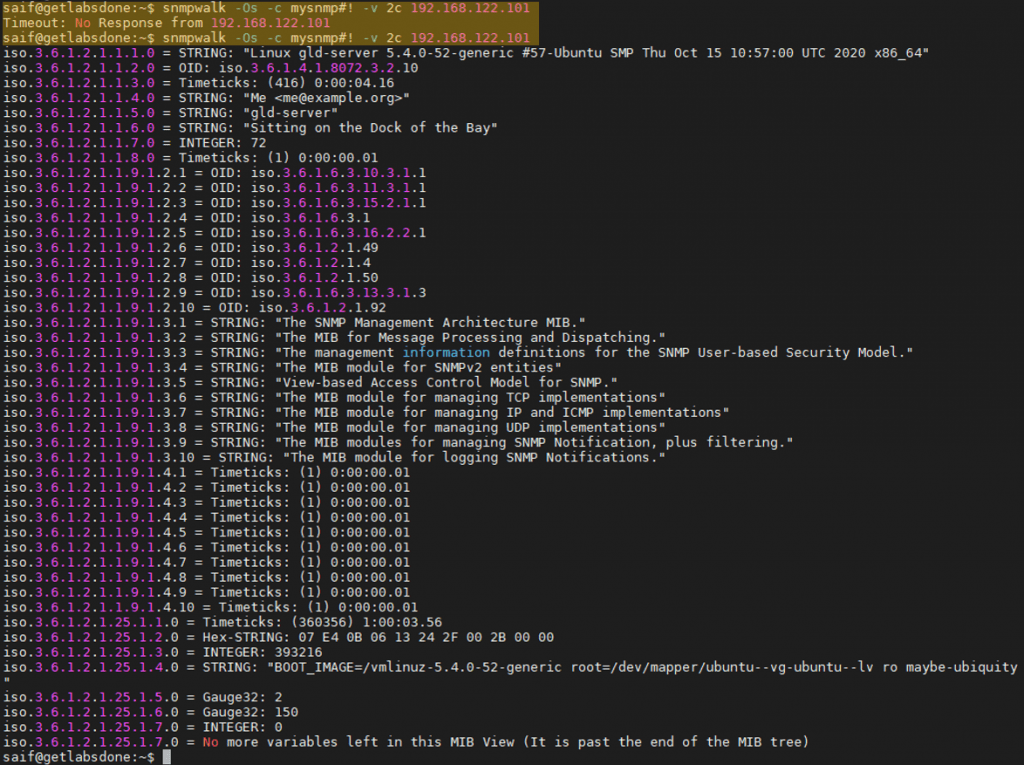
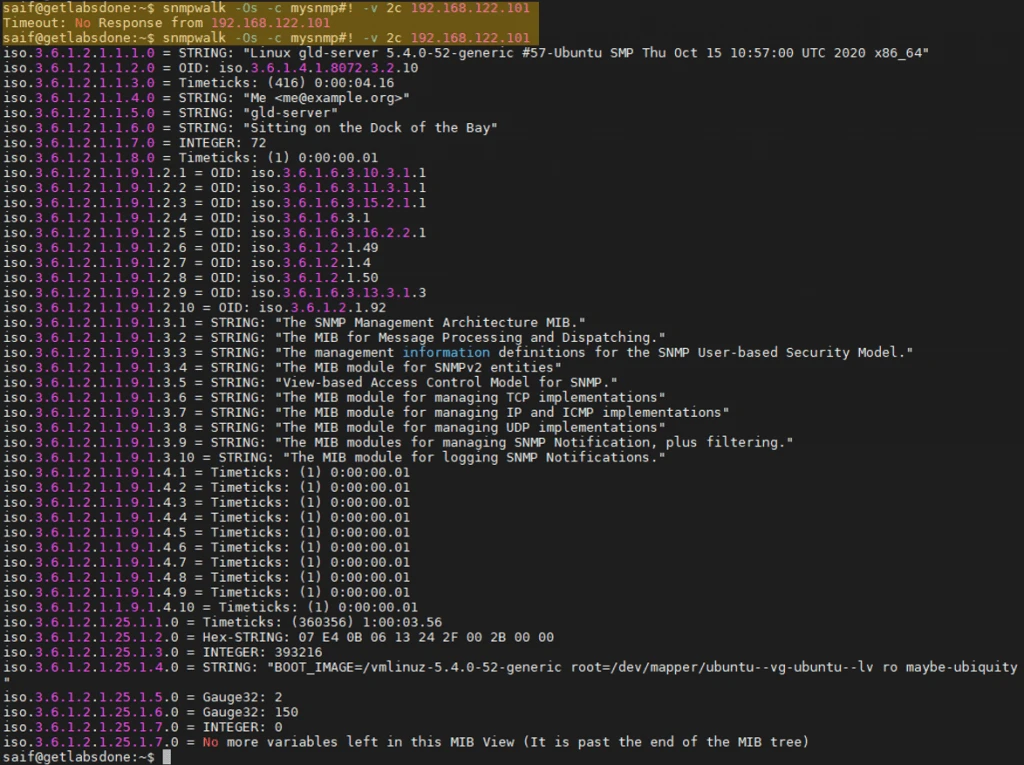
At this point, you should be able to connect this server to your monitoring server.
SNMP on Ubuntu not working?
When you make changes to the SNMP configuration file, make sure that you restart the SNMP service.
When you point the manager server talk to the SNMP host, make sure you use the correct IP address.
Even after following the above steps and things do not work, it could be due to the Ubuntu server not allowing the SNMP port 161 in your setup, so please allow the SNMP port.
sudo ufw allow from 192.168.122.1 to any port 161