
Installation of Redhat in a lab environment is the best option to learn about the RedHat operating systems. These days you don’t require a server to install Redhat operating system. You can use your laptop or PC and install any hypervisor in it and install the OS. As long as the hypervisor is installed that is compatible with the Redhat operating system, you should be good. And VirtualBox is one of the free and open-source hypervisors you could use to install the RedHat operating system.
VirtualBox is a common open-source hypervisor used by many users developed and maintained by oracle corporations. But it is free for anyone to use it. That’s why it is one of my favorite hypervisors.
In the last blog, we covered the installation of RedHat enterprise Linux on the Vmware workstation. In this blog, we will look at the installation of Redhat Enterprise Linux 8 on Virtualbox.
Is the RedHat subscription mandatory to install in VirtualBox?
Though Red Hat is an open-source Linux operating system, it is maintained and managed by the RedHat enterprise, which provides the subscription and support for the operating system. You can run Redhat Enterprise Linux in VirtualBox to test things out. Since you don’t have a subscription with the RedHat, you won’t get any updates or upgrades. And when something goes wrong, you won’t get any support either.
However, a developer subscription is available for those who want to learn about the RedHat products. Still, you should be good to install the RedHat without any subscription for lab purposes. For lab purposes, they recommend using CentOS and supporting it by yourself. However, Redhat had made some changes to the centos and renamed it to centos stream and how it used to work. Which made many users get upset and decide to switch to Ubuntu, which will be for another blog article.
If you are interested in installing centos 7/8 in the VMware workstation or VirtualBox, you may check out the article below.
Before you begin,
You should have VirtualBox hypervisor – click here to download the file.
And Redhat ISO image – You can download that from here.
1. Create Redhat virtual machine in Virtualbox.
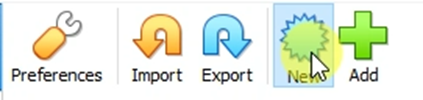
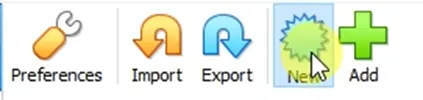
Open Virtualbox-> Click on New to create new virtual machine.
The new virtual machine creation wizard will open up in VirtualBox. There are two ways you can create a virtual machine. They are the guided mode and second, being the expert mode.
We chose expert mode to get more control over the RedHat virtual machine that we will install.
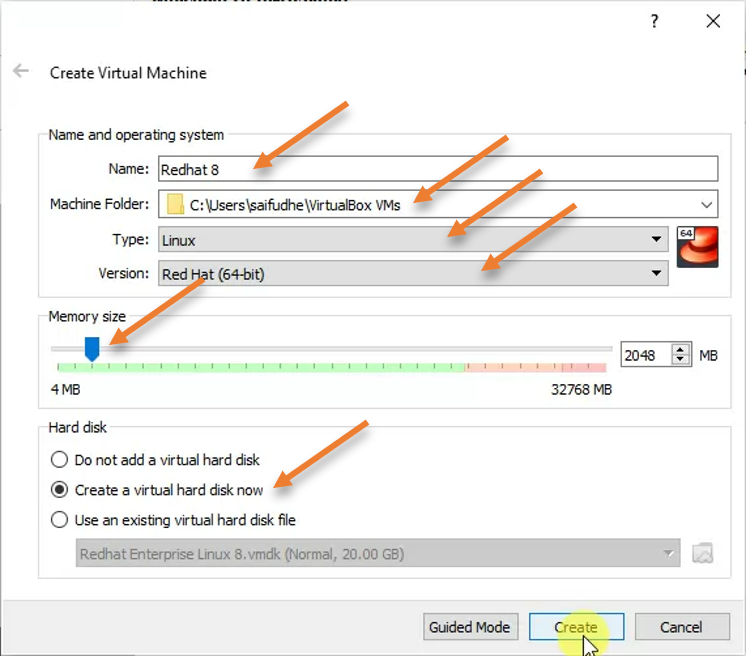
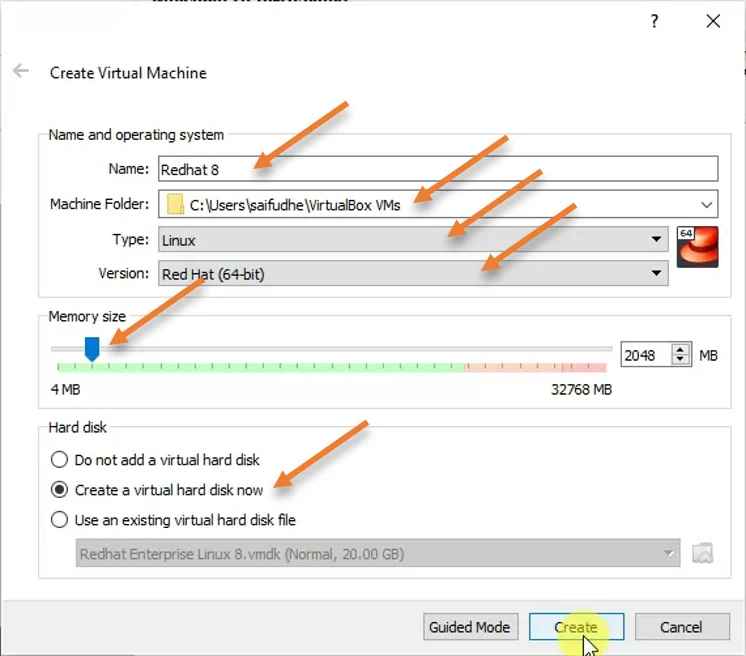
Name: Redhat 8
Machine folder: You may leave the default folder. If you have a folder or drive dedicated for the virtual machines, you can choose that here.
Type: Linux- when you typed the name as Redhat, Virtualbox already picked up the VM type as Linux as well as the version to Redhat 64Bit, which is excellent.
Memory: By default, the VirtualBox would assign 1GB of memory for the RedHat virtual machine, enough for most installations. If you plan to do a lot of multi-task work, you may choose memory based on your need. I am choosing 2GB here.
Hard disk : since we do not have a virtual hard disk created for the RedHat virtual machine, we would require a virtual hard disk to be created, hence select Create a virtual hard disk now option and click on Create.
2. Configure Virtual hard disk for Redhat VM.
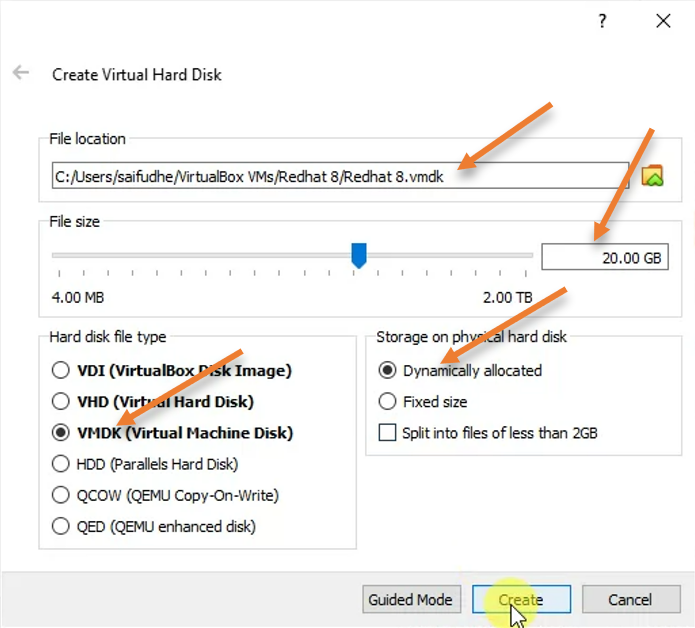
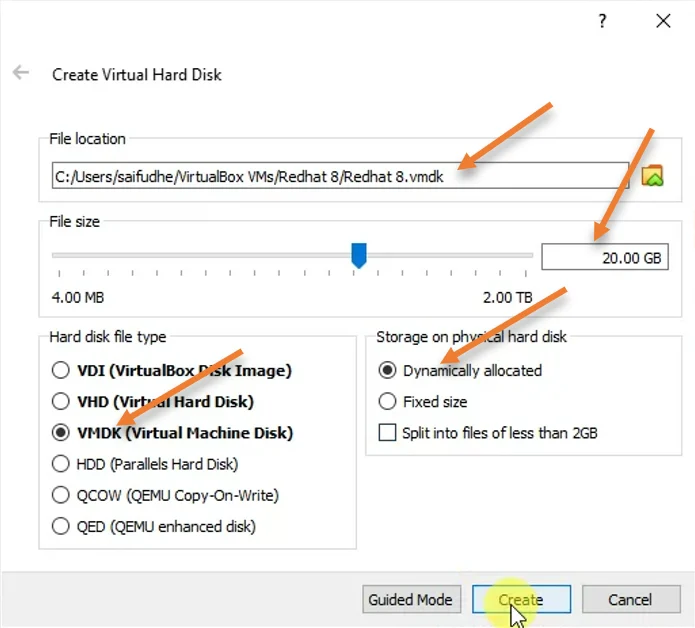
Since we have chosen to create a virtual hard disk now option, we got a prompt to create a new virtual hard disk.
File location: Here, we need to choose the file location where you would like to keep the virtual hard disk file.
File size: File size is nothing but the virtual hard disk storage size. By default VirtualBox would assign 8 GB of storage. If you feel that’s not enough and might require more storage in the future, you may increase the storage and keep it. I require more storage, so I choose 20GB instead of the default 8GB.
Hard disk file type: VDI (VirtualBox Disk image) is the default hard disk type from VirtualBox, if you plan to use this VM only in the VirtualBox, you may select the same. But if you plan to move this VM to some other hypervisor, it is recommended to keep it in VMDK format.
Storage on physical hard disk: Dynamically Allocated.
After the selection, click on Create.
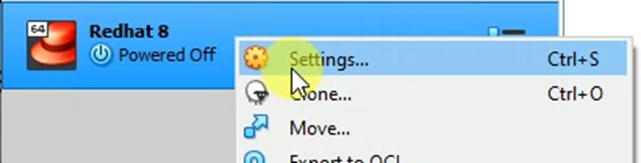
You will see the RedHat 8 virtual machine is now created. Before we go ahead and proceed with the installation, some other changes need to be made on the virtual machine.
Right-click on the virtual machine and click on settings.

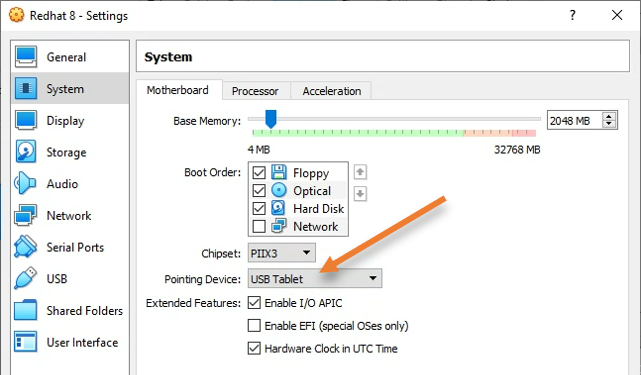
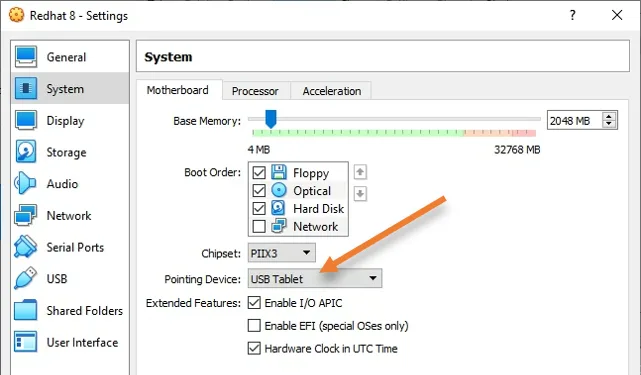
3. Configure the pointing device.
For the Redhat virtual machine to work correctly with the mouse and keyboard, you must change the default pointing device configured by the VirtualBox.
In the settings window, click on System.
Pointing device: USB Tablet.
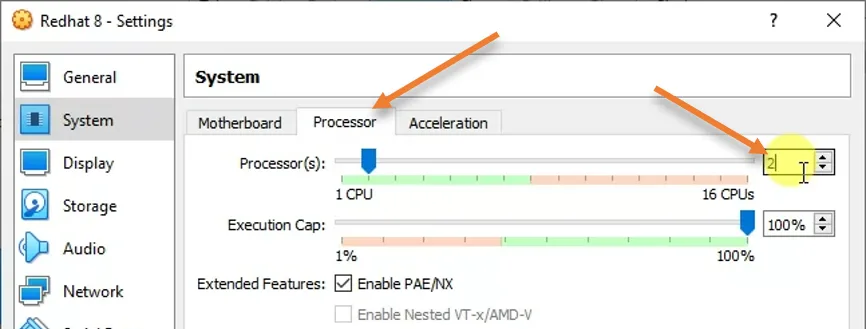
4. Configure the Processor.
In the same system tab, choose the processor.
By default, VirtualBox would assign 1 CPU for the Redhat VM; however, it is best to assign at least 2 CPUs for the VM.

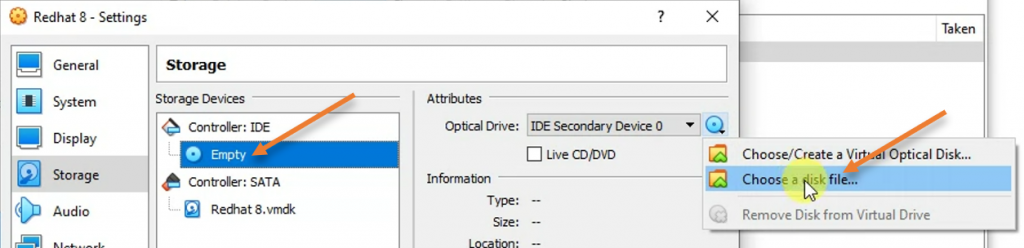
5. Attach the Redhat 8 ISO image.
After the CPU configuration, let’s go ahead and attach the Redhat 8 ISO image that we downloaded from the RedHat site.
Click on Storage-> Under storage devices, Choose the Empty virtual CD Drive.
In the attributes on the right side, choose a disk file. It will open up windows explorer to add the iso image.

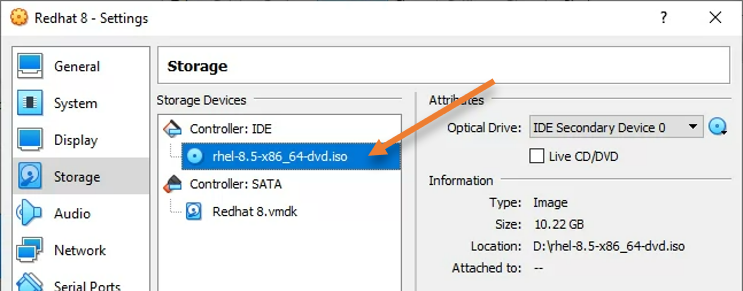
Once you added the iso images to the cd drive, the virtual CDROM name would change to the RedHat iso image name.

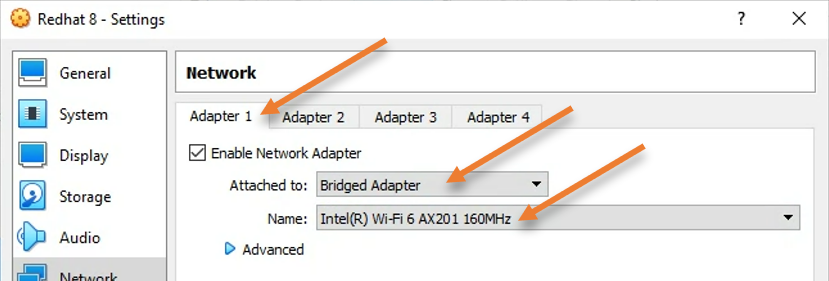
6. Configure the Network.
There are many ways you can configure the virtual machine network in VirtualBox, and that again depends on what you want to do with the virtual machine.
In my case, I would want the VM to be part of my local area network, so all the hosts in my local area network can talk to the virtual machine.
So I have chosen the Bridged adapter and selected my wifi interface. Because I am connected to my LAN network using the wifi. If you are using a wired connection, you will have to choose the ethernet adapter here instead.
Note: If you are in an office/enterprise network, you might not want to expose your virtual machine out to the local area network, and the VM requires just the internet connectivity. At that point, you may choose NAT network instead of bridge interface. This will be the secured option, and no one in your local area network will be able to talk to the virtual machine.
You may click here to learn more about the VirtualBox network types and how to use each network.
After that, save the settings.
7. Start the RedHat 8 virtual machine installation.
We have successfully created the virtual machine. It’s time for us to go ahead and proceed with the VM installation.
Right-click on the virtual machine and click on start.
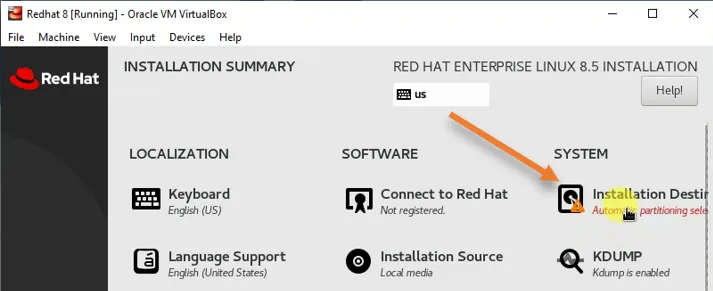
You will get the installation summary as shown below.
To proceed with the installation, you will have to configure those highlighted in the exclamation mark, including the Installation destination and the Root password.
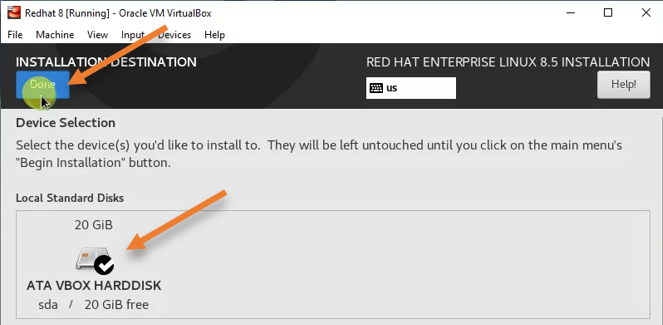
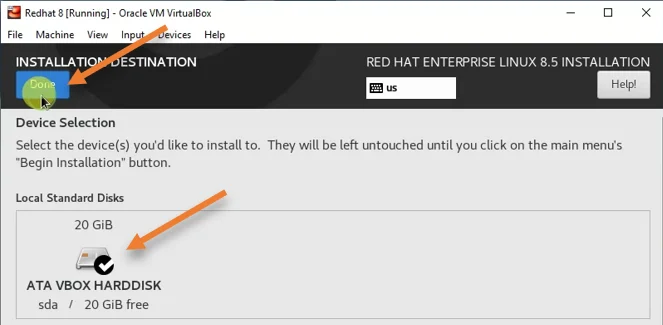
Installation destination: Click on installation destination to tell the virtual machine which virtual hard disk it has to choose to install.

Choose the virtual hard disk. You need to have a tick mark on the virtual hard disk and click on Done.
Set the Root password.
Click on the root password option,

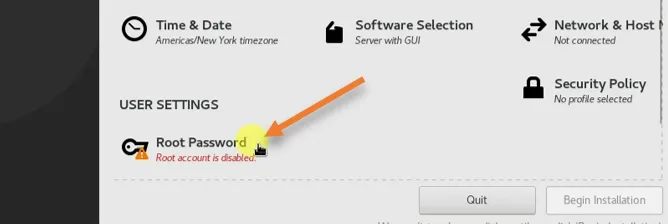
It will open up an option to set the root password for your virtual machine. Set that up and click on done.

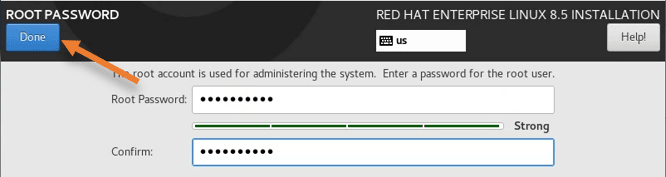
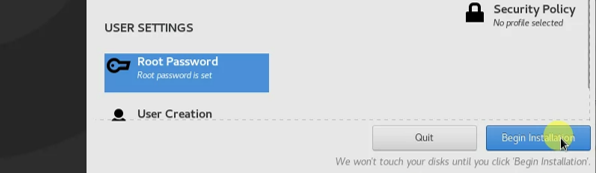
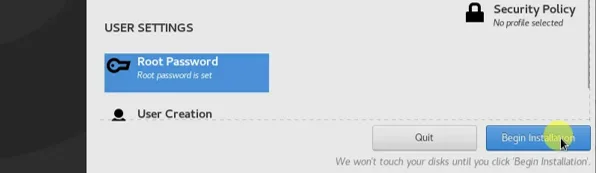
After that you will see that begin installation options are not grayed out anymore, click on begin installation to proceed with the virtual machine installation.
8. Finish the Redhat 8 installation.
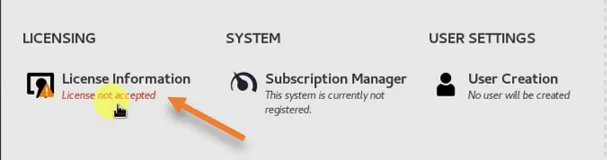
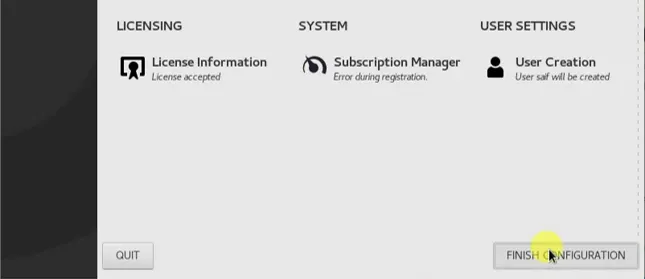
The installation will take some time. After the installation, you will get the below screen. In that you will have to accept the license agreement and create a User account. Subscription, as we said before, is not mandatory.
Accept the license agreement.
Click on the license information, and accept the license agreement.

Subscription manager.
In a lab environment, you most likely will not have a subscription available hence no action is needed.
If you have an option to subscribe to the RedHat subscription, you can do that here.
User creation.
We have only set the password for the Root account, which means only the root account exists in the virtual machine. But it is not a recommended option to keep only the root account. You will require another account for the virtual machine, which is not a root.
Click on the User creation option -> You will be asked to set the username and password for the virtual machine. You may set them up and click on done.
And then click on Finish configuration.

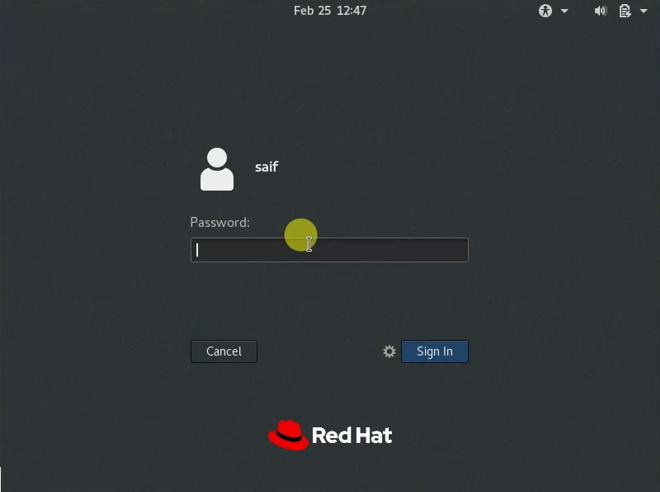
You will be taken to the login page of the RedHat Enterprise Linux 8, enter the username that you defined and the password, and you should be able to login successfully.
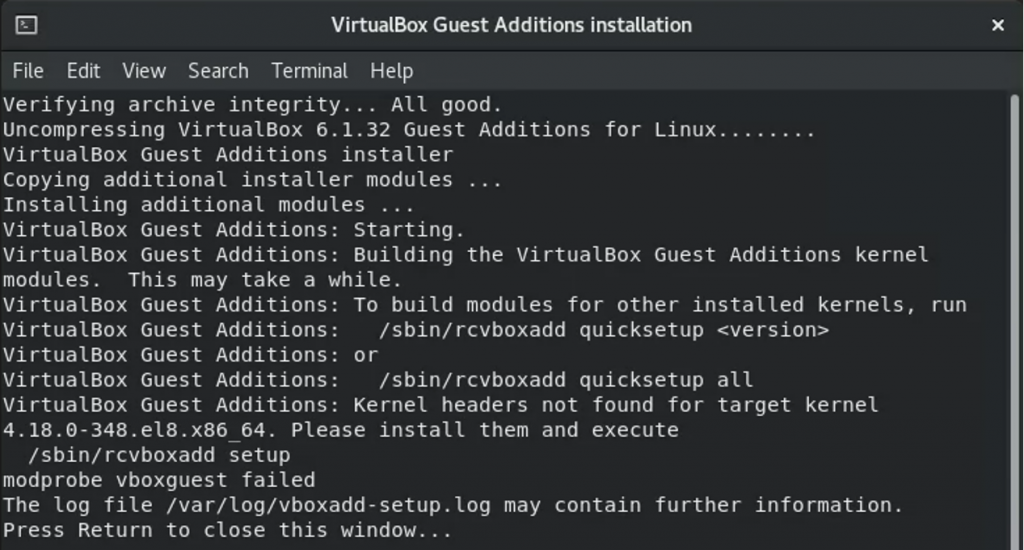
9. Install Virtual box guest additions on Redhat virtual machine.
To get good performance out of the virtual machine, you recommend installing VirtualBox guest additions on your virtual machine.
Click on Device-> Install virtualbox guest additions.
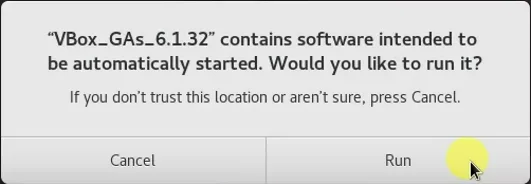
After a few seconds, you will get a notification to install the VirtualBox guest additions.
Click on Run.
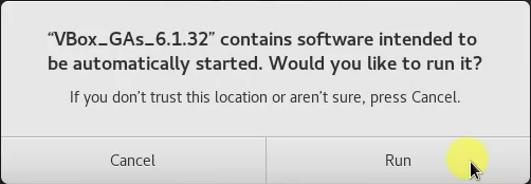
After the installation, you may go ahead and reboot the virtual machine.
We have successfully installed the RedHat 8 virtual machine in the VirtualBox environment. We could log in to the VM with the username and password we created during the installation. We also installed the VirtualBox guest additions to improve the virtual machine’s performance.